Cleaning heads
#1
This is what I posted previously in my head gasket thread
This is pretty simple if time consuming
Tools
Just take you time and stop when you are happy you can not get absolute perfection
I found a site or so referencing the use of a 320 grit wet/dry sandpaper rather than the White rolec disk. I noticed myself that the Rolec disk left circular marks behind, as I had a second bad head I decided to give sandpaper a shot.
1st up I checked the head 9 thou out in 1 place, sprayed that area with copper gasket seal and let set up.
Sanding process was very straight forward:
I can not upload images right now,the stall at 90% but will add them later
Any thoughts or comments
This is pretty simple if time consuming
Tools
- White 3M rolec disk and adaptor
- Drill cordless or corded
- WD 40
- Scotch bright pad
- Rags
- Ice scraper
- Spray on gasket remover - you may not need this it is like paint stripper for gaskets and toxic
- Windex or cheap equivalent
- Buffing pad for the drill
- Micro mesh 8000 or higher
Amazon Amazon
- Rags in the piston openings and water jacket
- Start with the plastic scraper get as much gasket material off as you can, it may be none that is ok
- Next the Rolec disk - keep it moving you will see circular swirl marks that is ok, use very light pressure
- Wipe the block down with windex and clean the disk every now and then the windex evaporates fast so you can get back to work
- Back to the scraper, then back to the Rolec this should get the gasket material off
- If you have no luck on step 2 to 4 breakout the evil chemical spray
- Once you have all the gasket material off clean with windex
- Take piece of Scotchbrite and soak it in Wd 40
- LIGHTLY run it long ways over the block - use more WD 40 as required
- Do step 9 just enough to get rid of the swirl marks - 2 or 3 passes should be enough DO NOT press down hard
- Clean with windex then buff with same
- Inspect your work make sure there is no gasket material left
- Finally soak the 12000 grit in Windex
- Take the 12000 grit and make the same 2 or 3 light passes adding windex as you go
Just take you time and stop when you are happy you can not get absolute perfection
1st up I checked the head 9 thou out in 1 place, sprayed that area with copper gasket seal and let set up.
Sanding process was very straight forward:
- Soaked the head in windex - to capture sandpaper and aluminum dust - this is very fine and the windex stops it for traveling
- 320 grint on a sanding block, a plastic sanding block works is best. I had originally indicated a good straight piece of wood without considering that can be very hard to find.
- 2 passes then dry and re-windex this limits the material getting into engine nooks and crannies
- I used a total of 10 passes
- Any left over gasket material has to be removed with a scraper/chemical remover
- You need a long sanding block which can be hard to handle
- you need to be very careful to prevent the windex getting where it should not
I can not upload images right now,the stall at 90% but will add them later
Any thoughts or comments
Last edited by Richard Gallant; 02-11-2020 at 03:21 PM. Reason: Update
#2
The following users liked this post:
Richard Gallant (02-10-2020)
#3


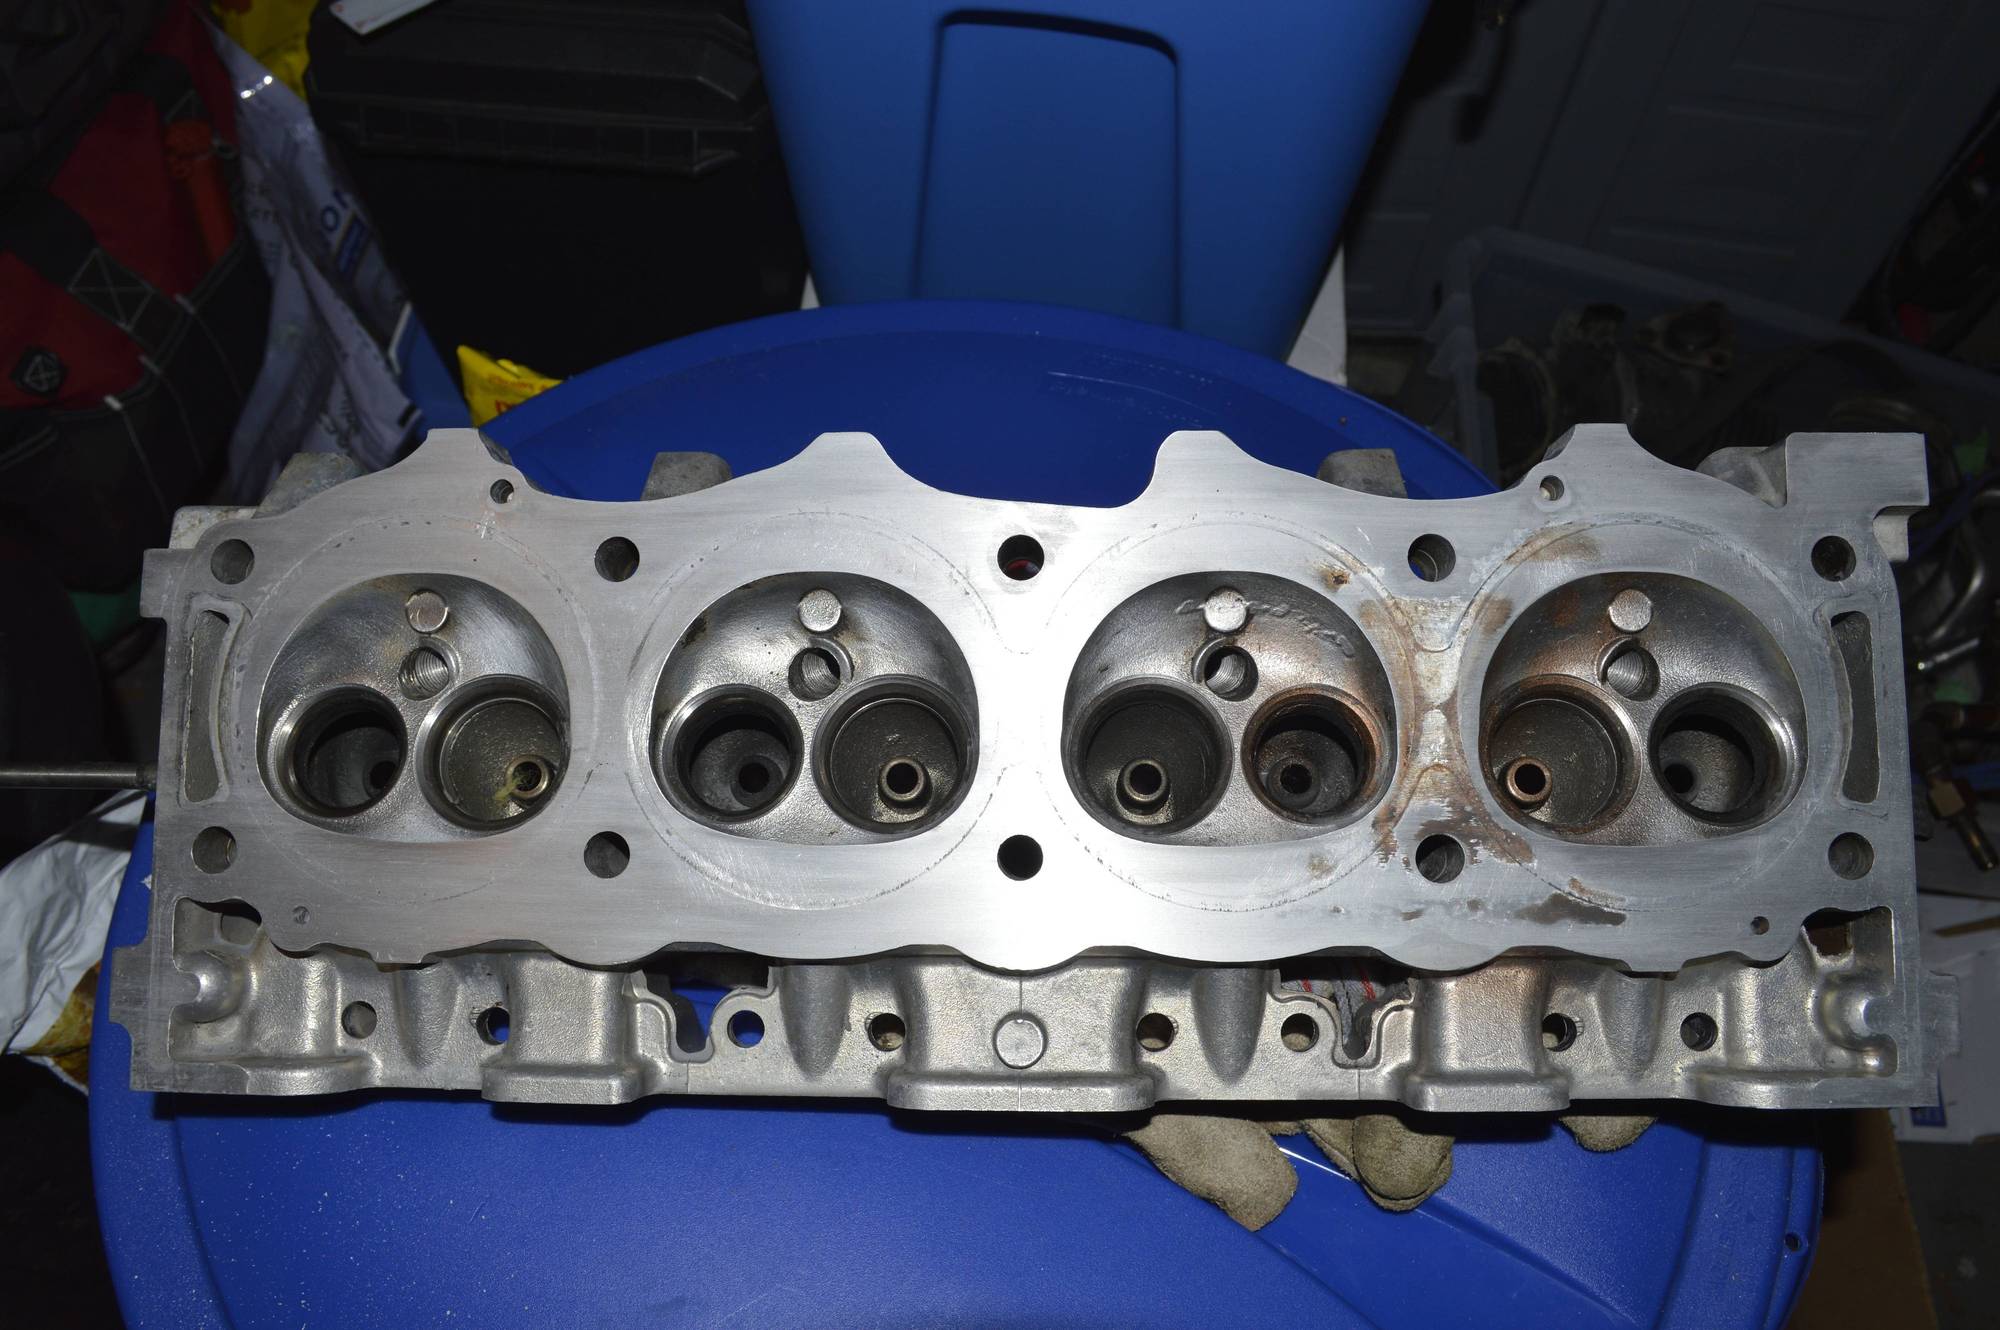
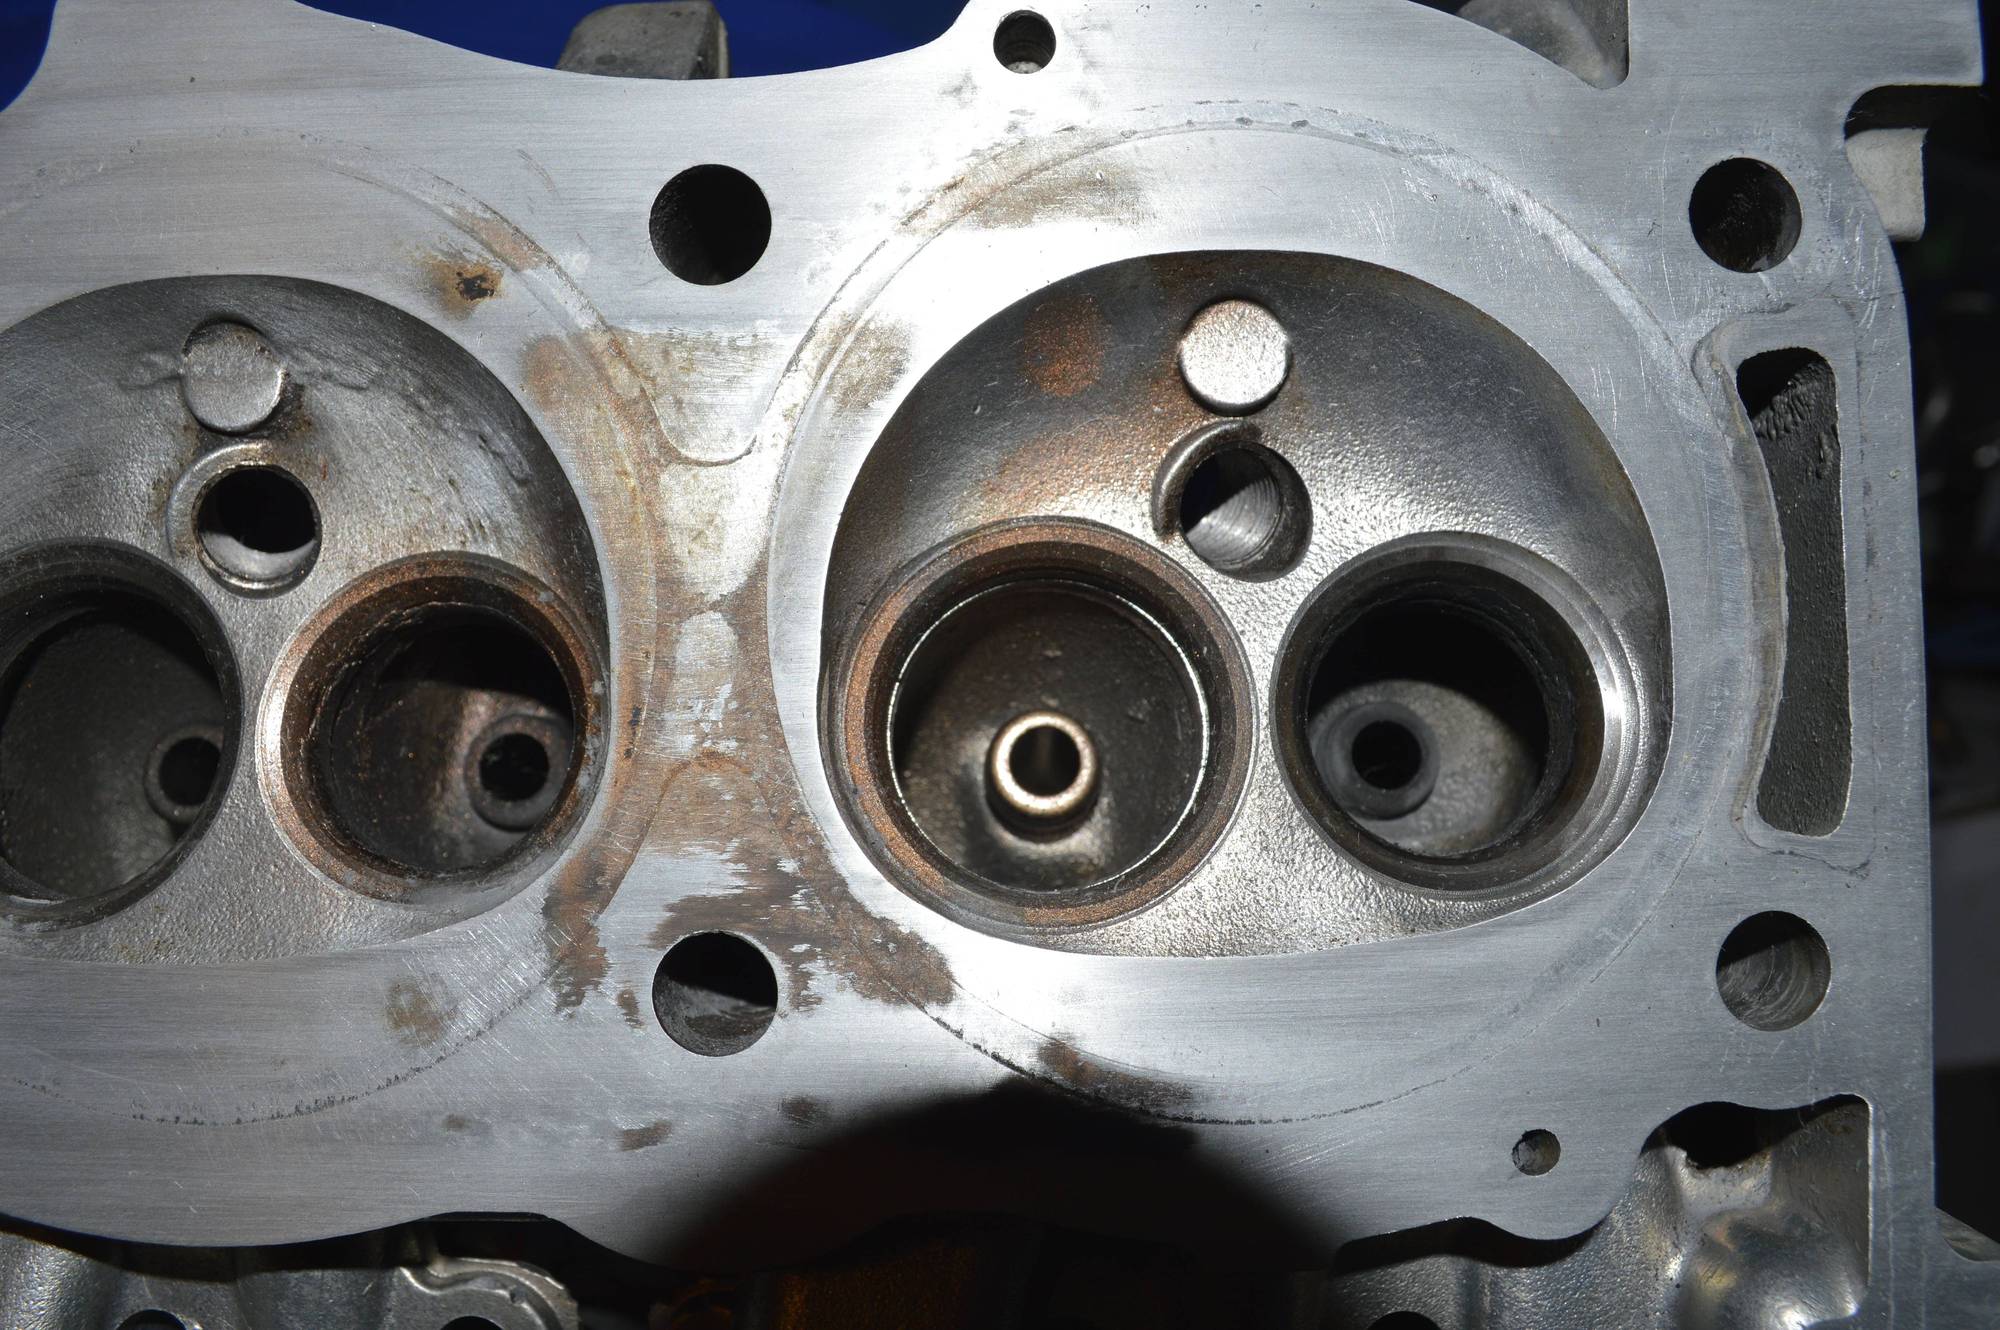
1st image is the overall head and the second is a close up of the low area and some of the pre-existing scratches
@robertf thanks for the photos, and yes the machine shop cleaning is always best, but I am not pulling my block so I need to clean that surface in place. With MLS gaskets you want a very clean and smooth surface on both sides.
I figure we can get some input from others make the next guys life easier
#4
The following users liked this post:
Sixpack577 (02-12-2020)
#5
@Llamasayswhat Yea I had not thought about places outside where I am, clean straight lumber is easy here. Thank you for your input
A proper sanding block is best, and to be clear this is about cleaning rather than leveling.
For anyone reading this if you need a head leveled - go to a reputable machine shop the odds of you getting it right by sanding is very slim unless you have huge patience.
It is very slow process, that takes constant checking with a steel straight edge and a good set of feeler gauges to make sure you do not add a wow.
The object of this thread is cleaning the head or block up nothing more
Last edited by Richard Gallant; 02-11-2020 at 03:21 PM.
#6
#7
I found it best to use a flex drive with brass brushed to reduce any metal removal, it does take longer and few brushed but worth the effort , but looking at your photos as a first pass I would check out the dark portion with a magnetic dial gauge, by looking at it its only to confirm your head need a skim to get it back to flat
#9
@frostythor @mln01 thanks for the responses
Hi guys those heads were toast improper torque with TTY bolts had them 5 thou out of true. The max they can be milled is 19, so they became my test bed for cleaning. I need to get my block clean and seemed to be a good idea to test on the old heads.
Ideally the gasket will largely come way when you remove the heads, but I had huge chunks everywhere. To even check your heads for level you need to get them clean, hence this thread. Gasket remover and carb cleaner do a lot of the work but even then you need all the material gone to check.
In the case of the block the same you need all the material gone before installing new gaskets hence this discussion.
The same methods should work on cleaning up the other aluminum mating surfaces we deal with.
Last edited by Richard Gallant; 02-12-2020 at 10:33 AM.
Thread
Thread Starter
Forum
Replies
Last Post


