When you click on links to various merchants on this site and make a purchase, this can result in this site earning a commission. Affiliate programs and affiliations include, but are not limited to, the eBay Partner Network.
DIY: How to remove brake booster vacuum connector on intake manifold
Verrrry specific, I know... but I searched a ton, including the service manual, and came up short. So for, you, Disco owner of the future, searching this very specific procedure, here's how you remove the vacuum line connector.
I don't know if these things have a very consistent failure rate. My 2002 has had the same once since birth, but my 2004 must've sprung a leak, because the prior owner schmooed it all up with silicone caulking to get rid of a vacuum leak. Too bad he didn't realize that the whole problem could've been fixed much more elegantly with a $40 part and 30 minutes.
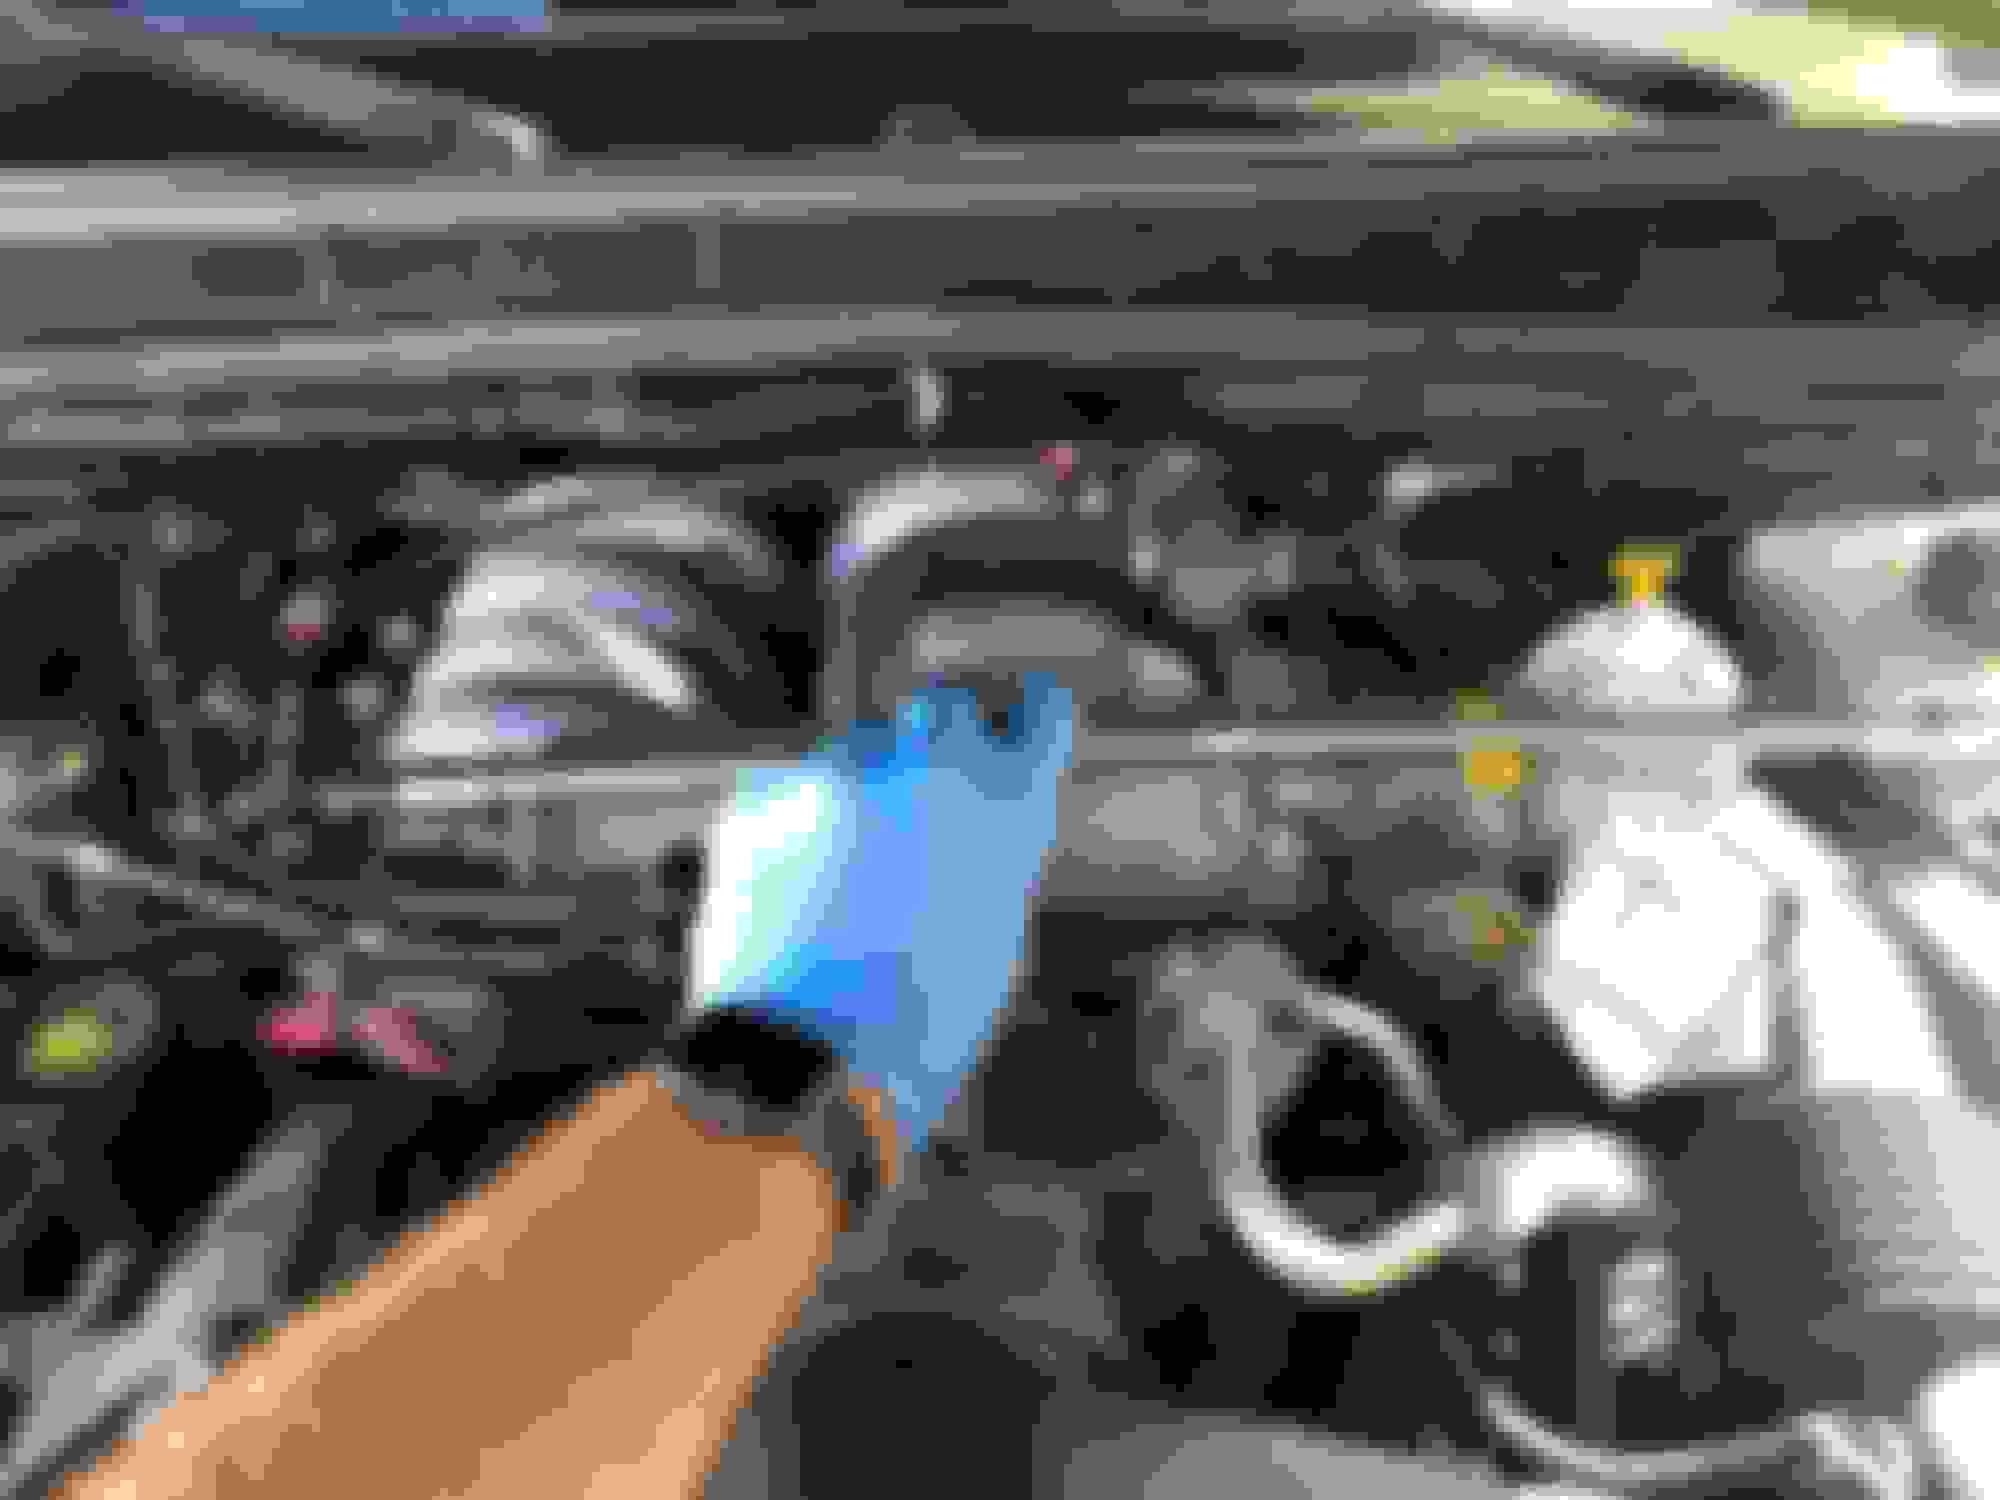
Let's begin - engine off (surprised how this isn't obvious to folks sometimes). Start by removing the intake tube that goes from the filter box to the throttle body. Carefully open the throttle body and keep it as wide open as you can. I jammed a rag underneath the bottom portion to do this.
Next, remove the vacuum line if it isn't already. Presumably you're replacing this because that connection failed, but if it didn't, you do this by pushing the red collar toward the middle of the engine whilst pulling the hose toward the passenger wheel well.
The connector is friction fit into the intake manifold using little jamming prongs that go one way. There's a little black collar on the back-side/intake manifold side that, if compressed, will also compress the jamming prongs, which eases it's egress from the manifold. We're going to compress that collar with these next steps.
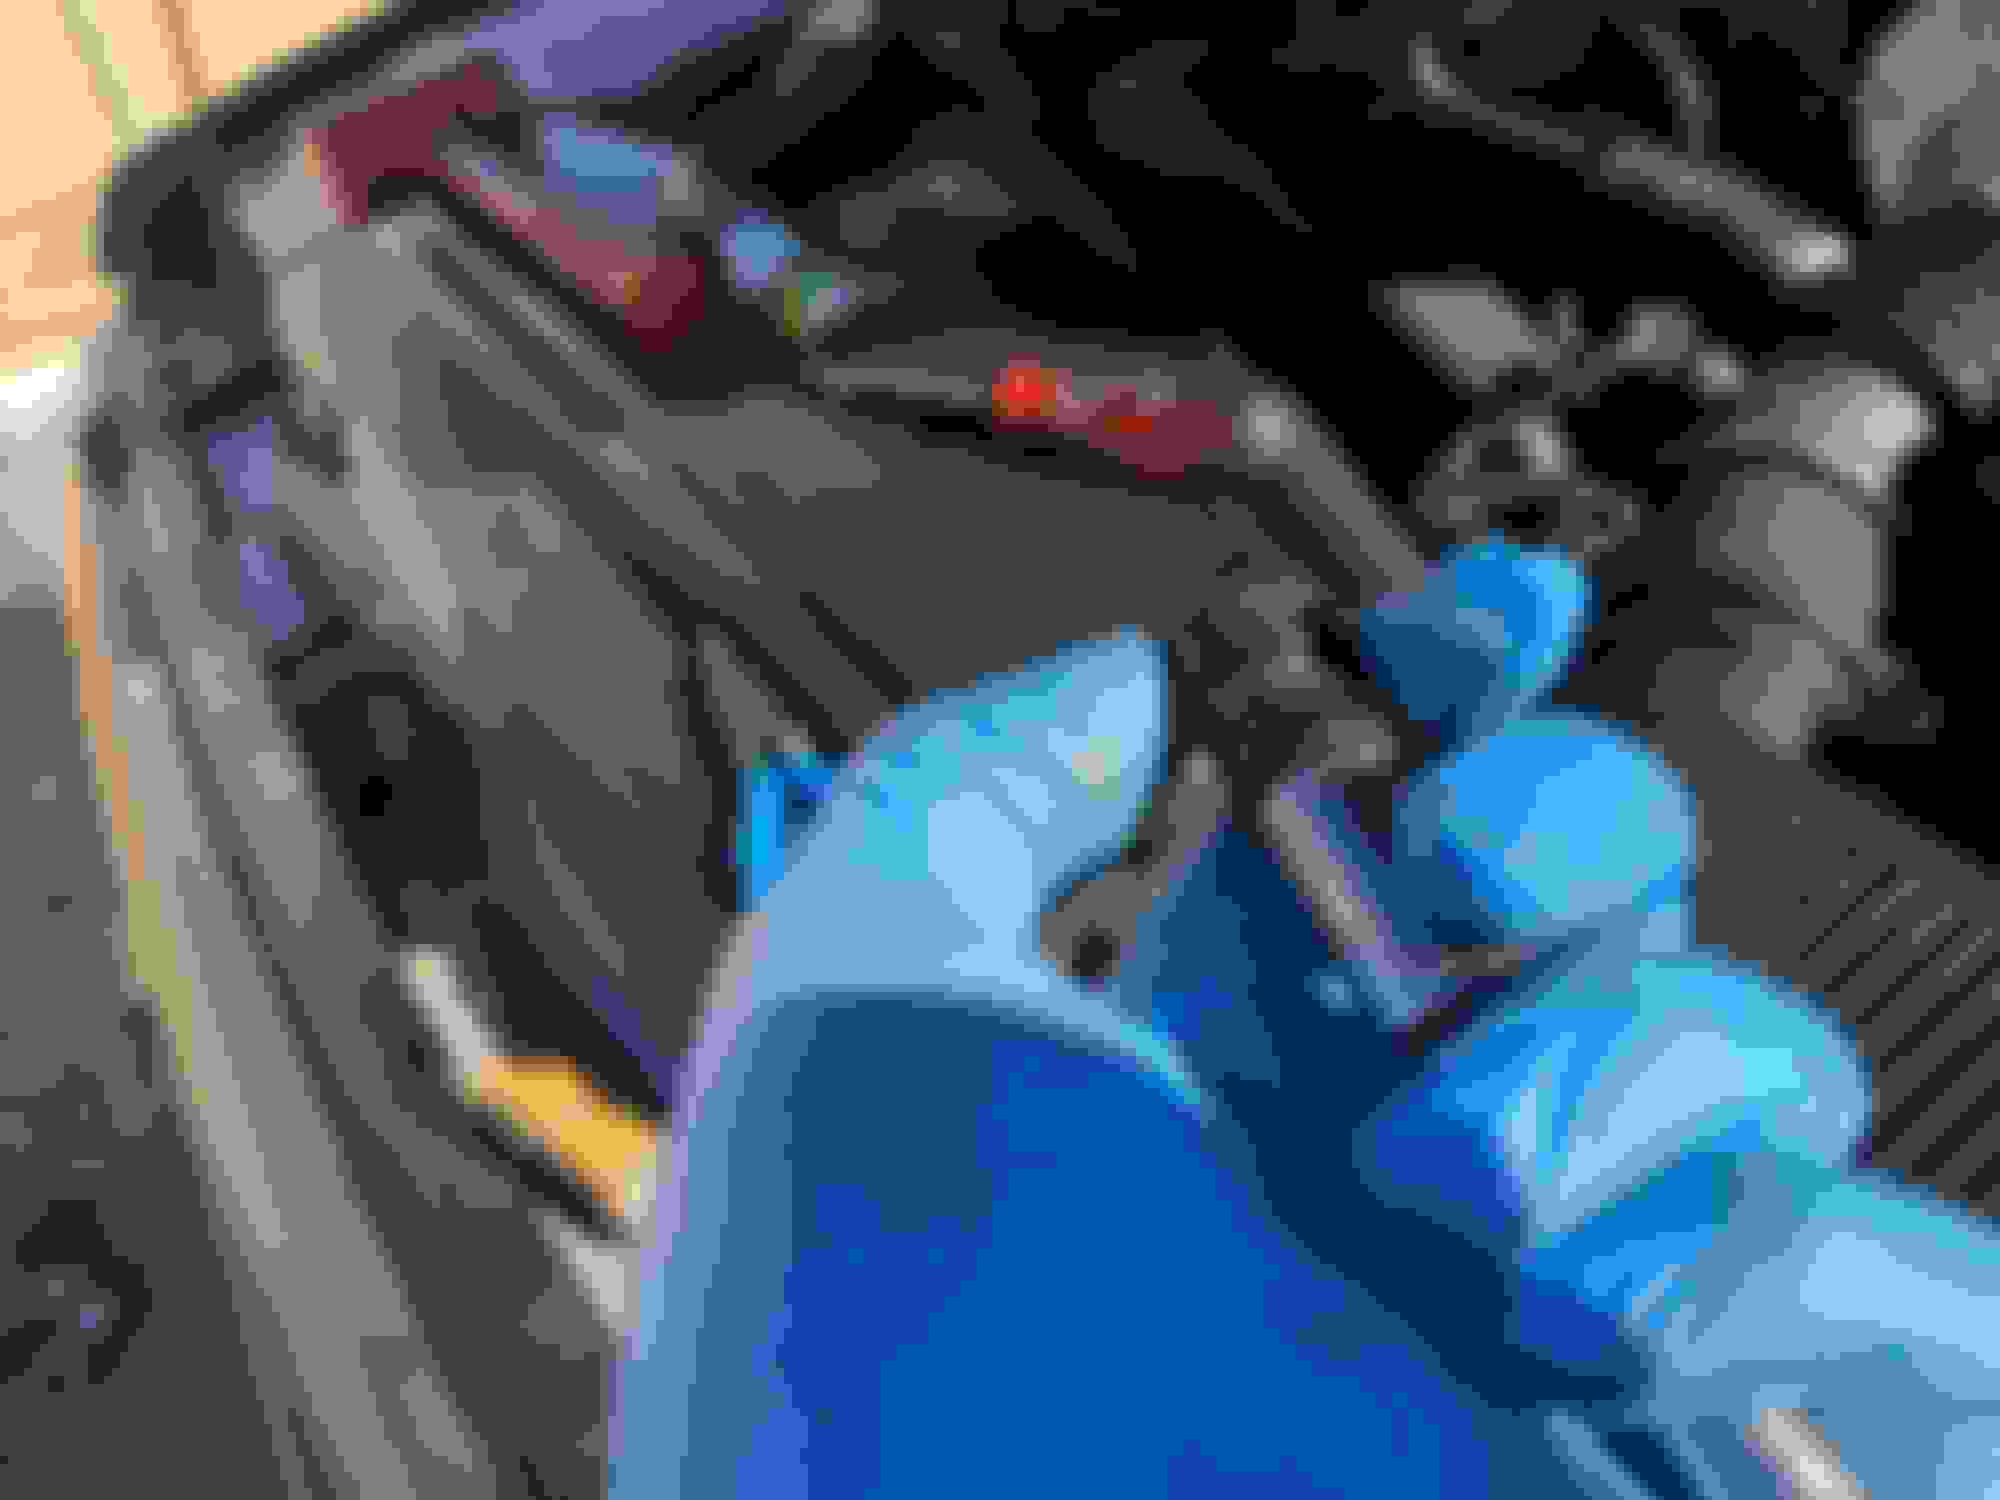
If you look down the throttle body, you can see daylight popping through the manifold connector. Cobble together two full-length extension bars and fix onto the end an 8mm hex bit. The hex bit fits into the tube hole and the collar gets depressed by the rest of the bit.
Insert the extension bar creation through the throttle body, find the hole with the hex bit, and with a soft mallet, give it some gentle yet authoritative taps until it works it way out. It took some finessing figuring out how much force to apply, but after a couple dozen hits, it worked its way out.
Clean up the intake manifold so the new one gets a good seal.
The new part comes with a little installer device. Leave that in and simply line up the hole and tap it together. I used a smaller bit to essentially do the same thing for install as we did for removal.
Remove the little plastic installer and reconnect the hose.
@Brandon318 You are a rock star! So I’m one of the lazy ones who just slathered everything in RTV as a stop gap…. A few years ago. As is good practice on a D2, just do a little googling to re-familiarize yourself with things are learn on the whole. Sure enough I stumble across this thread and the pics and instructions were perfect! Thanks!
@Brandon318 You are a rock star! So I�m one of the lazy ones who just slathered everything in RTV as a stop gap�. A few years ago. As is good practice on a D2, just do a little googling to re-familiarize yourself with things are learn on the whole. Sure enough I stumble across this thread and the pics and instructions were perfect! Thanks!