
Engine - Top End Face Lift


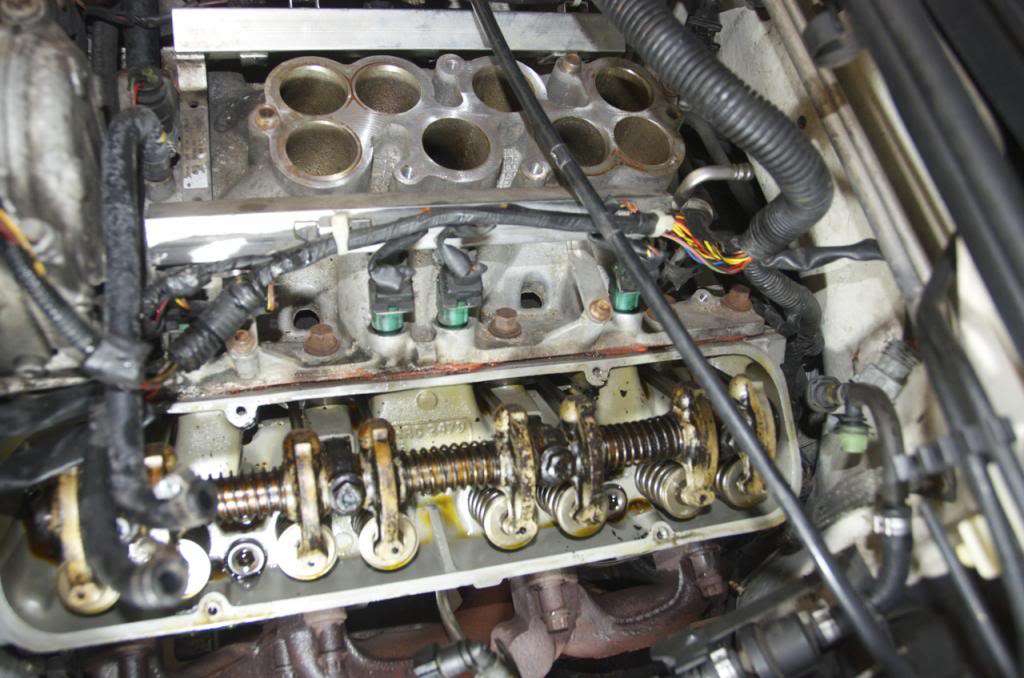
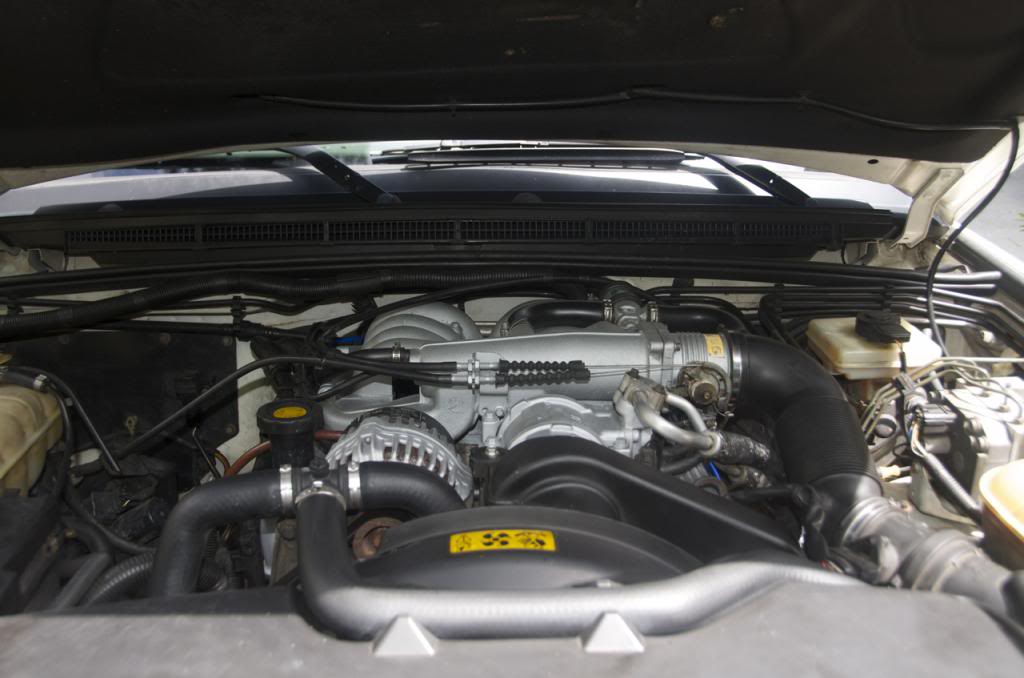
This past weekend I replaced my ignition coil packs which requires taking off the intake manifold. I decided to open up the rocker covers to see the condition and replace the gaskets while I was in there. As with almost every project, it turned into a lot more and I decided to clean and paint all of the top end components before putting them back in. It's actually a pretty easy half a days worth of work for anyone else interested, basic tools, and you'll only need to buy a few things:
Meguiars Hot Rims Aluminum Wheel Cleaner (or your choice of aluminum cleaner)
Engine Enamel Spray Paint - Cast Aluminum ( I used Rustoleom High Heat 2000+ degree Aluminum)
Throttle Body Gasket: GASKET THROTTLE BODY 4.0/4.6 1999 ONWARD, RND306, ERR6623 - Land Rover Parts | Rovers North
Intake Manifold Gasket: GASKET INLET UPPER-LOWER 4.0/4.6 1999 ON, PLD308, ERR6621 - Land Rover Parts | Rovers North
Throttle body heater kit (not required but reccomended): GASKET KIT THROTTLE BODY P38A RANGE ROVER & DISCOVERY II, RNH761, MGM000010K - Land Rover Parts | Rovers North
Valve Cover Gaskets (Again, probably not needed but up to you): GASKET VALVE COVER V-8, PLM035, LVC100260 - Land Rover Parts | Rovers North
The entire list above costs less than $100 or less than $50 without the valve cover gaskets and throttle body heater.
You'll lose less than a half a gallon of anti freeze durring this, have that on hand, or use water.
To break everything down I followed these very easy instructions: Engine Refresh (top end) � PaulP38A.com
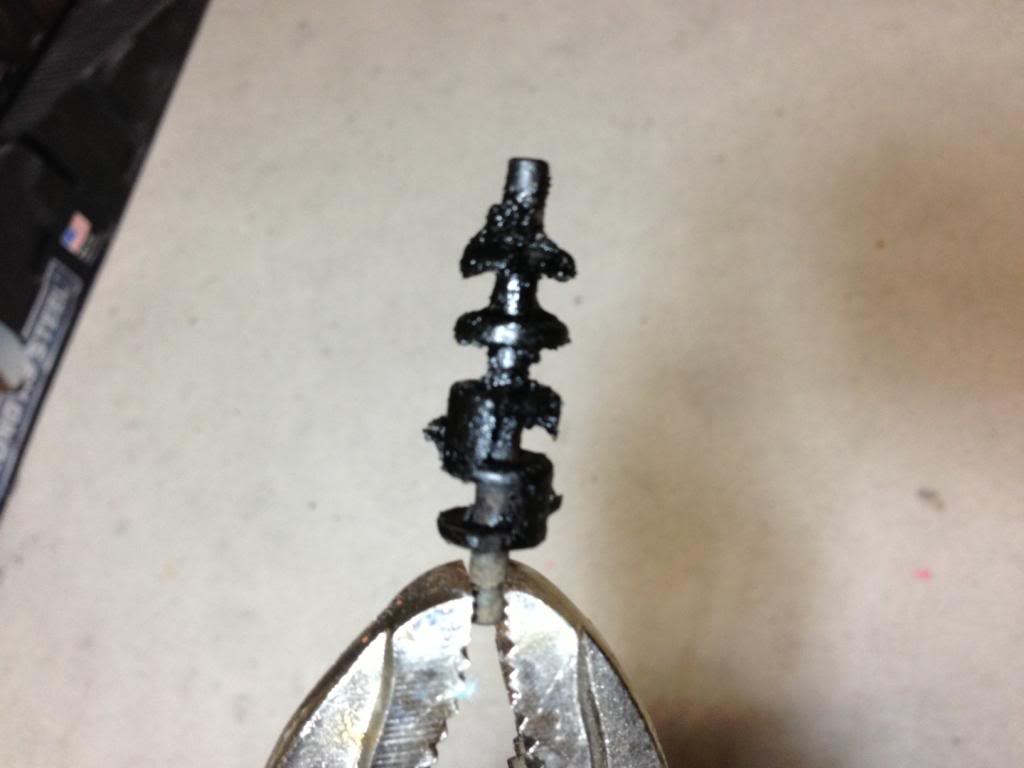
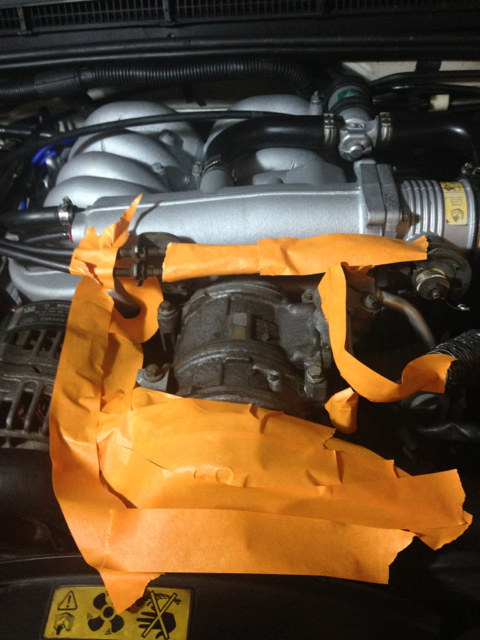
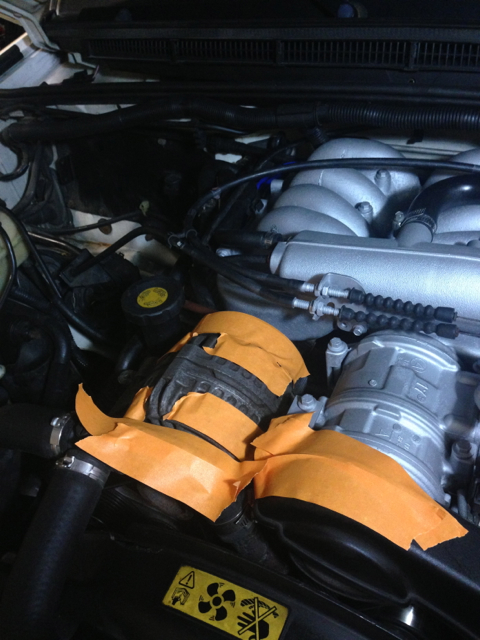
And I'll add a couple sides notes. Make sure and clean the throttle body thoroughly, it's easy to get real clean when it's off the intake! Also, be sure to remove the oil separator from the hose stem on the right rocker cover and clean. And be careful, they can be brittle, but it just pulls right out. Mine looked like this:
Also, my head gaskets had been recently done and the mechanic did a nice job with the heads, they looked great!
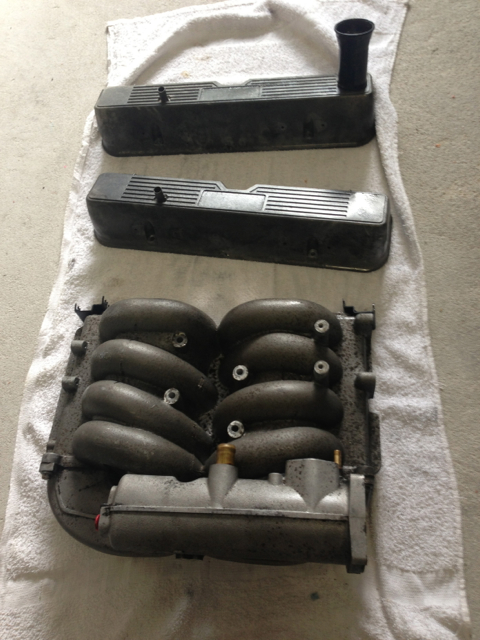
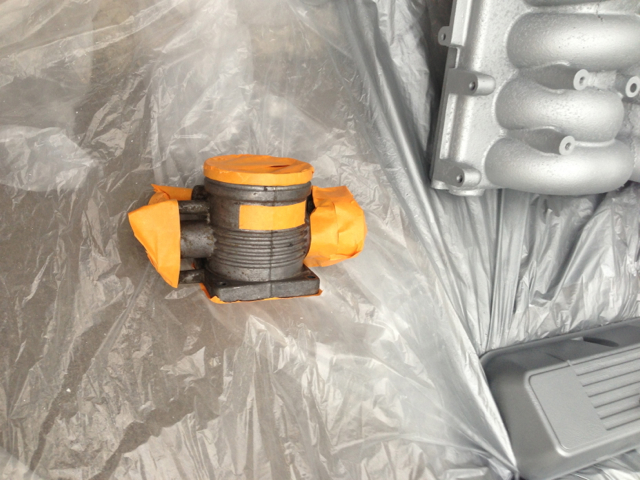
Once you have all of the parts out you'll need to remove all of the plastic wire clips from the sides of the rocker covers and rear of the manifold. Clean the components and prep for paint. I used a strong aluminum wheel cleaner, it broke down the gunk very quickly and with a brush I removed most all of it. The cleaner I used was strong and began to oxidize on the aluminum after it dried and was in contact with air. Spray it with break cleaner, wipe off with a rag, and paint.

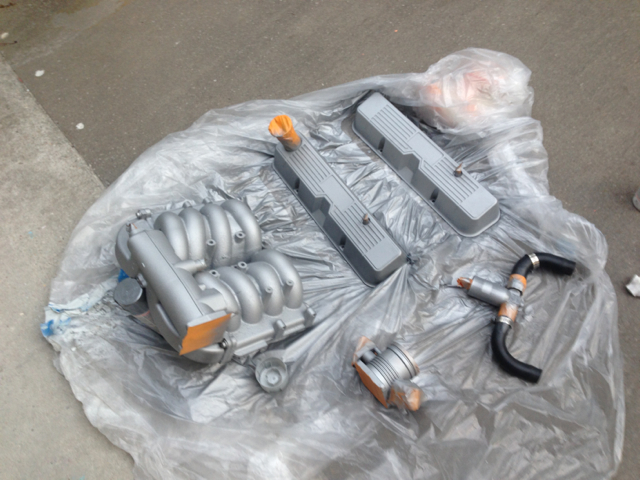
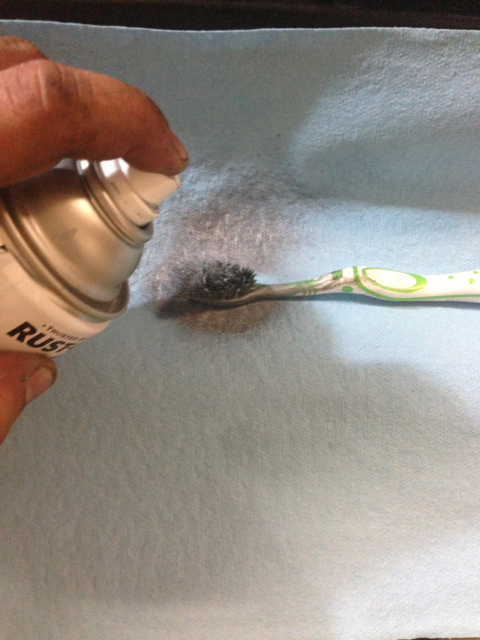
I used a beat up tooth brush, sprayed with the paint, and brushed the vents on the alternator and also to get into those other hard to reach places:
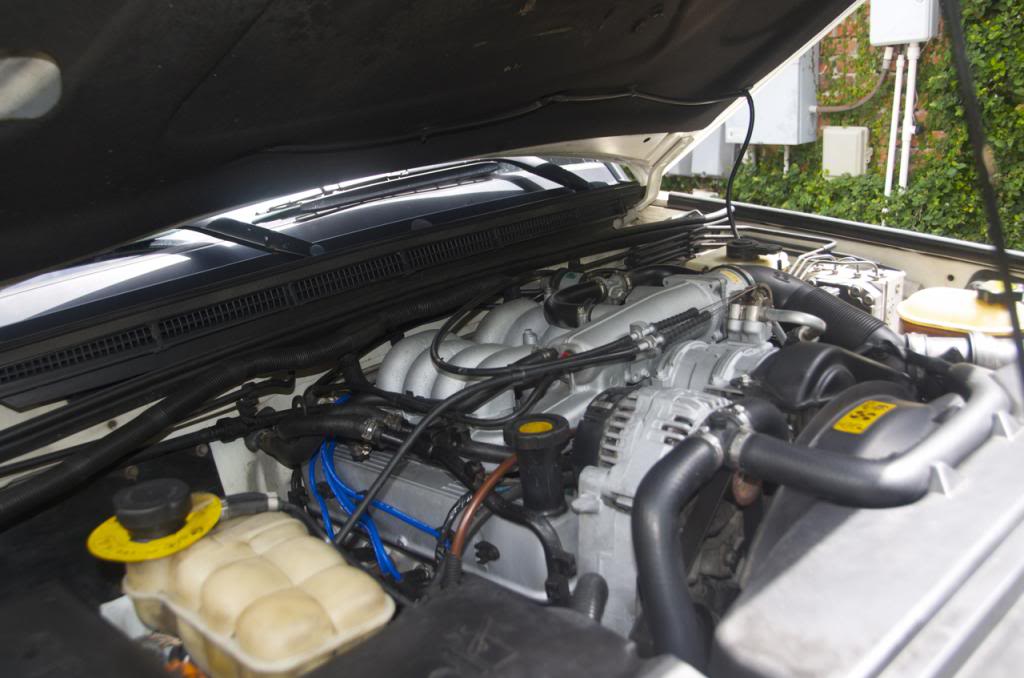
Now it looks as good as it runs!
Meguiars Hot Rims Aluminum Wheel Cleaner (or your choice of aluminum cleaner)
Engine Enamel Spray Paint - Cast Aluminum ( I used Rustoleom High Heat 2000+ degree Aluminum)
Throttle Body Gasket: GASKET THROTTLE BODY 4.0/4.6 1999 ONWARD, RND306, ERR6623 - Land Rover Parts | Rovers North
Intake Manifold Gasket: GASKET INLET UPPER-LOWER 4.0/4.6 1999 ON, PLD308, ERR6621 - Land Rover Parts | Rovers North
Throttle body heater kit (not required but reccomended): GASKET KIT THROTTLE BODY P38A RANGE ROVER & DISCOVERY II, RNH761, MGM000010K - Land Rover Parts | Rovers North
Valve Cover Gaskets (Again, probably not needed but up to you): GASKET VALVE COVER V-8, PLM035, LVC100260 - Land Rover Parts | Rovers North
The entire list above costs less than $100 or less than $50 without the valve cover gaskets and throttle body heater.
You'll lose less than a half a gallon of anti freeze durring this, have that on hand, or use water.
To break everything down I followed these very easy instructions: Engine Refresh (top end) � PaulP38A.com
And I'll add a couple sides notes. Make sure and clean the throttle body thoroughly, it's easy to get real clean when it's off the intake! Also, be sure to remove the oil separator from the hose stem on the right rocker cover and clean. And be careful, they can be brittle, but it just pulls right out. Mine looked like this:
Also, my head gaskets had been recently done and the mechanic did a nice job with the heads, they looked great!
Once you have all of the parts out you'll need to remove all of the plastic wire clips from the sides of the rocker covers and rear of the manifold. Clean the components and prep for paint. I used a strong aluminum wheel cleaner, it broke down the gunk very quickly and with a brush I removed most all of it. The cleaner I used was strong and began to oxidize on the aluminum after it dried and was in contact with air. Spray it with break cleaner, wipe off with a rag, and paint.
I used a beat up tooth brush, sprayed with the paint, and brushed the vents on the alternator and also to get into those other hard to reach places:
Now it looks as good as it runs!
Last edited by caymandrew; Jun 11, 2013 at 10:54 AM.

Three Wheeling
Joined: May 2012
Posts: 50
Likes: 1
A good idea when valve covers are off is to remove the oil baffles on inside top and scrape sludge then clean all the junk up there......Shoulda painted my upper intake when I did the head gaskets, the shiny blasted heads clash....


TReK
Joined: Feb 2013
Posts: 2,514
Likes: 656
Dupli-Color engine enamel works great. I've used it tons of times.
BONUS you can get it at any NAPA, Advance Auto, etc for about $7.00 a can. It also comes in about 30 colors, so GO NUTZ!
> https://duplicolor.com/product/engin...l-with-ceramic
BONUS you can get it at any NAPA, Advance Auto, etc for about $7.00 a can. It also comes in about 30 colors, so GO NUTZ!
> https://duplicolor.com/product/engin...l-with-ceramic
