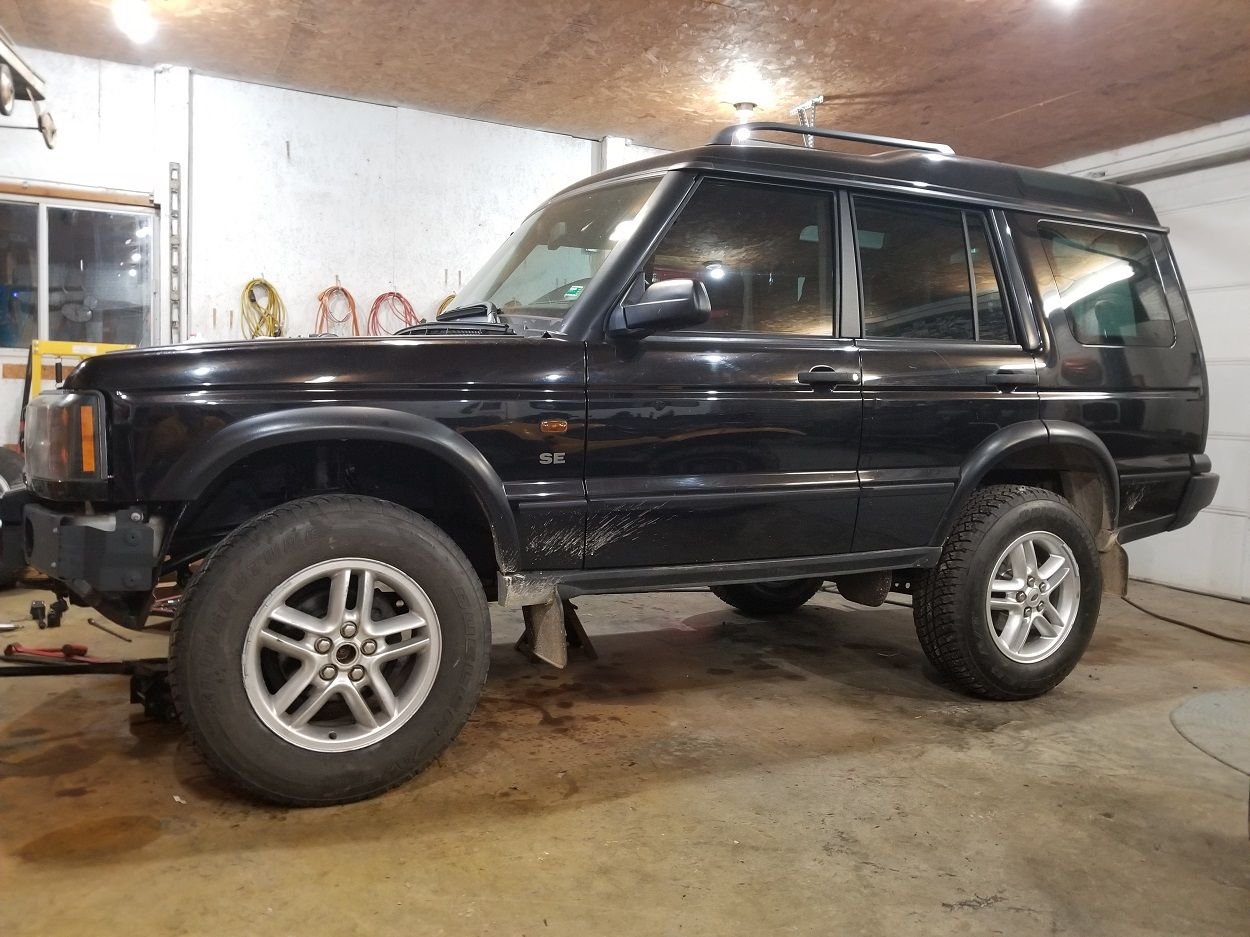
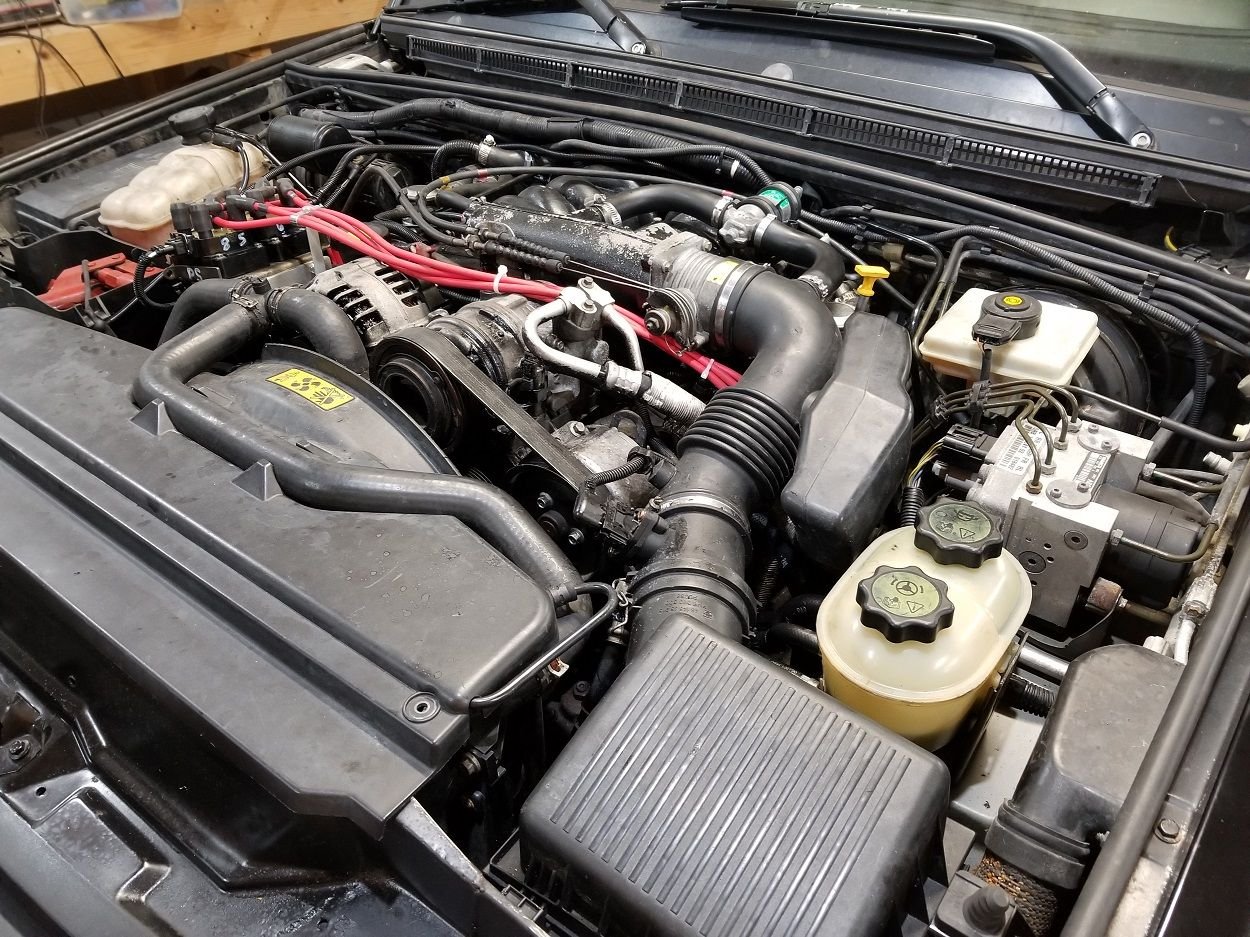
Getting started on my 03 DII
#12
I did just find it and the picks help. Thanks!
https://landroverclubvi.weebly.com/i...hermostat.html
https://landroverclubvi.weebly.com/i...hermostat.html
#13
New coil relocation bracket in place and passenger bank plugs and wires installed. Old plugs were Bosch four pronged critters with probably .025 or less gap. Someone before me put Beck Arnley rubber valve cover gaskets, so I snugged them a bit and moved on. I'll be ready to jack up the front yet today for the front lift, tie rod end and new rotors and pads. No rush as I have no pads yet. I saw UPS go by the house, but everything delivers to my office, so it will be tomorrow. Rear rotors are on. 1/8" bleeder for my inline thermostat mod will be here tomorrow as well. I'll be back to just an hour or so in the evening, but it helps me maintain my sanity! I could never make a living doing this-too damn meticulous. Anti seize on every bolt, zip tie wires so they don't rub anything, wiping off tools, cleaning, reading, thinking, studying, its definitely a not for profit endeavor!
#14
I've been busy at work and just getting an hour or so each evening on this project. I was pleased to find new rotors and pads on the front already, and they appear to be very recent. I'm thinking this thing has been dealer serviced up until recently. Ordered a Tom Woods front driveshaft as this one appears original and I probably did net 2.5" with my 2.5" spacers, so the driveshaft is extended a lot more than it would have been. Dont need a broken transmission or transfer! Hood is at the body shop getting painted, and under the hood is all buttoned up as far as the electrical. I'm going to do the inline thermostat and new antifreeze this weekend, and I'm going to try to do it without cutting the shroud. Ultragauge is ordered as was suggested. 255/70/18's are on and she grew up a lot! Looks like more than 4" but that is what the math indicates. I did remove the small crossmember under the front driveline. I ordered Disco I wiper arms and blades from Lucky 8 as well, as my blades look like they need replacing. Please ignore the plug wire routing as I had to pick up longer M8 bolts to put Gerry's mounts on correctly. I'll make it right.
I'm starting to think about a front bumper. All I am missing is the front bumper cover, but no luck so far finding one. I also need the plastic cover with the license plate lights that goes over the rear hatch latch. If anyone can help me out with that, I'd appreciate it. I have a line on a 04 that is wrecked that I can get the transfer case and linkage from so I have CDL. All in due time...
I think I've put around $1600 plus my time in it since I bought it, and I have only test drove it when I bought it and driven it in the shop! I'm hoping my misfires are gone. There were no other codes set. Everything else seems to be in order, and I'm looking forward to some windshield time. This forum has been and will continue to be a wealth of knowledge. I'll be back...
#17
All my rigs have always looked like they were off-road ready, but rarely see off-road use. i just don't want to tear anything up! I'm pretty easy on everything. Not unusual to get well over 100,000 miles out of a set of brakes for me. having said that, if there is somewhere I need to go, I go. Snow is just a welcome challenge.
Soooo, is that crossbar necessary for anything, and how much spacing is appropriate if i put it back? i bet it makes a baaaad noise when the front driveshaft rotates against it.
Soooo, is that crossbar necessary for anything, and how much spacing is appropriate if i put it back? i bet it makes a baaaad noise when the front driveshaft rotates against it.
#18
Worked on the inline thermostat mod yesterday. I have NEVER had a harder time removing a hose than I did with the lower hose on the engine. Mine is about 4" long and goes from the engine to the "Y". The factory spring clamps were literally turned so you could not get pliers on them. I used a cutoff wheel to split the clamps and then a razor knife to split the hose in order to remove it. Also, its a lot easier to remove the radiator cover that the top hose clips into and then the radiator shroud. That really gives you some room to work. Got all the orange stuff out. I used a 1-1/4" hose connector and just put that in where the original thermostat was. I went to the parts store and rummaged through their wall of hoses and I think I found a really good fit for the upper hose that will allow me to not cut the radiator shroud. I may get it back together this evening. If I do I'll be back with a part number and picture of that hose. I'm trying to replace any suspect hose and all the clamps with quality worm drive clamps as I go.
My Ultragauge arrived this morning, so I may be set to fire her up in the next day or 2. Still looking at replacing the cheesy battery connections with some heavier duty units.
My Ultragauge arrived this morning, so I may be set to fire her up in the next day or 2. Still looking at replacing the cheesy battery connections with some heavier duty units.
#19
I have a what is probably a loaded question.
Given the expense of the coil pack relocating bracket as opposed to the frequency of needing to replace a coil pack or plug - what exactly is the reasoning behind doing it?
I feel the same about the thermostat relocating mod - how often do you really expect to need to access these pieces of equipment to justify the cost and time invested in relocating them?
Bear in mind I've owned a D2 for all of 2 weeks but still think its a valid question........
Given the expense of the coil pack relocating bracket as opposed to the frequency of needing to replace a coil pack or plug - what exactly is the reasoning behind doing it?
I feel the same about the thermostat relocating mod - how often do you really expect to need to access these pieces of equipment to justify the cost and time invested in relocating them?
Bear in mind I've owned a D2 for all of 2 weeks
 but still think its a valid question........
#20
If you lose a coil you are usually going to lose 2 cylinders, sometimes 4. Makes it difficult to drive. I carry a spare in the truck.
As far as the bypass stat, my rig with a bypass stat never gets over 188. If an oem stat sticks, you can't change it without dumping all the coolant. With the bypass stat you can change it or remove it (and run without one) hot and not lose a drop of coolant. If you ever have a factory stat stick, you will kick yourself for not having the bypass stat.
As far as the bypass stat, my rig with a bypass stat never gets over 188. If an oem stat sticks, you can't change it without dumping all the coolant. With the bypass stat you can change it or remove it (and run without one) hot and not lose a drop of coolant. If you ever have a factory stat stick, you will kick yourself for not having the bypass stat.


