When you click on links to various merchants on this site and make a purchase, this can result in this site earning a commission. Affiliate programs and affiliations include, but are not limited to, the eBay Partner Network.
I don't mean to generalize but, after reading about them for a while and owning one for a short period, it does seem that the Land Rover V8s are prone to springing leaks in some pretty strange places.
My 99 Disco 2 is no different.
It sprung a leak that was pretty tricky to track down.
Unless you value things like your hair and/or fingers then the fun thing to do is start it up and and start poking your head around in every nook and cranny you can find until you spot the leak.
The proper thing to do is to pressurize the coolant system with the engine off via some type of external pumping system.
This way you can poke and prod all over a cool engine without risking your precious digits.
I am sure many of you have had this issue and gone to the auto parts store to borrow one of their tools only to find out that none of their adapters will fit your engine.
Now you scour the nets trying to find a suitable adapter but most of that info is vague at best.
You could buy a entire pump system but they start around $150 US and most don't say what adapters they come with.
With my Disco down for nearly 2 weeks I decided to rig up my own system.
The following will detail what I did to fab a quick and cheap cap to pressurize my system.
It worked like a charm or "worked a treat" as some of our British counterparts may say and cost me all of about $14 US.
Tools needed:
1. Regular old flat head screwdriver or anything suitable for prying
2. Hack saw or any other cutting method.
3. Hand file and/or various grits of sandpaper (I used 80 and 320 grit)
4 X-acto type sharp knife
5. A drill with a few different size bits. (may be able to get away without this if you are crafty with an X-acto)
Parts needed:
1. stock radiator cap (now's the time to get a new one and sacrifice your old one for the pressure cap. Rockauto seems to be the place to get a cheap one but I can't vouch for the quality)
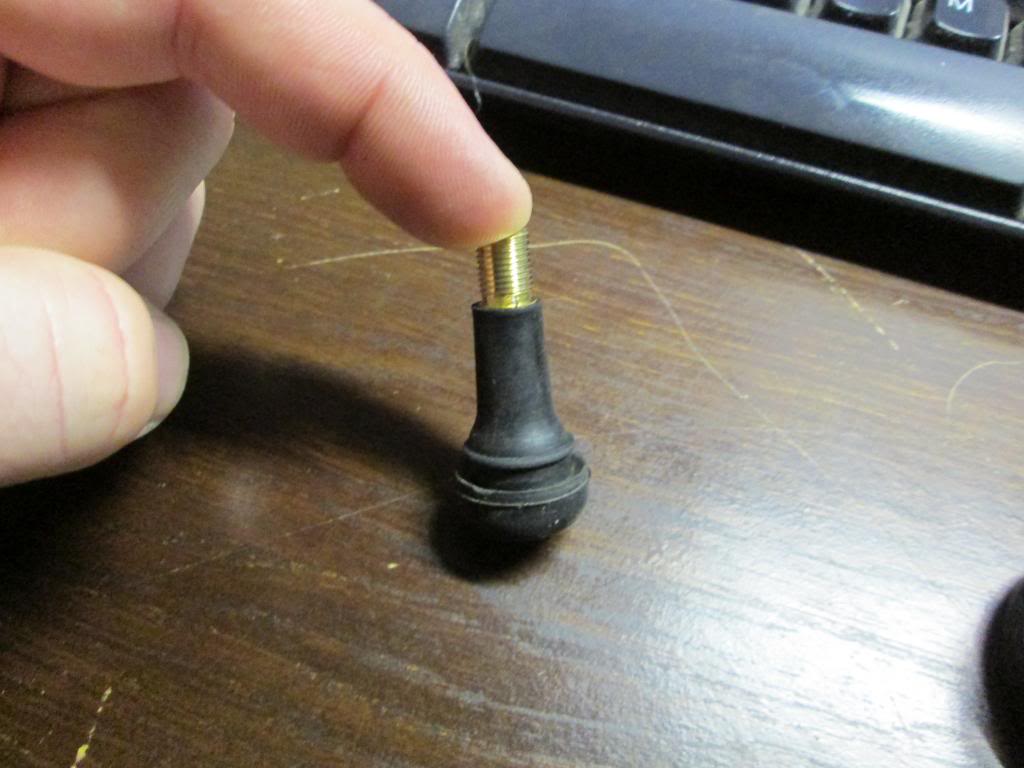
2. Push-in-Schrader-style valve stem (just about any size should work as long as it is straight)
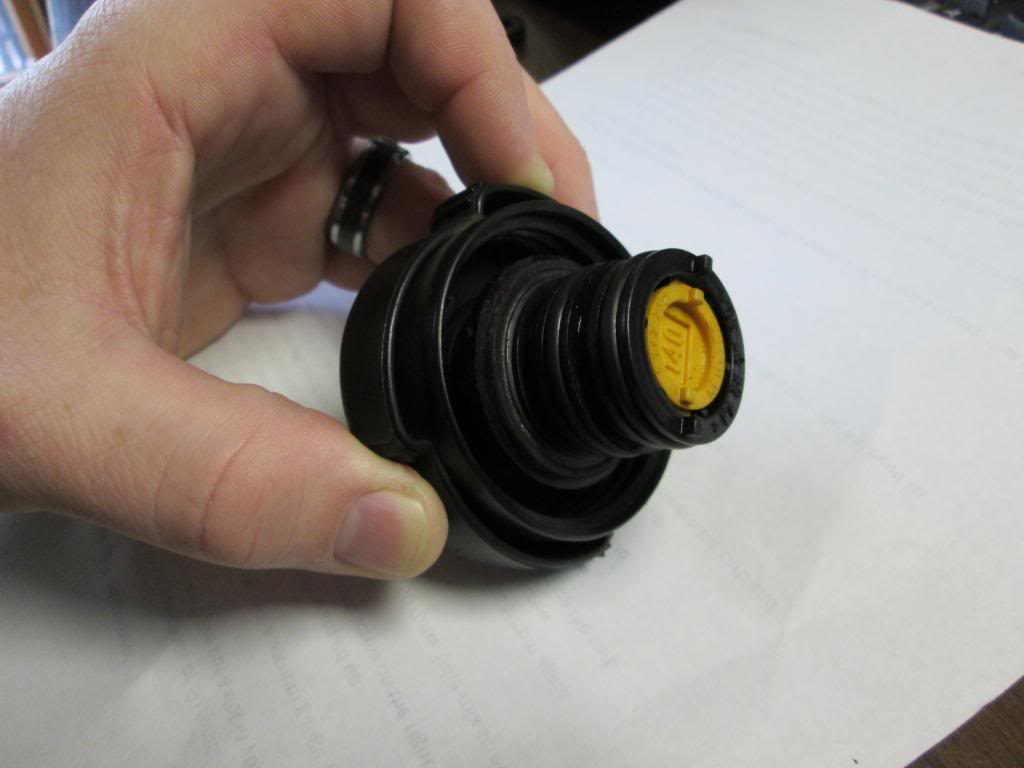
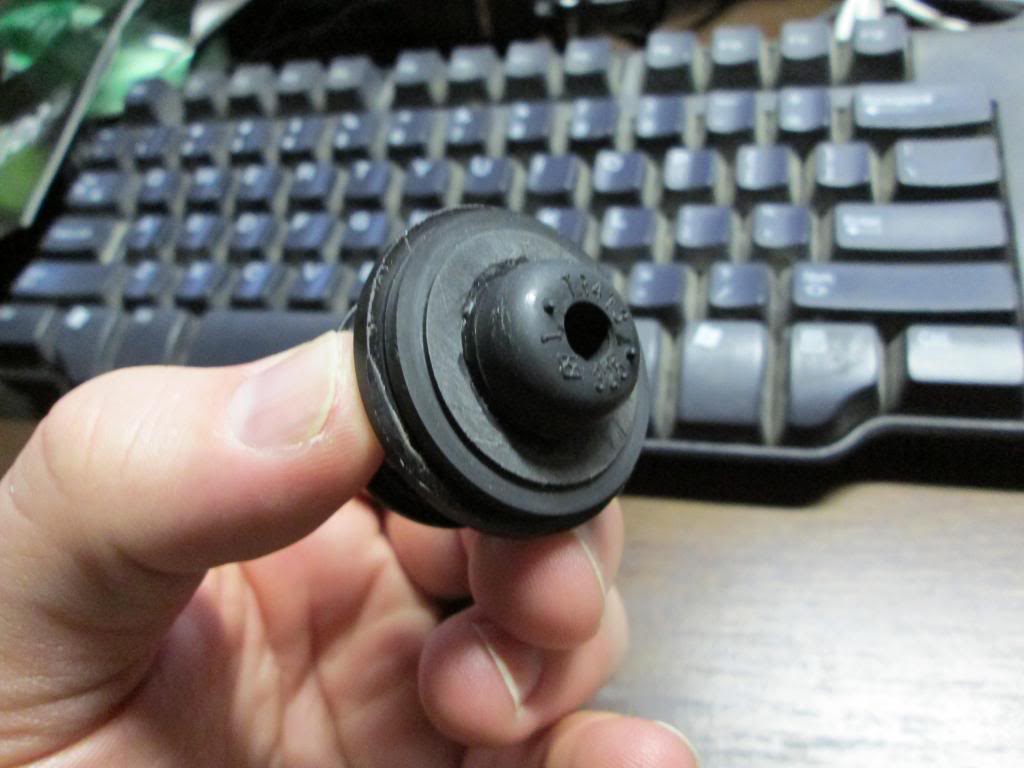
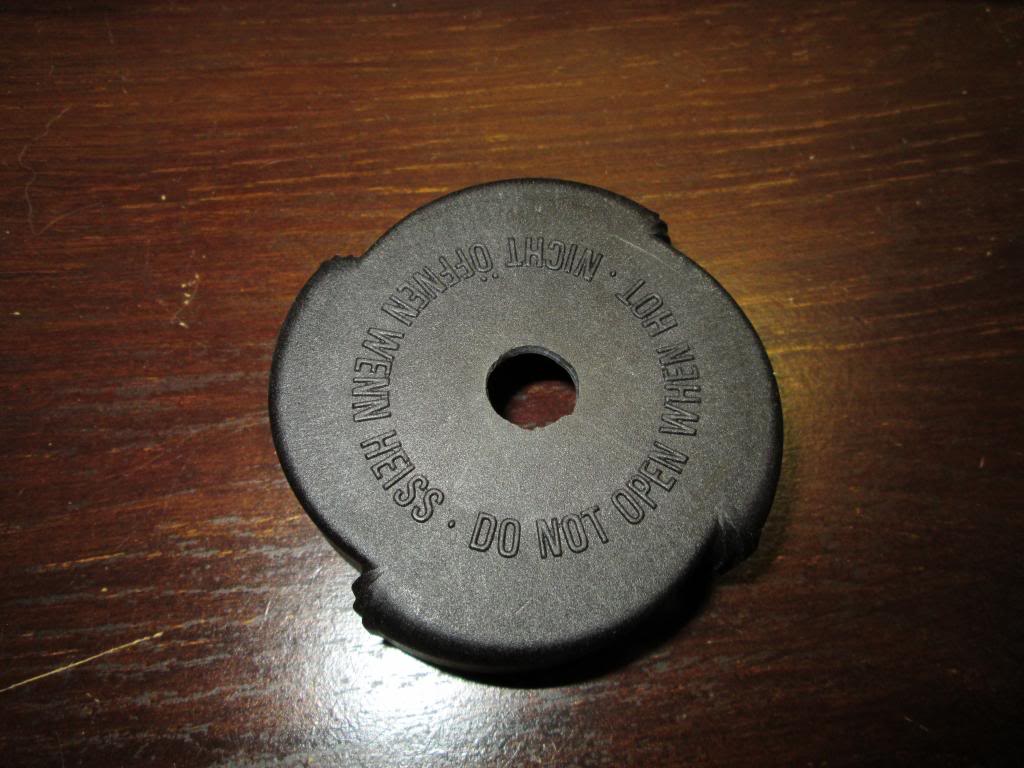
Here is what the stock cap looks like.
STEP 1. Remove the pressure assembly from the cap by prying under it to pop it out of the 4 tabs that hold it in the cap.
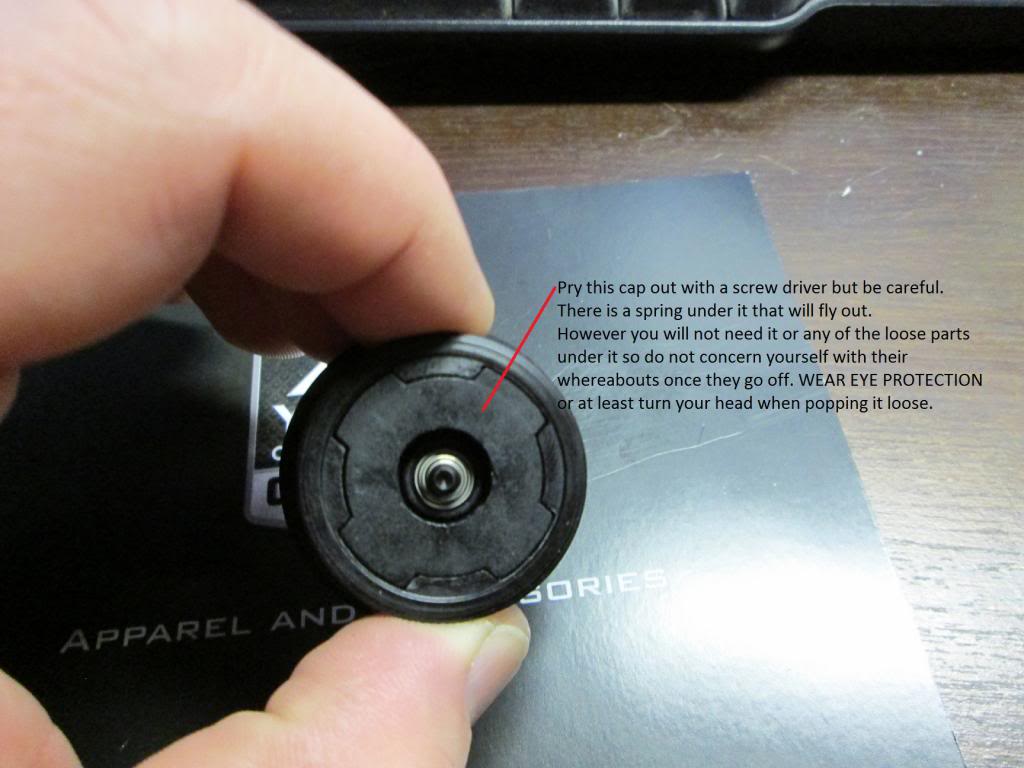
STEP 2. Using a screw driver or suitable prying device pop this cap from the end of the pressure assembly. (CAUTION!!! There is a spring under here that will go flying so wear eye protection or at least turn your head when popping this cap off. Don't worry about the parts that go flying. You will not need them anymore.)
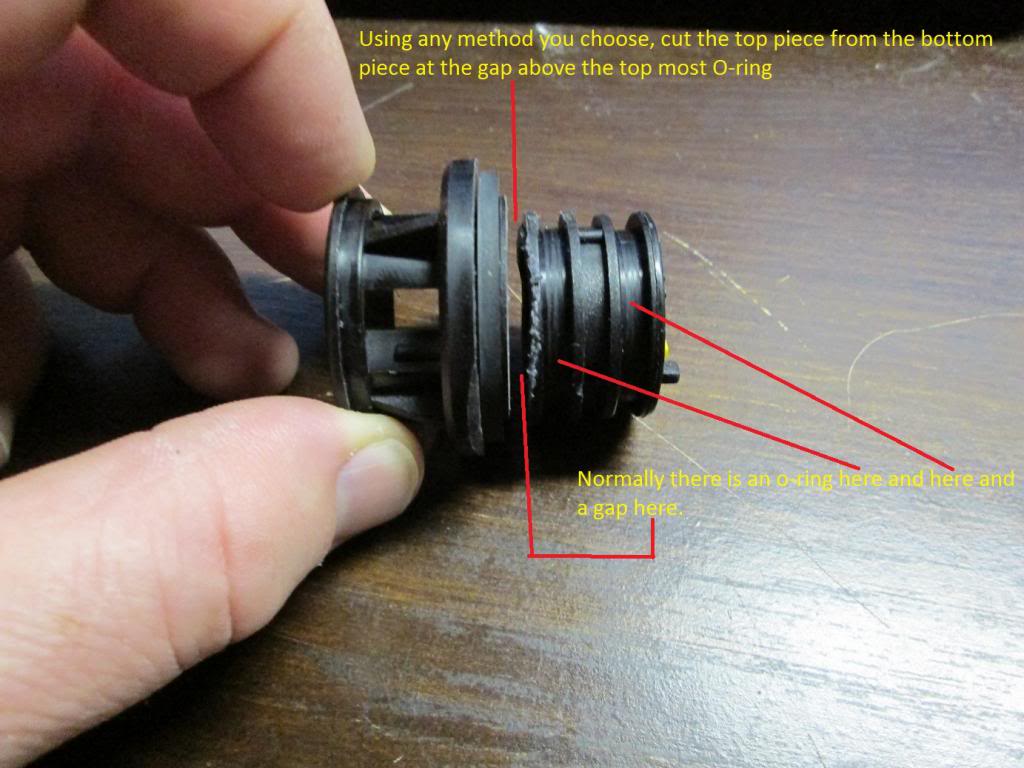
STEP 3. Cut the bottom part of the pressure assembly off as seen in the photo.
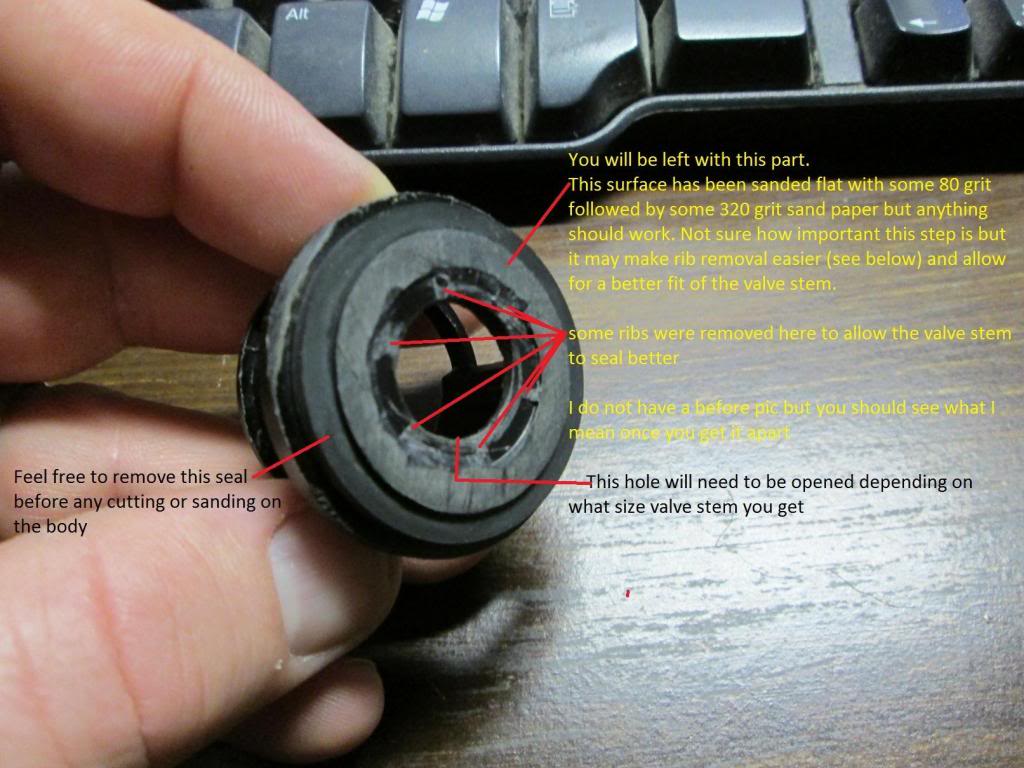
STEP 4. File, sand, shave and drill until you end up with the upper assembly that will house whatever size valve stem you bought. (I think there are only a couple of sizes of valve stem but I would go with one that fits in a smaller hole to make sure there is room in the assembly for it)
Here is the valve stem I used
A longer one might work a little better if you find one. I just happened to find this one in the garage so I have no idea on the part number.
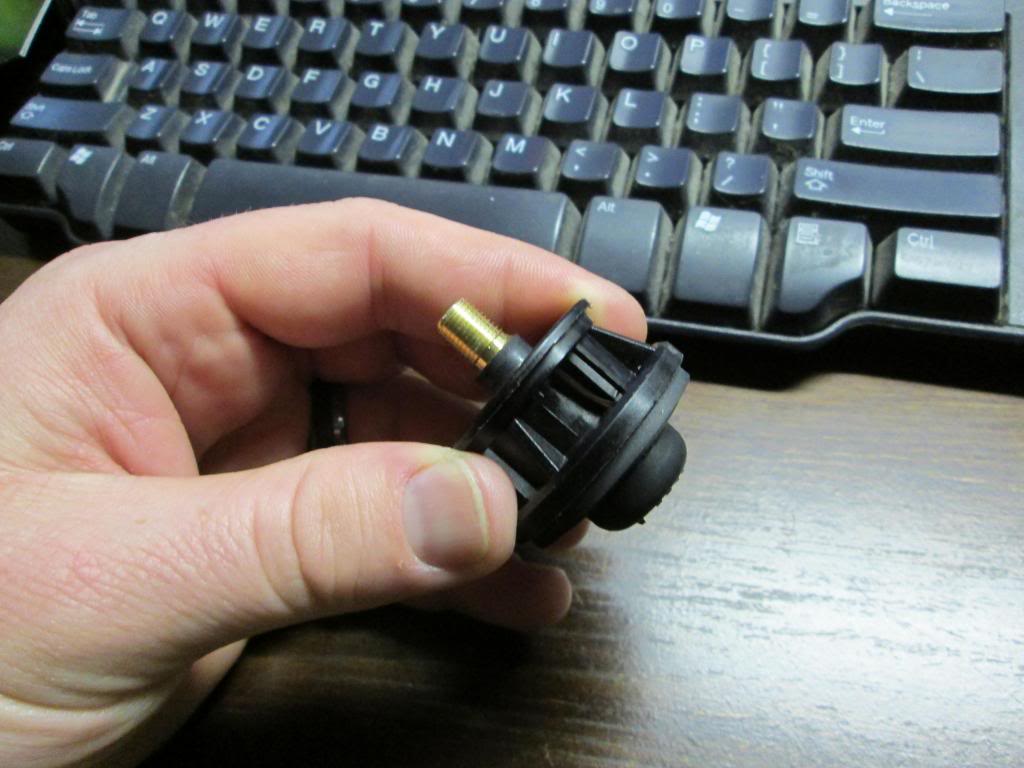
STEP 5. Pop your valve stem in place. You should have something that looks like this.
STEP 6. Drill a hole big enough in your cap to allow your valve stem to poke through.
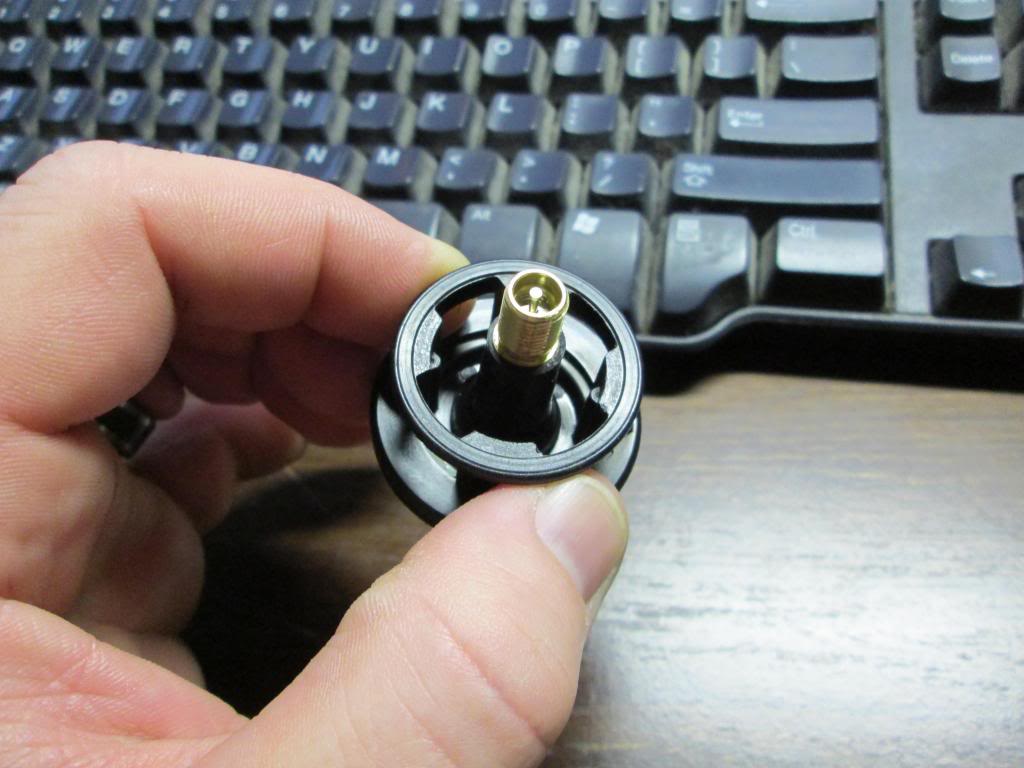
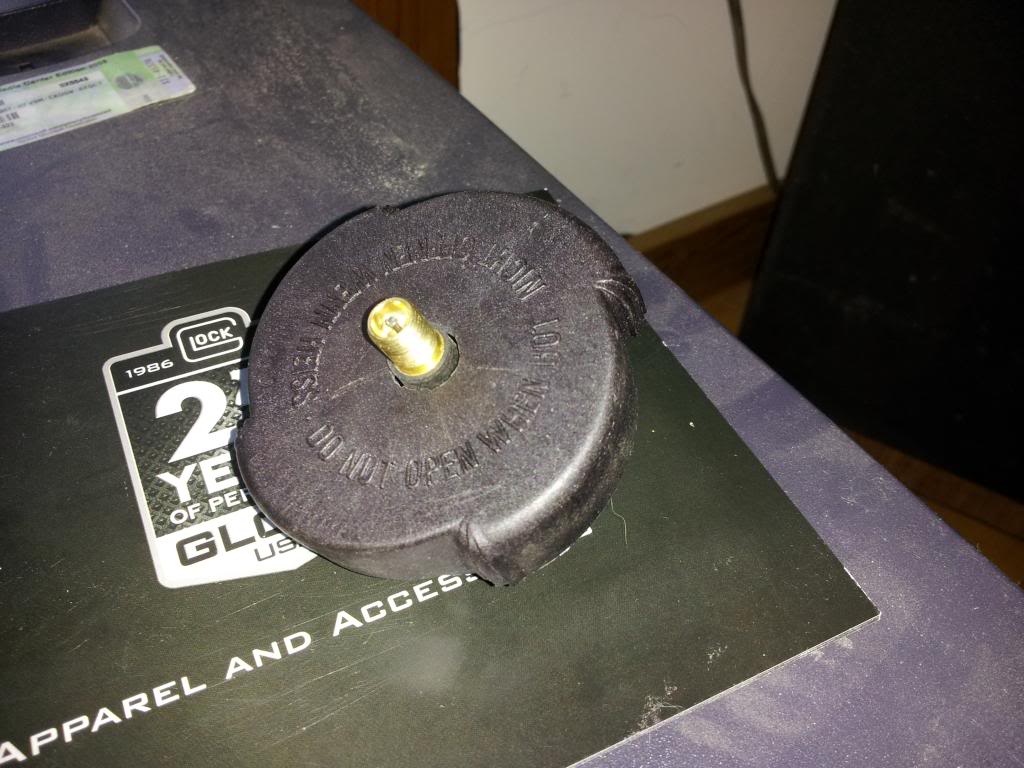
STEP 7. Snap your new pressure assembly back into the cap and you should have something that looks like this.
This can now be screwed onto the reservoir and a plain old tire pump can be used to put a little pressure on the system and check for leaks.
I would avoid using an air compressor unless you have a regulator that you can set to 15 psi or so.
You will no longer have the pressure relief part of the cap in place so it would be real easy to over charge the system and do some serious damage.
This took me all of about 20 minutes to build and it took about 10psi and 15 seconds to find my leak. (turns out it was the front cover gasket at the top of the left coolant passage)
Feel free to ask me about any other details I may have left out.
I didn't actually take pics while I was making it so I had to go back and document it after the fact so all the details may not be super accurate.
Be very sure not to go past 15 PSI. And note that on many shop air gauges 15 PSI is way down on the scale, where gauge is not as precise. Start with 10, then work up slowly if more is needed.
Great ideas and a solution to the discrimination wrought upon our vehicles by the very merchants who would benefit most by our problems.
I know this is an OLD thread, but I tried it and wanted to say thanks and offer a quick upgrade to this (I cut mine too close and had a heck of a time closing the gap...)
If the cut is made at the lower end (from the cap) of the piece removed where the first o-ring sits, there is a spacer right there that pops right out and is the exact size of the upgraded valve stem I used (Slime TR416 - part number 20128) Just drop a washer in on the stem part and use one of the supplied nuts to snug it up. Might need a valve stem adapter to get it long enough to get out the cap, not sure, since I didn't see all of this until AFTER I messed it up... Got it to work and it's a brilliant solution for under 20 bucks (I had to buy a small bicycle pump with a gauge, so that was another 11 bucks)
Anyhow, it helped me diagnose a valley pan gasket leak and saved me a ton of time!
I want to thank everyone for this thread. It is an oldy but a goody.
I was pretty convinced that I had lost my head gasket. Built this in a few minutes.. and in less than it took to drink a beer I found I had a leaking coolant hose.
Hey, this is my first post. I have a discovery sport that is leaking coolant from somewhere and I found this thread very helpful. I just wanted to add an update. The Discovery Sport uses (what seems to be) a standard ford cap which is different from the one posted here.
This was how I modified mine.... similar but different:
1. bought a new cap off amazon for about $10. Part number 3M5H-8100-AD
2. Used a screwdriver, same as above, to pry the lower assembly out of the cap.
3. Used a small screwdriver (you could also use a punch or an awl) to punch a hole in the brass disk that holds the valve assembly in and then pried it out.
4. I drilled the bottom of the lower assembly out with a 13/32" drill bit. The plastic is soft and cuts really easily.
5. I went to a tractor-trailer/transport truck shop and bought a TR573 valve stem. I removed the stock rubber bushing at the bottom and cut a circular seal out of an old bicycle innertube. It fits perfectly in the lower assembly. I dropped the nut into the hole in the lower assembly and just tightened the valve stem by hand, which should be more than sufficient.
6. I drilled a hole in the cap, same as above.
7. Snap the upper and lower assemblies back together and you're done.
Good job on the write up and photos @Wallybanger FWIW, might be more helpful to other Discovery Sport owners if you post in the appropriate section, this section is for the 1999-2004 D2.
Thanks and yes, I can post over there. I posted here because this is the thread that google found so I figured it would be good to post here if other people are browsing the web looking for info.