
How to: Paint Worn Fender Flare Arches Properly


Drifting
Joined: Jan 2010
Posts: 38
Likes: 0
From: around nashville
thanks for the inspiration, Cam. i made a trip to the depot this morn to pick up the exact paint you used.
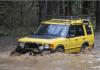
some notes for those yet to do this (this may apply to my vehicle only or may not); most of the flares have a gap between them and the body panels to allow for the masking tape to slip in between for a solid covering without having to try to match it up exactly to the edge of the flare.
Cam nailed it about the sanding. even if you think you're done, keep going. i have a couple of areas where i didn't quite get it enough and the fresh coats of paint show these pitted areas. nothing extremely irritating, but since you're taking the time/effort to do the job do it thoroughly so you'll be satisfied.
don't worry if you get a slight amount of overspray on something. a bit of wax / rubbing compound will take it right off.
thanks again, Cam!
Brian

Glad it worked out for you Brian. You're absolutely right about the small gaps between the arches. They make the taping a much easier job.
Thanks for adding your input, the more the better!
Thanks for adding your input, the more the better!

Mudding
Joined: Sep 2009
Posts: 214
Likes: 19
From: Arizona
I taped first and than sanded with 200 grit to get the large pitting out and than finished with a 400 grit to smooth it out. Primered with a black automotive primer and than shot 4 coats of bumper paint. I tried satin, semi-gloss and flat and didn't like any of them so I got the bumper cover paint that I did my brush guard with and I think it turned out awesome. What do you think?
TReK
Joined: Nov 2009
Posts: 2,433
Likes: 5
From: Woodway, WA
I taped first and than sanded with 200 grit to get the large pitting out and than finished with a 400 grit to smooth it out. Primered with a black automotive primer and than shot 4 coats of bumper paint. I tried satin, semi-gloss and flat and didn't like any of them so I got the bumper cover paint that I did my brush guard with and I think it turned out awesome. What do you think?
....I'll add that a little Simple Green on a rag works well to remove over-spray if you get to it quickly.


