
Panhard Conversion w/ All Factory Parts ($50)


Thread Starter
|
Camel Trophy
Joined: Aug 2014
Posts: 4,743
Likes: 985
From: Southwestern Virginia
Hey guys! This one's been a long time coming. I just completed my own rear panhard conversion and so here's the write up. I entirely used factory parts. I guessed on the price based on factory panhard prices on eBay. I used pieces I kept off my old parts truck.
This is honestly a super easy swap if you're good at welding. I think it took me like 4 hours working fairly slowly since I was taking pictures along the way.
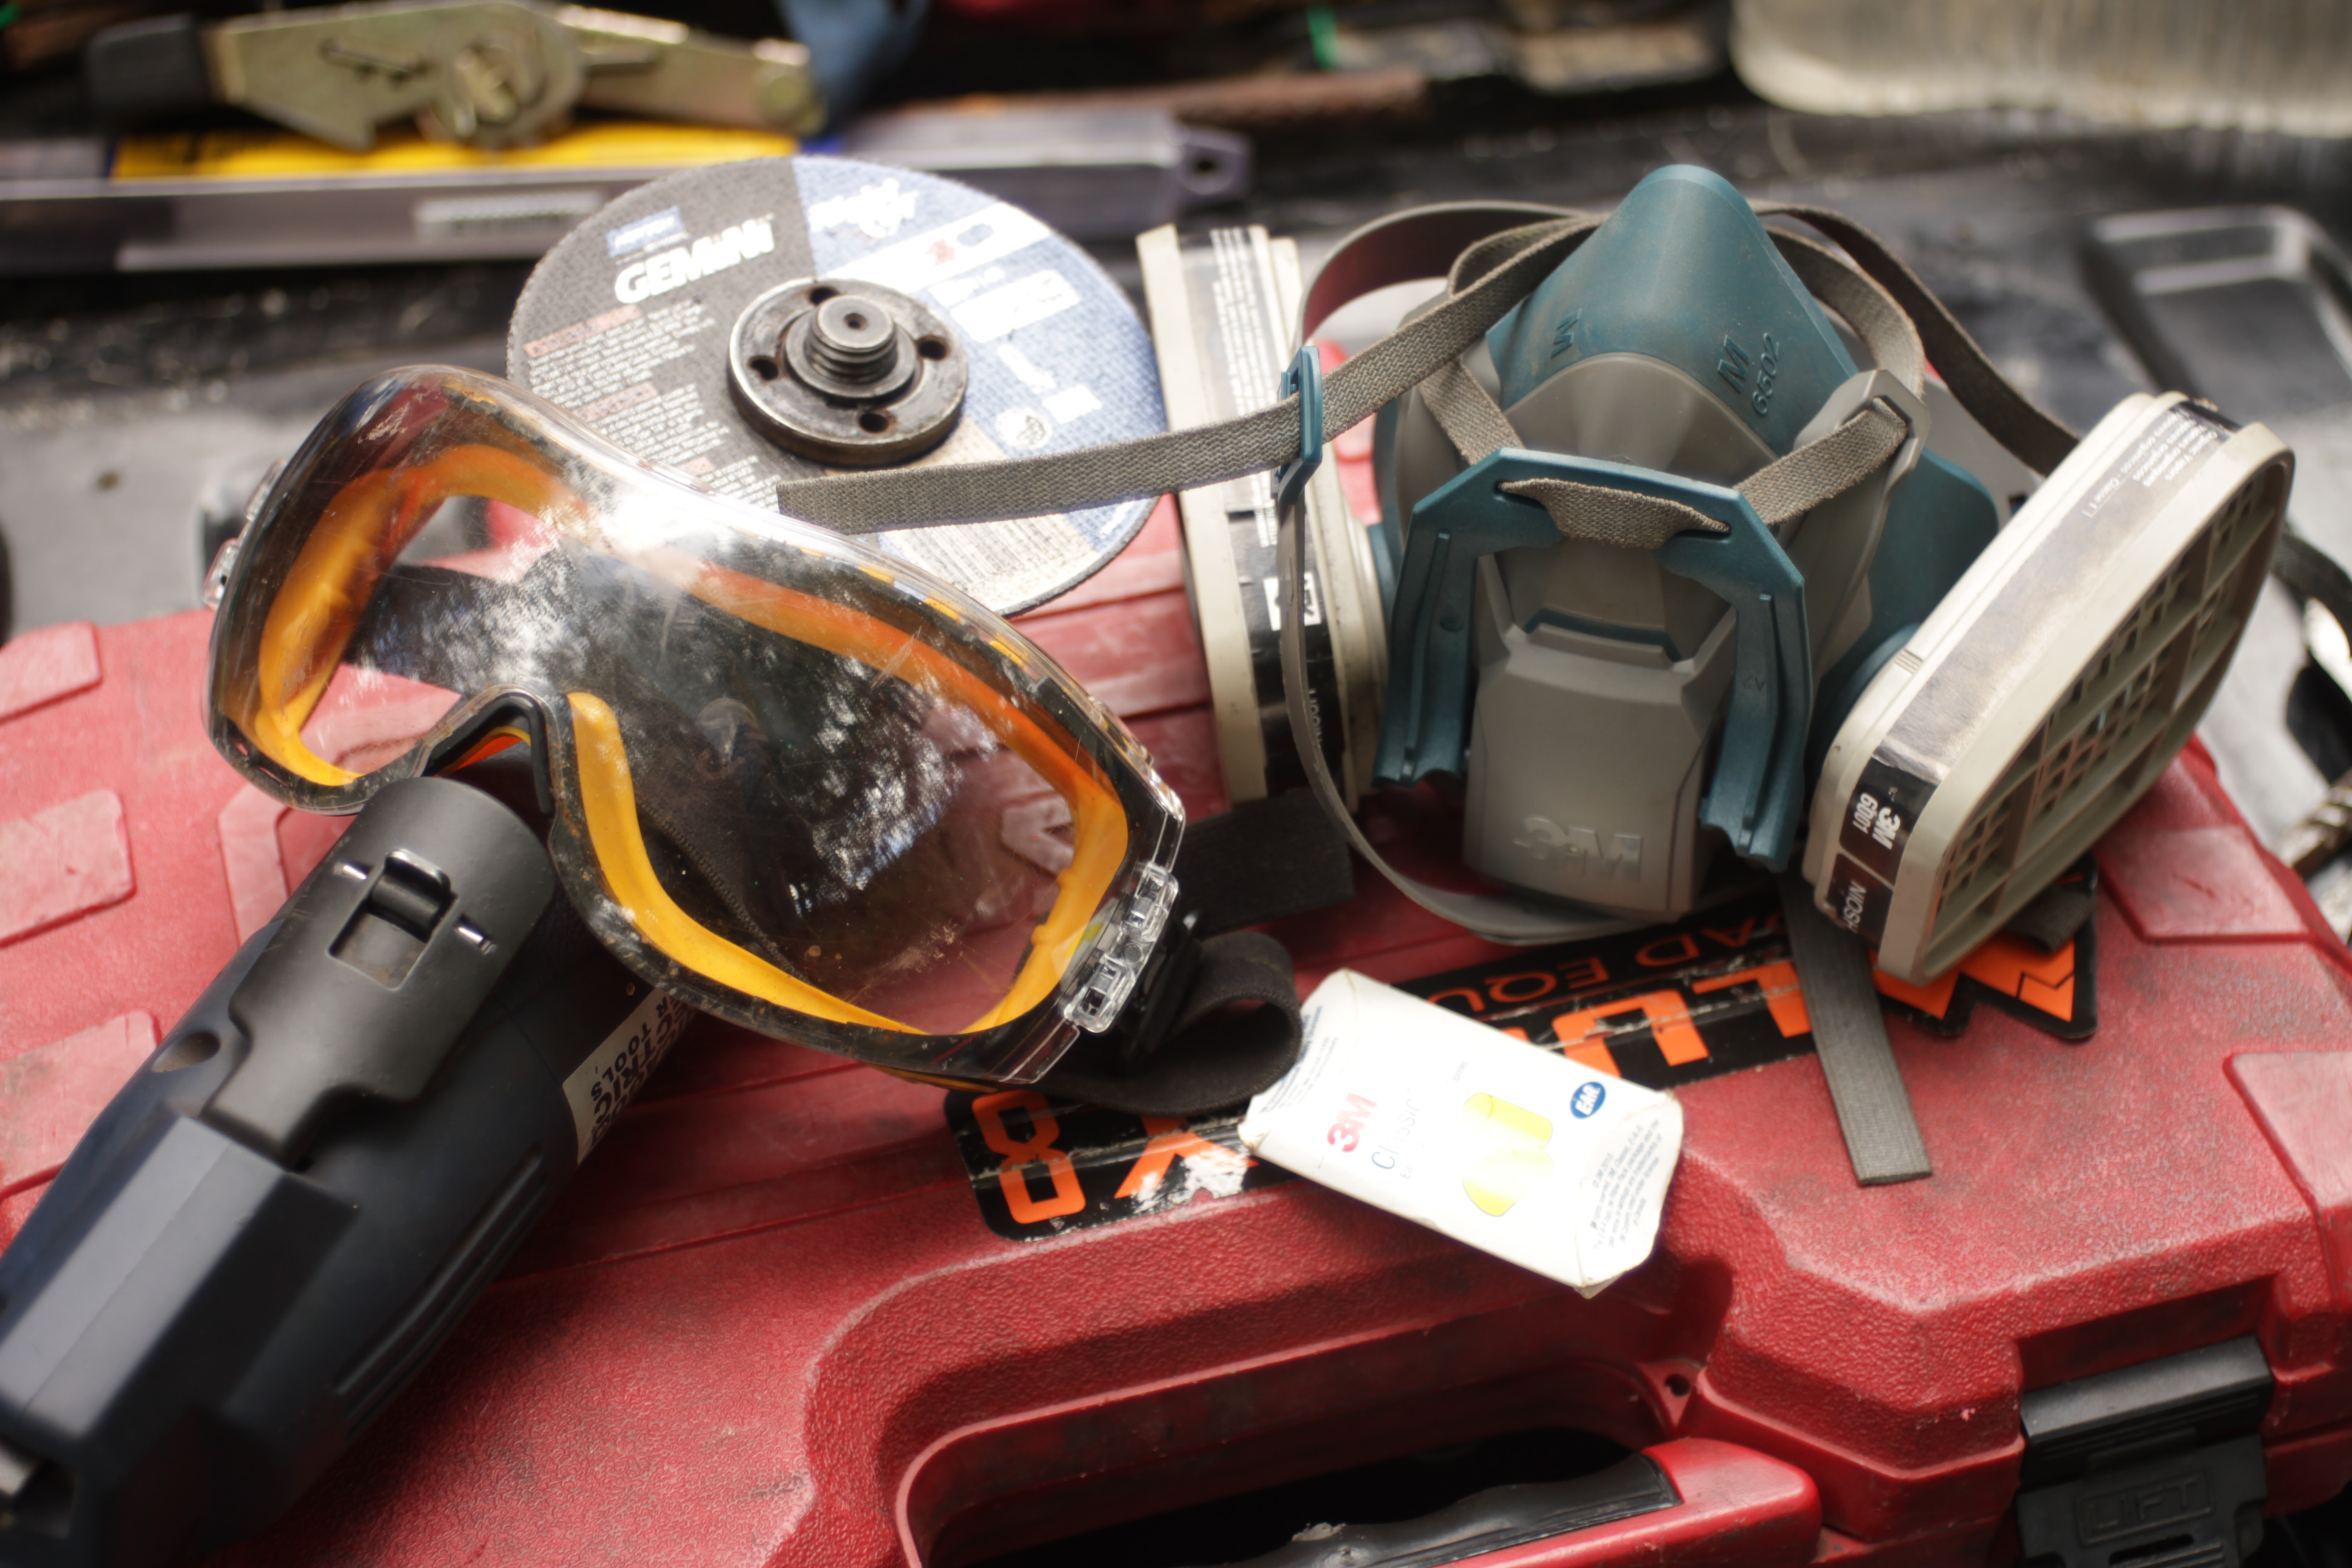
First up, tools needed for getting the parts you'll need. Eye protection required, hearing and breathing protection highly recommended. Protect your bodies! It's the only one you get, and you don't want to finish life missing one of your senses.
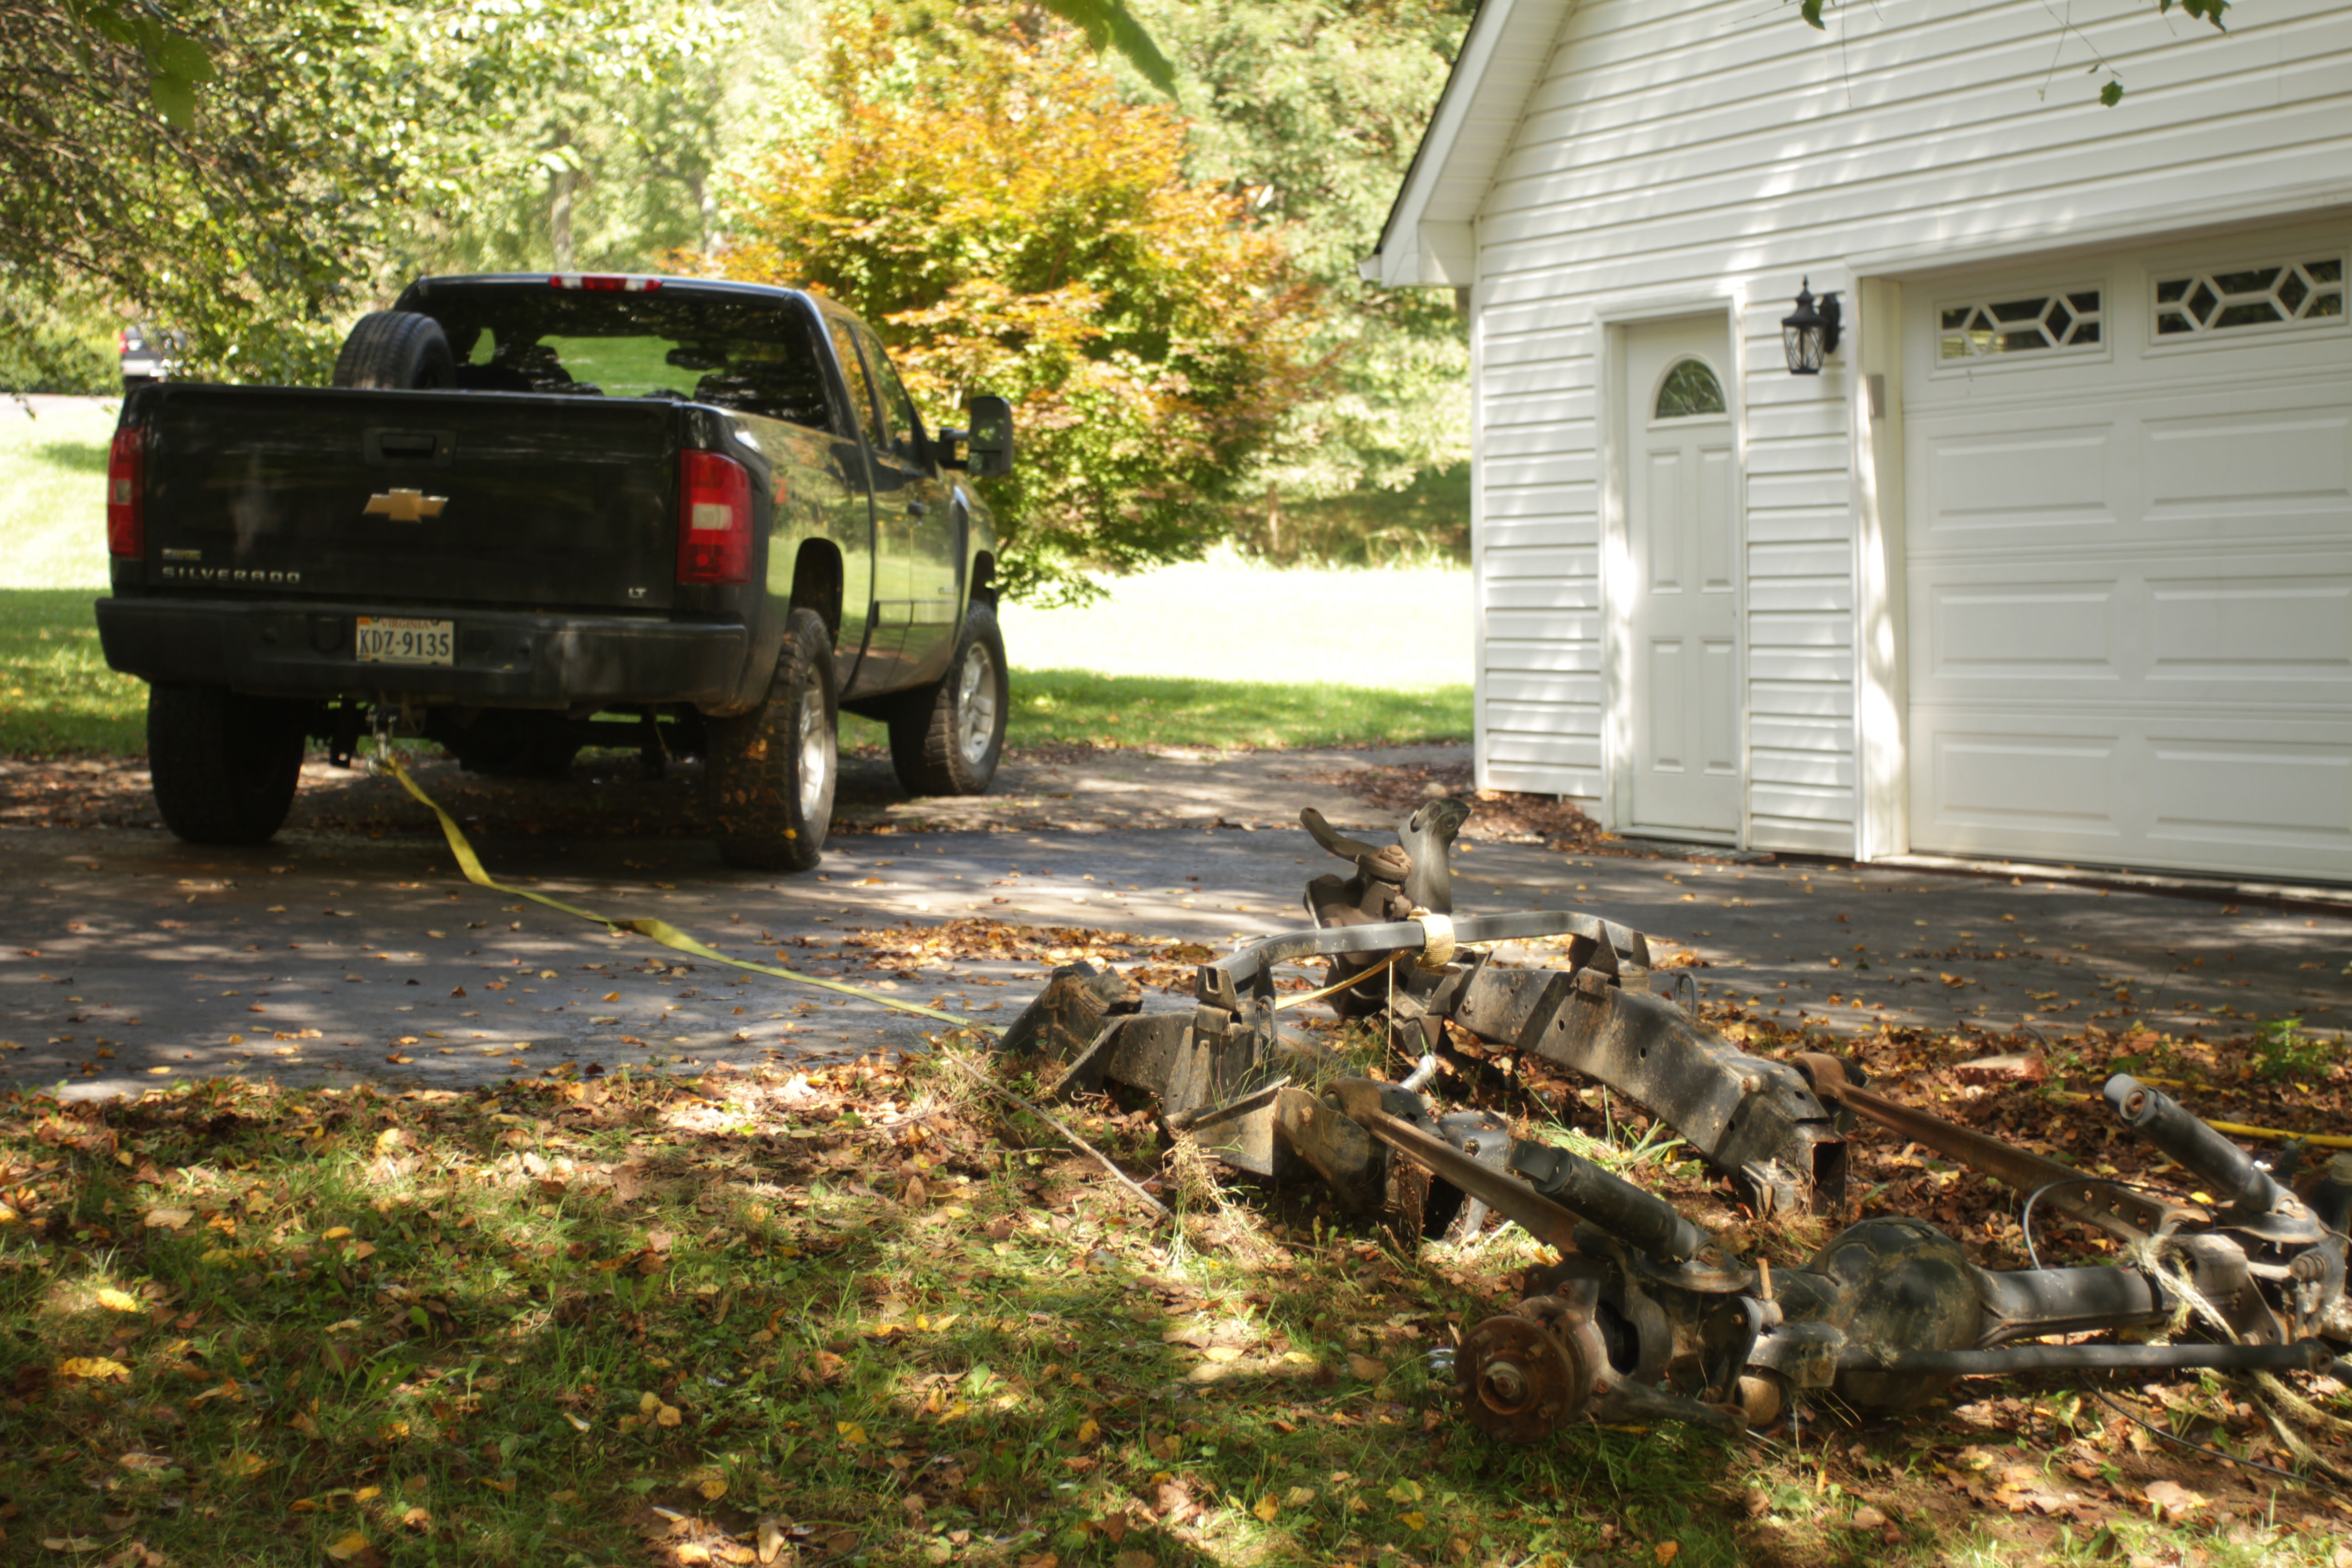
I'm guessing most of you will start in a junk yard; I started in my driveway with just the front half of a frame. This will still give you an idea of what you need to do.
I will say, I actually did cut off the factory frame size mount, but ended up not using it. Maybe one of you can, but I couldn't fit it because of my 3" tailpipe. I can't remember exactly how the factory exhaust ran because it's been a couple years since it was on my truck.
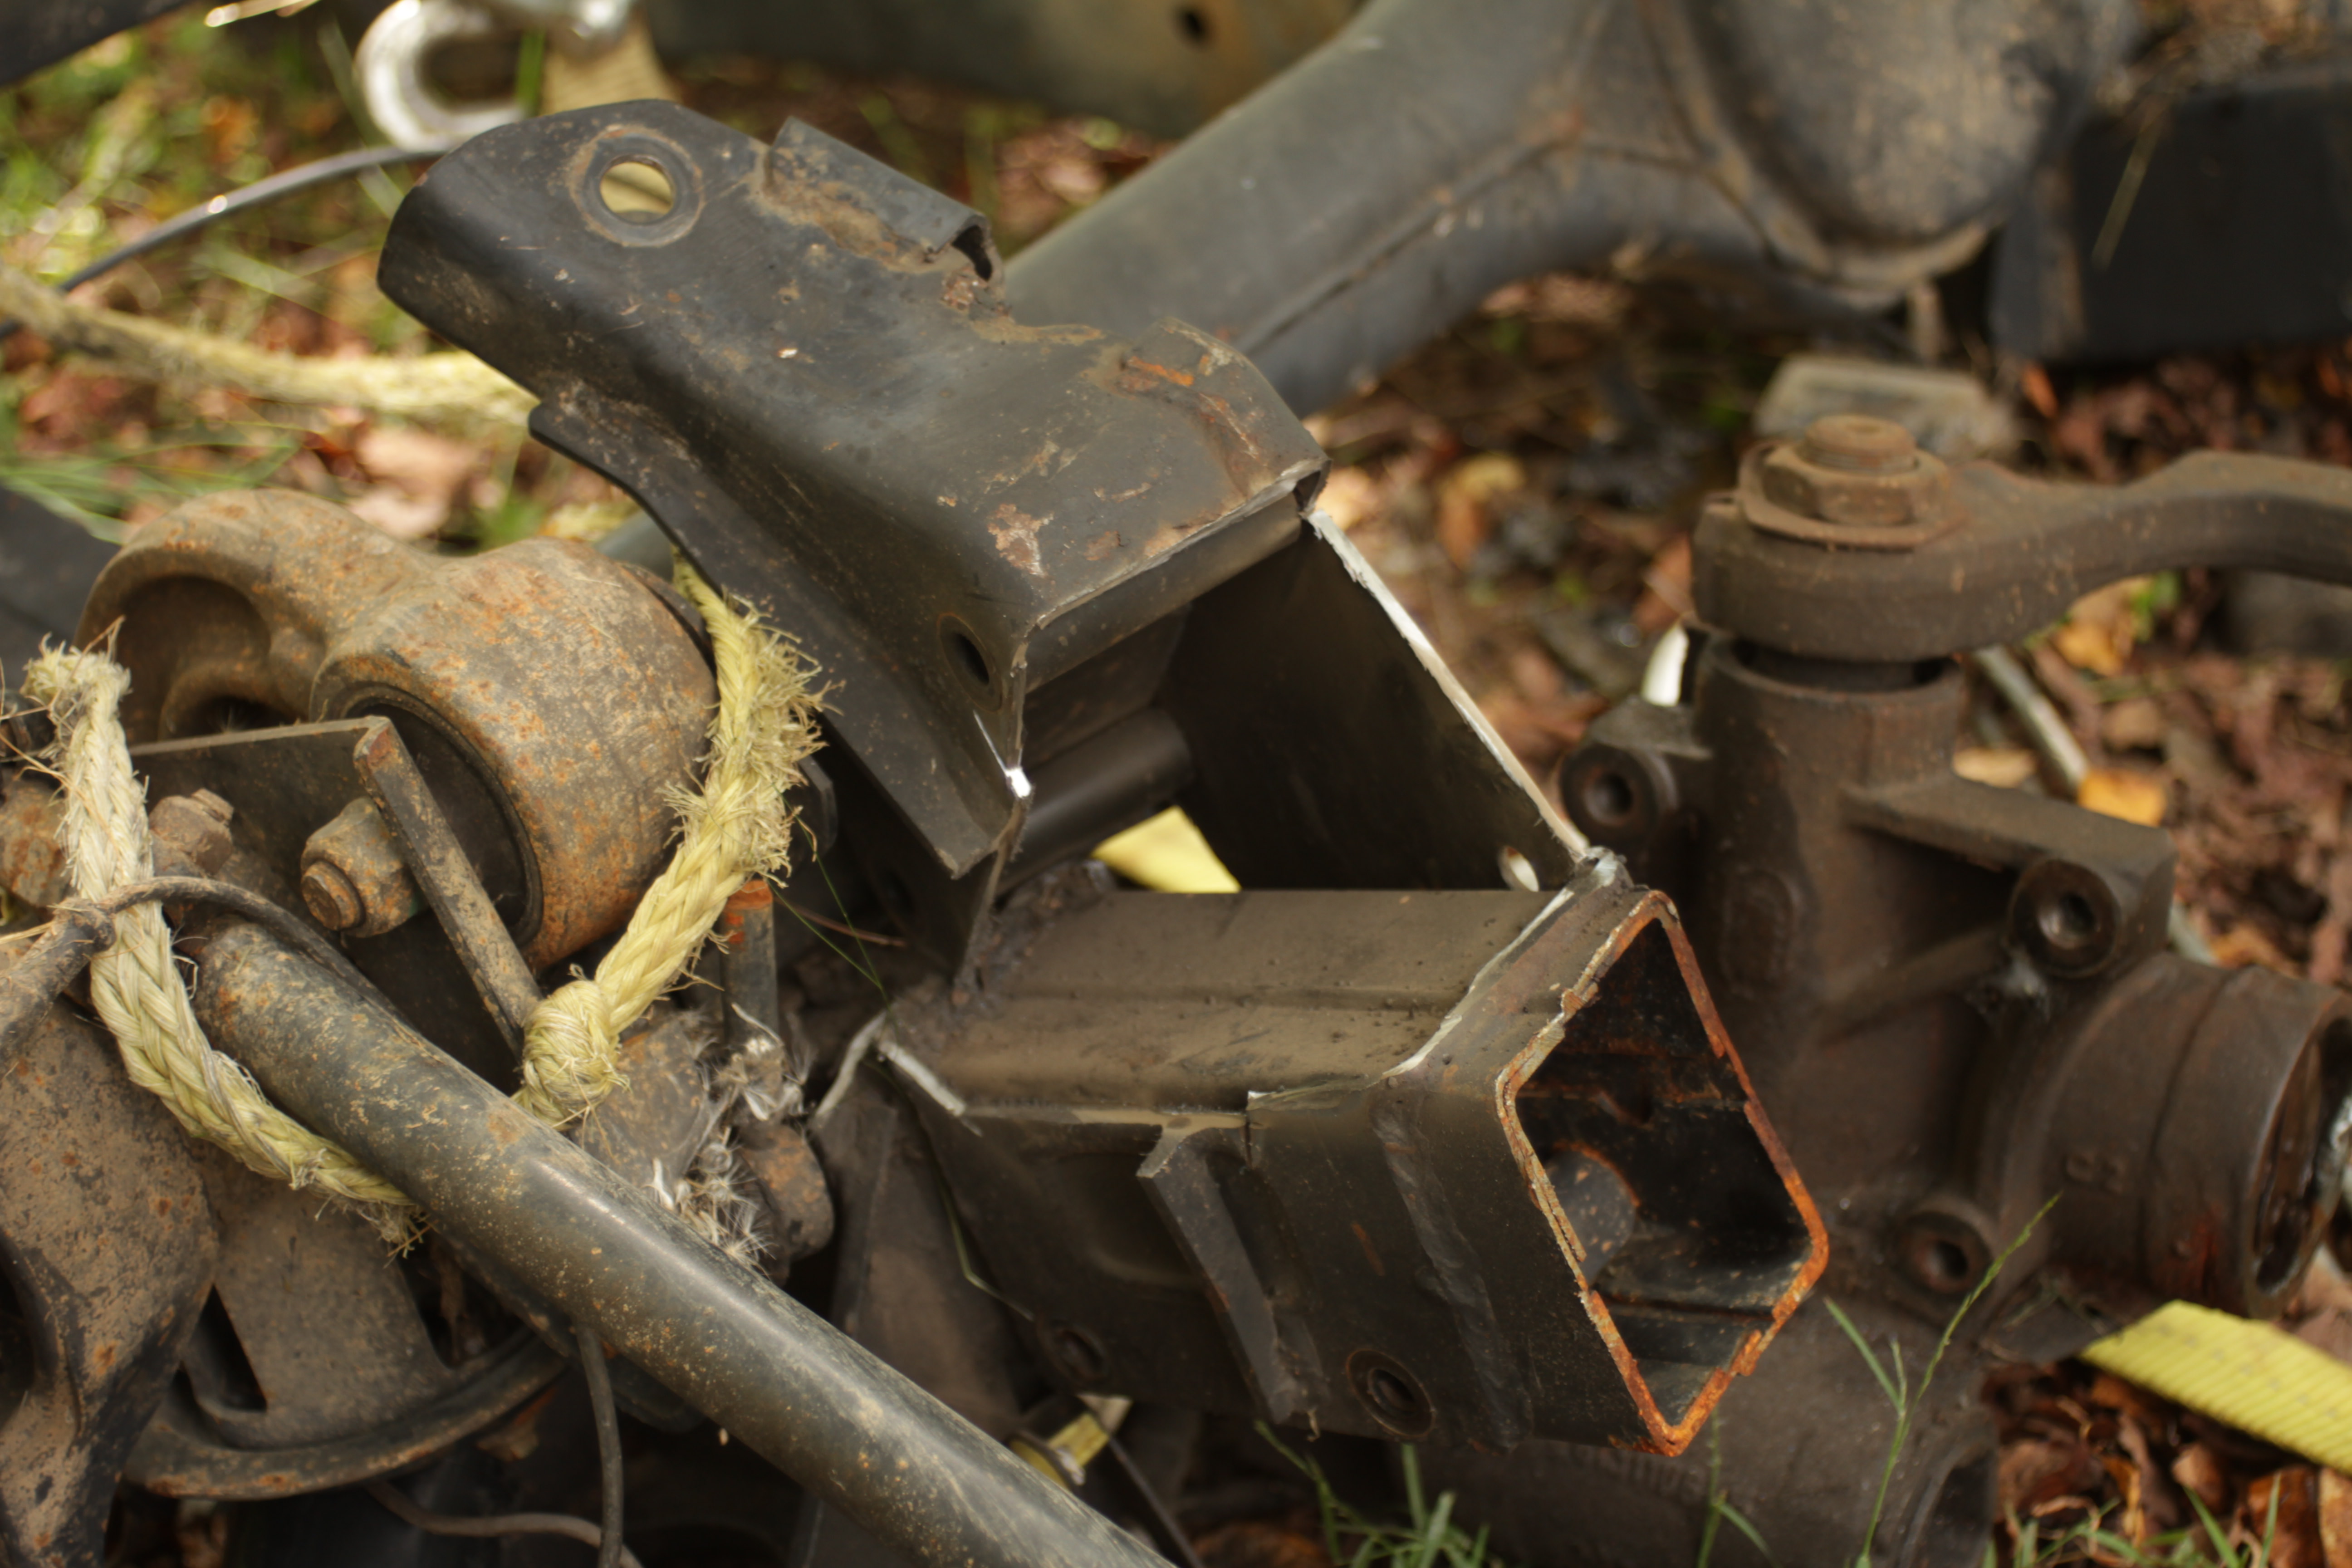
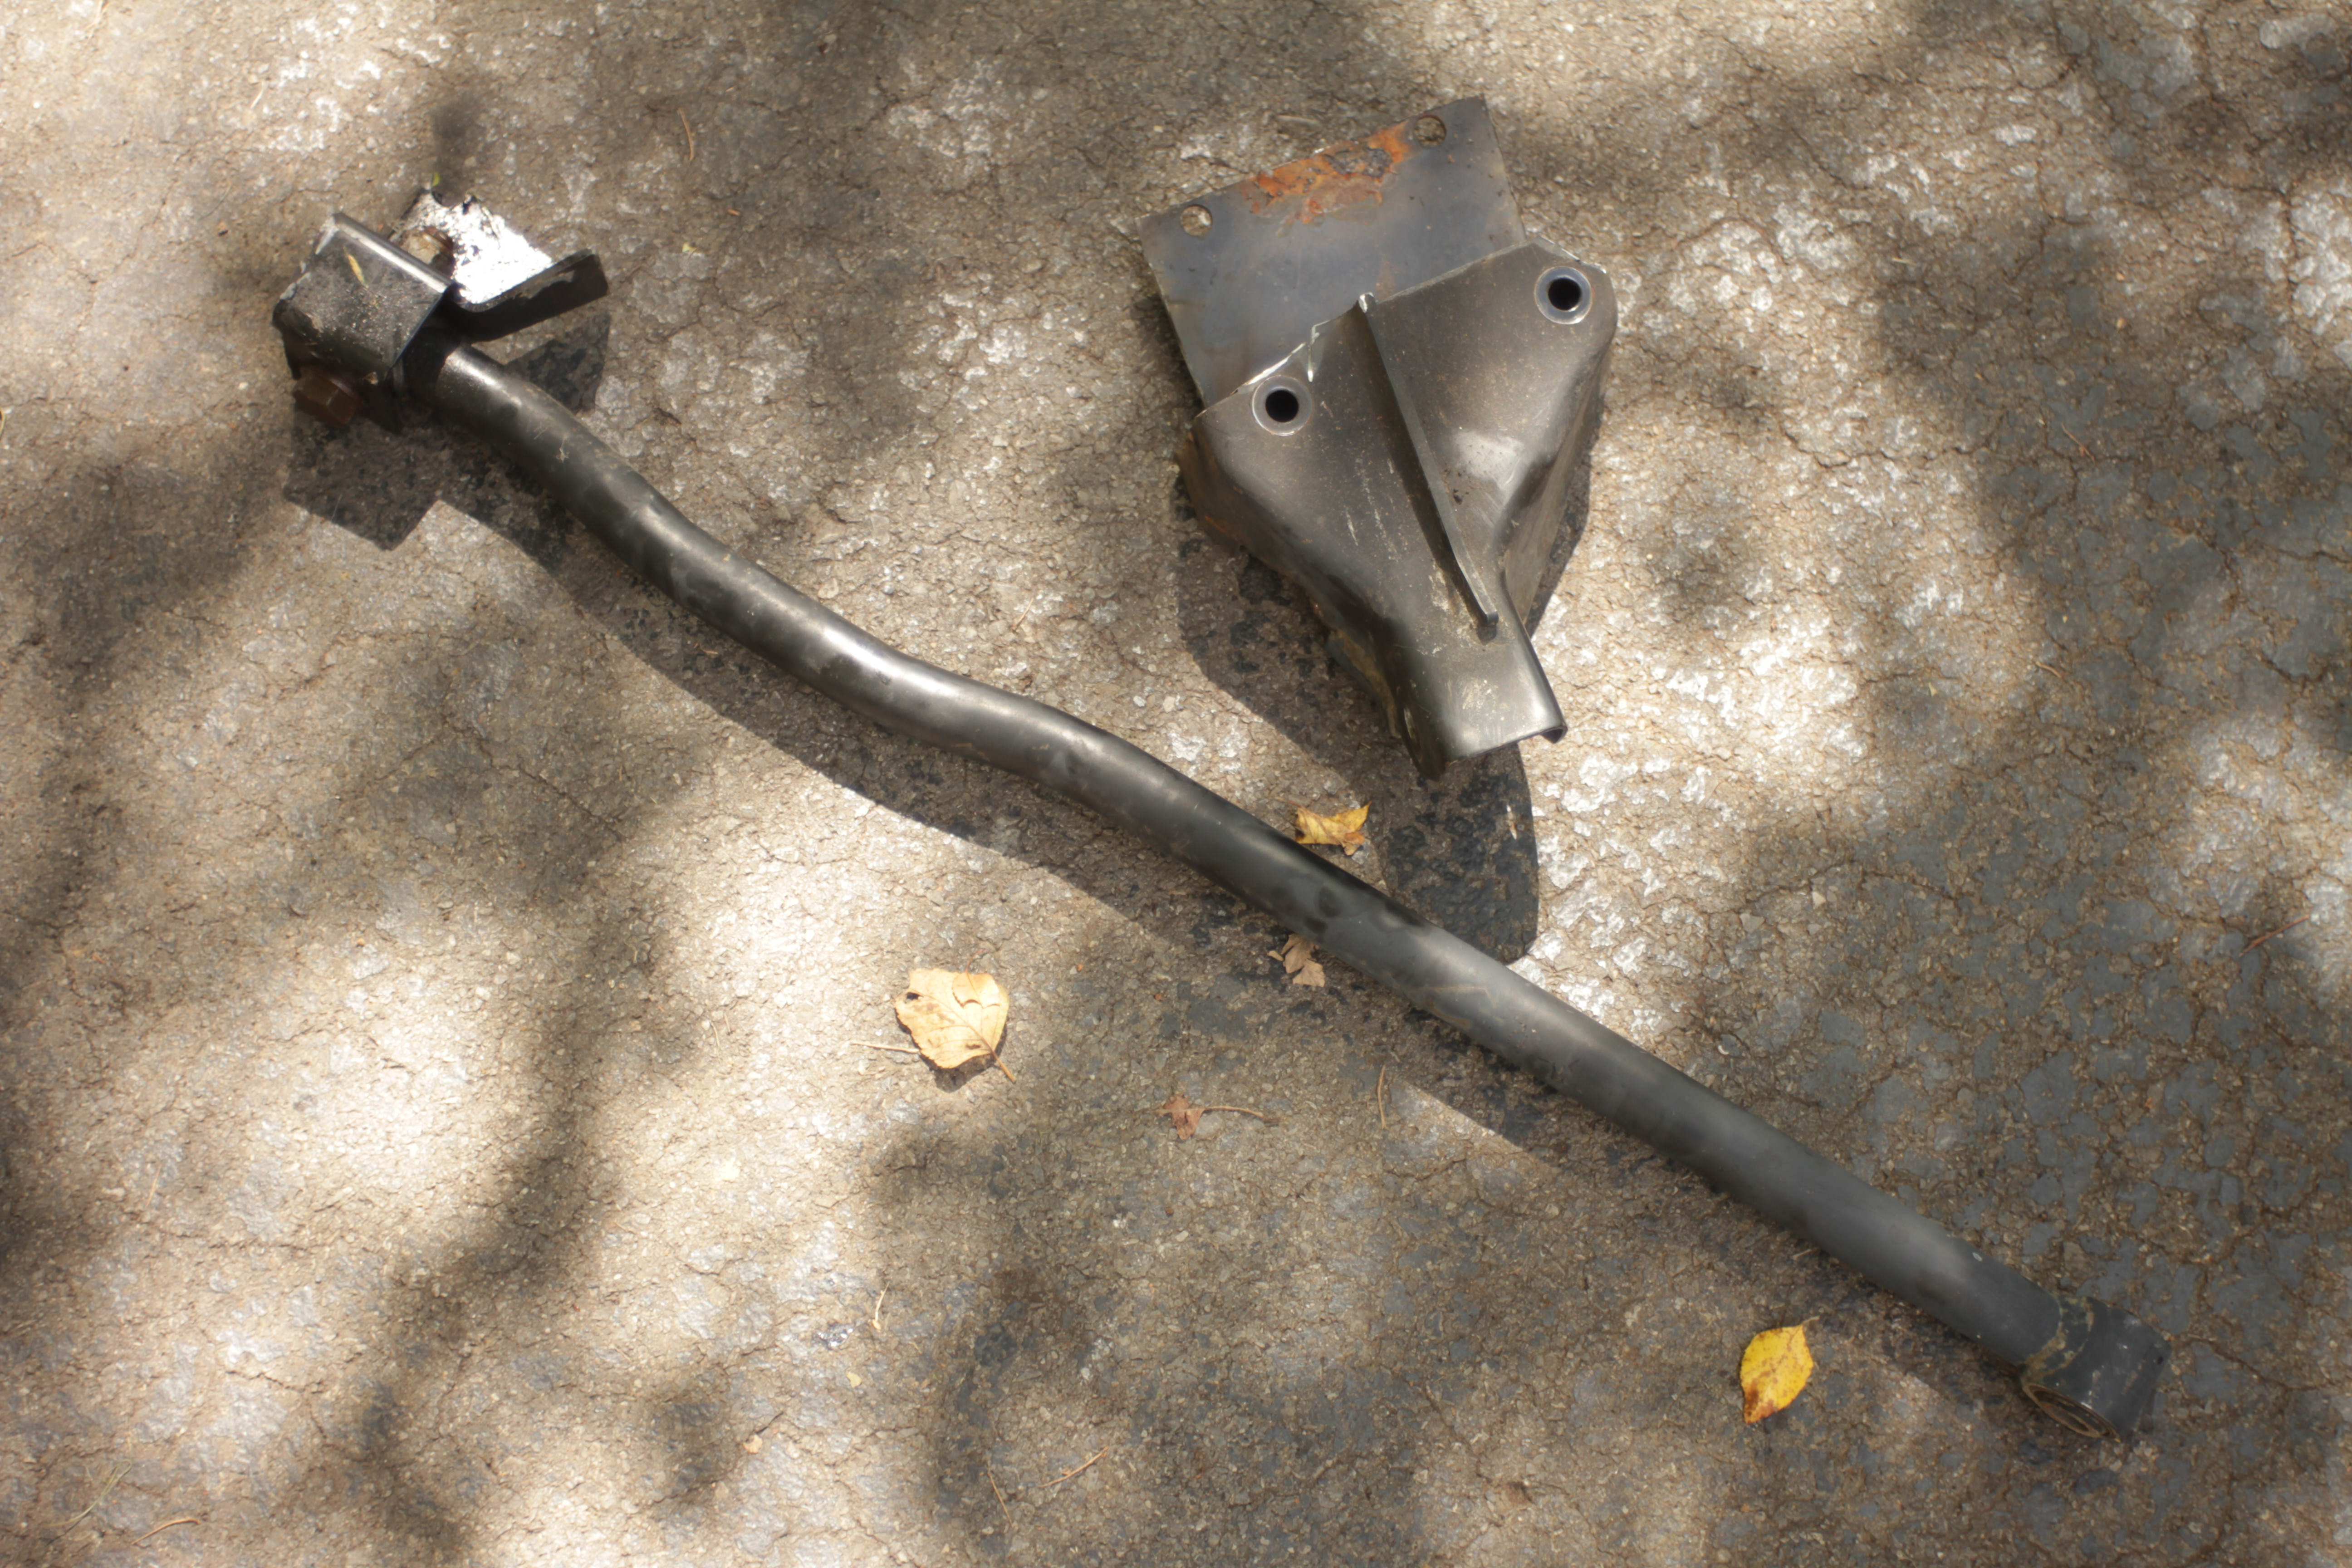
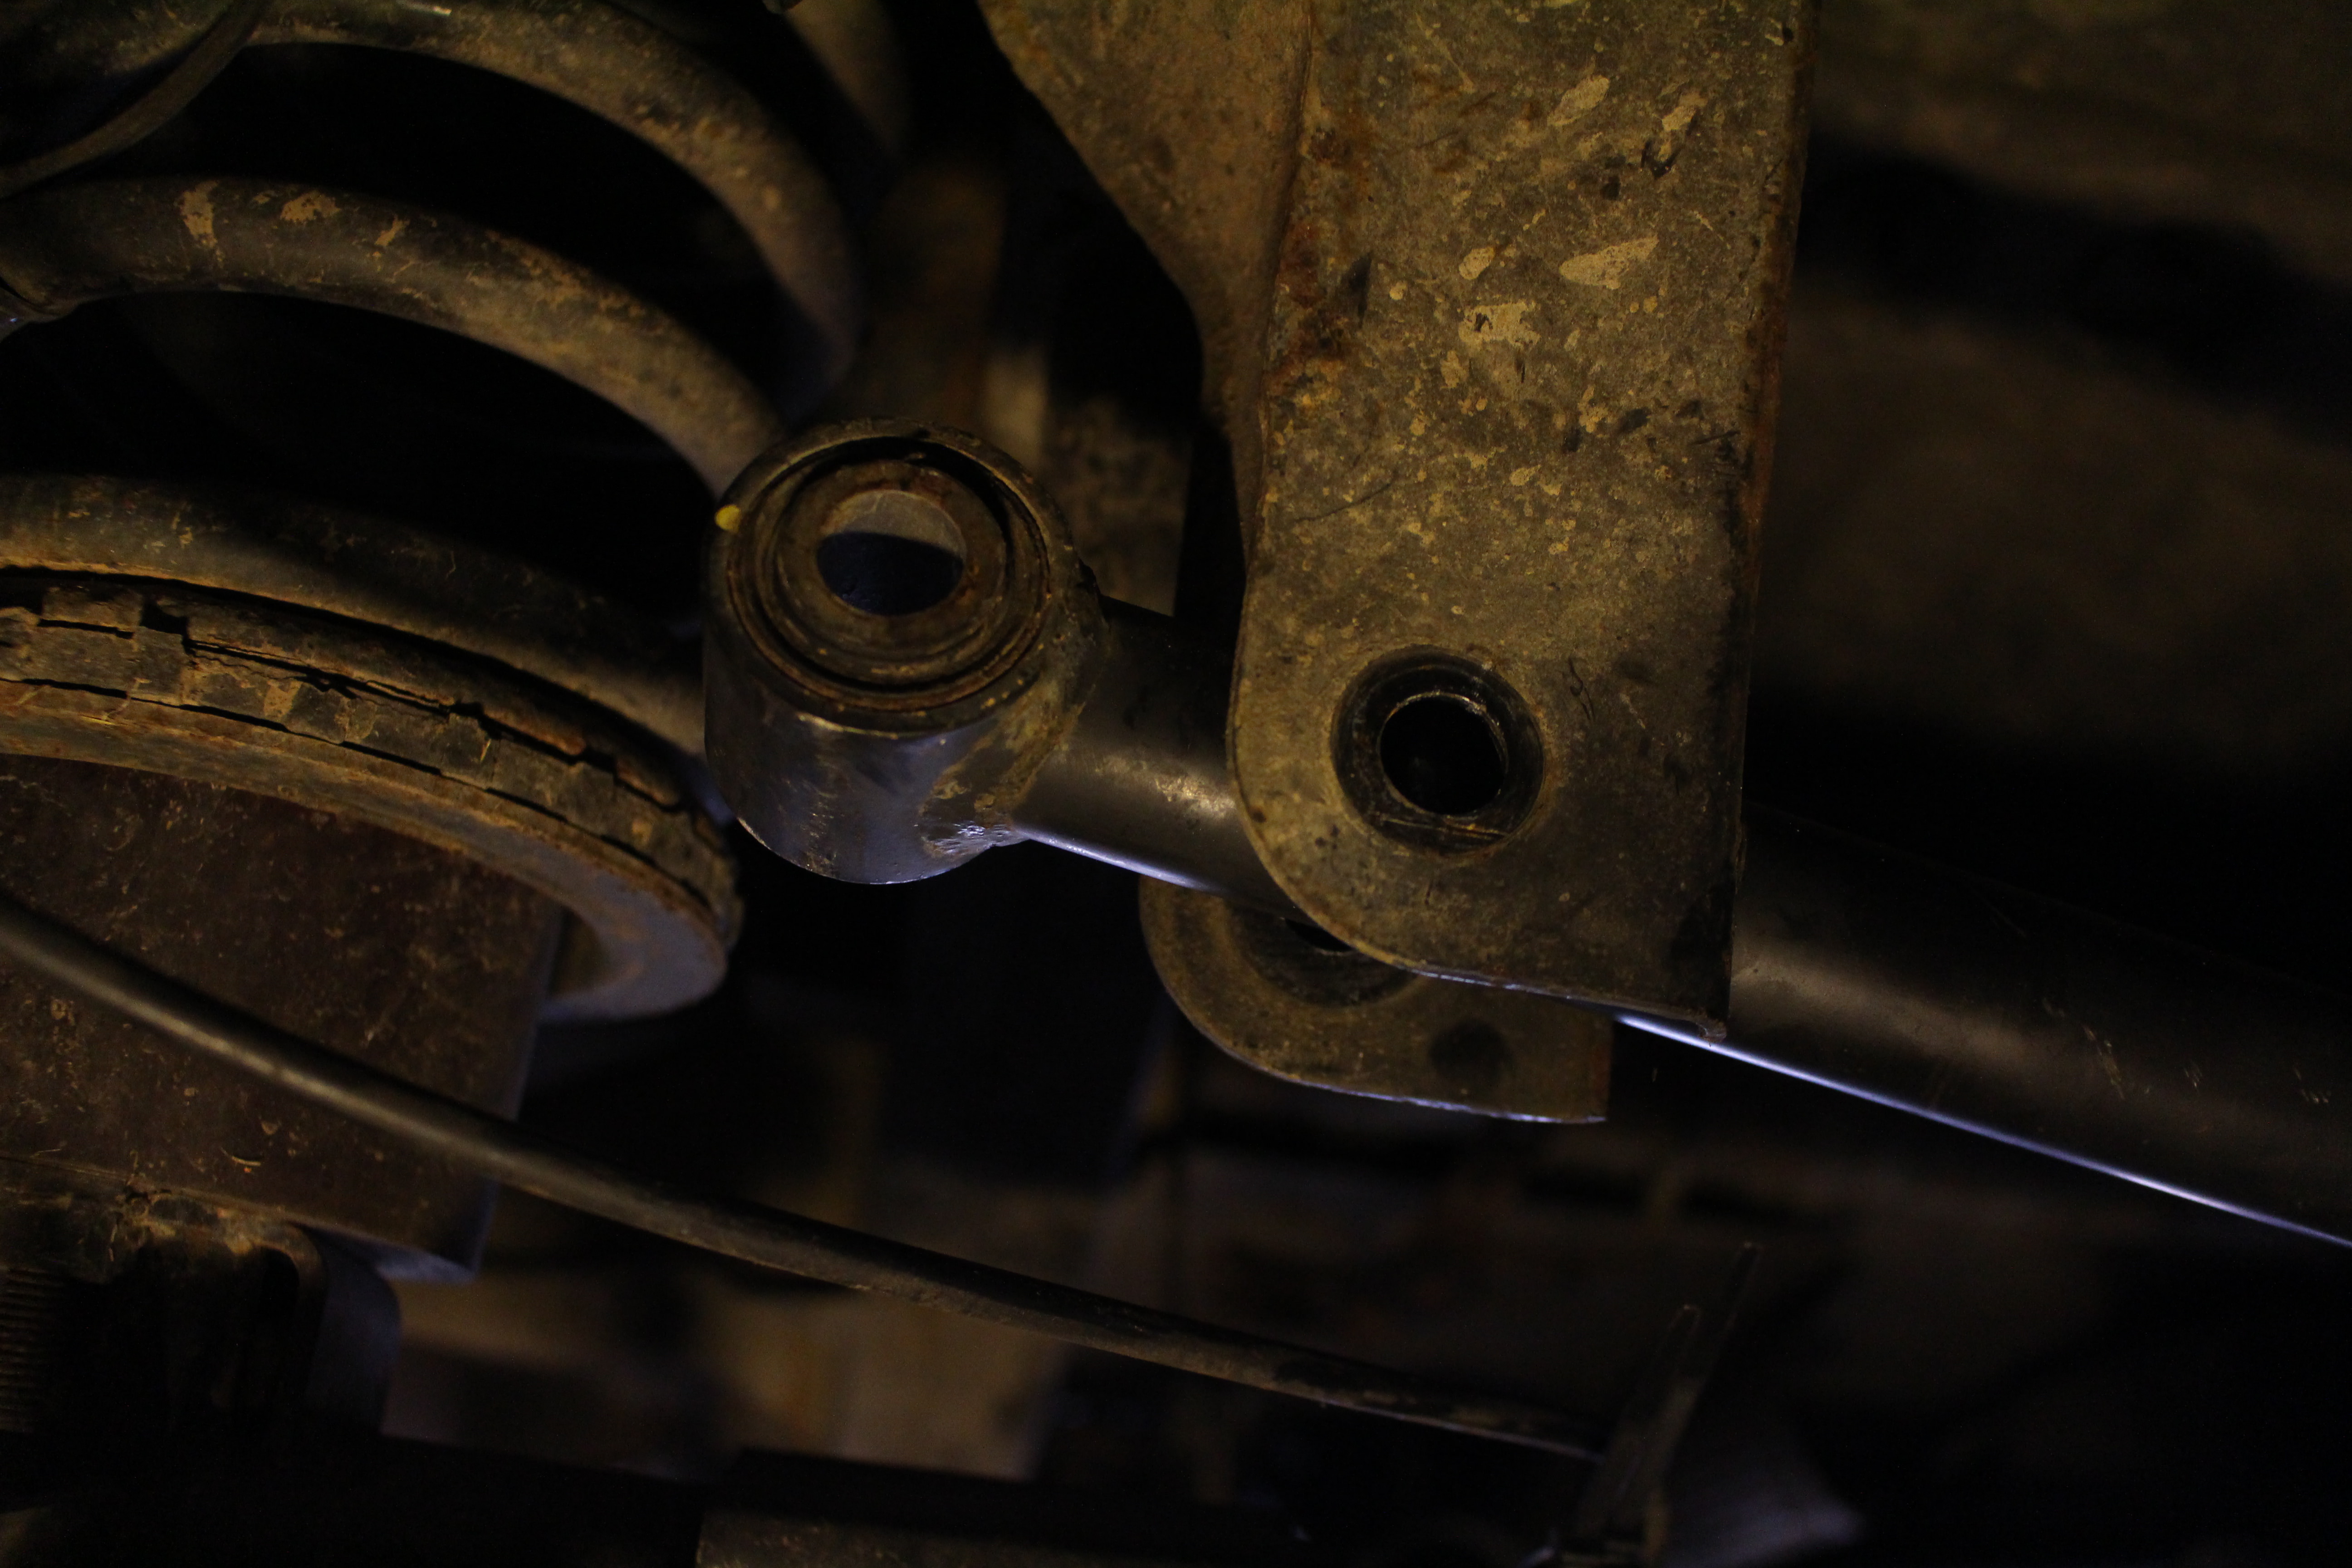
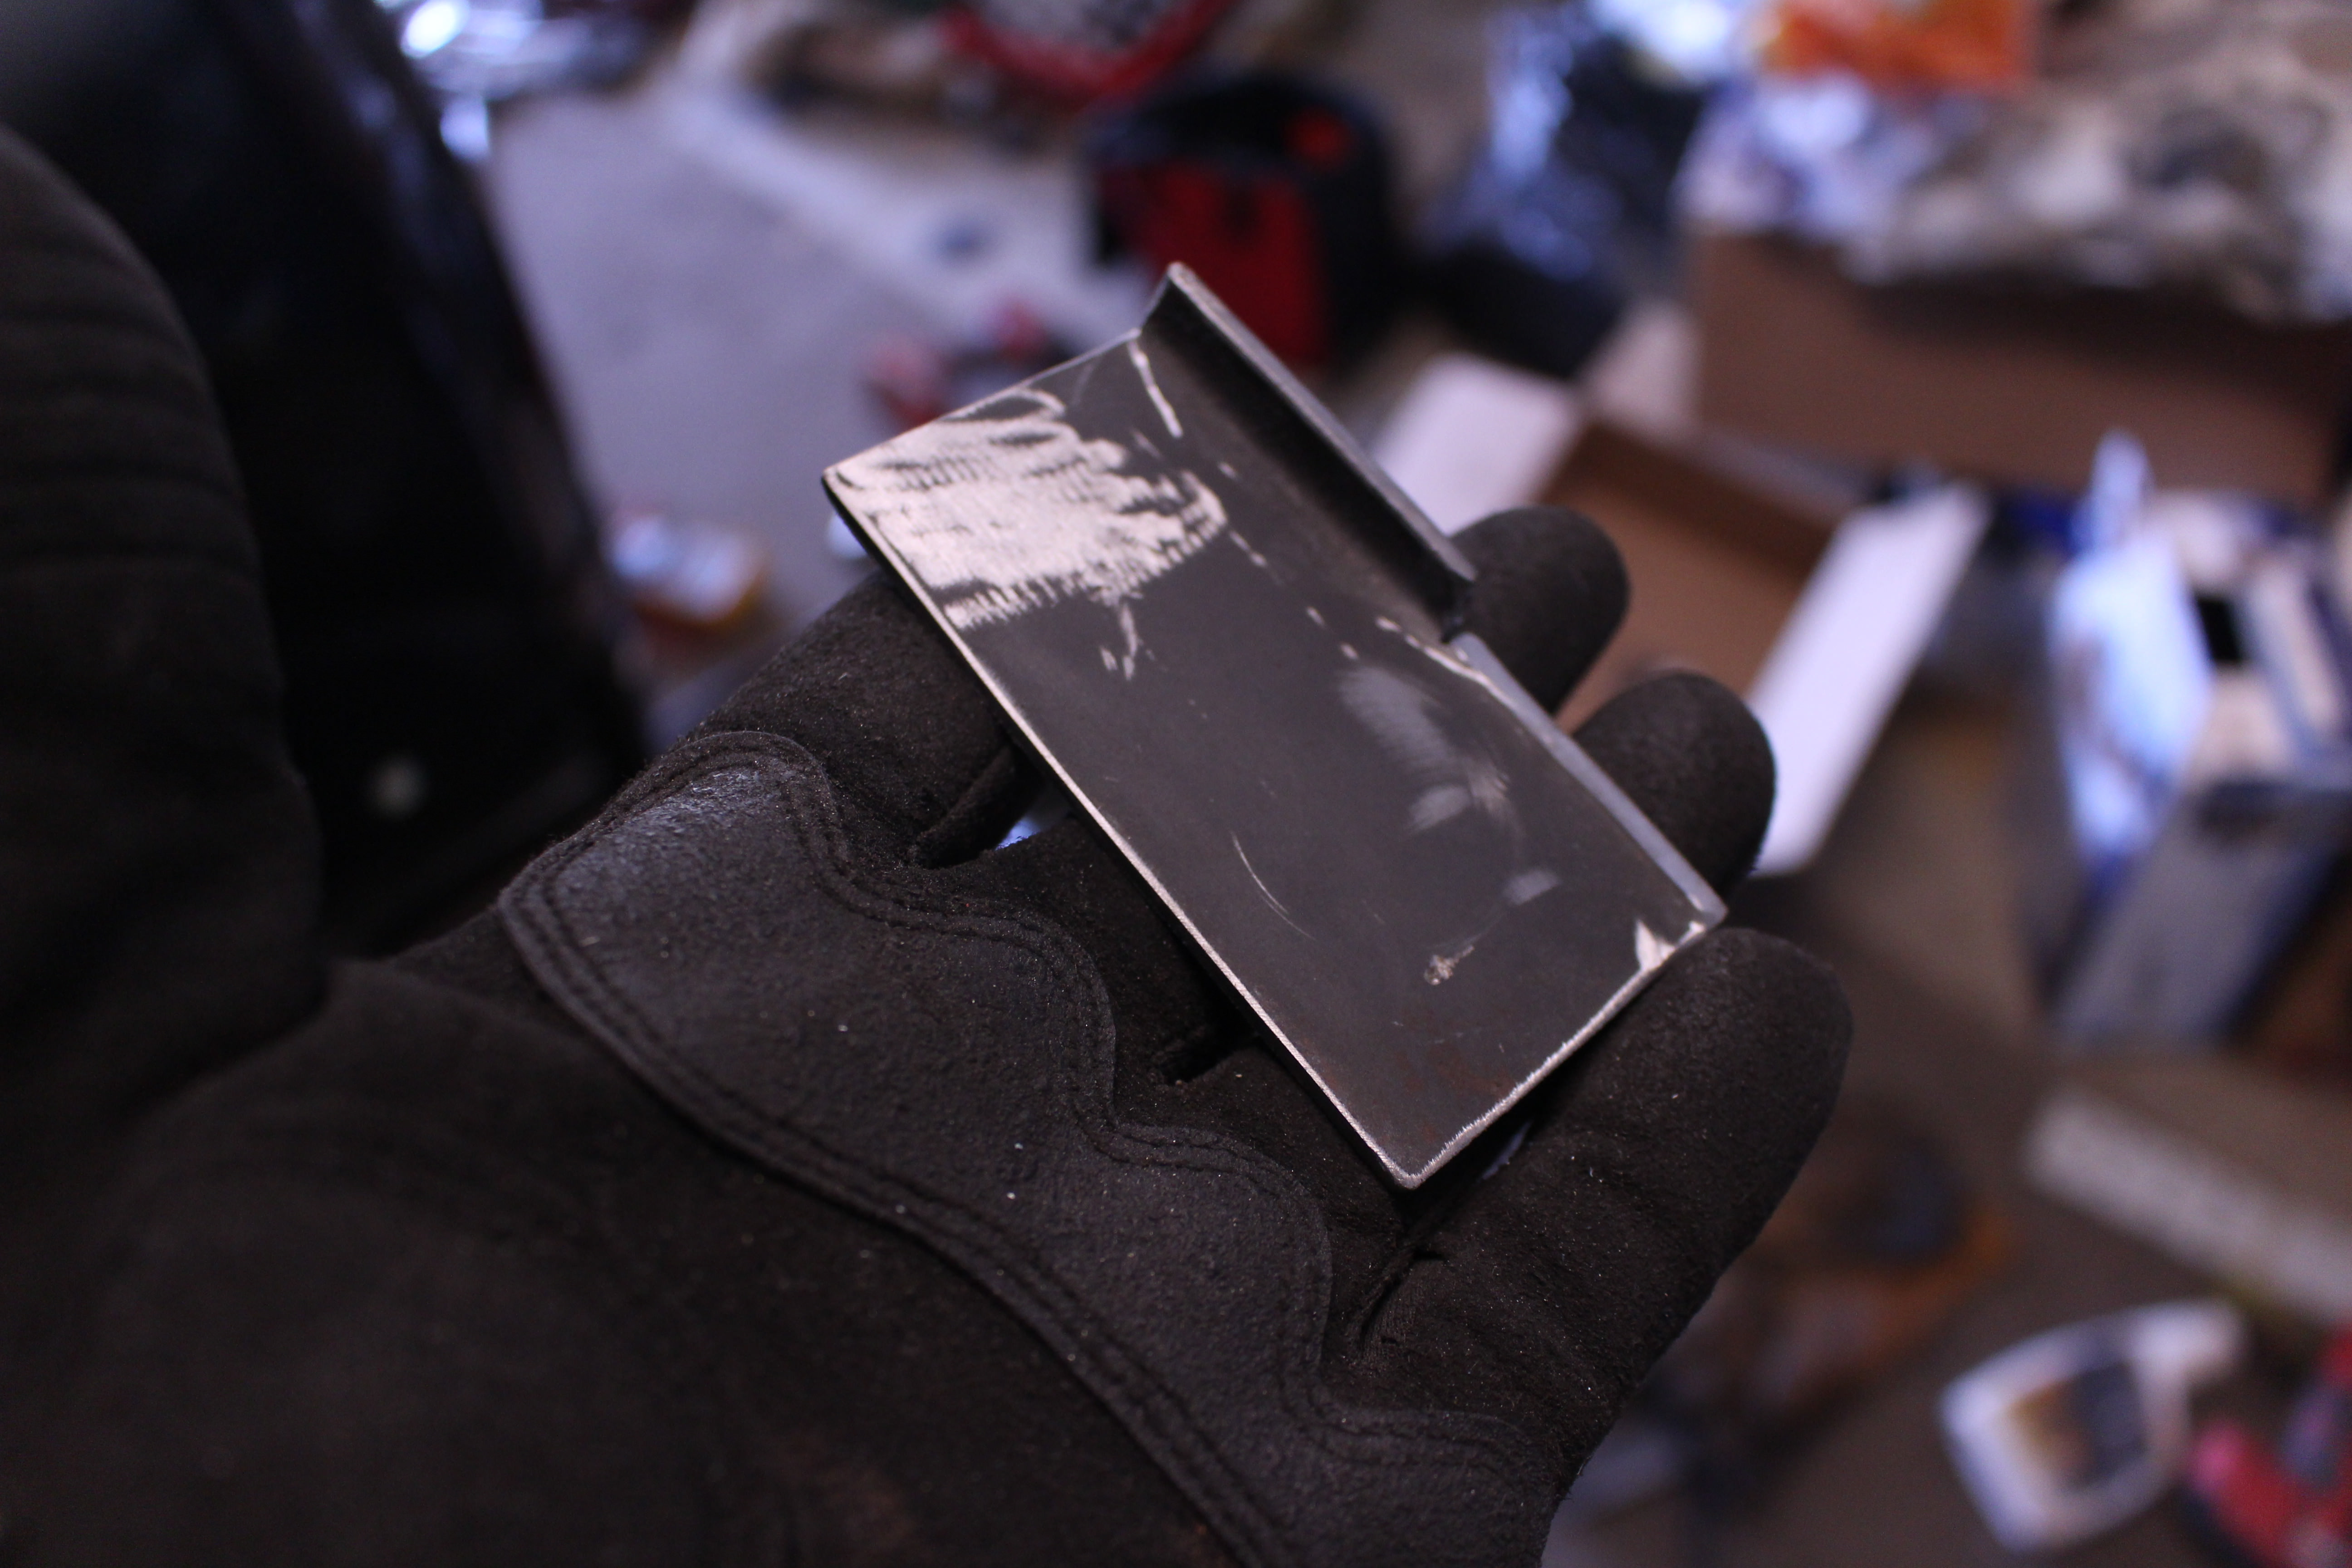
Now for the parts you definitely need. The panhard bar itself as well as the axle side mount. You're seeing a bottom up view in this picture if you were looking under a truck. I couldn't get the angle grinder all the way to the corner on these cuts, so I used a 1/2" drill bit in the corner and then a metal chisel to get it the rest of the way out. Make your cuts as tight to the axle as possible so you have the most possible material to work with.
I never even unbolted the panhard bar from the axle mount. Also, again I didn't use the frame side mount because of space limitations. That's ok; the rear won't see the same side to side forces as the front because the front has to deal with a lot of steering force that the rear doesn't see.
Now into your garage and lets start the actual swap! It appears I'm missing a couple pictures or I might've forgotten to take them. Some of these pictures are also really dark. Sorry, guys.
First things first, lets clean up the pieces down to bare metal for better welds. This is absolutely necessary since this is a structural part. I used an air die grinder, but a regular electric angle grinder will of course work fine also.
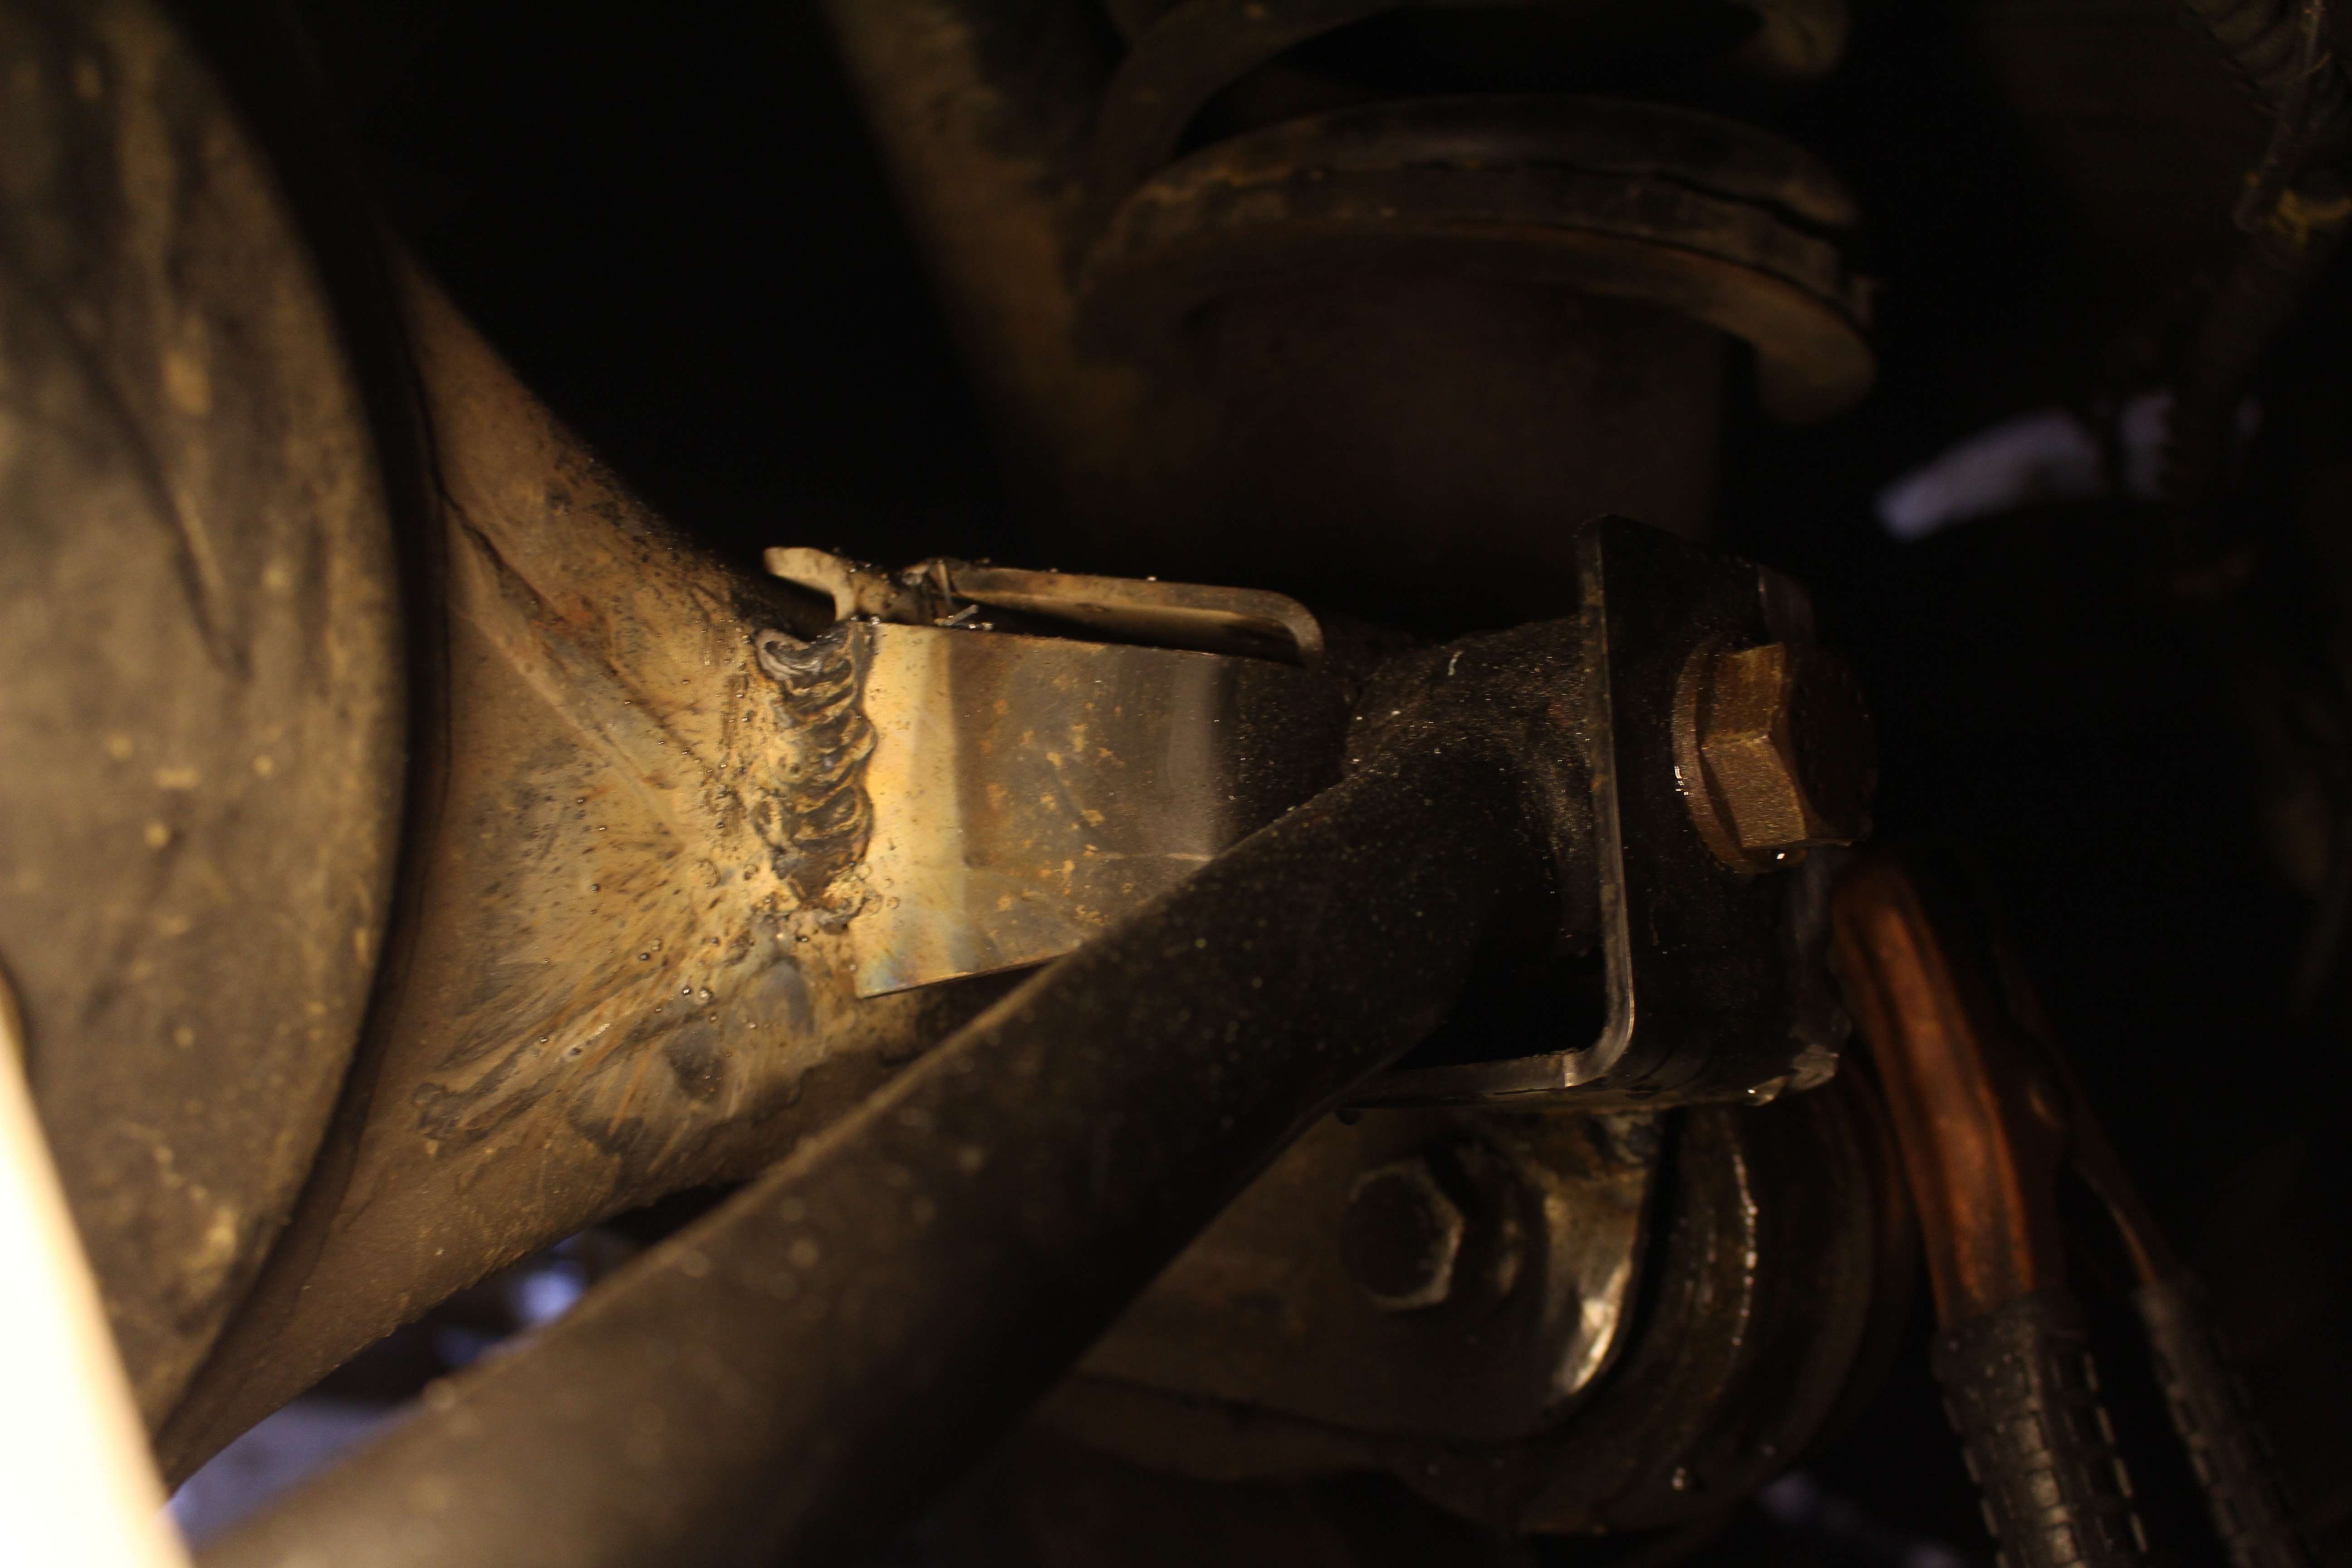
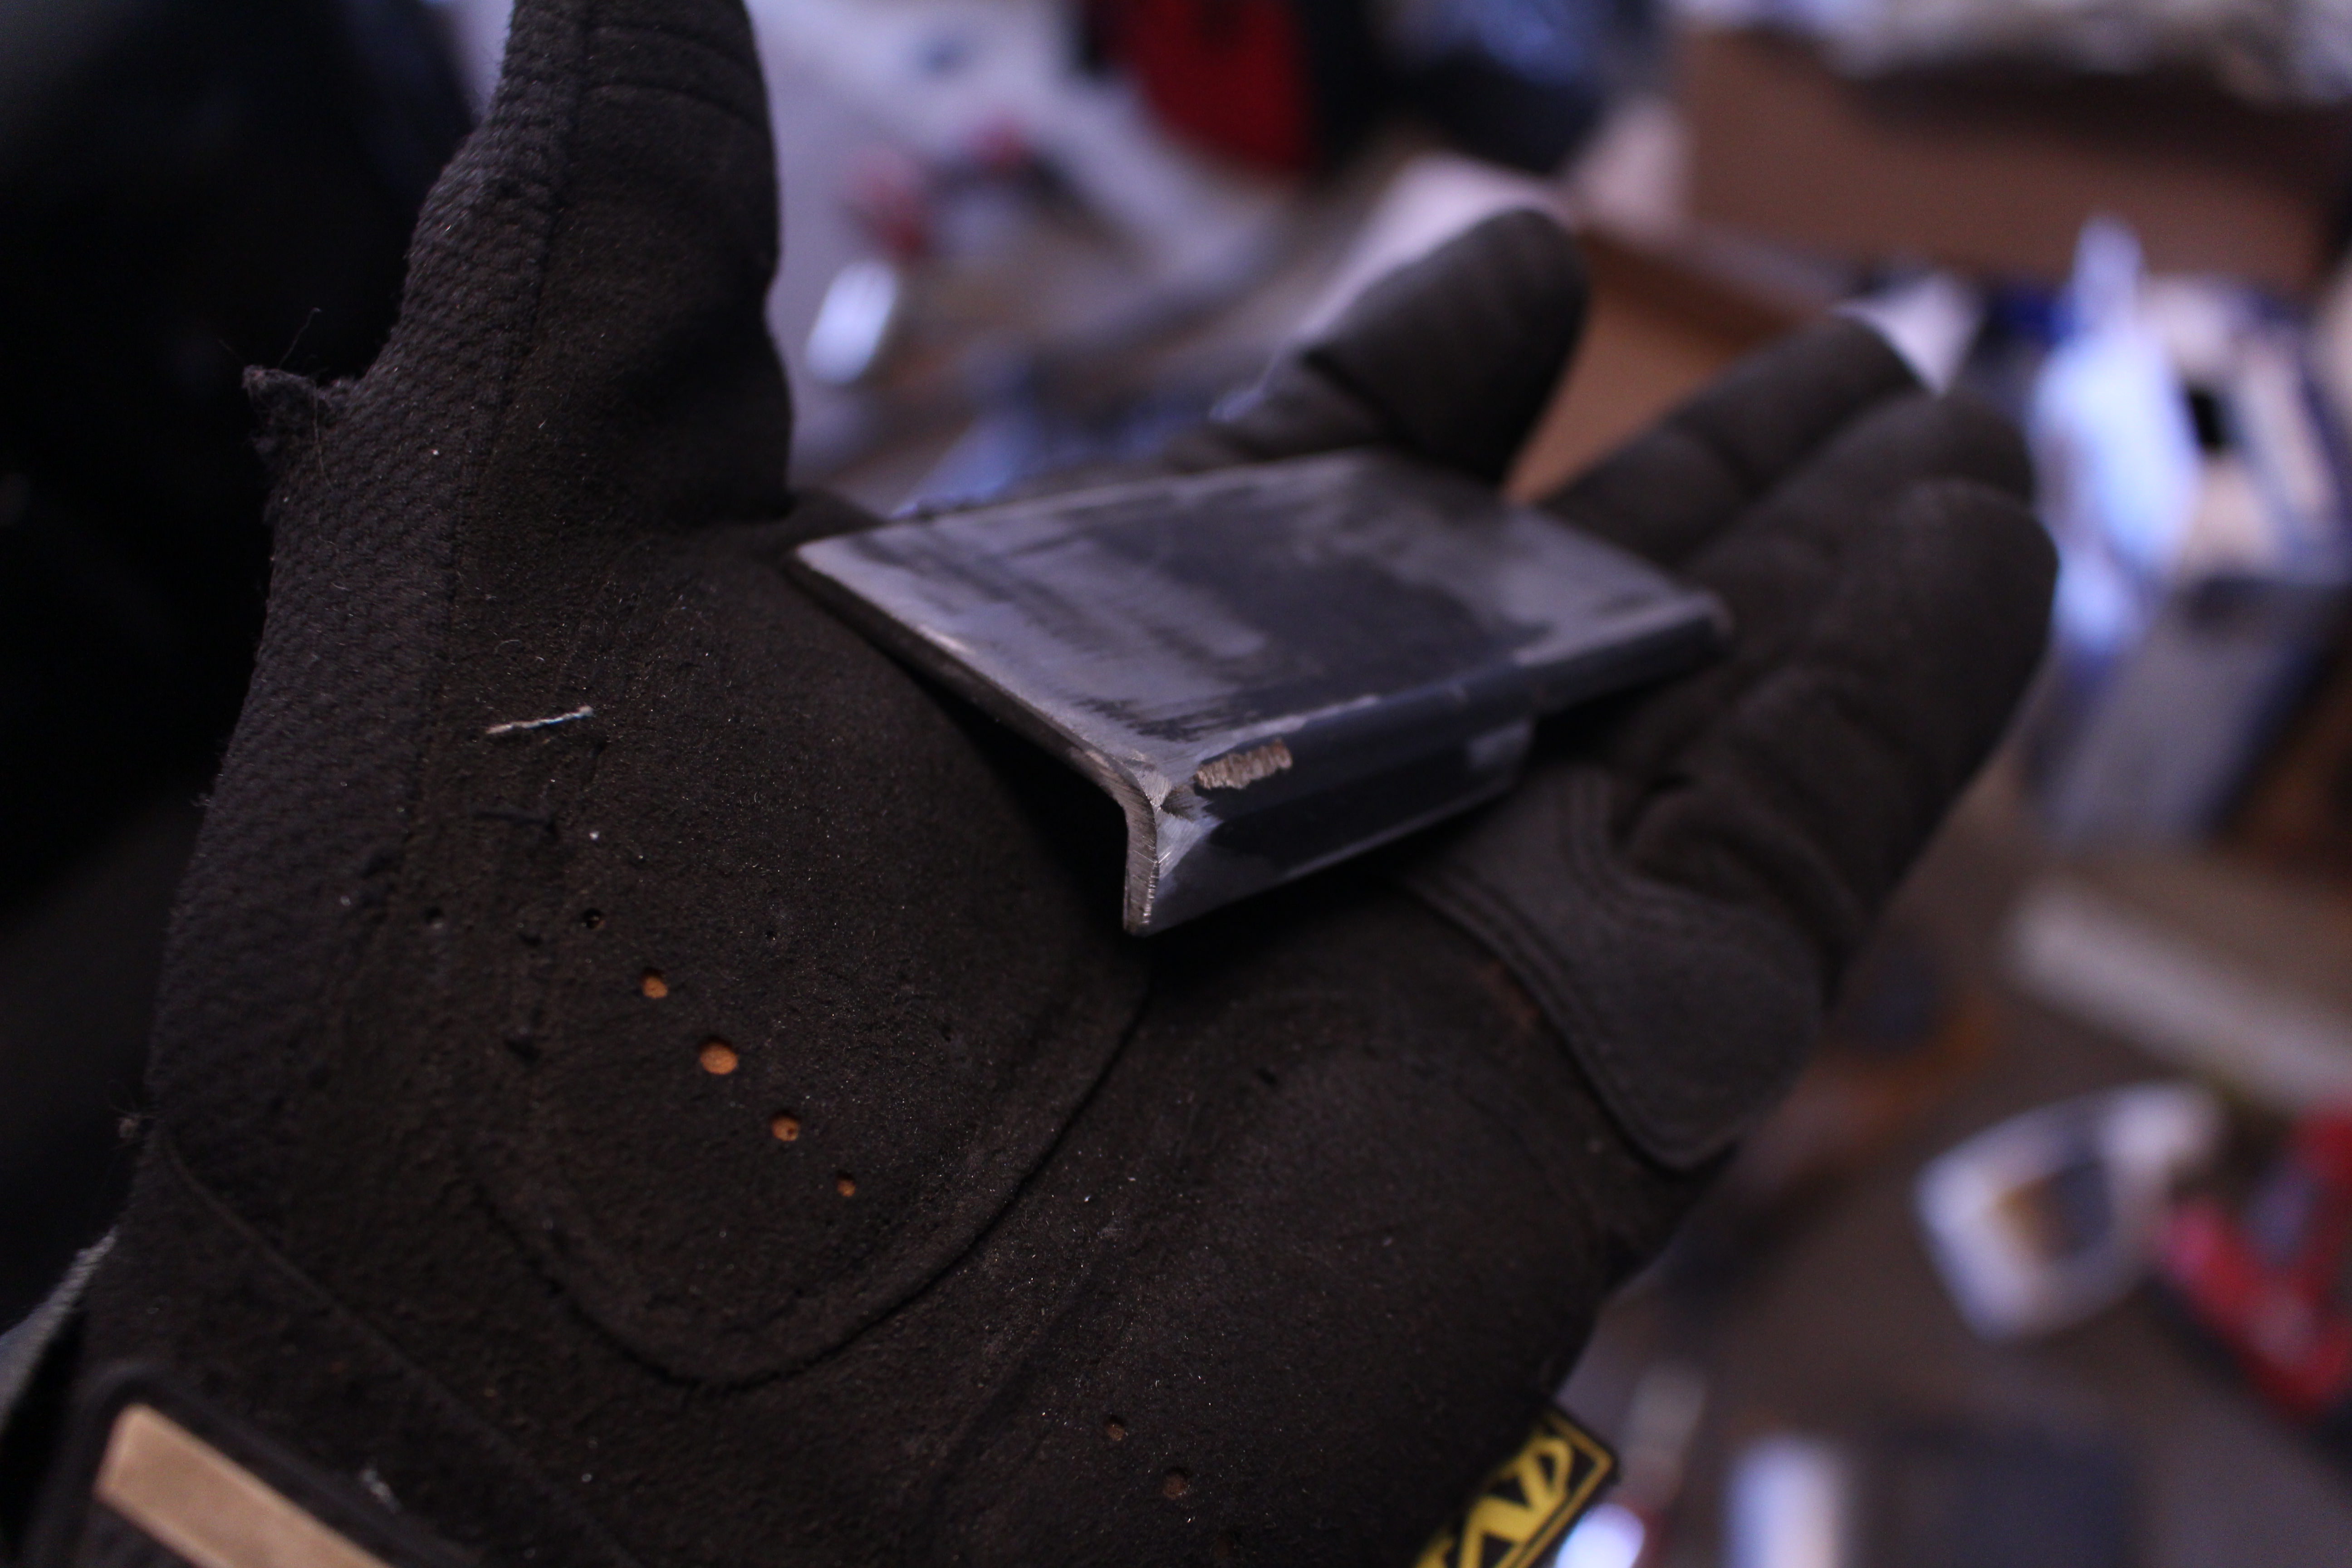
Do the same on the passengers side of your rear axle like in this picture, even up on top of your bump stop plate.

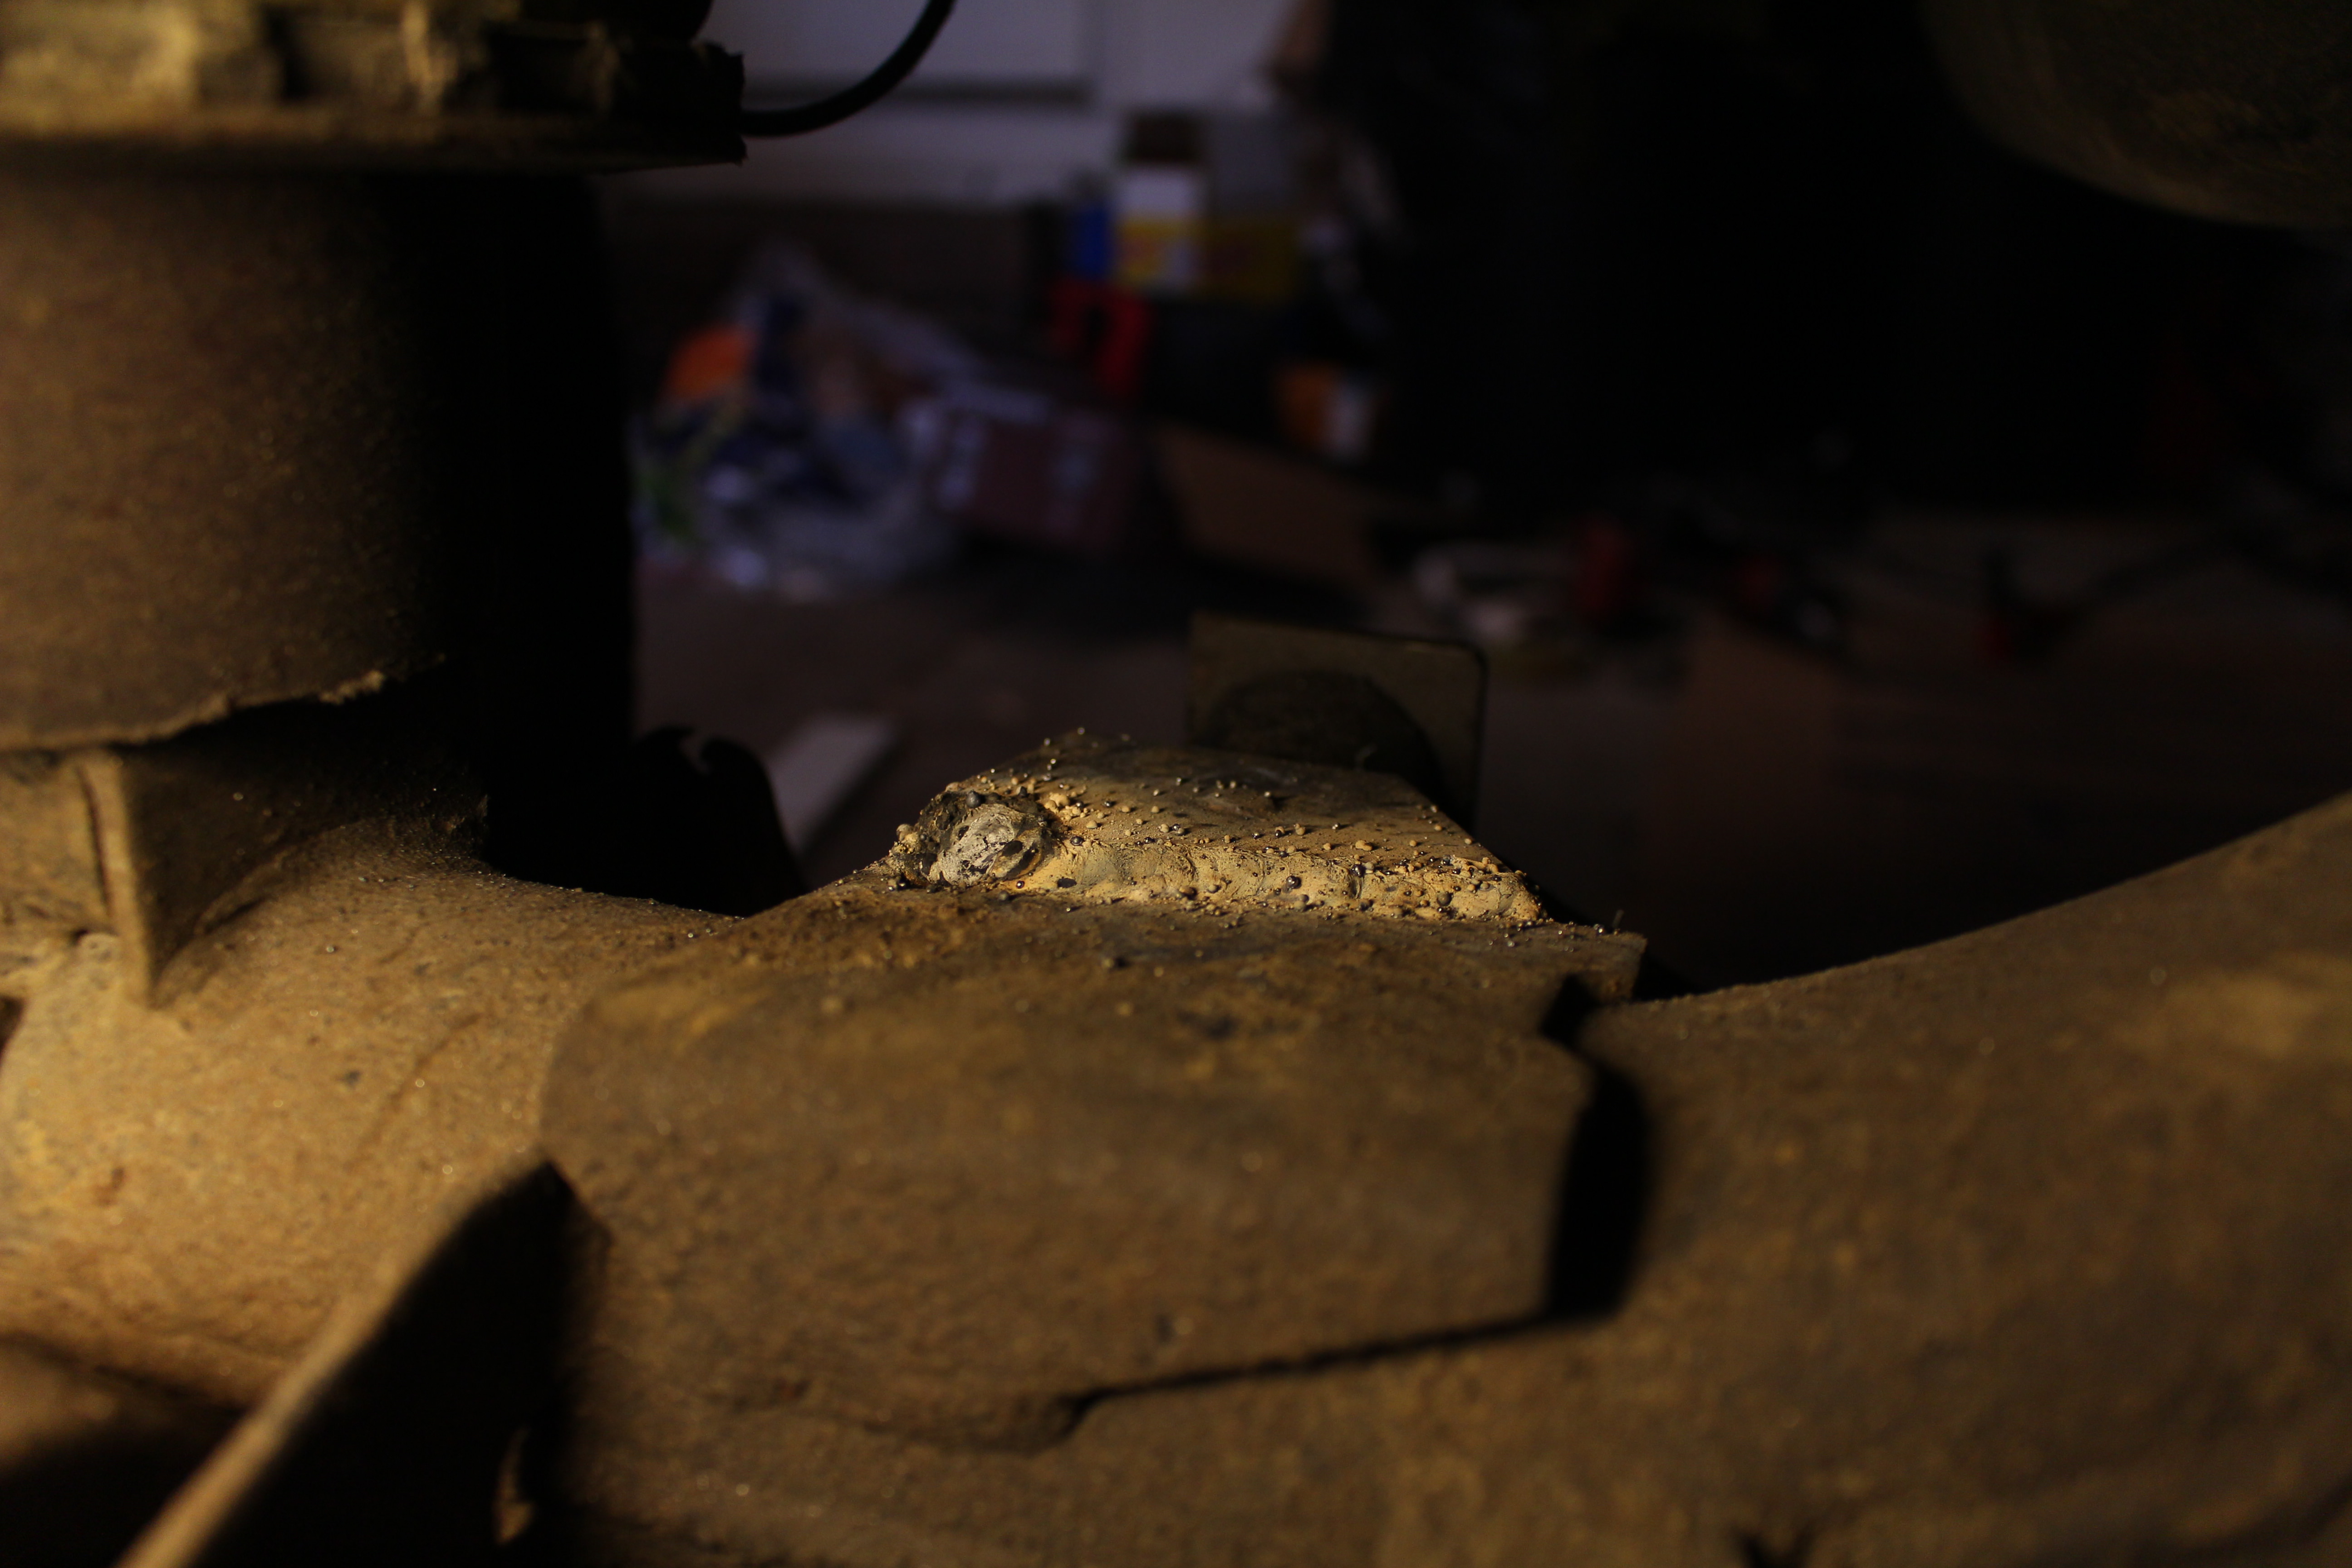
Now we're ready to start welding. Hopefully you can see well enough in this picture where I put my grounding clamp. You'll need to take your grinder and clean your grounding spot, too.
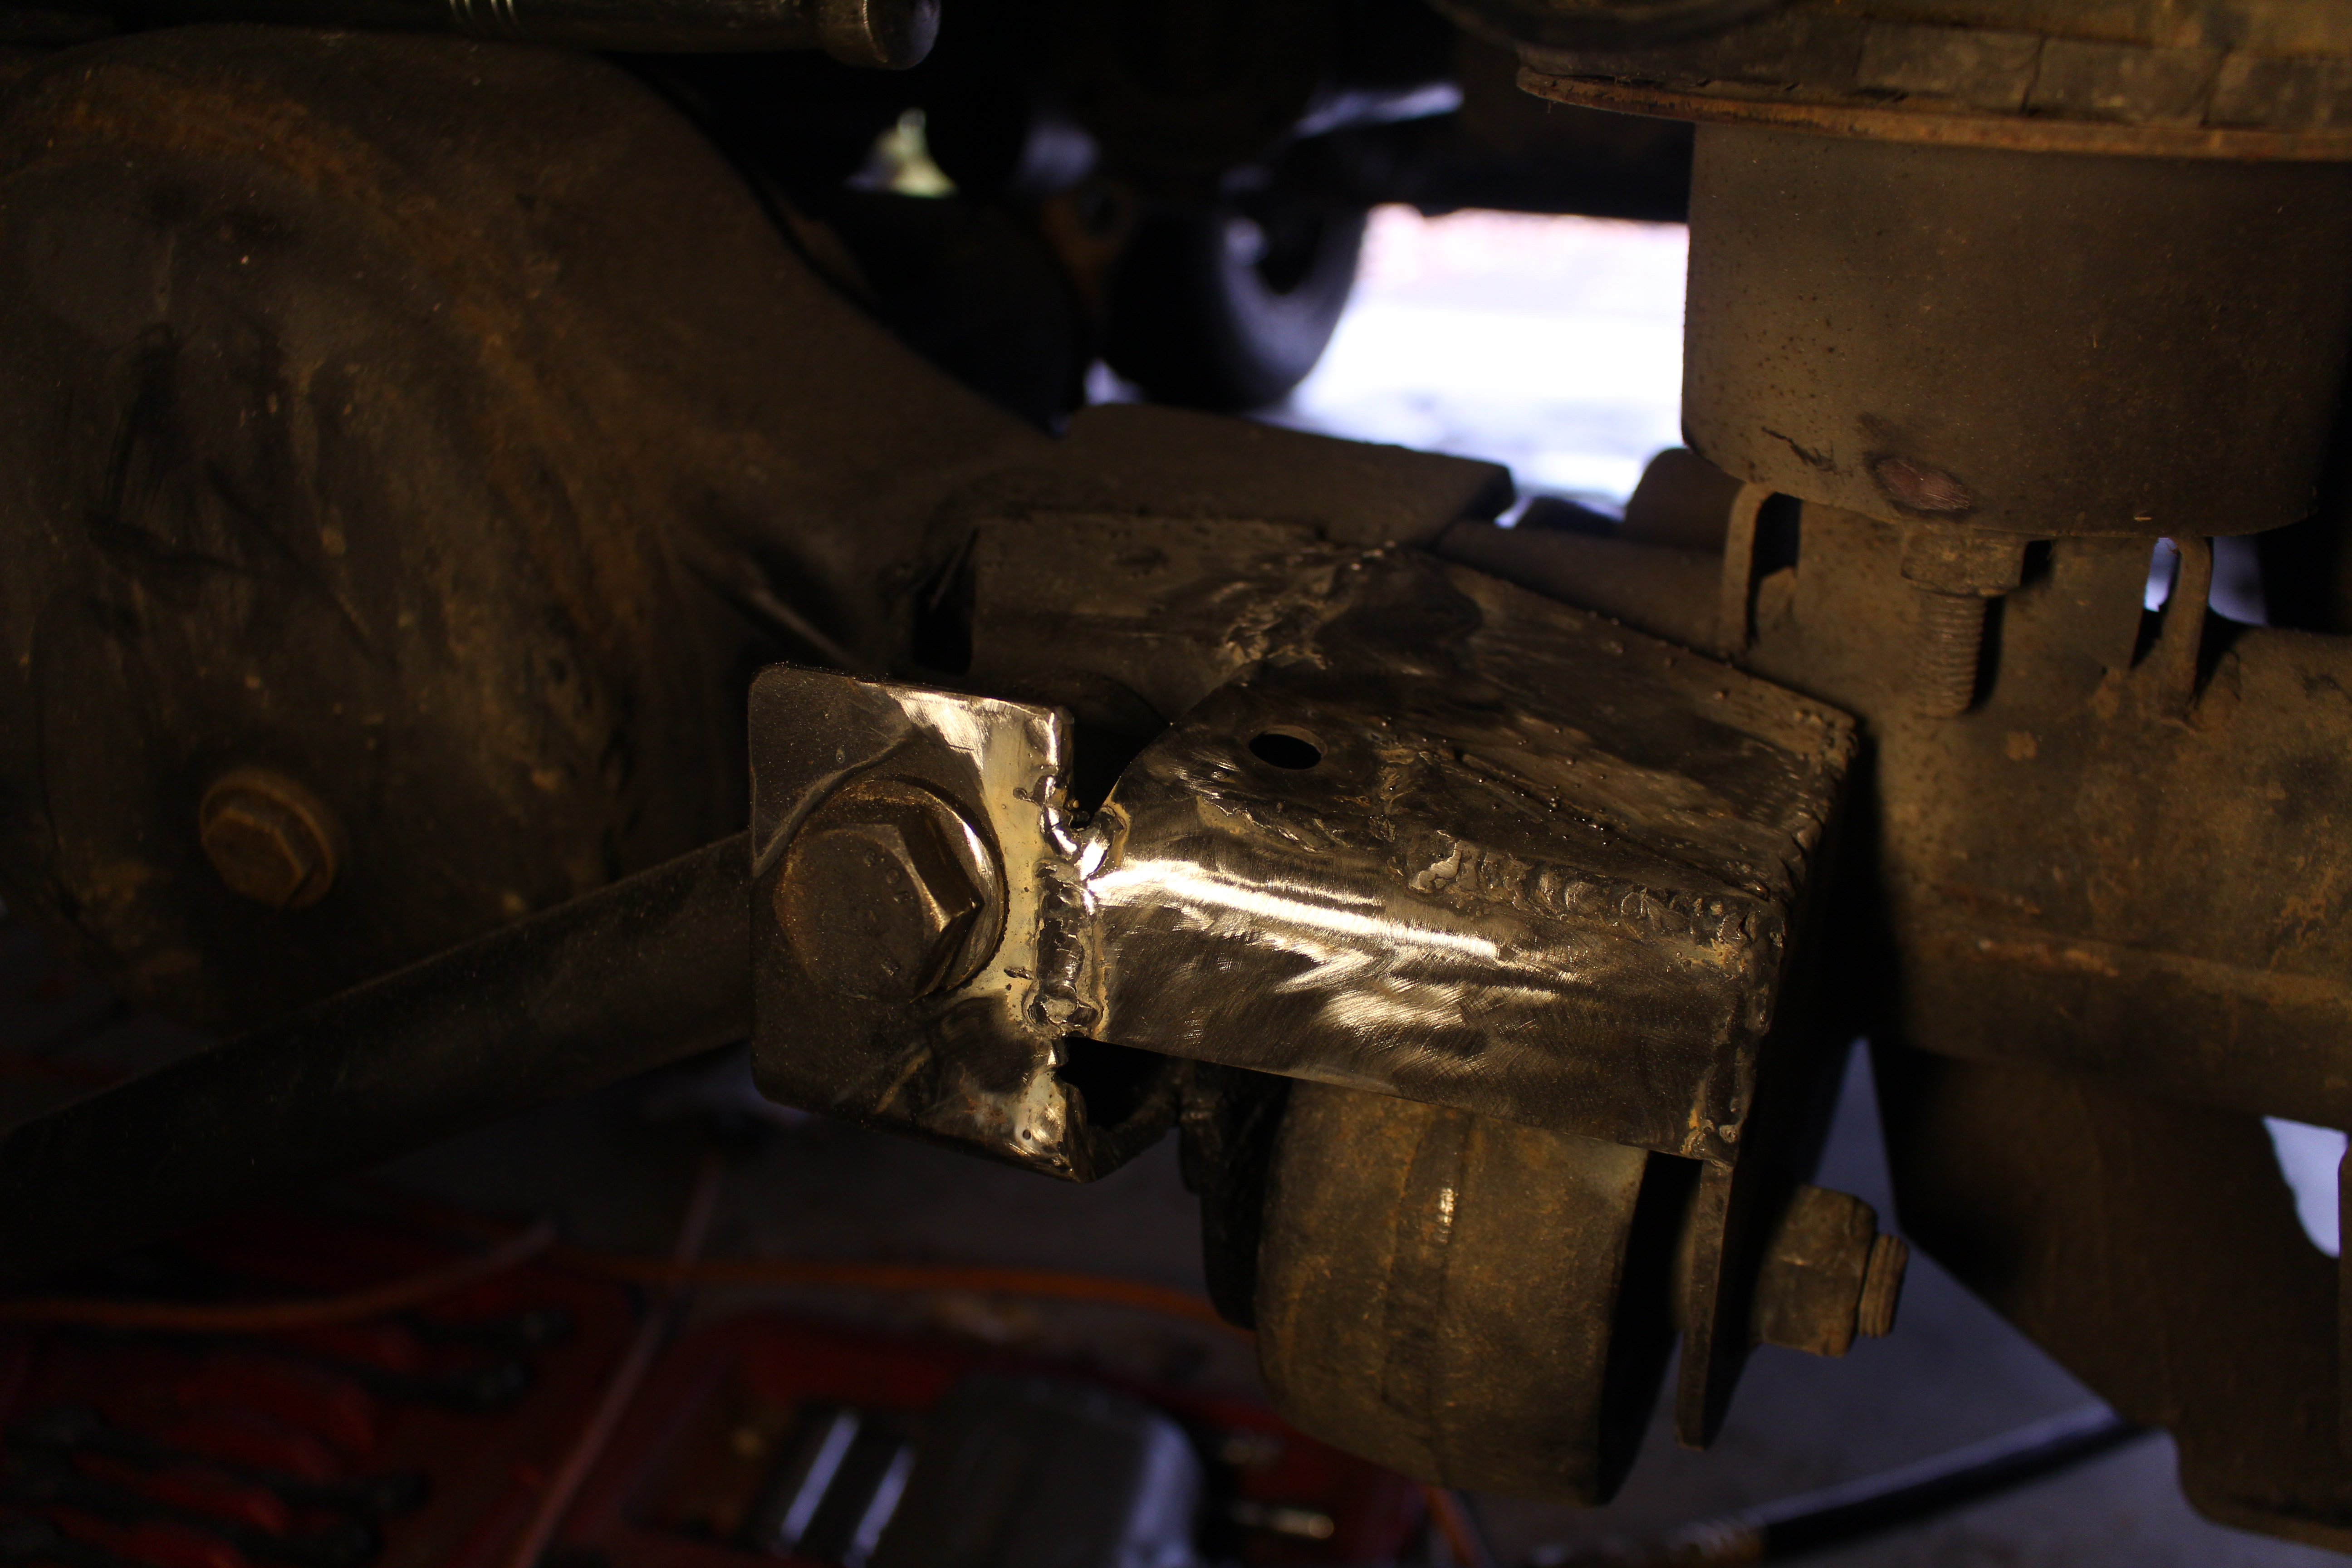
Now, we're going to mount it upside down by comparison to how the front is done because we are doing the same side of the vehicle, but the axle is of course flipped the opposite direction. My placement gave enough room to get the nuts both on the panhard bolt as well as the radius arm bolt if (when) I need to. Start just by tacking it in place.
Once you're tacked and like your positioning, go ahead and weld it up all the way around.
I also made this piece to go across the top and connect the outside of the mount to the other side of the radius arm mount to add some strength. I used an old piece of the factory bumper, but should be a pretty easy piece to make. Most likely just a little more squared off if you fab one.
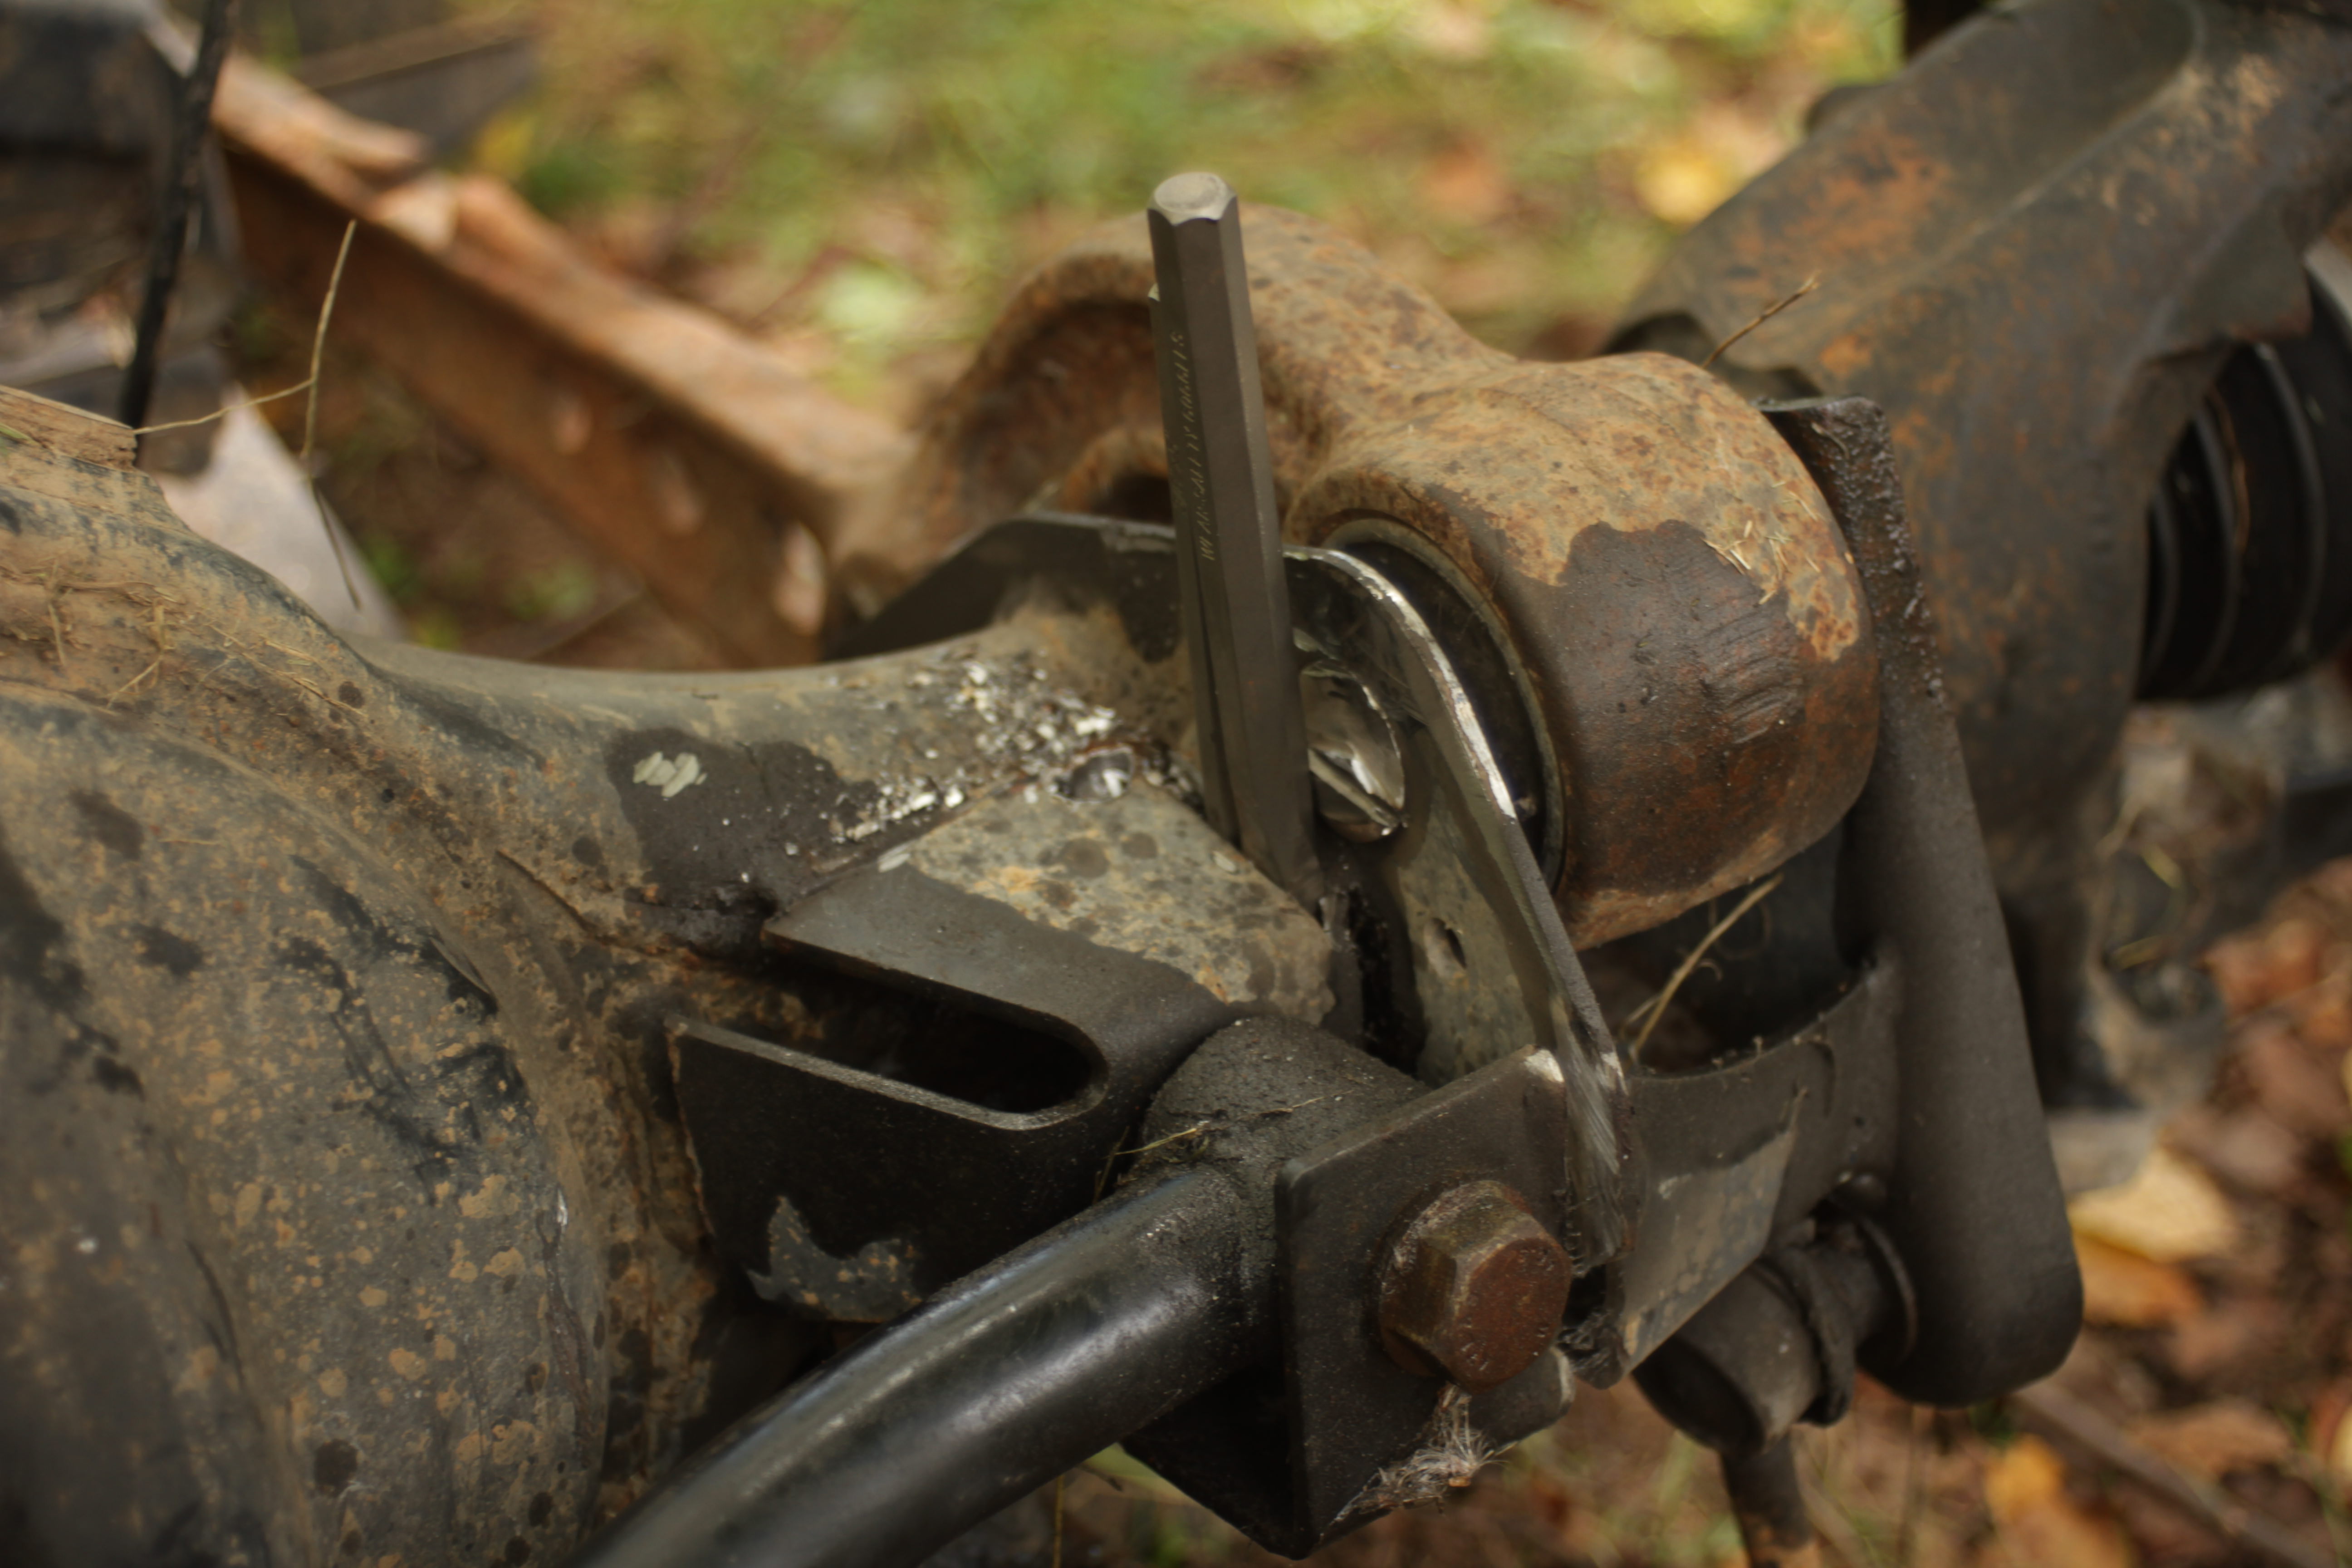
Now it's time to remove the watts link. The main center bolt has two nuts on the back you have to remove. I think I used a 1" socket, not sure. Maybe 13/16". Who knows, honestly. Just try a few in that range and you'll find it. Remove the rear nut first, then stick a crecent wrench on the other with a breaker bar on the back and crank on her till she gives.
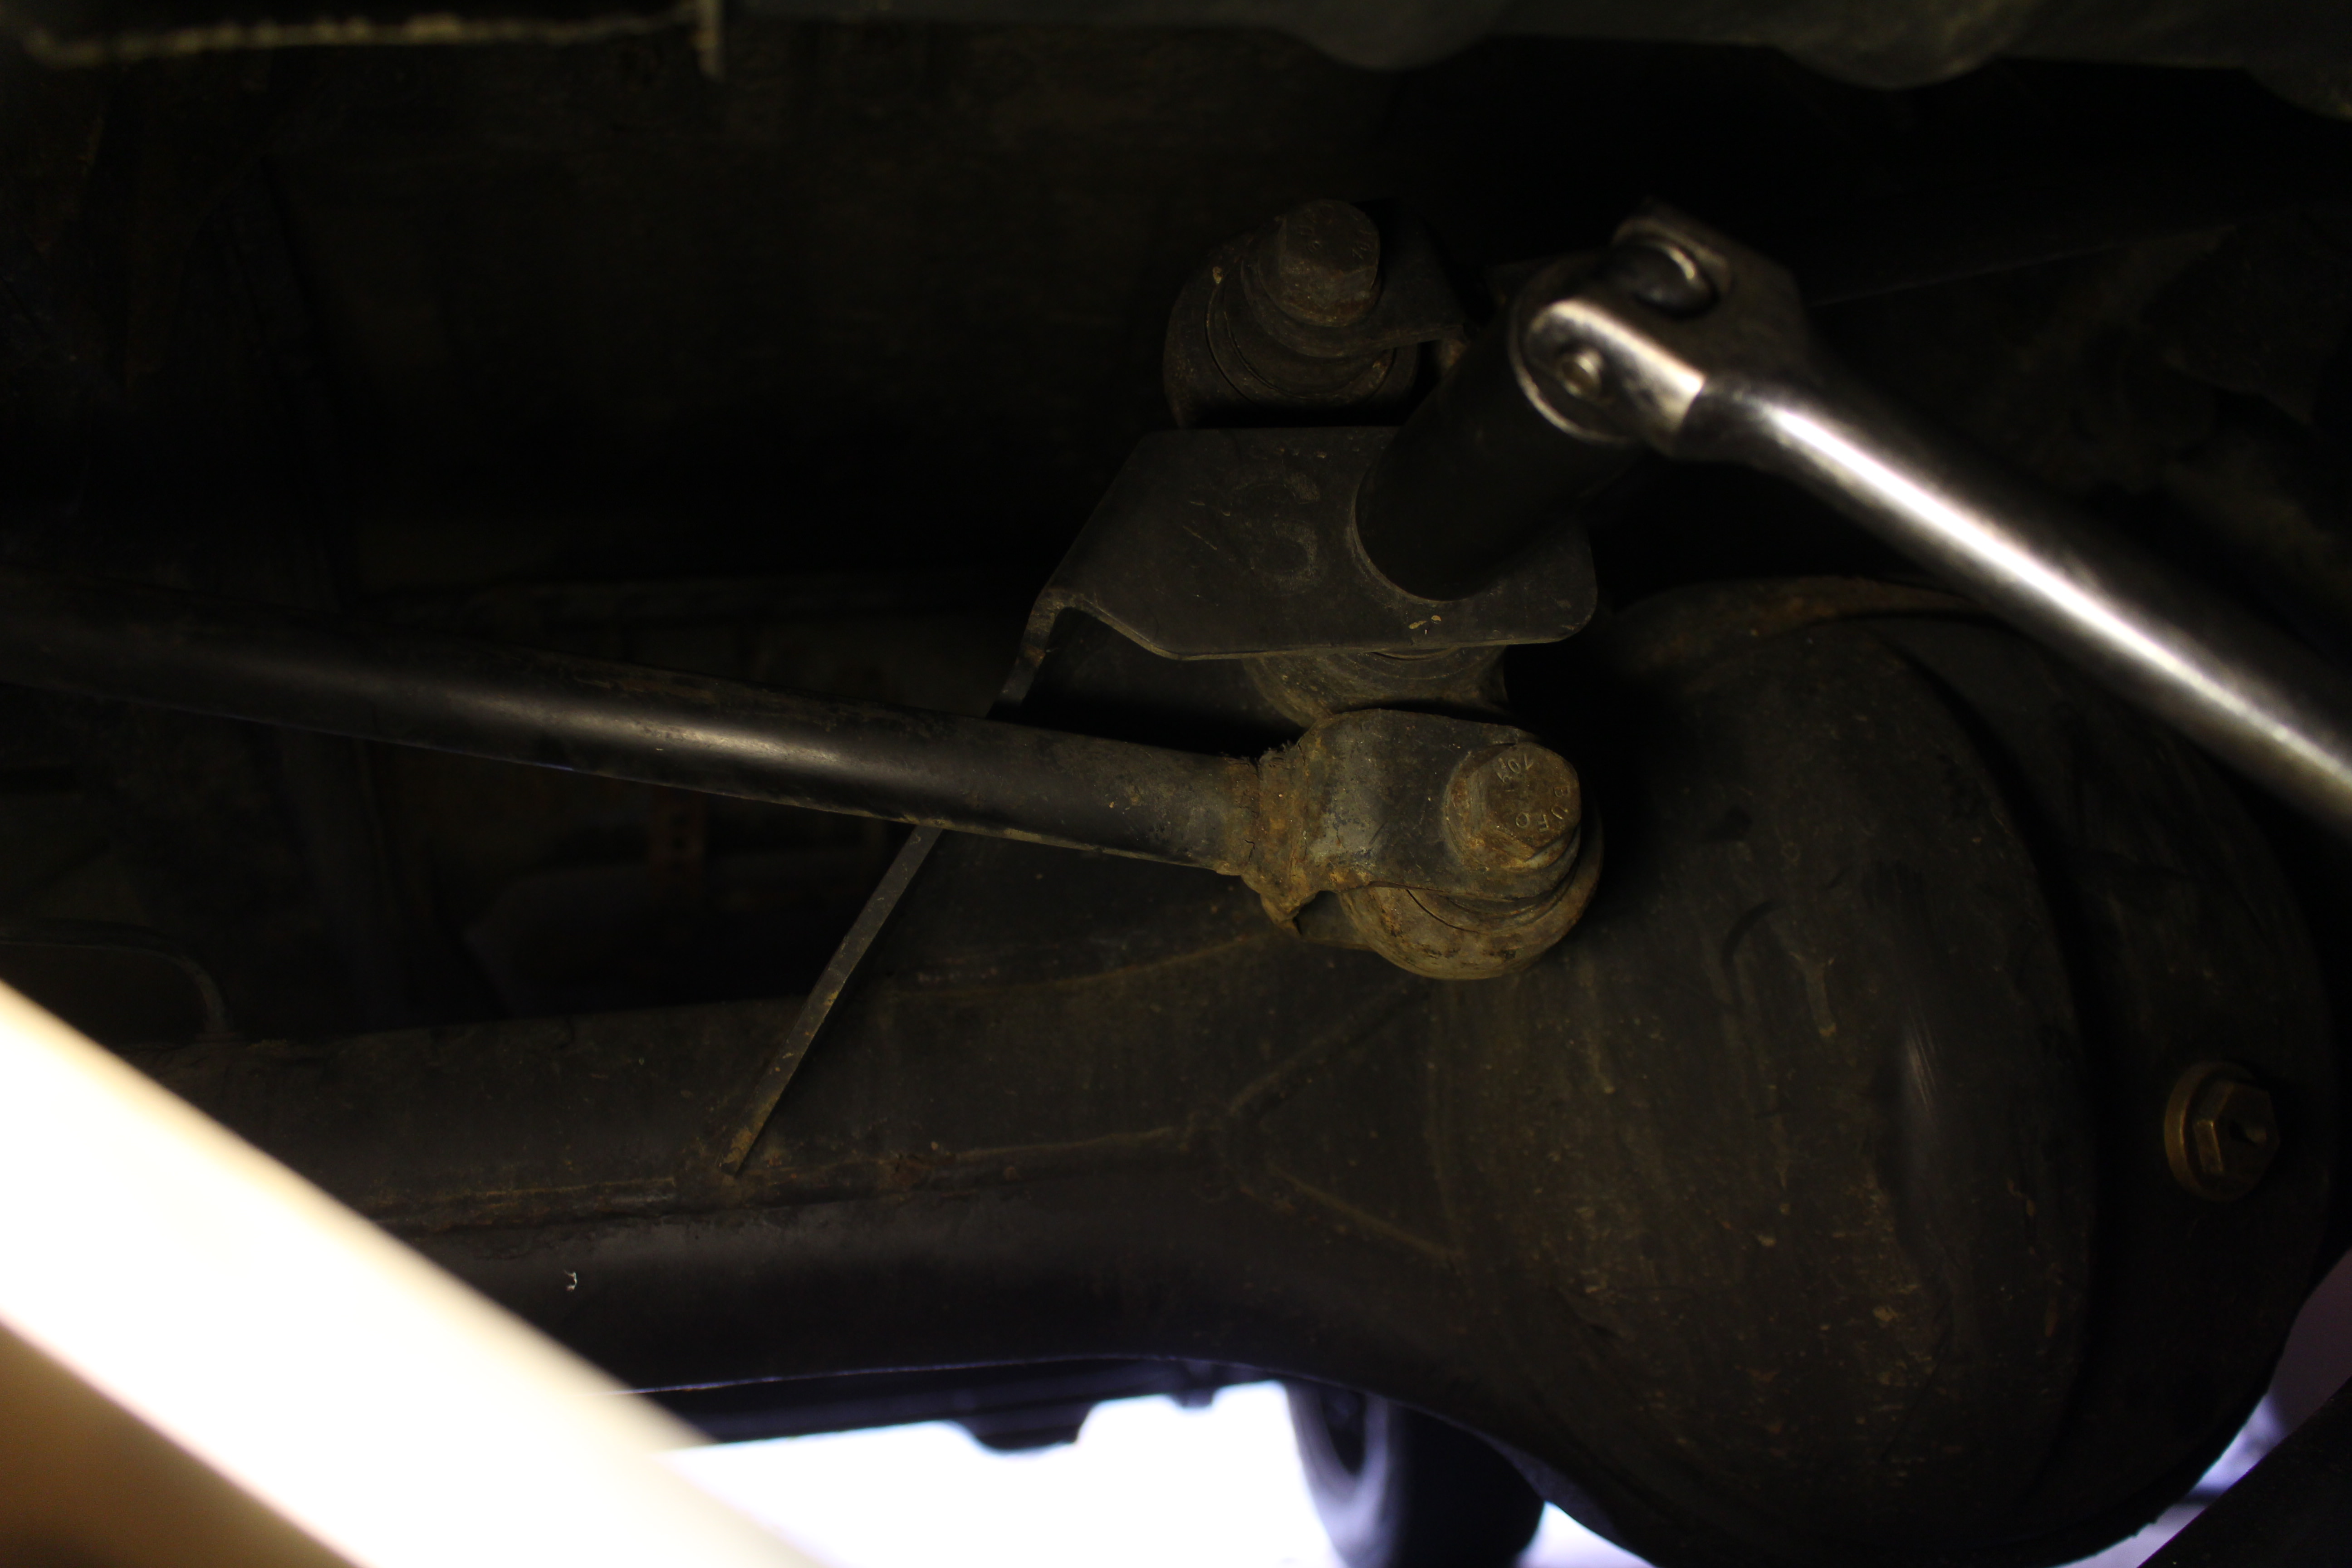
I recommend leaving the bolt in place while you remove the nuts from the two frame side nuts from their bolts. Once they're all free you can remove the bolts, too.
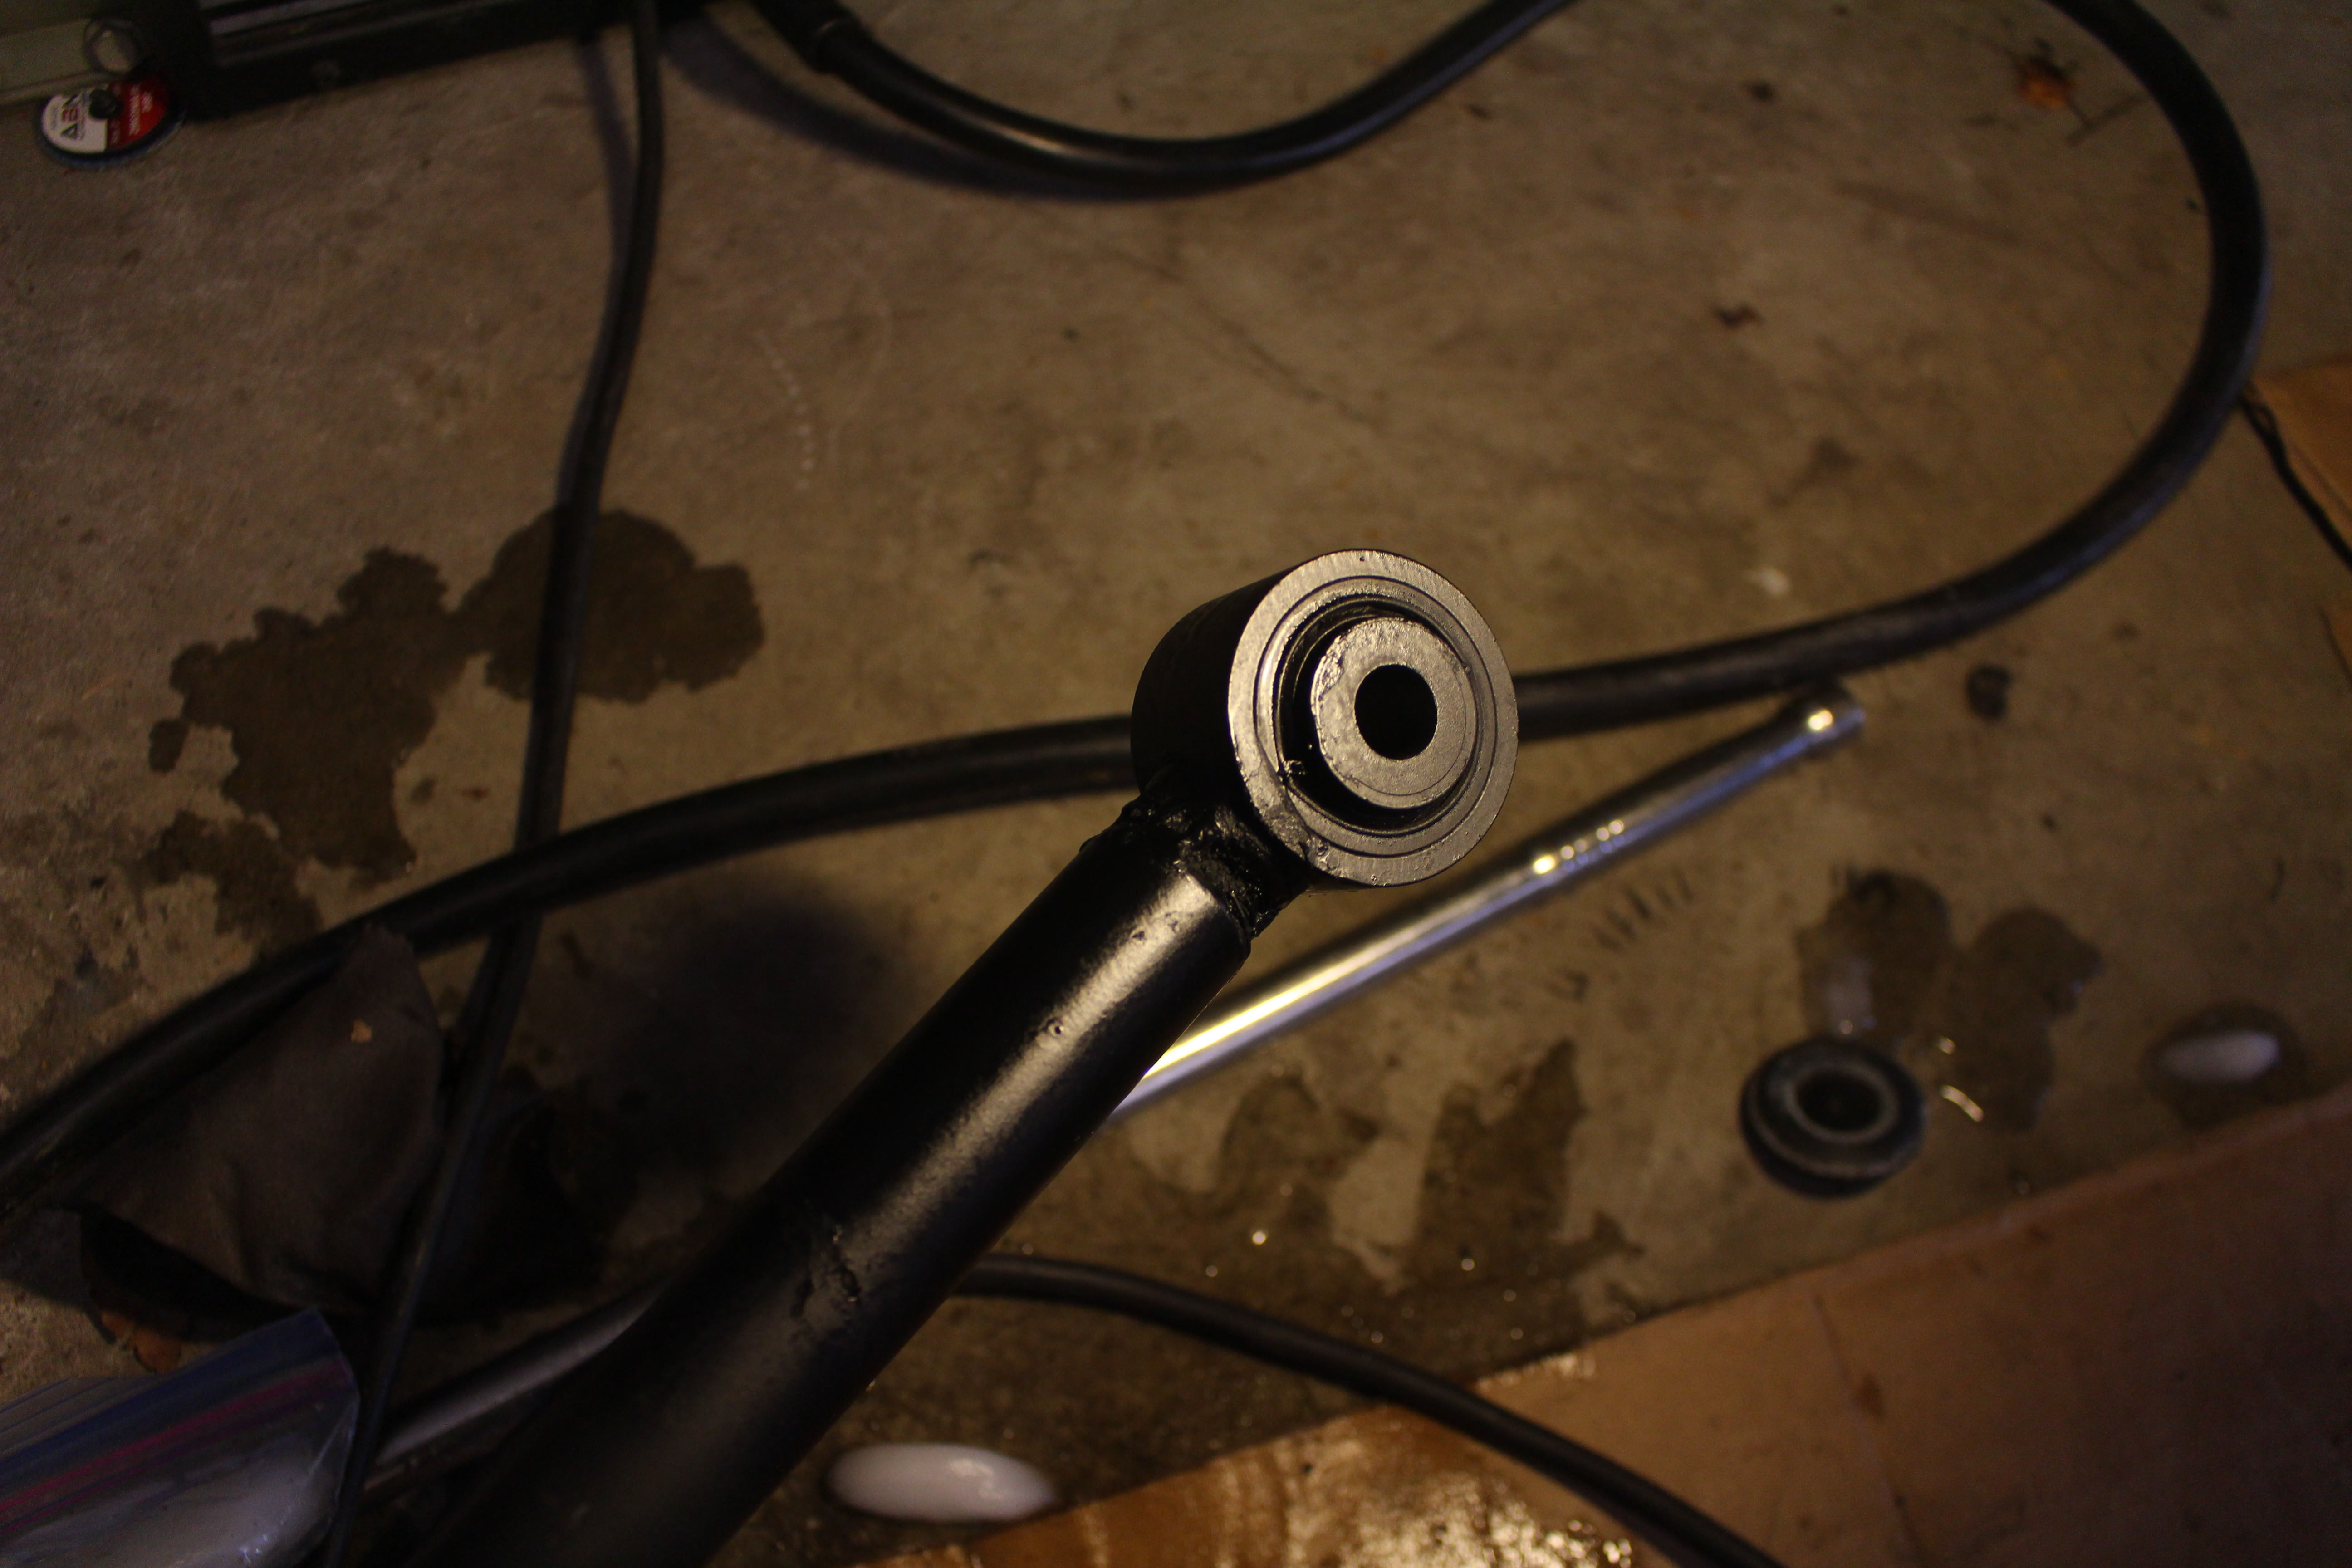
Once they're out you need to cut the tab off of the mount so the panhard bar can clear. Cut it flush with the line that's already there that it protrudes from. Keep the piece you cut off.
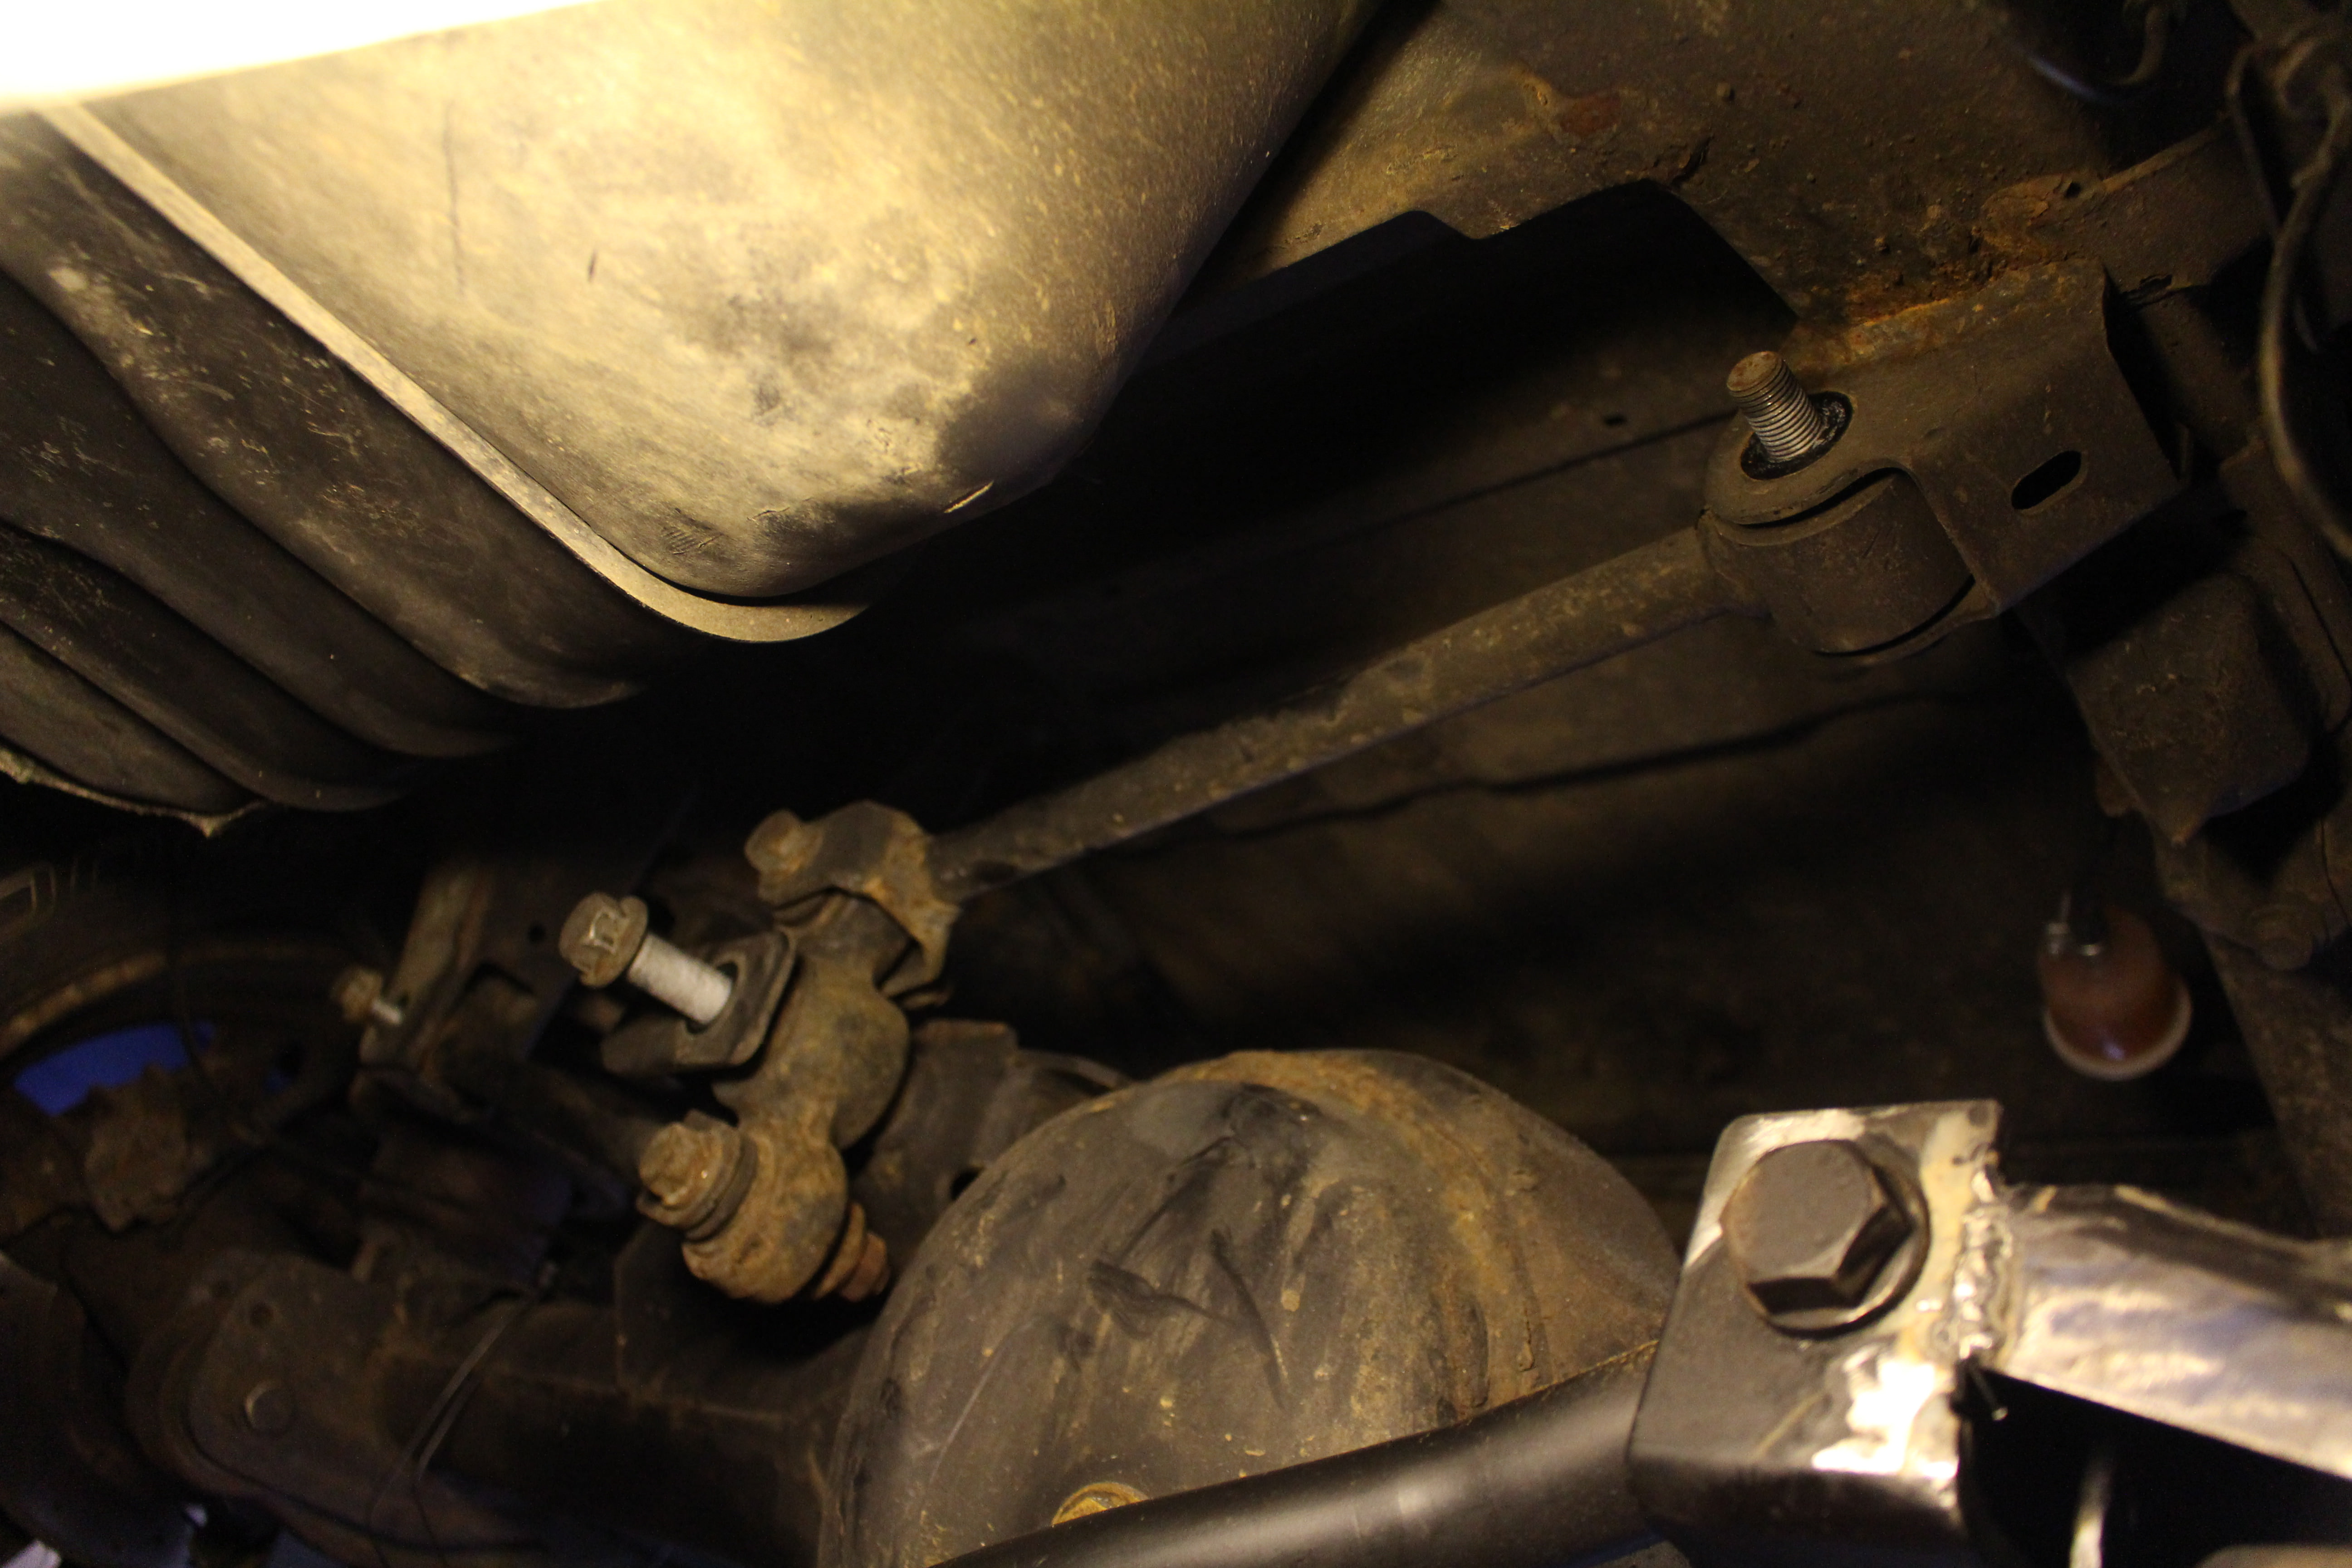
Now, we're going to leave the factory frame side mount that was used for the watts link. Raise your panhard bar up into the mount. It's going to be too long. Mark the center of the hole on the bar.
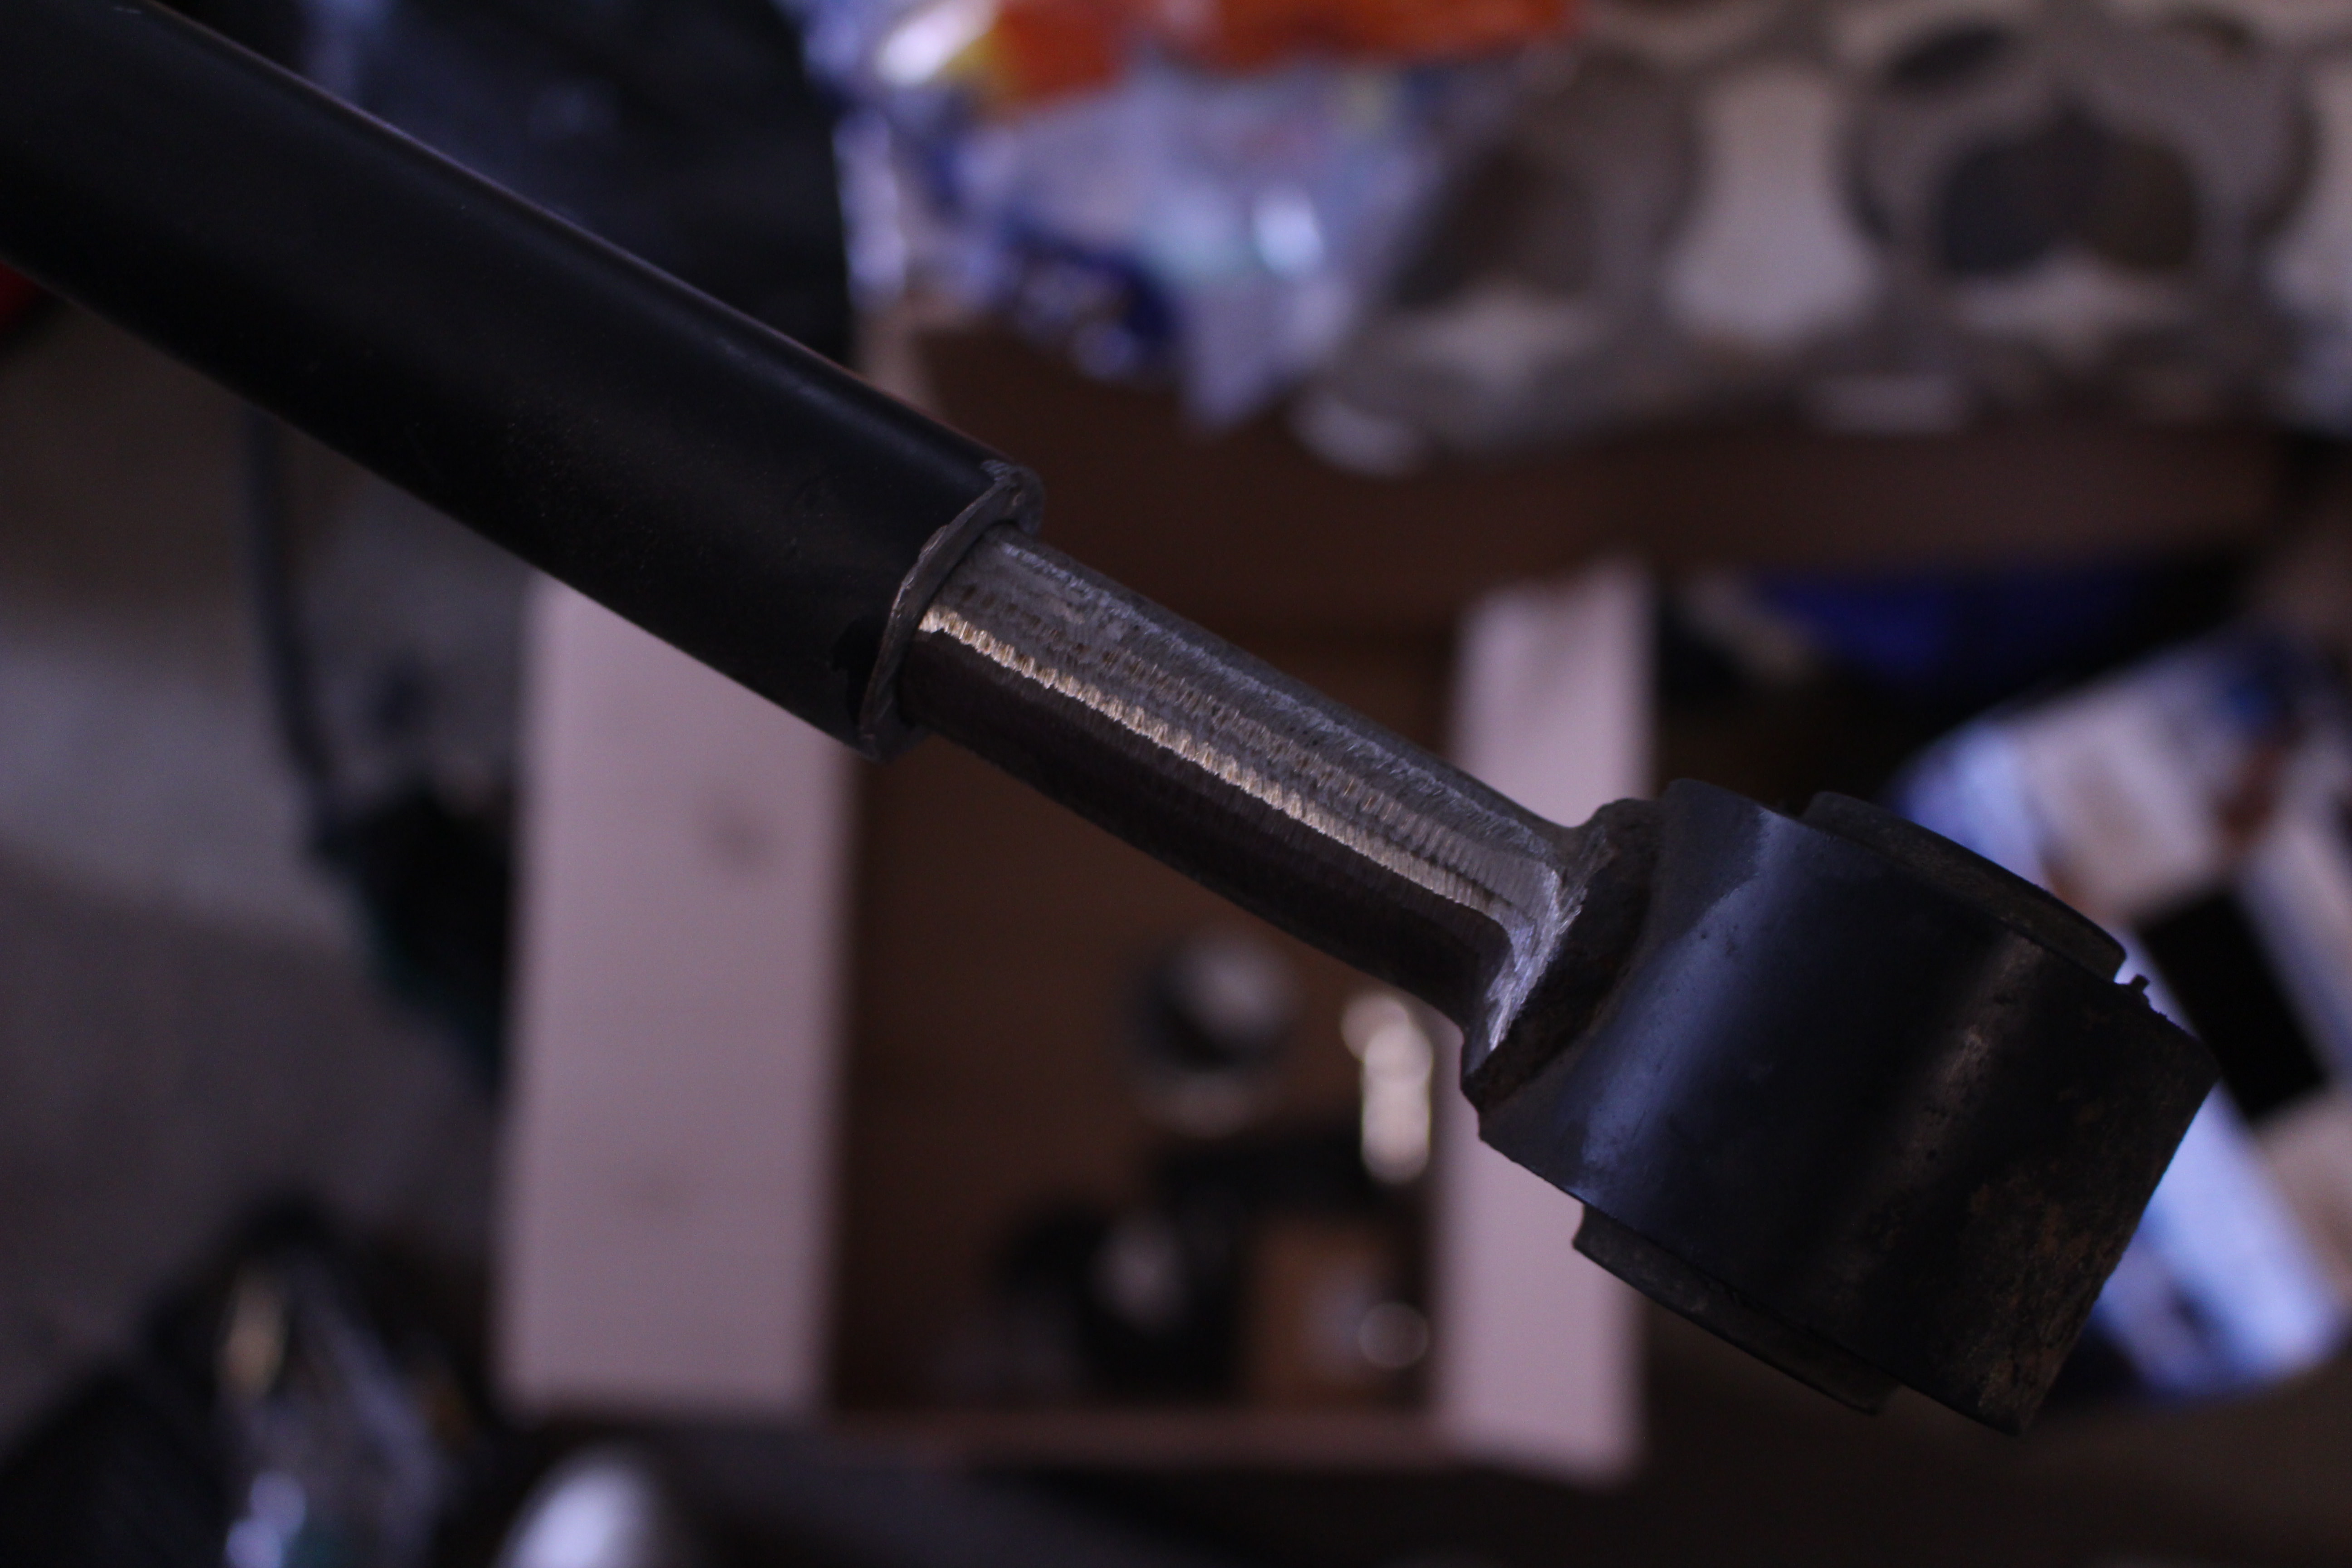
I seem to not have any pictures of this part. We're going to cut one end off of the factory watts link and then cut the end off of the panhard bar. You need to cut your bar shorter than where you marked. Maybe an inch or so? Cut it so that you can slide the watts link end down into the panhard bar so the center of the watts bushing will line up with the center line of the hole. I really wish I'd grabbed this measurement, but you guys have got it. When you cut the watts link, maybe give yourself 3" of bar.
Now, the watts link bar is a little too big to fit down into your panhard bar. Stick the watts end in your vice and take a grinder to it. Take it down just enough all the way around so it sleeves down into the panhard bar tight enough not to move, but loose enough that it's easy to tap it into another position.
If you have a lathe this would be easy work, but I don't and I'm betting most of you don't either. This part took me maybe 10 minutes of grinding, testing, grinding, testing.
Once you get it to the right size, stick it into the panhard bar, eyeball the alignment with the other end, and then drop it on the floor to let the weight of the panhard bar insert the watts end down into the bar.
Now go back under the truck with a hammer. Stick the panhard back in the axle side mount and just slide the bolt through to hold it in place. You don't need to tighten it down for this step.
Go to the other end and tap tap tap until you get the watts end lined up with the hole on the frame side mount.
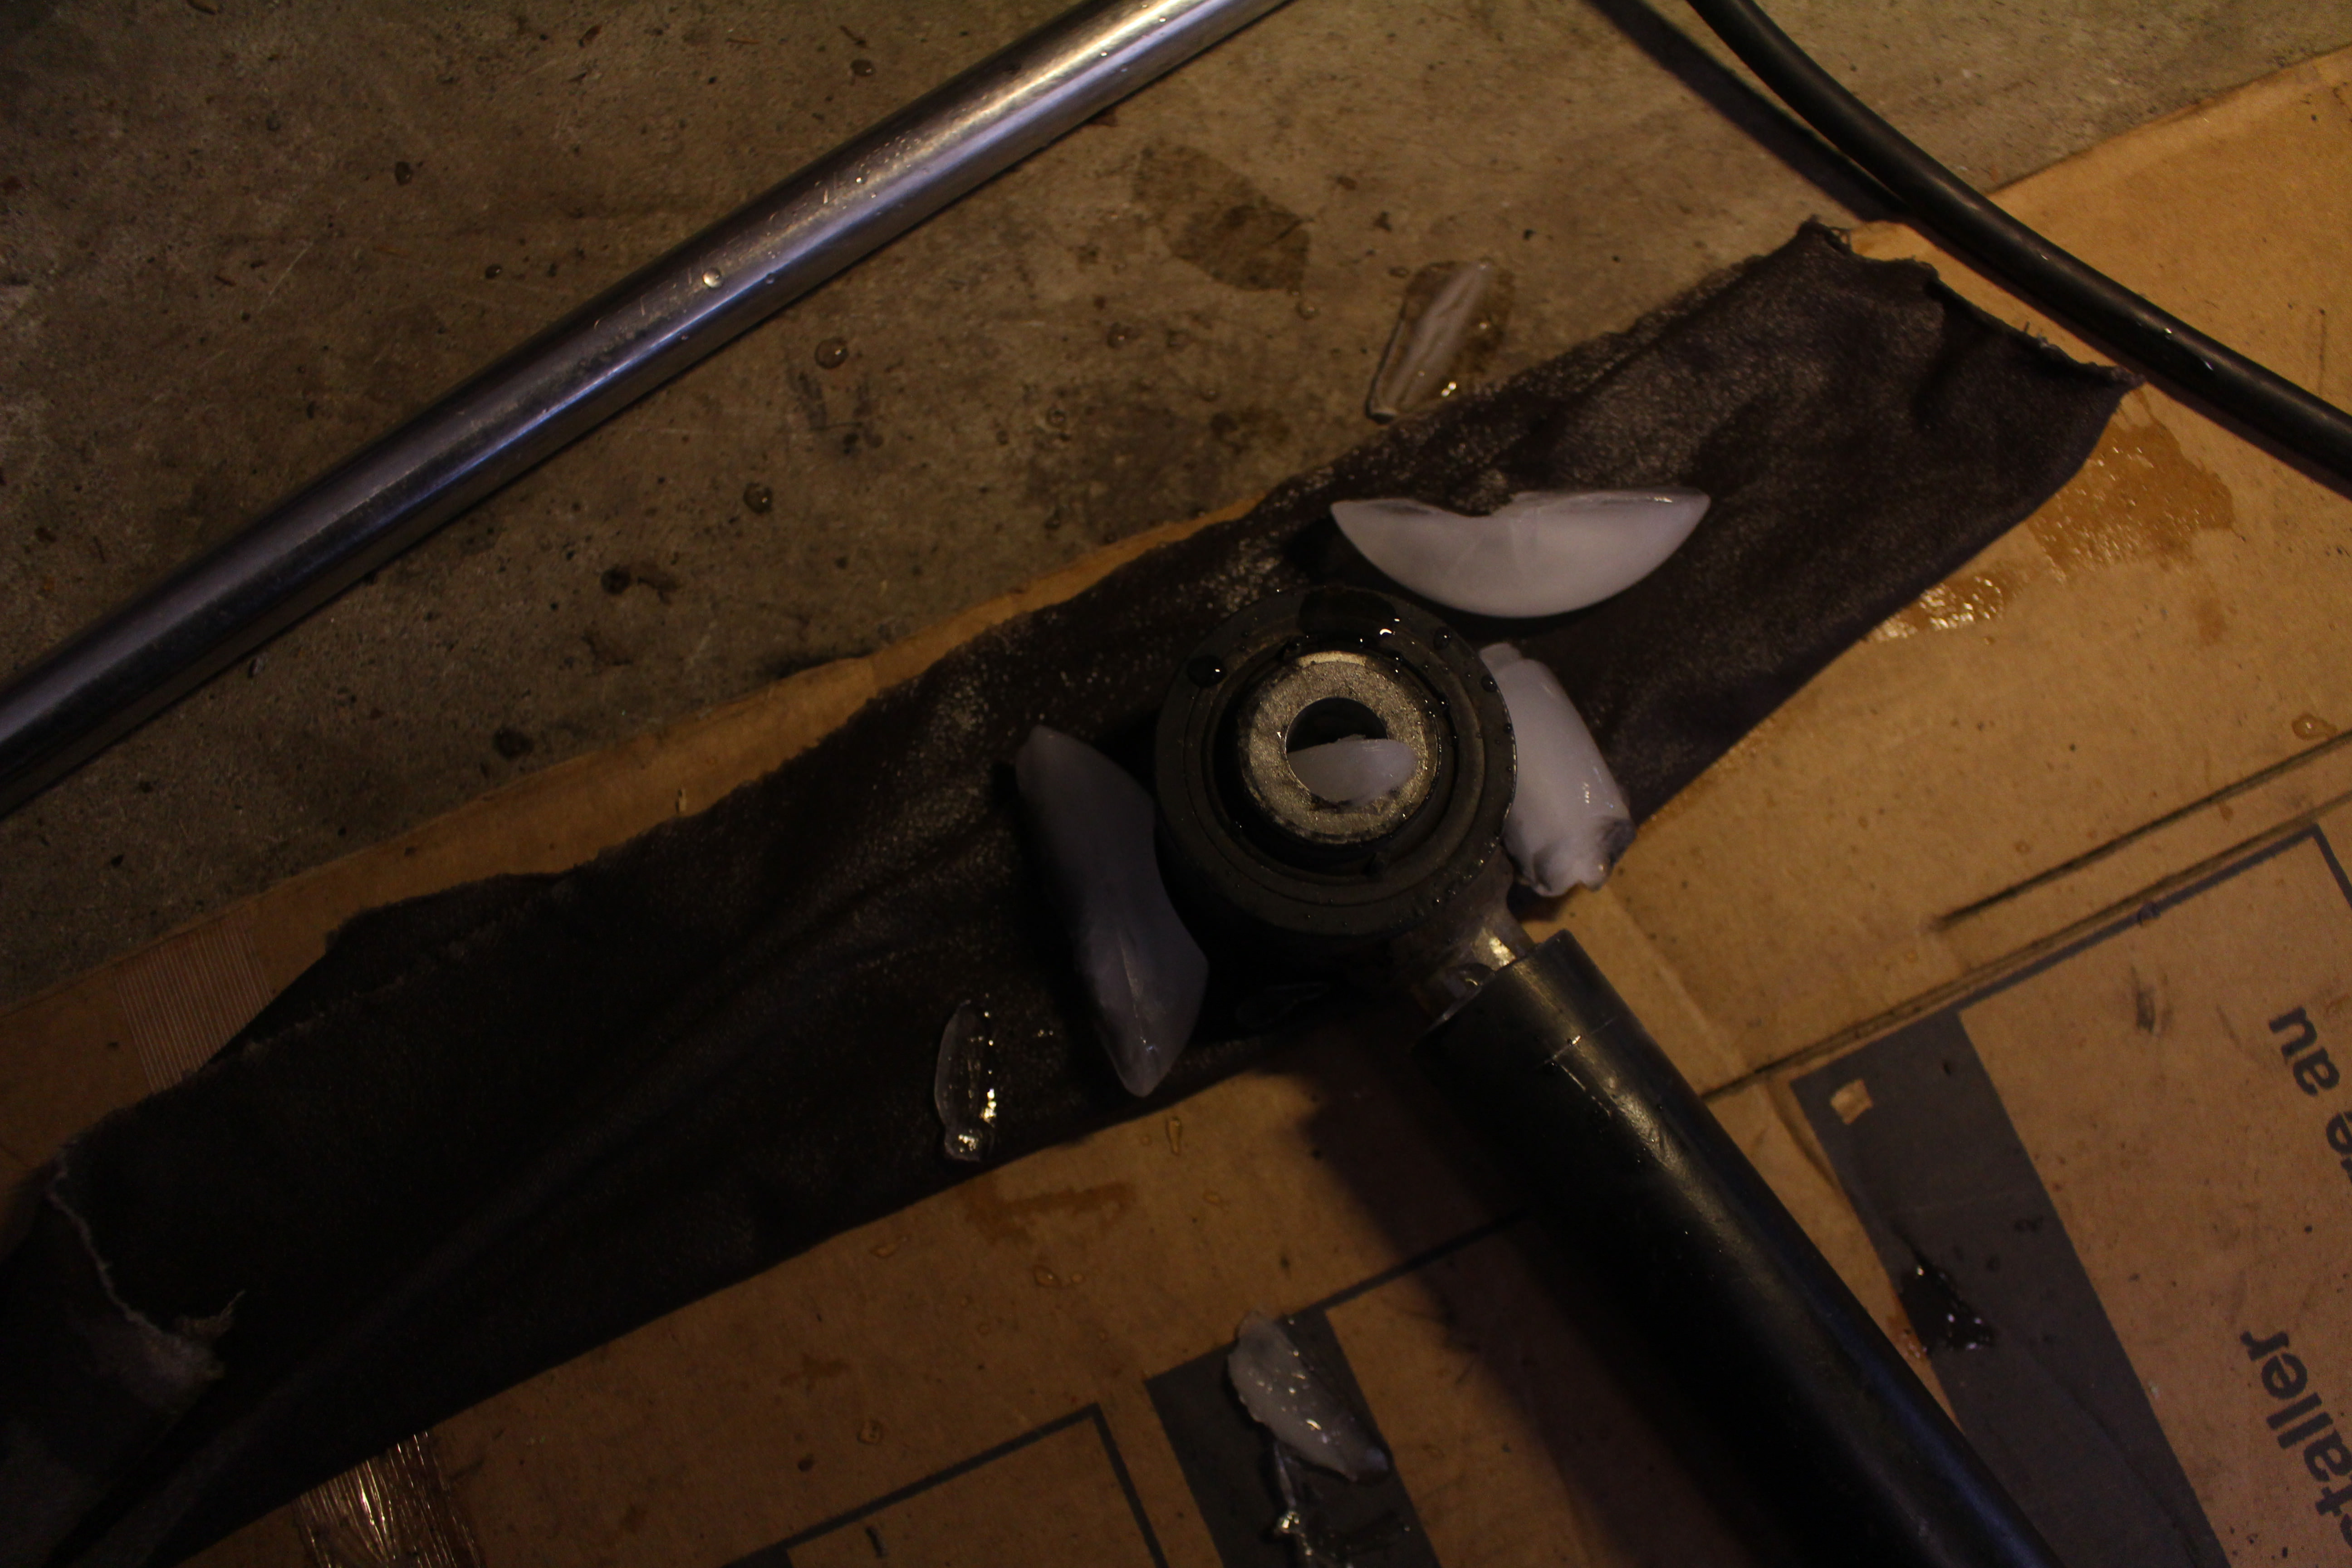
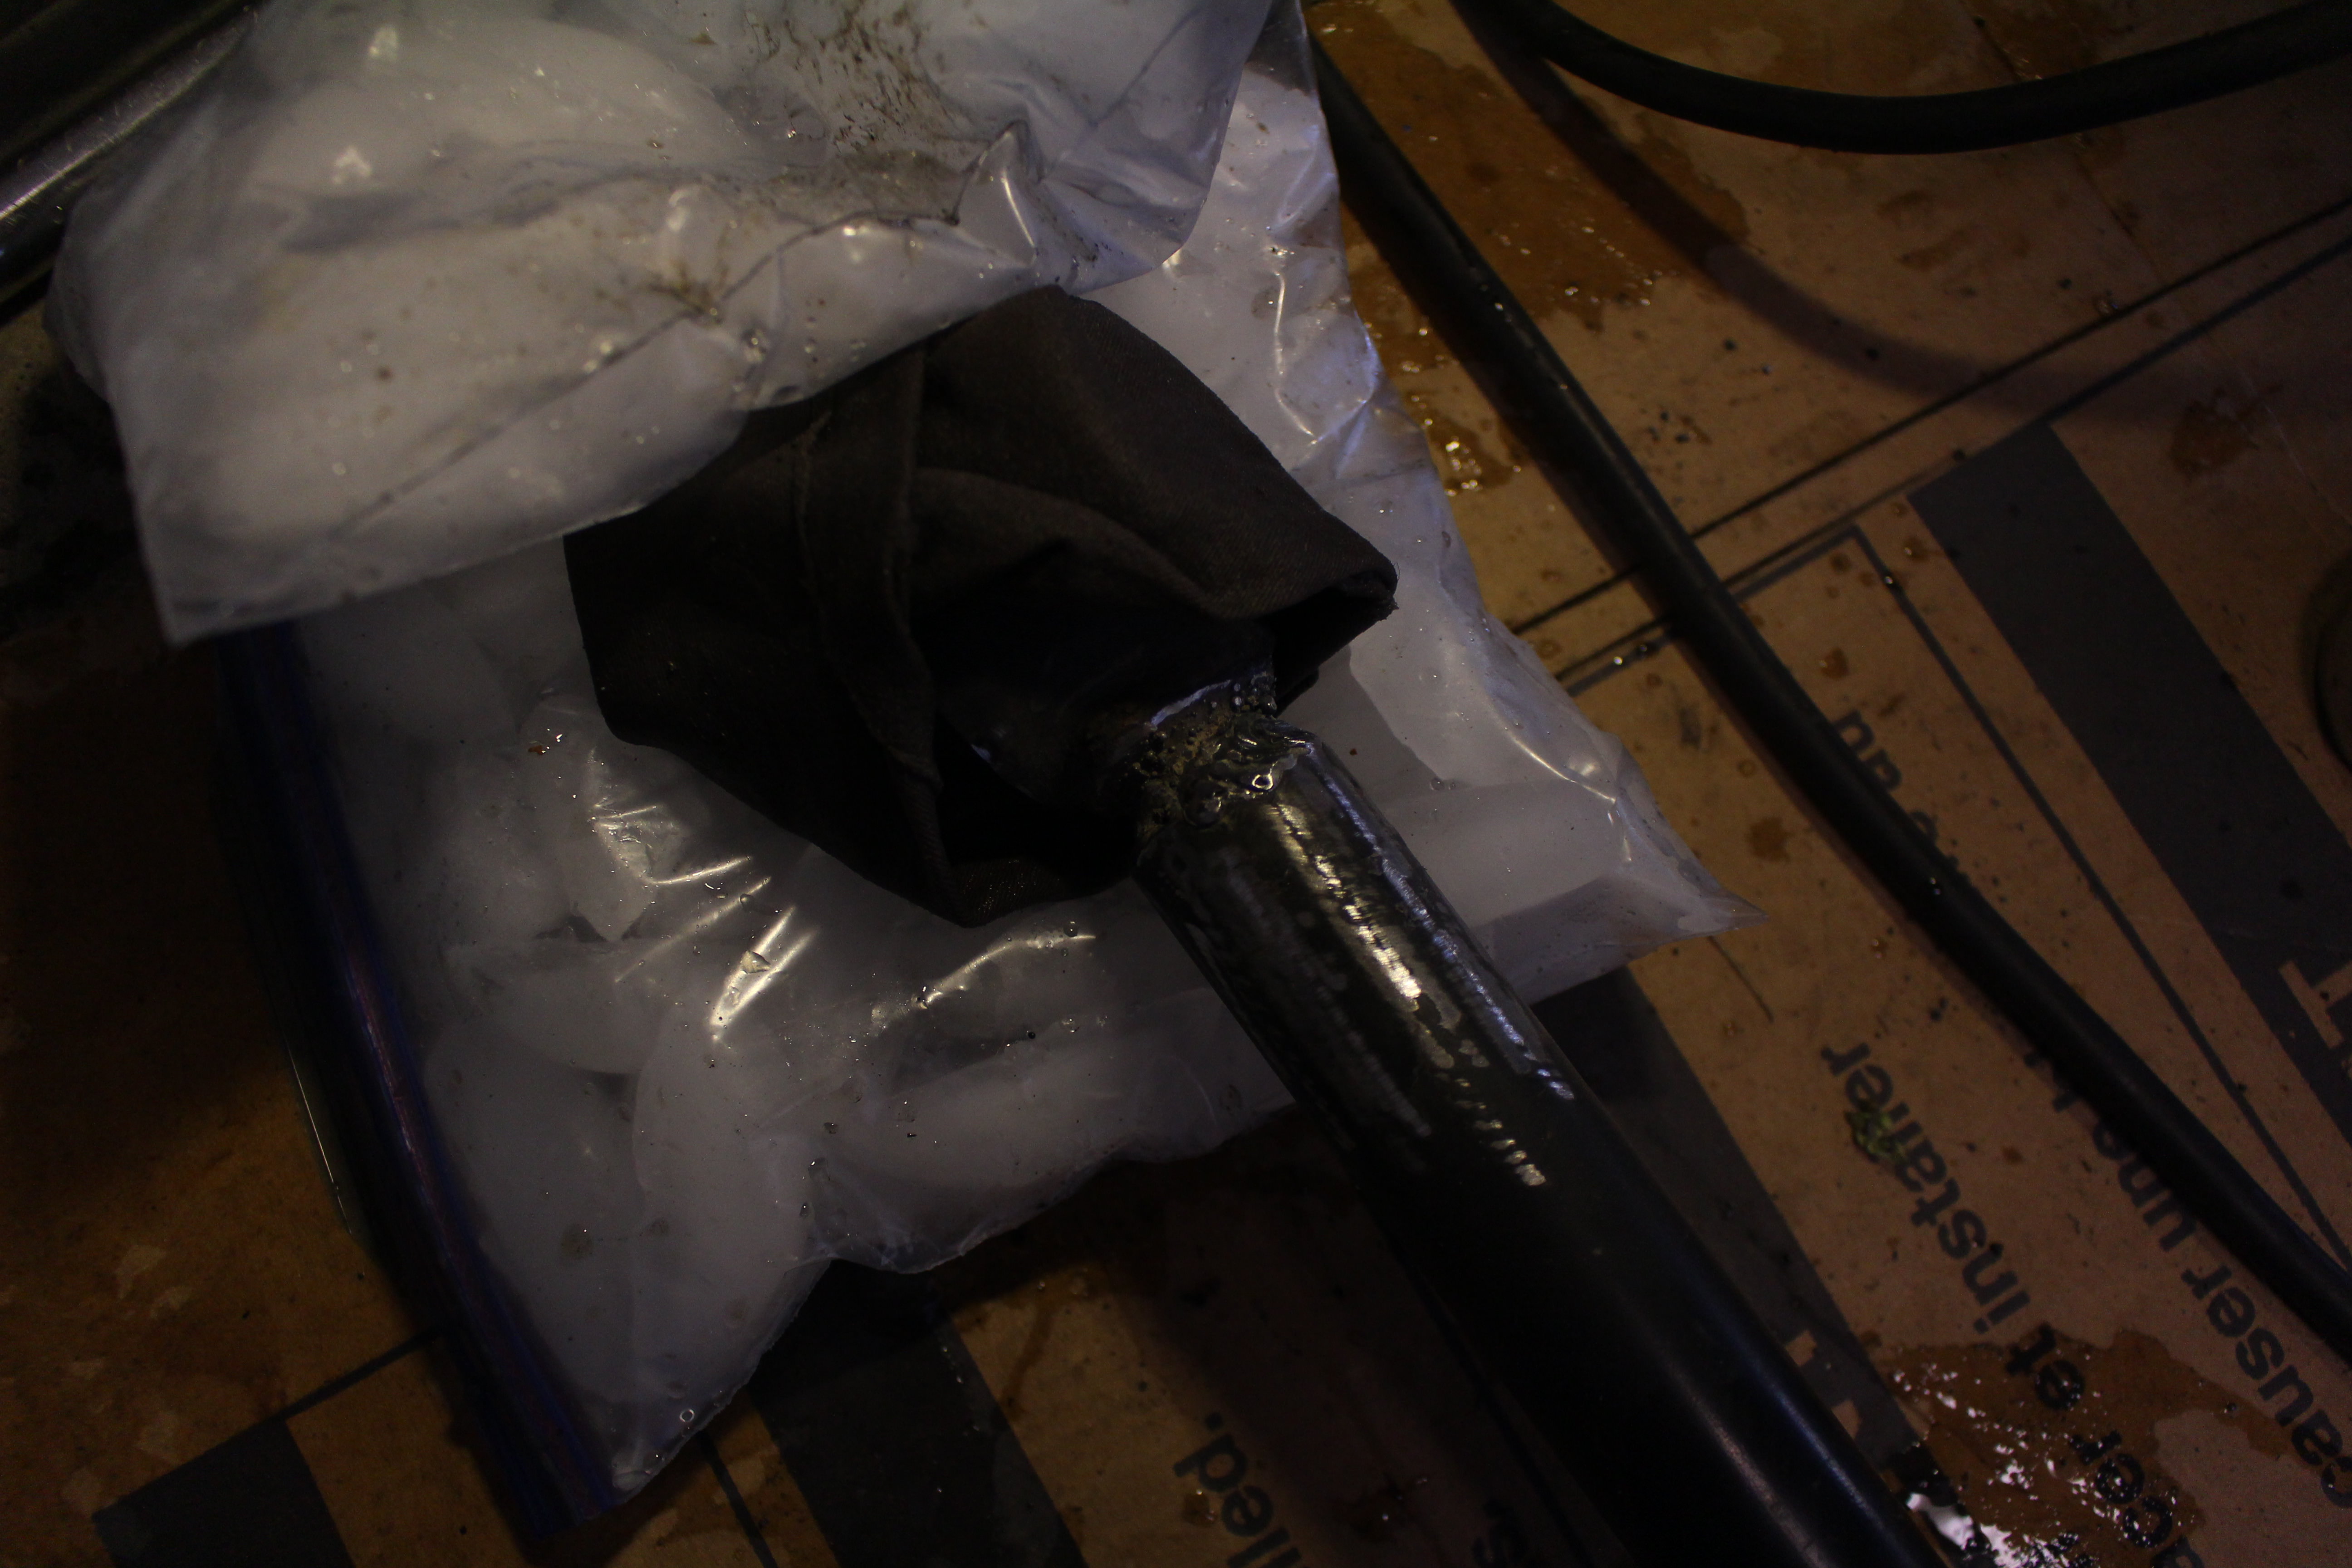
Once you do, pull it back out and grab a few sandwich bags of ice and a wet rag.
To start, just wrap the watts end with the rag and a few ice cubes. This will keep the bushing cool. Just tack weld the end and double check your length again.
This is honestly a super easy swap if you're good at welding. I think it took me like 4 hours working fairly slowly since I was taking pictures along the way.
First up, tools needed for getting the parts you'll need. Eye protection required, hearing and breathing protection highly recommended. Protect your bodies! It's the only one you get, and you don't want to finish life missing one of your senses.
I'm guessing most of you will start in a junk yard; I started in my driveway with just the front half of a frame. This will still give you an idea of what you need to do.
I will say, I actually did cut off the factory frame size mount, but ended up not using it. Maybe one of you can, but I couldn't fit it because of my 3" tailpipe. I can't remember exactly how the factory exhaust ran because it's been a couple years since it was on my truck.
Now for the parts you definitely need. The panhard bar itself as well as the axle side mount. You're seeing a bottom up view in this picture if you were looking under a truck. I couldn't get the angle grinder all the way to the corner on these cuts, so I used a 1/2" drill bit in the corner and then a metal chisel to get it the rest of the way out. Make your cuts as tight to the axle as possible so you have the most possible material to work with.
I never even unbolted the panhard bar from the axle mount. Also, again I didn't use the frame side mount because of space limitations. That's ok; the rear won't see the same side to side forces as the front because the front has to deal with a lot of steering force that the rear doesn't see.
Now into your garage and lets start the actual swap! It appears I'm missing a couple pictures or I might've forgotten to take them. Some of these pictures are also really dark. Sorry, guys.
First things first, lets clean up the pieces down to bare metal for better welds. This is absolutely necessary since this is a structural part. I used an air die grinder, but a regular electric angle grinder will of course work fine also.
Do the same on the passengers side of your rear axle like in this picture, even up on top of your bump stop plate.
Now we're ready to start welding. Hopefully you can see well enough in this picture where I put my grounding clamp. You'll need to take your grinder and clean your grounding spot, too.
Now, we're going to mount it upside down by comparison to how the front is done because we are doing the same side of the vehicle, but the axle is of course flipped the opposite direction. My placement gave enough room to get the nuts both on the panhard bolt as well as the radius arm bolt if (when) I need to. Start just by tacking it in place.
Once you're tacked and like your positioning, go ahead and weld it up all the way around.
I also made this piece to go across the top and connect the outside of the mount to the other side of the radius arm mount to add some strength. I used an old piece of the factory bumper, but should be a pretty easy piece to make. Most likely just a little more squared off if you fab one.
Now it's time to remove the watts link. The main center bolt has two nuts on the back you have to remove. I think I used a 1" socket, not sure. Maybe 13/16". Who knows, honestly. Just try a few in that range and you'll find it. Remove the rear nut first, then stick a crecent wrench on the other with a breaker bar on the back and crank on her till she gives.
I recommend leaving the bolt in place while you remove the nuts from the two frame side nuts from their bolts. Once they're all free you can remove the bolts, too.
Once they're out you need to cut the tab off of the mount so the panhard bar can clear. Cut it flush with the line that's already there that it protrudes from. Keep the piece you cut off.
Now, we're going to leave the factory frame side mount that was used for the watts link. Raise your panhard bar up into the mount. It's going to be too long. Mark the center of the hole on the bar.
I seem to not have any pictures of this part. We're going to cut one end off of the factory watts link and then cut the end off of the panhard bar. You need to cut your bar shorter than where you marked. Maybe an inch or so? Cut it so that you can slide the watts link end down into the panhard bar so the center of the watts bushing will line up with the center line of the hole. I really wish I'd grabbed this measurement, but you guys have got it. When you cut the watts link, maybe give yourself 3" of bar.
Now, the watts link bar is a little too big to fit down into your panhard bar. Stick the watts end in your vice and take a grinder to it. Take it down just enough all the way around so it sleeves down into the panhard bar tight enough not to move, but loose enough that it's easy to tap it into another position.
If you have a lathe this would be easy work, but I don't and I'm betting most of you don't either. This part took me maybe 10 minutes of grinding, testing, grinding, testing.
Once you get it to the right size, stick it into the panhard bar, eyeball the alignment with the other end, and then drop it on the floor to let the weight of the panhard bar insert the watts end down into the bar.
Now go back under the truck with a hammer. Stick the panhard back in the axle side mount and just slide the bolt through to hold it in place. You don't need to tighten it down for this step.
Go to the other end and tap tap tap until you get the watts end lined up with the hole on the frame side mount.
Once you do, pull it back out and grab a few sandwich bags of ice and a wet rag.
To start, just wrap the watts end with the rag and a few ice cubes. This will keep the bushing cool. Just tack weld the end and double check your length again.
Last edited by Alex_M; Nov 19, 2017 at 06:13 PM.
Thread Starter
|
Camel Trophy
Joined: Aug 2014
Posts: 4,743
Likes: 985
From: Southwestern Virginia
If your length is correct, pull it back out. Wrap the end in the wet rag again and put your bags of ice on all sides, still giving yourself room to weld. Be VERY careful not to get your gloves wet. Remember that a welder uses electricity to melt the metal and if your hands are wet you CAN be electrocuted. As long as your hands/gloves are dry you'll be fine.
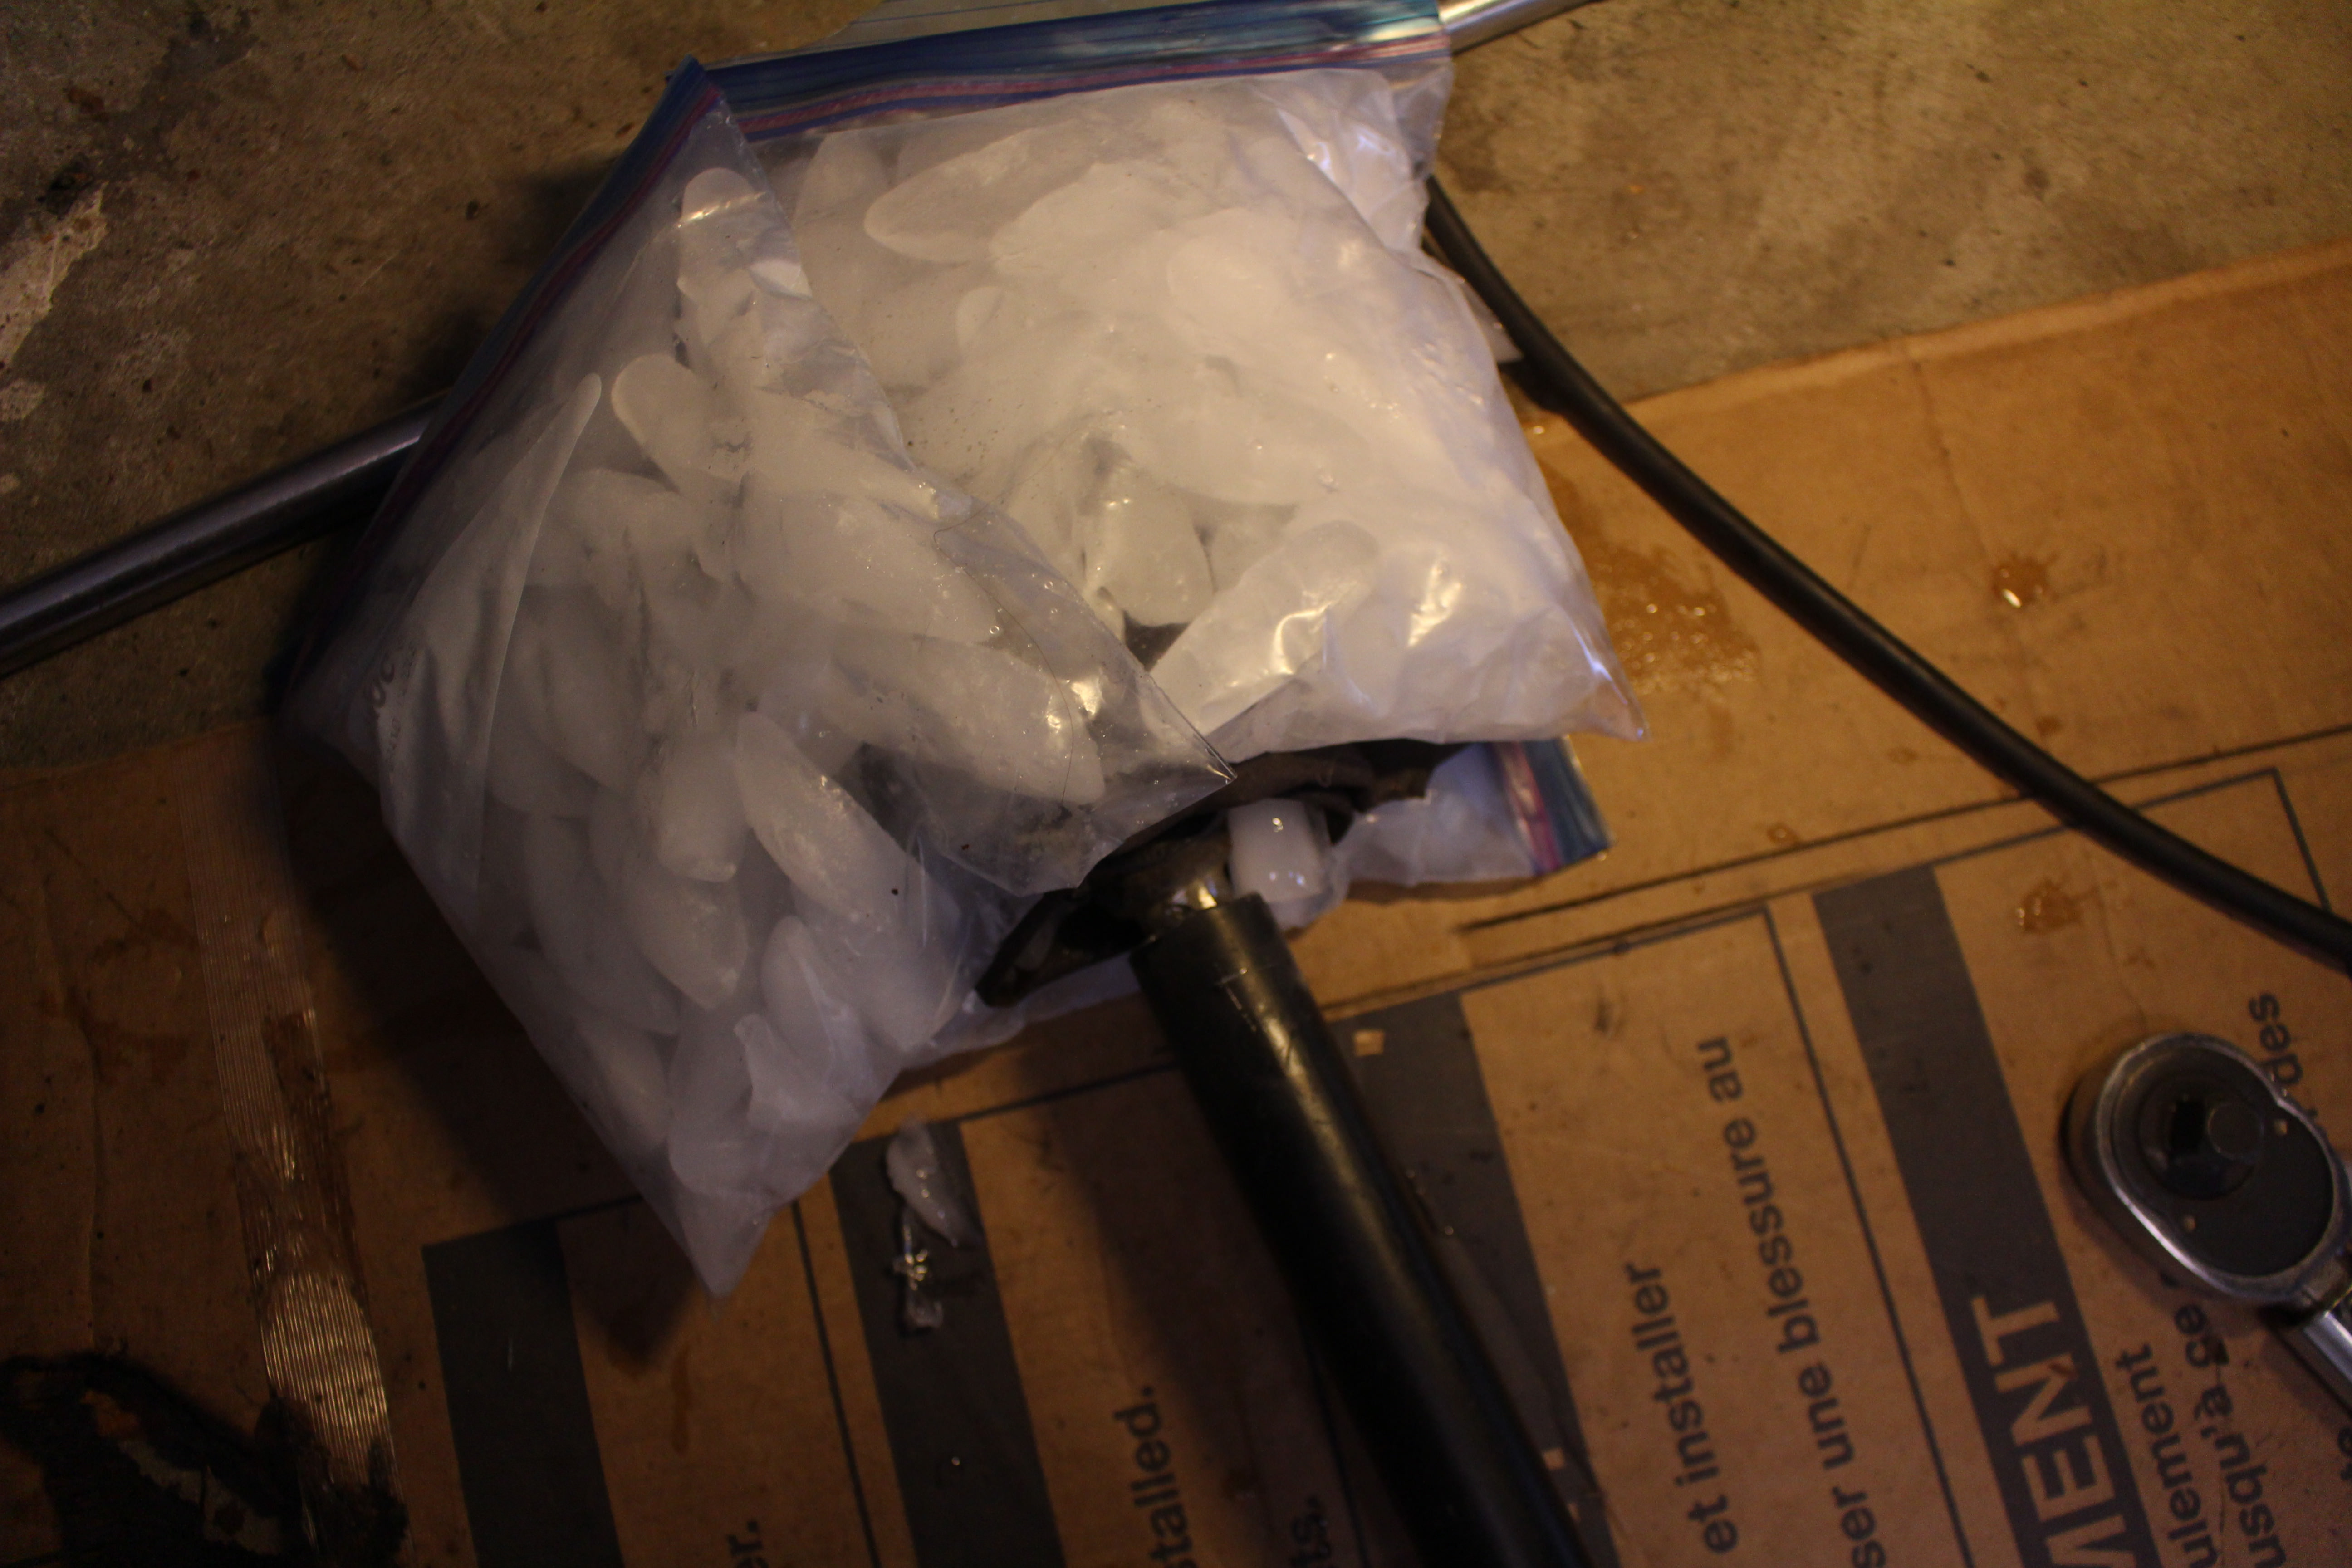
Weld all the way around. I recommend doing about 1/4 of the diameter at a time and then allowing it to cool. This will keep you from melting the bushing.
I went all the way around twice to fill in the valley that was left after the first go around because of the difference in diameter between the watts link bar and the panhard bar.
Let me say, I know that you typically do NOT want to cool your work with water, ice, etc; you want to let it cool on its own to keep it from hardening and becoming brittle. That said, in this case it was necessary and the way I did it it did not cool it super quickly like spraying water right on the weld would. If you're worried about it you can press the bushing out, weld it normally, and then press a new bushing in. I was in for free at this point and didn't have the cash for another bushing. You can also check to see if it's become hardened with a file. If it bites it hasn't hardened and if the file kinda skates across then it has become hardened.
Now, with it being sleeved and not butt welded, and as securedly as it is welded, I'm not worried about it even if it is hardened there because with the thickness of that section another part of the bar will bend before that breaks.
Anyway, with that out of the way, once you have it welded up take a wire brush to it to clean it off and then hit it with some spray paint.
You're now ready to install the bar. When you tighten the bolts, be sure to do so with the truck on the ground so you don't bind the bushings and wear them out prematurely. As a matter of fact, I never jacked the truck up for any part of this.

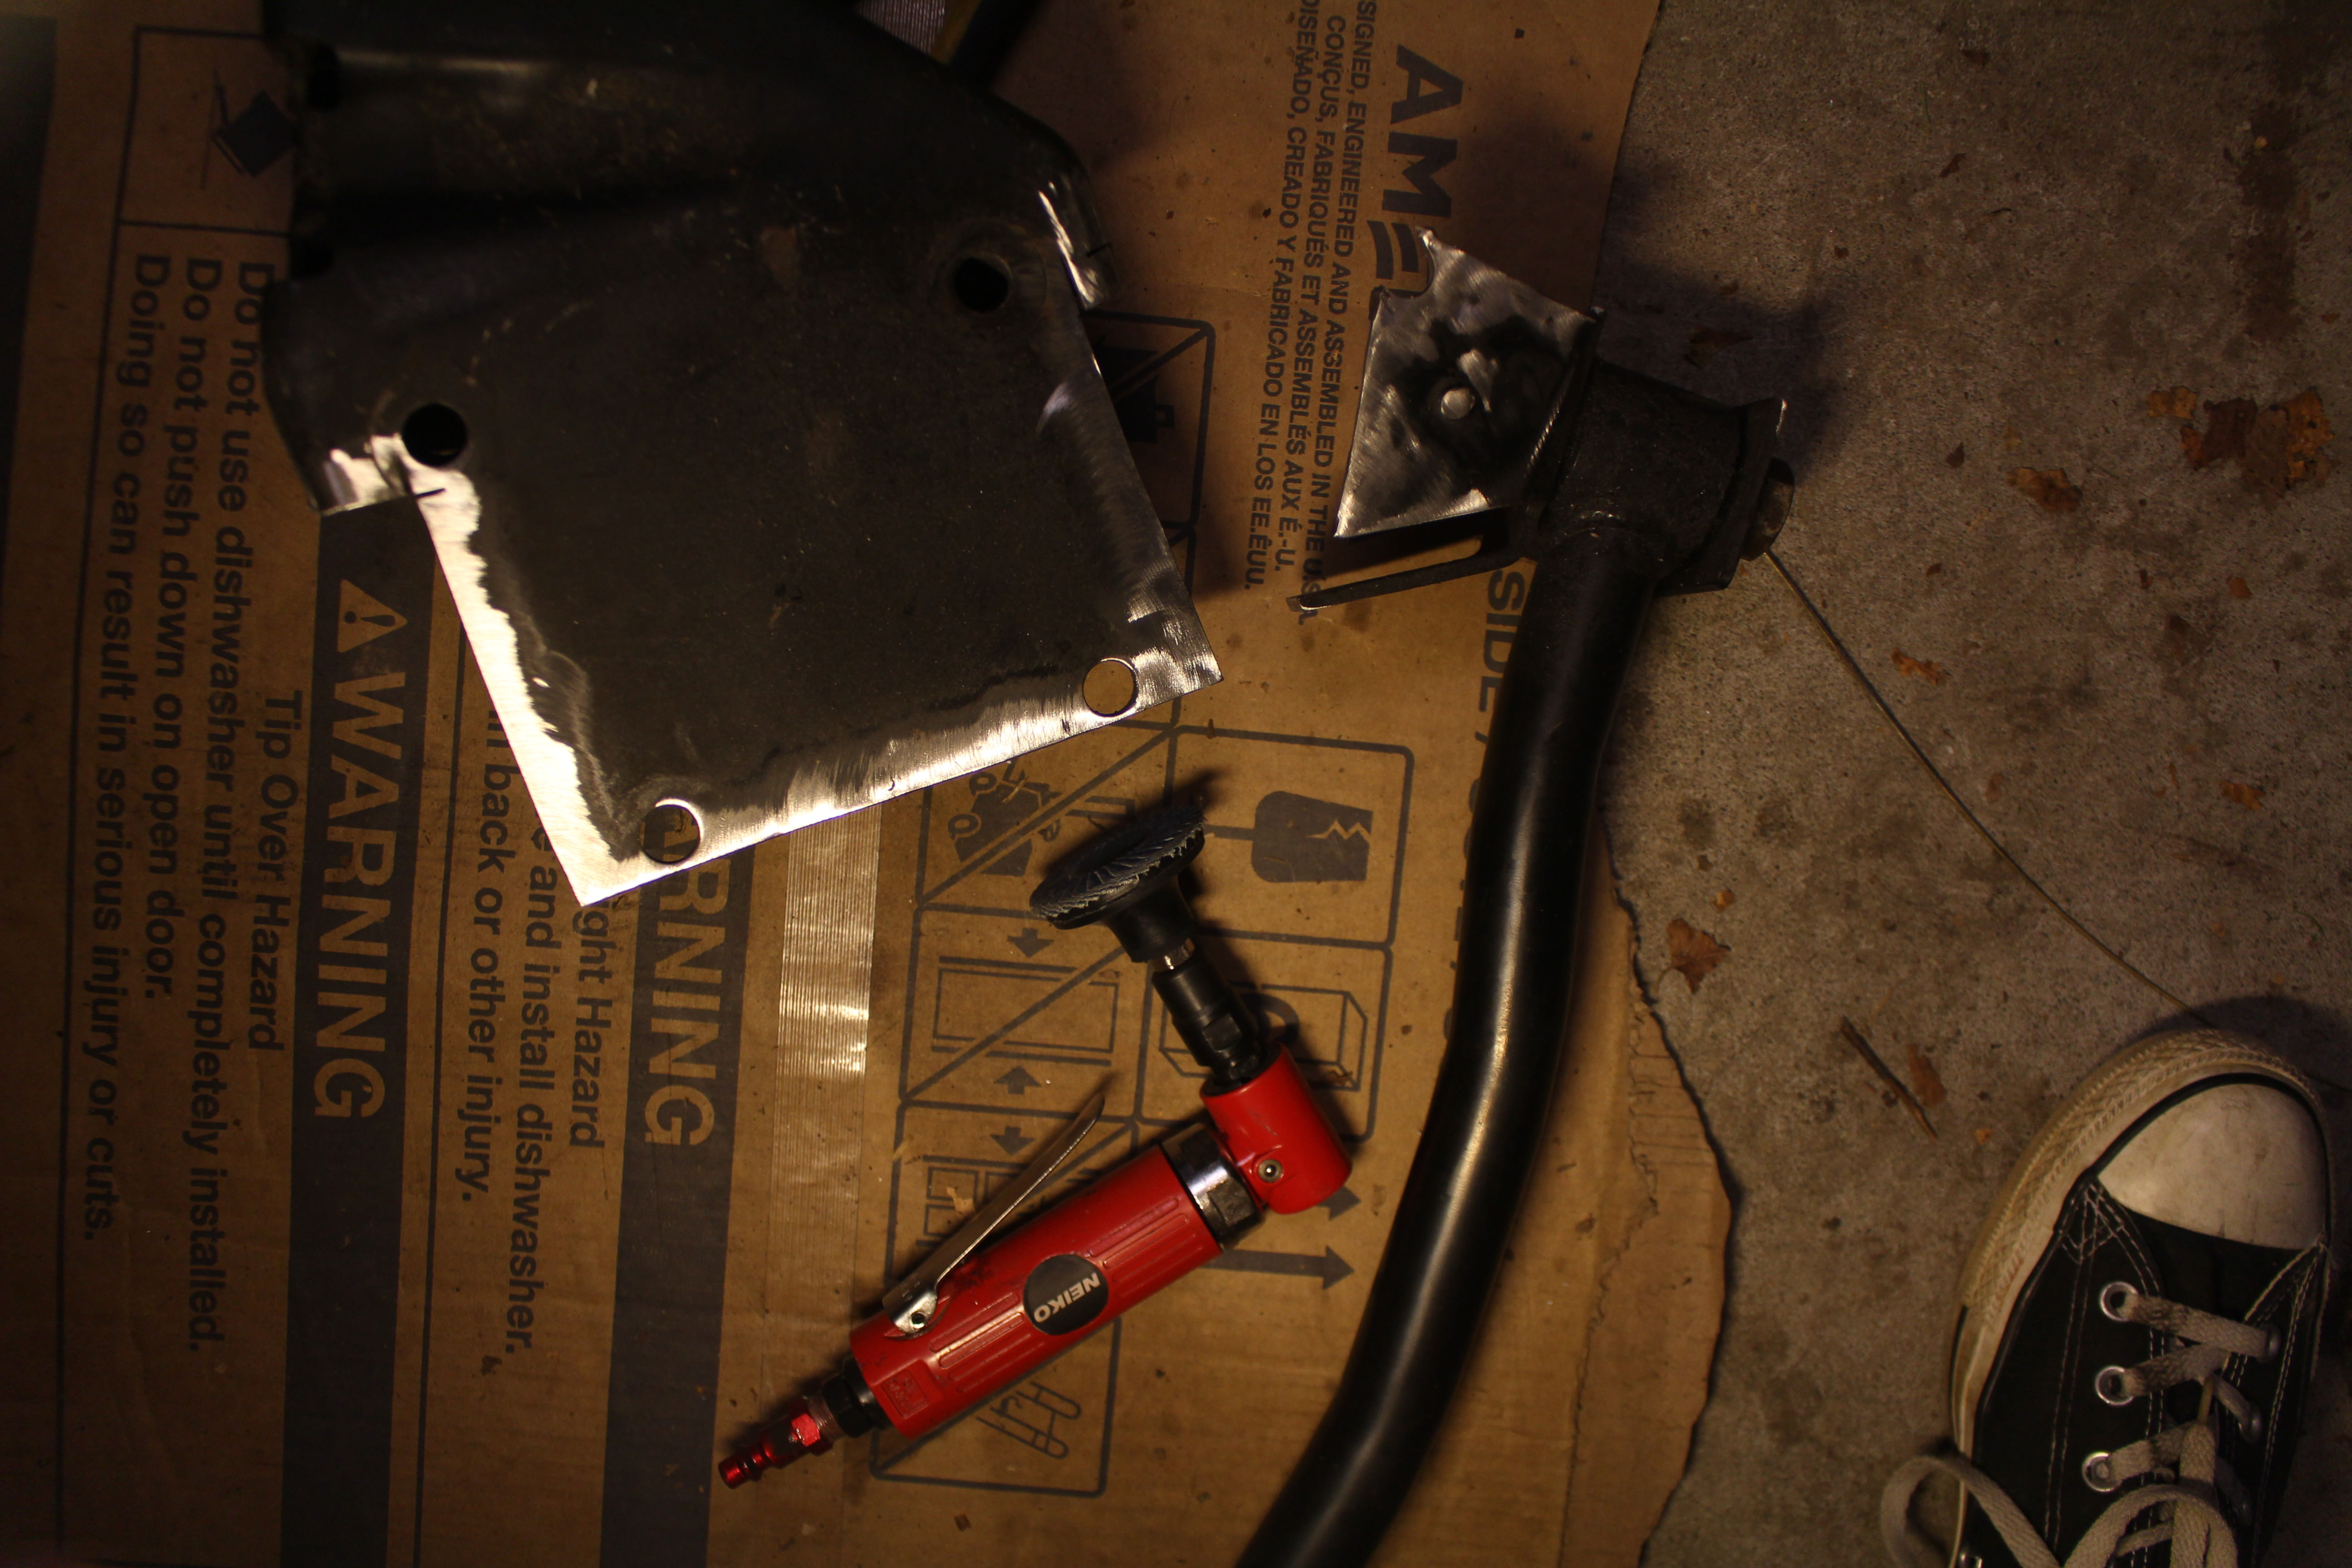
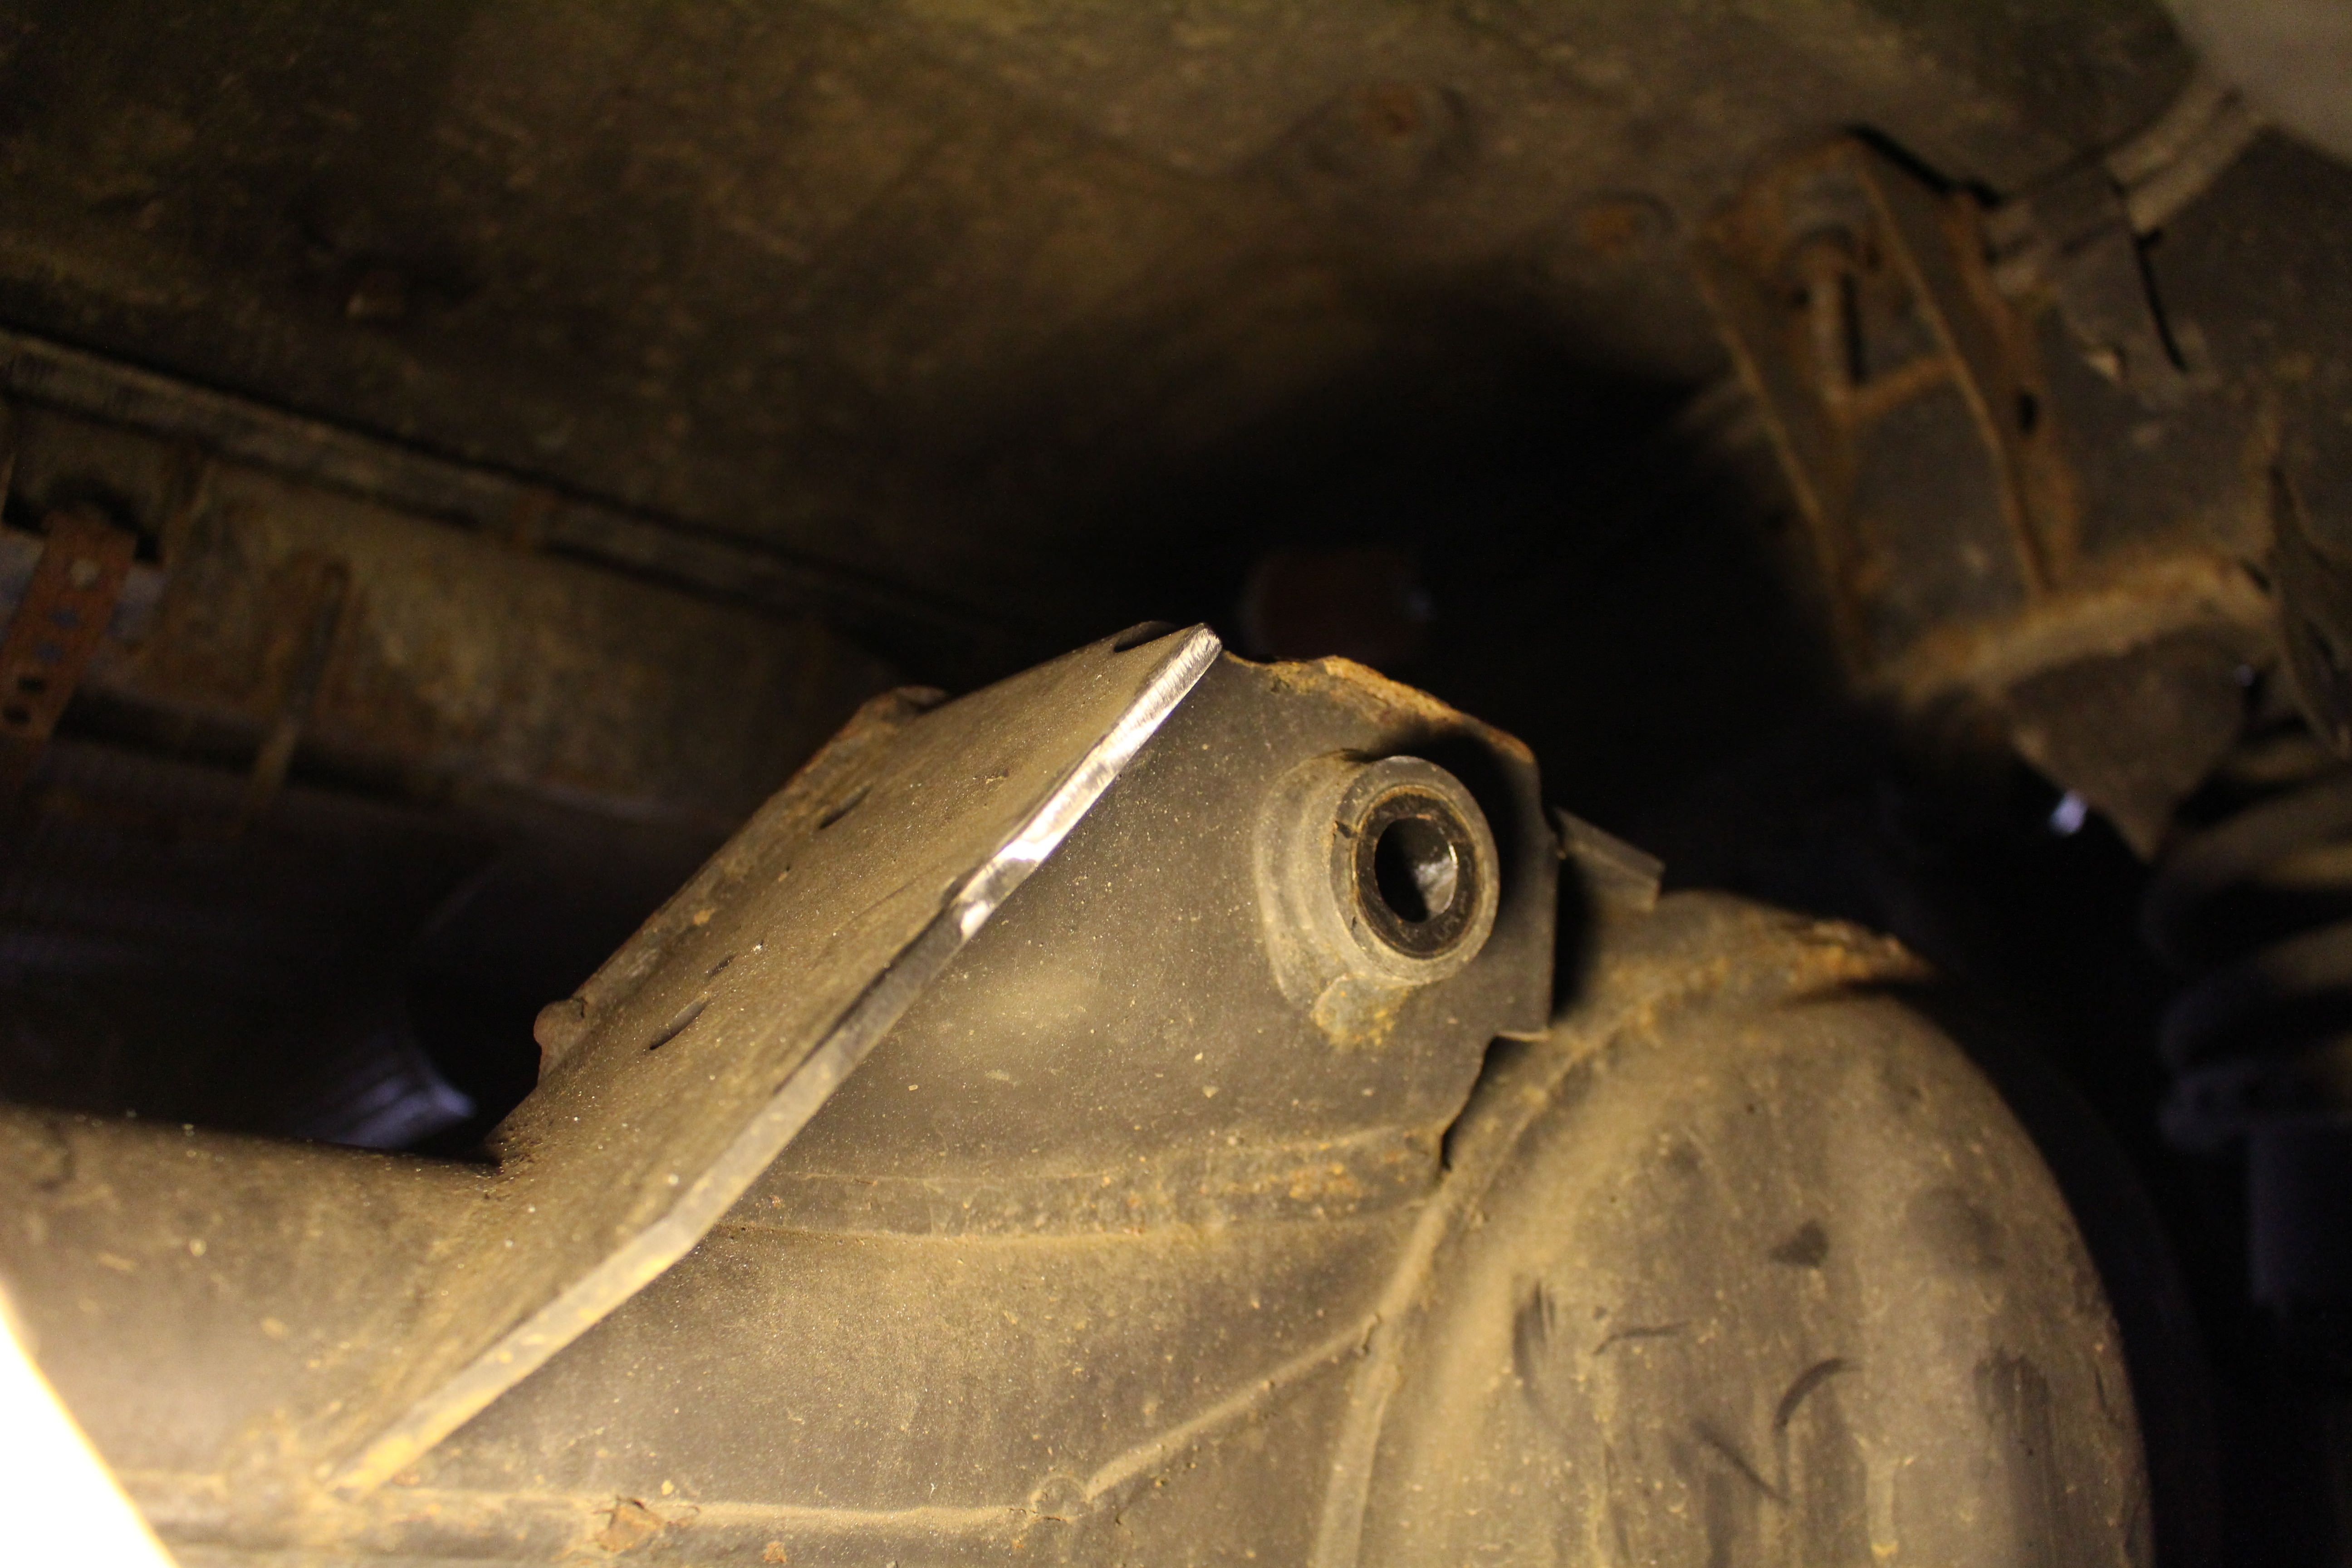
Now, remember that piece you cut off that I told you to keep? You're ready for it again. Pull it out, clean up the edge that I show cleaned up here.
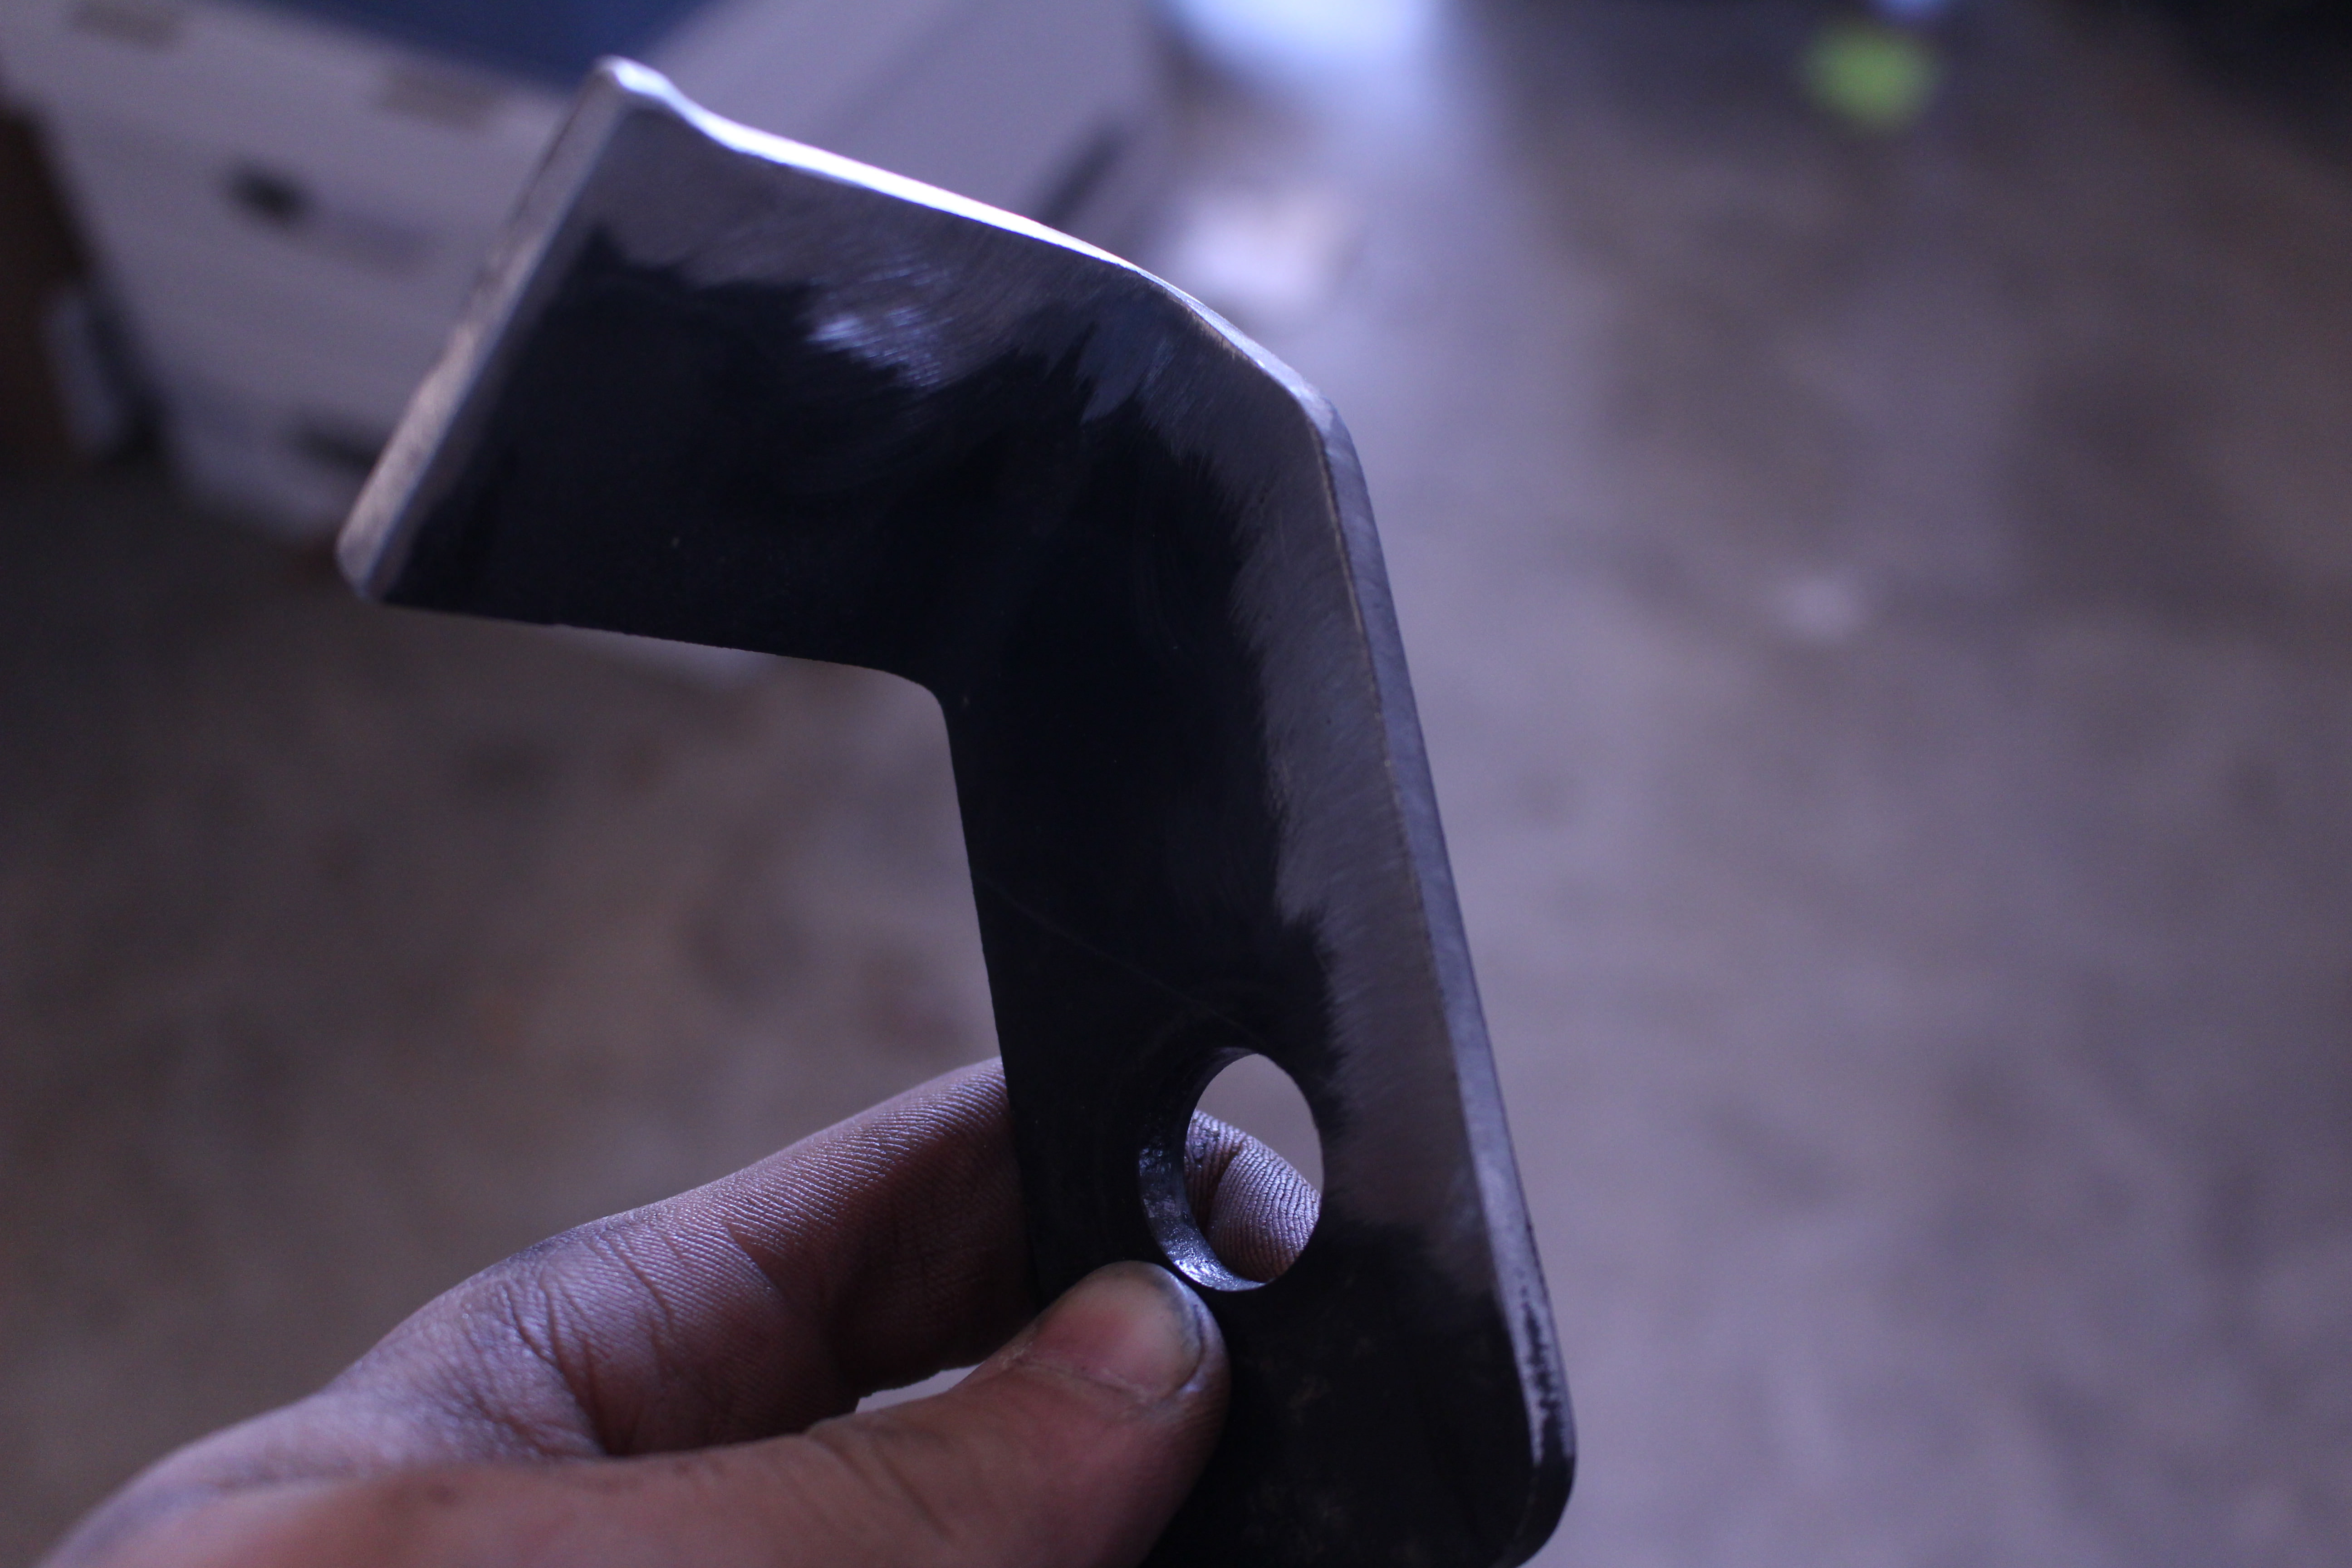
Take the same piece and cut the side off as I show here.
Heck, I must've not taken a picture of the next step. I'll grab one next time I think about it.
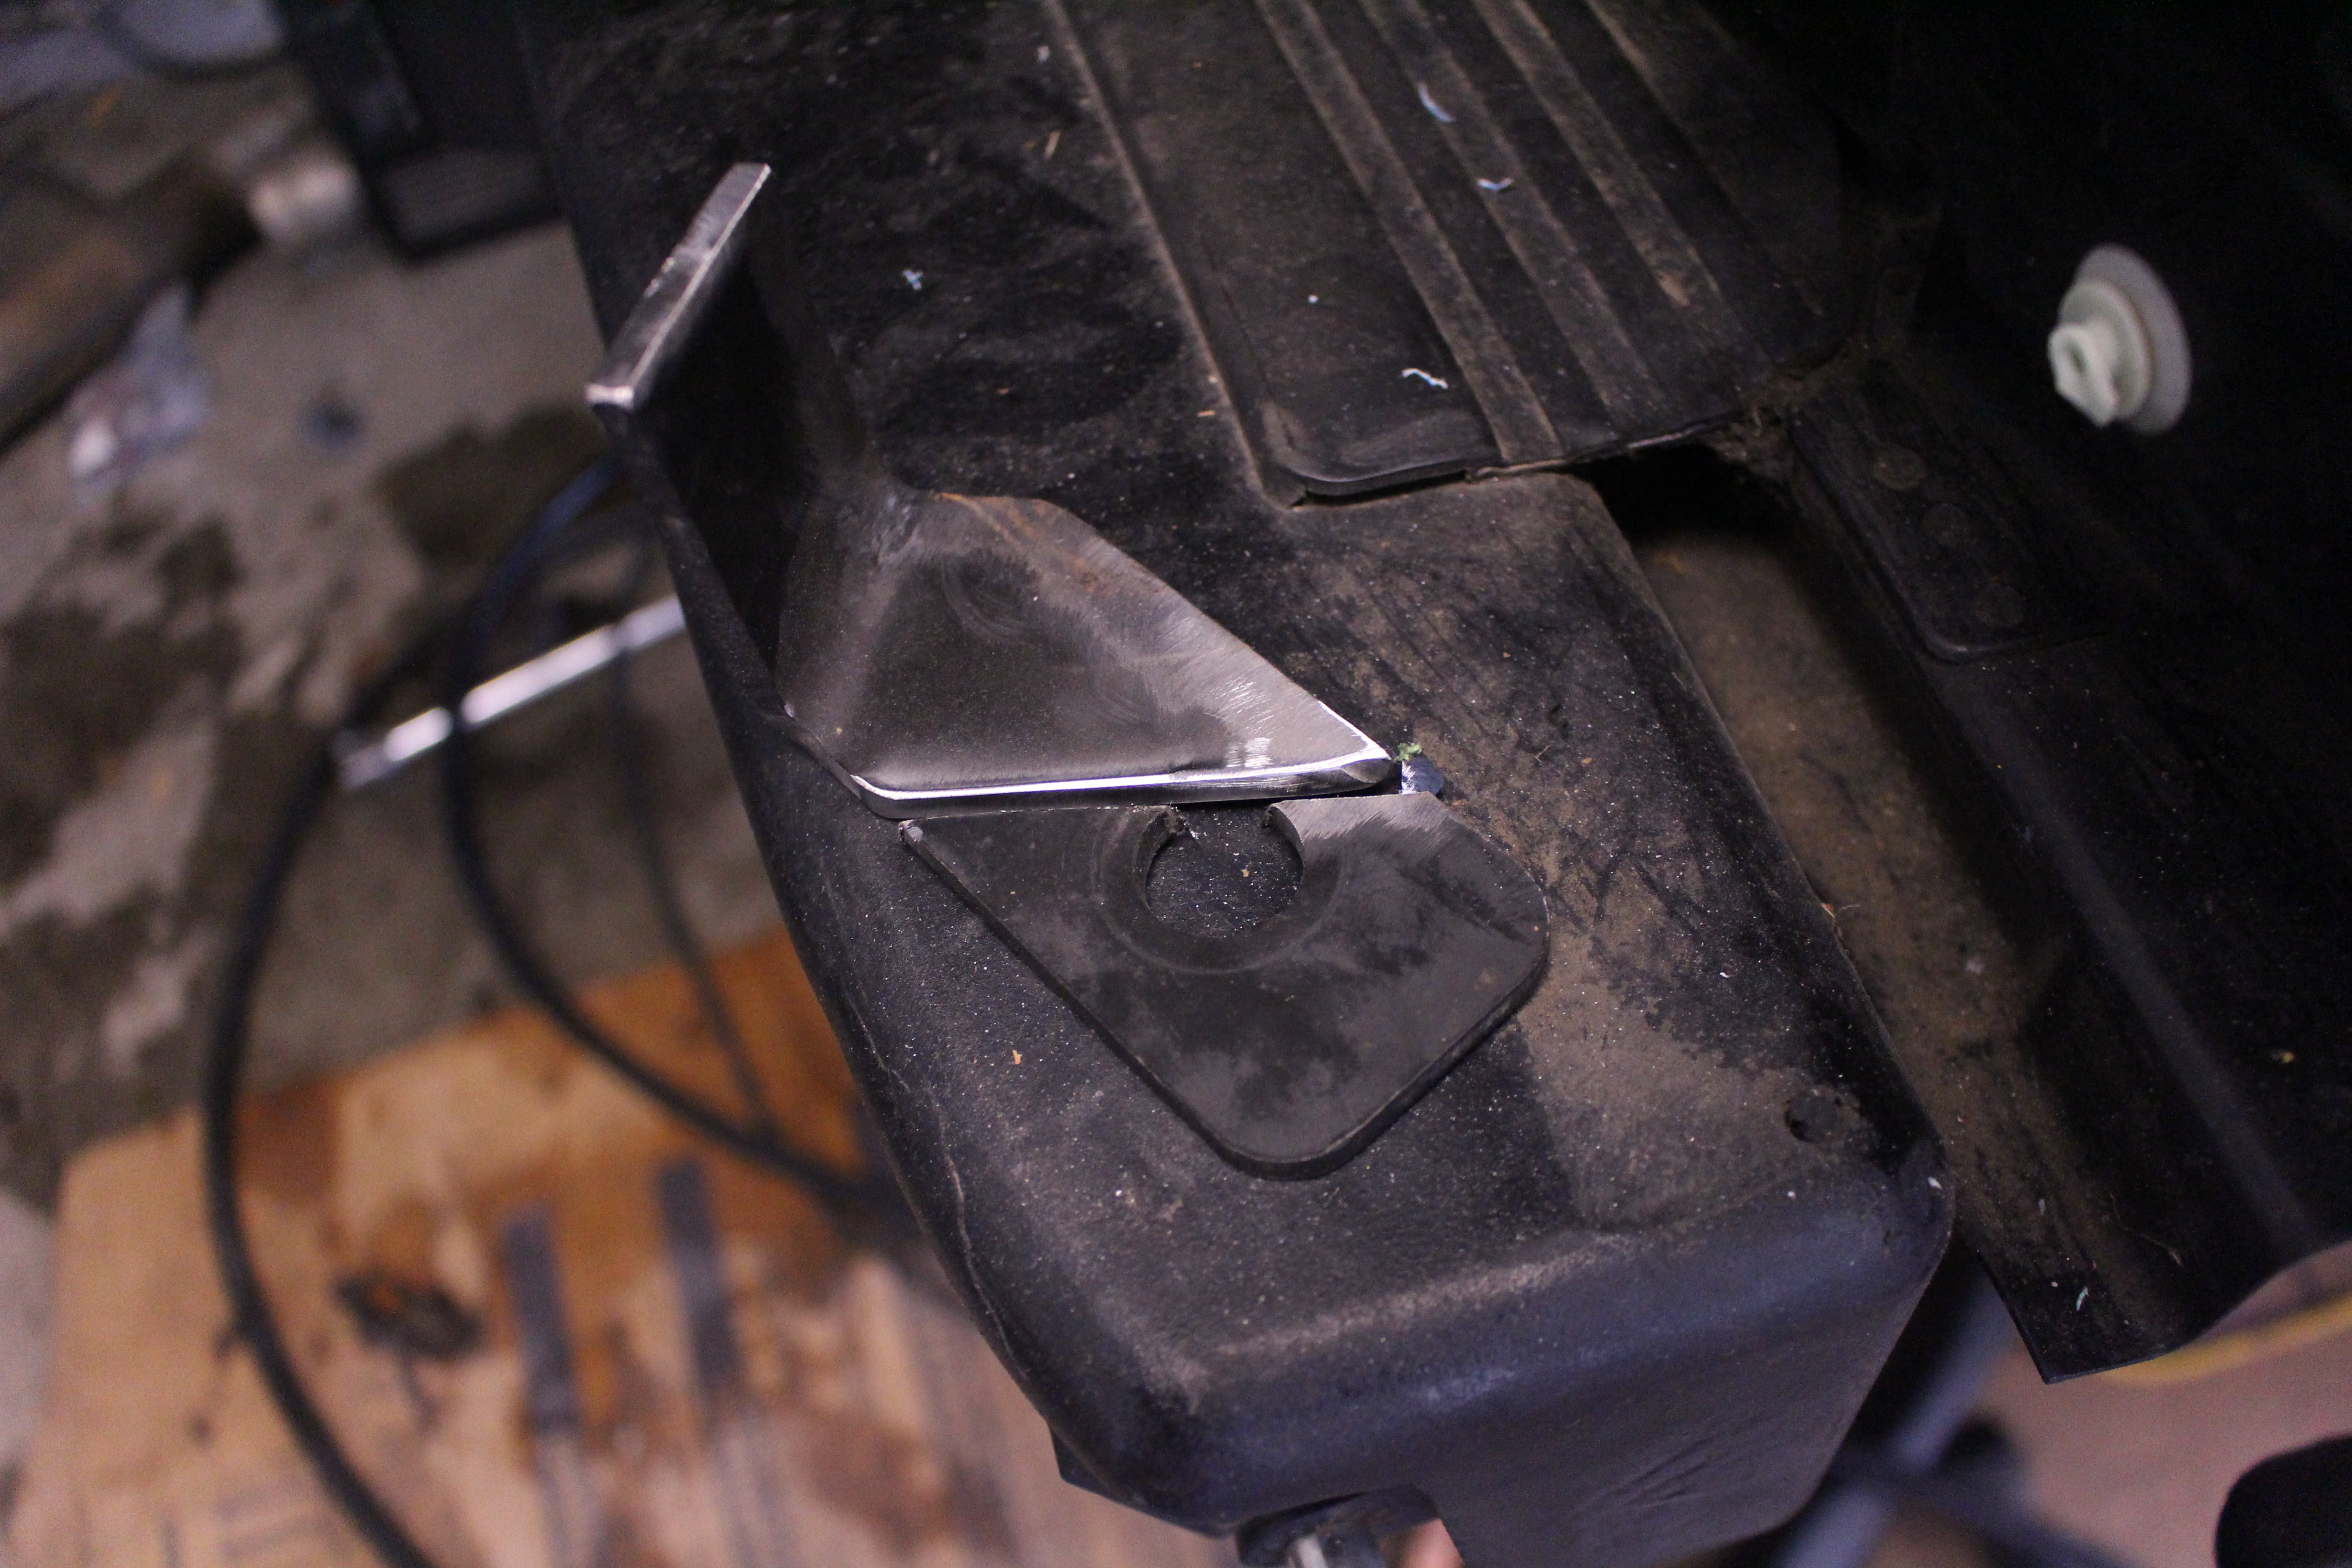
Anyway, this piece is going to be used to reinforce the frame side mount just a little bit. On the back side of the mount (outside of the frame) take your grinder and clean it down to bare metal. The angle of this tab matches up perfectly with the angle of the bend in the frame mount. Sit it in there with the flat side on top, tack it in, and then weld it up. This may not even be necessary, but it gave me some peace of mind.
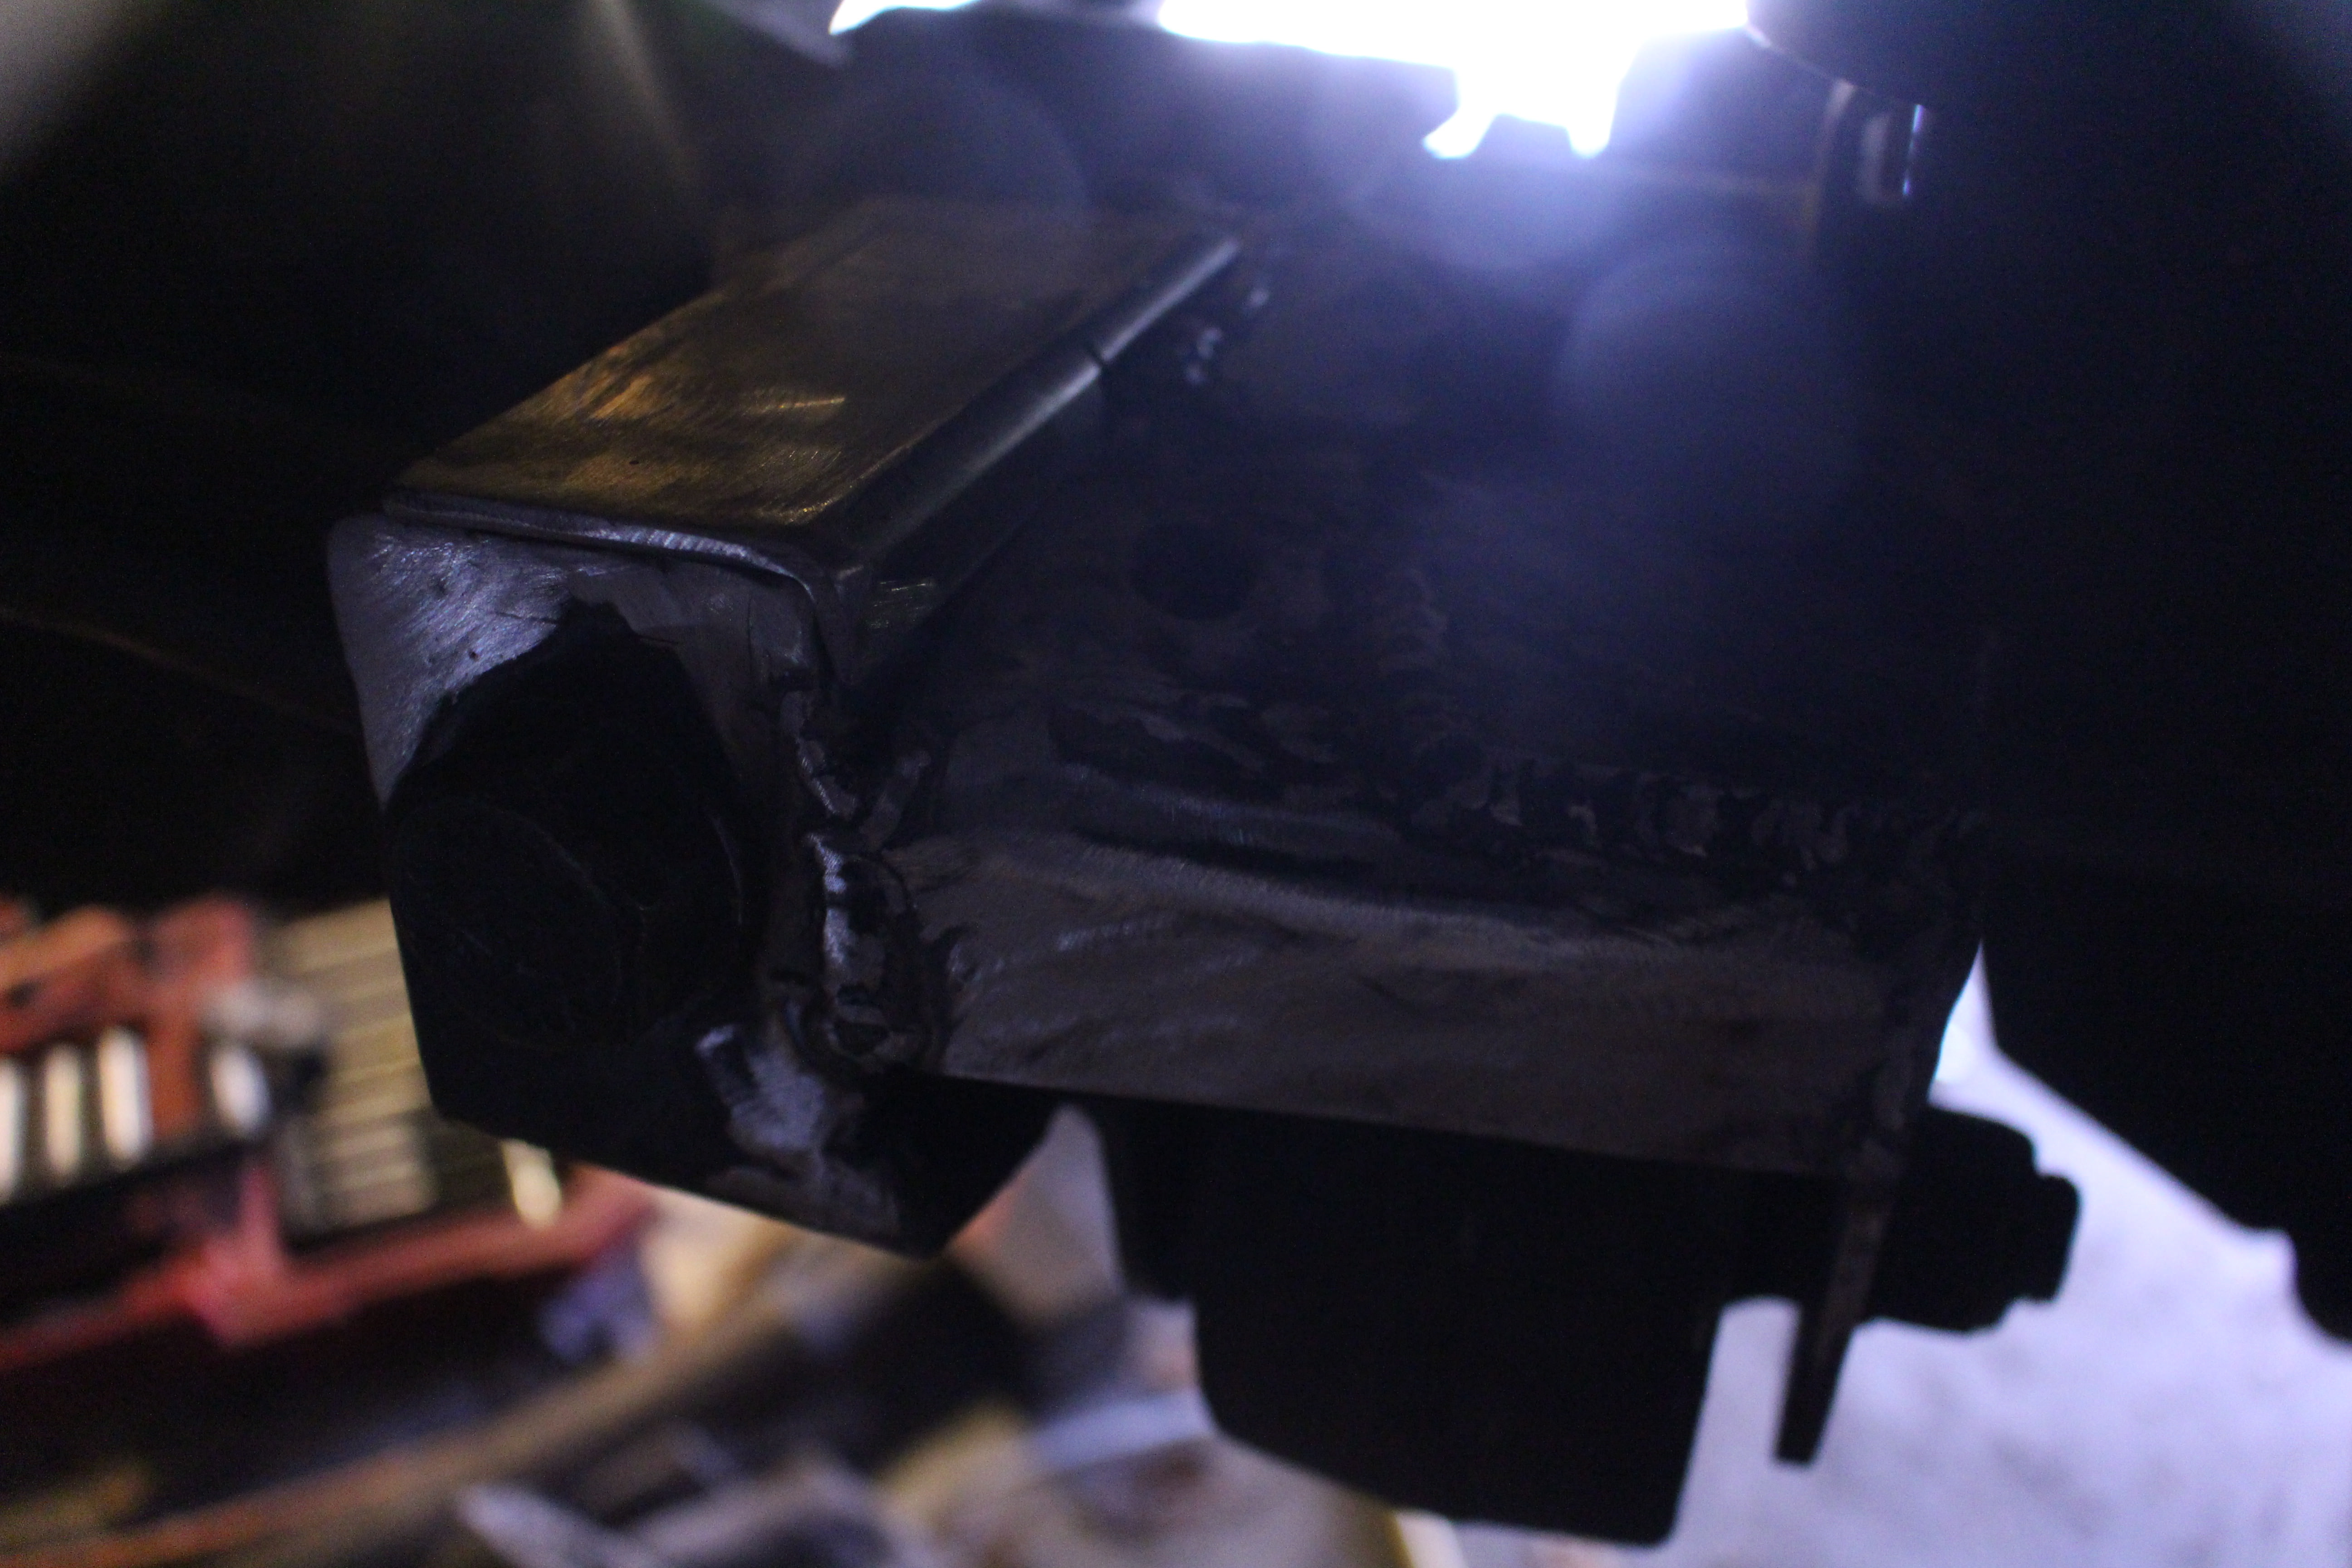
At this point I still wasn't quite happy with the axle side mount. I was almost happy, but just not quite there. I found some scrap I had lying around and I cut out this piece. It was cut from a piece of 1"x2" rectangle tube stock, but you can use about anything.
Take the piece and it's going to go on top of the axle side mount to finish boxing it in more. Weld it up where I show it sitting and then hit everything with some spray paint to prevent rust. Rust preventative paint would be best. I just used plain old Dupicolor Ceramic Engine Enamel I had laying around in black. This stuff is good because it's more chip resistant being ceramic, but pretty much use whatever you've got.
And just like that, you're done!
As always everyone, if you have any questions, comments, or recommendations please post them below! Many of you are more experienced than me and may have some better ideas and others of you are still learning. I'll help answer questions in any way I can!
Weld all the way around. I recommend doing about 1/4 of the diameter at a time and then allowing it to cool. This will keep you from melting the bushing.
I went all the way around twice to fill in the valley that was left after the first go around because of the difference in diameter between the watts link bar and the panhard bar.
Let me say, I know that you typically do NOT want to cool your work with water, ice, etc; you want to let it cool on its own to keep it from hardening and becoming brittle. That said, in this case it was necessary and the way I did it it did not cool it super quickly like spraying water right on the weld would. If you're worried about it you can press the bushing out, weld it normally, and then press a new bushing in. I was in for free at this point and didn't have the cash for another bushing. You can also check to see if it's become hardened with a file. If it bites it hasn't hardened and if the file kinda skates across then it has become hardened.
Now, with it being sleeved and not butt welded, and as securedly as it is welded, I'm not worried about it even if it is hardened there because with the thickness of that section another part of the bar will bend before that breaks.
Anyway, with that out of the way, once you have it welded up take a wire brush to it to clean it off and then hit it with some spray paint.
You're now ready to install the bar. When you tighten the bolts, be sure to do so with the truck on the ground so you don't bind the bushings and wear them out prematurely. As a matter of fact, I never jacked the truck up for any part of this.
Now, remember that piece you cut off that I told you to keep? You're ready for it again. Pull it out, clean up the edge that I show cleaned up here.
Take the same piece and cut the side off as I show here.
Heck, I must've not taken a picture of the next step. I'll grab one next time I think about it.
Anyway, this piece is going to be used to reinforce the frame side mount just a little bit. On the back side of the mount (outside of the frame) take your grinder and clean it down to bare metal. The angle of this tab matches up perfectly with the angle of the bend in the frame mount. Sit it in there with the flat side on top, tack it in, and then weld it up. This may not even be necessary, but it gave me some peace of mind.
At this point I still wasn't quite happy with the axle side mount. I was almost happy, but just not quite there. I found some scrap I had lying around and I cut out this piece. It was cut from a piece of 1"x2" rectangle tube stock, but you can use about anything.
Take the piece and it's going to go on top of the axle side mount to finish boxing it in more. Weld it up where I show it sitting and then hit everything with some spray paint to prevent rust. Rust preventative paint would be best. I just used plain old Dupicolor Ceramic Engine Enamel I had laying around in black. This stuff is good because it's more chip resistant being ceramic, but pretty much use whatever you've got.
And just like that, you're done!
As always everyone, if you have any questions, comments, or recommendations please post them below! Many of you are more experienced than me and may have some better ideas and others of you are still learning. I'll help answer questions in any way I can!

I'm sure the Watts linkage is great for sports cars or on-road use but off-road it really sucks. I've burned through a few of them. finally did a pan hard conversion and it was a massive improvement. Gained about 2 inches of articulation.
Thanks for featuring this cheap fix. I've recently purchased a new D2 with a salvage truck as well. I'll work on this in the New year.
Thanks for featuring this cheap fix. I've recently purchased a new D2 with a salvage truck as well. I'll work on this in the New year.


Thread Starter
|
Camel Trophy
Joined: Aug 2014
Posts: 4,743
Likes: 985
From: Southwestern Virginia
Very welcome, toofar! Throw up a picture when you get it done. I'd love to see it.
Thanks, Juke! Learn to weld, though! I started with soldering. Honestly welding is similar. Just a much hotter version. Haha
Thanks, Juke! Learn to weld, though! I started with soldering. Honestly welding is similar. Just a much hotter version. Haha

Pro Wrench
Joined: May 2016
Posts: 1,617
Likes: 184
From: Lake Tahoe
Nice!! Thanks for the write up. I've been away for a while and just skimmed through the posts over the past few months and was happy to see this.
I want to do it, but with no garage or welding skills... I'm in a pickle.
I want to do it, but with no garage or welding skills... I'm in a pickle.

Baja
Joined: Aug 2013
Posts: 5,845
Likes: 368
From: Near Bordeaux, France
Good write up Alex. I use mine only on road so not an issue, but I sincerely hope you have success with your mod. I noted some time ago that someone, can't remember who exactly, did a similar mod but it tore one existing anchor point off where the Watts was originally fixed. I wish you lots of luck with your mod though.

Baja
Joined: Aug 2013
Posts: 5,845
Likes: 368
From: Near Bordeaux, France


I have to admit, sadly, that my welding is crap also, so you're not alone.
(there are a couple of pure skills that require lots of practice, plastering and welding and sadly I never get enough practice at either)