Rear door (Hatch) actuator: Disco2
#11
I didn’t think so....but. I have had 2 sent to me from salvage yards, perported to be fully functional, and neither of them have worked. The manual release works, but the automated actuator doesn’t. I just had a parts guy I was thinking of buying a 3rd one from say it had to be synced....
but I can’t find anything anywhere that provides evidence of that.
Doc
#12

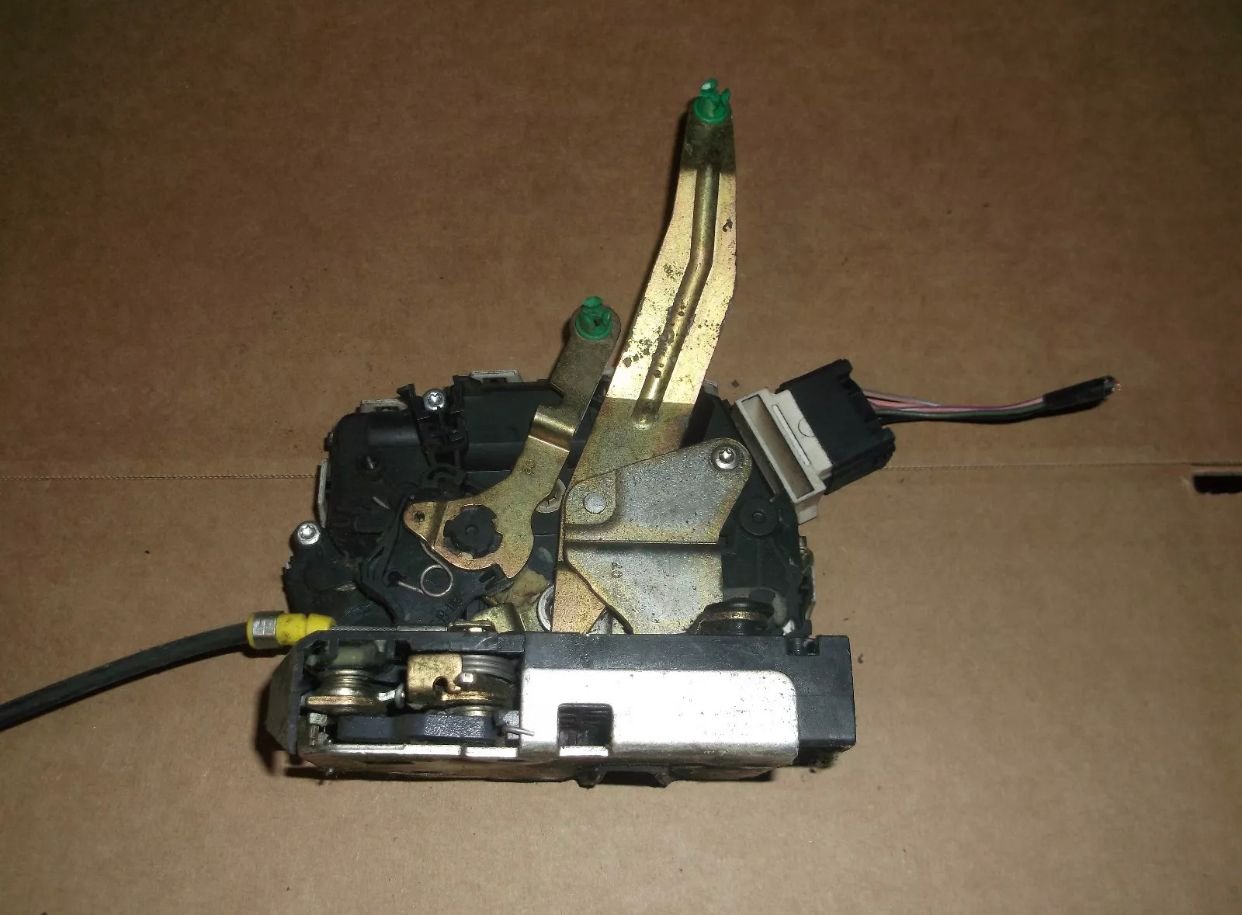
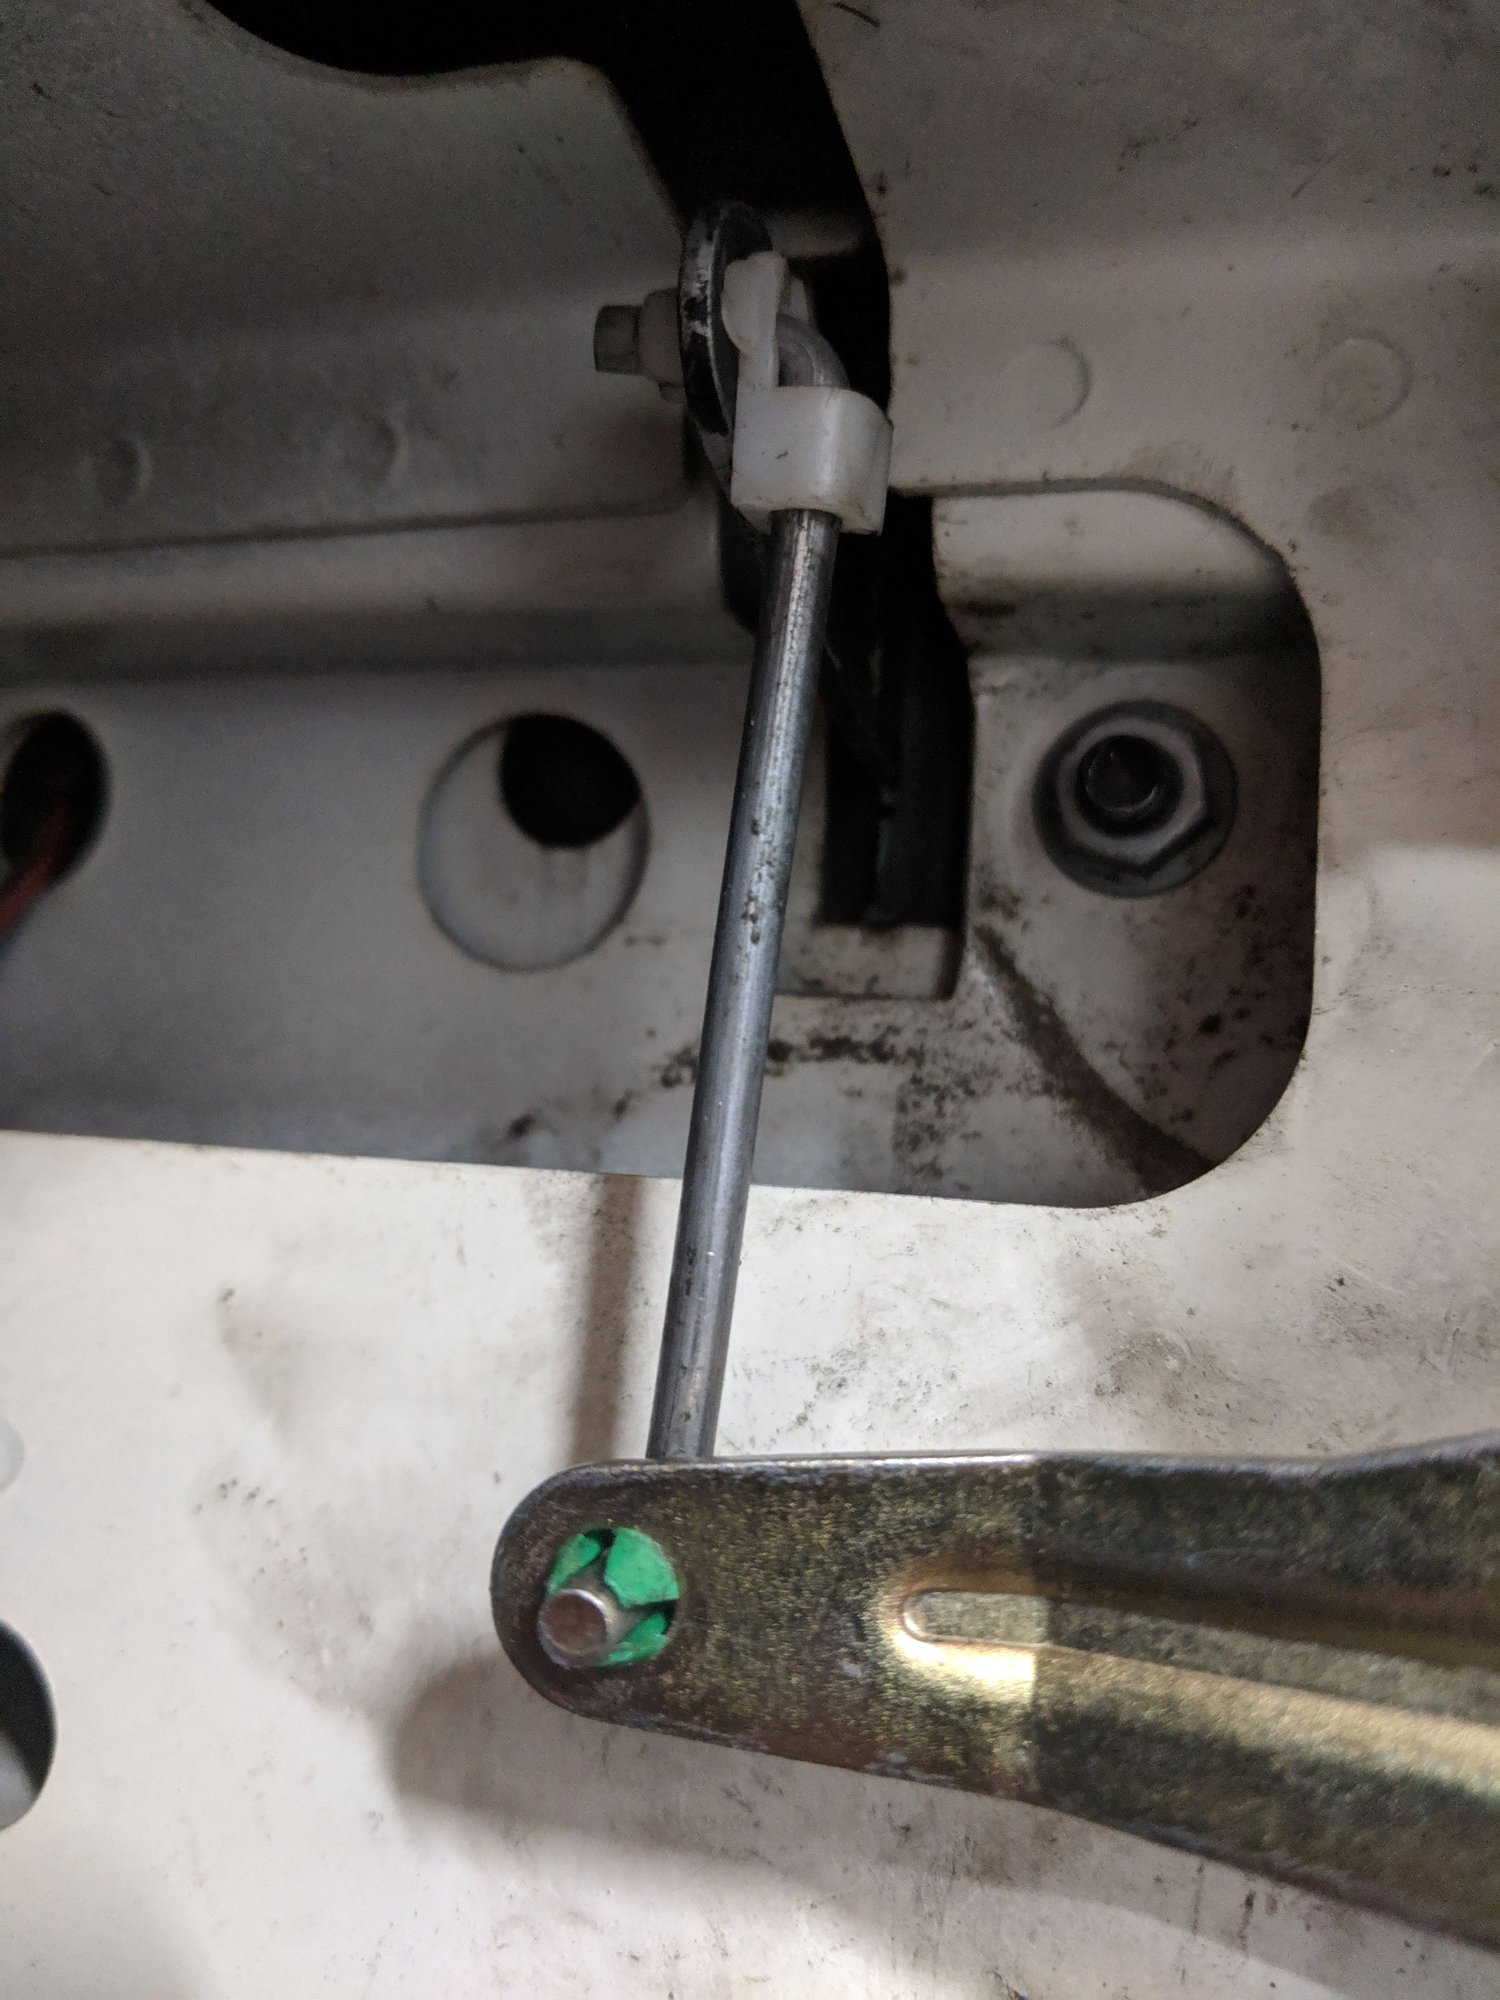
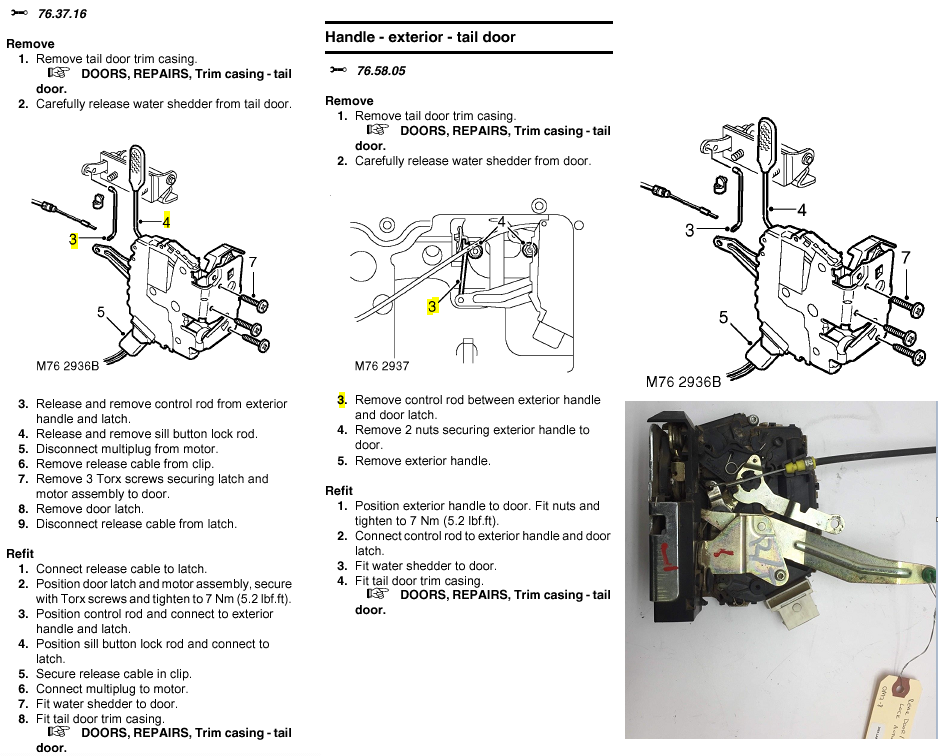
there are 3 connectors in rear lock actuator and mechanism. Two are green in color, one is white in color (connects to tab sticking up from actuator). Make sure the pull button rod is connected thru the white portion of the connector and the “swivel latch” is connected to the rod. If the white connector is not attached, actuator will not unlock. Just worked on this today while changing gasket surrounding the outside rear door latch cover.
there are two rods, and a cable. The two rods lock into the many actuator arm and the locking lift pin via two green bushings; the cable locks into the back of the actuator assembly via a ring.
if I am missing a connection please can you copy this image and circle the area you are referring to?
thanks
Doc
#13
there used to be a tutorial on how to open the case I can no longer find that; can you link that as well.
#15
#16
https://www.roversnorth.com/Land-Rover-Parts/995
Part number 2 is the white connector (door latch cable clip)...The lock rod comes down, seats in the center of the hole once the white bushing is placed in the open hole, then it swivels up and snaps into place around the rod. I guess I should have taken pictures yesterday, sorry. No need to disassemble actuator.
Part number 2 is the white connector (door latch cable clip)...The lock rod comes down, seats in the center of the hole once the white bushing is placed in the open hole, then it swivels up and snaps into place around the rod. I guess I should have taken pictures yesterday, sorry. No need to disassemble actuator.
Last edited by Frtpilot; 10-25-2018 at 03:36 PM. Reason: Error
#17
Forgive the primitive artwork.
You are missing one important part, the white clip w/swivel.
Install actuator in position, then slide sill button and rod up thru the hole on the sill. Sill rod will be shaped at bottom like backwards capital "L"
The leg on the "L" must face front, and will slide into the white bushing with the swivel connection. The connection is unlike the green connectors.
Match the length of the down rod, and you will find where it is supposed to go in the actuator. Unfortunately, the Rave pics and other diagrams appear to be lacking in definition and clarity.
If you don't find the white connector, Rovers North has them. See previous link I sent you. Next time, I'll take pictures. Sorry, in a hurry, but hope it helps!
#18
Forgive the primitive artwork.
You are missing one important part, the white clip w/swivel.
Install actuator in position, then slide sill button and rod up thru the hole on the sill. Sill rod will be shaped at bottom like backwards capital "L"
The leg on the "L" must face front, and will slide into the white bushing with the swivel connection. The connection is unlike the green connectors.
Match the length of the down rod, and you will find where it is supposed to go in the actuator. Unfortunately, the Rave pics and other diagrams appear to be lacking in definition and clarity.
If you don't find the white connector, Rovers North has them. See previous link I sent you. Next time, I'll take pictures. Sorry, in a hurry, but hope it helps!
You are missing one important part, the white clip w/swivel.
Install actuator in position, then slide sill button and rod up thru the hole on the sill. Sill rod will be shaped at bottom like backwards capital "L"
The leg on the "L" must face front, and will slide into the white bushing with the swivel connection. The connection is unlike the green connectors.
Match the length of the down rod, and you will find where it is supposed to go in the actuator. Unfortunately, the Rave pics and other diagrams appear to be lacking in definition and clarity.
If you don't find the white connector, Rovers North has them. See previous link I sent you. Next time, I'll take pictures. Sorry, in a hurry, but hope it helps!

#19
Forgive the primitive artwork.
You are missing one important part, the white clip w/swivel.
Install actuator in position, then slide sill button and rod up thru the hole on the sill. Sill rod will be shaped at bottom like backwards capital "L"
The leg on the "L" must face front, and will slide into the white bushing with the swivel connection. The connection is unlike the green connectors.
Match the length of the down rod, and you will find where it is supposed to go in the actuator. Unfortunately, the Rave pics and other diagrams appear to be lacking in definition and clarity.
If you don't find the white connector, Rovers North has them. See previous link I sent you. Next time, I'll take pictures. Sorry, in a hurry, but hope it helps!
You are missing one important part, the white clip w/swivel.
Install actuator in position, then slide sill button and rod up thru the hole on the sill. Sill rod will be shaped at bottom like backwards capital "L"
The leg on the "L" must face front, and will slide into the white bushing with the swivel connection. The connection is unlike the green connectors.
Match the length of the down rod, and you will find where it is supposed to go in the actuator. Unfortunately, the Rave pics and other diagrams appear to be lacking in definition and clarity.
If you don't find the white connector, Rovers North has them. See previous link I sent you. Next time, I'll take pictures. Sorry, in a hurry, but hope it helps!
I know how the rods and bushings come apart and return to position. I know how to reconnect the pull cable.
this issue has nothing to do with any of the rods or cables not being connected; this is an internal issue with the electronic actuator inside the door lock not releasing the sill rod.
so unless we are on two entirely different wave lengths here, I’m not sure what you are explaining to me.
Doc
#20


