When you click on links to various merchants on this site and make a purchase, this can result in this site earning a commission. Affiliate programs and affiliations include, but are not limited to, the eBay Partner Network.
Seems like this conversion hasn't been talked about in a few years so thought I'd bring it back.
I could use a little help as to how to install it. I've never welded before.
First off, which brackets should I get? I do have a 3 inch lift by Terafirma shocks and coils. Is that enough space for a centered bracket or stick with off-set?
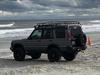
Photo #1:
I've seen guys weld the axle bracket outside of the spring to achieve more articulation, is this okay? This is the driver's side looking from the rear.
Next, do I get a inside or outside frame bracket?
Pic #2:
And install whereexisting watts linkage arm bushing is located? View from rear passenger side.
I'm not sure if my axles are stock or aftermarket length. Anyway to tell? I'm a new owner. Overall width does seem wider than normal.
I just need a little guidance, preferably from people who have done the conversion but all input welcomed. Much appreciated~
Last edited by TaylorCadence; Apr 13, 2018 at 08:23 PM.
Looks like he relocated the brake line to the new bracket. In search of more info on this method.
Another thing dawned on me... Wondering which side (drivers or passenger) the upper mounting bracket should be? Some argue that it should be opposite of front panhard, which would be drivers side I believe.
I did one a few months ago and did a write up. You can find it in the link in my signature.
If you've never welded before, do NOT attempt the panhard conversion. Have someone else weld it. It is a high stress point on the suspension and you would not be the first person to have one break free on them, which is very bad.
As for which side to mount it, I did the same way as the front just because of ease. I don't think it matters that much, honestly. It's been perfect for me how it is.
Thanks for the clarification. I�ll look at your write up. Was a little nervous of welding, just never been afraid to dive in to new things hah. I tried blasting out a notice here locally if anyone can do the job for me but so far no luck(small island). Would this be an expensive labor cost for a shop?
Found out that shipping the Ruff stuff kit out here too is gonna be around $100. This is becoming a little more pricey compared to just replacing the linkage
Yeah, metal fabrication is typically pretty costly in any form. This would fall under that category. I would only trust it to a dedicated welding shop or metal fabrication shop. Not just a mechanic with a welder.
I absolutely support diving in head first 9 times out of 10, but this is the 10th time that could put lives at risk. I'd still recommend learning to weld though! It's incredible how often it becomes useful once you learn. So many simple little rinky don't problems solved just by that one skill.
What part of your Watts went out? It's quite straightforward (and pretty reasonable cost-wise) to replace the entire "snowman" assembly in the middle rather than mess around with replacing the various bushings.
Yeah, metal fabrication is typically pretty costly in any form. This would fall under that category. I would only trust it to a dedicated welding shop or metal fabrication shop. Not just a mechanic with a welder.
I absolutely support diving in head first 9 times out of 10, but this is the 10th time that could put lives at risk. I'd still recommend learning to weld though! It's incredible how often it becomes useful once you learn. So many simple little rinky don't problems solved just by that one skill.
I believe it, not going to go a shop route then. I did land one connection that can help me but he�s no where near being a skilled welder. Just has one for random projects. Not sure what to do now...
ill def pick it up though maybe they have classes around at the college.
What part of your Watts went out? It's quite straightforward (and pretty reasonable cost-wise) to replace the entire "snowman" assembly in the middle rather than mess around with replacing the various bushings.
top bushing went out. I have a parts rover to pull from. I have the center bolt to remove and then it�ll be free to inspect how worn those bushings are. If they are shot, I was going to do the panhard conversion. But you�re right, now I�m leaning toward the Lucky8 replacement for a little sturdier of a unit from the OEM.