
Rear Rotoflex Delete / U-joint Conversion ($125)
#1
 11-17-2017 | 07:41 PM

Thread Starter
|
Camel Trophy
Joined: Aug 2014
Posts: 4,734
Likes: 971
From: Southwestern Virginia
Hey guys! Finished up my rotoflex delete a couple weeks ago and I couldn't find a good write up online anywhere, so here's one for all you guys.
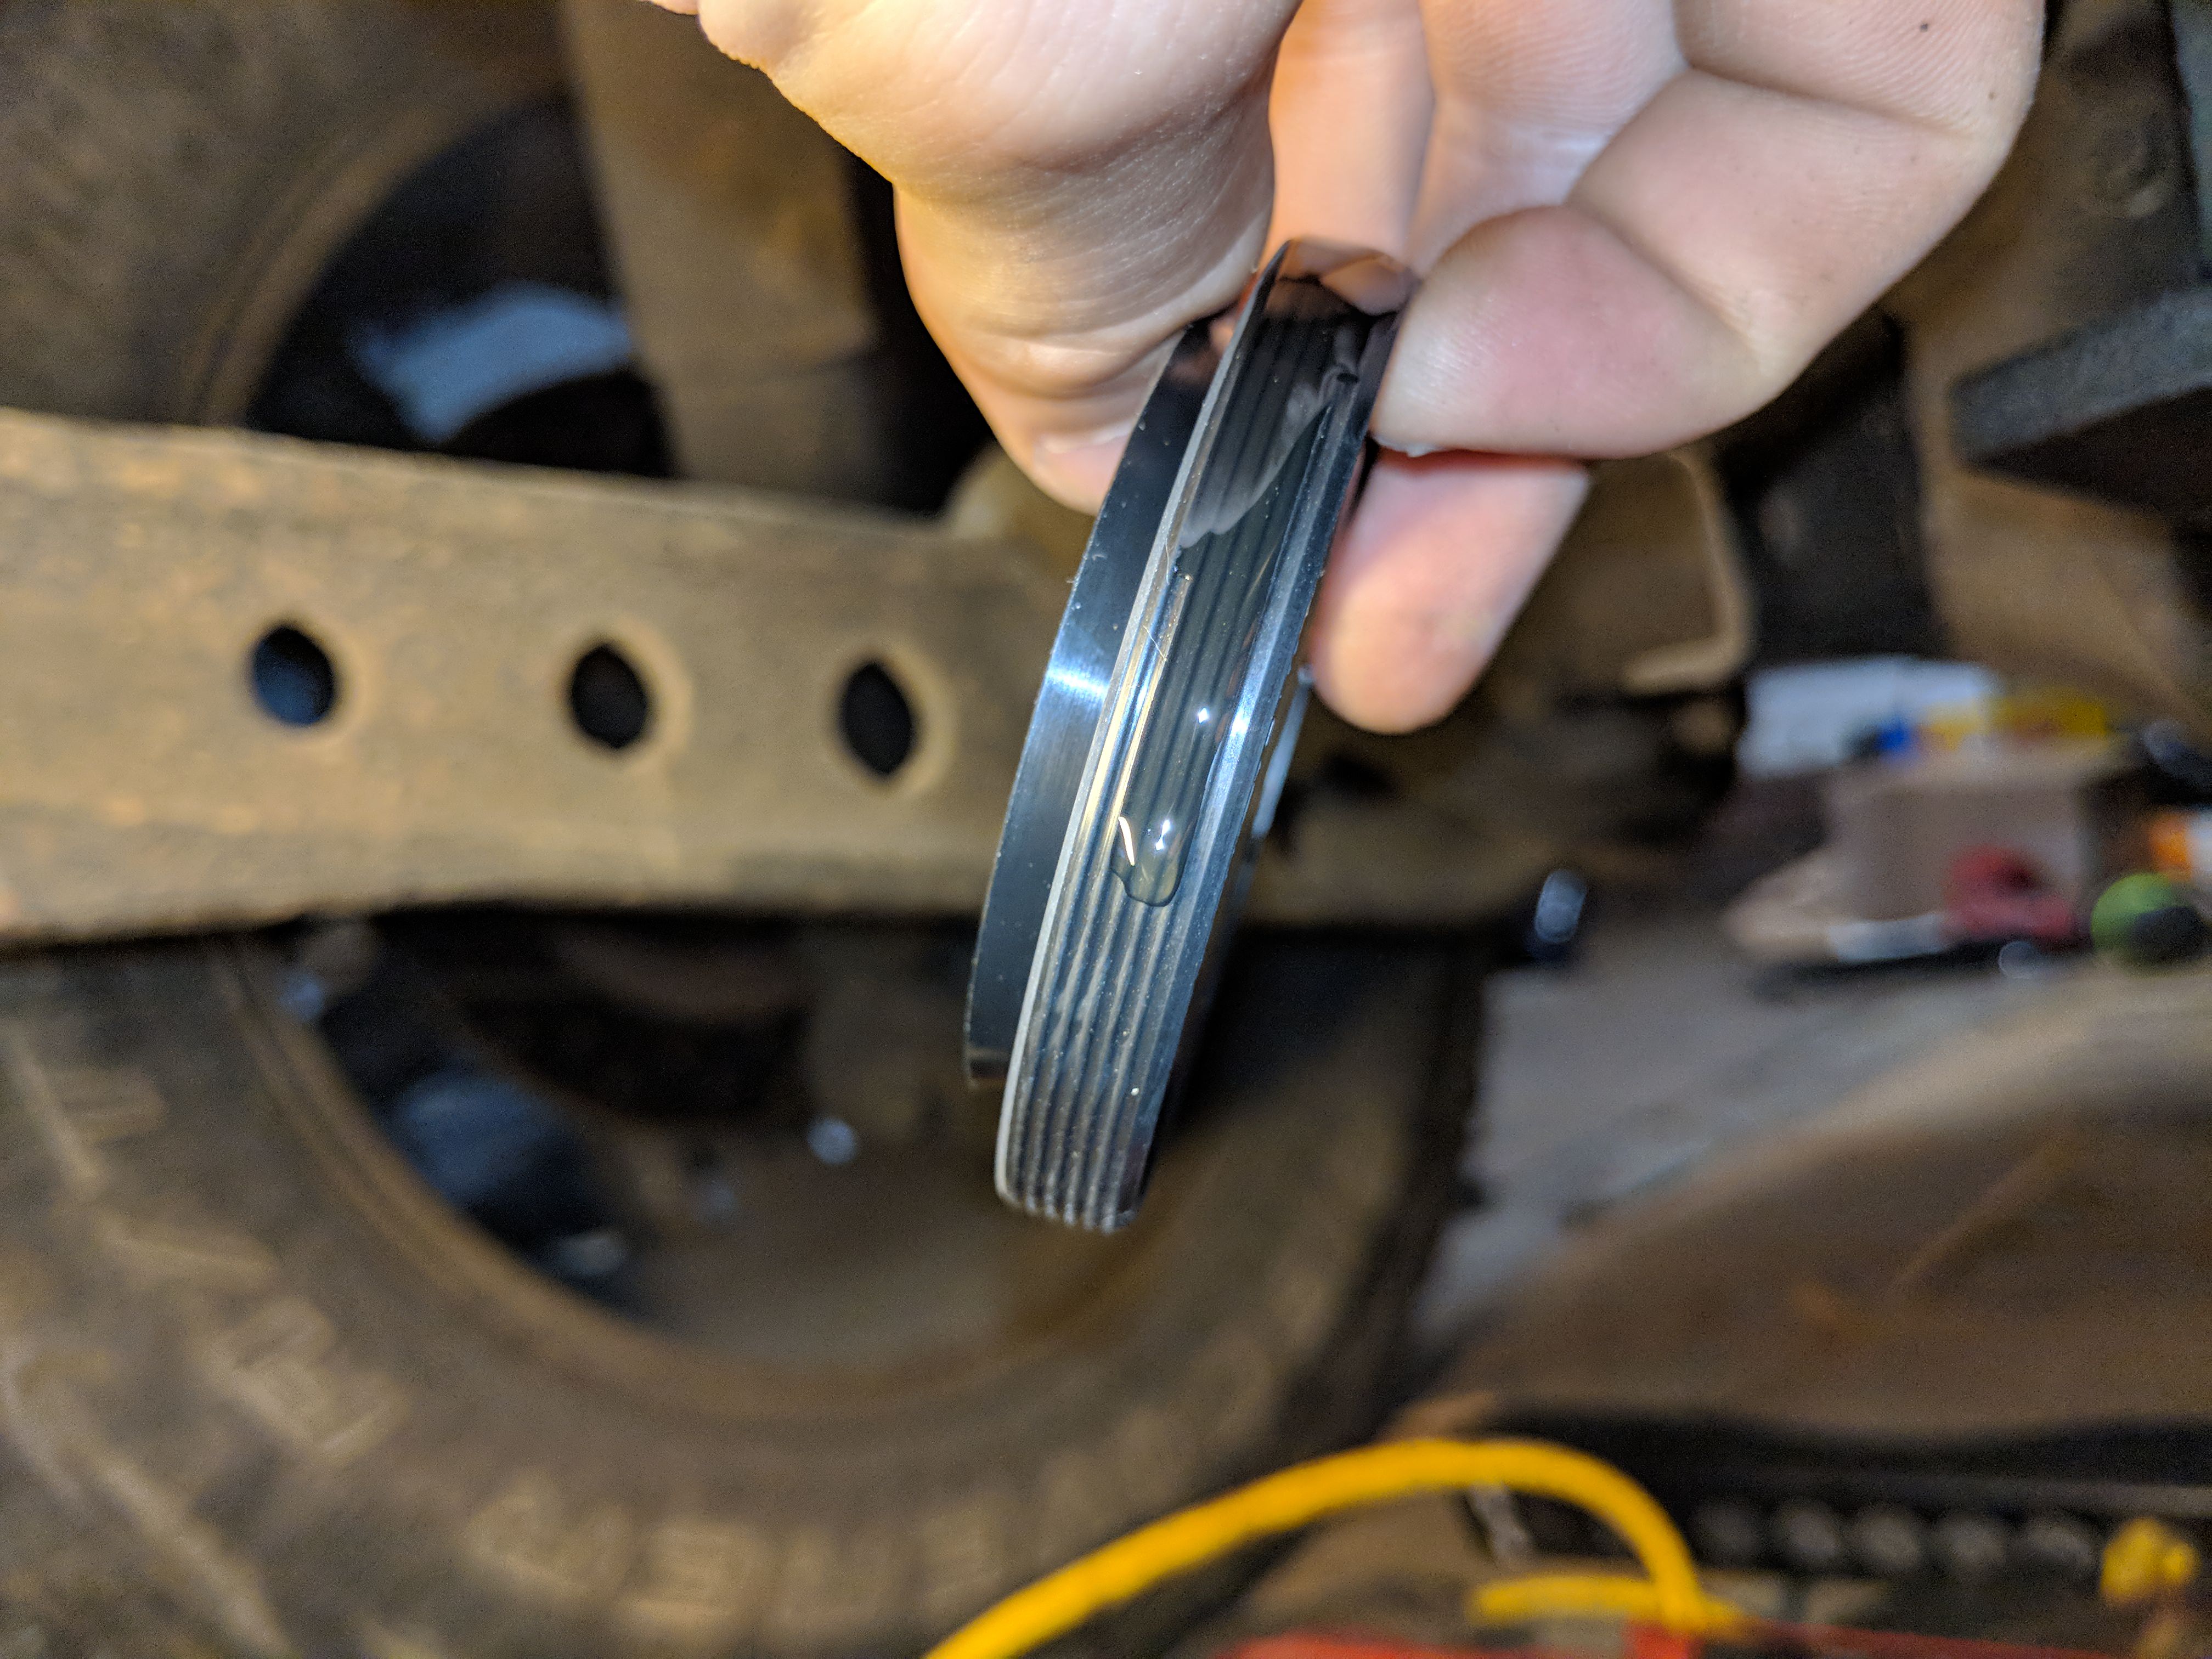
The parts I used were the rotoflex delete kit from Lucky 8 (with forum member discount) and a Discovery 1 rear driveshaft from eBay, used. The driveshaft was $68, the flange from L8 will vary depending on how far it has to ship to you.
Let me just say, definitely get the kit from L8 instead of worrying with a used flange. The kit comes with a new seal and a new bolt with loctite and I paid less than $15 more than I paid for my first used flange, which ended up being from a P38 (someone shipped me the wrong part) which won't work; the shaft diameter is much larger and it's a little longer.
Other than that, you need 4 3/8" bolts with nyloc nuts. I think my bolts were 1.5" which gave me some extra length. Also a 4" 8mm x 1.25 pitch bolt. Shoot, I think that's the right pitch, I can't remember exactly. Whichever one is most common. You also need a tap and die of the same size.
Once you've got all that, lets crawl under your truck and start removing the rear driveshaft and rotoflex. I just used two crescent wrenches.
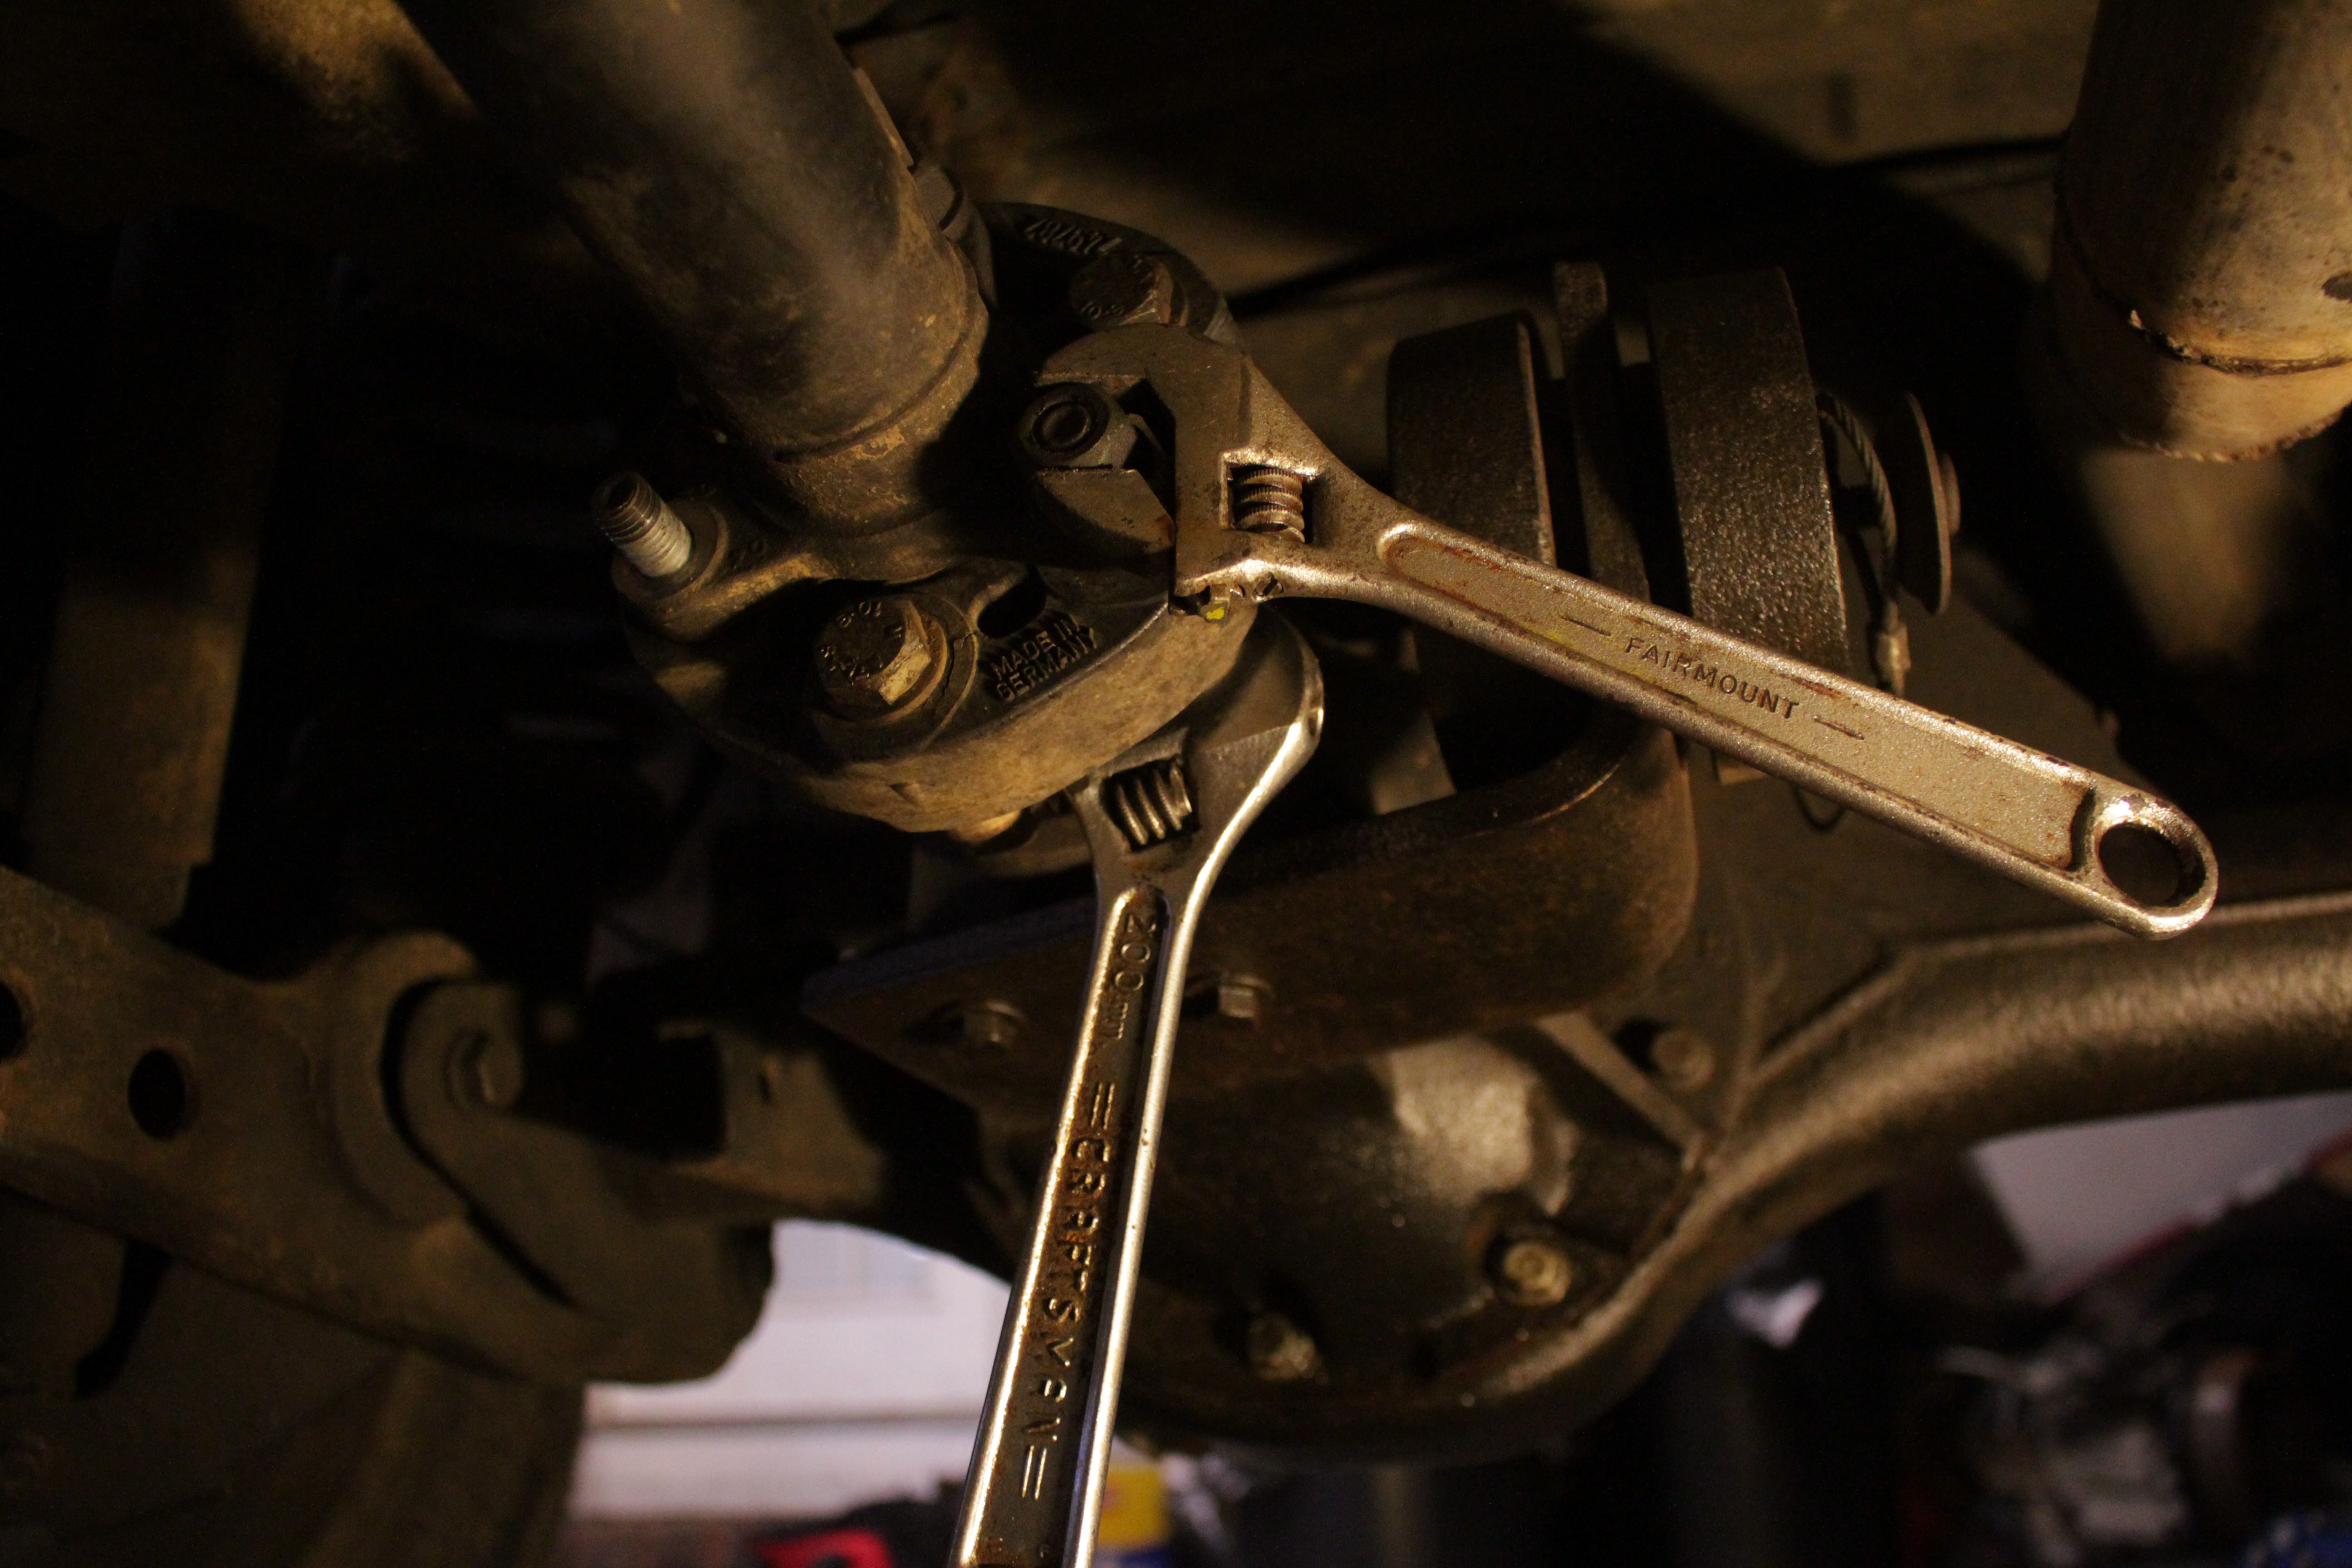
I removed the driveshaft first, then I got the rotoflex off. I had to use a breaker bar; these were on tight.
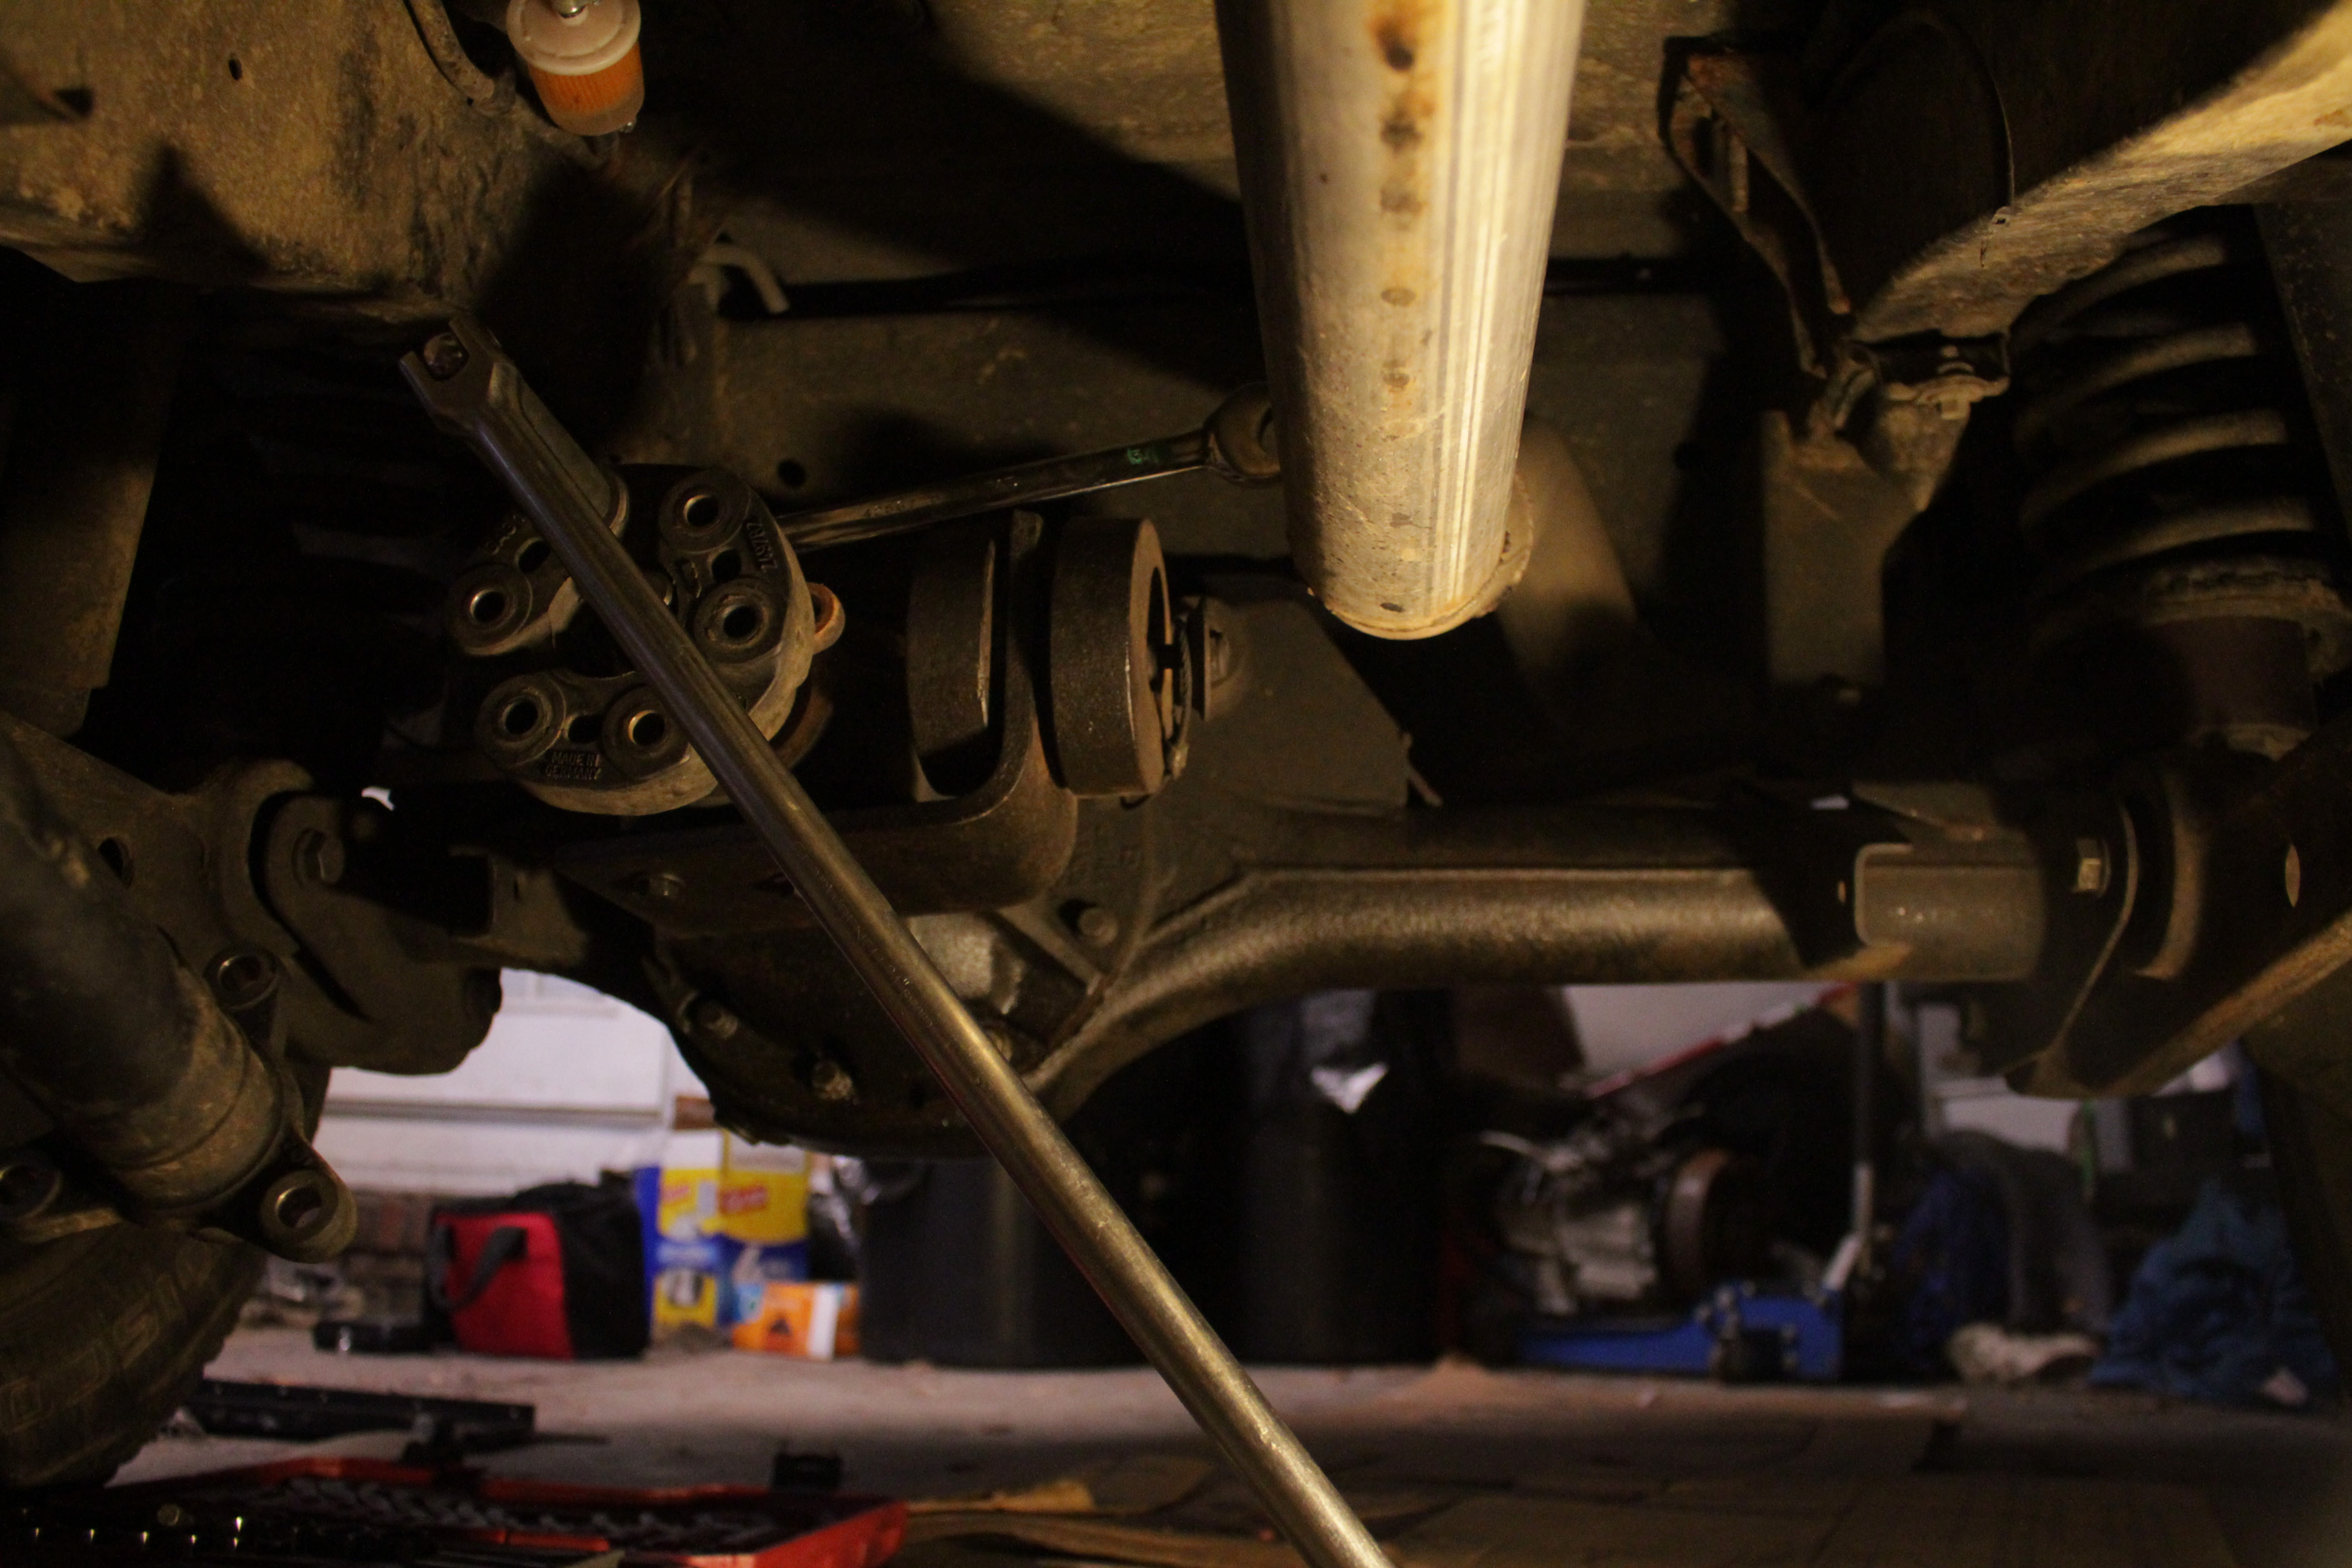
I didn't get a picture of removing the other side, but you fellas know how to take 4 nuts off if you're tackling this project.
Now get back out from under your truck and grab your long 8mm bolt and the die. Stick your die in a vice or something. Run the bolt all the way down the head in the tap; you're going to need the threads. A drill makes this quick work; use some gear oil or cutting fluid. Careful, the bolt will be hot.
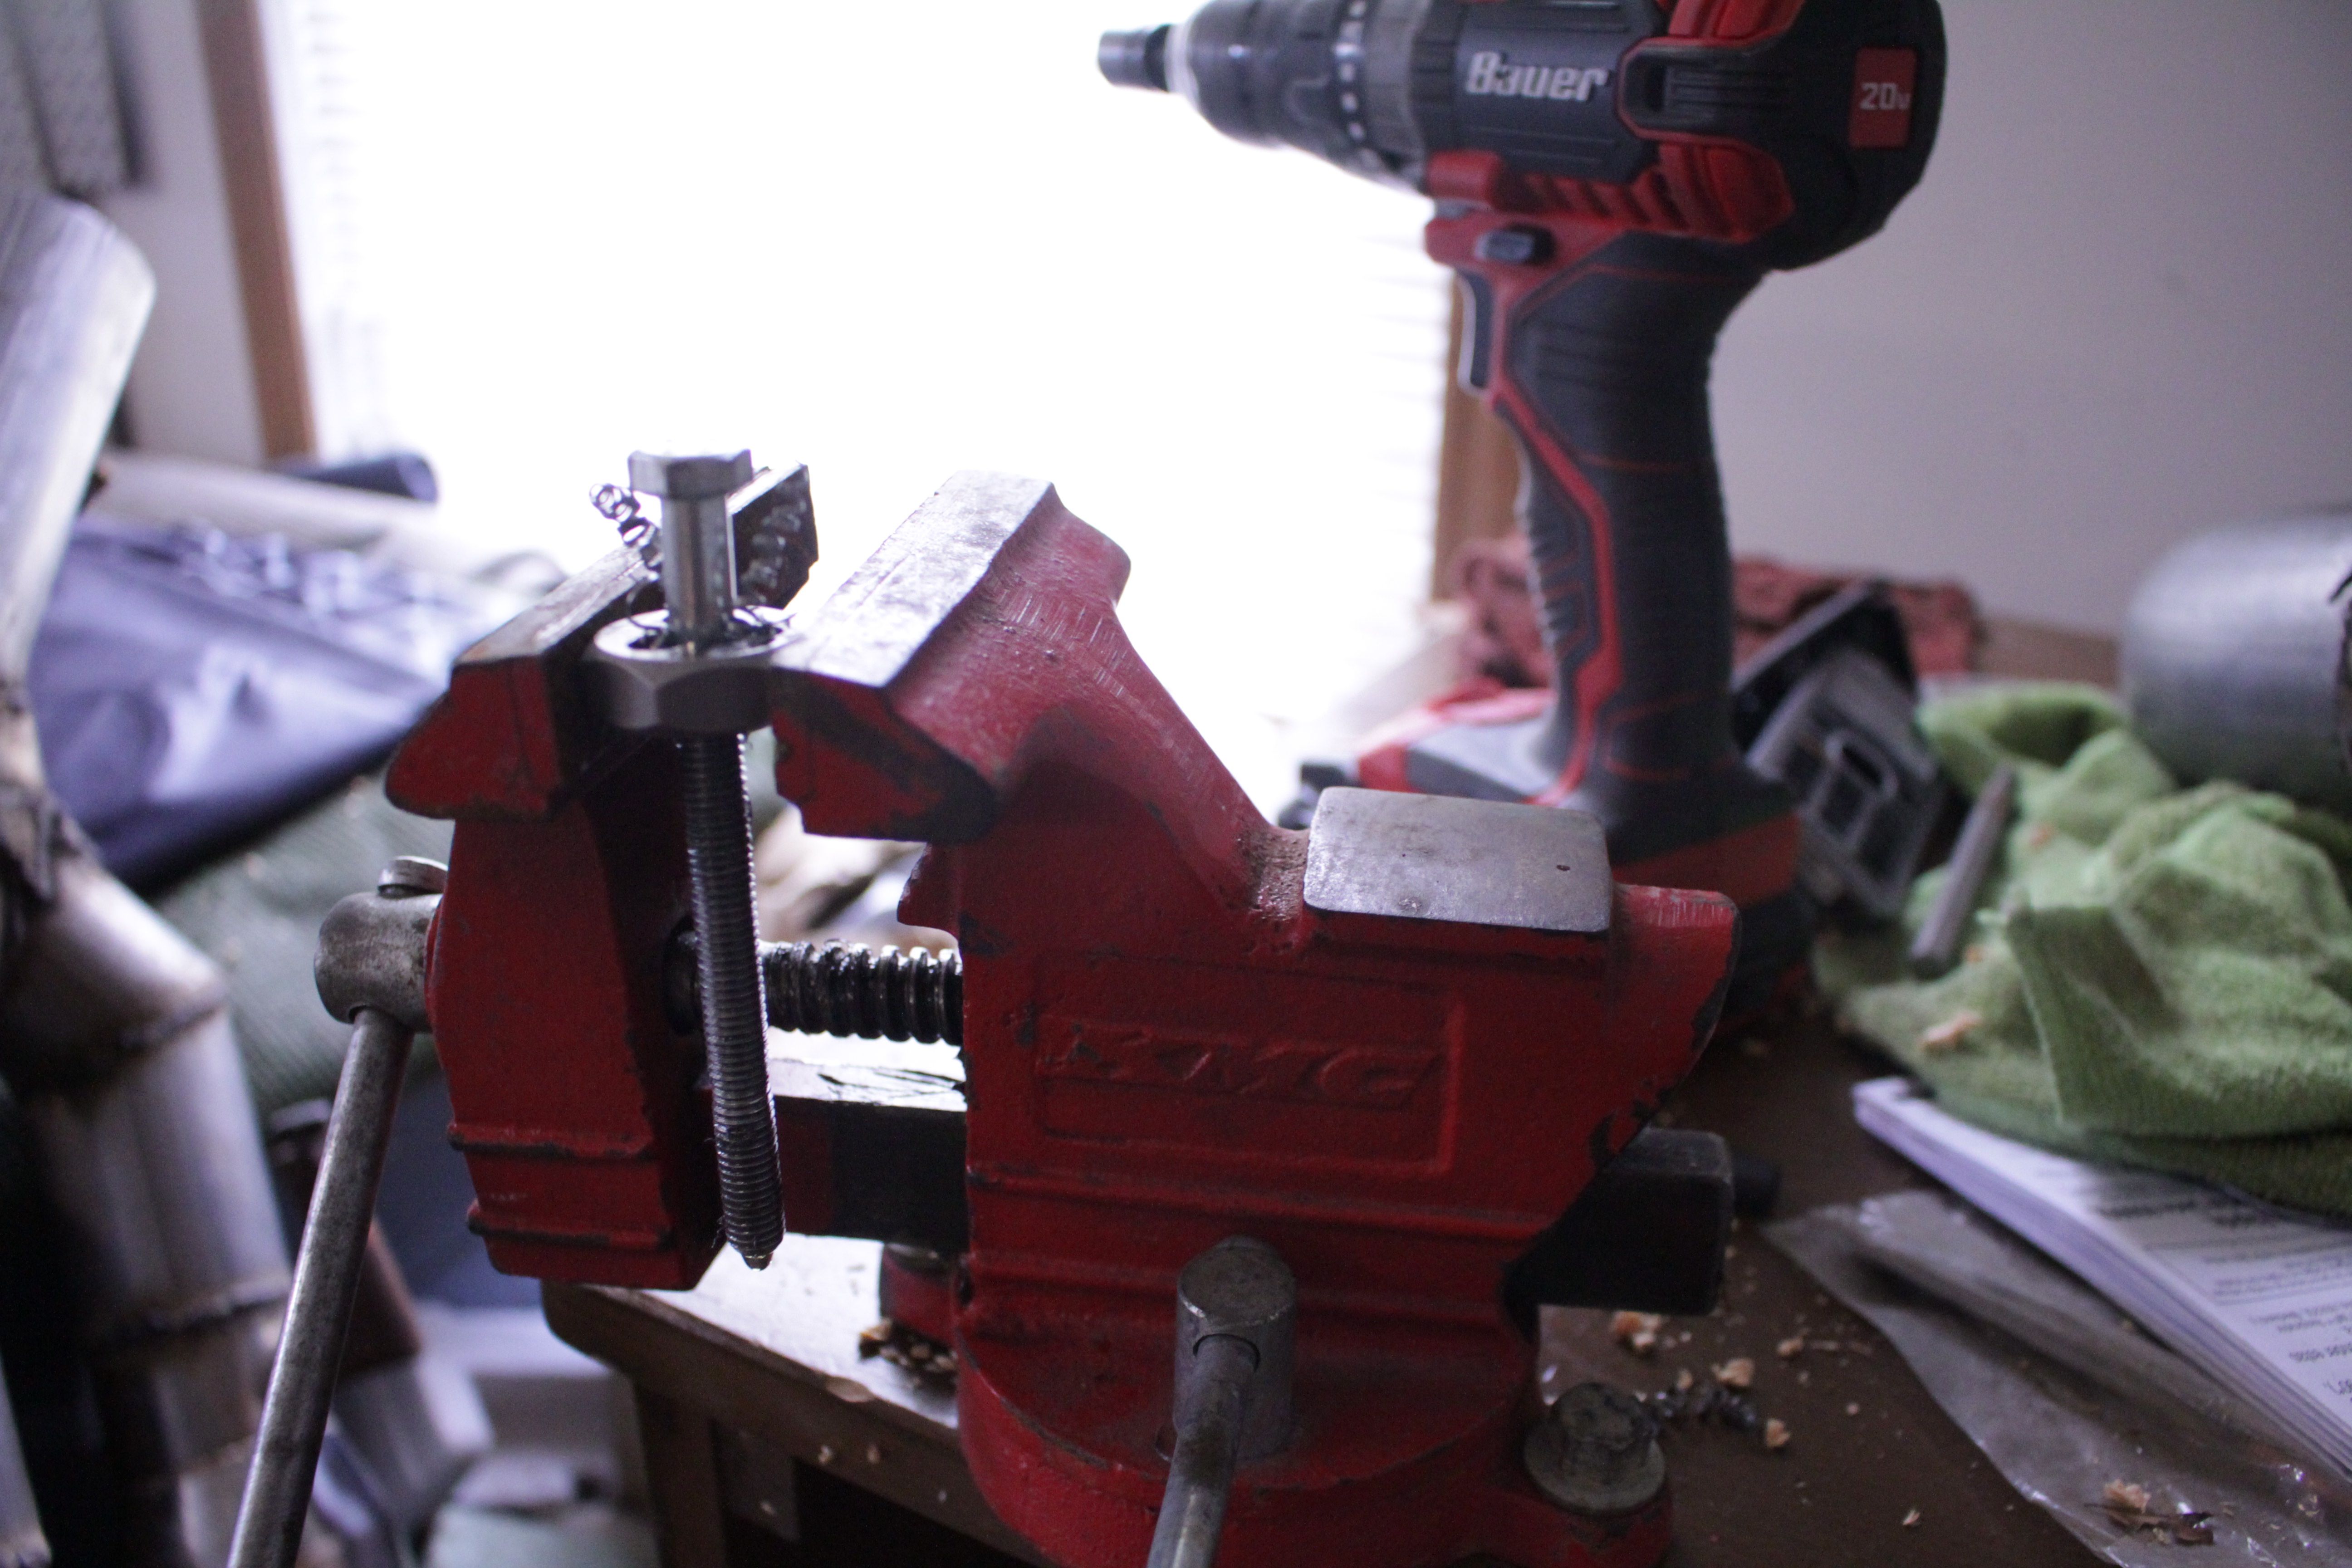
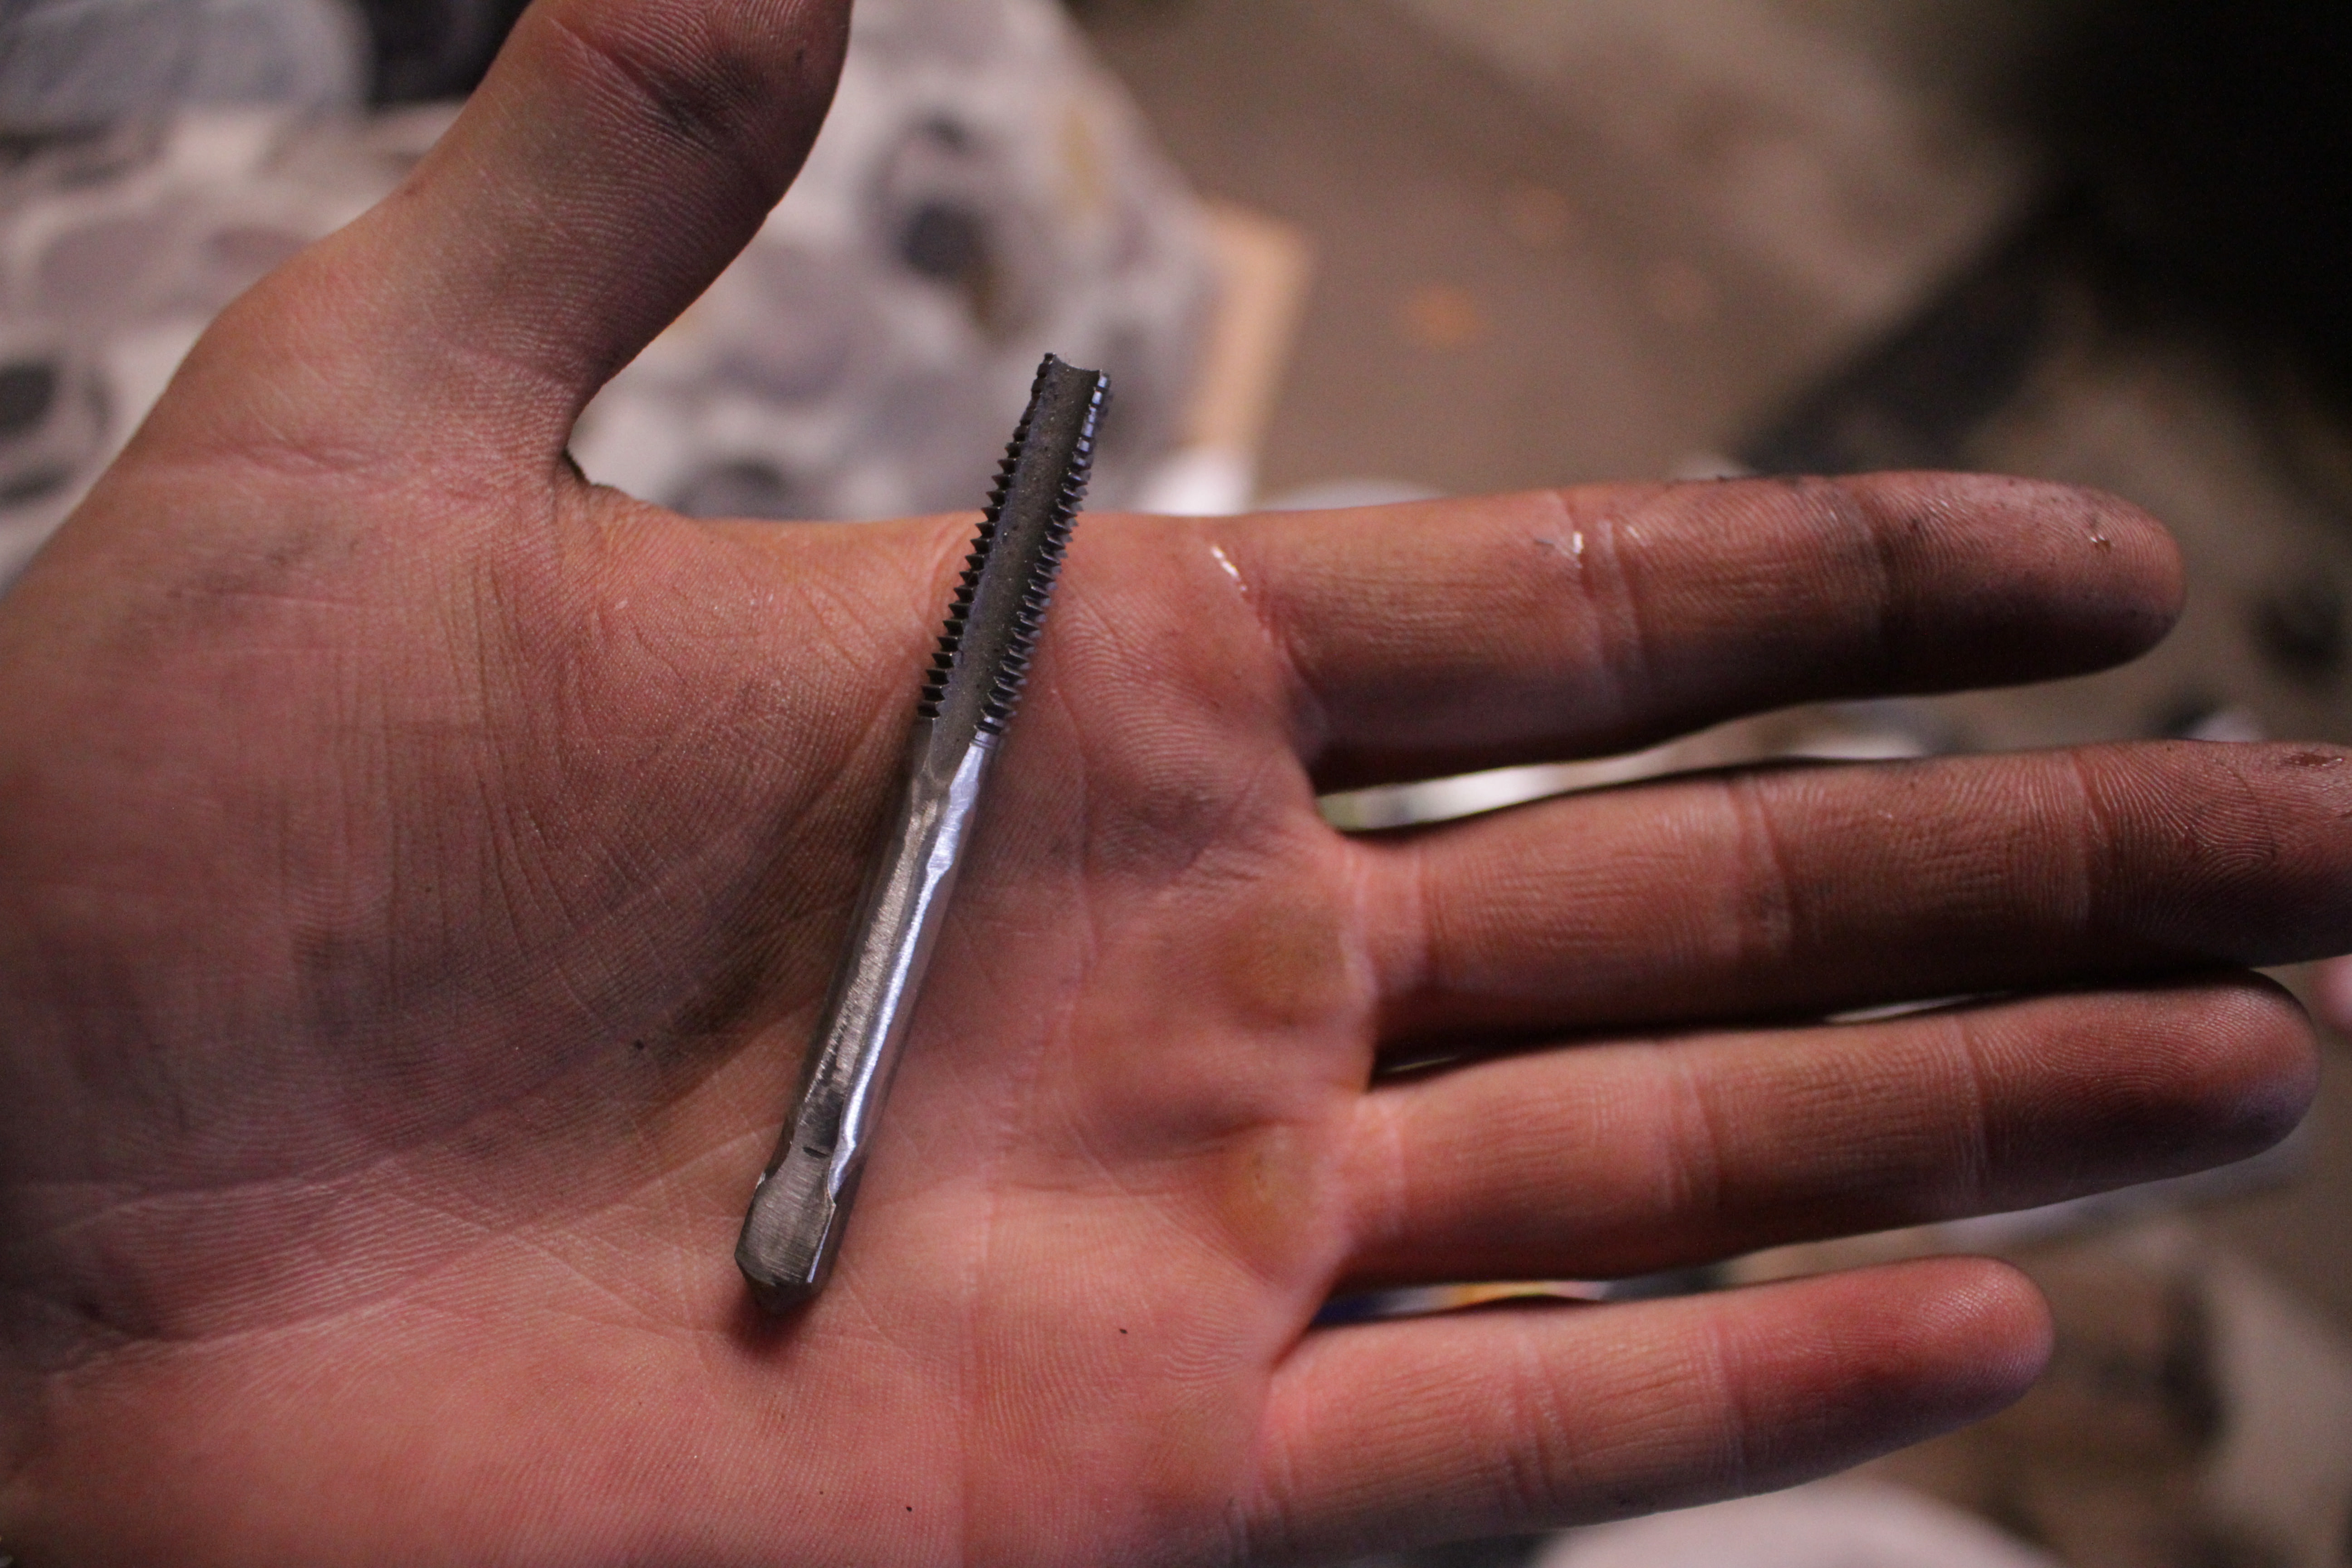
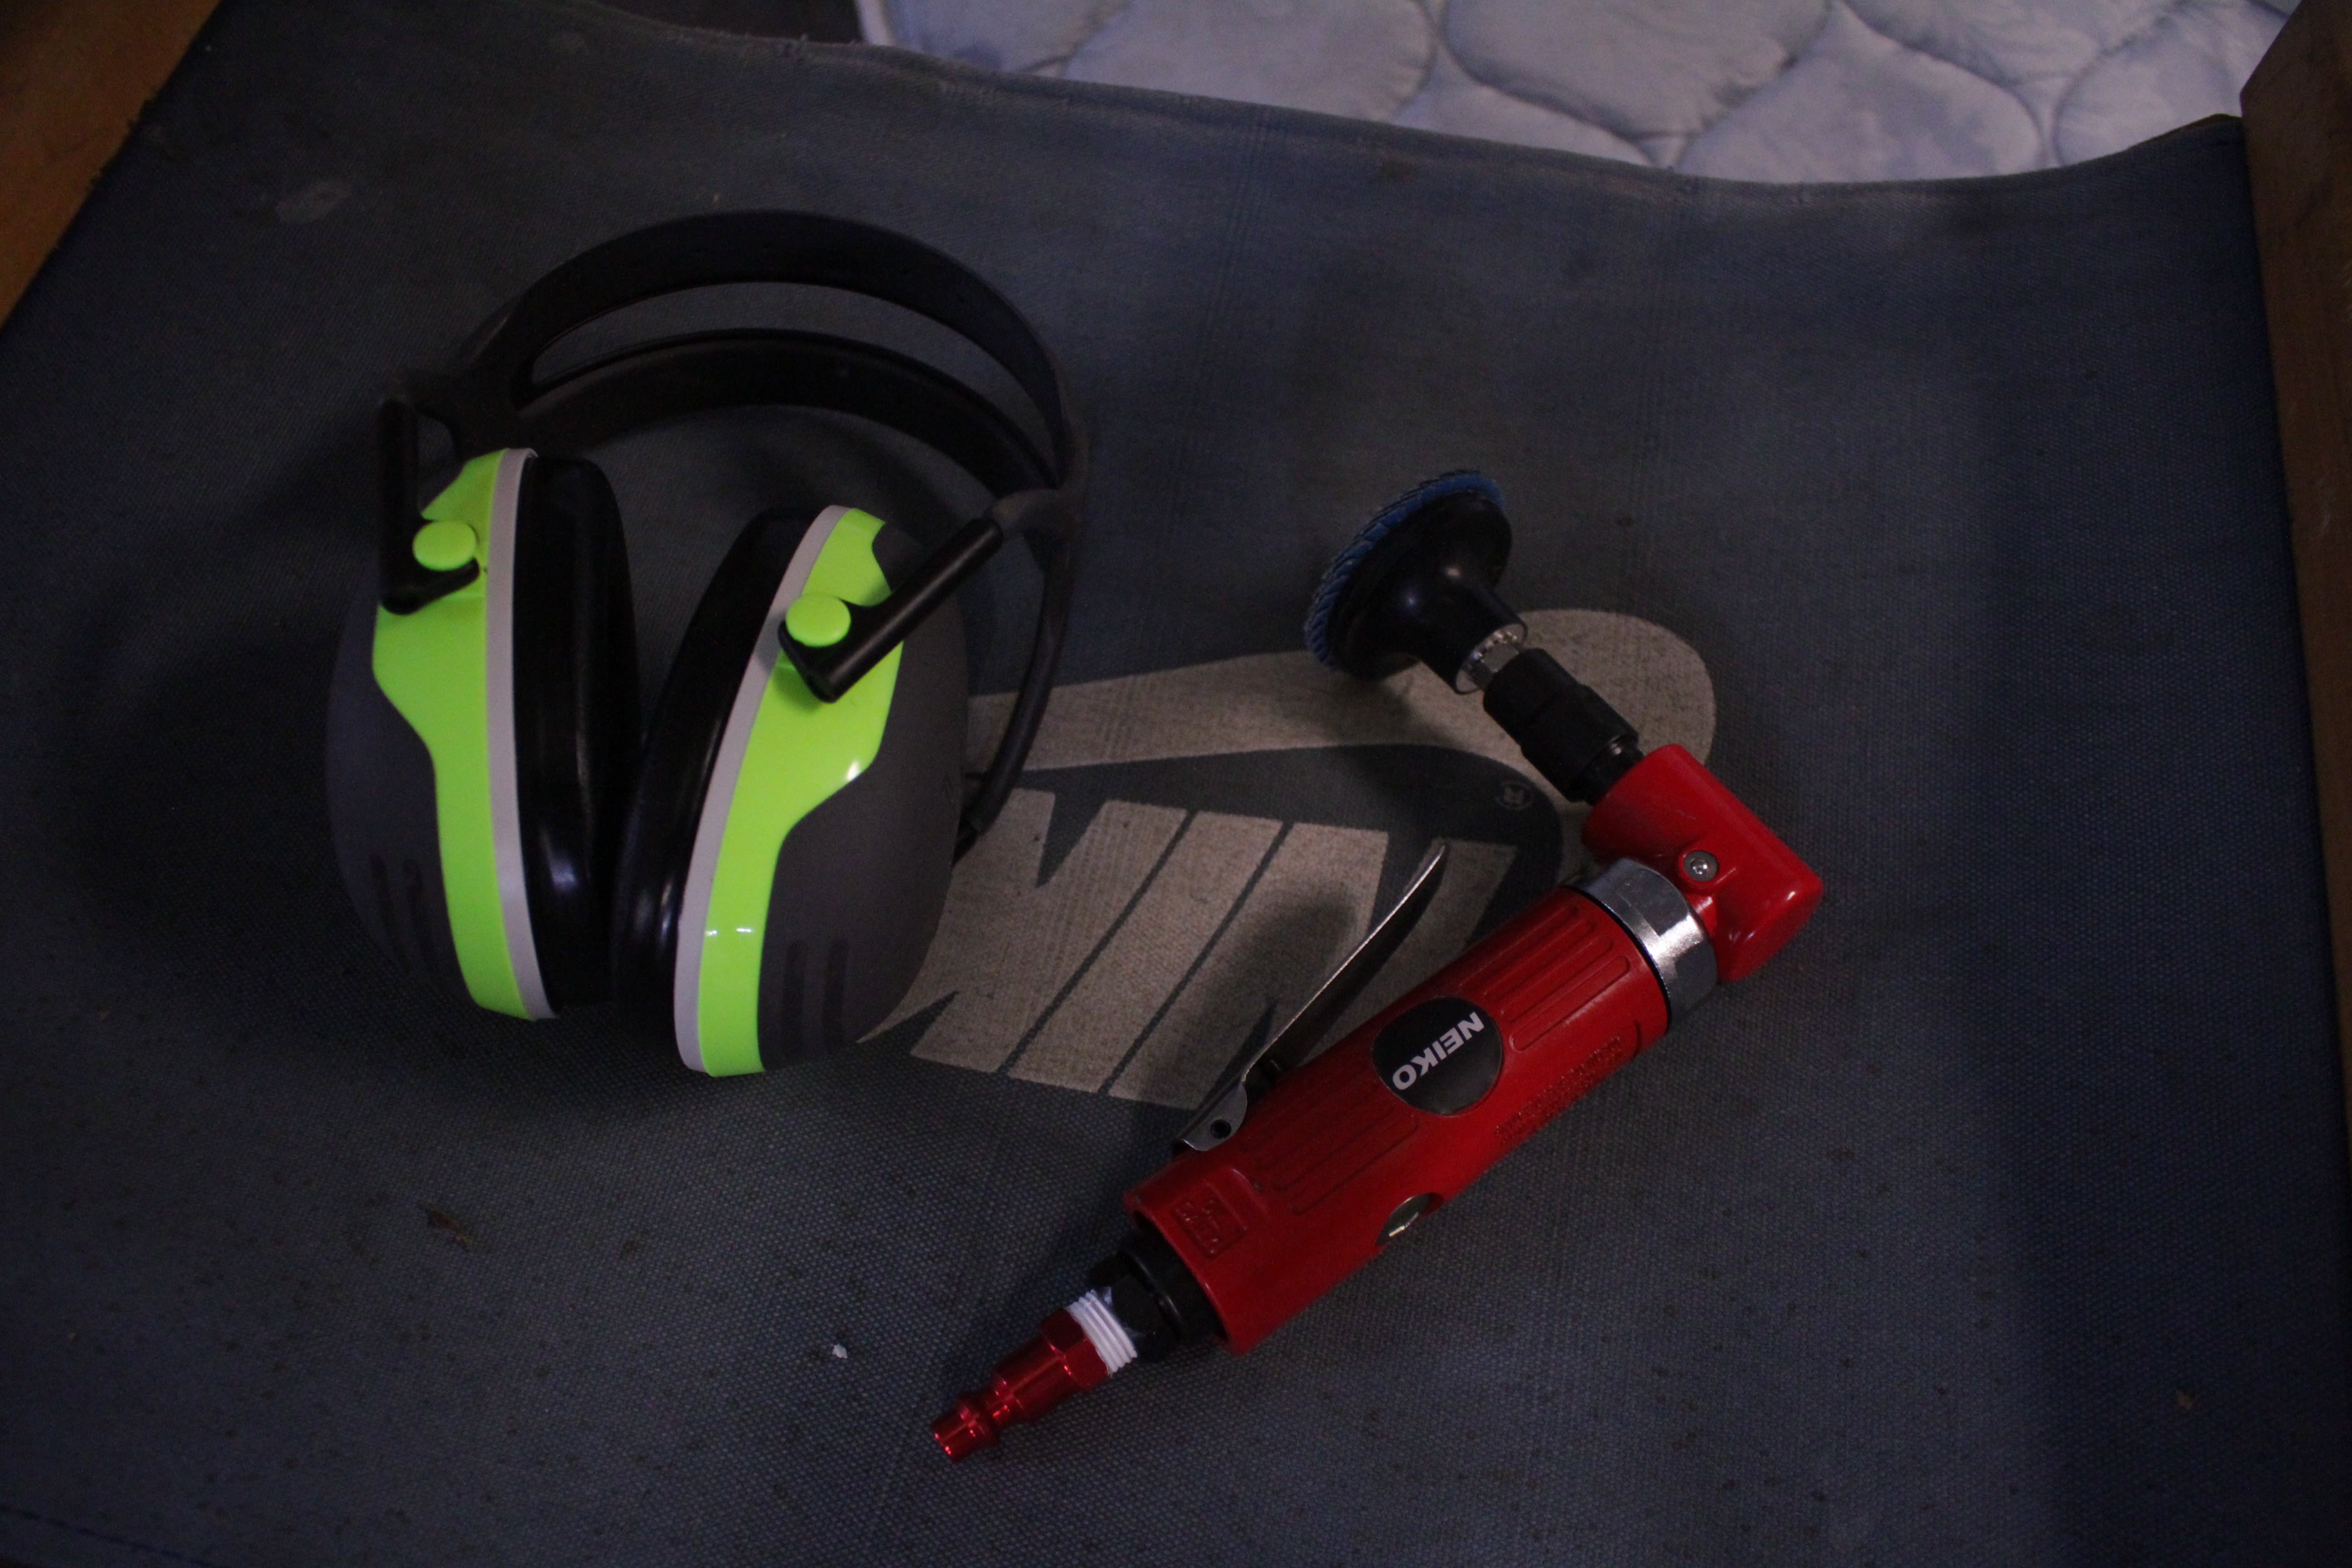
Now stick your tap in the vice by the square end. You'll need to grind down the raised part after the cutting portion. I used an air die grinder with a flap disc to keep it from getting too hot. If you get it hot the hardening will be ruined, though it will still work for this application. It just won't last very long. You need to grind it down low enough so that the shaft doesn't damage the threads you cut; the tap is going deeper than the thread cutters can reach and you don't want to damage any of the threads. You'll see what I mean below.
Now go back under your truck, bolt and tap in hand. This centering bushing is already drilled and partially tapped. Start the tap in the existing threads.
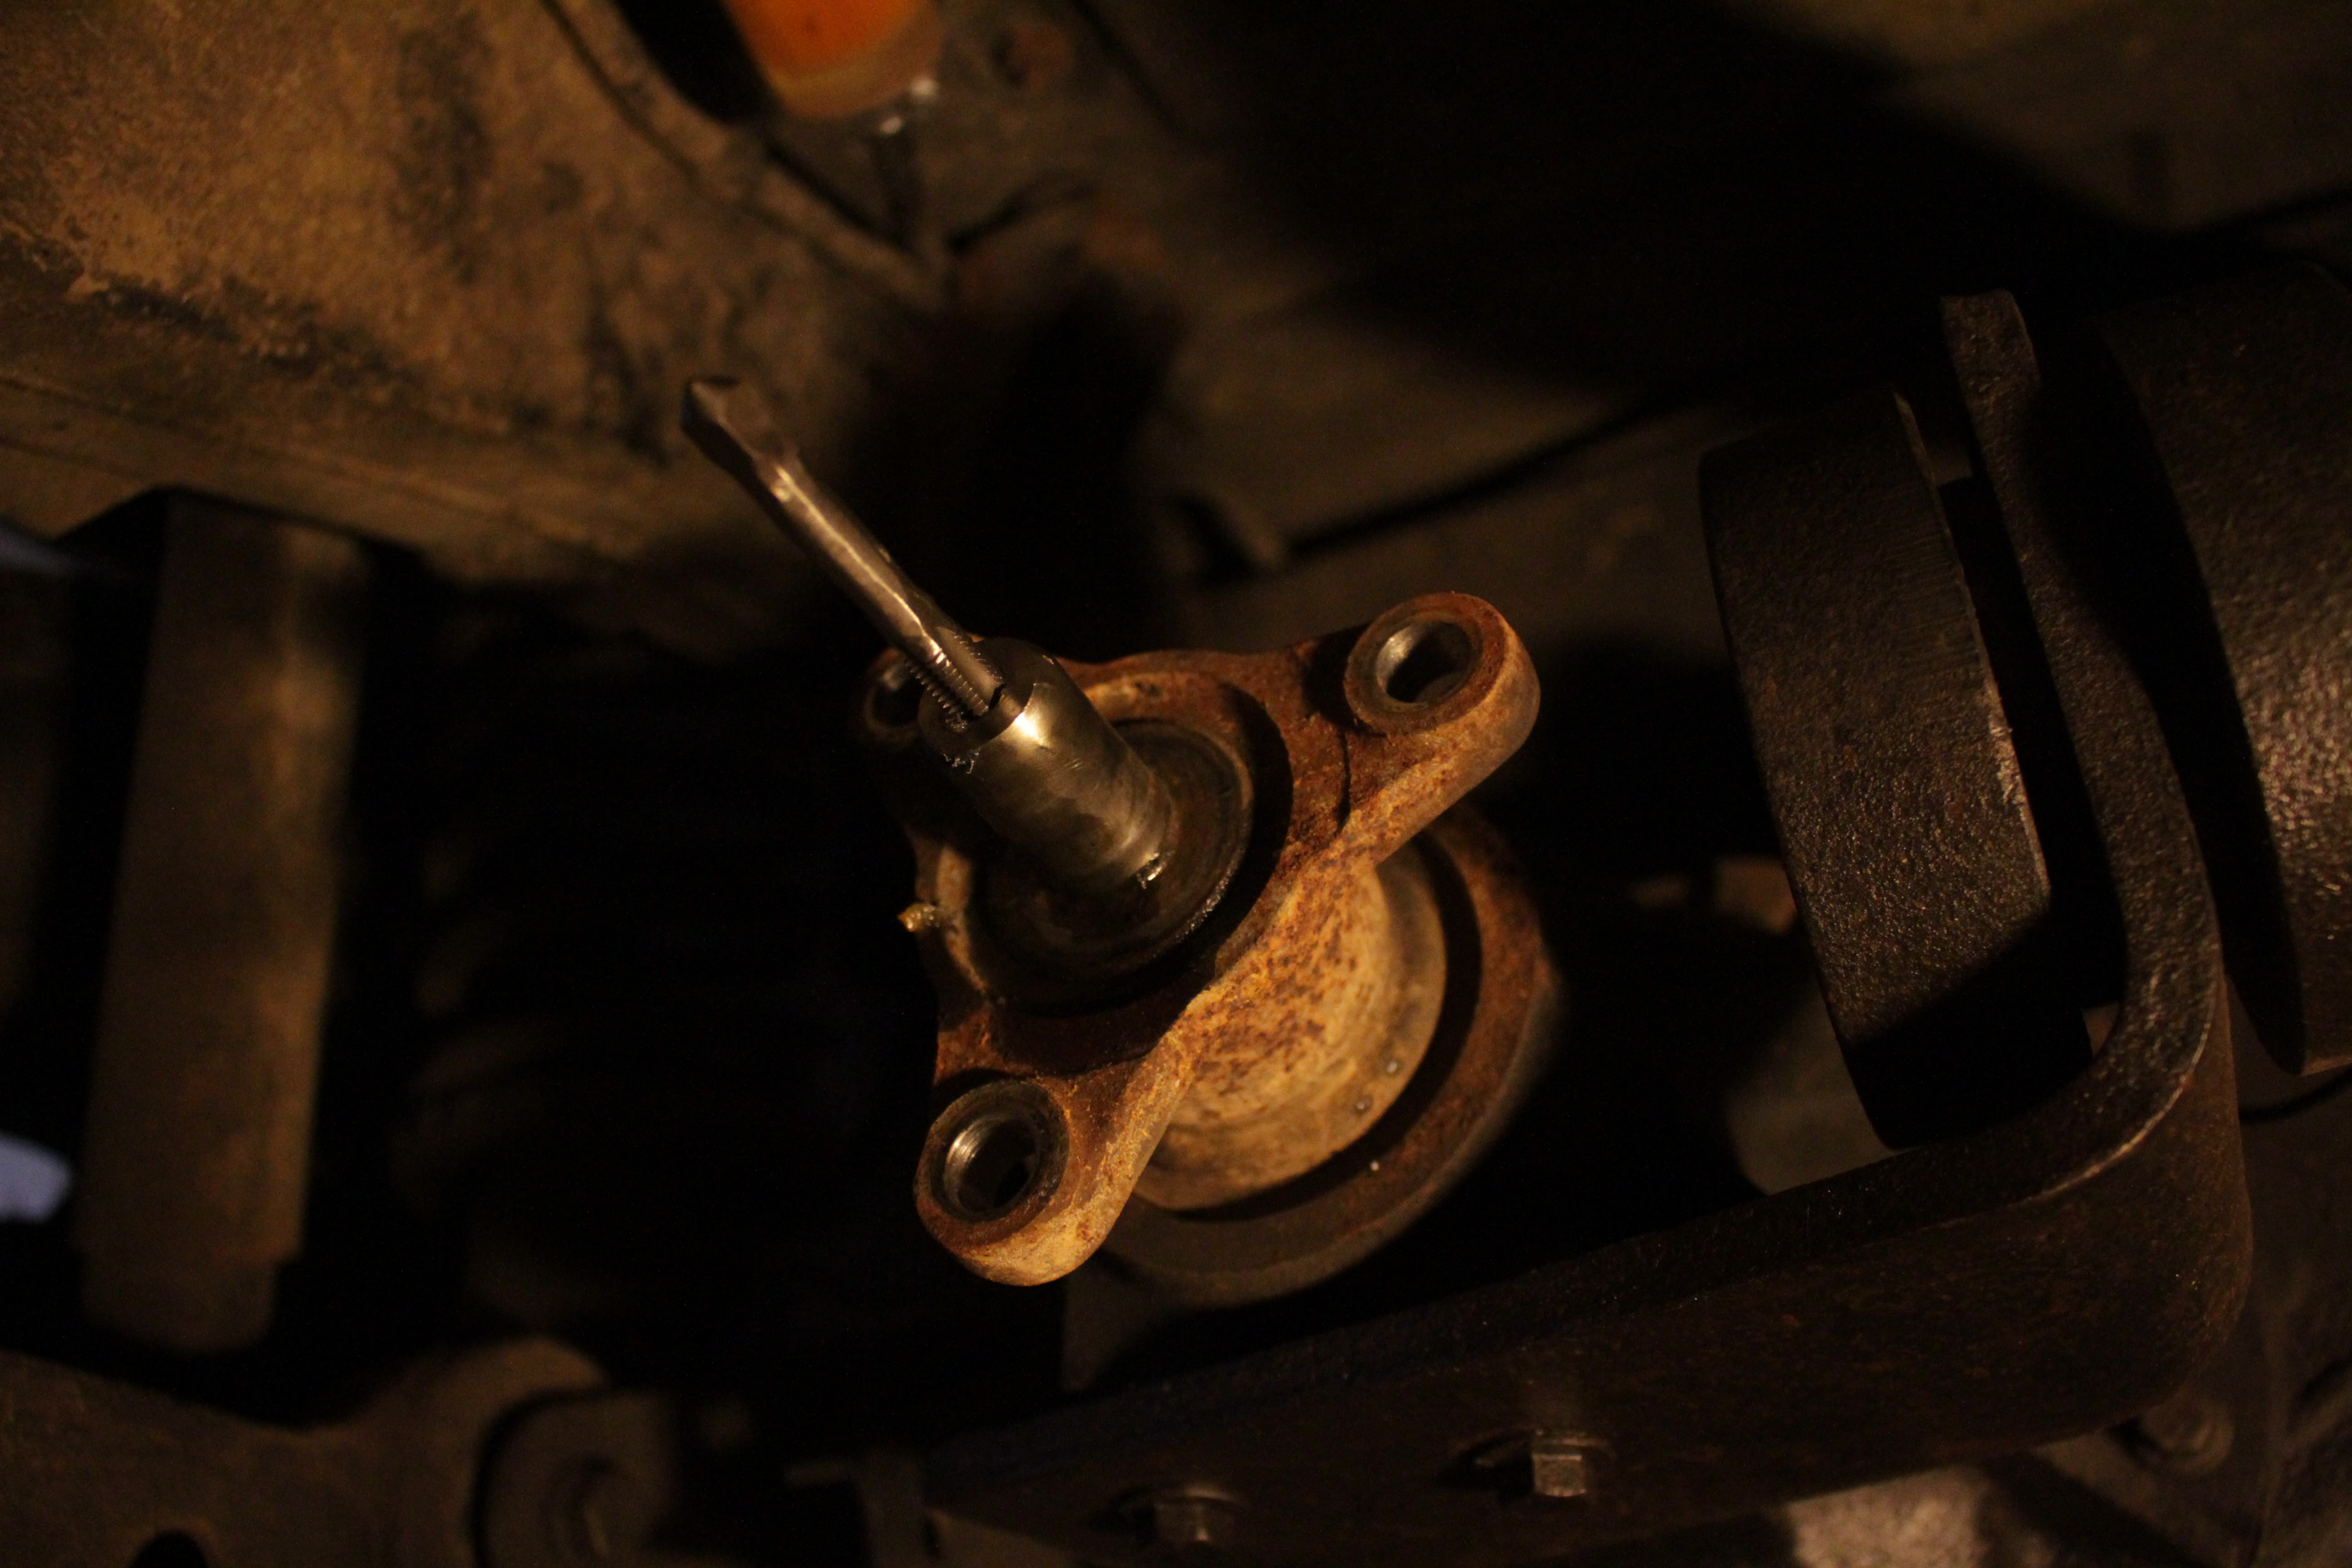
Run the tap all the way down to the end. This is why you had to grind down the shaft.
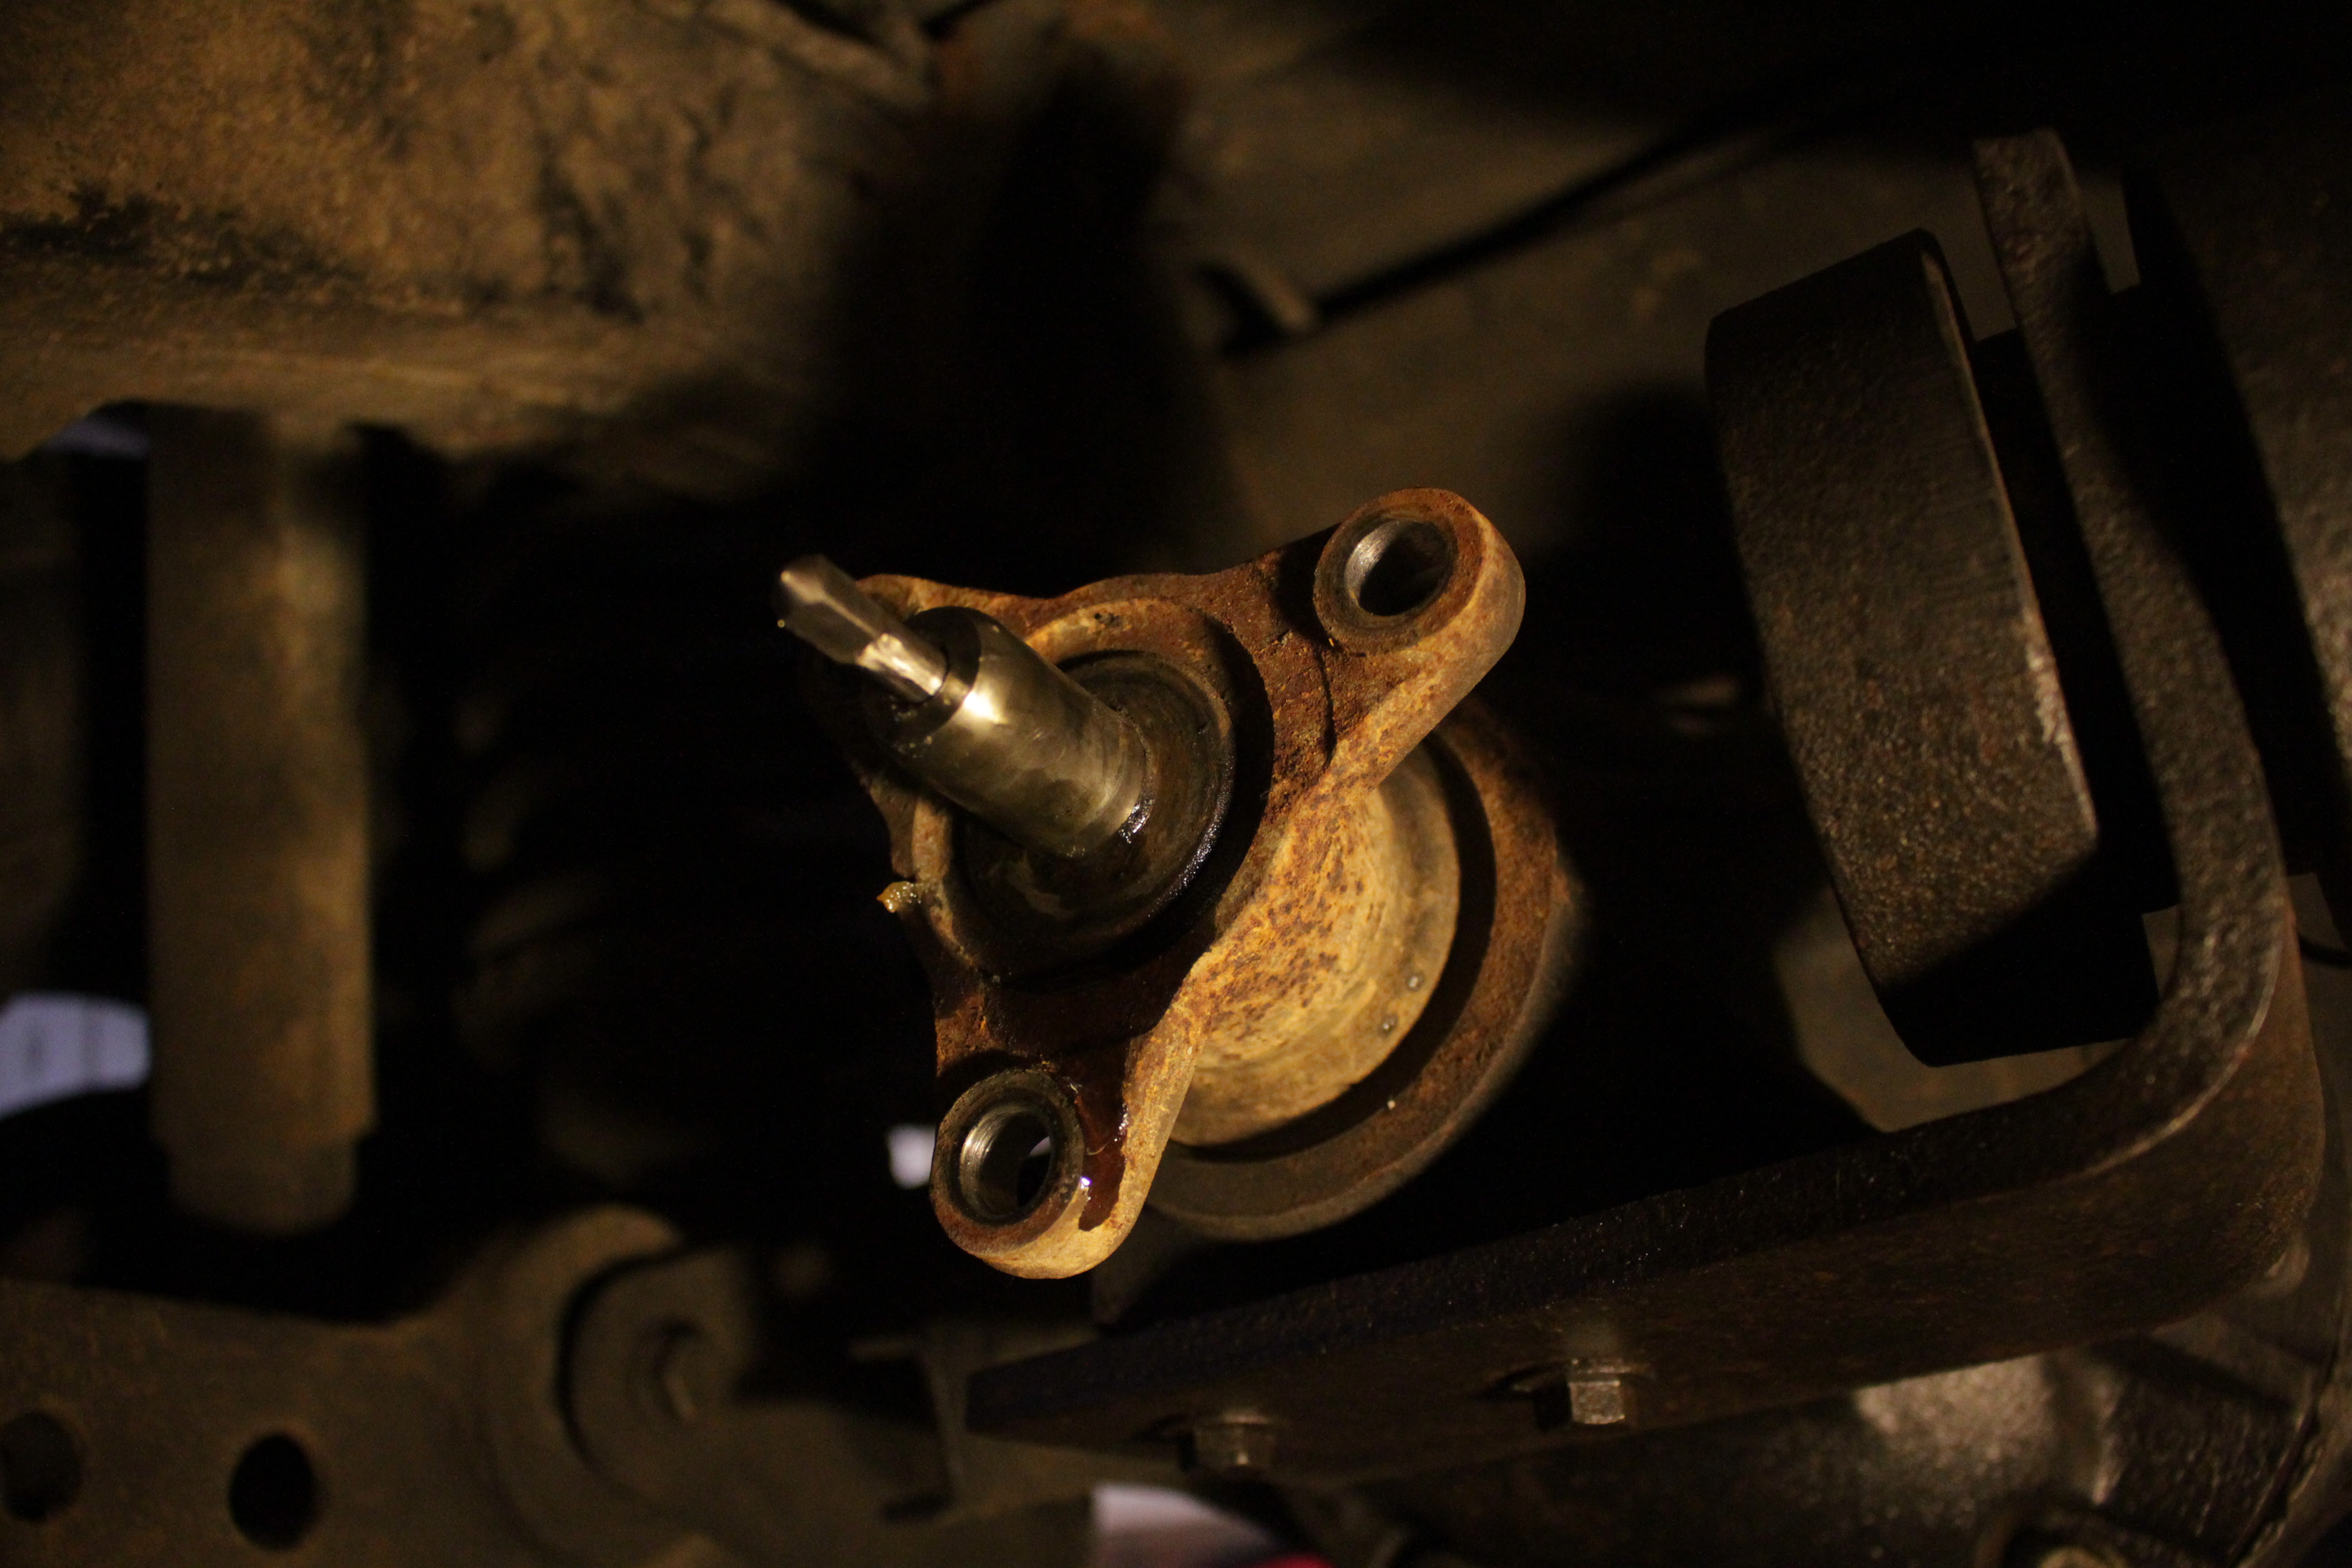
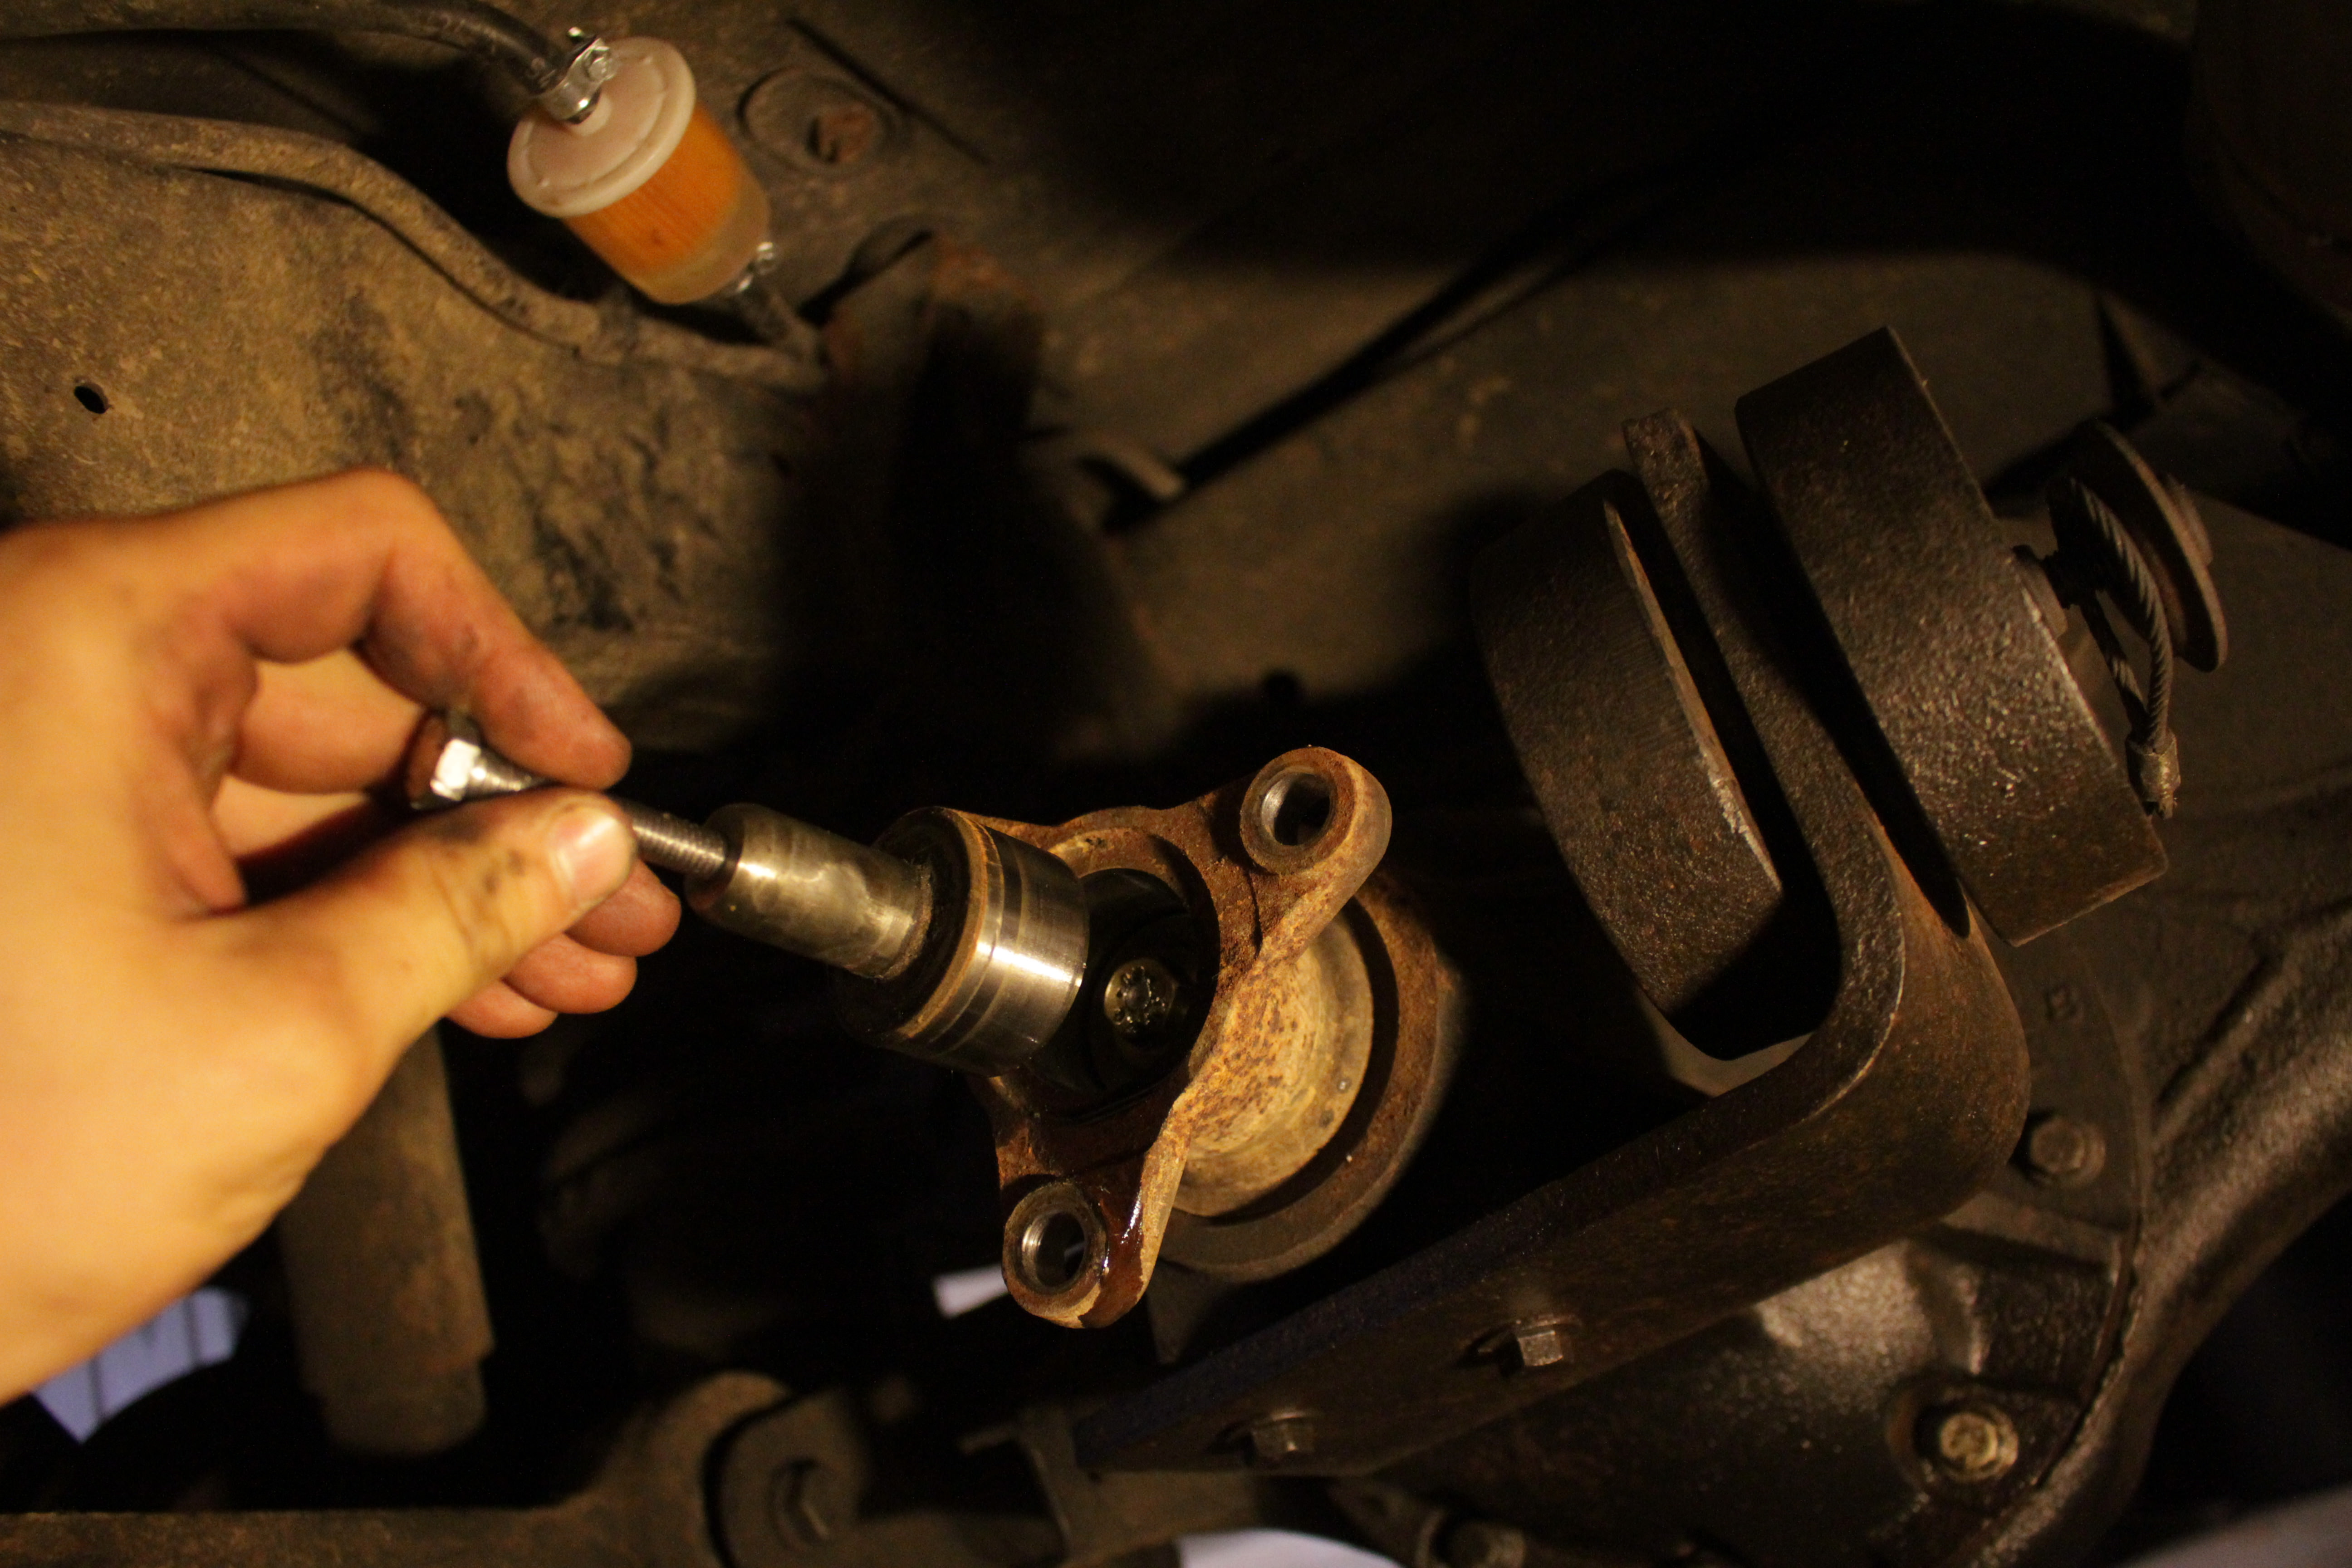
Now back the tap back out. Grab your bolt and wrench. Run the bolt as far down as you can by hand. We're going to use the bolt to press the bushing out.
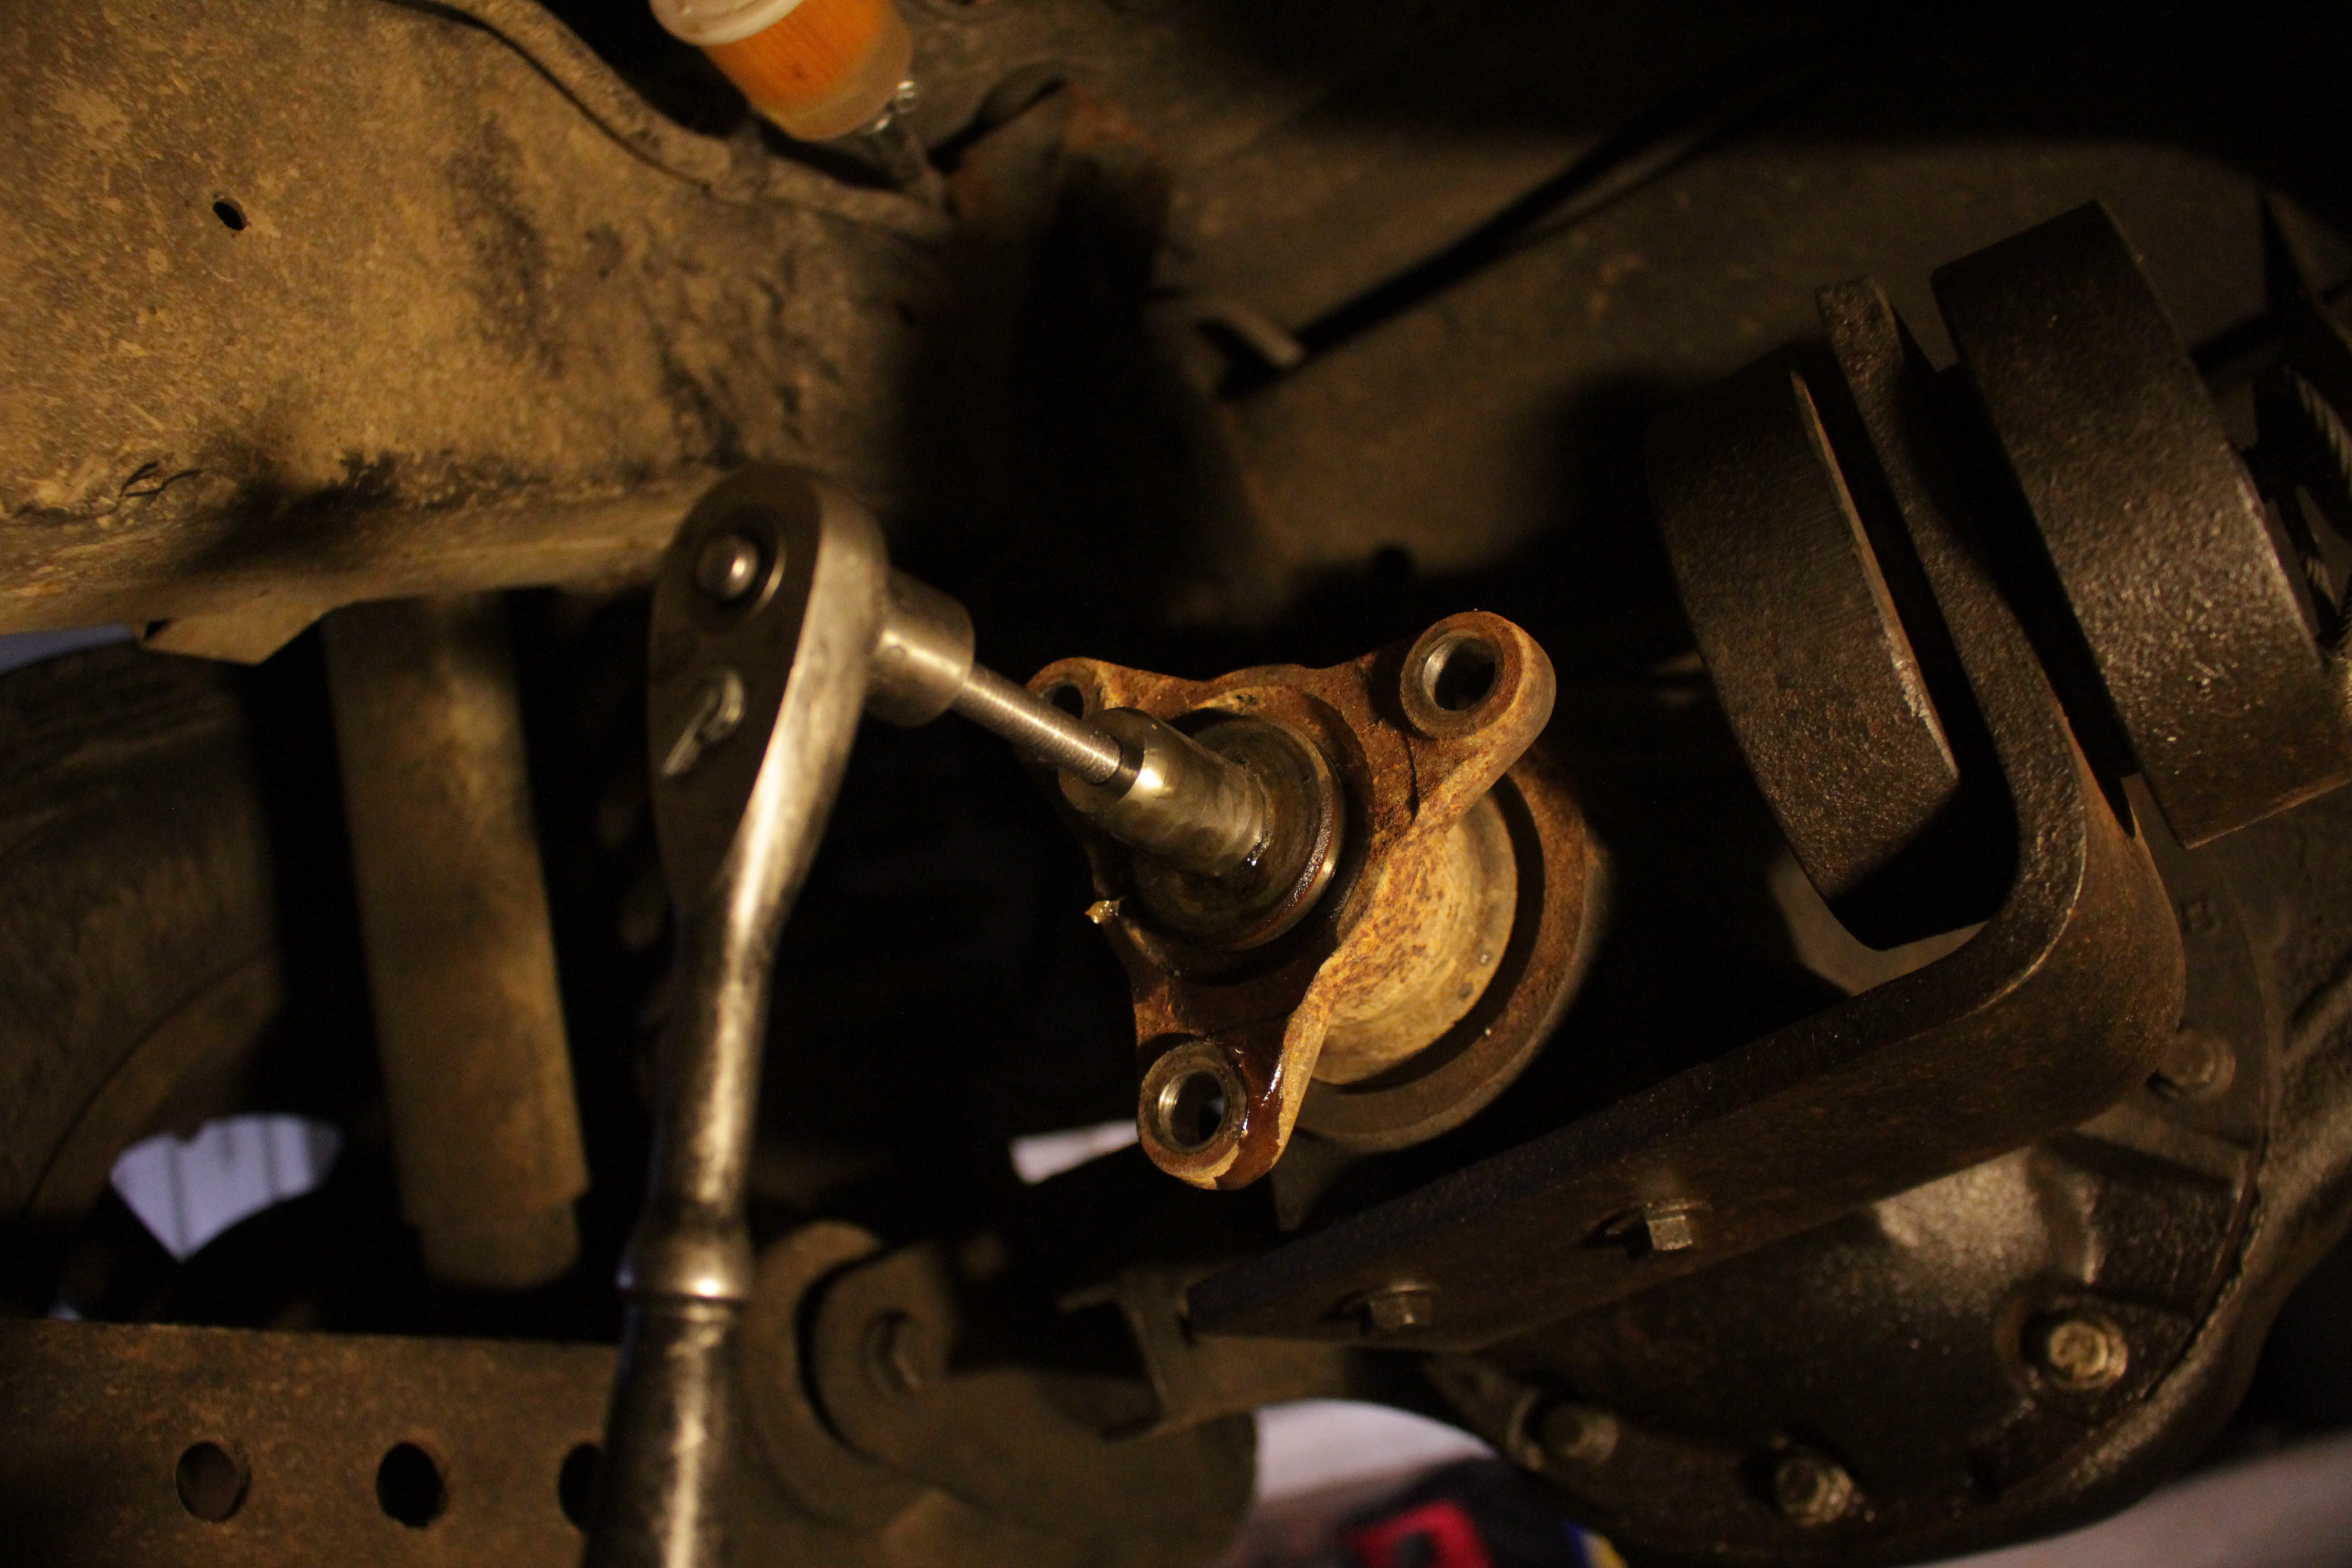
It should come fairly easily. I did lightly oil the threads, but probably not necessary. I've heard some people have some problems with the 8mm and size up to a 10mm, but I think that's people who don't tap the hole the rest of the way down not realizing the threads are not cut all the way through.
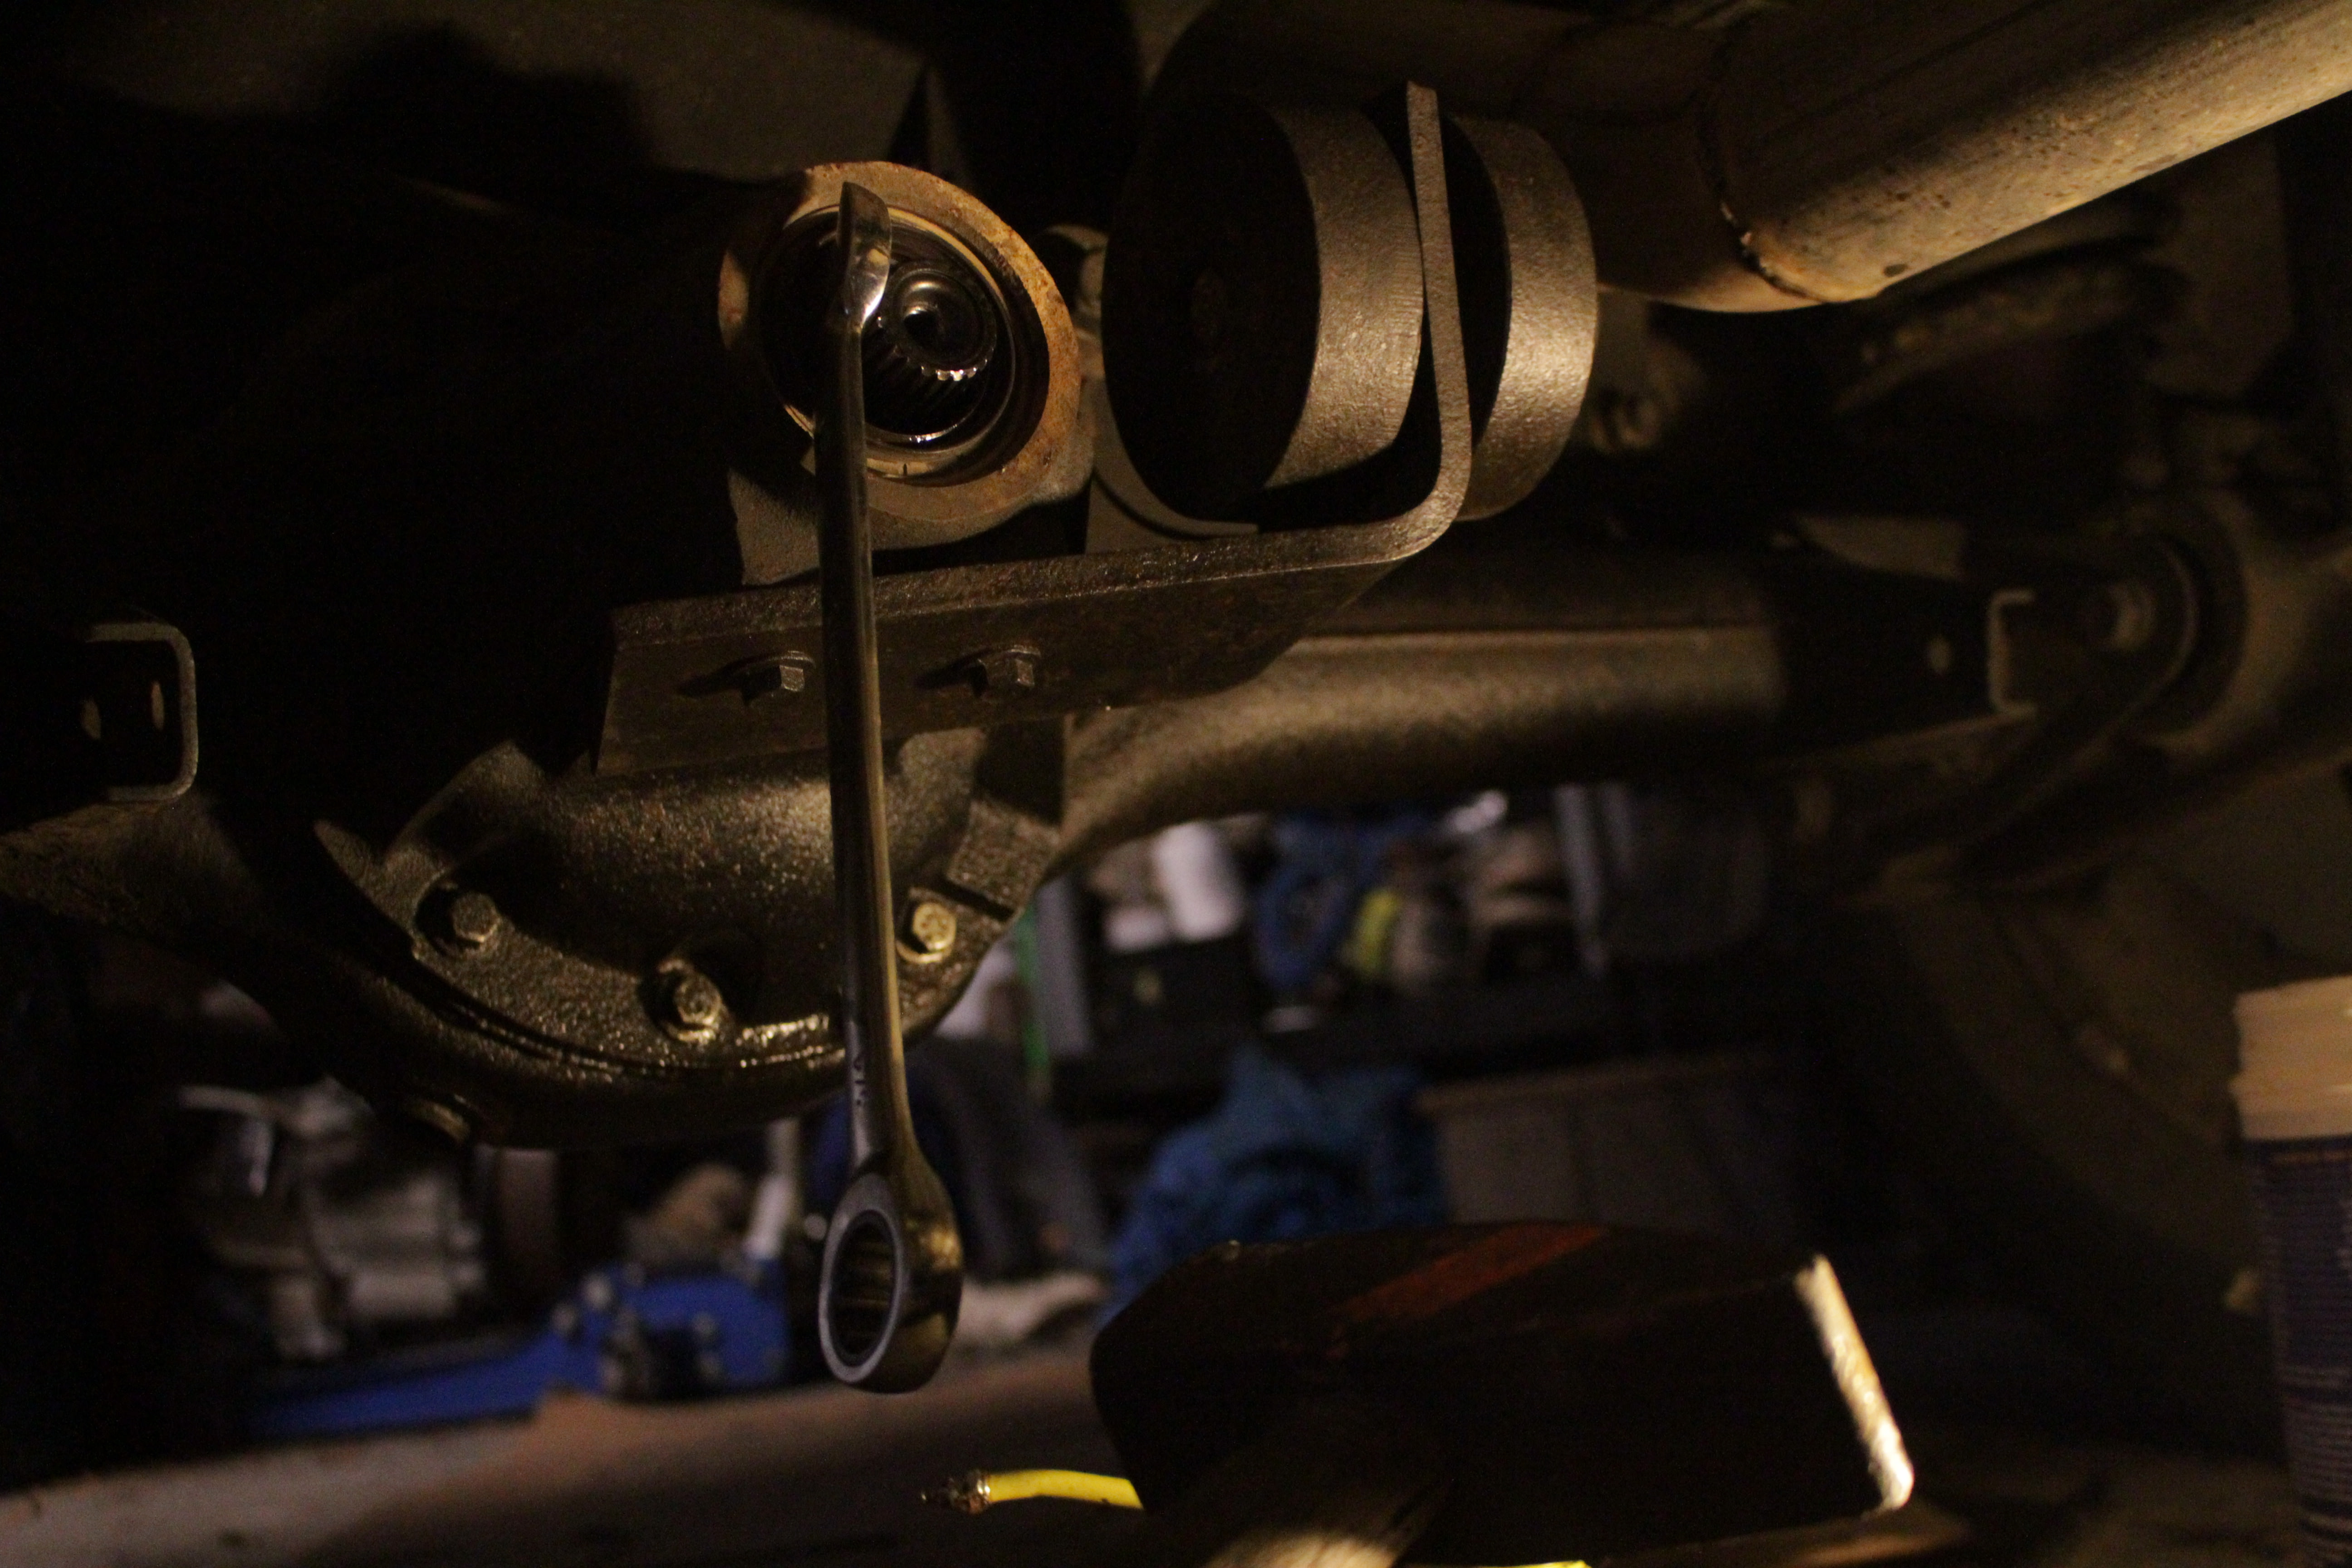
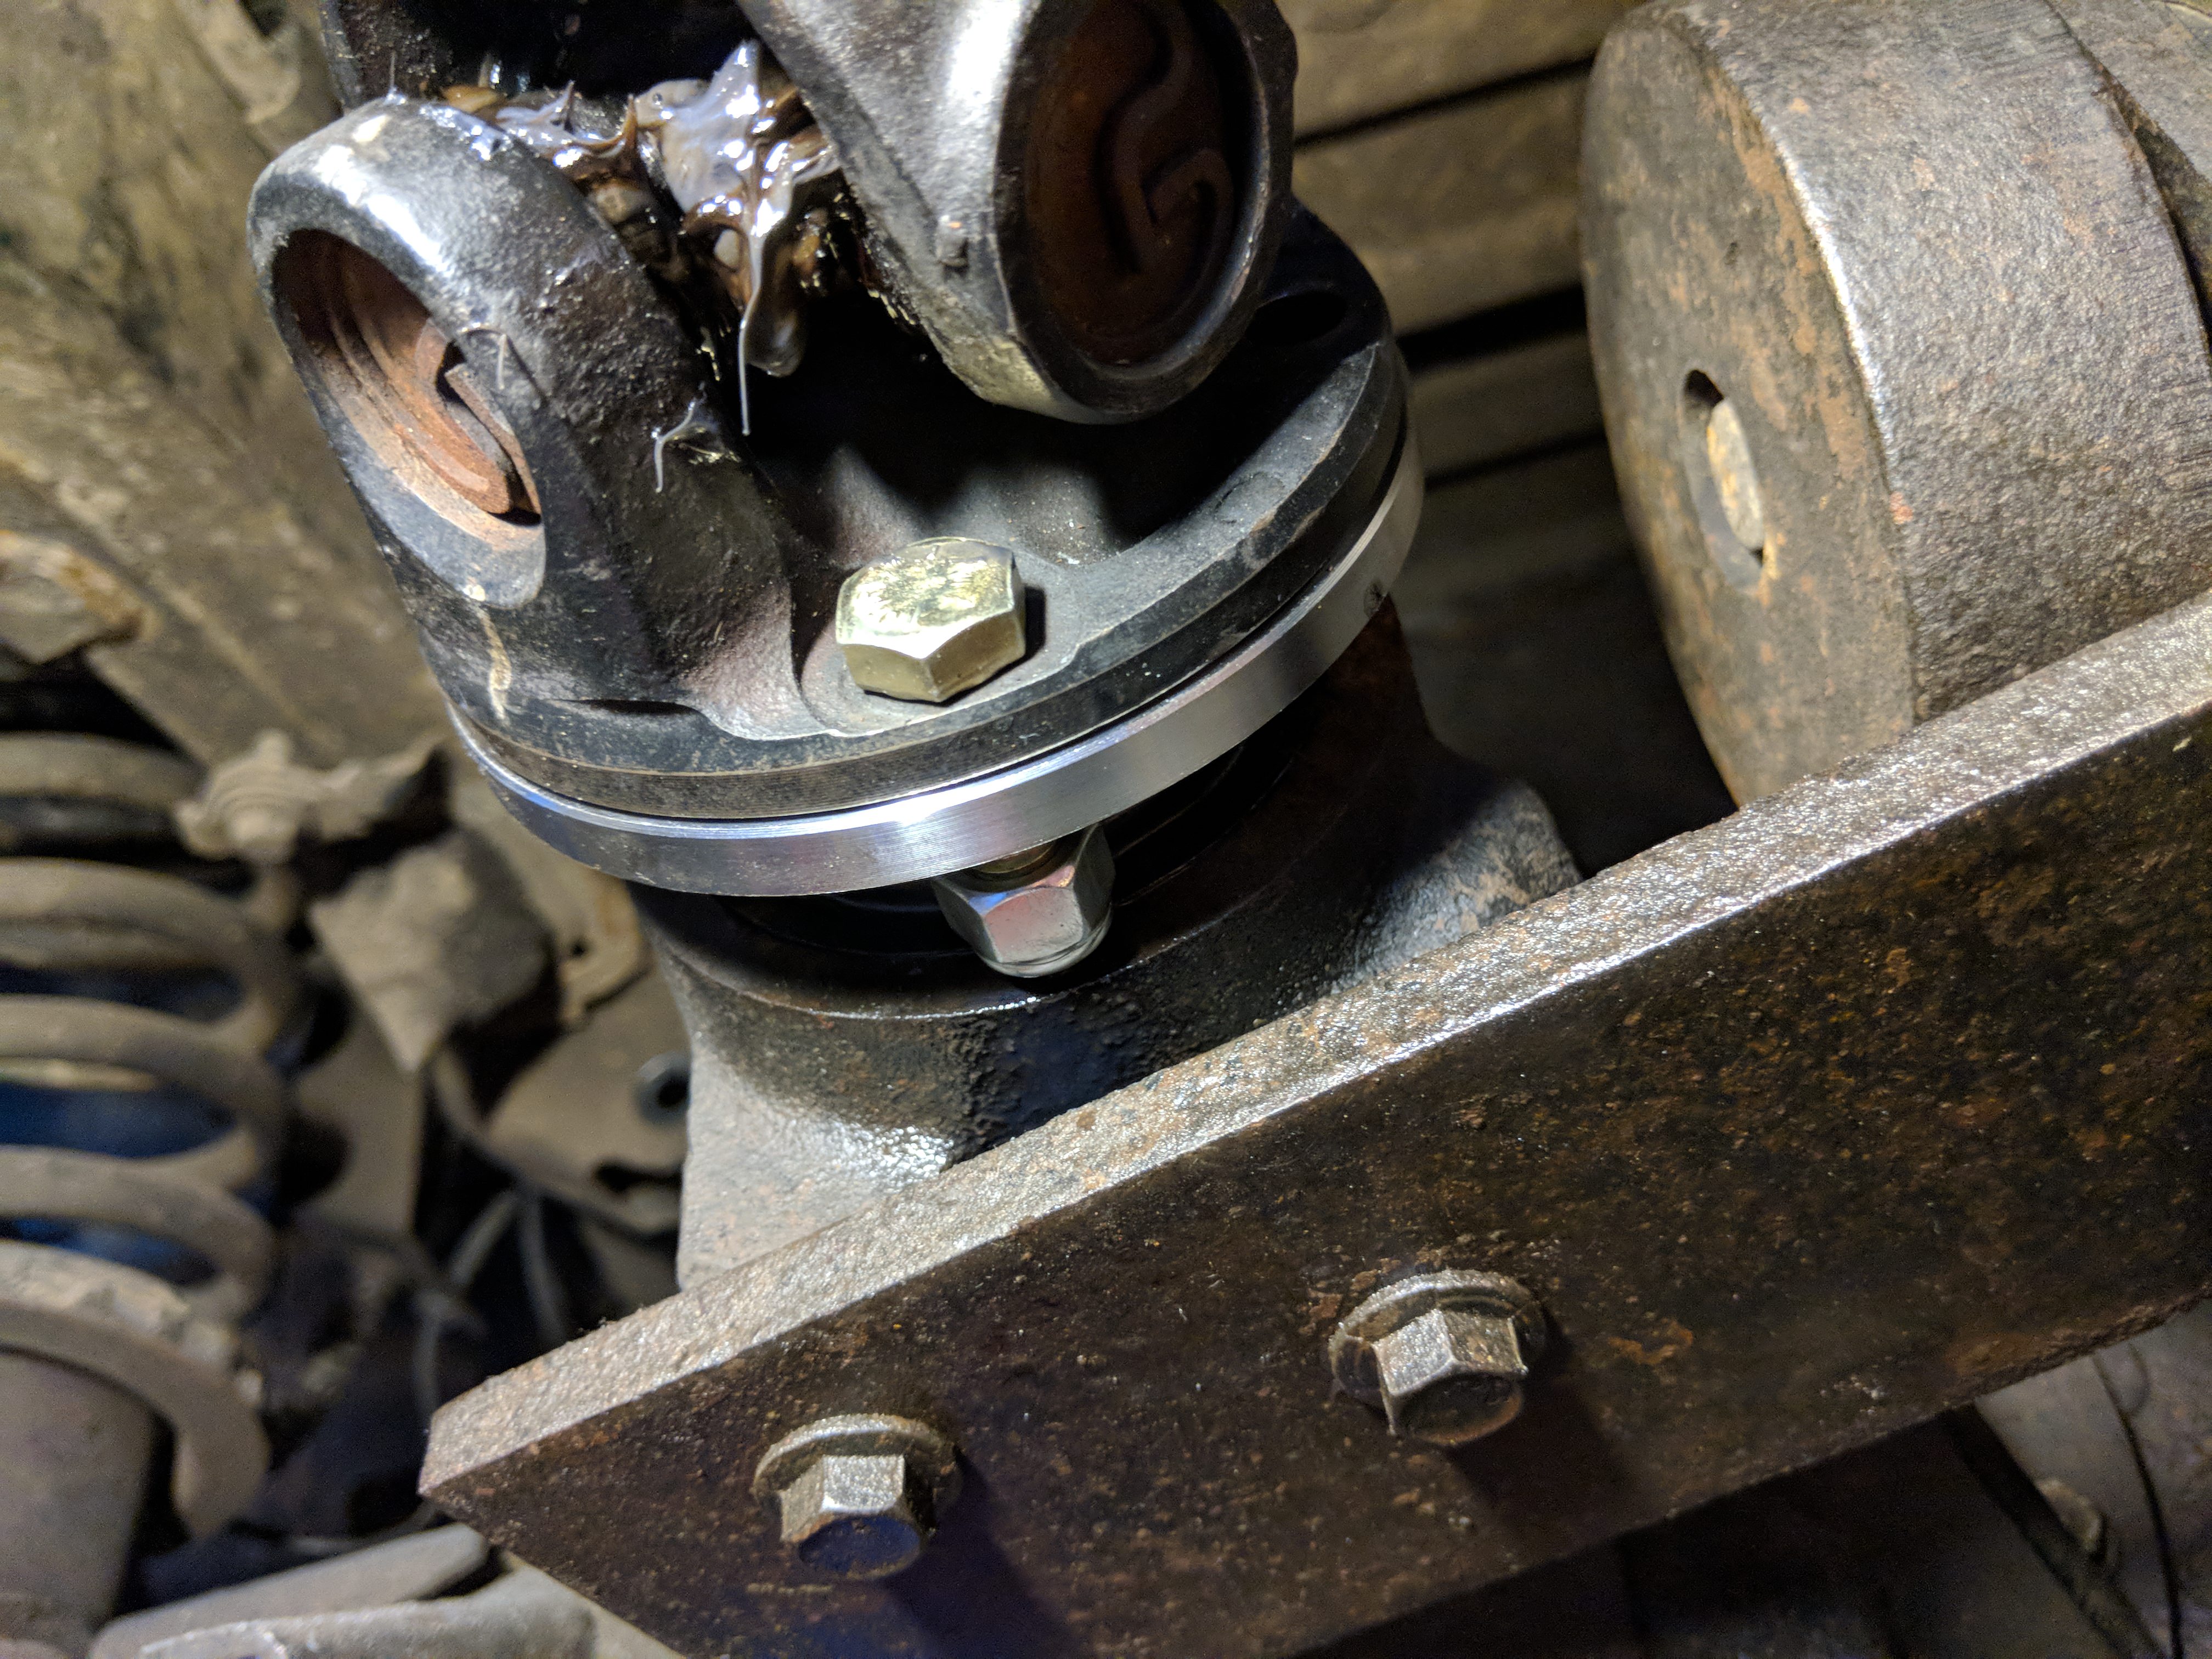
Now take your breaker bar and a 15mm socket and take the center bolt out of the flange. You WILL need a breaker bar. Even with it it was everything I could do to break the bolt loose, and I'm a fairly strong guy.
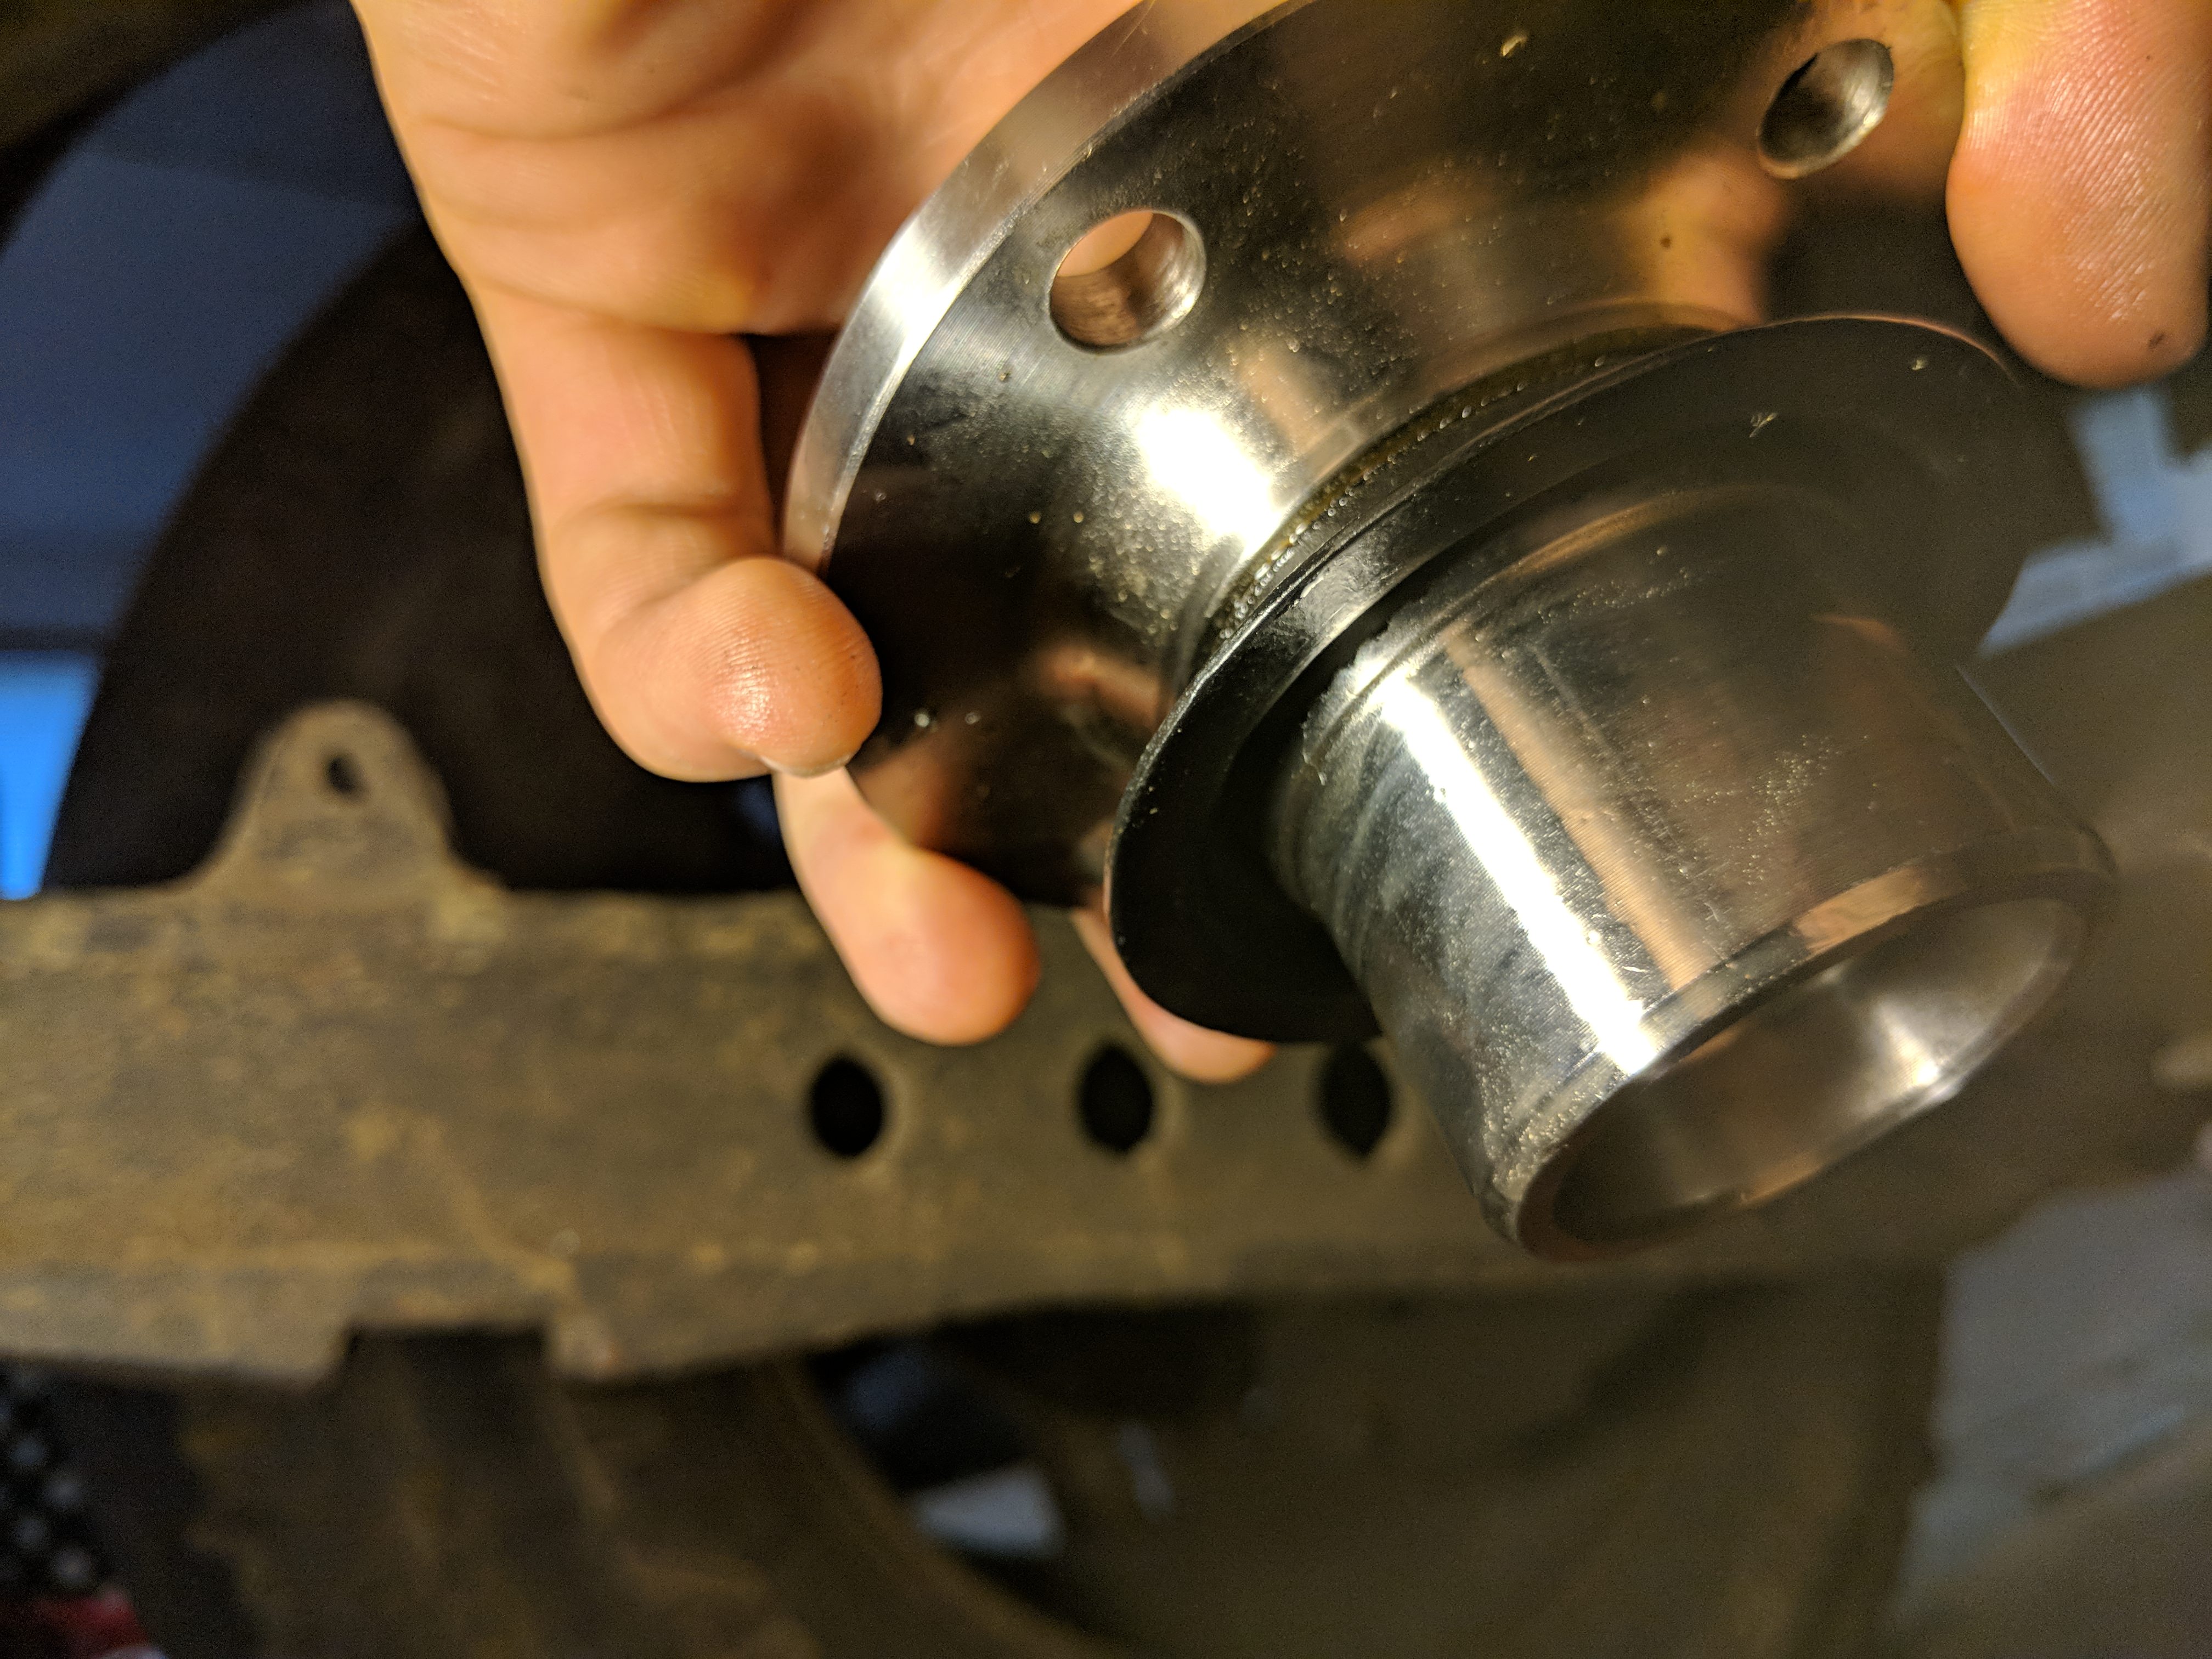
Once the bolt is out the flange should slide out very easily.
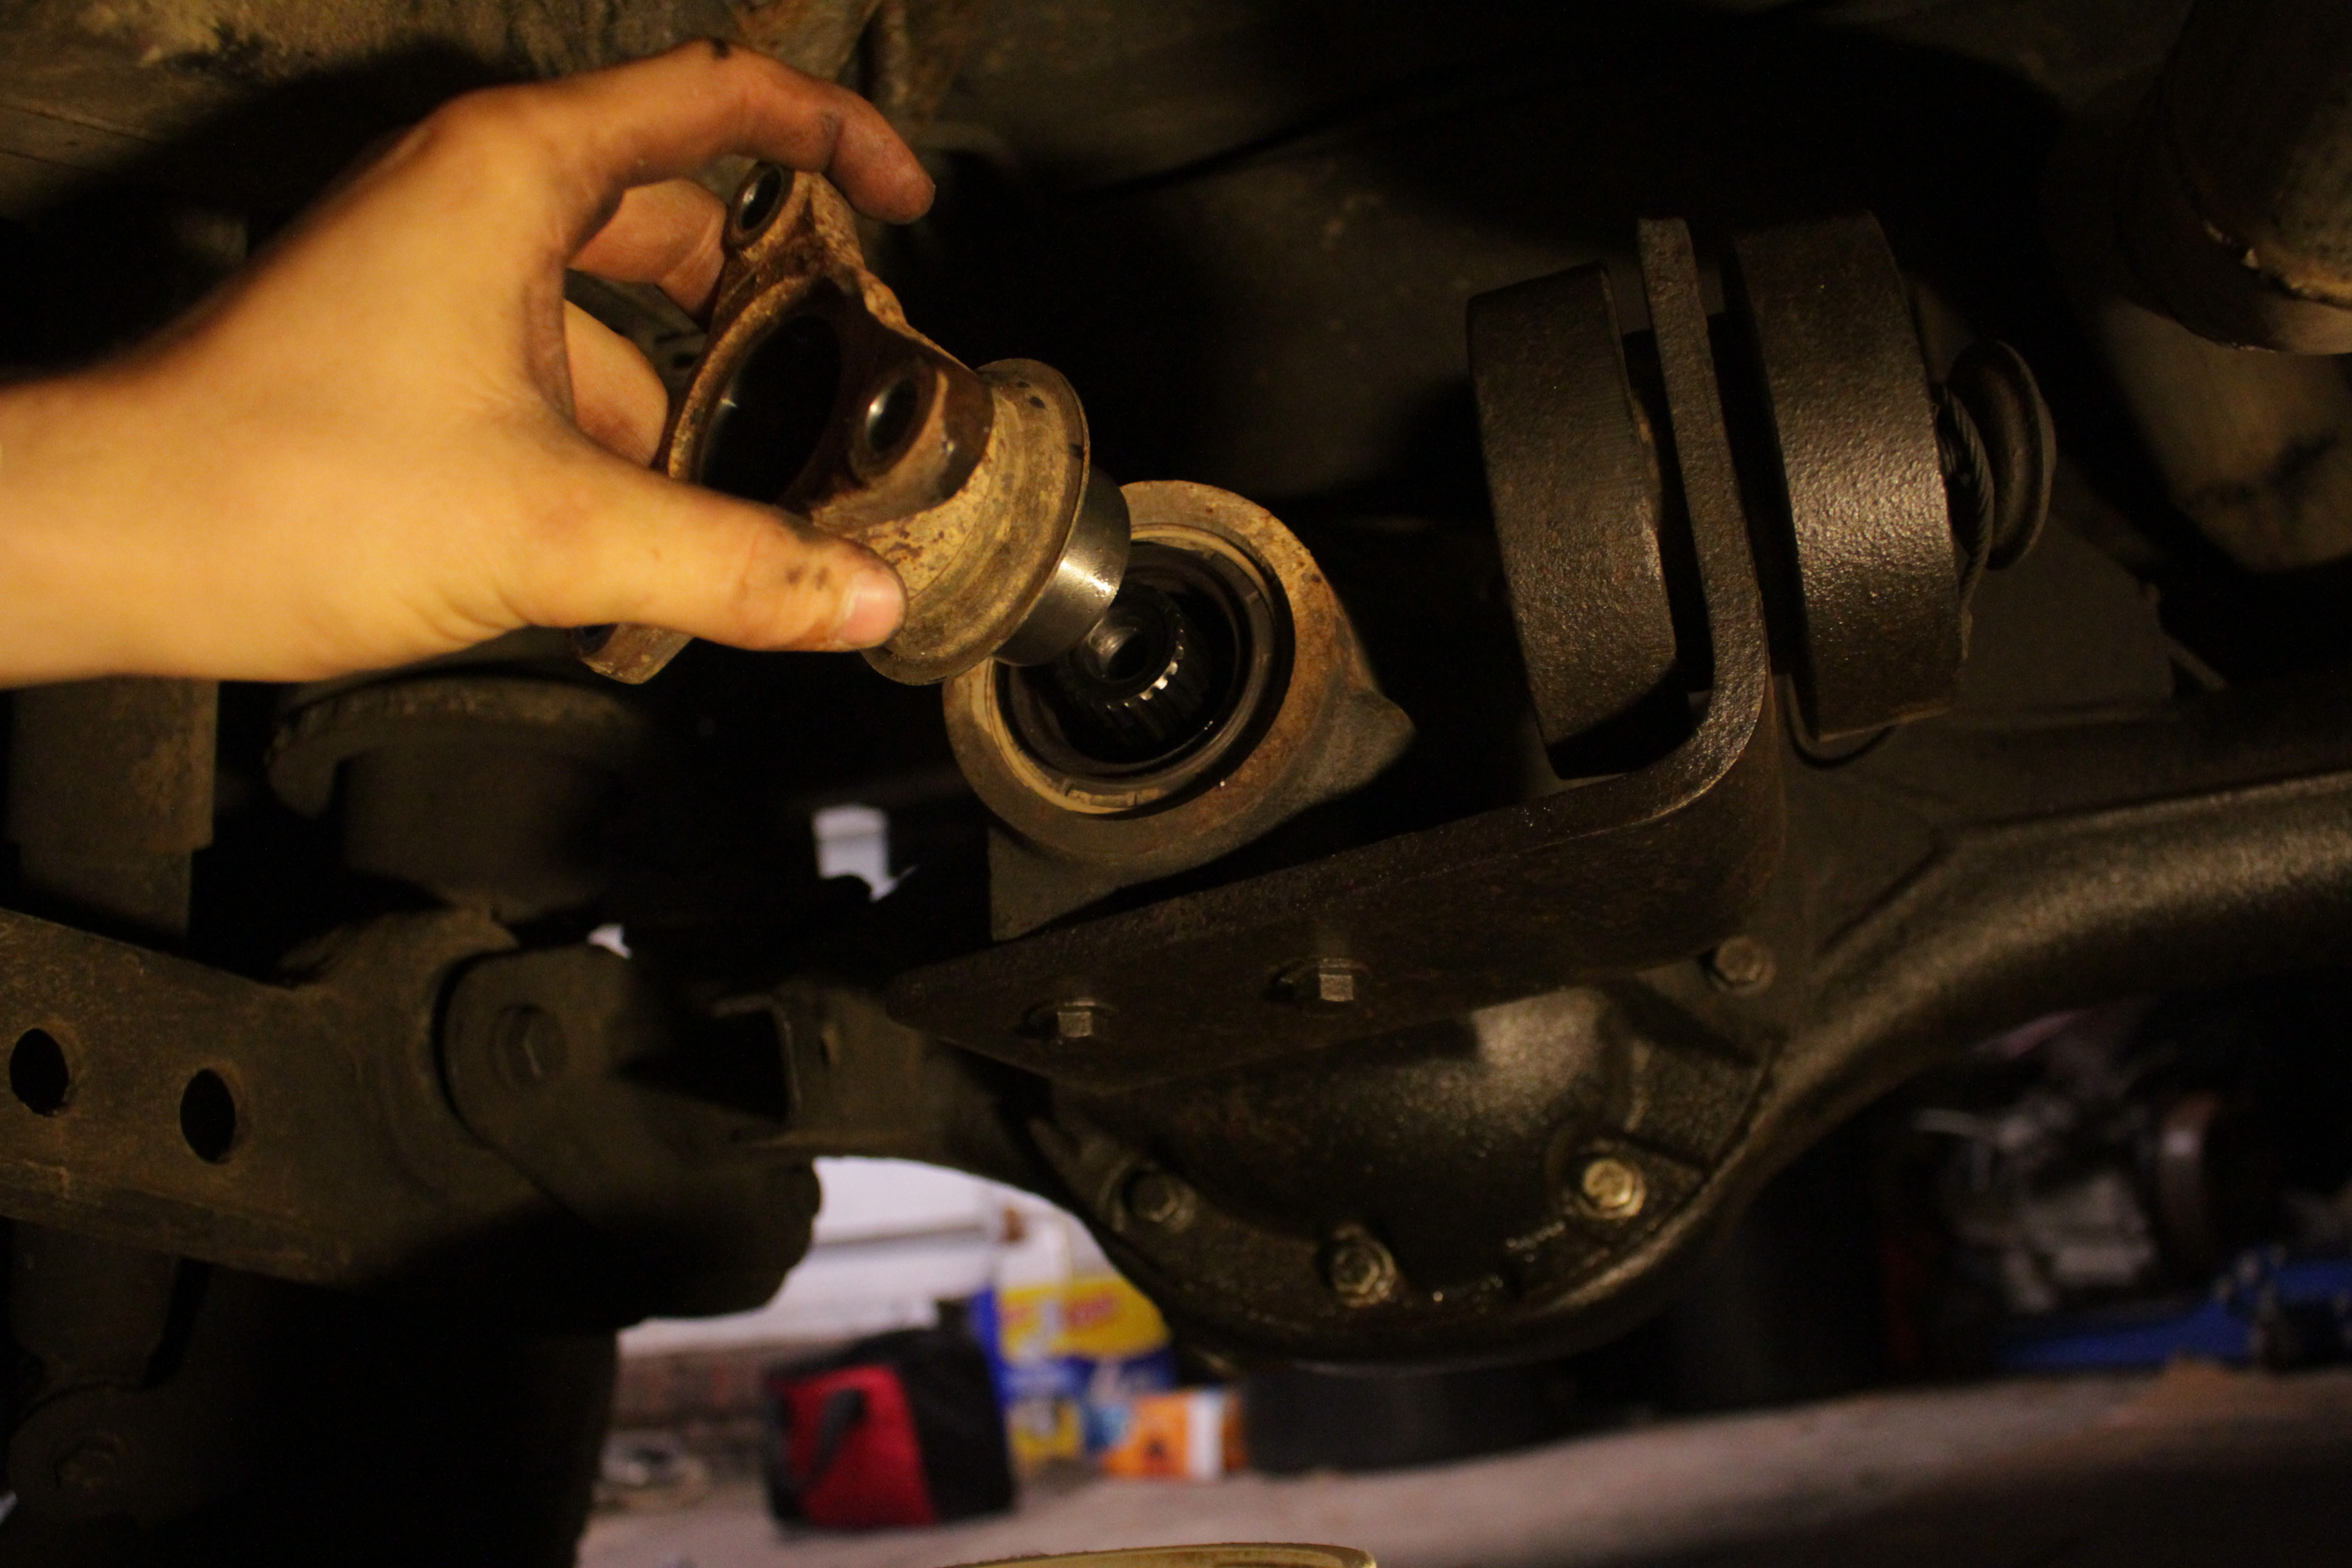
If you ordered the L8 kit or if you have a new seal on your own, time to remove the old seal. I do not have a seal puller. I just stuck a 3/4" box wrench in there and smacked the opposite end a couple times to get it out; super easy.
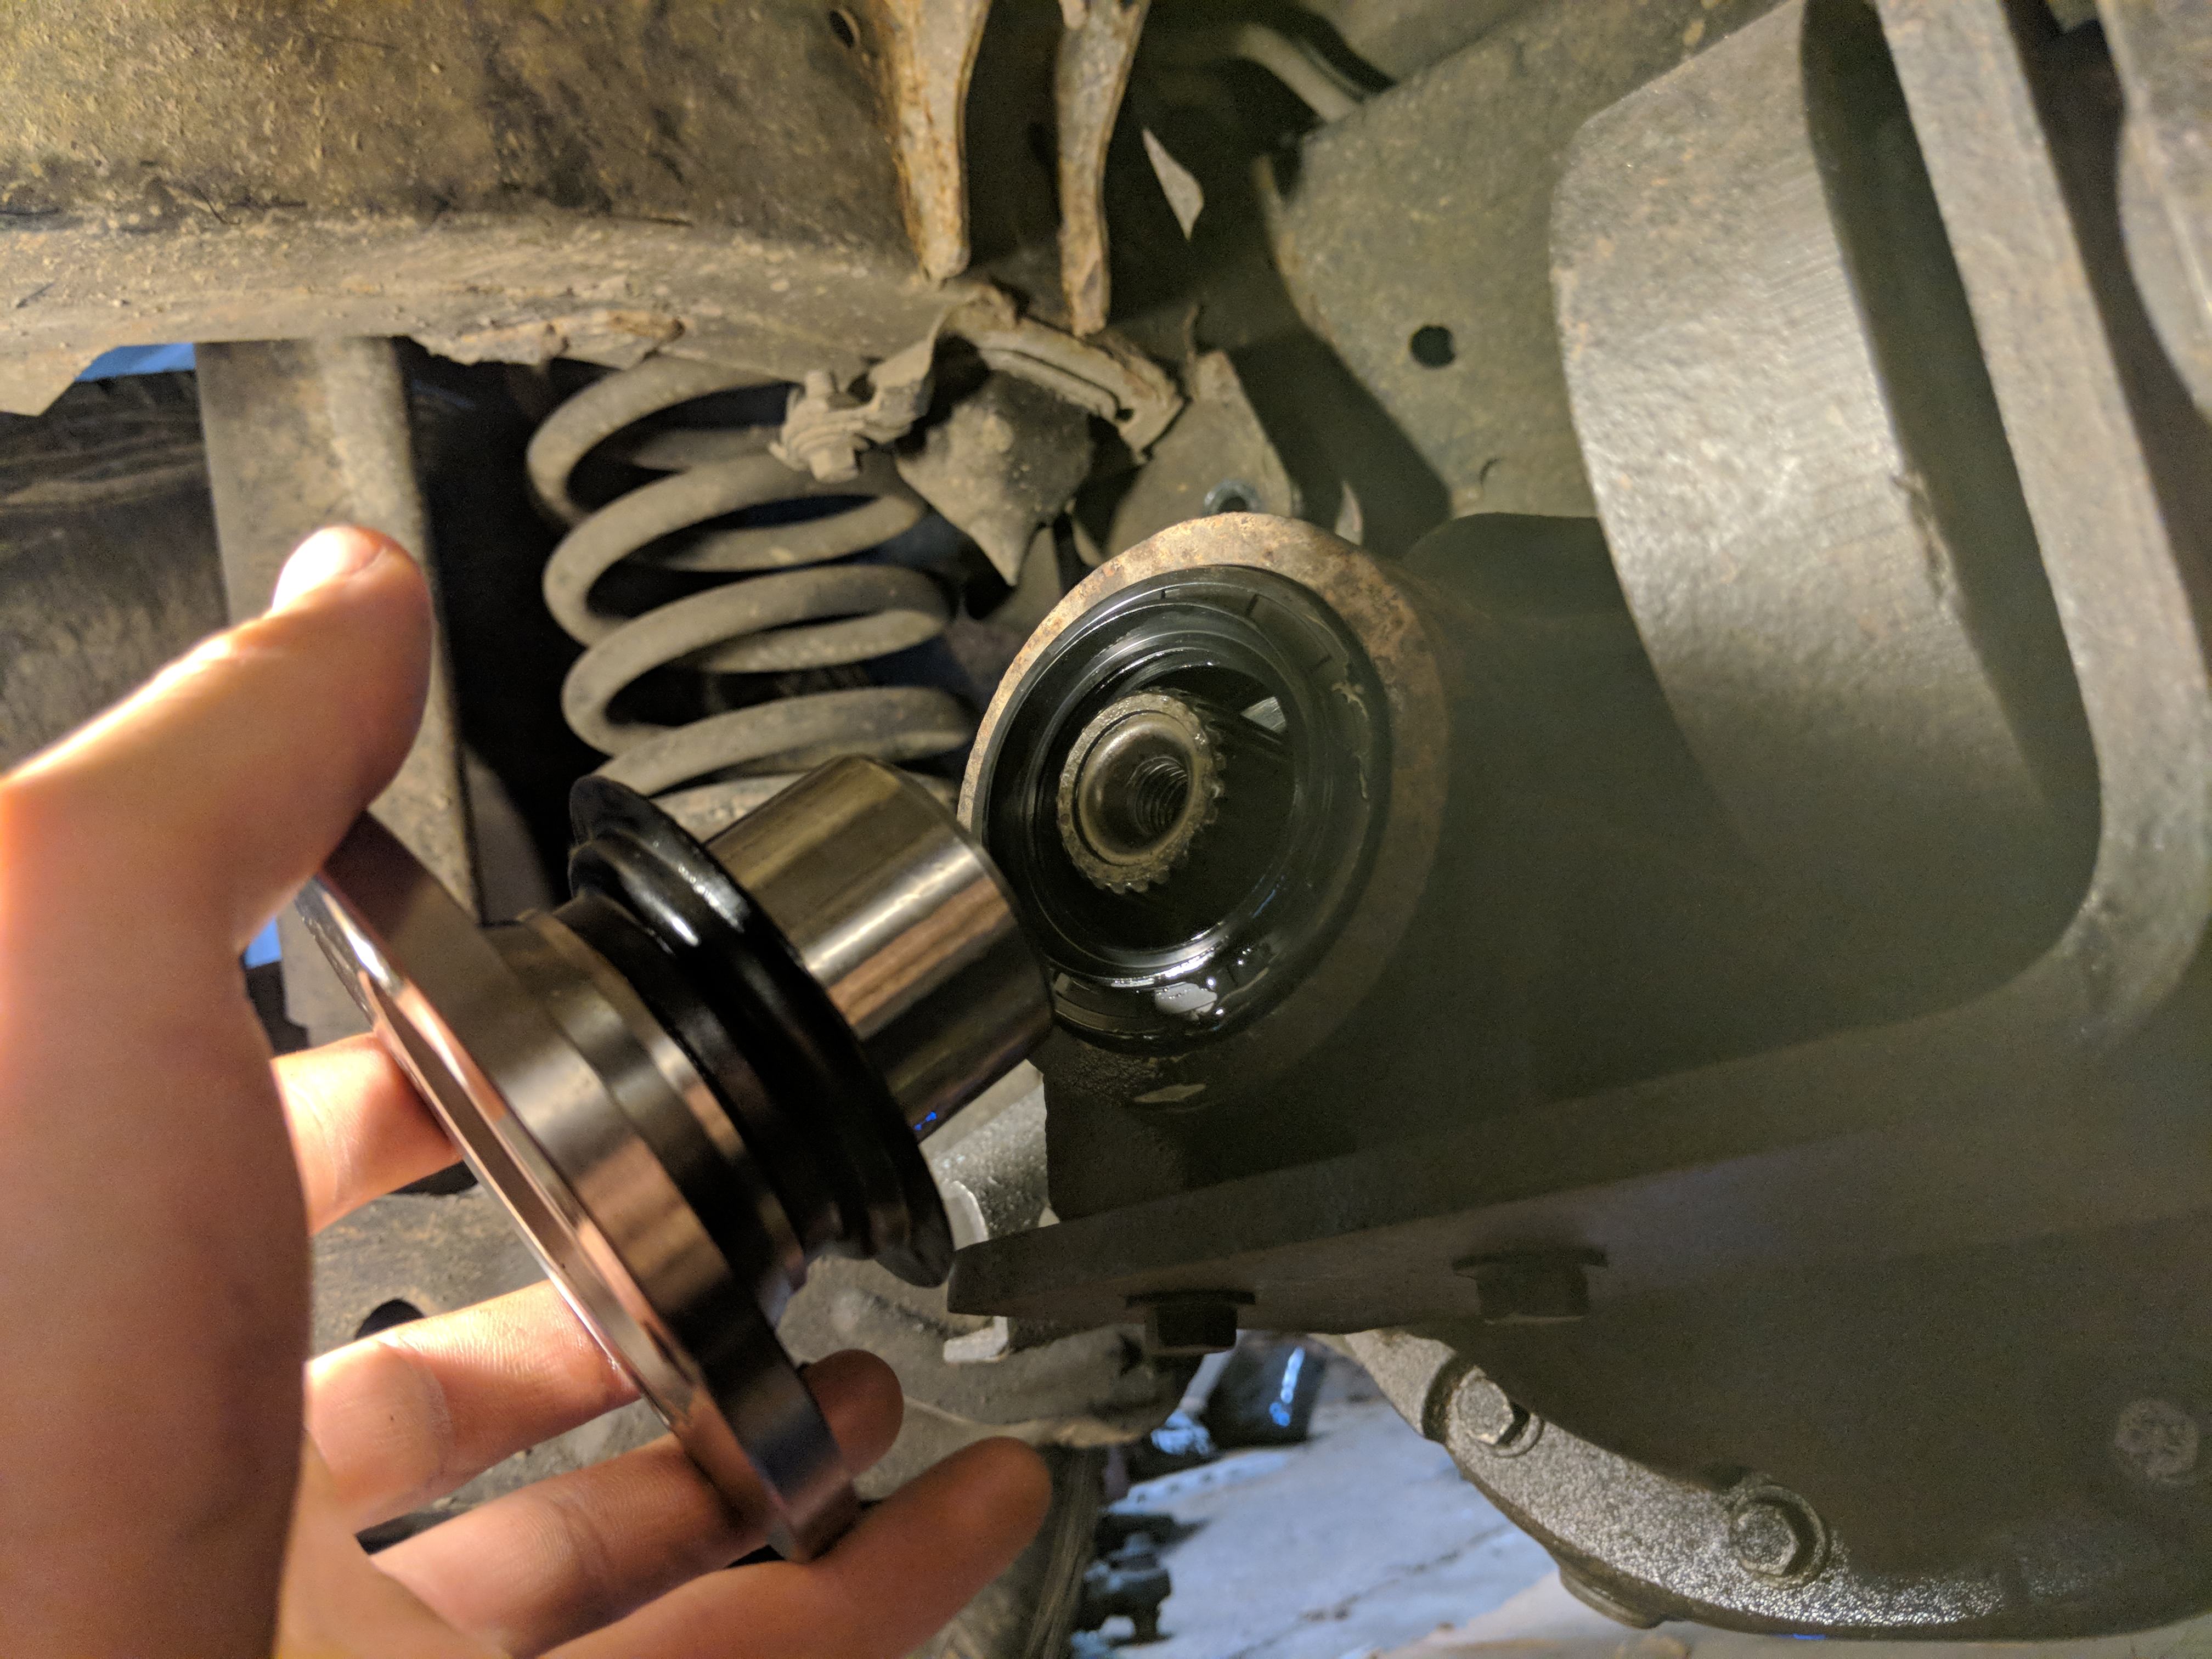
Once it's out we can insert the new seal. I put a little gear oil on the outside of mine to ease it along. I also put some oil on the shaft of the new flange.
Once that's done, insert the seal as far as you can by hand and then insert the flange. No need to hammer on anything, we're going to allow the bolt to bring them on in.
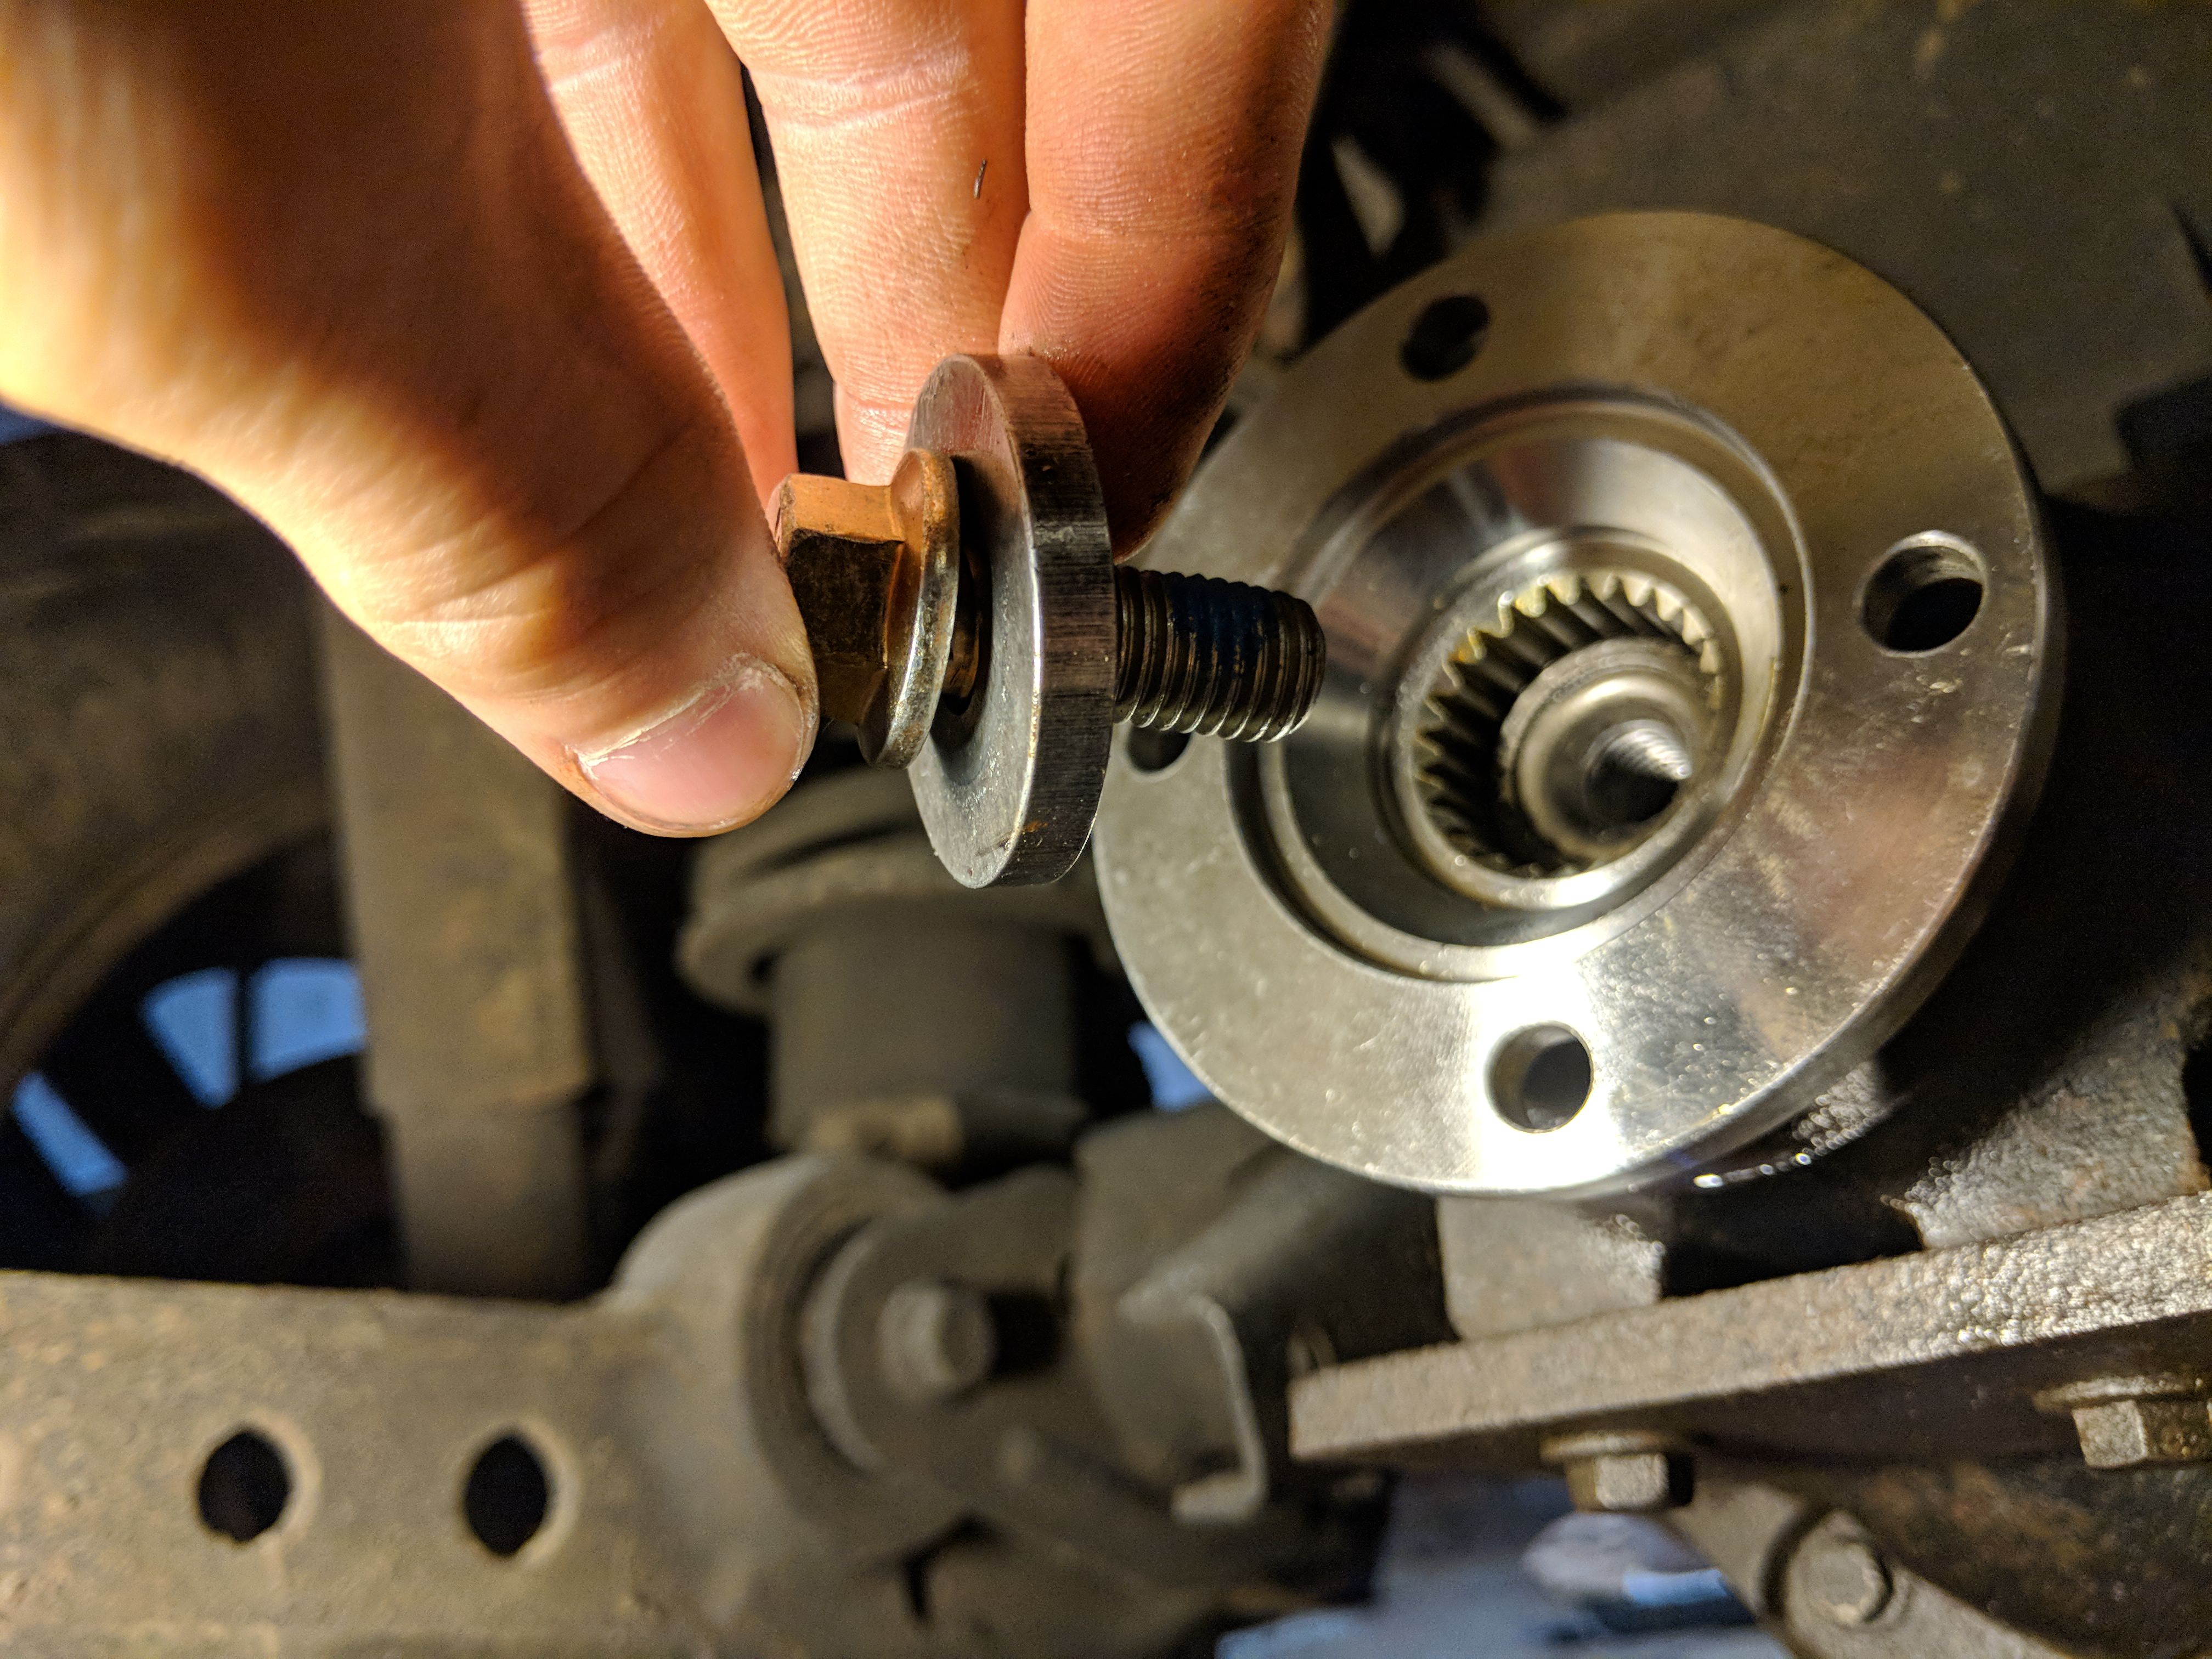
The kit does come with a new bolt, but you'll have to reuse the old washer. Tighten it down the same way you took the old out. Torque it down pretty good. I don't know what the torque spec is, but this fastener can handle quite a bit of torque. Crank on it pretty good.
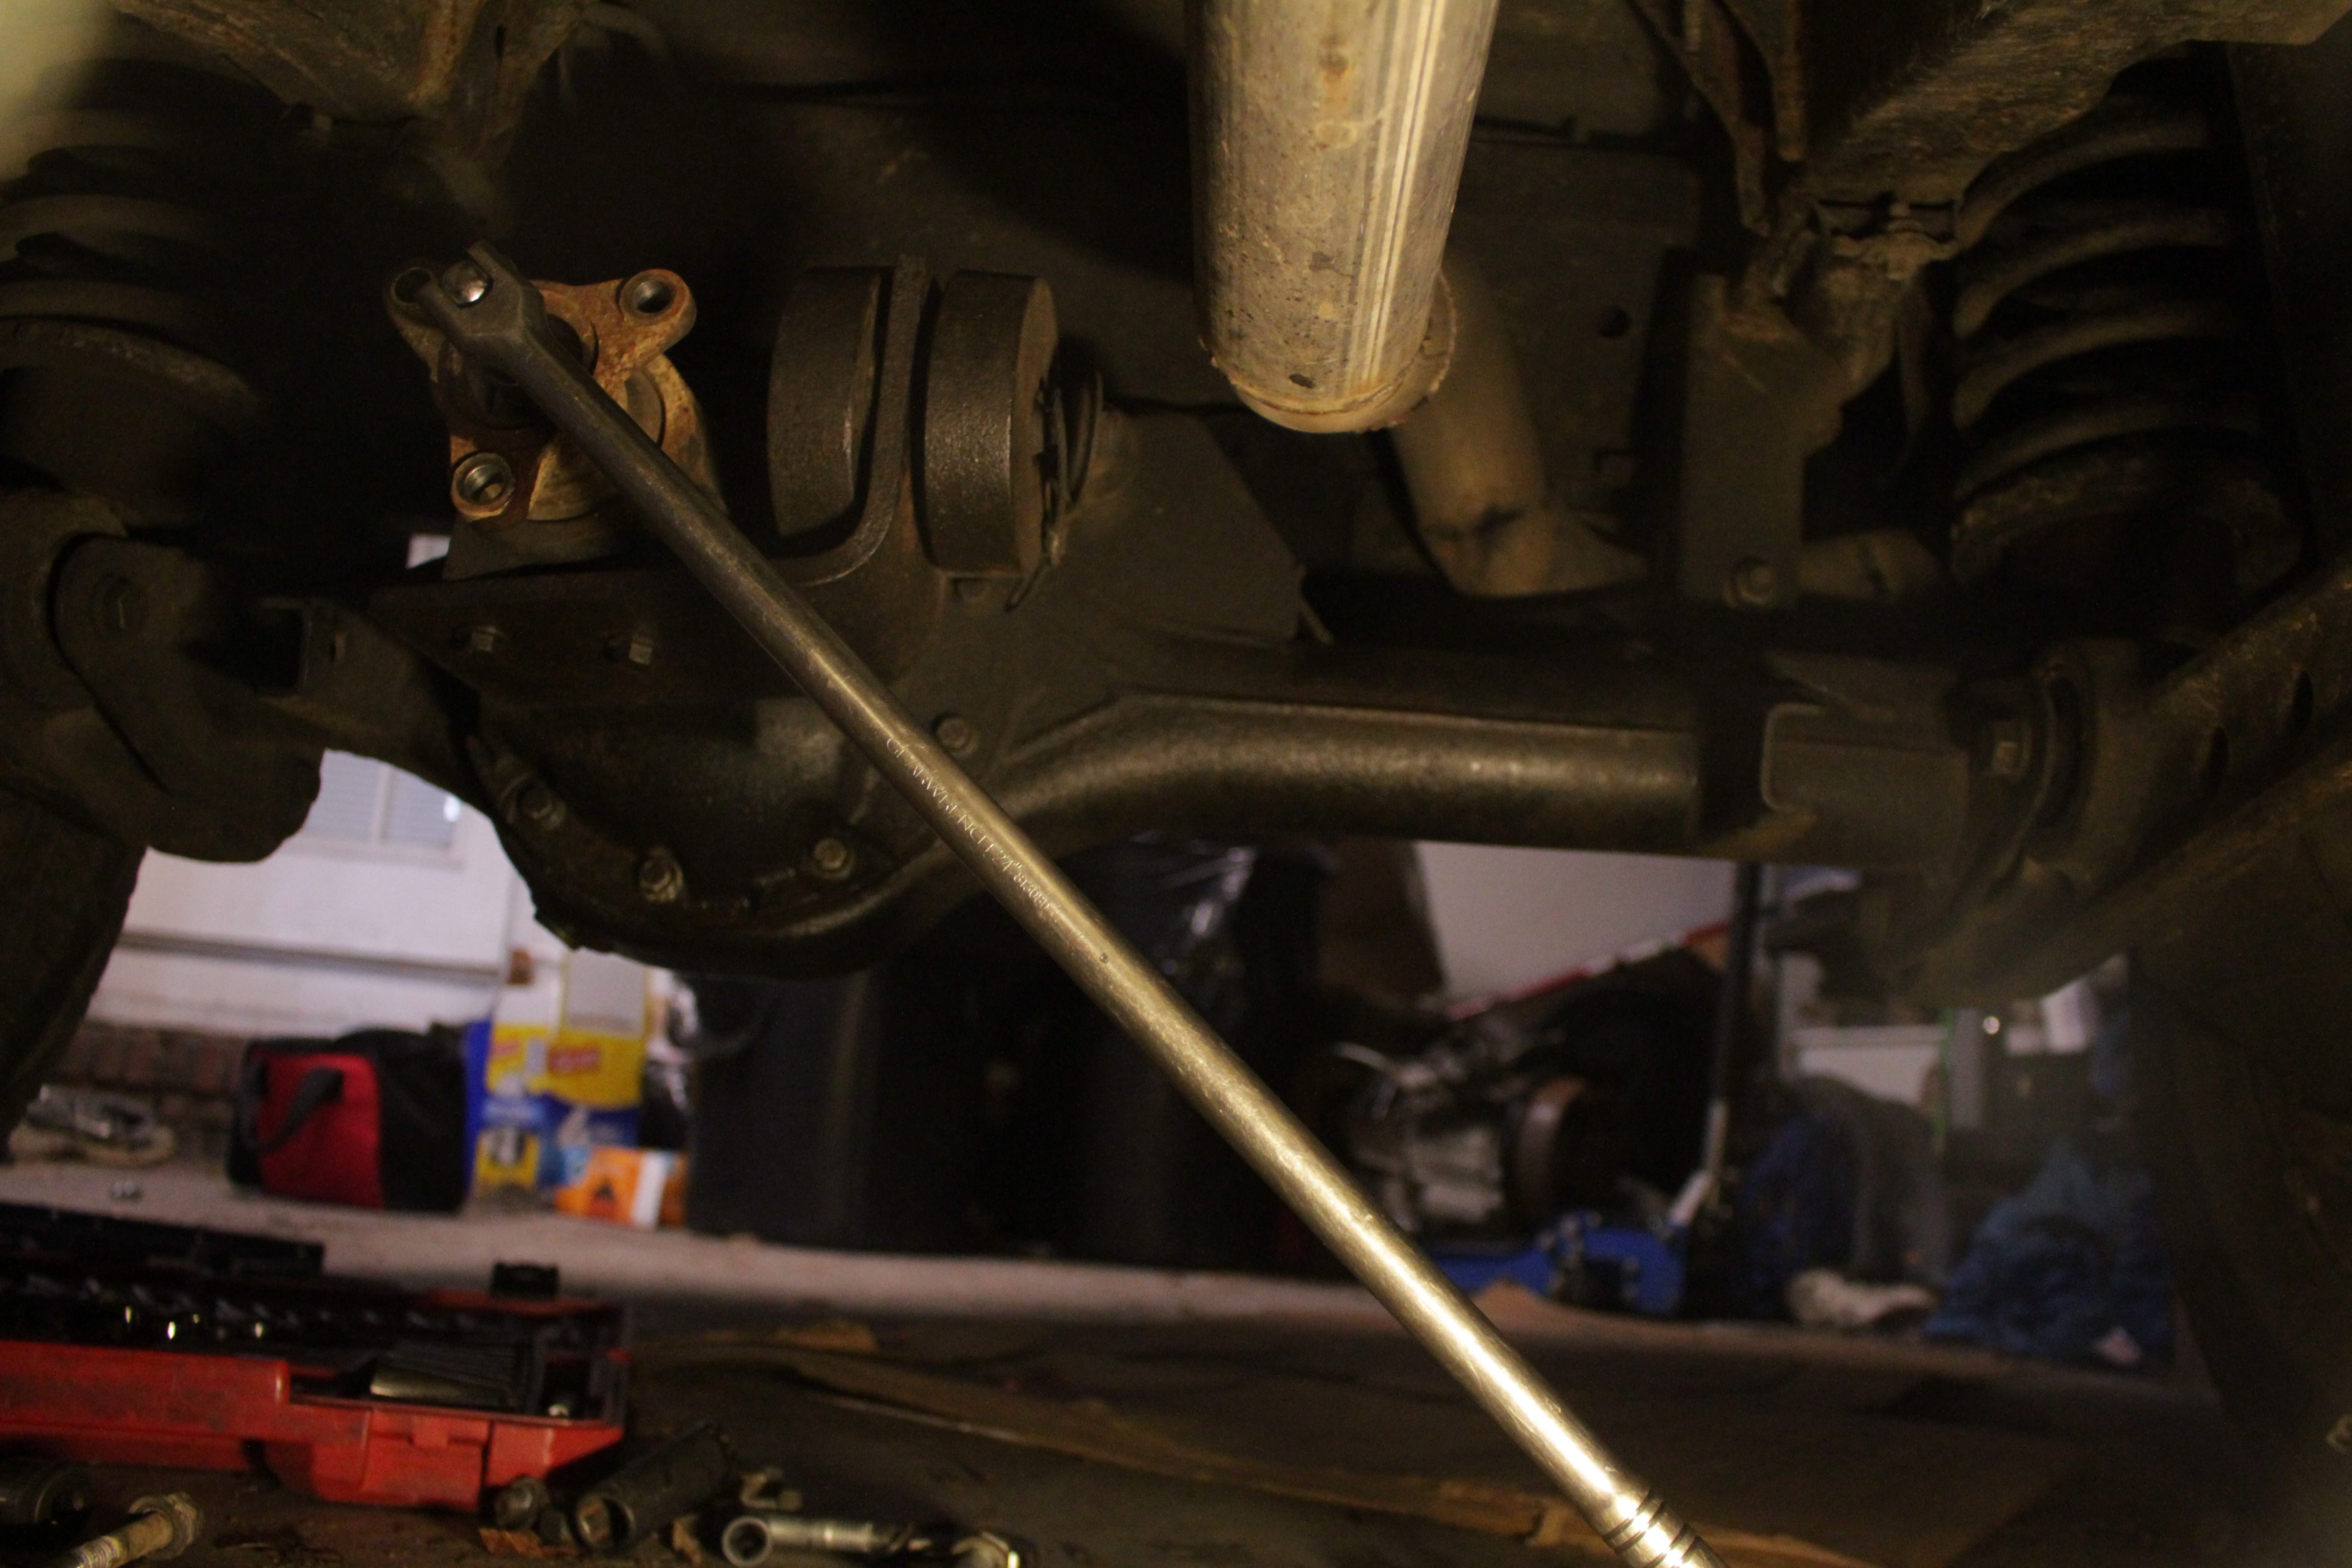
Once you're all tightened up it's time to install the driveshaft. I did the transfer case end first. I put the slip joint at the top because that's how the factory shaft was. Honestly not sure if it even matters. Just slip it on and tighten it down.

And now use your 3/8" nuts and bolts to install the pinion side of the driveshaft. Once you've got that in, you're done!
As always guys, I hope this write up was helpful. If you have any questions, comments, or recommendations please throw them below. I'm just a regular guy figuring this out on his own. Many of you may have a better way of doing something than I have done and recommended.
Thanks!
Alex
The parts I used were the rotoflex delete kit from Lucky 8 (with forum member discount) and a Discovery 1 rear driveshaft from eBay, used. The driveshaft was $68, the flange from L8 will vary depending on how far it has to ship to you.
Let me just say, definitely get the kit from L8 instead of worrying with a used flange. The kit comes with a new seal and a new bolt with loctite and I paid less than $15 more than I paid for my first used flange, which ended up being from a P38 (someone shipped me the wrong part) which won't work; the shaft diameter is much larger and it's a little longer.
Other than that, you need 4 3/8" bolts with nyloc nuts. I think my bolts were 1.5" which gave me some extra length. Also a 4" 8mm x 1.25 pitch bolt. Shoot, I think that's the right pitch, I can't remember exactly. Whichever one is most common. You also need a tap and die of the same size.
Once you've got all that, lets crawl under your truck and start removing the rear driveshaft and rotoflex. I just used two crescent wrenches.
I removed the driveshaft first, then I got the rotoflex off. I had to use a breaker bar; these were on tight.
I didn't get a picture of removing the other side, but you fellas know how to take 4 nuts off if you're tackling this project.
Now get back out from under your truck and grab your long 8mm bolt and the die. Stick your die in a vice or something. Run the bolt all the way down the head in the tap; you're going to need the threads. A drill makes this quick work; use some gear oil or cutting fluid. Careful, the bolt will be hot.
Now stick your tap in the vice by the square end. You'll need to grind down the raised part after the cutting portion. I used an air die grinder with a flap disc to keep it from getting too hot. If you get it hot the hardening will be ruined, though it will still work for this application. It just won't last very long. You need to grind it down low enough so that the shaft doesn't damage the threads you cut; the tap is going deeper than the thread cutters can reach and you don't want to damage any of the threads. You'll see what I mean below.
Now go back under your truck, bolt and tap in hand. This centering bushing is already drilled and partially tapped. Start the tap in the existing threads.
Run the tap all the way down to the end. This is why you had to grind down the shaft.
Now back the tap back out. Grab your bolt and wrench. Run the bolt as far down as you can by hand. We're going to use the bolt to press the bushing out.
It should come fairly easily. I did lightly oil the threads, but probably not necessary. I've heard some people have some problems with the 8mm and size up to a 10mm, but I think that's people who don't tap the hole the rest of the way down not realizing the threads are not cut all the way through.
Now take your breaker bar and a 15mm socket and take the center bolt out of the flange. You WILL need a breaker bar. Even with it it was everything I could do to break the bolt loose, and I'm a fairly strong guy.
Once the bolt is out the flange should slide out very easily.
If you ordered the L8 kit or if you have a new seal on your own, time to remove the old seal. I do not have a seal puller. I just stuck a 3/4" box wrench in there and smacked the opposite end a couple times to get it out; super easy.
Once it's out we can insert the new seal. I put a little gear oil on the outside of mine to ease it along. I also put some oil on the shaft of the new flange.
Once that's done, insert the seal as far as you can by hand and then insert the flange. No need to hammer on anything, we're going to allow the bolt to bring them on in.
The kit does come with a new bolt, but you'll have to reuse the old washer. Tighten it down the same way you took the old out. Torque it down pretty good. I don't know what the torque spec is, but this fastener can handle quite a bit of torque. Crank on it pretty good.
Once you're all tightened up it's time to install the driveshaft. I did the transfer case end first. I put the slip joint at the top because that's how the factory shaft was. Honestly not sure if it even matters. Just slip it on and tighten it down.
And now use your 3/8" nuts and bolts to install the pinion side of the driveshaft. Once you've got that in, you're done!
As always guys, I hope this write up was helpful. If you have any questions, comments, or recommendations please throw them below. I'm just a regular guy figuring this out on his own. Many of you may have a better way of doing something than I have done and recommended.
Thanks!
Alex
The following 6 users liked this post by Alex_M:
acg (11-20-2017),
jacobmstein (05-05-2021),
JUKE179r (11-18-2017),
longtallsally (11-17-2017),
mollusc (11-18-2017),
and 1 others liked this post.

#3
11-18-2017 | 08:57 AM
Thread Starter
|
Camel Trophy
Joined: Aug 2014
Posts: 4,734
Likes: 971
From: Southwestern Virginia
You probably could, but I actually preferred doing it the way I did so that there was more thread engagement thus negating the chances of pulling the threads out if it was seized in there good. Using a flap disc it shouldn't mess with the temper either. If it stays cool enough to touch then the temper won't be bothered.
#4
11-18-2017 | 09:47 AM

TReK
Joined: Feb 2013
Posts: 2,512
Likes: 653
Great write up Alex. Just a thought on the centering pin removal, a large socket, M8-1.25 bolt and nut, plus some washers works as a puller very well.
That centering pin can be a PITA to remove(it is held on with Loctite 601), but I've used the "puller method" many times with no worries.
Looks like this >
OR there is always this guys commitment to CRAZY! LOVE IT!!!
That centering pin can be a PITA to remove(it is held on with Loctite 601), but I've used the "puller method" many times with no worries.
Looks like this >
OR there is always this guys commitment to CRAZY! LOVE IT!!!
Last edited by OverRover; 11-18-2017 at 11:08 AM.
The following users liked this post:
JUKE179r (11-19-2017)
#5
11-18-2017 | 01:44 PM

Baja
Joined: Aug 2013
Posts: 5,845
Likes: 368
From: Near Bordeaux, France
Hi Alex, if you had said something I have the equivalent of the LR tool for pulling the rear diff spigot which I could have sent you.
There is only a couple of problems as far as I know with a rear shaft conversion, there is no shock absorber effect now and secondly it'll be all non-standard parts involved, but I guess you realise that.
There is only a couple of problems as far as I know with a rear shaft conversion, there is no shock absorber effect now and secondly it'll be all non-standard parts involved, but I guess you realise that.
#6
11-18-2017 | 04:22 PM
Thread Starter
|
Camel Trophy
Joined: Aug 2014
Posts: 4,734
Likes: 971
From: Southwestern Virginia
Thanks OverRover! Never thought about the socket method, but it's a neat idea. The only other method I've seen is using a legit puller. Speaking of...
France, I appreciate that. Had no idea, though the way I did it worked perfectly. I very much appreciate the offer though.
Yes, aware of the lack of shock protection, though I'd still consider these standard parts since the pinion flange and the driveshaft are factory parts; just off of a different model. Wouldn't be hard to find replacement u-joints or anything if I needed to.
#7
11-18-2017 | 11:58 PM

Camel Trophy
Joined: May 2016
Posts: 3,967
Likes: 853
From: Britainistan, UK
#8
11-19-2017 | 05:02 AM

Camel Trophy
Joined: Oct 2016
Posts: 4,705
Likes: 1,282
From: Michigan
#9
11-19-2017 | 08:33 AM
TReK
Joined: Feb 2013
Posts: 2,512
Likes: 653

#10
11-19-2017 | 08:58 AM
Thread Starter
|
Camel Trophy
Joined: Aug 2014
Posts: 4,734
Likes: 971
From: Southwestern Virginia
Yeah, I was getting one REALLY bad around 70 mph. Went to looking for replacement rotoflex and it seemed like the good ones were $200+. I was like, heck, for that money I'll just concert and never have another issue until the Universal's wear out.
Odd the pictures aren't loading. Might be that they're high res as mentioned. They're loading fine on both my phone and my laptop.
I'll see if I can post up a direct link to the picture album for those that are having issues with the pictures loading.
Odd the pictures aren't loading. Might be that they're high res as mentioned. They're loading fine on both my phone and my laptop.
I'll see if I can post up a direct link to the picture album for those that are having issues with the pictures loading.