
refurbishing the fender flare plastics...

Thread Starter
|
Rock Crawling
Joined: Jan 2012
Posts: 498
Likes: 20
From: Belton, TX
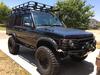
Just curious if anyone has refurbished there fender flairs? I'm thinking sanding and polishing? Mine arent just sun beat but have rough spots. Thanks for any help.

Recovery Vehicle
Joined: Sep 2009
Posts: 1,135
Likes: 14
From: Roanoke Valley, VA
I used Duplicolor Bed Armor in a spray can. Awesome stuff! Follow can directions by sanding modestly with 180 grit sand paper, (I used 150 as that is what I had). Paint in light coats as many coats as you like, I used 6-8, but 3-4 is probably enough. See previous link on this here:
https://landroverforums.com/forum/di...o-lined-59306/
Here are my added points in the above post when using the Duplicolor Bed Armor.
1) Taping / Sanding - Tape it off before you sand so you do not scuff the paint as you sand close to the body. Just basic sanding to prep surface using 180 grit sandpaper. I worked on the rougher spots a little more, but not much. After a few coats the textured rubberized paint will fill it in anyway.
2) Shake Well and while painting - Because this is textured and rubberized, it is very important to shake well before and ever minute during painting. Instructions say this, but do not rush to get started before you get the can good and mixed. I did mine one wheel arch at a time, so really the painting time for each coat was less than a minute.
3) Light Coats - Because this paint is textured and rubberized it does not have over-spray like regular spray paint which is nice, but it can come out in larger paint spots sometimes, so light coats are a must to keep it from running. If you do see a run developing, just let it dry for the 10 minutes per instructions between coats, and before the next coat run your finger over it to spread the paint and knock down the run area. Or on a few runs I just ran my finger over it just after painting to smooth it out. The next light coat or two will cover it right up. The instructions call for 3 to 4 light coats, I think I ended up with about 6.
4) Clean Spray Nozzle Often - Due to the textured and rubberized paint after each coat a bit of thick paint is left on the spray nozzle. Wipe off the nozzle after each coat to keep the spray as clean and even as possible for the next coat.
Last edited by Rover_Hokie; Jul 2, 2013 at 11:49 PM.


I paid someone to put a rhino-line product on mine, lifetime guarantee on the product and workmanship. Everyone has there own way, I wanted a permanent fix, paid under $150 and the license plate plastic was done too. There are pics of it the before and after on the forum.
Recovery Vehicle
Joined: Sep 2009
Posts: 1,135
Likes: 14
From: Roanoke Valley, VA
In regard to cleaning the Bed Armor on the fender flares, I let it dry good for a few days to make sure it had hardened well, but I washed the flares just like the rest of the body with a soft brush on my car wash extension handle and have seen no change in the appearance. I have run by D2 through the car wash with brushes a few times as well, and have seen no issues there either. I also painted the rear tailgate door handle cover above the license plate, and it is still looking good also.
I guess if you really wanted to you could add some rubber/vinyl protectant, but I have not done anything special to mine. I will probably add some Black Magic vinyl protectant as that is what I like to use on my plastic items to put the "oil" back into the plastic and give it a little shine. Not sure it is necessary here with the multiple coats of bed armor. I am not sure the Black Magic would ever get down to the plastic or not to soak in, but there is some rubber in the bed armor, so may give it a try. I have had some interior and exterior black plastic trim pieces on other vehicles that were a bit faded; I just rubbed the Black Magic on it ever time I saw it looking dried-out over a couple weeks, and it eventually stayed black and would not soak up anymore. I lived in Sugarland, TX for a short while a few years back, and I would say with that heat and sun, a little protectant in that type of climate may be helpfu in Texas.
I am not an expert, but to date, I really like this stuff. It looks a lot like the OEM look, and that is what I was really going for. Some guys like the flares to be smooth, and others like to remove them all together. To each their own, but so far I like it. I rode some tight trails with over grown trees/bushes this past weekend, and did not notice any damage to the bed armor on the flares either.
Last edited by Rover_Hokie; Jul 22, 2013 at 10:38 PM.
Thread Starter
|
Rock Crawling
Joined: Jan 2012
Posts: 498
Likes: 20
From: Belton, TX
Nice, well im out of Temple TX, a bit north of Sugarland and the sun is killing my plastics. I think i will do the bottom side trim, front grill, mirrors, rear door handle, door handle, roof bars and rear lower corner pieces. The good thing is I can remove these pieces. I just wanted to make sure it was washable considering a rag gets raped on the pointy stuff.,.,

Recovery Vehicle
Joined: Jan 2012
Posts: 1,064
Likes: 16
From: San Antonio,Tx
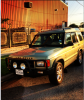
I don't know if I'm too late on this but I painted my fender flares awhile back and made a thread while doing it. You can check it out if you want. https://landroverforums.com/forum/di...-flares-49802/
Hope I'm able to help a fellow Texan.
Hope I'm able to help a fellow Texan.
Last edited by Jared9220; Jul 23, 2013 at 07:44 PM.