
Stereo Help


TReK
Joined: Feb 2009
Posts: 2,186
Likes: 200
From: Linden, NJ
Can't you adjust the gain and sound and such at the head unit level? I'm quite certain this is not audiophile quality, but might save you a heck of a lot of work/money.
My plan is just the head unit (for the same reasons as everyone else: bluetooth and/or usb) using the OEM amp. As such, I thought that Metra or whatever adapter gives you the ability to turn the OEM harness into regular RCA cables. And if you've got RCAs, can't you plug them into the pre-outs of the head unit and subsequently control the sound and output by amp?
Again, not the audiophile way, but could save a lot of headache.
I am sure once you have the head unit connected properly you can adjust your audio preferences. BT for your phone and handsfree calls. It's a nice upgrade from the original unit.

Thread Starter
|
Rock Crawling
Joined: Nov 2014
Posts: 371
Likes: 12
From: Eugene, OR
I've already got the Metra harness in the dash with my existing head unit. I'm going to use the plugs only from those. I plan on pulling all the wires/terminals/RCA's from the plug housings. Then track down some new crimp terminals, and tie them directly into the Alpine wire harness. That way I won't have to couple or soldier any wires together.

Recovery Vehicle
Joined: Dec 2016
Posts: 1,195
Likes: 488
Hmm. The engine noise spooks me a bit, but I thought those things would all be shielded this day (even when these things were built) day in age. Shoot, my late 80s BMWs with factory amps didn't do this when I put in an aftermarket HU.
Thanks for the info either way. I think I'll stick with my plan as although this will be a DD, my "big rims big stereo" days are long passed, so as long as I don't get interference, the simpler the better.
Thanks for the info either way. I think I'll stick with my plan as although this will be a DD, my "big rims big stereo" days are long passed, so as long as I don't get interference, the simpler the better.
TReK
Joined: Feb 2009
Posts: 2,186
Likes: 200
From: Linden, NJ
Try both the power and the amp input. These below might help.
Install Bay IBNF10 10-amp Noise Filter | eBay
NEW BOSS B25N 12V CAR CB / RADIO/AMP RCA AUDIO NOISE FILTER GROUND LOOP ISOLATOR | eBay
3.5mm Aux Audio Noise Filter Ground Loop Isolator Car Electrical Eliminator
Install Bay IBNF10 10-amp Noise Filter | eBay
NEW BOSS B25N 12V CAR CB / RADIO/AMP RCA AUDIO NOISE FILTER GROUND LOOP ISOLATOR | eBay
3.5mm Aux Audio Noise Filter Ground Loop Isolator Car Electrical Eliminator
Thread Starter
|
Rock Crawling
Joined: Nov 2014
Posts: 371
Likes: 12
From: Eugene, OR
We've already committed to replacing everything. When I say we I meant me.
This should be a pretty easy job, and nothing over the top about it. At first I was concerned about the wiring, but after really thinking about it's pretty straight forward. I just want to make sure that it's a clean install, and use use good crimp terminals.
I'll be sure to post up pictures as I go so everyone can see what I had to do. I'm also going to add sound deadening to the doors, and apply new vapor barriers. I plan on inspecting the window tracks as well to see if they need to be replaced.
Last edited by Mstudt; Jan 4, 2017 at 11:18 AM.
Thread Starter
|
Rock Crawling
Joined: Nov 2014
Posts: 371
Likes: 12
From: Eugene, OR
Looks like everything stereo wise will be in next week along with the sound deadening. The pins I ordered are coming from the UK so I'm sure that'll take a little bit of time.
I'll start posting pictures once things start coming in, and I get going on this task.
I'll start posting pictures once things start coming in, and I get going on this task.
Thread Starter
|
Rock Crawling
Joined: Nov 2014
Posts: 371
Likes: 12
From: Eugene, OR
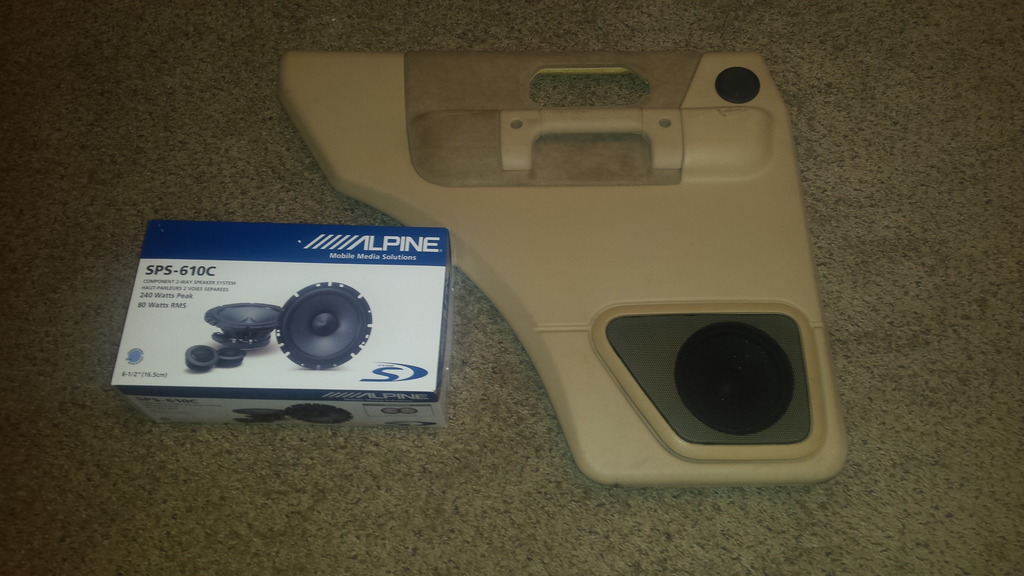
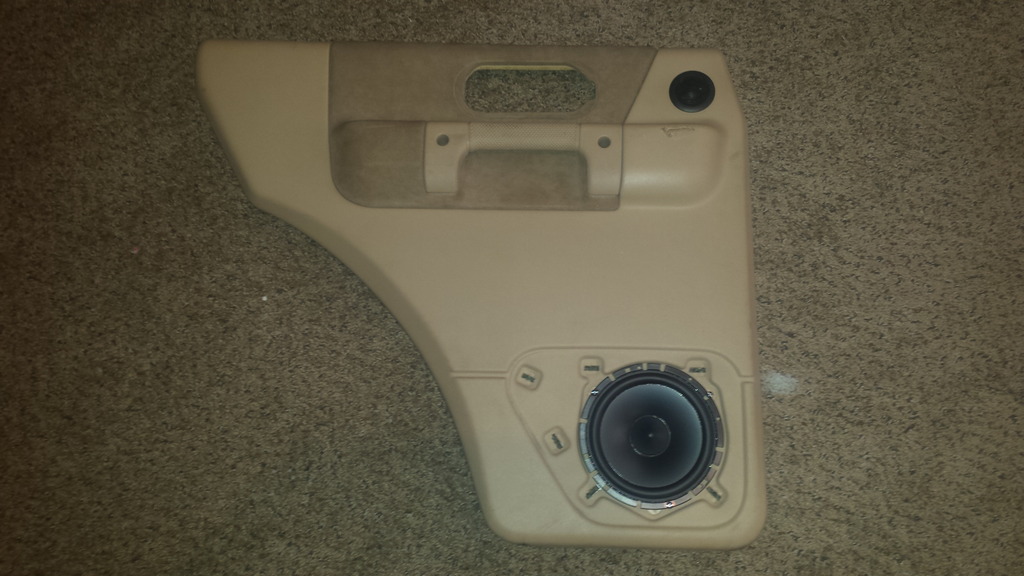
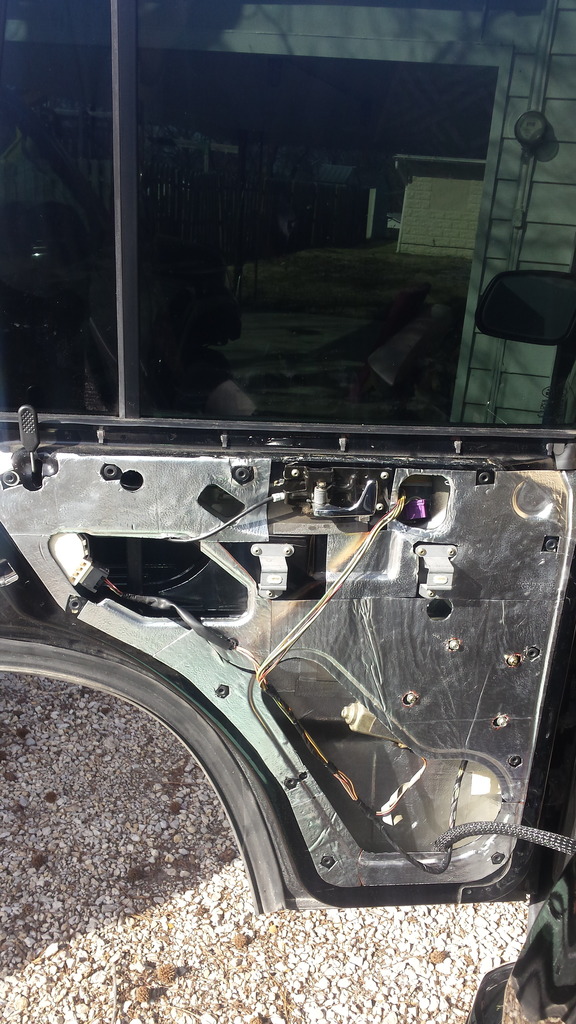
I was finally able to start on the stereo this past weekend, and I decided to go after the rear doors first. I sound deadened the doors before I installed the new speakers. The sound deadening was placed on the inner metal, and the outer metal.
Installation of the Alpine SPS-610C's were very easy. The factory tweeter opening needed to be enlarged very slightly, and that was done with a razor blade.
Before Install
Installed Speakers
Sound Deadening
Installation of the Alpine SPS-610C's were very easy. The factory tweeter opening needed to be enlarged very slightly, and that was done with a razor blade.
Before Install
Installed Speakers
Sound Deadening
Thread Starter
|
Rock Crawling
Joined: Nov 2014
Posts: 371
Likes: 12
From: Eugene, OR
I started with the install on the head unit, and amp yesterday. I'm still completely amazed at the lack of space in the dash area on these, and that makes mounting a amp a bit more difficult. I ended up mounting the mini amp in the glove box, and still have room to put a couple things in there.
I need to get some picture of the install, but the glove box is going to be the best option for this.
I need to get some picture of the install, but the glove box is going to be the best option for this.

Winching
Joined: Jan 2014
Posts: 741
Likes: 55
From: South Flatistan
I started with the install on the head unit, and amp yesterday. I'm still completely amazed at the lack of space in the dash area on these, and that makes mounting a amp a bit more difficult. I ended up mounting the mini amp in the glove box, and still have room to put a couple things in there.
I need to get some picture of the install, but the glove box is going to be the best option for this.
I need to get some picture of the install, but the glove box is going to be the best option for this.
Thread Starter
|
Rock Crawling
Joined: Nov 2014
Posts: 371
Likes: 12
From: Eugene, OR
I've been using GT Sound Control for the last couple years. It's a good product, and doesn't carry the high price tag.