
wheel well trim replacement


 ? Was it difficult? What's involved? Thanks, Mark J
#2
 01-01-2017, 01:50 PM
There have been some discussions about renovating old trim pieces but I don't recall hearing about anyone getting a completely new set and sticking them on. For renovation you can tape off and recover with rattle can black, rubberized undercoating or even bed liner. If trim gets loose or falls off you can clean the painted surface behind the trim and then reapply with adhesive or 3M sticky tape of the proper width.
A few of us have removed all of the wheel trim completely which (arguably) cleans up the appearance of the truck. This can be time consuming as the sticky tape is usually difficult to remove from the painted surfaces. If your truck has spent any time baking in the sun the paint underneath the wheel trim can be a few color shades darker when compared to the remainder of the body.
I'm about 70% of the way decided to remove all of my wheel trim but I don't look forward to the work of removing the old adhesive tape. My Disco is silver so it doesn't show the color difference as much.

#4
01-01-2017, 02:52 PM

Pro Wrench
Perfect timing!!
I was out in the garage scrubbing all the exterior bits with some plastic cleaner and was thinking about removing mine, hitting with some sand paper, and then doing the bed liner or rubberized approach. Need to read up on how well the bed liner or rubberized stuff sticks to the plastic.
I was out in the garage scrubbing all the exterior bits with some plastic cleaner and was thinking about removing mine, hitting with some sand paper, and then doing the bed liner or rubberized approach. Need to read up on how well the bed liner or rubberized stuff sticks to the plastic.

#7
01-01-2017, 03:24 PM

Just rip them off (it won't hurt your paint) and use this 3M adhesive remover wheel. This is a super easy job with the right tools and this 3M wheel is all you need. It's make specifically for this type of stuff. My father inlaw owns a body shop and he told me to use one when I mentioned I was having trouble with whatever BS processes I had read on the forum.
#8
01-01-2017, 03:39 PM
Pro Wrench
It was easy, just reach in there with gloves and pull slowly.
If you need to get the plastic away from the fender, so you can grab it, use a flat head screwdriver and push towards you from inside the wheel well.
I started at the drivers door corner and worked my way around the wheel well prying off the top bit with my hands(paint did come off as noted in the second picture)
I then started again at the drivers door corner and pulled the bottom part off working my way around the wheel well.
I will get a hair dryer and heat the plastic where the 3M tape is for the passenger side, as paint did come off around the top part.
I added a picture of rear drives side where the 3M tape is so you can get an idea of where to heat.
I would suggest getting some rubbing compound and/or clay bar, some type of solvent or gas, plastic scrapper, and some kind of polishing wheel as noted above (I used the Dremmel polishing wheel on speed setting 6).
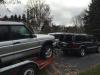
Finally the last picture is the completed removal. I really like the look and now I am not sure if I am going to put them back on.
If you need to get the plastic away from the fender, so you can grab it, use a flat head screwdriver and push towards you from inside the wheel well.
I started at the drivers door corner and worked my way around the wheel well prying off the top bit with my hands(paint did come off as noted in the second picture)
I then started again at the drivers door corner and pulled the bottom part off working my way around the wheel well.
I will get a hair dryer and heat the plastic where the 3M tape is for the passenger side, as paint did come off around the top part.
I added a picture of rear drives side where the 3M tape is so you can get an idea of where to heat.
I would suggest getting some rubbing compound and/or clay bar, some type of solvent or gas, plastic scrapper, and some kind of polishing wheel as noted above (I used the Dremmel polishing wheel on speed setting 6).
Finally the last picture is the completed removal. I really like the look and now I am not sure if I am going to put them back on.
Last edited by Friday Night Disco; 01-01-2017 at 06:29 PM.
#9
01-02-2017, 07:51 AM

#10
01-02-2017, 08:25 AM

Rock Crawling
I have replaced them - remove them carefully if you want to reuse them.
for new replacement get all the glue cleaned off with laquer thinner and then put the new ones on. Hold them in place with pressure for a few minutes. Do this in a warm area for best results. I also used a screw to hold mine down on the inside edge (optional)
for new replacement get all the glue cleaned off with laquer thinner and then put the new ones on. Hold them in place with pressure for a few minutes. Do this in a warm area for best results. I also used a screw to hold mine down on the inside edge (optional)