When you click on links to various merchants on this site and make a purchase, this can result in this site earning a commission. Affiliate programs and affiliations include, but are not limited to, the eBay Partner Network.
I will update this thread as I finish this project. Today I just fitted the battery into the second bay. This is a US LHD model LR3 - 2006.
The first thing was to get a battery that would fit. Many threads, many comments. Some battery sizes I could not locate in the US. I ended up with a 40R. The size, 40R, has the "euro" top which works with the factory hold-down. And while this battery is physically smaller than the main battery the capacity remains pretty much the same. 800CS, 650CCA. So I have matched batteries. NAPA Auto Parts carries the 40R for $125 USD. If you have a Sam's Club, you can pick up a 40R from Duracell for just $100 USD. You can also use a regular group 40. The R means reverse terminals, which for how I am positioning the battery and routing wires was ideal. This battery is a wet cell lead acid starting battery. Its NOT a deep cycle. Because I dont camp much this works fine. I usually stay at a place for just one night. And even if I stress the battery enough to kill it, I should get at least three years out of it. Battery has a 75 month warranty. I assume the is some prorated coverage after the first year.
But the battery will be wired for jump starting, winch assist, and house power via 4awg lines to the rear. To assist in charging and switching power for jumping/winching the main batter I have a Blue Sea ML-ACR (model: 7622). I bought this particular kit after looking at the popular Traxide solenoid for a couple reasons. First the Blue Sea solenoid was about the same price since I will be making all my own cables. Second, its IP67 rated. This means it can take pressurized water, like from a pressure washer, just fine as well as be submerged for 30 minutes. Traxide fails to mention any IP rating. Third it can operate up to 500amps continuous. I will never push the amp rating that far, but the Traxide is rated for only 160amp and I dont believe continuous. This may not be a big deal, but if I am winching and want all the power I can get I want to be certain its there safely. The best price for these was from Amazon for about $200. It includes a remote switch, standard carling style. I will have to extend the cable.
INSTALL:
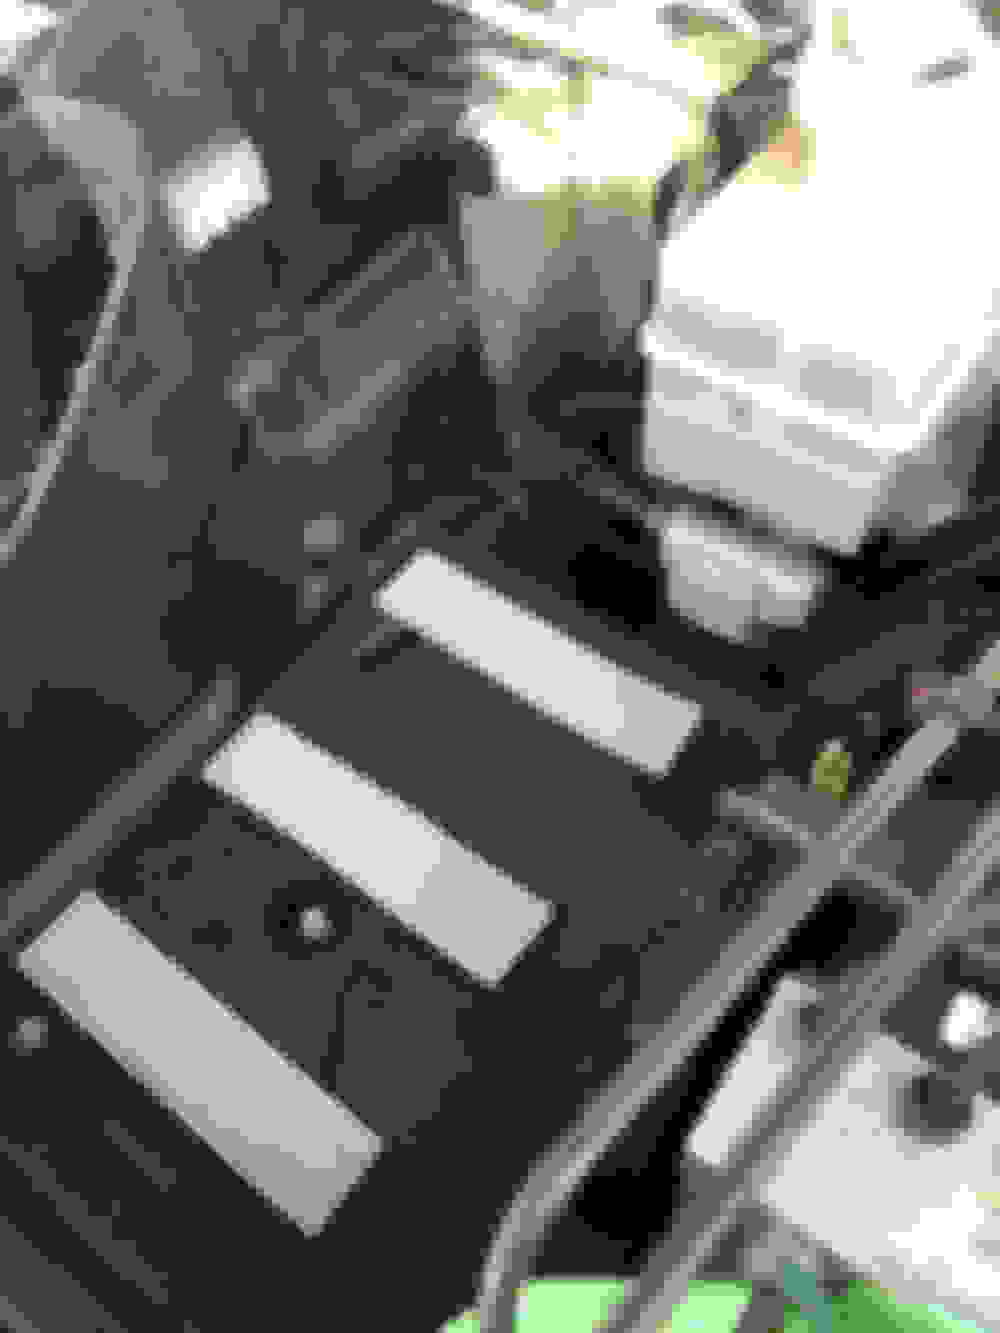
So today I deiced to at least get the battery fitted into the second bay. If you are going for the largest battery that will fit, like I did, you need to make some minor modifications to the battery compartment base. On the forward end there are some support ribs that must be removed. I removed half the base and with careful Dremel work took them off. For the three remaining on the other half base, same deal. I just did so with the base installed. Make sure you smooth things out. The plastic is very hard and I feel its possible burs could cut into the battery shell. Before final install, I will be placing some compression foam to support the battery and snug it up.
As you can see in the pics, there is still about a quarter to half inch gap between the battery and master cylinder. I will be installing some dense foam on that side of the battery. I may even insert some studs in the compartment base to prevent the battery from sliding backwards into the master cylinder. But for now I am happy with how much clearance there is. I test fit the cover and there was no issue, plenty of room. The one mistake I made was to purchase a battery hold down for an LR3 that stated it was for the second bay. They are not the same, you need different holders for each side. So I am off to purchase the proper one now. I know I could make my own but I much prefer the security of the original design.
Thanks for doing this write up. Looking forward to your additional pictures. Please post source and part numbers for the battery mount that works as I’m about to install a second battery. Appreciate the inline photos too!
The battery hold-down is YJF500100R. Some people sell them with the long bolts, some not. On eBay a kit is a whopping $50. Total rip-off. But there are not a ton of reliable sources in the US. Im still looking around for a better price.
edit: Bought the one on eBay. They have several available. All new with bolts.
Last edited by DakotaTravler; Mar 9, 2019 at 01:15 AM.
Using that part number, I found a listing that I had seen earlier at BPUtah for the bracket and both bolts for LHD for $40 plus shipping. Is that same thing you Found on eBay? British Parts of Utah
Wrong bracket, note the last letter of the part number. But yes, they have an eBay store and that�s were I just bought mine from. Says seller is away now so not sure when it will ship.
So while I was waiting for my exhaust to cool, I took a few minutes to install the battery itself. Thus, not much to report right now. The battery is shorter than stock, so I picked up a couple thick nylon washers that worked perfectly! I also installed a bit of foam. It compresses a lot. So it sorta acts as a cushion pad but also to prevent the battery from shifting. So now the battery is very well secured. I dont feel it would hit he master cylinder at all. Coming up soon will be the solenoid and cable installation.
Looks good! I installed my National Luna kit this weekend. I didn’t have good luck with the OEM hold down. The Odyssey 34r that I bought didn’t have the same shape to the top. I need to run the the auto parts store and see what I can find that may work with the limited space under the cover.
If you are handy with basic metal work and can find metric threaded rod, I have seen some use a simple piece of flat metal. Inch or two wide. Drill a couple holes and then just a couple nuts on the top end of the thread. Paint it black to look pretty. Simple but effective and very low profile.
Last edited by DakotaTravler; Mar 18, 2019 at 10:35 PM.