When you click on links to various merchants on this site and make a purchase, this can result in this site earning a commission. Affiliate programs and affiliations include, but are not limited to, the eBay Partner Network.
What I didn't do today (no pictures so, it didn't happen)
I did not take any pictures (I forgot) So in proper forum decorum, I will describe what I did not do.
They say that a picture is worth a thousand words, so I will apologize for the four picture post.
I had heard it was a pain it is to add under mirror puddle lights to the LR3 and I had given up trying.
I was looking for some unrelated ham radio stuff yesterday and I found a set of LED lights that I had bought some time ago thinking it would be an easy, modification. Nothing else real pressing, so why not explore this again.
I did not take off the door card as is described in at least 17 YouTube videos.
I did not remove the mirror as outlined in the service manual.........
OK, I have had my fun, so I will describe what the problems were and how I solved them.
Remove the door card and mirror as shown in many YouTube videos or service manuals. Once you have the mirror sitting on you work bench, you are ready to begin:
Removing the glass in the mirror is straight forward. Grab the bottom and the glass and gently but firmly pull the bottom part up until it disconnects. If you have heated mirrors, you will need to disconnect the two black wires from the glass. After that ,remove the three Torx 10 bolts and remove a cover plate. You will find three places that have plastic welded rivets holding the front piece to the rear piece. Drill these out with a large enough bit to remove the top part and allow the parts to separate. (don't worry there is a hole in the middle allowing you to use a short screw to reattach them.) There is a plastic tab that needs to be moved up in one of the openings, just use a flat head screw driver to move it out of the way allowing the two pieces to separate. Also to aid in the wire maneuvering, remove the rubber cover at the mount end from the metal and extend it along the wire all the way to the connector.
Now the fun begins. I tried various types of stiff / flexible wires to fish thought from the inside to the mirror housing or from the housing to the inside. no luck. I was now understanding why everyone said it was a PITA or even impossible to do. It seem the wires make two 90 degree turns and that was preventing me from getting the wire through.
Undeterred, I used a small exact-o knife to carefully cut the sticky friction tape that is wrapped around the wire bundle and set one of the black wires for the heated mirror free. I then cut the connector off (easy enough to crimp on a new one) and taped on a 5 foot long piece of 24 gauge wire.I carefully pulled the black wire from the mirror case toward the mount and was able to now have the 24 gauge wire pulled through. (be VERY CAREFUL here! if you pull too hard and the wires will separate.) I pulled the 24 gauge wire about 2 feet past, re taped the black wire for the mirror and then pulled it back into place. I then connected a second 24 gauge wire to the first in the mirror case and fed the wire in from the mirror case. as I gently pulled from the mount side. I now had the black heater wire back where it started, and two small gauge wires for the puddle light.
I placed the puddle light on the bottom side of the mirror and drew an outline with a fine tip marker. (there are lines on the bottom of the case but they did not match the shape or size of the LED lights I had). Using a dremel tool I carefully cut out the hole and trimmed as required until the light fit properly. I soldered the pig tails of a T10 socket to make the LED connection and snapped the light in place. A quick test from a 12 volt power source and all was good. I also did a continuity test for all the other wires I yanked and pulled on just for good measure. I re assemble the front and rear pieces, found three short wood screws to re-attach where I removed the plastic weld rivets and replaced the torx bolts and small cover.
Feed the new 24 gauge wires and the original wires and connector though the hole and mounted the mirror using the three torx bolts. I ran the wires along the other wire bundles to the bottom door light and made a connection there.
Now, when I unlock the door,s not only do the interior light come on, so does the light under the mirror.
Sorry about the lack of photos, but I think I described it well enough to help guide you on this modification if you choose. As also, if you don''t know ,stop and ask questions.
Jeff
General Disclaimer: I may be wrong, but that does not make me responsible if you harm you car after reading my posts.
Last edited by Rufflyer; 08-31-2020 at 09:35 AM.
Reason: Thick thumbs when typing
Could you post a jpg of the underside of the mirror showing the LEDs? I must admire your determination and also your success.
Here you go.
They say it is a direct replacement. I did see an outline under the mirror, but it was bigger than the LED, so that is why I measured. This is the second one. I was tired and the opening has a couple of .... OOPS moments, but I think a small dab of clear RTV will solve that issue.
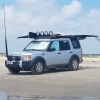
Had to turn off the garage lights to admire my 4 1/2 hours of work. My helper spent most of the time stretched out in the middle row seats waiting to go for a ride.
They say it is a direct replacement. I did see an outline under the mirror, but it was bigger than the LED, so that is why I measured. This is the second one. I was tired and the opening has a couple of .... OOPS moments, but I think a small dab of clear RTV will solve that issue.
Had to turn off the garage lights to admire my 4 1/2 hours of work. My helper spent most of the time stretched out in the middle row seats waiting to go for a ride.
Much appreciated - that looks like the under the door lights but LED rather than incandescent.
I have never looked at the factory mirror puddle lights - will have to start looking on the newer 3's or 4's.
Today I was checking my Lr3 2006 SE 65K AND I SEE A small ( i ) simbol on my cluster when I press the button on my turning signal and I go through all the menu at the end it say
HDC Fault System Not Available
Everything works properly i think car was in garage for 6 years I just started driving it yesterday maybe my battery is not gucci?
Swapping out an upper control arm and the upper bushing. Every nut and bolt has been a struggle. Currently using the Hackzall to get the last bolt out. Also found a frozen caliper guide pin as well. It to go the torch, but I saved it.


 08-31-2020, 09:32 AM