My P38 Transformation


#12
 08-30-2012, 12:47 AM

Mudding
Join Date: Feb 2012
Location: Park City, Utah
Posts: 183
Likes: 0
Received 0 Likes
on
0 Posts
Your image dimensions are 2560x1920 px. Resize them to something like 1200x900 before attaching/uploading them.
#13
08-30-2012, 09:56 AM
#14
08-30-2012, 11:03 AM
Mudding
Join Date: Feb 2012
Location: Park City, Utah
Posts: 183
Likes: 0
Received 0 Likes
on
0 Posts

#15
08-31-2012, 10:09 AM
Hello hello!
I installed the CB last night. Well, actually, everything except for the power. Otherwise, it's fully installed. I plan on hooking it to power tonight. I had planned on tapping into the terminals that power the BeCM as has been done by some of you before. My other alternative was to tap into the power from the cigarette lighter, but was advised that this would provide background noise/interference while running the unit.
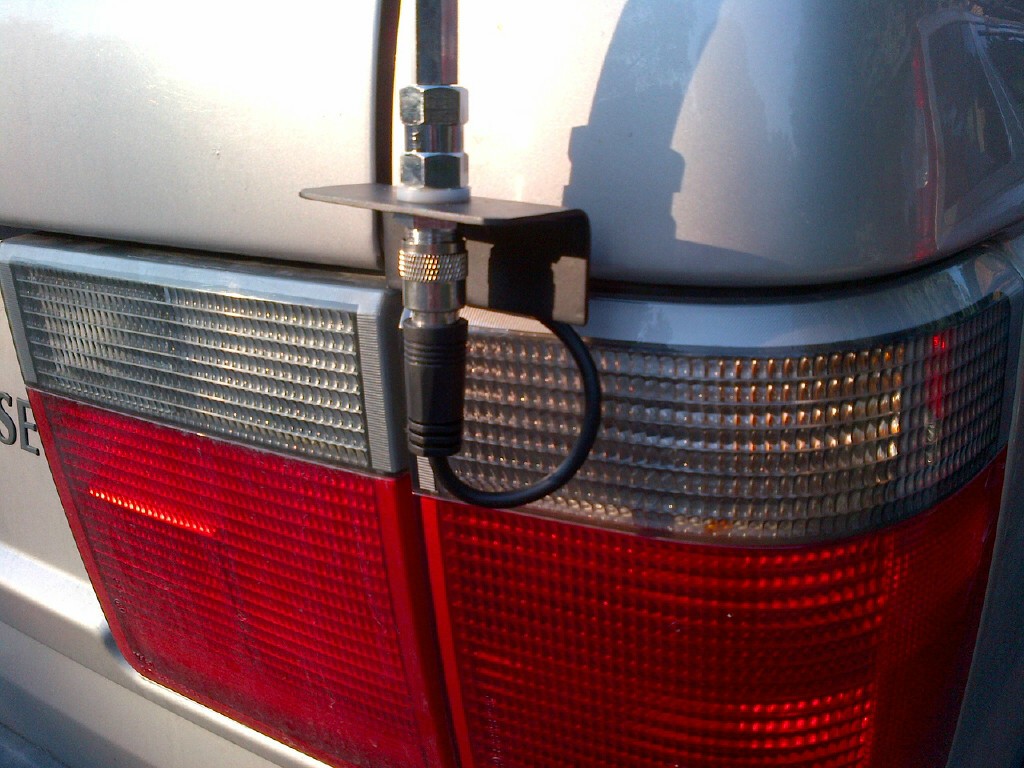
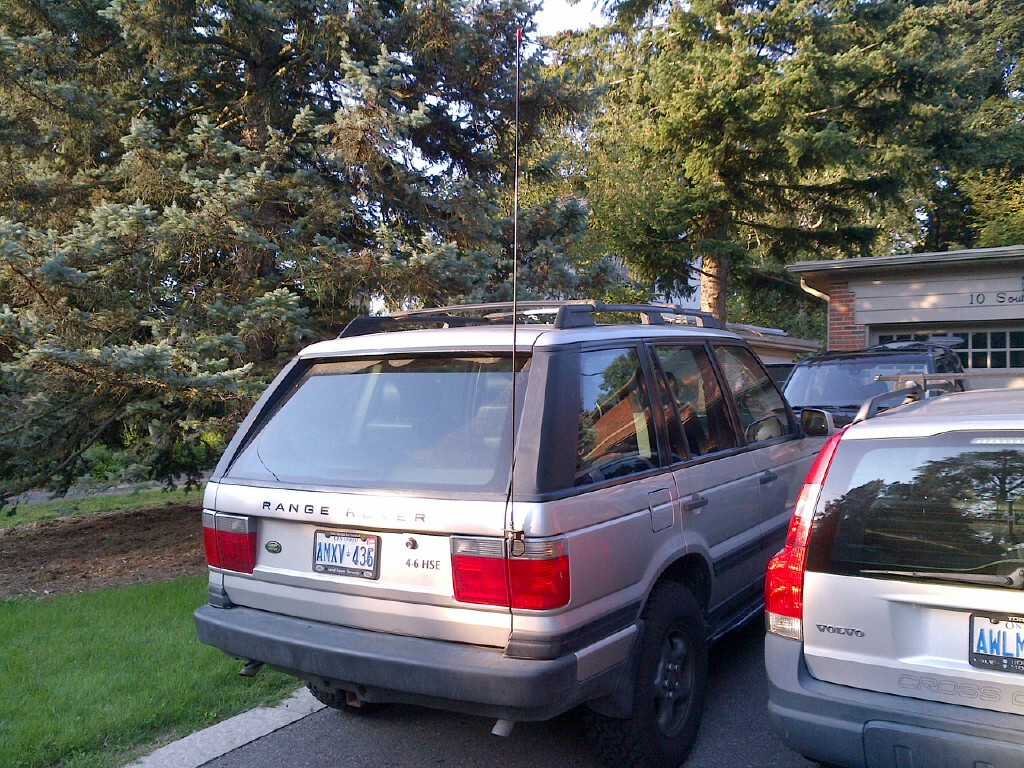
I mounted the antenna on the rear of the vehicle. For lack of any other options that worked for me, I used a custom bracket to mount the antenna. The bracket uses the existing bolts that hold the lower tailgate latches in place. It then comes out and sits just above the rear tail light. I saw potential in sending the coaxial cable back into the vehicle by way of the tail light as well. I removed the tail light to see, and decided to go for it. I notched a small path for the coax cable to run through in the inner portion of the tail light as shown.
I took out the parcel tray, sat-nav and trim to run the cable behind it all. I wanted a seemingly unnoticeable installation, and this seemed like the best idea. I ran the coaxial cable back behind the trim and insulation, along side all the electrical wiring that runs front to back in the vehicle already. I ran it down the lower C-pillar trim and underneath the plastic rear door trim, along with the other existing wires as well.
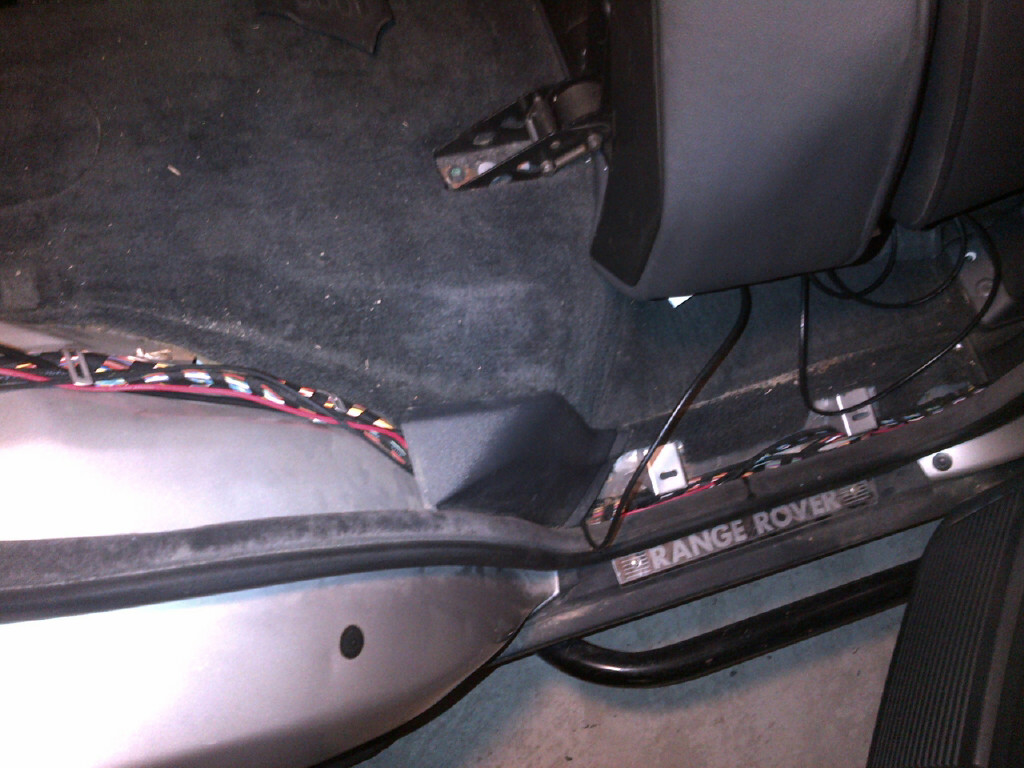
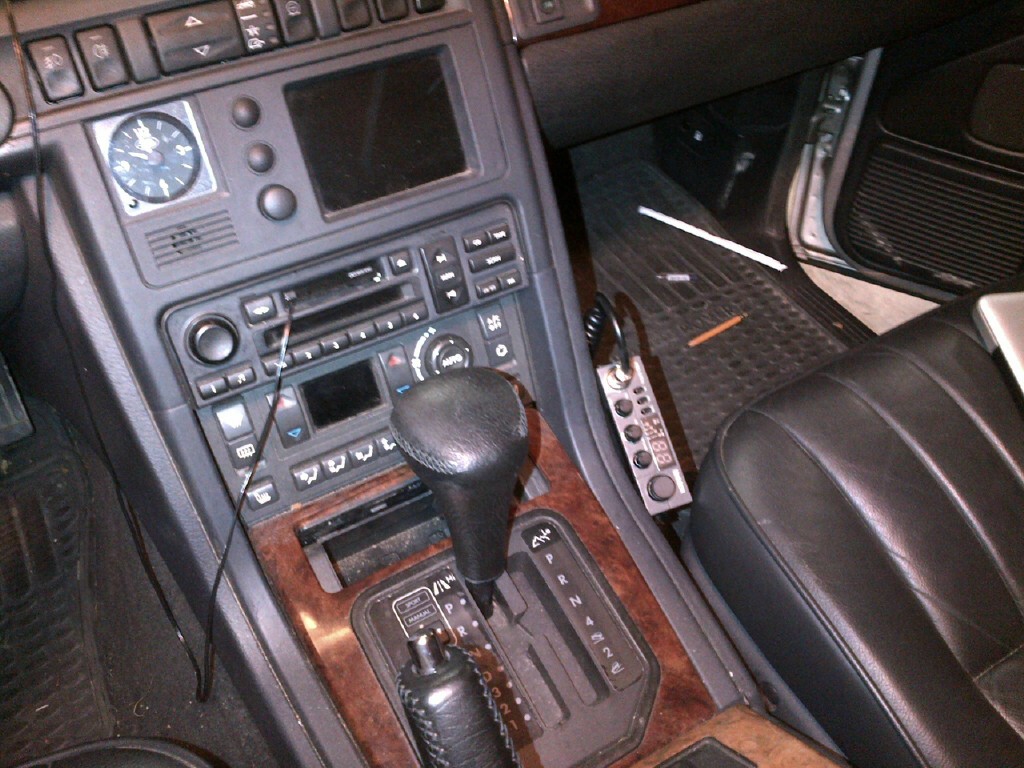
The wire then comes up at the base of the B-pillar, and goes across and under the passenger seat. It then runs along the side of the center console, and attaches to the radio receiver which I mounted on the passenger side of the center console.
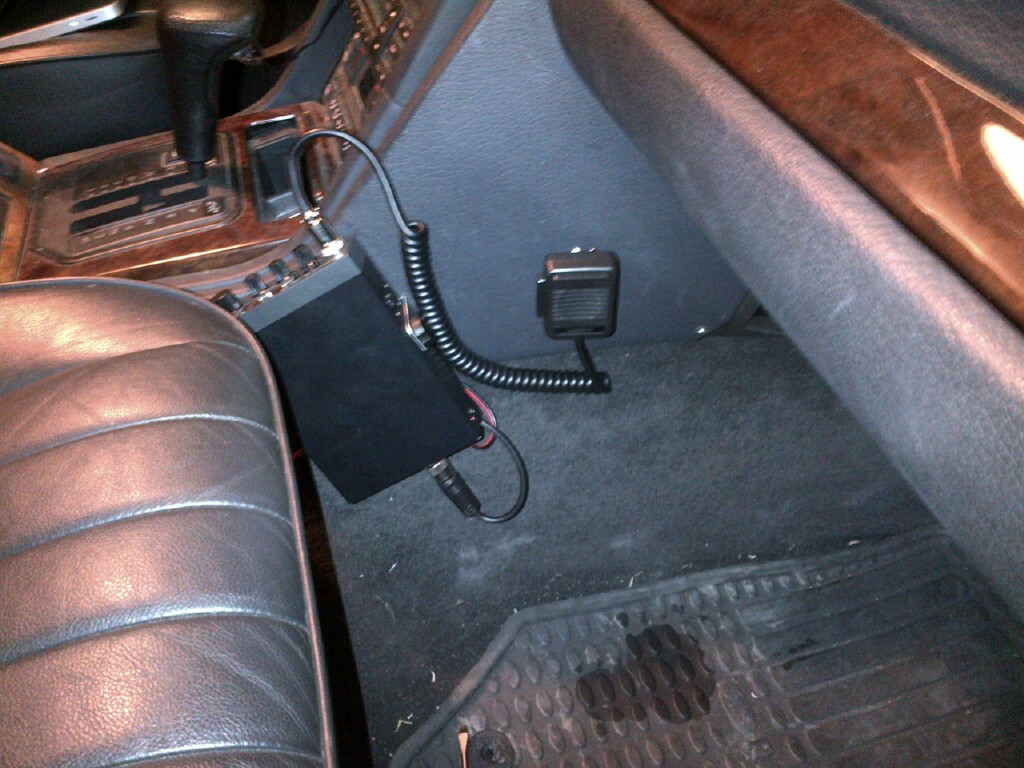
I mounted the mic bracket there for when the radio is not in use. It's out of the way, yet still accessible to the driver if need be. I am going to be mounting a second mic bracket to the right of the instrument cluster in the empty portion of dashboard between that and the center vents. This will be for when the CB is in use. The reason I wanted a separate bracket from this one, is I don't want the mic chord traversing across my center panel/radio/GPS all of the time, as it doesn't look as clean that way.
Here's a view of it from the driver's seat. Very discreet, yet totally accessible by both the driver and the passenger if need be.
All done on the outside as well. Here are some more pictures.
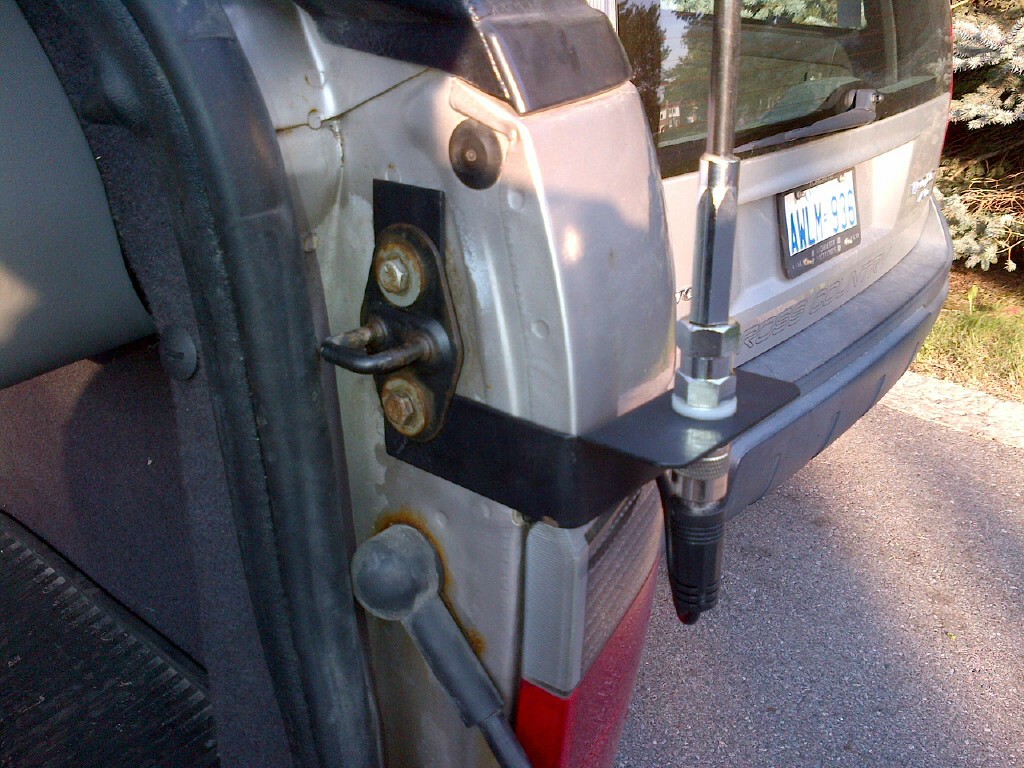
Here is the bracket I mentioned. It seems to work pretty well, although I may replace it with one a little bit thicker, as it does bend a bit with the whip swaying to and fro.
In this one, you can just see the coax cable running in and behind the tail light if you look closely enough.
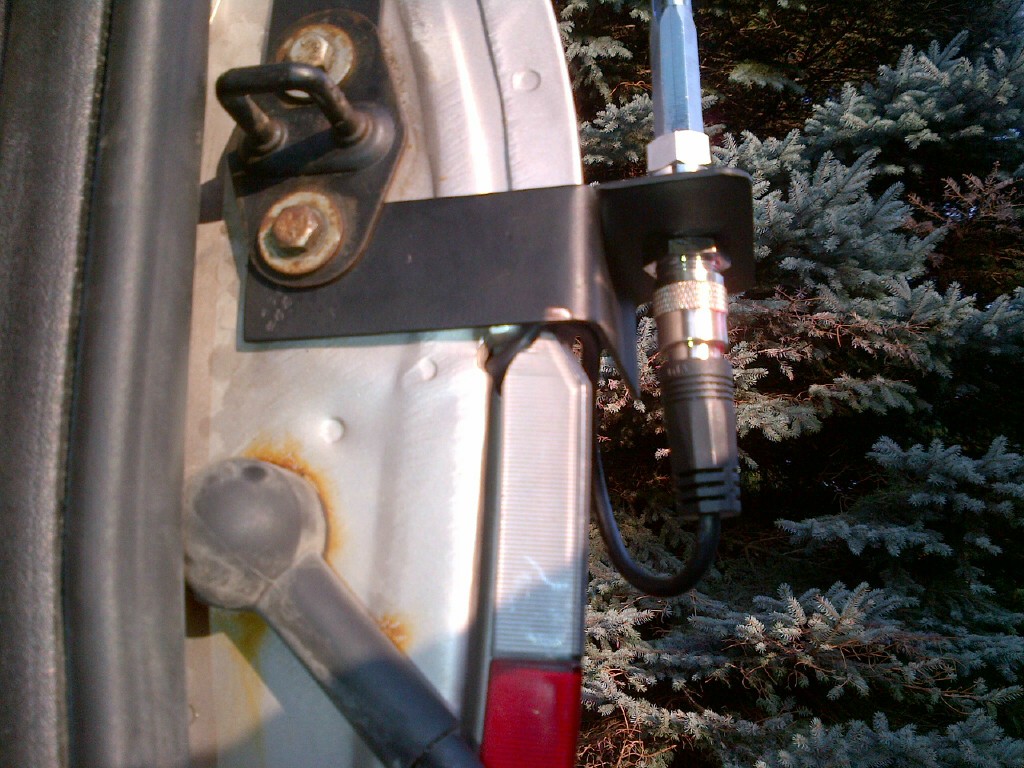
Here's a view from the other side. Looks pretty clean in my opinion.
And here's a full view. I got myself a 5 1/2' whip, as I wanted to ensure good reception. However, I feel as though it might be a tad long, and maybe a 4' whip might do the trick. What are your thoughts? Either way, it won't be hard for me to return it. I may even keep it, and use a shorter one for city applications, and swap out the longer one for other uses. Would that be beneficial or just overkill?
I installed the CB last night. Well, actually, everything except for the power. Otherwise, it's fully installed. I plan on hooking it to power tonight. I had planned on tapping into the terminals that power the BeCM as has been done by some of you before. My other alternative was to tap into the power from the cigarette lighter, but was advised that this would provide background noise/interference while running the unit.
I mounted the antenna on the rear of the vehicle. For lack of any other options that worked for me, I used a custom bracket to mount the antenna. The bracket uses the existing bolts that hold the lower tailgate latches in place. It then comes out and sits just above the rear tail light. I saw potential in sending the coaxial cable back into the vehicle by way of the tail light as well. I removed the tail light to see, and decided to go for it. I notched a small path for the coax cable to run through in the inner portion of the tail light as shown.
I took out the parcel tray, sat-nav and trim to run the cable behind it all. I wanted a seemingly unnoticeable installation, and this seemed like the best idea. I ran the coaxial cable back behind the trim and insulation, along side all the electrical wiring that runs front to back in the vehicle already. I ran it down the lower C-pillar trim and underneath the plastic rear door trim, along with the other existing wires as well.
The wire then comes up at the base of the B-pillar, and goes across and under the passenger seat. It then runs along the side of the center console, and attaches to the radio receiver which I mounted on the passenger side of the center console.
I mounted the mic bracket there for when the radio is not in use. It's out of the way, yet still accessible to the driver if need be. I am going to be mounting a second mic bracket to the right of the instrument cluster in the empty portion of dashboard between that and the center vents. This will be for when the CB is in use. The reason I wanted a separate bracket from this one, is I don't want the mic chord traversing across my center panel/radio/GPS all of the time, as it doesn't look as clean that way.
Here's a view of it from the driver's seat. Very discreet, yet totally accessible by both the driver and the passenger if need be.
All done on the outside as well. Here are some more pictures.
Here is the bracket I mentioned. It seems to work pretty well, although I may replace it with one a little bit thicker, as it does bend a bit with the whip swaying to and fro.
In this one, you can just see the coax cable running in and behind the tail light if you look closely enough.
Here's a view from the other side. Looks pretty clean in my opinion.
And here's a full view. I got myself a 5 1/2' whip, as I wanted to ensure good reception. However, I feel as though it might be a tad long, and maybe a 4' whip might do the trick. What are your thoughts? Either way, it won't be hard for me to return it. I may even keep it, and use a shorter one for city applications, and swap out the longer one for other uses. Would that be beneficial or just overkill?
#16
09-01-2012, 01:14 AM
I don't know much about CB systems but if it were my truck, I would either mount the antenna high up, or come up with something that protects the base of the antenna (where the cable comes out of the tail light) from all the dirt mud and moisture. But otherwise a dam good job and a very interesting project you have here. Glad to see someone has the $$$ and time to work so extensively on their Rover! Good luck man and keep us up to date on everything.
#17
10-07-2012, 11:17 PM
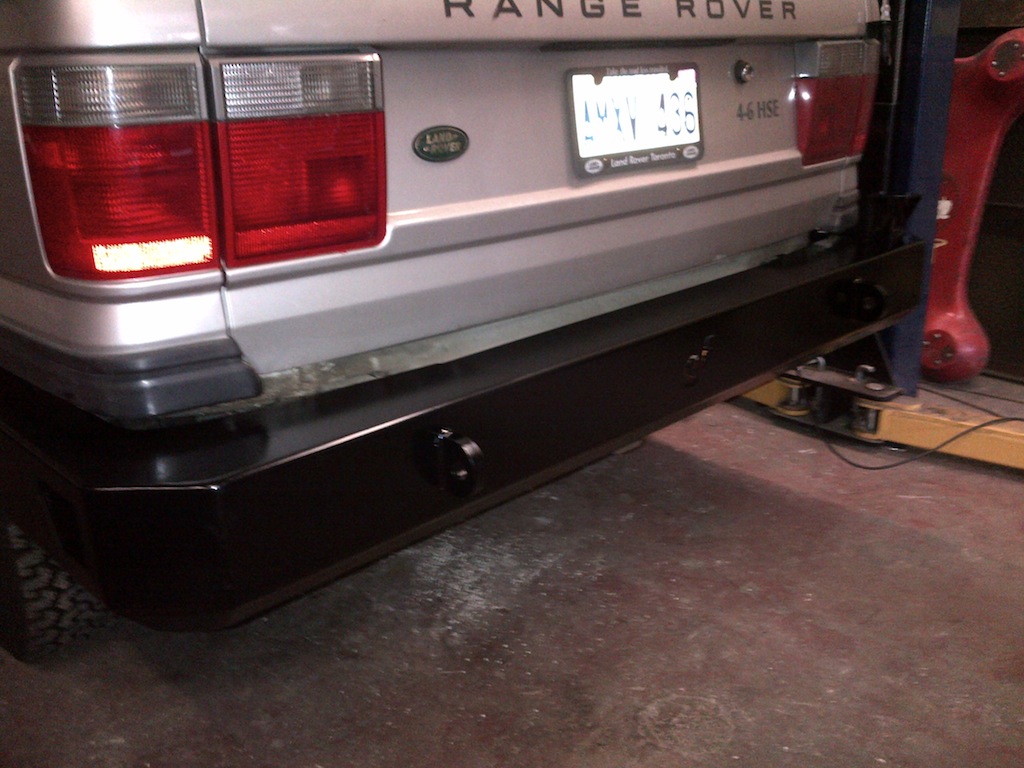
So I got the rear-bumper ready and mocked-up on the vehicle. It still doesn't have the spare tire carrier, but it's nearly complete. The bumper is not yet mounted to the vehicle, but I hope to get it fairly snug to the original fit of the stock bumper. I'm thinking of leaving a little bit of room between the bumper and the bodywork just in case I come down hard on it and something gives/bends - that way I don't necessarily damage the body as well. However I also like the idea of a nice tight fit. We'll soon see how it all works when things are fit and finished.
Here's a view of the bumper. It's not mounted fully, just resting in place for a general idea of the look.
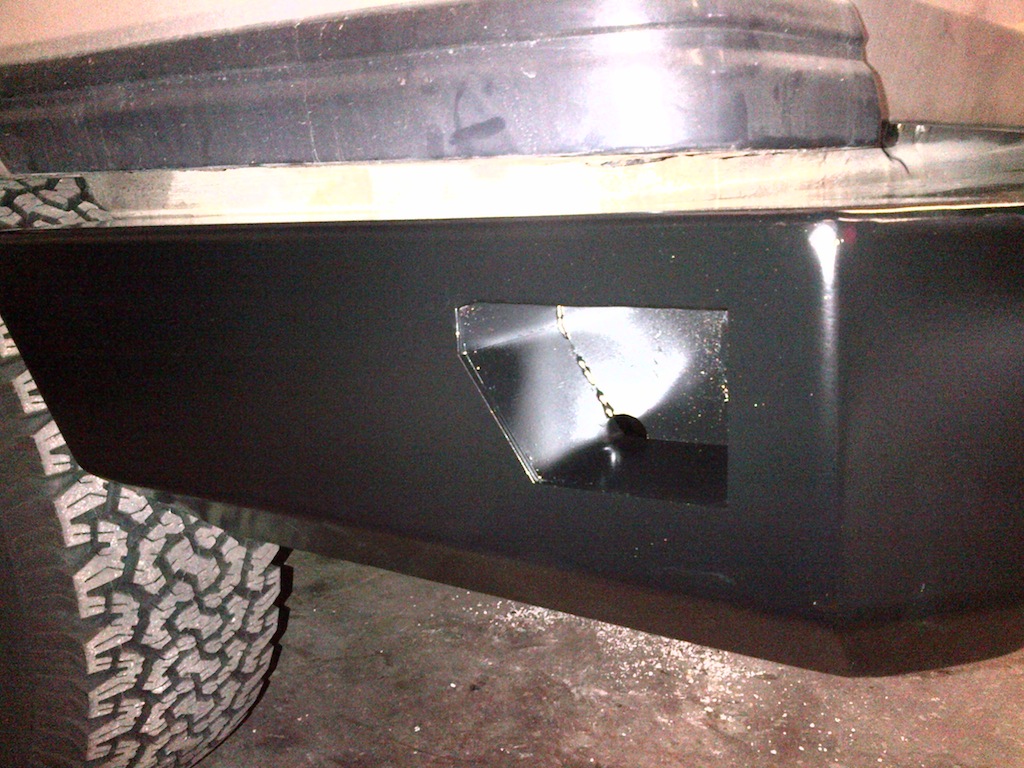
A side view:
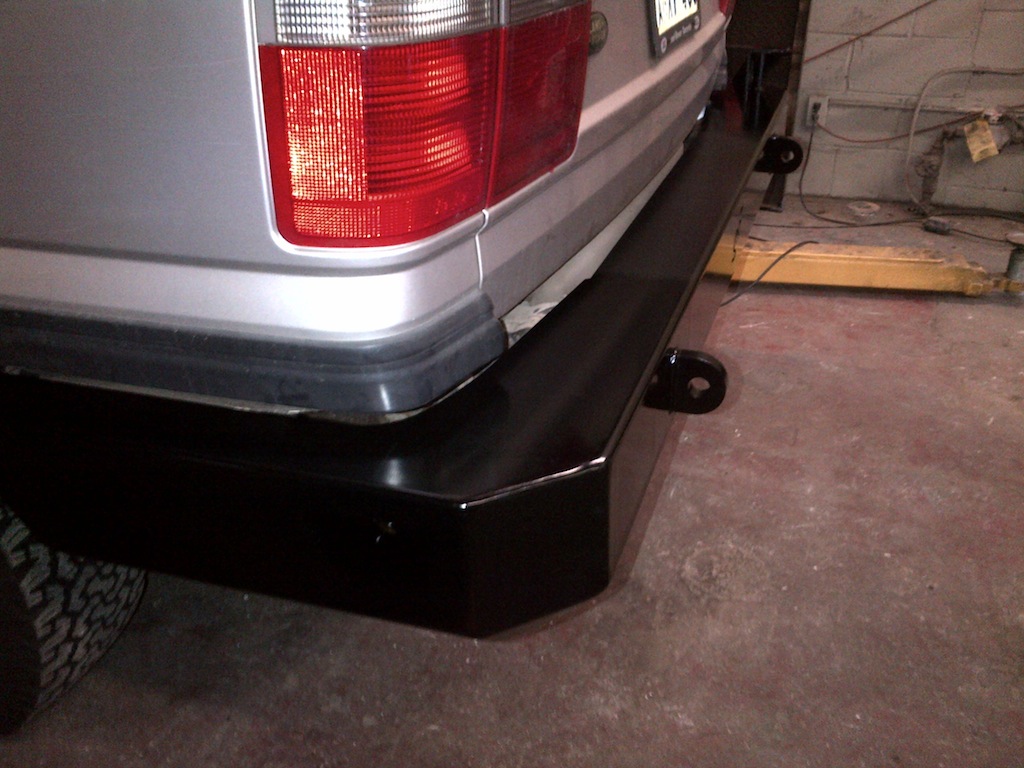
Here's a view of where the tire carrier will swing from:
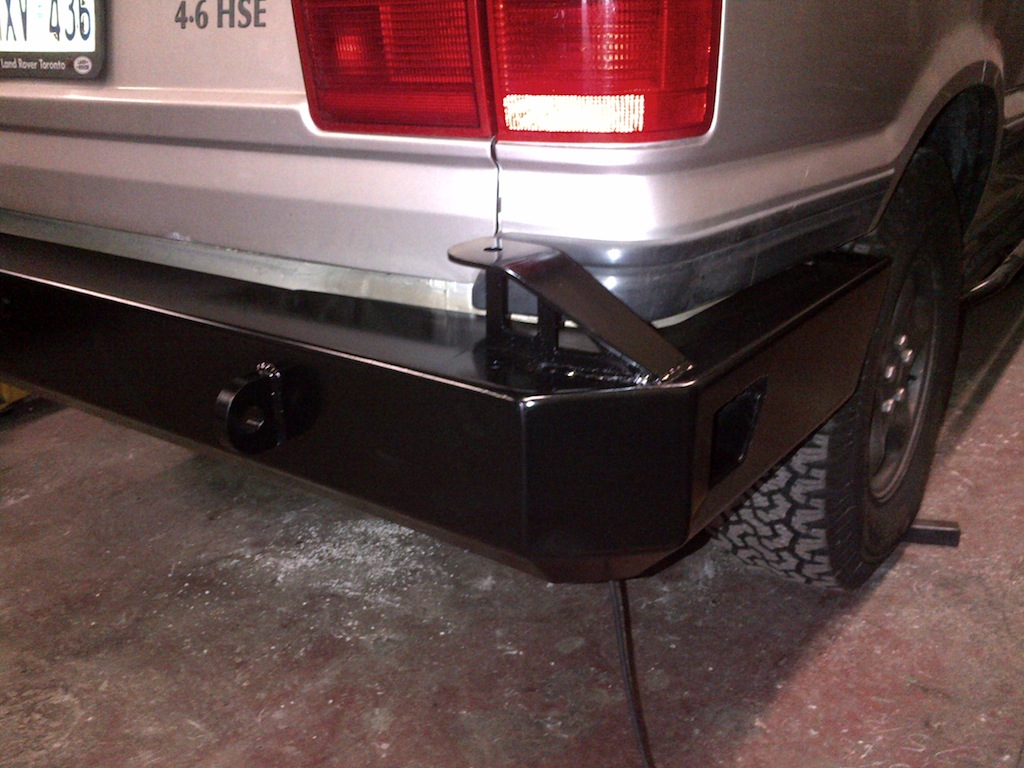
And here you can see one of the Hi-Lift jacking points. The rear bumper has one on each side (you can see the other one in the previous picture). As will the front bumper, and so do my sliders. These just allow for a stable place to jack the vehicle from if needed. I like it!
I'll post more pictures once it's all said and done with.
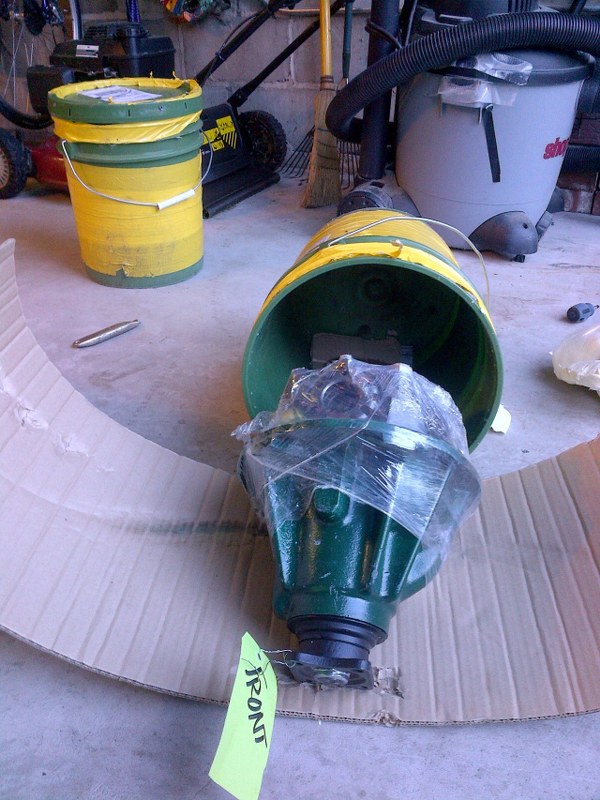
Soon to have pictures of the diff guards as well!
After that I'll post progress of the front bumper. It's just in auto-cad at the moment, but will soon become a reality!!!
Here's a view of the bumper. It's not mounted fully, just resting in place for a general idea of the look.
A side view:
Here's a view of where the tire carrier will swing from:
And here you can see one of the Hi-Lift jacking points. The rear bumper has one on each side (you can see the other one in the previous picture). As will the front bumper, and so do my sliders. These just allow for a stable place to jack the vehicle from if needed. I like it!
I'll post more pictures once it's all said and done with.
Soon to have pictures of the diff guards as well!
After that I'll post progress of the front bumper. It's just in auto-cad at the moment, but will soon become a reality!!!

#19
10-10-2012, 07:29 PM
#20
10-10-2012, 11:35 PM

Those are well done, they look tough as hell! Seem to fit well, too. I'm excited to see your spare swingout. CB setup is sweet