Then what? HG
#11
Yeah you'll want to remove all of that stuff... I recommend downloading the shop manual here
land rover service factory manual RAVE download land rover resource, service manual, workshop factory manual, download, rave, vehicles including discovery, series, defender, range rover, freelander, LR3, Handbooks, Catalog, Catalogue, Land Rover Inte
It will give detailed instructions
land rover service factory manual RAVE download land rover resource, service manual, workshop factory manual, download, rave, vehicles including discovery, series, defender, range rover, freelander, LR3, Handbooks, Catalog, Catalogue, Land Rover Inte
It will give detailed instructions
The following users liked this post:
LR03NJ (11-11-2016)
The following users liked this post:
LR03NJ (11-11-2016)
#13
#14
You have to take the tensioner off to access all of the alternator bracket bolts. Take the large bolt off of the center of the tensioner. Not the one on the pulley. Comes right out. I think it is a 17mm.
The following users liked this post:
LR03NJ (11-11-2016)
#15
Sorry I didn't mean to reply to you directly, Mollusc.
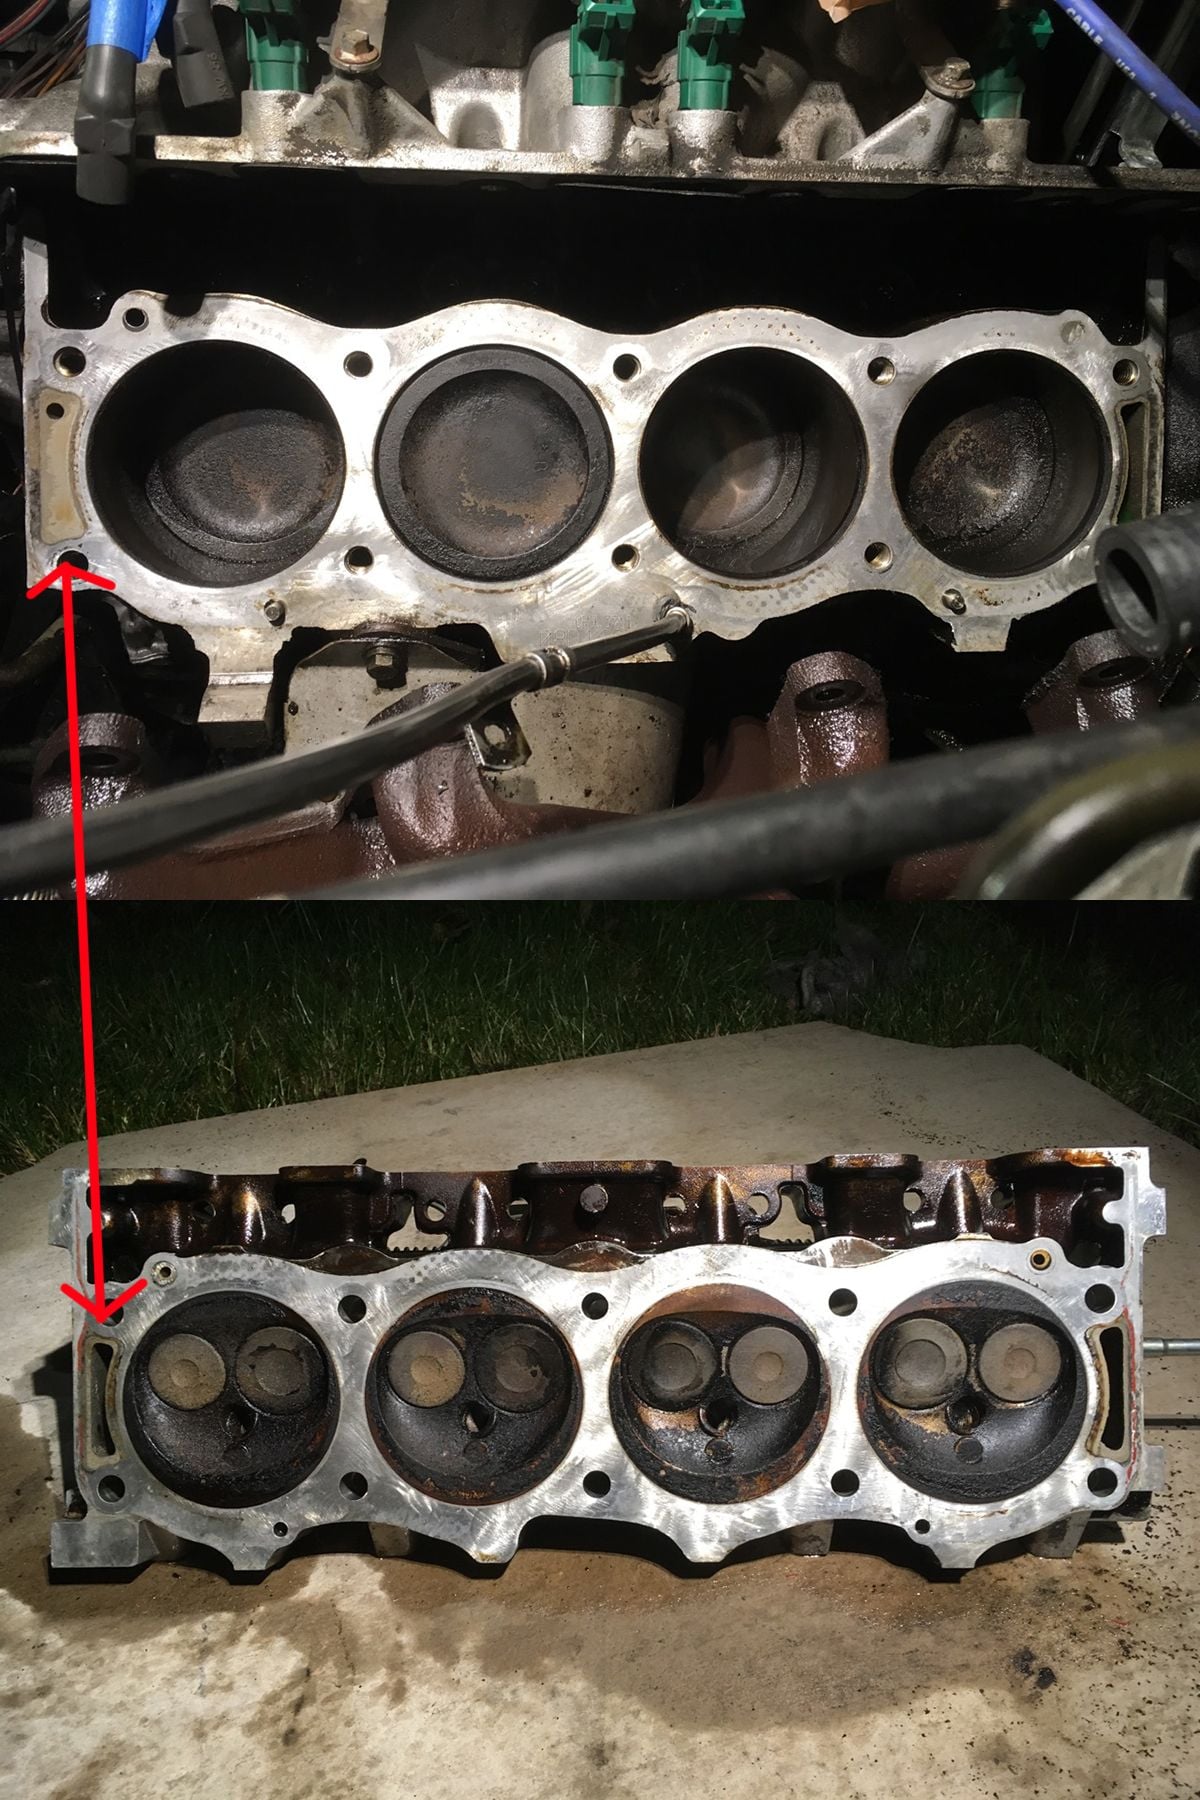
FWIW I think the heads look pretty clean.
The heads are supposed to be interchangeable left and right but the one in your top picture looks like it would only go on one side. Interesting. I have a bunch of heads laying around and I'll look when it is light.
I have planed and not planed. Planing and valve seating really is the way to go, at least for peace of mind. But without an overheating event I would not worry about either. Once you've done this job the dreaded head gasket will seem not so bad, and if there is a problem with the heads you'll know what to do.
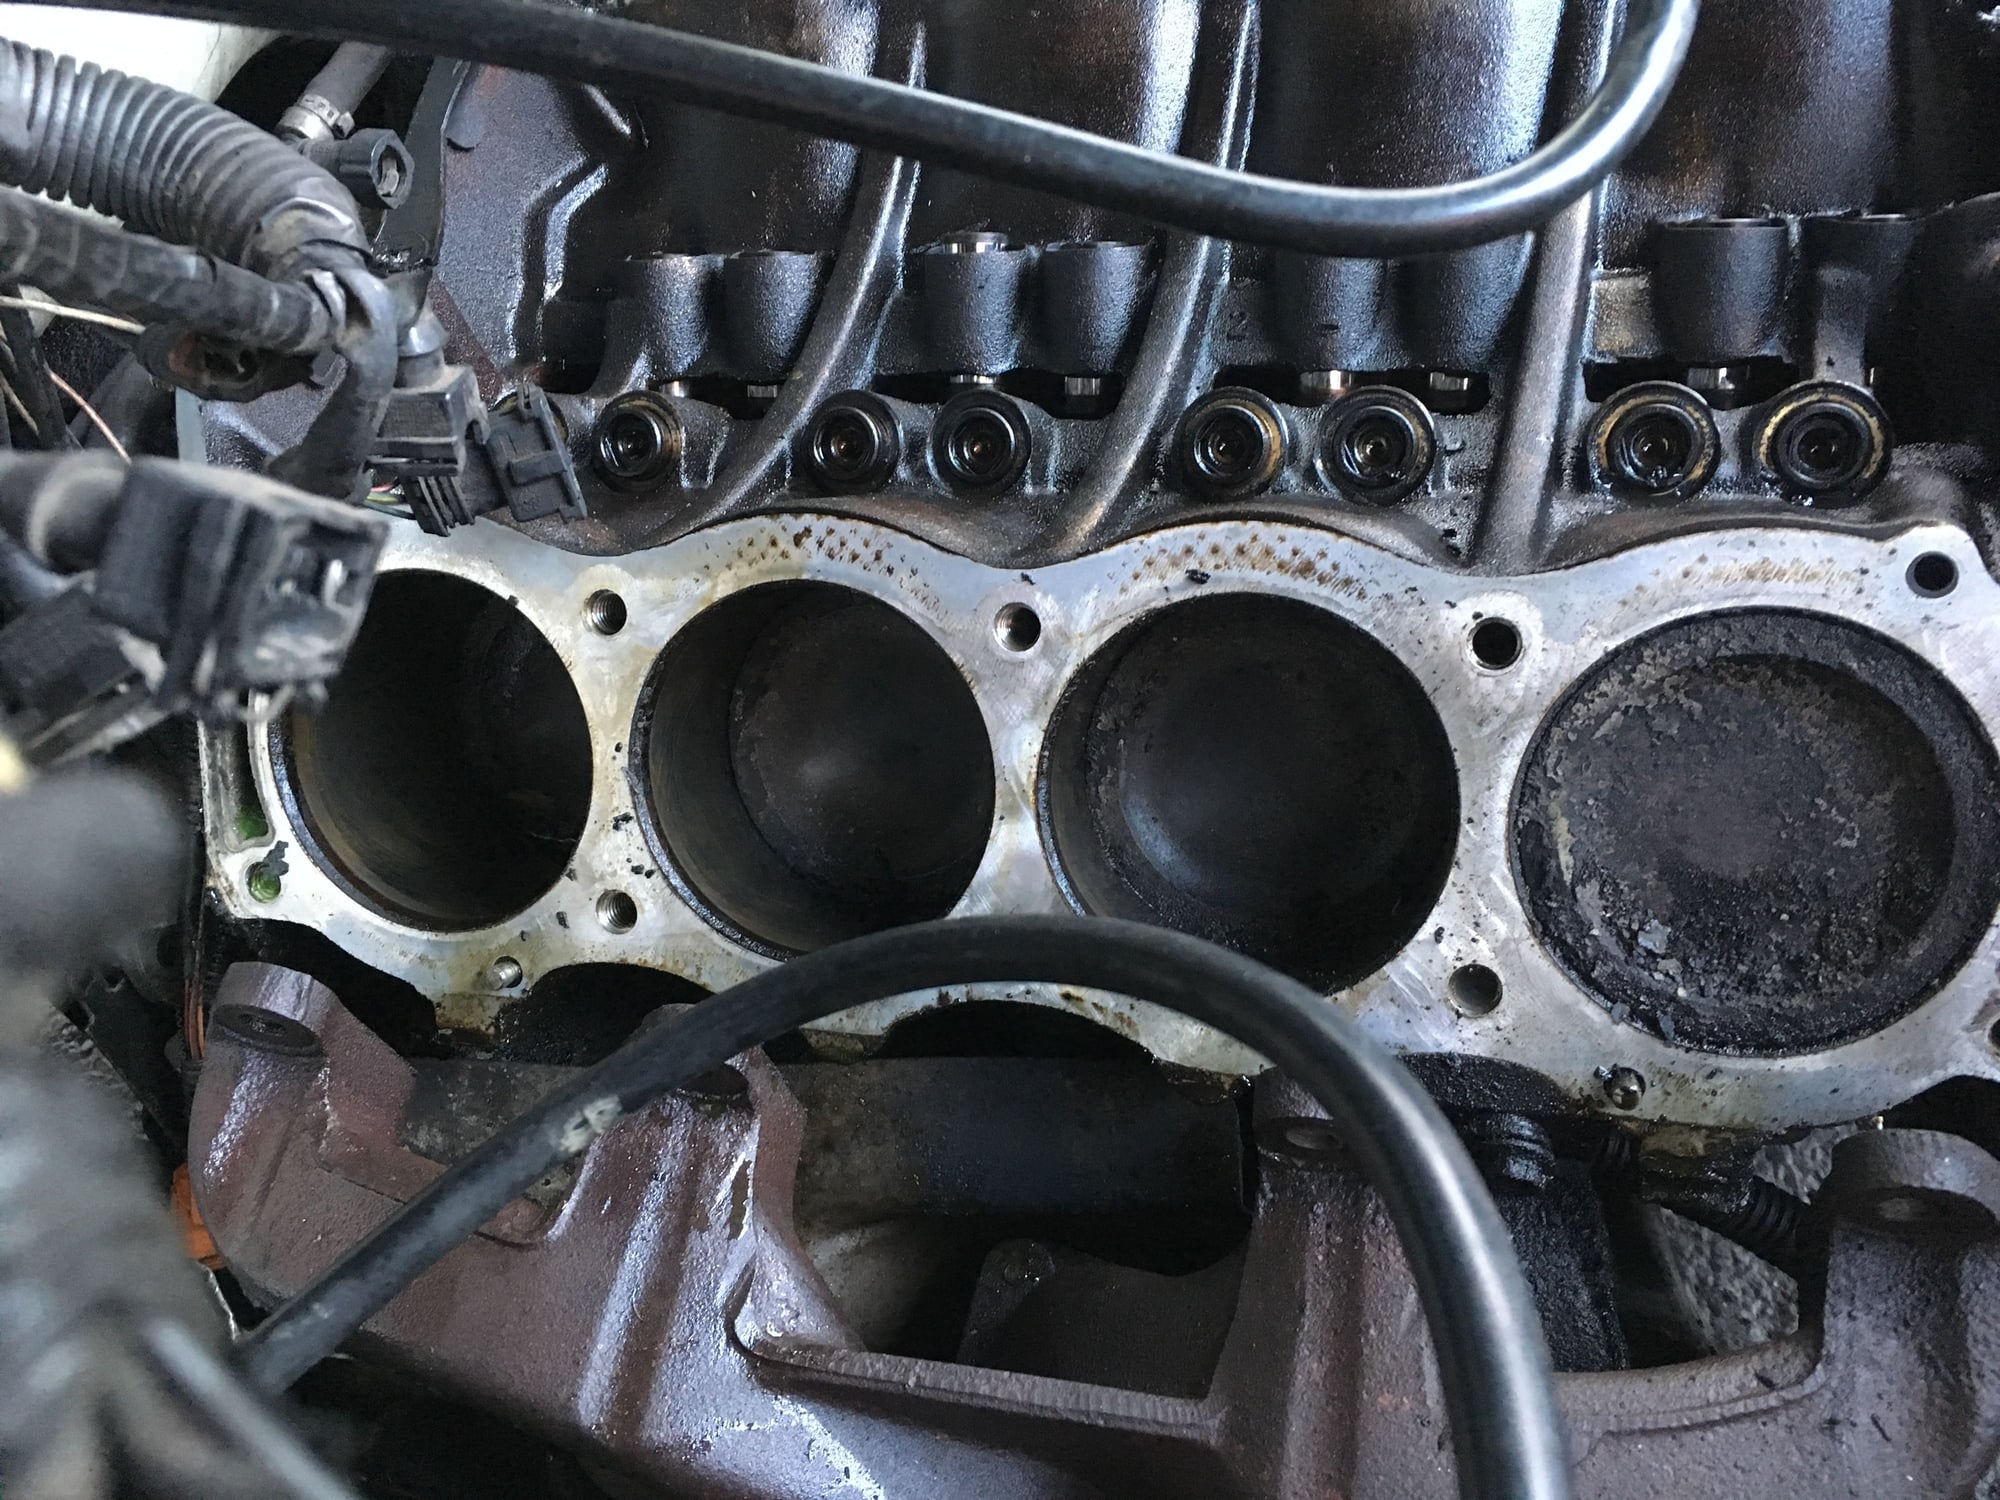
In the first picture with the coolant in the cylinder... that's normal. The main passage is right behind it and when you break the seak seal of the gasket, the cylinder will get flooded with coolant. It gets everywhere. You want to be sure to really clean out the bolt threads on the block of coolant and oil before you put it back together.
Unsolicited: I would suggest head studs instead of bolts, and I know there is a debate over that. But my reasoning is simple... they are reusable and more importantly they help keep everything lined up if you are doing the job by yourself.
The following users liked this post:
LR03NJ (11-11-2016)
#16
Sounds like a plan! I'm right near the Bayonne Bridge on the SI side.
And don't worry about speed -- I took at least a month to get mine done and I've rebuilt several engines in my time. Shoot me a message if you need any assistance.
Once we get you back on the road we'll have to head down to Wharton State Forest for some offroading.
And don't worry about speed -- I took at least a month to get mine done and I've rebuilt several engines in my time. Shoot me a message if you need any assistance.
Once we get you back on the road we'll have to head down to Wharton State Forest for some offroading.

#17
#18
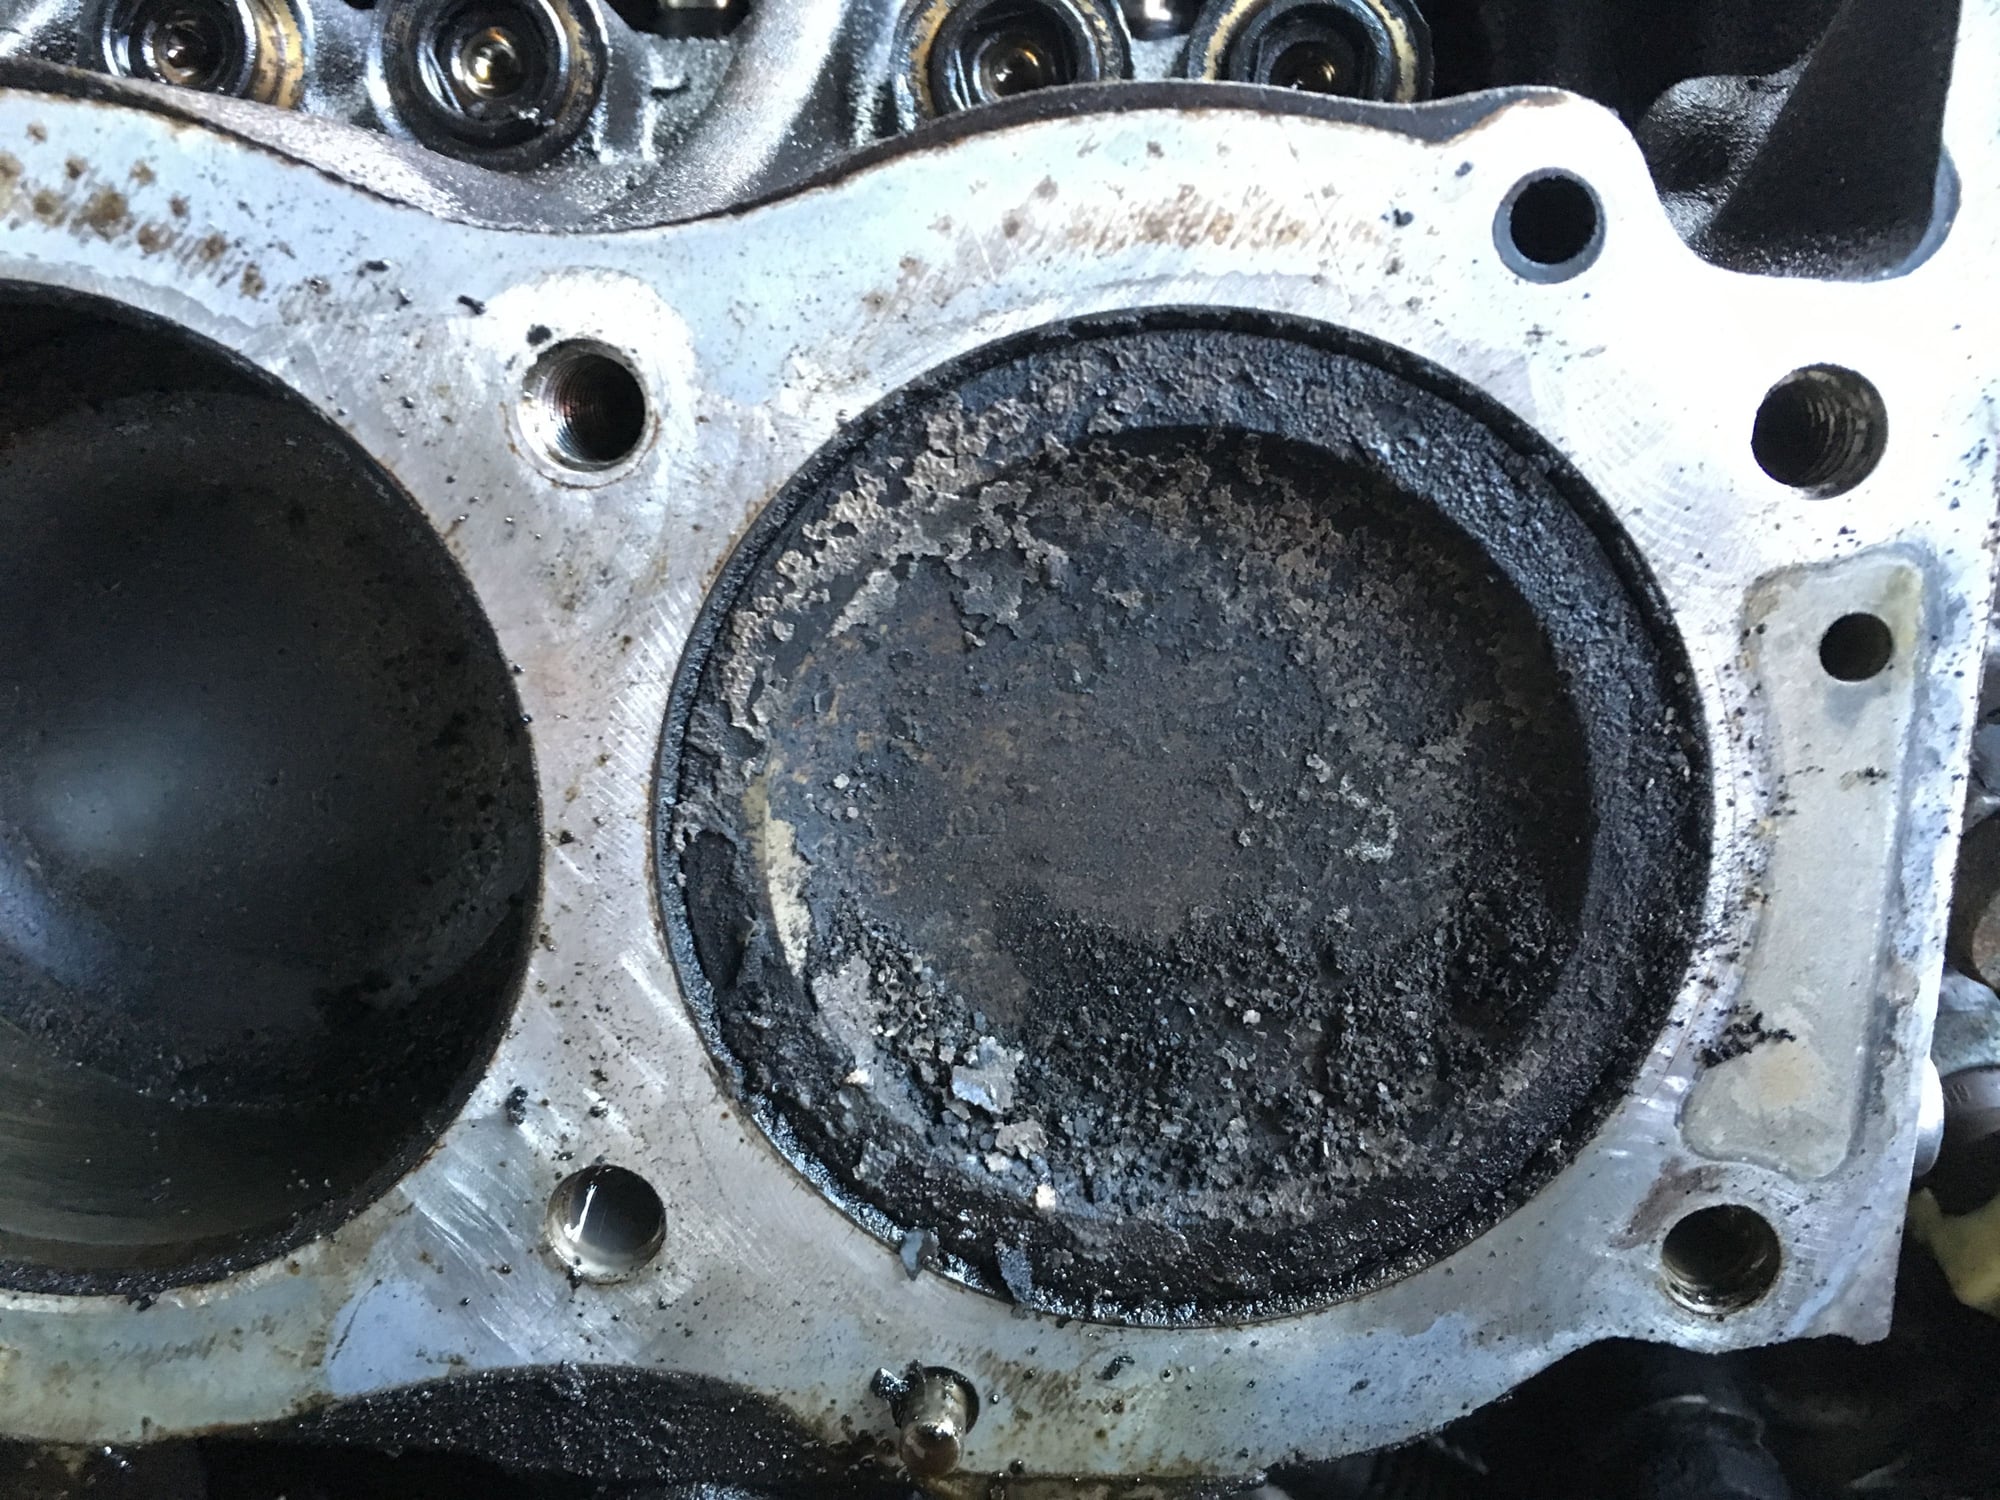
Cheap gas, misfire, rings letting oil in combustion chamber, etc.
Use the attached to clean piston tops. Turn the crank until they are at the top then use a drill motor. Stay away from cylinder edge/walls.
https://www.amazon.com/gp/aw/d/B000F...CaL&ref=plSrch
Use the attached to clean piston tops. Turn the crank until they are at the top then use a drill motor. Stay away from cylinder edge/walls.
https://www.amazon.com/gp/aw/d/B000F...CaL&ref=plSrch
The following users liked this post:
LR03NJ (11-12-2016)
#19
Join Date: Oct 2016
Location: St. Clair County, Michigan
Posts: 4,590
Received 1,187 Likes
on
849 Posts
The following users liked this post:
LR03NJ (11-12-2016)
#20
Since it's flaky and not sludgy, it's more likely to be gas-related than oil. Although oil is still possible as a cause if water was getting into that cylinder where the head gasket was broken and causing a steam-cleaning effect. Normally the cylinder would be really clean in that case though.
This could be due to too much fuel getting in, as well as any of the numerous other possible causes. Once you're up and running again, chuck some injector cleaner into a low tank of gas.
This could be due to too much fuel getting in, as well as any of the numerous other possible causes. Once you're up and running again, chuck some injector cleaner into a low tank of gas.
The following users liked this post:
LR03NJ (11-12-2016)


