Log In
Register
Forums
General Land Rover Forums
New Member Introduction
Off Topic
Sights N Sounds
General Tech Help
Modifications
Build Threads
Engine Swaps
4X4 Events and Weekend Outings
ROAMING WITH FRIENDS
TEST FORUM
Land Rover
Freelander
LR2
Discovery Sport
Discovery I
Discovery II
LR3
LR4
New Discovery V
2020 Defender
Defender
Series I, II, IIa, III Land Rovers
Other
Range Rover
Range Rover Evoque
Range Rover Sport L320 (2005-2013)
Range Rover Sport L494 (2013-present)
Range Rover Velar
Range Rover Classic (1st Gen)
Range Rover P38 (2nd Gen)
Range Rover L322 (3rd Gen)
Range Rover L405 (Fourth Gen)
Range Rover L460 (Fifth Gen)
General Range Rover Discussion - Archived
Brand Reviews
Appearance & Camping Set Ups
Audio/Visual Electronics
Detailing
Engine & Internal
Headers, Intake, & Exhaust
Nitrous, Super Chargers, & Turbos
Tires
Suspension sponsored by Arnott Inc.
Land Rover Classifieds
the *new* Rover Marketplace
Vendor Announcements and Specials
Retired - Private For Sale/Trade Classifieds
Retired - Private 'Wanted' Classifieds
Other
Forum Help & Suggestion Center
Gallery
Tools
Car Payment Calculator
Tire Rim Calculator
Vin Decoder
Recalls
Technical Service Bulletins (TSBs)
Members List
Live Feed
Marketplace
Vendor Directory
Become a Vendor
The Rover Marketplace
New Posts
View Dark Mode
Please register or login to enable Dark Mode.
Log In
Register
Threads
Google
Threads
Posts
Advanced
Dark Mode
Please register or login to enable Dark Mode.
Log In
Forgot your Password?
By logging into your account, you agree to our
Terms of Use
and
Privacy Policy
, and to the use of cookies as described therein.
or
Login with Facebook
Recent
Commented
Albums
My Pictures
My Post Pictures
Seattled2
December 30, 2019
53
0
Sort:
Default
Default
Most Recent
Yeaaa the halo lights from Tuff-Rok 😜
0
2021/10/03 10:36:40
72821
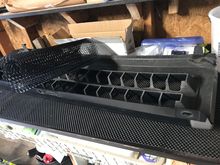
Mesh and back end of front grill… on the bench ready to choppy chop.
0
2021/10/16 22:01:19
72821
Using the Dremel. And a diamond flat head it took me 30 minutes to cut through the plastic. Remember take off less you can always trim more later. Can’t put it back. 😳
0
2021/10/16 22:01:22
72821
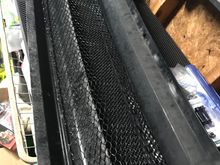
Test fitting and measuring the mesh
0
2021/10/16 22:01:26
72821
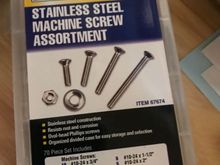
Ok.. I cut the mesh to short 🤦🏻♂️😱. So now I made it a wrap. Hardware screw for Rivot in shot for comparison.
0
2021/10/16 22:01:31
72821
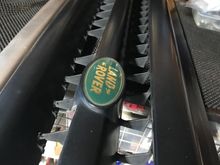
Harbor Frieght hardware kit… I made sure the rivot tool set matched the thread and size.
0
2021/10/16 22:01:35
72821
Final assembly with 5 rivot points.
0
2021/10/16 22:01:39
72821
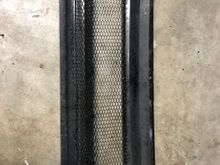
Final assembly - Angles shot to show the “side” that you need to make sure you have enough coverage…
0
2021/10/16 22:01:44
72821
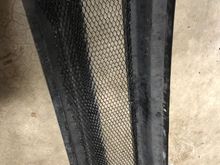
Final Assembly - front. With angle so you can see where the rivots are.
0
2021/10/16 22:01:48
72821
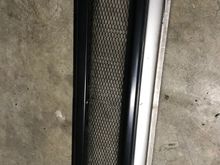
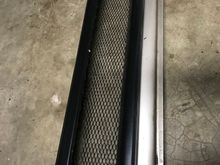
Final Assembly - Ledt angle. Notice the top center rivot. (It doesn’t have hardware yet) but the rivot on the inside pokes out enough. The mesh wire wraps around it to keep it secure for now..
0
2021/10/16 22:01:52
72821
Test Fit - Installed front
0
2021/10/16 22:01:56
72821
Test Fit - you can see 2 of the lower rivots.. meh. Least if a bird nukes it.. I can swap it.
0
2021/10/16 22:02:00
72821
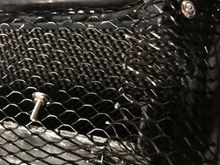
Test Fit - Close up. I’m glad I did the rivot method. It’s just 10 more minutes of work and makes it replaceable.
0
2021/10/16 22:02:04
72821
First
Page
2 of 2
Last
Go To
Page
1
2
2 of 2
Go To
GO
Go to page
of 2
pages
1
2