Totaled my DII & bought it back - just decided to fix her! Many ?'s...
#21
 11-11-2012, 05:03 AM


Thanks for the kind words - I'm fairly determined to pull this off so get the sticky ready 
The vehicle does hold a rather special place in my heart honestly - I picked her up as a "beater" and my first SUV ever to get me through the winter a few years ago. It turned out to be the worst winter on record, 72" (DC area.., I think like 3x average) - I actually drove 7 hours to Long Island to get her AS that first December snowstorm approached that night! We finished the paperwork and I dropped off the rental, headed back after 1:30AM.. due South directly into the storm. I passed signs on I-95 warning of dangerous conditions, whiteouts, etc.. yet I already felt mysteriously comfortable in the Disco.
She got me through that night (somehow) and many others without missing a beat, including a crazy ski trip to Timberline WV last winter while my range rover sport was in the shop (only snow I saw last winter so that PISSED me off, since I just got the 'sport and never had a chance to test it) - but that's another story. I have since SOLD my mustang and bought a range rover sport lol.
Anyways it's a great vehicle, especially considering what I paid for it - ..does things that simply put other vehicles to shame (at any price) so it certainly makes me a proud driver every time I hop in her.
Yeah I figured about the switch, wasn't sure if it just cuts the fuel pump and allows cranking or if it kills power to all ignition position circuits on the key & the starter relay.
No kidding about the DOT bumper thing. Literally cut the hood and various aluminum stuff.. not pretty.
#22
12-05-2012, 09:07 AM

Just a quick update, it's full speed ahead on this project now - finally cut out the remainder of the inner fender apron and have that piece and the core support here at the shop from the parts car.
I just painted both pieces yesterday - the Kinversand met. paint is a pain to shoot, had to use red to cover the silver paint of the parts car and the kinversand barely covered the red. It looks darker in the pictures but that's the actual PPG Kinversand color, I think the matte clear that I used darkened it a bit, but it'll be 80% covered by components under the hood anyways. I'm happy with the results! The PPG paint is $142 a PINT at my cost, and so far I've used what little I had left over from earlier projects - so areas that I wasn't going to see aren't covered as well (inside headlight area, headlight back plate area, etc) the important parts were the fender and top of core support.
Minor setback after cutting out the inner fender remnants on the driver side (2 cuts, one horizontal near the footwell, one vertical next to that going downwards) - I had a clear view of the firewall just under the brake booster, basically where your toes sit near the pedals. Well, there was some rust under the booster and while looking around I thought I saw a reflection behind the rust (?!) but upon closer inspection it was actually DAYLIGHT shining through from the inside of the car. Soooooo I'm spending today grinding that away and coating it with rust converter then fabricating a small piece to cover it AND support the new fender that needs to be welded to that area (where the cuts were on the old one) since it's so rusted it wouldn't support anything anyways right now.
Interestingly enough, even the fender apron I got from my parts car had a 3 x 7 " rust patch on it, very near the base of the wheel well almost to the firewall location - I had to repair and patch that before painting it. The parts car was an '01 with less than 100k miles on it.
Sooooo if I were you, I'd take a close look under the brake booster on the firewall if you can get a view down there. Another method is to pull back the piece of carpet/insulation directly behind the brake pedal inside the vehicle. The seam between areas above the fender apron and below it sits right about there. On mine you could see that hole just behind the carpet. No damage or water appears to have gotten through and honestly the impact may have been enough to break the rust seam there, but it's still worth checking.


I just painted both pieces yesterday - the Kinversand met. paint is a pain to shoot, had to use red to cover the silver paint of the parts car and the kinversand barely covered the red. It looks darker in the pictures but that's the actual PPG Kinversand color, I think the matte clear that I used darkened it a bit, but it'll be 80% covered by components under the hood anyways. I'm happy with the results! The PPG paint is $142 a PINT at my cost, and so far I've used what little I had left over from earlier projects - so areas that I wasn't going to see aren't covered as well (inside headlight area, headlight back plate area, etc) the important parts were the fender and top of core support.
Minor setback after cutting out the inner fender remnants on the driver side (2 cuts, one horizontal near the footwell, one vertical next to that going downwards) - I had a clear view of the firewall just under the brake booster, basically where your toes sit near the pedals. Well, there was some rust under the booster and while looking around I thought I saw a reflection behind the rust (?!) but upon closer inspection it was actually DAYLIGHT shining through from the inside of the car.
Soooooo I'm spending today grinding that away and coating it with rust converter then fabricating a small piece to cover it AND support the new fender that needs to be welded to that area (where the cuts were on the old one) since it's so rusted it wouldn't support anything anyways right now. Interestingly enough, even the fender apron I got from my parts car had a 3 x 7 " rust patch on it, very near the base of the wheel well almost to the firewall location - I had to repair and patch that before painting it. The parts car was an '01 with less than 100k miles on it.
Sooooo if I were you, I'd take a close look under the brake booster on the firewall if you can get a view down there. Another method is to pull back the piece of carpet/insulation directly behind the brake pedal inside the vehicle. The seam between areas above the fender apron and below it sits right about there. On mine you could see that hole just behind the carpet. No damage or water appears to have gotten through and honestly the impact may have been enough to break the rust seam there, but it's still worth checking.
Last edited by EstorilM; 12-05-2012 at 09:14 AM.
#23
12-05-2012, 09:17 AM
I too have taken my d2 in white out conditions to timberline. We live in charleston, wv and don't get snow like they do up in elkins. On the way home it was so bad that 4 runners and jeeps etc... were on the side of the road. This d2 crawled on the steepest of snowy roads without a single problem. We can't wait to go back this year!

#24
08-20-2014, 12:35 PM
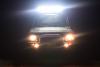
So, after slowly wrenching on this thing for the past few months (I've actually put 5k miles on it since I got it mostly "mechanically sound" since the crash) I FINALLY located a facelift bumper locally and finished painting and installing it.
I didn't realize that the core support modifications for the facelift headlights eliminates two out of three mounting holes required for the washer reservoir, so I had to make a bracket for that the other day before I could throw the bumper on.
Anyways, here she is!
I didn't realize that the core support modifications for the facelift headlights eliminates two out of three mounting holes required for the washer reservoir, so I had to make a bracket for that the other day before I could throw the bumper on.
Anyways, here she is!
#25
08-20-2014, 02:28 PM
So, after slowly wrenching on this thing for the past few months (I've actually put 5k miles on it since I got it mostly "mechanically sound" since the crash) I FINALLY located a facelift bumper locally and finished painting and installing it.
I didn't realize that the core support modifications for the facelift headlights eliminates two out of three mounting holes required for the washer reservoir, so I had to make a bracket for that the other day before I could throw the bumper on.
Anyways, here she is!
I didn't realize that the core support modifications for the facelift headlights eliminates two out of three mounting holes required for the washer reservoir, so I had to make a bracket for that the other day before I could throw the bumper on.
Anyways, here she is!
#26
08-20-2014, 09:09 PM
I actually swapped out the wheels when I got the bumper last week - same guy was selling both. I got the entire bumper assy. (+ fogs and end caps) and the wheels with brand new tires (less than 2k miles) for $750, including spare and lug nuts / wheel locks.
I liked the RR 19's but they just seemed too big for this thing (mechanically at least) and after all this work, it feels "right" putting it back to stock kinda. The RR wheels were MUCH heavier also, plus I was never able to get the lug-centric rims to center on the hub-centric disco and the wheels were very "shaky" since I got them. The Michelins also dry rotted REALLY BAD (sidewalls and tread gaps, BIG cracks) which is a shame because they still had 60%+ tread left. They also had ~5 plugs in the set total I think, one was still leaking and another had a defective valve stem. I could spend $700 on new tires or get 5 DII wheels and tires and entire facelift bumper for $750.

Apparently they are special-order Saudi/export rims that LR made back in the day.. very rare. They actually look IDENTICAL to the 2006 Range Rover Sport HSE 19" stock wheels except they're 18" and hub-centric. I'm positive they were the inspiration for the RRS wheels though. They even have the 5 accent "dots" between each spoke set.
Some other new build photos I had laying around. Note having to cut the entire inner fender out and line up a new one... one mm off at the weld by the firewall and the entire core / headlight/hood/fender/bumper alignment would be off by A LOT. I ended up measuring the spot weld distance with calipers and lining up the new fender till its spot weld matched the nearest old spot weld center-to-center.
 Seemed to work well - I had the rave measurements but they didn't help me too much.


#29
08-22-2014, 08:55 PM
I still wouldn't mind a white one - as much as I love the Atacama Sand color of the RRS I seriously regret not getting a white one. The Kinversand I can deal with though; it was the launch color of the Discovery II and the press vehicle color, as well as the parts catalog vehicle color. That's about it, they didn't actually really produce them in Kinversand except for a few - many were in fact the launch/press vehicles.

Thread
Thread Starter
Forum
Replies
Last Post
EstorilM
Discovery II
4
12-13-2012 08:11 PM
Polo//S4
Discovery II
11
10-05-2012 07:22 PM
G Reeves
Off Topic
14
06-19-2012 10:39 AM