
my 98 disco1

Thread Starter
|
Baja
Joined: Mar 2009
Posts: 5,736
Likes: 230
From: south n.j. and ne va.
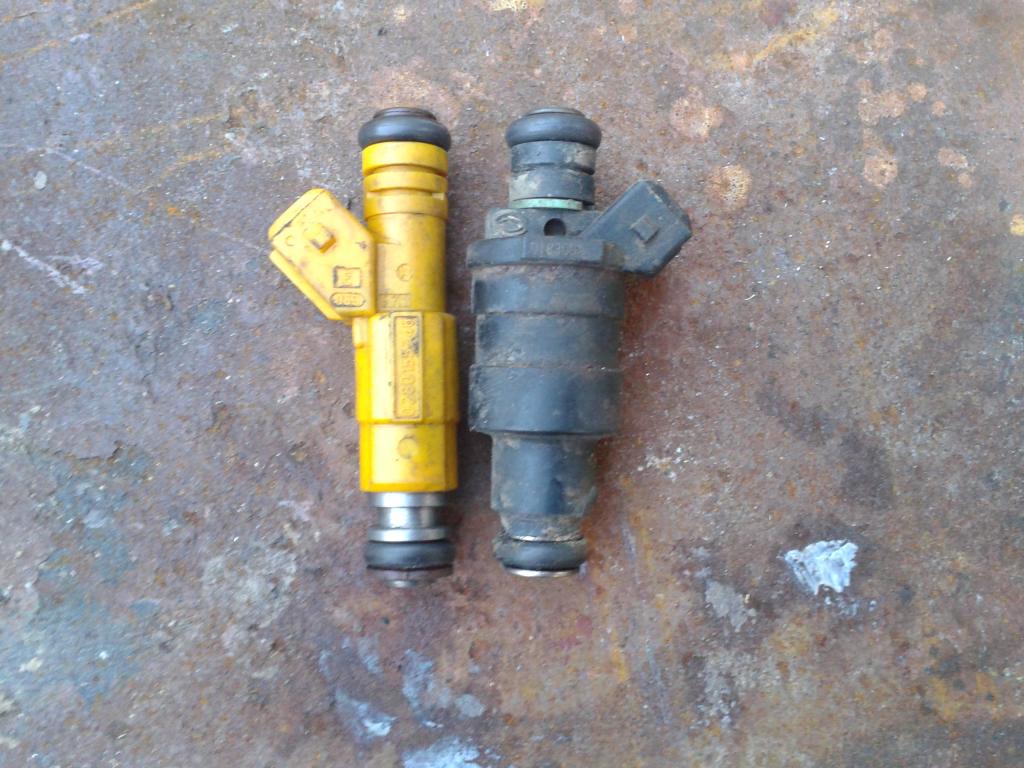
pulled off upper and lower plenum and fuel rails, swapped in the Volvo 831 injectors, just waiting on the new fuel pressure regulator to arrive for reassembly
guys that have done injectors on d1, did you put injectors on the intake then press on the fuel rail, or press into rail and install the entire thing in one shot?
it came apart rail first, so assume injectors then rail
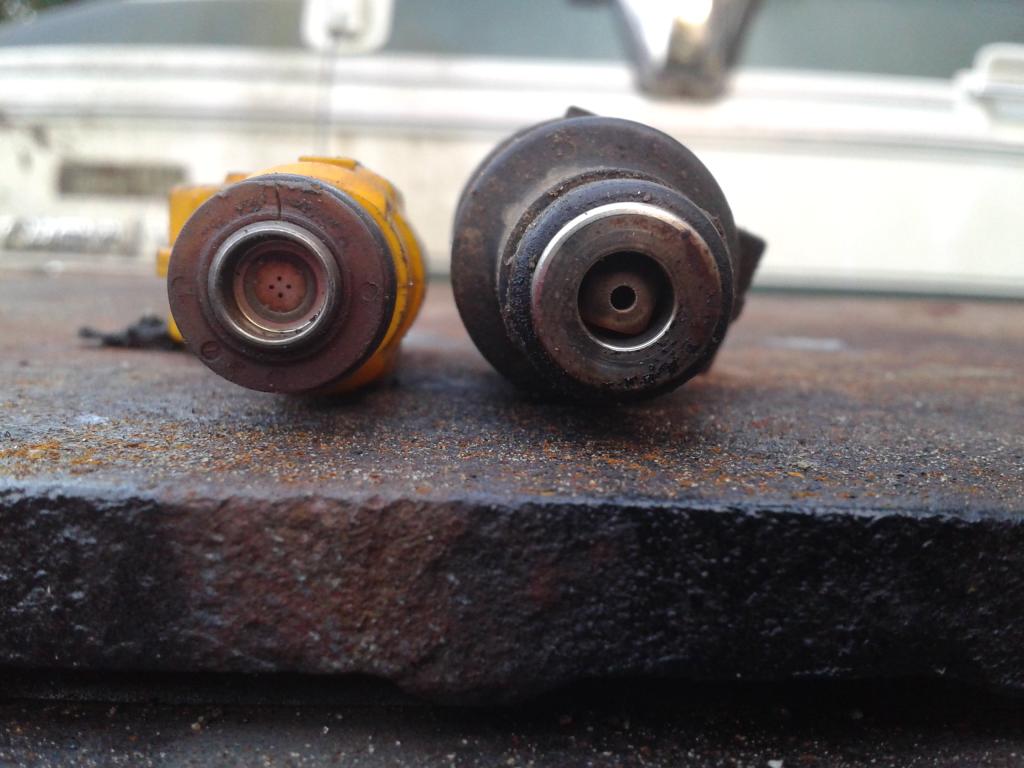
it is easy to see why the Volvos are so much better then the rover injectors it is like comparing a precision plant mister to an open garden hose, rover ones being the crude garden hose, I will post pics later
did rover use 1 giant tip to prevent clogging? all I can say is the rover engineers strike again another glorious idea, also love the no gaskets in the plenum upper or lower
now I have been using ultra gray or ultra black to seal upper and lower plenum but this time I also have the lower plenum off, same thing or do I need to get the right sealer, crap just looks like Indian head shelak
guys that have done injectors on d1, did you put injectors on the intake then press on the fuel rail, or press into rail and install the entire thing in one shot?
it came apart rail first, so assume injectors then rail
it is easy to see why the Volvos are so much better then the rover injectors it is like comparing a precision plant mister to an open garden hose, rover ones being the crude garden hose, I will post pics later
did rover use 1 giant tip to prevent clogging? all I can say is the rover engineers strike again another glorious idea, also love the no gaskets in the plenum upper or lower
now I have been using ultra gray or ultra black to seal upper and lower plenum but this time I also have the lower plenum off, same thing or do I need to get the right sealer, crap just looks like Indian head shelak
Thread Starter
|
Baja
Joined: Mar 2009
Posts: 5,736
Likes: 230
From: south n.j. and ne va.
I had initaly pulled a set from a mustang that looked identical to the rover ones same size but orange with the 4 hole nozzle the Volvo have, no idea if they would have worked so got the recommended ones
Last edited by TOM R; Sep 2, 2014 at 08:02 PM.
guys that have done injectors on d1, did you put injectors on the intake then press on the fuel rail, or press into rail and install the entire thing in one shot?
it came apart rail first, so assume injectors then rail
it is easy to see why the Volvos are so much better then the rover injectors it is like comparing a precision plant mister to an open garden hose, rover ones being the crude garden hose, I will post pics later
did rover use 1 giant tip to prevent clogging? all I can say is the rover engineers strike again another glorious idea, also love the no gaskets in the plenum upper or lower
now I have been using ultra gray or ultra black to seal upper and lower plenum but this time I also have the lower plenum off, same thing or do I need to get the right sealer, crap just looks like Indian head shelak
my jeep injectors were the same, i soaked them in diesel for a few hours and popped them back in. they're fine.

Three Wheeling
Joined: Mar 2014
Posts: 98
Likes: 1
Notice any difference in throttle response?
Only time will tell if there is an improvement in fuel economy, etc..
Seems like a huge difference. How long before the ECM will notice and change the fuel map? Or will it?
Maybe keeping the battery disconnected for a while to reset everything is a good idea.
Only time will tell if there is an improvement in fuel economy, etc..
Seems like a huge difference. How long before the ECM will notice and change the fuel map? Or will it?
Maybe keeping the battery disconnected for a while to reset everything is a good idea.
Thread Starter
|
Baja
Joined: Mar 2009
Posts: 5,736
Likes: 230
From: south n.j. and ne va.
Won't know till I put the engine back together
Consensus seems to be you will get a little improvement in all areas, a little
I am mainly hoping for little better MPG from better fuel atomazation
Consensus seems to be you will get a little improvement in all areas, a little
I am mainly hoping for little better MPG from better fuel atomazation
Thread Starter
|
Baja
Joined: Mar 2009
Posts: 5,736
Likes: 230
From: south n.j. and ne va.
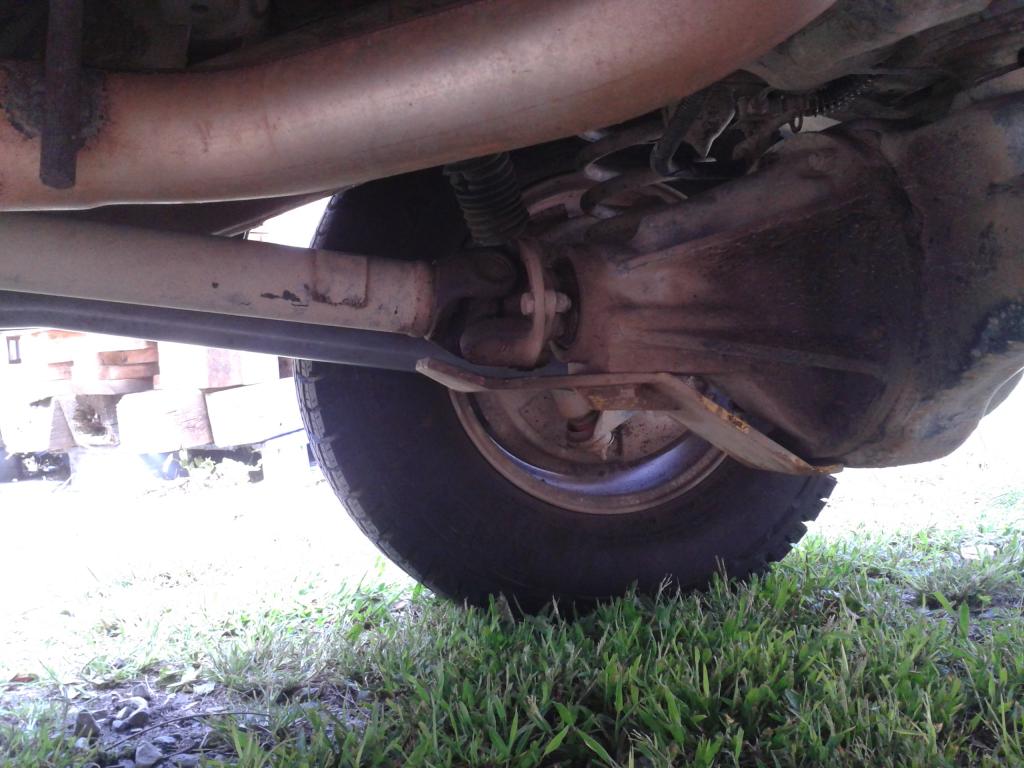
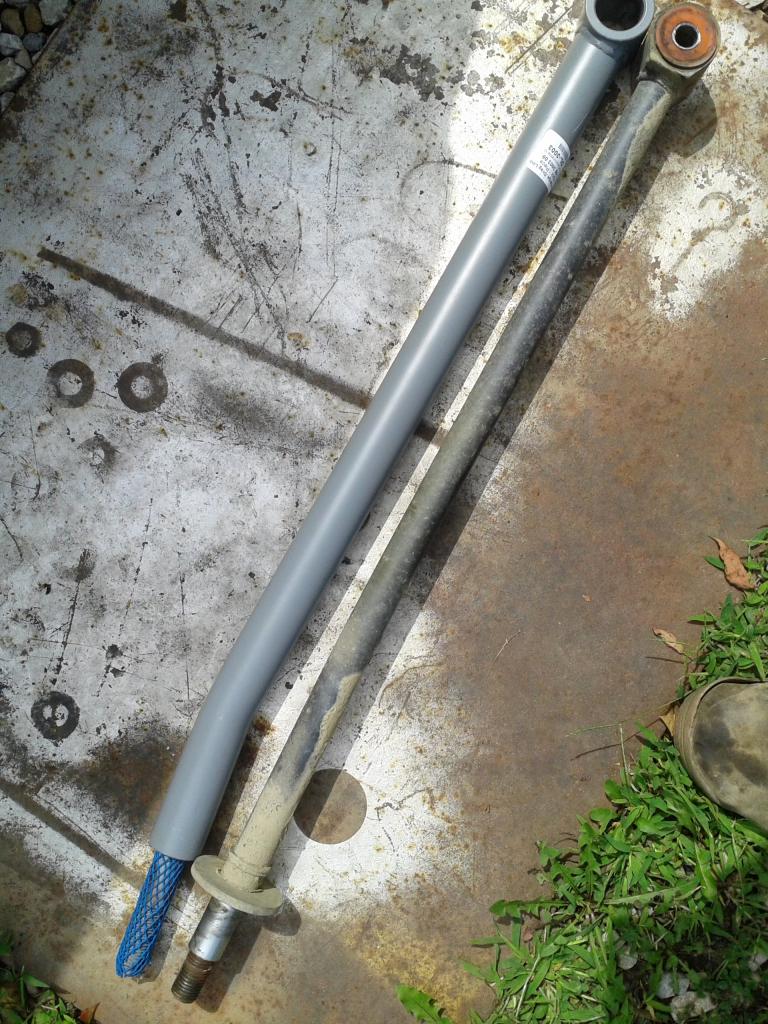
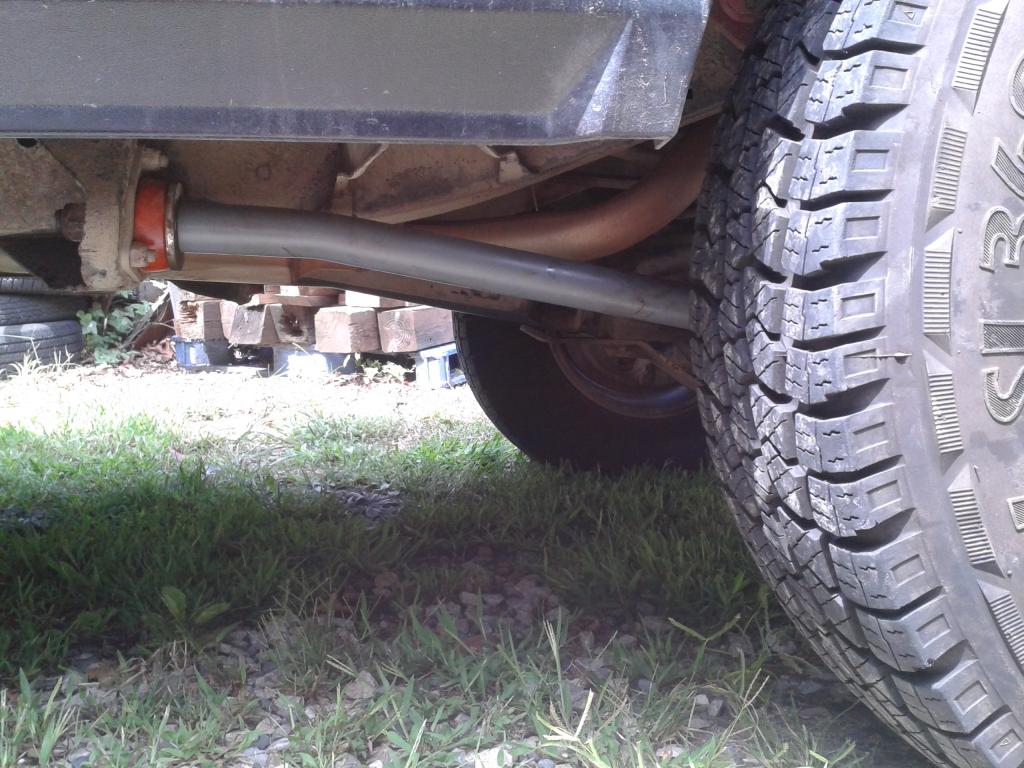
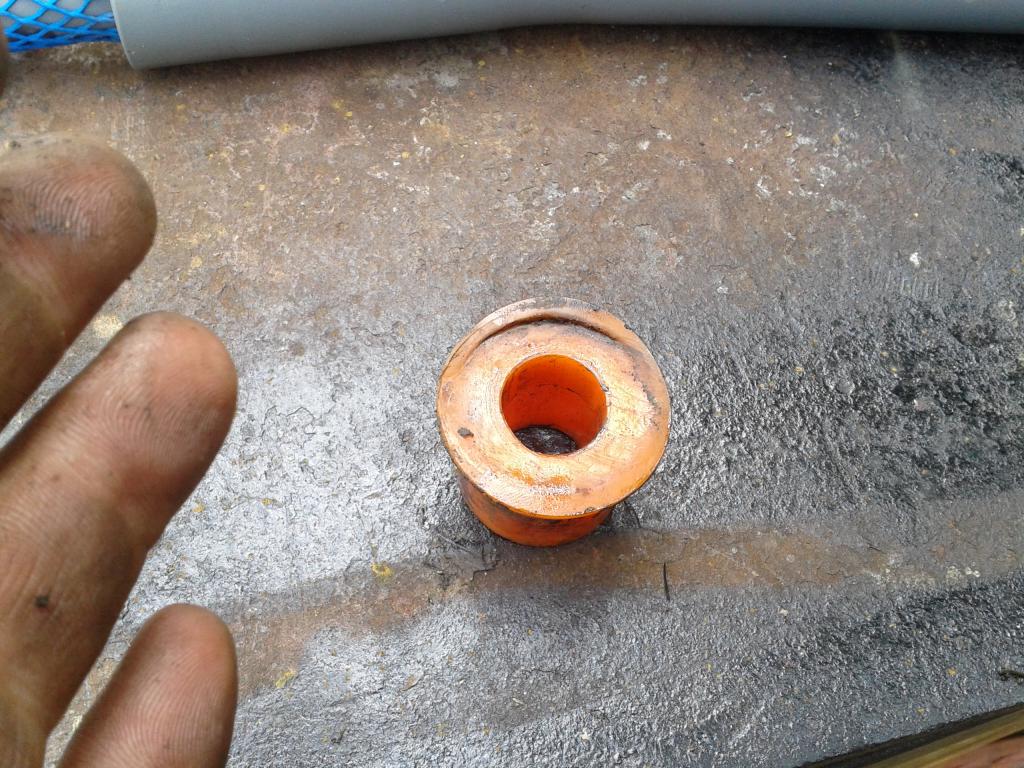
progress today, my proline rear radius arms from rovers north showed this morning 2 minutes to swap em they came with new orange urethane bushings for the loop end but I saved them and reused the orange off the stock arms
they come gray no decals on em but the part #
originals are 1 1/16" OD
these cranked proline are 1 9/16 OD so 1/2" larger and way heavier I would estimate 2-3 times the weight of original, there is no visible weld or seam on the threaded end I would almost dare to venture these are solid bar not tubing
post pics later cause I am unsure of what it did to my pinion angle, it appears the pinion is straight now no tilt up, I am at the low end of the lift requirement for these hope I am not to low
on the other end of the truck I disassembled the fuel rail, when I removed the steel fuel line from the fuel pressure regulator there was no O ring on the fuel line and none in the regulator, yet I had no fuel leak, I wonder if it was rubber and disintegrated into the regulator? wonder if this is in some way the cause of my problem? still waiting on part
But I did find some sealer for the plenum, I cannot find hylomar anywhere local no one sells it or knows what it is.
at pep boys I found permatex 85420 permashield gasket dressing and flange sealant, package says compare to hylomar , states resists all automotive fuels used for metal to metal gasket less mating surfaces non hardening guess I will give it a shot it is either this or rtv again
link to product Gasket Sealants : Permatex� PermaShield

Thread Starter
|
Baja
Joined: Mar 2009
Posts: 5,736
Likes: 230
From: south n.j. and ne va.
No smart phone, the pinion looks level/ straight now instead of tilted up
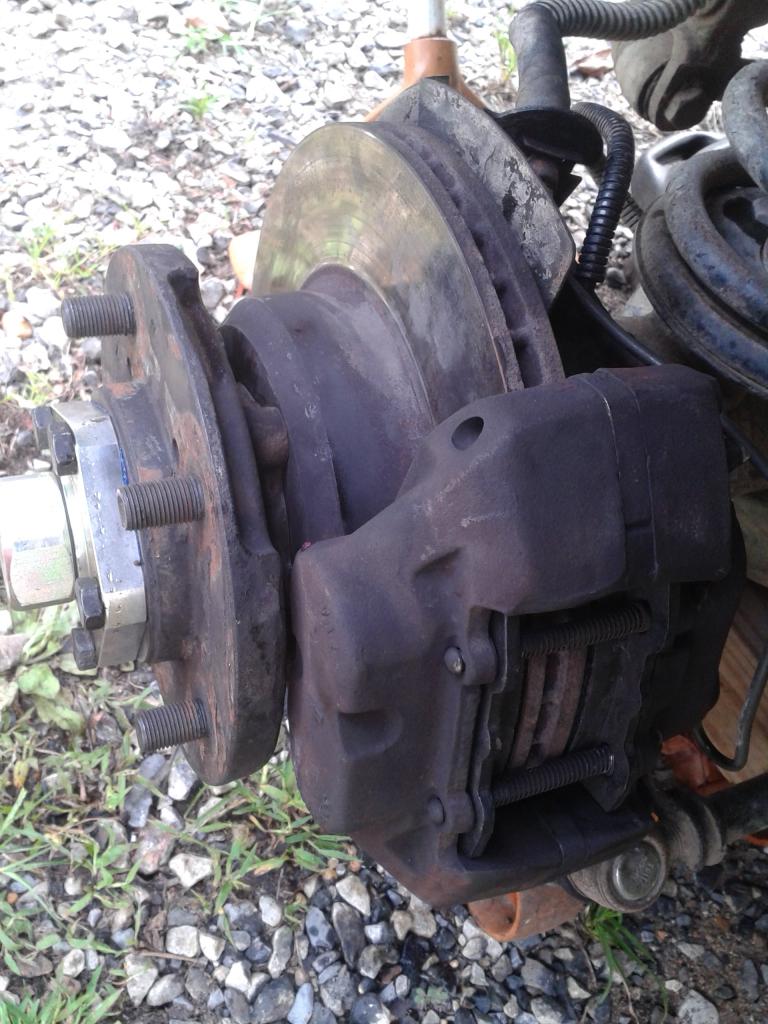
Front brakes all done and bled, I got the extended brake lines from the guy but the rears are twice as long as stock I would need a lot of lift for them did not check how much longer the fronts are just left em all in the box for now
Front brakes all done and bled, I got the extended brake lines from the guy but the rears are twice as long as stock I would need a lot of lift for them did not check how much longer the fronts are just left em all in the box for now