
Another build thread


Thread Starter
|
Three Wheeling
Joined: Feb 2013
Posts: 50
Likes: 1
From: Connecticut, USA
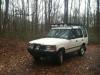
I purchased my D1 over the winter and have been slowly amassing parts and turning wrenches in an effort to get it street worthy. I picked it up from a customer who was tired of dropping money into it. It was in running condition, with a blown brake master and a RF shock blown through the turret. I gave her $400 in the interest of saving a cool truck from the scrap heap.
I compiled a list today of everything I've purchased just so know how much I've spent so far ($3,230) and I'll list everything here as well as what has actually been installed and what is still on the shelf.
Installed:
Upper oil cooler hose
Lower oil cooler hose
Front cover oil seal
Spark plugs
Magnecore 8mm plug wires
Power steering hose kit
TF HD shock tower rings
TF AT shock kit
TF steering damper
Head gasket kit (HG, intake, etc)
Head bolts
Thermostat
TF HD spring retainers
TF HD shock towers
TF HD rear shock mounts
2 inch lift blocks (I know...I'll probably end up with a 3" spring kit)
Brake master cylinder
EBC green 6000 rear pads
Vacuum advance unit
Ebay cross drilled rotors
Rear propshaft U-joint
Rear differential fluid (75-140 Valv Syn)
Jensen 7" touchscreen DVD head unit
Air filter
MSD blaster 2 ignition coil
Distributor cap
Distributor rotor
Headlight bulbs
Radio antenna
Front and read wipers
Rear view mirror
Now on to what is still either in the mail or sitting on my bench:
Swivel ball drain plugs
Swivel seal retaining rings
Trans filter kit
Bottom end gasket kit
Serp belt
Fuel filter
CV joint/Swivel ball reseal kits
Water pump
EBC green 7000 front pads
Ebay cross drilled rotors (front)
Front brake hardware kit
Oil pan bolt kit
Ignition condenser
Swivel ball grease
Water pump bolt kit
Timing chain
Fan clutch
Cam sprocket
Distributor drive gear
Cam spacer
Crankshaft gear
Oil pressure switch
Exhaust collector gaskets
As you can see I still have quite a bit of work ahead of me. I have yet to take photos, but will try tomorrow.
Any advice/criticism is welcomed, except about my choice of lift spacers. I really will change to a new spring kit. Promise.
Thread Starter
|
Three Wheeling
Joined: Feb 2013
Posts: 50
Likes: 1
From: Connecticut, USA
As it sits today, the head gasket job is finished. I made sure it was running well before I started the timing cover/ bottom end job, which is where its currently at.
Im waiting on Trevor to send my timing gears so I can get her running again.
Im waiting on Trevor to send my timing gears so I can get her running again.
Thread Starter
|
Three Wheeling
Joined: Feb 2013
Posts: 50
Likes: 1
From: Connecticut, USA
Finished the bottom end seal up. Filled the engine with 15-40 Rotella and cranked her up...the distributor was a tooth off. Quickly fixed that and it fired right up. I immediately noticed that the idle was smoother and throttle response was much faster. The new vacuum advance and pickup adjustment made a huge difference. After a quick warm up I did some 0-60 pulls. To say I was impressed would be an understatement. It pulled like a 3100 pound car, not a 6200 pound truck.
In an attempt to replace the exhaust manifold collector gaskets, I broke two of the three studs on the drivers manifold. Sort of expected that. Ill see if I can find some time this weekend to drill them out and run some nut and bolt combos through.
So today we got a new:
Oil pickup gasket
Oil pan gasket
Cam sprocket
Crank sprocket
Cam gear spacer
Distributor drive gear
Timing chain
Timing cover gasket
Front cover oil seal
Oil pressure switch
Oil change
New coolant
Water pump
Fan clutch
Serp belt
Lower radiator hose


Thread Starter
|
Three Wheeling
Joined: Feb 2013
Posts: 50
Likes: 1
From: Connecticut, USA
So after god knows how long, I started working on the Disco again. In the meantime, I bought a Durango which required some attention and I've been trying to spend more time with the ol' lady.
I brought the Disco home from my buddys house where it spent the winter and today I tore apart the right front all the way down to the axle housing. Later this week I'll install new swivel ball retainers and seals, pins, bearings, brakes and the like.
I really missed working on this truck and I'm looking forward to finishing this project and enjoying her in the dirt soon.
Thread Starter
|
Three Wheeling
Joined: Feb 2013
Posts: 50
Likes: 1
From: Connecticut, USA
In the last few days Ive cleaned and reinstalled my right side swivel ball with new seal and flange gasket, cleaned and painted my swivel pin housing with gloss black caliper paint and installed new upper and lower swivel pins, lower pin bearing, shim kit, rialco bushing, upper bearing and washers, ABS "bushing" in the top pin and ABS sensor seal. New swivel seal and retaining ring are hanging in place. Painted the right front caliper gloss black. Installed new seal, bearing and thrust ring in the stub axle.
Just have to set preload, which is proving more complicated that I anticipated.
Just have to set preload, which is proving more complicated that I anticipated.

Thread
Thread Starter
Forum
Replies
Last Post