Discovery I Talk about the Land Rover Discovery Series I within.

Gutting a low range lock-out solenoid.

Thread Tools
 
Search this Thread
 
  #21  
Old 12-21-2011, 04:04 PM
hh65flyer's Avatar
Rock Crawling
Thread Starter
Join Date: Oct 2011
Location: Whitefsh, MT
Posts: 326
Likes: 0
Received 0 Likes on 0 Posts
Default

Are you going to remove the auto-shifter? I don't believe it can be done without that piece out and I know you had some reservations about messing with it and possibly damaging the cable.

Good luck.
 
  #22  
Old 12-21-2011, 04:17 PM
Join Date: May 2009
Location: Westchester, NY
Posts: 5,763
Likes: 0
Received 14 Likes on 11 Posts
Default

Originally Posted by hh65flyer
Are you going to remove the auto-shifter? I don't believe it can be done without that piece out and I know you had some reservations about messing with it and possibly damaging the cable.

Good luck.
no i can take it out. i have no problem taking it out been done before. the other end where the cable bolts to the xyz. that trunion nut can get rusty and will snap the cable if too much pressure is put on it.

the last time i tried reaching the solenoid we were on the trail so im sure it will be easier, brighter and more comfortable to do it in my driveway tomorrow so hopefully i can get in there and reach it with a small 1/4" ratchet
 
  #23  
Old 12-21-2011, 04:29 PM
hh65flyer's Avatar
Rock Crawling
Thread Starter
Join Date: Oct 2011
Location: Whitefsh, MT
Posts: 326
Likes: 0
Received 0 Likes on 0 Posts
Default

This may seem pretty obvious but I had success by going from side to side also. At times it was easier to work from the driver's side then at other times it was easier to be working from the pass side.

Apparently you have been in there before so you probably know the drill and wouldn't do anything dumb like re-assemble everything only to find you have left the heat ducts on the floor behind the front seats. NOT that that happened to me or anything...just sayin'. ;-)
 
  #24  
Old 12-21-2011, 06:57 PM
Join Date: May 2009
Location: Westchester, NY
Posts: 5,763
Likes: 0
Received 14 Likes on 11 Posts
Default

Bahaha no I have been in there at least thirty times think I can reassemble it in twenty mins cuoholders and all. Just got fat hands and couldn't get to those bolts like I said it was on the trail so I should do better tomorrow in my drive.
 
  #25  
Old 12-22-2011, 12:01 PM
Join Date: May 2009
Location: Westchester, NY
Posts: 5,763
Likes: 0
Received 14 Likes on 11 Posts
Default

there is no way. just no freakin way to get that thru the console. i tried from pass and driver sides two of the bolts are easy but i had it down to the back corner bolt and there was just no way. maybe i if i had a 3/8" universal but even then i think it might be near impossible. i did notice that it sits alot closer to the pass side seat rails then i thought it had so even with the panel that one back corner bolt will be hard but not impossible at least with an access panel i will be able to get a ratchet in there and have it horizontal.
 
  #26  
Old 12-23-2011, 12:01 PM
hh65flyer's Avatar
Rock Crawling
Thread Starter
Join Date: Oct 2011
Location: Whitefsh, MT
Posts: 326
Likes: 0
Received 0 Likes on 0 Posts
Default

Maybe your body is much closer to the frame than mine is...like too many Dukes of Hazzard manuevers! Seriously, I just did not have those kind of problems at all. The bolt you are referring to was the most difficult but once my ratchet came in contact with the underbody, I was able to get it out the rest of the way with just my fingers.

Time for the sawzall I guess! In the end your access panel will likely pay off as many times as you have been in there. Now you will be looking for excuses to open it up and take a look around!
 
  #27  
Old 12-26-2011, 06:44 PM
Join Date: Mar 2010
Location: Pittsburgh PA suburbs.
Posts: 5,584
Likes: 0
Received 7 Likes on 7 Posts
Default

Originally Posted by hh65flyer
Well it's all back together and works like a charm now. CDL and Low Range all work as they should.

I ended up taking the guts out completely but leaving the wires in under the cap. Used some permatex to seal the whole thing.

Another item checked off the list... ;-)

I got to wondering about what you said regarding the wires and began to wonder, if they are still connected, you are going to have 12 volts applied, are they insulated or disconnected to prevent a possible problem?

I would not want to be putting 12 volts to ground with a hot wire.
 
  #28  
Old 12-27-2011, 10:30 AM
hh65flyer's Avatar
Rock Crawling
Thread Starter
Join Date: Oct 2011
Location: Whitefsh, MT
Posts: 326
Likes: 0
Received 0 Likes on 0 Posts
Default

Thanks Danny Lee, I wrapped each wire individually with elect tape then sealed them to the inside of the cap with permatex. So far it's been completely trouble free and works great. Matt
 
  #29  
Old 05-01-2018, 09:22 PM
Fastercat's Avatar
Recovery Vehicle
Join Date: Nov 2017
Location: Amherstburg Ontario
Posts: 787
Received 294 Likes on 183 Posts
Default


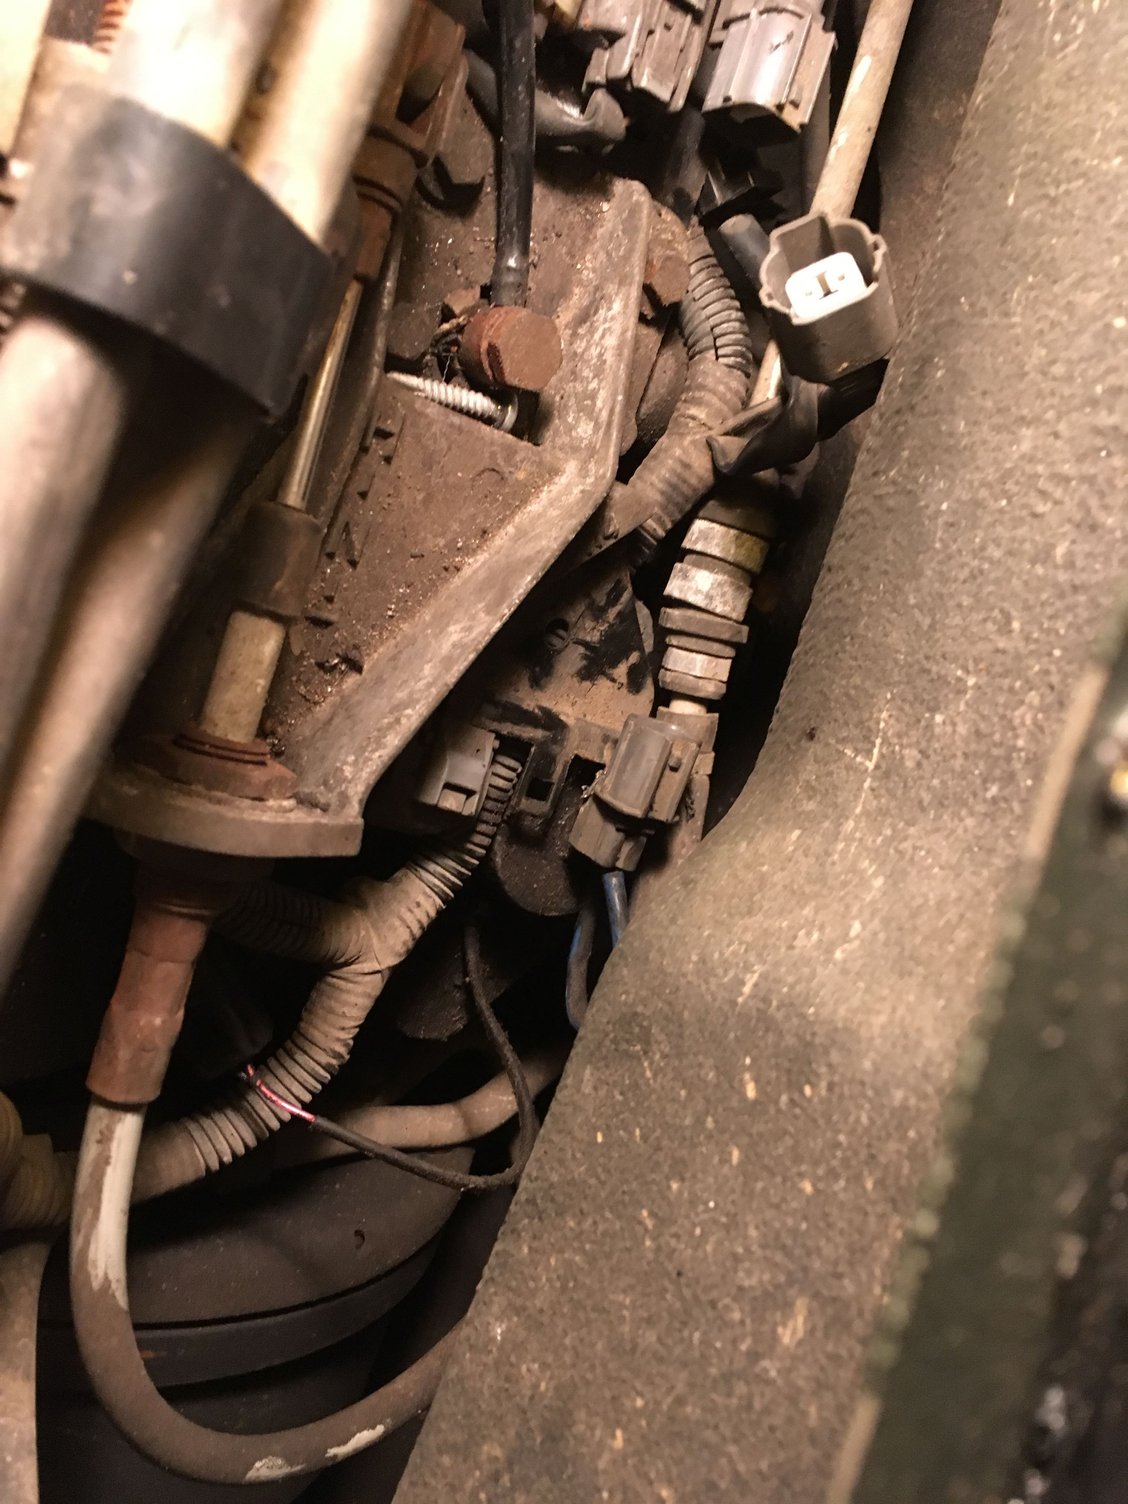
Do you guys have to remove the low range bracket first to get access to the solenoid? I have a bunch of wiring connectors mounted on a steel plate that seems to be over top of the solenoid
 

Last edited by Fastercat; 05-01-2018 at 09:24 PM. Reason: Add a picture
Related Topics
Thread
Thread Starter
Forum
Replies
Last Post
RSPTex
Discovery II
3
11-19-2014 05:28 AM
jayvick
Modifications
7
12-16-2012 05:28 PM
jayvick
General Range Rover Discussion - Archived
1
12-15-2012 09:26 PM
bullcrew
Discovery II
5
01-11-2012 12:10 PM
twaszak
Discovery II
0
06-27-2011 01:32 PM


Quick Reply: Gutting a low range lock-out solenoid.


All times are GMT -5. The time now is 01:54 AM.