
How to Change Your Front Rotors w/ Wheel Bearings


Things you will need:
-Time (a lot of this)
-Patience (not so much as time, you are allowed to throw things and cuss)
-Lift (1.5 Ton is what I used)
-Socket for lug nuts (1 1/16" or bigger if you have screwed ones like me)
-13mm (12pt) socket for brake calipers
-14mm (12pt) socket for bolts holding the rotor to hub assembly
-Zip ties (for attaching brake caliper to springs so they don't dangle)
-Long Flat head screw driver (removing dust cap and removing bearing race and removing)
or
Chisel
-Cir-clip Pliers(C-Clip)
-17mm Socket for drive member bolts
-2 1/16" socket for lock nuts
or
Joint Pliers (I used since I lost my socket)
-2 rotors
-2 drive member paper gaskets
-2 lock washers
-4 wheel bearings (I used Timken Set37)
-2 inner grease seals (I used RTC3511)
-Wheel bearing grease
-Hammer or mallet
Optional:
Impact gun
Gloves to keep that dirt off your hands (I used a crap load)
Rags or old Tshirt
1. Loosen front wheel nuts, jack up vehicle and
lower onto axle stands and remove road wheel.

2. Release brake hose clips and remove brake
caliper. Secure to one side.
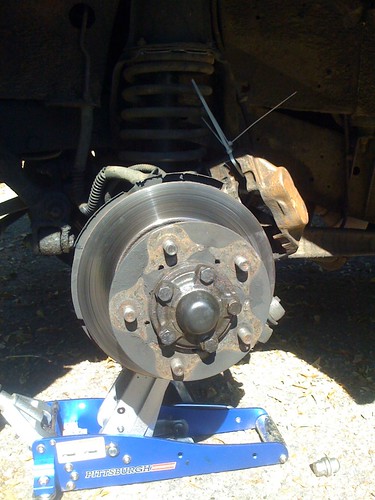
(Two 13mm bolts on the top and bottom of the caliper)
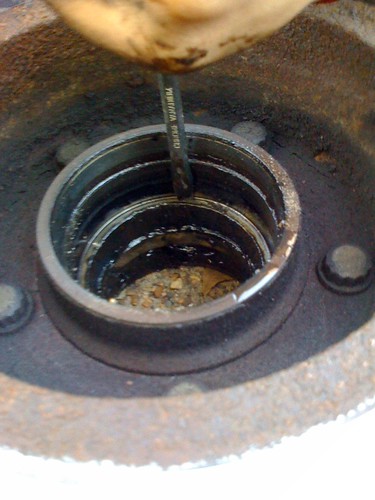
3. Lever off dust cap.
(That black thing in the center of the last picture)
4. Remove circlip and drive shaft shim from
driveshaft.
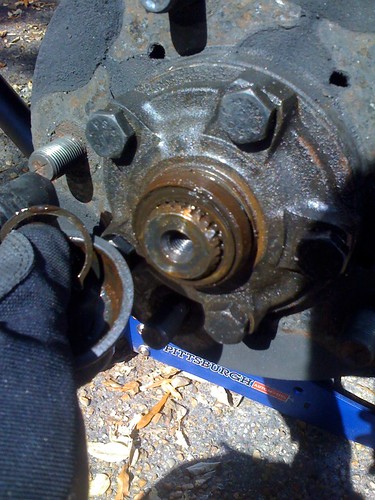
(Use the C-Clip Plier, put the two ends in the two holes and separate)
5. Remove five bolts and withdraw driving member
and joint washer.
(17mm socket)
6. Bend back lock washer tabs.
I didn't have to so idk.. use the flathead?
7. Remove locknut and lock washer.
(Use the 2 1/16" socket, which I lost, or the joint pliers)
8. Remove hub adjusting nut.
(same instructions as previous step)
9. Remove spacing washer.
(if you can't remove this, give up and sell your rover.. just kidding. Just pull the darn thing)
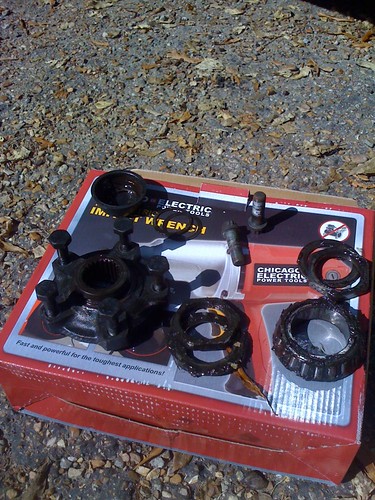
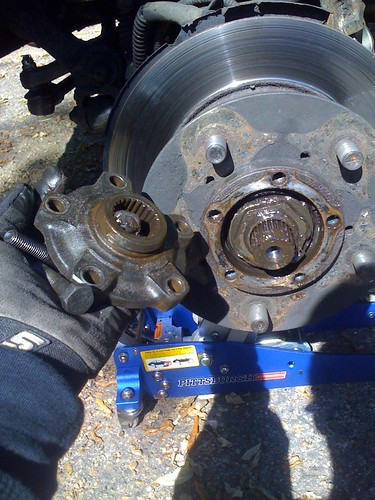
-Drive member with 5 bolts (bottom left)
-Lock nut with lock washer (center bottom)
-Outer bearing (bottom right)
-Hub adjusting nut with spacing washer (top right)
-Brake caliper mounting bolts (top center)
-Dust cap with C-Clip inside (Top Left)
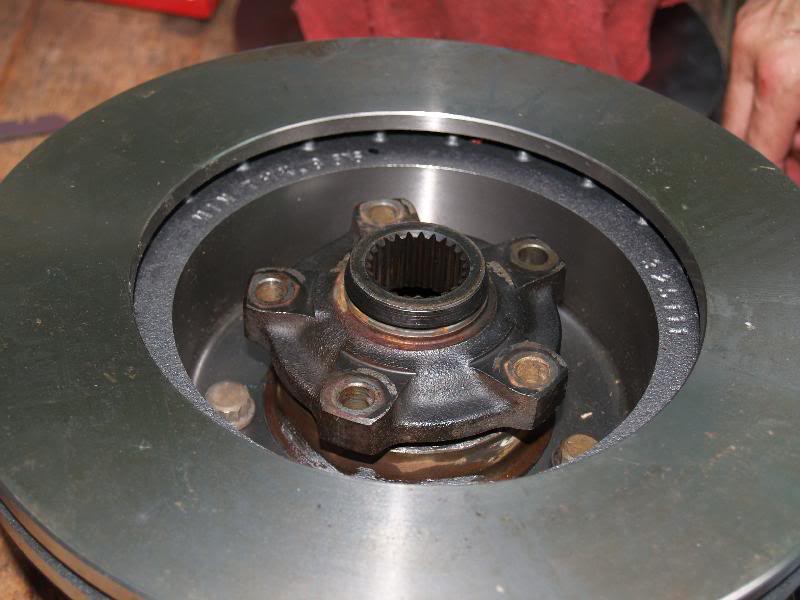
10. Remove hub and brake disc assembly complete
with bearings.
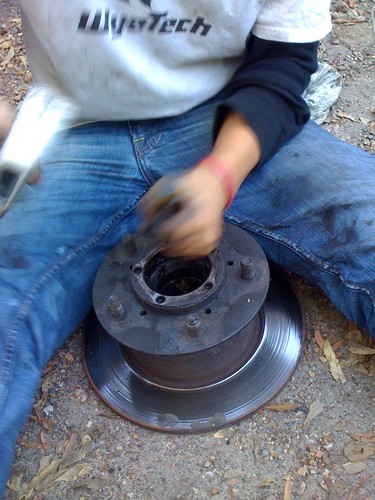
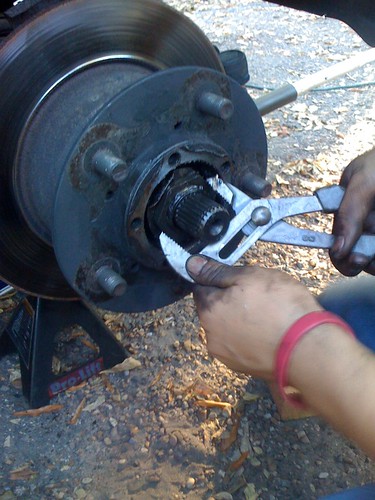
2. Remove five hub to disc bolts.
(use the 14mm socket here)
**As you can see I cheated and used my Impact Gun, if you do not have one you can insert your long flathead in between the bolts on the opposite end as a hold point** Above one bolt, below the following one in order (sorry didn't take a pic)
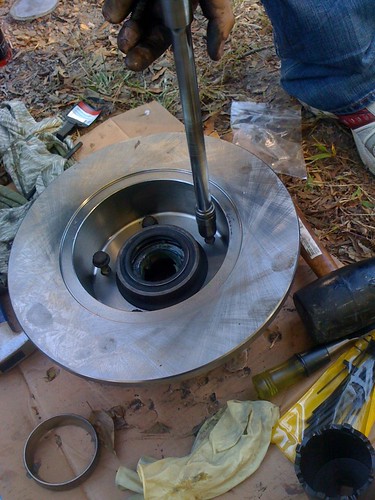
3. Tap disc to separate from hub.
(um...hit it?)
NOW TO THE FUN PART!
(Knocking out the bearing races..)
**Race: that round thing your bearing goes into when you open the box
1) lay your hub with the bolts facing down
(You should have just the hub, since you knocked off the rotor)
2) See the two races? Well in between the two races is a metal median. You are placing the flathead (chisel) between that median and the race
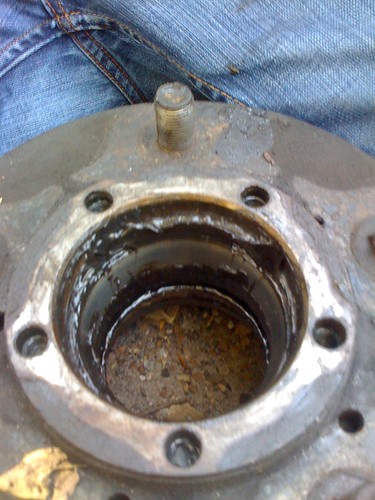
(Silver shiny part a little past the median is the race)
(sorry it was hard to take a picture)
3) Knock on it once or twice, but you have to take it out evenly or it's a PITA!
**Like a clock, hit it on opposite sides
so 12 then 6
then 3 then 9
repeat..
4) race falls out, flip over the hub and repeat steps 2 and 3 for other side
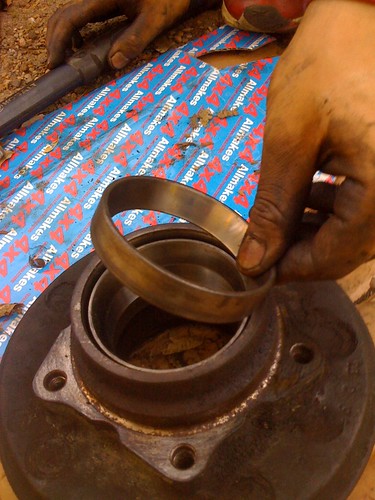
**keep the races and wipe them clean
5) clean out the gunk in hub with a rag or tshirt
HARD, MADE SIMPLE
(Installing new races)
So taking out the races was a pain in the butt.. no fear I learned how to put them in UBER easy
1) after you cleaned it, place the new race inside (doesn't matter which side of the hub since you are doing both.
Make sure the race is going in right
------------
I00000I - RACE
-----
The thick bottom part goes in facing down, if in doubt just put the bearing in the race and place it in the hub. The tip of the cone is going IN the hub like a bullet goes through an unwanted trespasser
2) Remember those two races you saved? Place one, in the same way as if you are installing it with the thick part facing down and use that as a guide for the new race you are installing. Hammer evenly, 12 to 6 and 3 to 9.
3) Once flush with the hub, place the other saved old race on top of the two already installed races. Hammer evenly.
4) now flip it over and hammer the old races out, really you only need to hammer the second one since it will push the 3rd one out also. And if you noticed you have a nice spot to place your chisel or flathead.
5) repeat for other side
GREAT! Now to grease your bearings
1) Get your grease
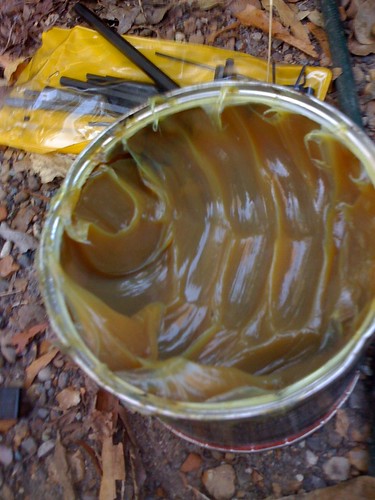
2) Place some in the palm of your hand (nice glob)
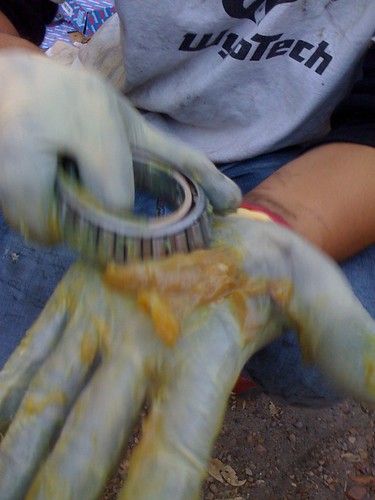
3) Take your bearing (larger circumference on bottom) and press the edge in the middle of it forcing it into the grease
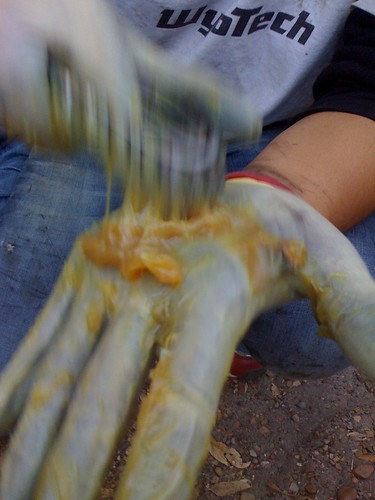
4) Repeat till the grease comes through the top
5) Go around the entire bearing
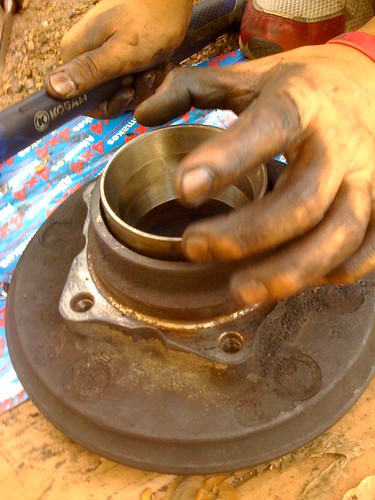
Insert your bearing into the race and prepare for the inner seal install!
Inner seal top
IMG_0271 by calebmbo, on Flickr
Inner Seal Bottom
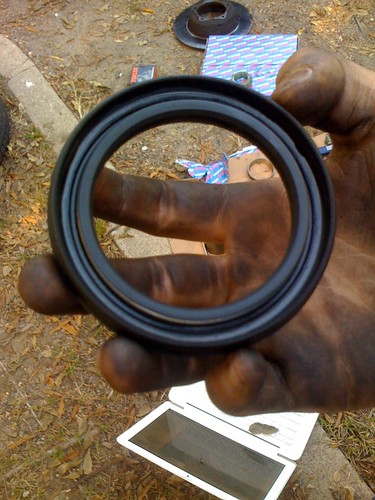
Place the seal into the hub, after the bearing, with the inner seal bottom going INTO the hub.
**Make sure you are doing the correct side of the hub, the bolts should be on the floor.

(Inner Seal Top...is on top..)
I think I'm done for tonight, I will finish this later. If I mistyped something or misinformed please tell me, it's been a long day and I tried to remember everything I did.
-Time (a lot of this)
-Patience (not so much as time, you are allowed to throw things and cuss)
-Lift (1.5 Ton is what I used)
-Socket for lug nuts (1 1/16" or bigger if you have screwed ones like me)
-13mm (12pt) socket for brake calipers
-14mm (12pt) socket for bolts holding the rotor to hub assembly
-Zip ties (for attaching brake caliper to springs so they don't dangle)
-Long Flat head screw driver (removing dust cap and removing bearing race and removing)
or
Chisel
-Cir-clip Pliers(C-Clip)
-17mm Socket for drive member bolts
-2 1/16" socket for lock nuts
or
Joint Pliers (I used since I lost my socket)
-2 rotors
-2 drive member paper gaskets
-2 lock washers
-4 wheel bearings (I used Timken Set37)
-2 inner grease seals (I used RTC3511)
-Wheel bearing grease
-Hammer or mallet
Optional:
Impact gun
Gloves to keep that dirt off your hands (I used a crap load)
Rags or old Tshirt
1. Loosen front wheel nuts, jack up vehicle and
lower onto axle stands and remove road wheel.
2. Release brake hose clips and remove brake
caliper. Secure to one side.
(Two 13mm bolts on the top and bottom of the caliper)
3. Lever off dust cap.
(That black thing in the center of the last picture)
4. Remove circlip and drive shaft shim from
driveshaft.
(Use the C-Clip Plier, put the two ends in the two holes and separate)
5. Remove five bolts and withdraw driving member
and joint washer.
(17mm socket)
6. Bend back lock washer tabs.
I didn't have to so idk.. use the flathead?
7. Remove locknut and lock washer.
(Use the 2 1/16" socket, which I lost, or the joint pliers)
8. Remove hub adjusting nut.
(same instructions as previous step)
9. Remove spacing washer.
(if you can't remove this, give up and sell your rover.. just kidding. Just pull the darn thing)
-Drive member with 5 bolts (bottom left)
-Lock nut with lock washer (center bottom)
-Outer bearing (bottom right)
-Hub adjusting nut with spacing washer (top right)
-Brake caliper mounting bolts (top center)
-Dust cap with C-Clip inside (Top Left)
10. Remove hub and brake disc assembly complete
with bearings.
2. Remove five hub to disc bolts.
(use the 14mm socket here)
**As you can see I cheated and used my Impact Gun, if you do not have one you can insert your long flathead in between the bolts on the opposite end as a hold point** Above one bolt, below the following one in order (sorry didn't take a pic)
3. Tap disc to separate from hub.
(um...hit it?)
NOW TO THE FUN PART!
(Knocking out the bearing races..)
**Race: that round thing your bearing goes into when you open the box
1) lay your hub with the bolts facing down
(You should have just the hub, since you knocked off the rotor)
2) See the two races? Well in between the two races is a metal median. You are placing the flathead (chisel) between that median and the race
(Silver shiny part a little past the median is the race)
(MEDIAN)
(RACE)IIIIIII(RACE)
flathead between race and median
(RACE)IIIIIII(RACE)
flathead between race and median
(sorry it was hard to take a picture)
3) Knock on it once or twice, but you have to take it out evenly or it's a PITA!
**Like a clock, hit it on opposite sides
so 12 then 6
then 3 then 9
repeat..
4) race falls out, flip over the hub and repeat steps 2 and 3 for other side
**keep the races and wipe them clean
5) clean out the gunk in hub with a rag or tshirt
HARD, MADE SIMPLE
(Installing new races)
So taking out the races was a pain in the butt.. no fear I learned how to put them in UBER easy
1) after you cleaned it, place the new race inside (doesn't matter which side of the hub since you are doing both.
Make sure the race is going in right
------------
I00000I - RACE
-----
The thick bottom part goes in facing down, if in doubt just put the bearing in the race and place it in the hub. The tip of the cone is going IN the hub like a bullet goes through an unwanted trespasser
2) Remember those two races you saved? Place one, in the same way as if you are installing it with the thick part facing down and use that as a guide for the new race you are installing. Hammer evenly, 12 to 6 and 3 to 9.
3) Once flush with the hub, place the other saved old race on top of the two already installed races. Hammer evenly.
4) now flip it over and hammer the old races out, really you only need to hammer the second one since it will push the 3rd one out also. And if you noticed you have a nice spot to place your chisel or flathead.
5) repeat for other side
GREAT! Now to grease your bearings
1) Get your grease
2) Place some in the palm of your hand (nice glob)
3) Take your bearing (larger circumference on bottom) and press the edge in the middle of it forcing it into the grease
4) Repeat till the grease comes through the top
5) Go around the entire bearing
Insert your bearing into the race and prepare for the inner seal install!
Inner seal top
IMG_0271 by calebmbo, on Flickr
Inner Seal Bottom
Place the seal into the hub, after the bearing, with the inner seal bottom going INTO the hub.
**Make sure you are doing the correct side of the hub, the bolts should be on the floor.
(Inner Seal Top...is on top..)
I think I'm done for tonight, I will finish this later. If I mistyped something or misinformed please tell me, it's been a long day and I tried to remember everything I did.
Last edited by calebbo; Oct 16, 2011 at 03:24 AM.

Super Moderator
Joined: Jan 2011
Posts: 16,322
Likes: 88
From: Savannah Georgia
Very nice write up and kudos to photographer assistant. The Wynotech sweatshirt was a nice touch. Only improvement I would suggest is spread a tarp, so small parts will be easier to find when dropped. Certainly shows what can be done in field conditions, and under the shade tree.

Baja
Joined: Sep 2007
Posts: 5,232
Likes: 52
From: Georgia, USA
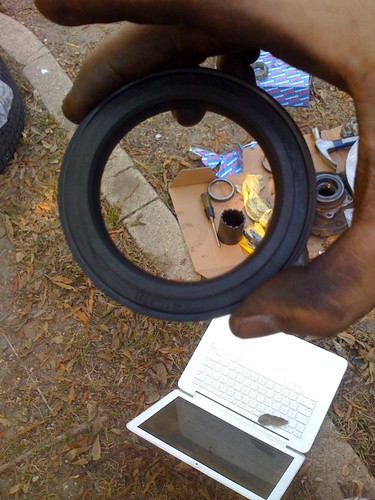
For removing the rotor retaining bolts if you don't have an impact gun or vice with rubber jaw inserts you can lay a wheel/tire face down on the ground and place the hub inside it to hold it in place.
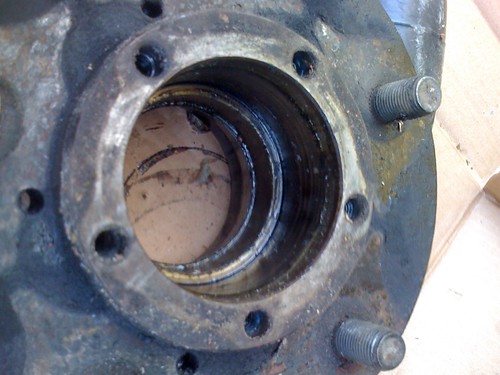
It's hard to tell for sure from the photos, but the RTC3511 seal should look like this:
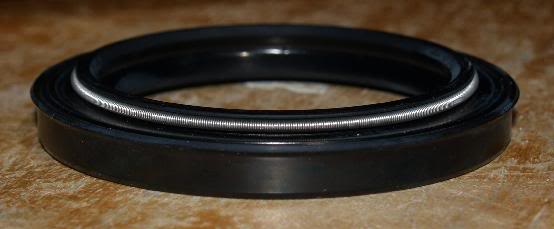
They should be recessed 4mm (I hadn't finished greasing the inner bearing race in this photo)
A front drive member lip is just the right diameter for recessing them
Just be sure to not drive it all the way down as that will recess them too much.
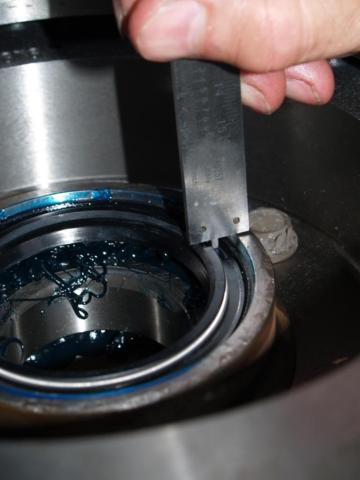
Since you aren't able to set the torque on the bearing lock nuts you'll have to do it by end float, which is specified as 0.010mm. This will be the smallest detectable end float once the bearing nuts are tightened. Keep in mind the outer nut will reduce the end float you get with just the inner one tightened. You may have to do it several times to get it right. Tighten the inner one, while spinning the hub, until it's difficult to turn the hub, then back off and repeat a couple of times. This will make sure the bearings are fully seated. Then adjust the end float.
You'll want to jack up the wheel and check the play after a couple hundred miles.
The risks of incorrect preload

It's hard to tell for sure from the photos, but the RTC3511 seal should look like this:
They should be recessed 4mm (I hadn't finished greasing the inner bearing race in this photo)
A front drive member lip is just the right diameter for recessing them
Just be sure to not drive it all the way down as that will recess them too much.
Since you aren't able to set the torque on the bearing lock nuts you'll have to do it by end float, which is specified as 0.010mm. This will be the smallest detectable end float once the bearing nuts are tightened. Keep in mind the outer nut will reduce the end float you get with just the inner one tightened. You may have to do it several times to get it right. Tighten the inner one, while spinning the hub, until it's difficult to turn the hub, then back off and repeat a couple of times. This will make sure the bearings are fully seated. Then adjust the end float.
You'll want to jack up the wheel and check the play after a couple hundred miles.
The risks of incorrect preload
what is end float? And I didn't recess the seals.. Just made it flush with the inner rim.(last pic}.. Dang, guess I get to tear into her again
thanks, the wyotech shirt was a free prize, I took the ford AAA exam my junior year and scored top 95% in my state haha, just need a UTI one now
thanks, the wyotech shirt was a free prize, I took the ford AAA exam my junior year and scored top 95% in my state haha, just need a UTI one now
Last edited by calebbo; Oct 16, 2011 at 10:09 AM.
Baja
Joined: Sep 2007
Posts: 5,232
Likes: 52
From: Georgia, USA
End float is the lateral motion of a bearing, in this case how far the hub assembly moves in and out in relation to the stub axle. It's set with a dial indicator.

Last edited by antichrist; Oct 16, 2011 at 09:21 AM.

Baja
Joined: Mar 2010
Posts: 5,584
Likes: 7
From: Pittsburgh PA suburbs.
C'BoBo,
What's up with the laptop laying in the dirt? Don't tell me you referred to the procedure on the laptop as you did the work. Wheel bearing grease and laptops don't mix very well. You need one of those special covers.
Try printing out the pages before you start, then you can retain the greasy finger print smudged pages as a record of what you did. And the laptop won't get full of grease and dirt.
Using the removed wheel to support and hold the hub is better than the leglock vise.
Good Pics.
Last edited by Danny Lee 97 Disco; Oct 17, 2011 at 03:45 PM.
I got myself a digital caliper, when I recess the seals do I just push down or what? I don't think using a chisel and hammer would work in this scenario 
Yeah sorry, my mac is kinda greasy now but not that bad. Magic eraser and some baby wipes will fix that later today haha.
Yeah sorry, my mac is kinda greasy now but not that bad. Magic eraser and some baby wipes will fix that later today haha.


Rock Crawling
Joined: Dec 2012
Posts: 317
Likes: 1
From: Monroe, NY
Nice. I've just got mine apart. This should be usefull putting it back together.
Had to sand blast the calipers and paint them. Now I've got to remove the seals and pistons and replace them.
The rotors were cross drilled, and rust in and around the holes completely destroyed the rotors. The DPO put in new pads which was useless given the rotor condition.
Also have to replace the brake lines to the rear, they were rusted through in a half dozen places. I've got new stainless flex hoses for the front & rear.
ABS has front left sensor open, got one of those.
The rotors were unexpected, but the rest is typical for an older vehicle.