
My Winch Bumper Project


Pro Wrench
Joined: Oct 2010
Posts: 1,669
Likes: 2
From: San Juan, Puerto Rico
i took the D2 out of the sketchup file repository (forgot what that was called) and built the bumper around it. i would pay for the design with promise not to share if my welder doesn't just hack it out. i doubt i'd get a winch as any offroading will be in the d1. i'm big on intellectual property and respecting the artist so i'd do the right thing. my original idea was to make the same one for both trucks with as little mod as possible to fit. it was just teh start of an idea.
i did my whole house in sketchup and was able to walk through it before i got the keys. was super helpful in my renovation plan...which was pretty major.
i did my whole house in sketchup and was able to walk through it before i got the keys. was super helpful in my renovation plan...which was pretty major.

Thread Starter
|
Winching
Joined: Nov 2010
Posts: 624
Likes: 3
From: Sugar City, ID
Updates! I had a ton of fun today. I'm all done except for the d-ring tabs and light bar, and drilling a few holes for mounting things like dune flags, CB antennas, brush cutters, etc. Then I'll take it in for powdercoating.
Lined up the center portion first:

Everything tacked in place. Yes, those vertical members are square, it's just the camera angle...

Welding around a pipe:


More welds:

Lined up the center portion first:
Everything tacked in place. Yes, those vertical members are square, it's just the camera angle...
Welding around a pipe:
More welds:
Thread Starter
|
Winching
Joined: Nov 2010
Posts: 624
Likes: 3
From: Sugar City, ID
I even verified that the headlights and corner markers can still be removed with the brush guard in place.
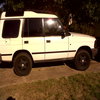
Here's a picture of the whole bumper:

My goal was to make it look like that pipe is one continuous piece rather than three sections. Fooled a few people in the welding lab who hadn't seen me assemble it!
Also I verified the angles on the front of my bumper, they are roughly 30�. I used 30� as my bending angle for that front section of pipe as well.
Here's a picture of the whole bumper:
My goal was to make it look like that pipe is one continuous piece rather than three sections. Fooled a few people in the welding lab who hadn't seen me assemble it!
Also I verified the angles on the front of my bumper, they are roughly 30�. I used 30� as my bending angle for that front section of pipe as well.
Thread Starter
|
Winching
Joined: Nov 2010
Posts: 624
Likes: 3
From: Sugar City, ID
Well it has about the heft of a bag of portland cement, so I'd say 94 pounds. I haven't weighed it yet. But I used about 40% of the area of a roughly 200 pound sheet of steel, plus three pieces of tubing that felt like 5 pounds each, so that supports the 90 to 100 pound estimate as well.
Since my winch has synthetic cable and a composite spool, it weighs only 58 pounds. And I'd guess all the OEM crap I removed weighed 50+ pounds, so I'm really only looking at an extra 100 to 110 pounds on the nose. And I've already got Old Man Emu HD springs.
I'll give you an exact weight when I get a chance to hold it up and stand on the bathroom scale, assuming that doesn't max out the scale...
Thread Starter
|
Winching
Joined: Nov 2010
Posts: 624
Likes: 3
From: Sugar City, ID
Big updates for today!
I decided, screw my English homework, I'd rather weld.
I made five of these tabs to mount in various parts of the bumper:

Note the vertical bracing members, and the three center tabs for future lights and accessories:

Close-up of bracing:

Welded on recovery points, installed bumper:

Close-up of three center tabs:

Close-up of one of the two side tabs for mounting brush cutters:

Not pictured, I drilled two holes in the winch tray area for drainage. I also drilled two holes on the upper deck of the main body of the bumper for mounting fog lights.
I dropped the bumper off at the local fab shop to have it powder coated. I picked Sherwin Williams Raven Texture Black, which is a textured 60% gloss black. Based on the sample, it should match the black trim on the rest of the truck pretty well. I should be able to pick up the bumper this weekend, Monday at the latest. Just in time for spring wheeling season!
I decided, screw my English homework, I'd rather weld.
I made five of these tabs to mount in various parts of the bumper:
Note the vertical bracing members, and the three center tabs for future lights and accessories:
Close-up of bracing:
Welded on recovery points, installed bumper:
Close-up of three center tabs:
Close-up of one of the two side tabs for mounting brush cutters:
Not pictured, I drilled two holes in the winch tray area for drainage. I also drilled two holes on the upper deck of the main body of the bumper for mounting fog lights.
I dropped the bumper off at the local fab shop to have it powder coated. I picked Sherwin Williams Raven Texture Black, which is a textured 60% gloss black. Based on the sample, it should match the black trim on the rest of the truck pretty well. I should be able to pick up the bumper this weekend, Monday at the latest. Just in time for spring wheeling season!
Last edited by Mountain Goat; Mar 21, 2012 at 09:30 PM. Reason: Updating photo server
Thread Starter
|
Winching
Joined: Nov 2010
Posts: 624
Likes: 3
From: Sugar City, ID
I thought about a steering guard, but for the moment at least, I take it as a matter of pride that I keep track of where my undercarriage components are and not hit them on rocks. I'd probably go for HD tie rods instead if I feel I need them. Differential guards, now, I could see those being worthwhile.


Recovery Vehicle
Joined: Feb 2010
Posts: 1,062
Likes: 23
From: West Chester PA
That thing is ****ing huge. It looks good. Welds are nice, if I can get over how big it is it's a really nice bumper, certainly nicer than all the ones I've made (which I havent). Good for you. Wish my terrafirma had head light guards so I could get limb risers too. Nice job