
Prepping for paint


Rock Crawling
Joined: Dec 2005
Posts: 271
Likes: 0
From: Mountain House California
that will be nice color on the Disco when you are done

Baja
Joined: Aug 2013
Posts: 6,919
Likes: 794
From: Huntington Beach CA
I recently took out my Alpine windows and re-installed after rust repair. Take out the extra center trim in the gasket, then use a plastic pry bar to start from the inside working the lip out. It is a good idea to have someone on the outside make sure the window doesn't pop out. I used the same gaskets when I re-installed. There is a weird lip on the top that the gasket has to get around when removing and re-installing( I started at the bottom and worked my way around to the top). I added clear RTV in the channel to seal it up perfect for the re-install. I actually put the gasket in the frame, then aded the window starting at the bottom and working the top. Once it is all in, replace the center moulding piece. When re-installing the center trim, be sure to first start it at the top position, both ending edges butted up. Then push in in the corners, then pick equal distant points to push it in "the field"(if you start at one side and work your way around it will stretch and you will have too much insert moulding)
I have not done the sides, but if it is like my 23 window volks bus, should be easy. I use Talc powder and string and put it on the channel of the gasket that meets with the lip of the frame. Place the window in position on the outside, and start pulling the string out(on the inside)too get the rubber lip to come over the metal lip of the frame. Also have someone pushing in from the outside. It could be harder if the gasket is dry and has cracks.
Good luck!!!! Love the color. I am about to Plasti-Dip my silver one black and use a final coat of the "glorifier" to get a satin finish.

Pro Wrench
Joined: Oct 2010
Posts: 1,669
Likes: 2
From: San Juan, Puerto Rico
I recently took out my Alpine windows and re-installed after rust repair. Take out the extra center trim in the gasket, then use a plastic pry bar to start from the inside working the lip out. It is a good idea to have someone on the outside make sure the window doesn't pop out. I used the same gaskets when I re-installed. There is a weird lip on the top that the gasket has to get around when removing and re-installing( I started at the bottom and worked my way around to the top). I added clear RTV in the channel to seal it up perfect for the re-install. I actually put the gasket in the frame, then aded the window starting at the bottom and working the top. Once it is all in, replace the center moulding piece. When re-installing the center trim, be sure to first start it at the top position, both ending edges butted up. Then push in in the corners, then pick equal distant points to push it in "the field"(if you start at one side and work your way around it will stretch and you will have too much insert moulding)
I have not done the sides, but if it is like my 23 window volks bus, should be easy. I use Talc powder and string and put it on the channel of the gasket that meets with the lip of the frame. Place the window in position on the outside, and start pulling the string out(on the inside)too get the rubber lip to come over the metal lip of the frame. Also have someone pushing in from the outside. It could be harder if the gasket is dry and has cracks.
Good luck!!!! Love the color. I am about to Plasti-Dip my silver one black and use a final coat of the "glorifier" to get a satin finish.
I have not done the sides, but if it is like my 23 window volks bus, should be easy. I use Talc powder and string and put it on the channel of the gasket that meets with the lip of the frame. Place the window in position on the outside, and start pulling the string out(on the inside)too get the rubber lip to come over the metal lip of the frame. Also have someone pushing in from the outside. It could be harder if the gasket is dry and has cracks.
Good luck!!!! Love the color. I am about to Plasti-Dip my silver one black and use a final coat of the "glorifier" to get a satin finish.
i need to do roof only so that will include sunroofs.

Thread Starter
|
Overlanding
Joined: May 2010
Posts: 17
Likes: 0
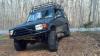
With only about an hour a day, it is finally ready to tape and paint. Rear windows removed without breakage even! Going out of town for work, so it will be couple weeks. Any tips on rear door latch assembly removal or atleast loosening it up to fix gasket, looks kinda like a pita