
So what did you do to your Disco today?


Pro Wrench
Joined: Sep 2011
Posts: 1,526
Likes: 18
From: Oregon


http://homepage.ntlworld.com/stage1v...BonnetPins.htm
How long do the pins need to be? Were yours maxed out? How long are they?
I like this kit but not sure if they're long enough:
Ford Racing M-16700-A - Ford Racing Hood Latch and Pin Kits - Overview - SummitRacing.com


Camel Trophy
Joined: Nov 2009
Posts: 4,079
Likes: 227
From: IL
I'm assuming you placed the pins in the same place this guy did:
Land Rover Anorak Technical Discovery I
How long do the pins need to be? Were yours maxed out? How long are they?
I like this kit but not sure if they're long enough:
Ford Racing M-16700-A - Ford Racing Hood Latch and Pin Kits - Overview - SummitRacing.com
Land Rover Anorak Technical Discovery I
How long do the pins need to be? Were yours maxed out? How long are they?
I like this kit but not sure if they're long enough:
Ford Racing M-16700-A - Ford Racing Hood Latch and Pin Kits - Overview - SummitRacing.com
I wouldn't recommend the "drop the hood" technique that guy used. I installed the pins and put a tiny dab of the silver anti-sieze on the top of each pin. I then slowly lowered the hood till it made contact with the pins. I raised the hood, marked where the anti-sieze transferred. I then repeated the process two more times to verify I had the exact spot. I always use a punch to make a divot, then start with a small drillbit and work my way up. Step bits are great for this.
The Sparco pins are 5" long, and while they aren't totally topped out there isn't much to spare. I kept the factory "hook" and centering pin/spring. The pin/spring keeps everything toight, and the hook is just a failsafe. If the pins you like aren't long enough you can grab one of those long hex nut couplings. Sorry, I don't know the technical term. They look like s long nut, hex shaped, and are fully threaded for joining two pieces of threaded rod.
I oriented my pins in such a way that they wouldn't be accidently unlatched by trees/brush coming up the hood.
Last edited by fishEH; May 31, 2012 at 03:29 PM.
Camel Trophy
Joined: Nov 2009
Posts: 4,079
Likes: 227
From: IL
Installed my 3" RTE springs today. 
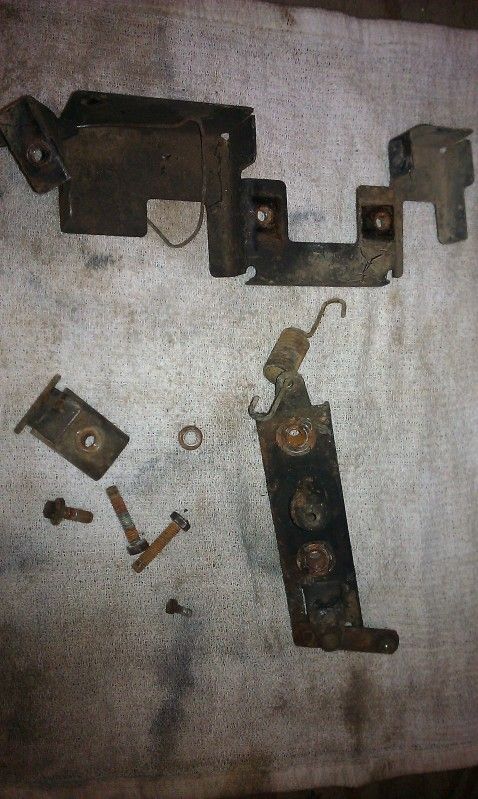
Also realized my rear pads are just about toast. And it looks like one of my rear calipers has blown a ring out, no leaking though. Kinda irritating because these calipers were new 2-3 years ago and the pads I replaced last July.
Also realized my rear pads are just about toast. And it looks like one of my rear calipers has blown a ring out, no leaking though. Kinda irritating because these calipers were new 2-3 years ago and the pads I replaced last July.

Recovery Vehicle
Joined: Mar 2011
Posts: 1,016
Likes: 2
From: Ankeny IA
Where's the pic with 3" springs?? Can you measure perch to perch front and rear and text it to me? thanks buddy


Removed my roof rack, sanded and washed the roof, painted the rust spots on the roof, put the roof rack back.
I was also going to make sure my a/c drains are clear but I am going to wait until my next oil change in a week or so.
I was also going to make sure my a/c drains are clear but I am going to wait until my next oil change in a week or so.