
Fuel Pump Removal and Disassembly
#1
 12-17-2015, 04:26 PM


Ok, so because of my turbo thread I've decided to disassemble the fuel pump on my donor truck to see if there was a way for me to bypass the factory fuel regulator so that I could still use the factory pump. I figured I'd do a write up on the removal and disassembly of the pump while I was at it.
You've got to begin by removing the rear carpet. The fuel pump is related in the very center of the rear storage area's floor. I just cut the carpet out because this is a parts truck, but you would likely prefer to remove all of the rear trim followed by the carpet.
Next, remove the fuel line by pinching the white clip and pulling backwards. Then squeeze the electrical connector and pull up on the wires to remove the plug and place it to the side.
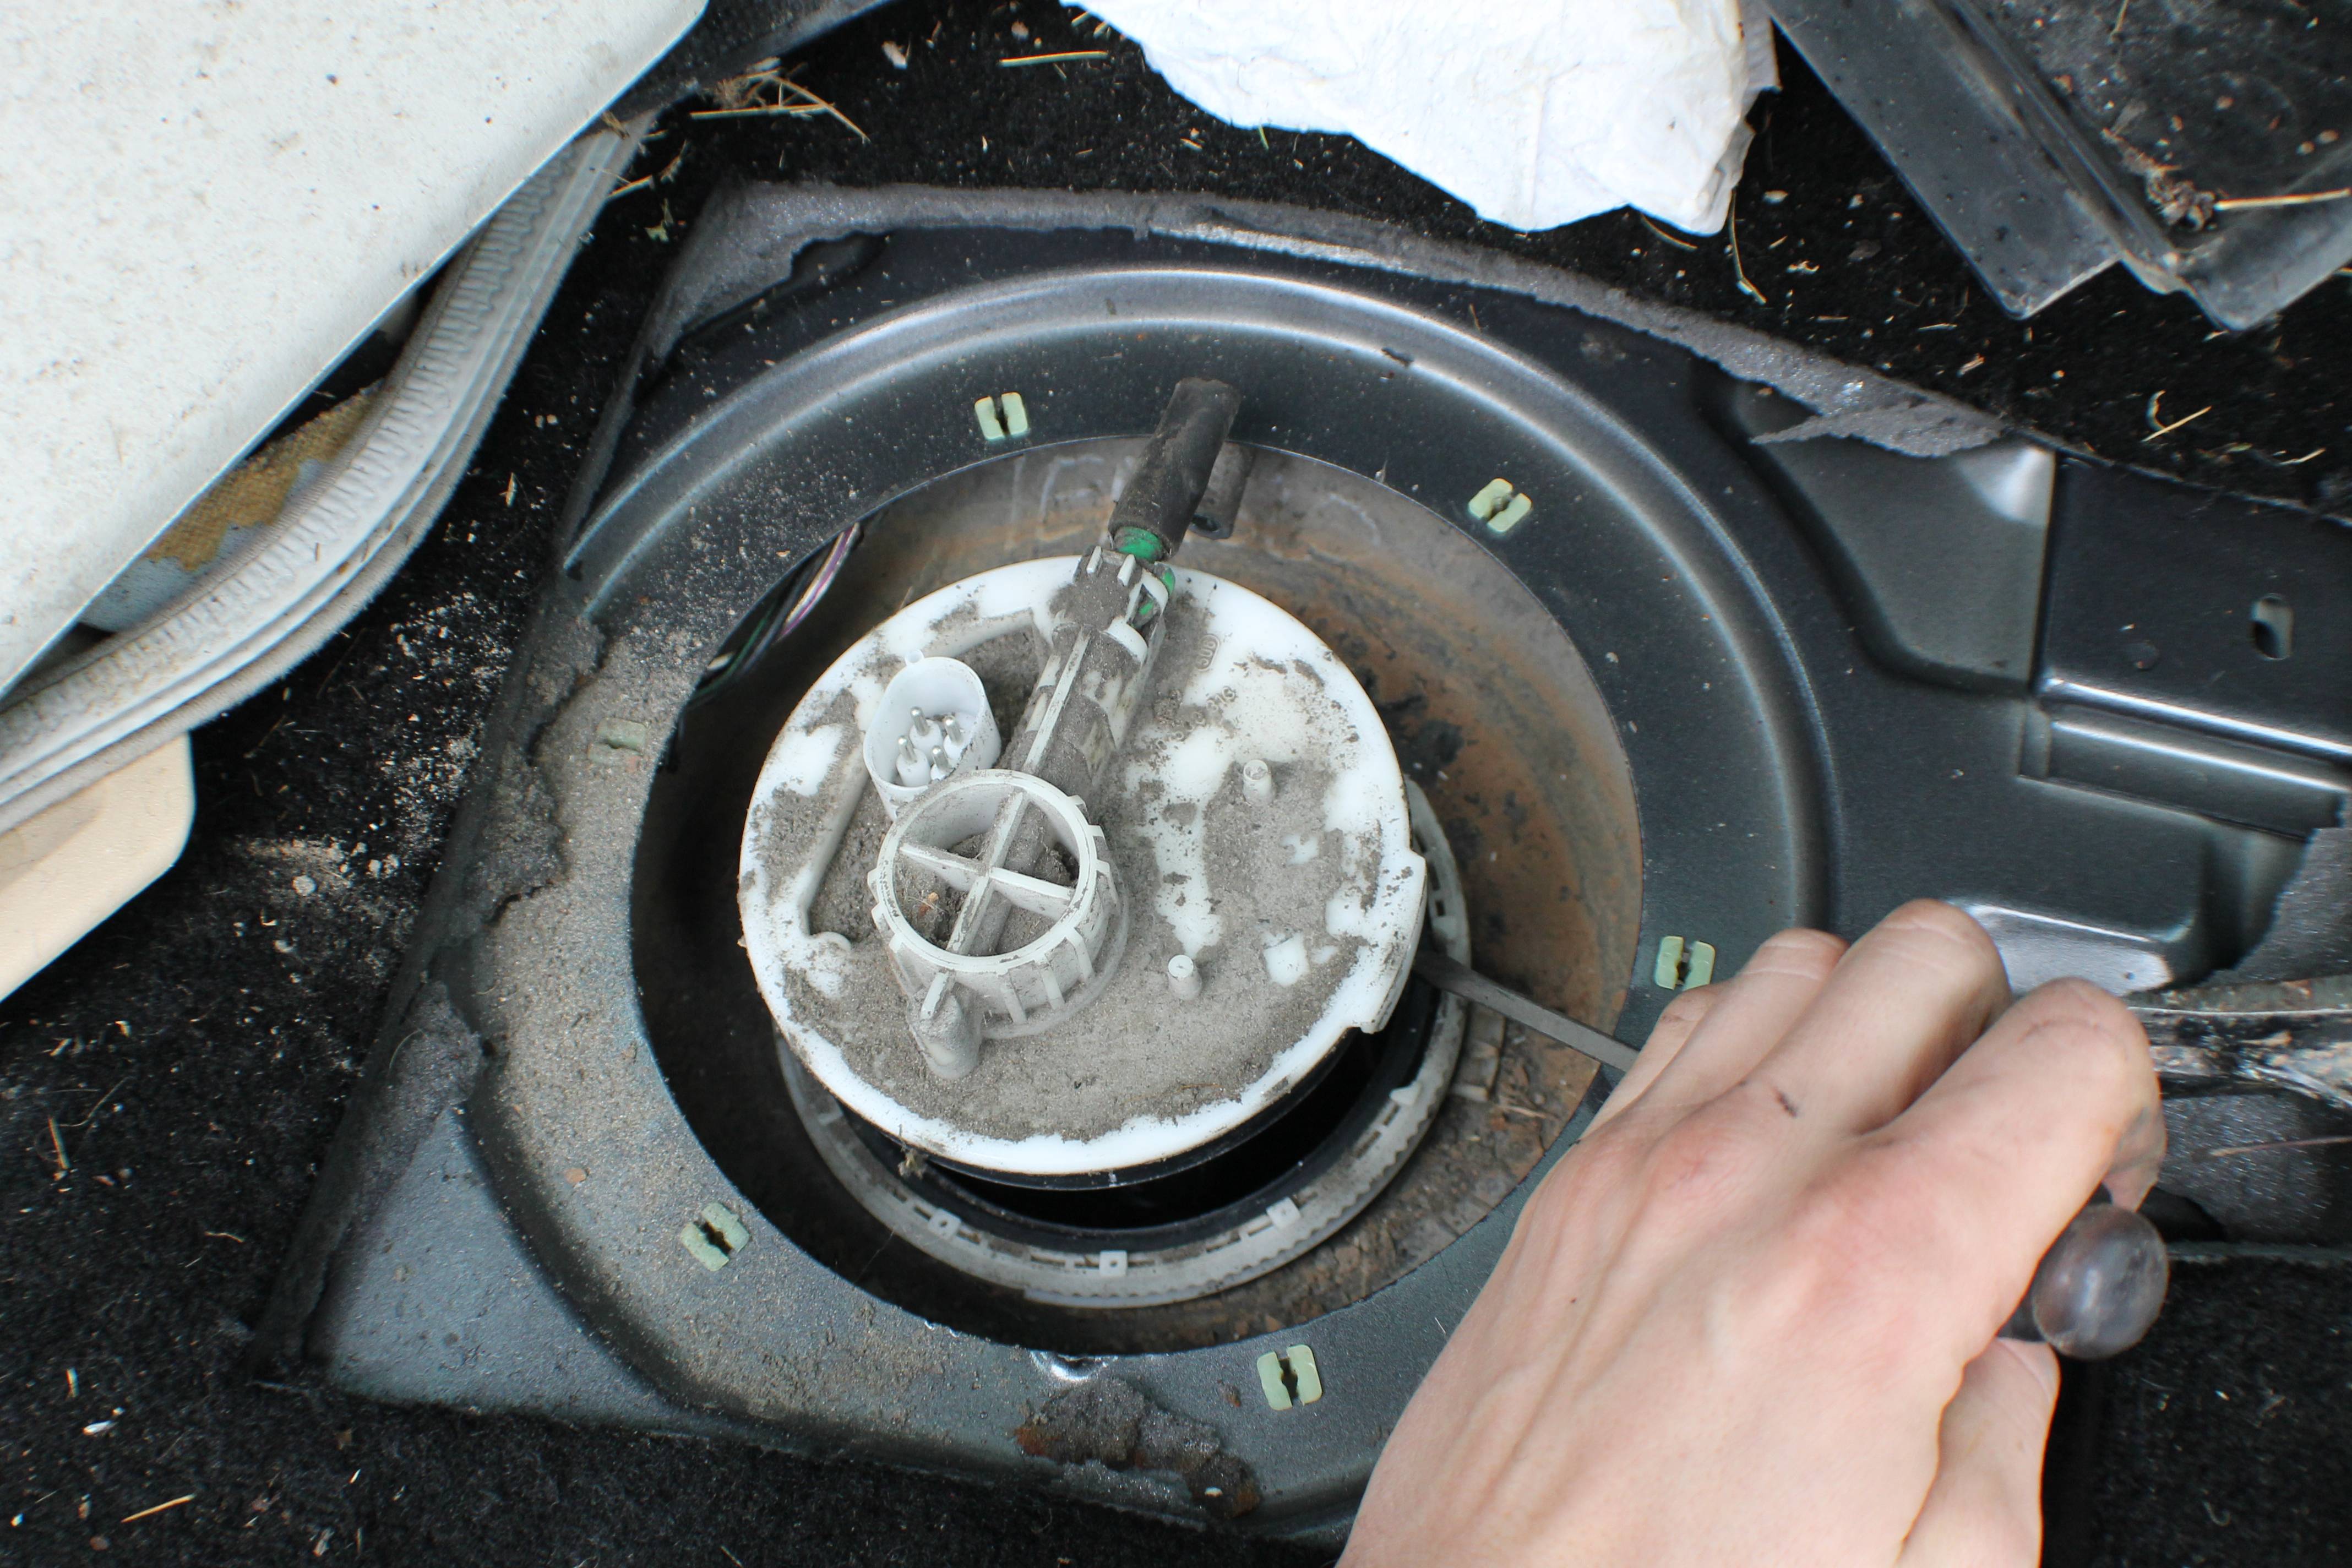
Now, there is a black retaining ring around the pump you have to remove. There is a special tool to remove it but it is not required. Just use a sturdy flat head screwdriver and a hammer to knock it around as shown. It won't move at first and you'll have to whack on it pretty good, but keep going and it will move. Don't place the screwdriver inside the raised metal but on the edge of it.
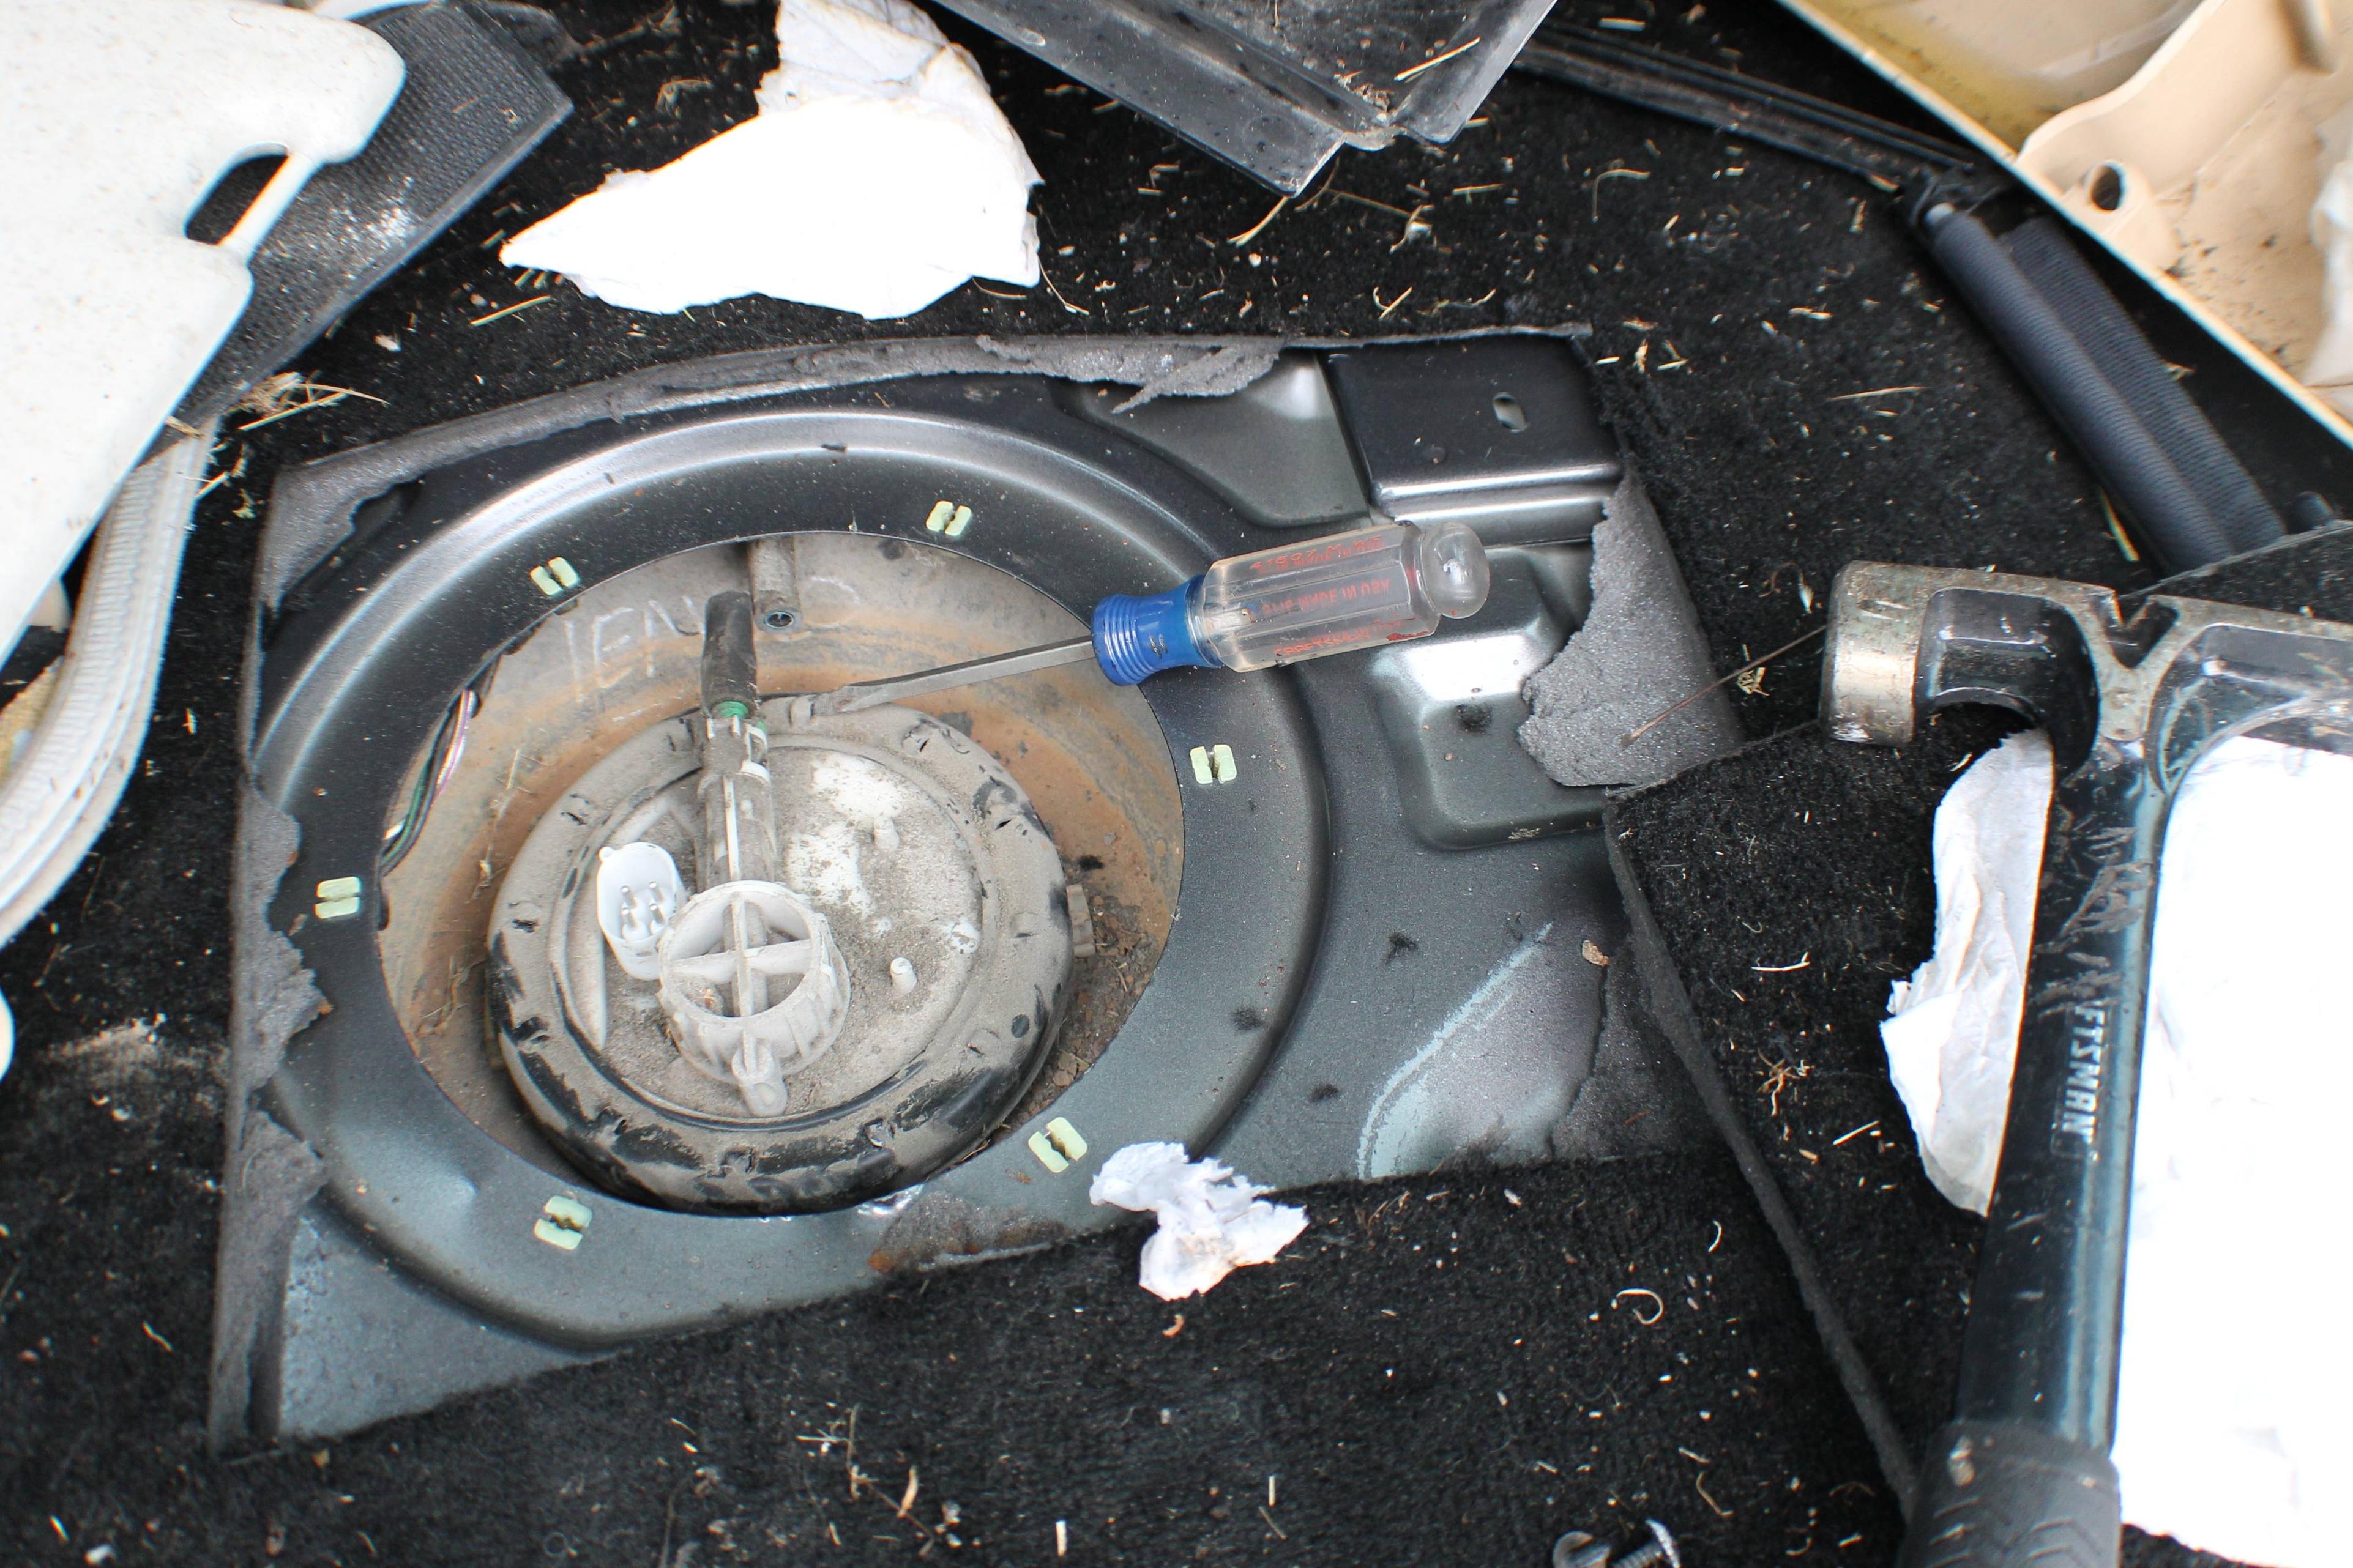
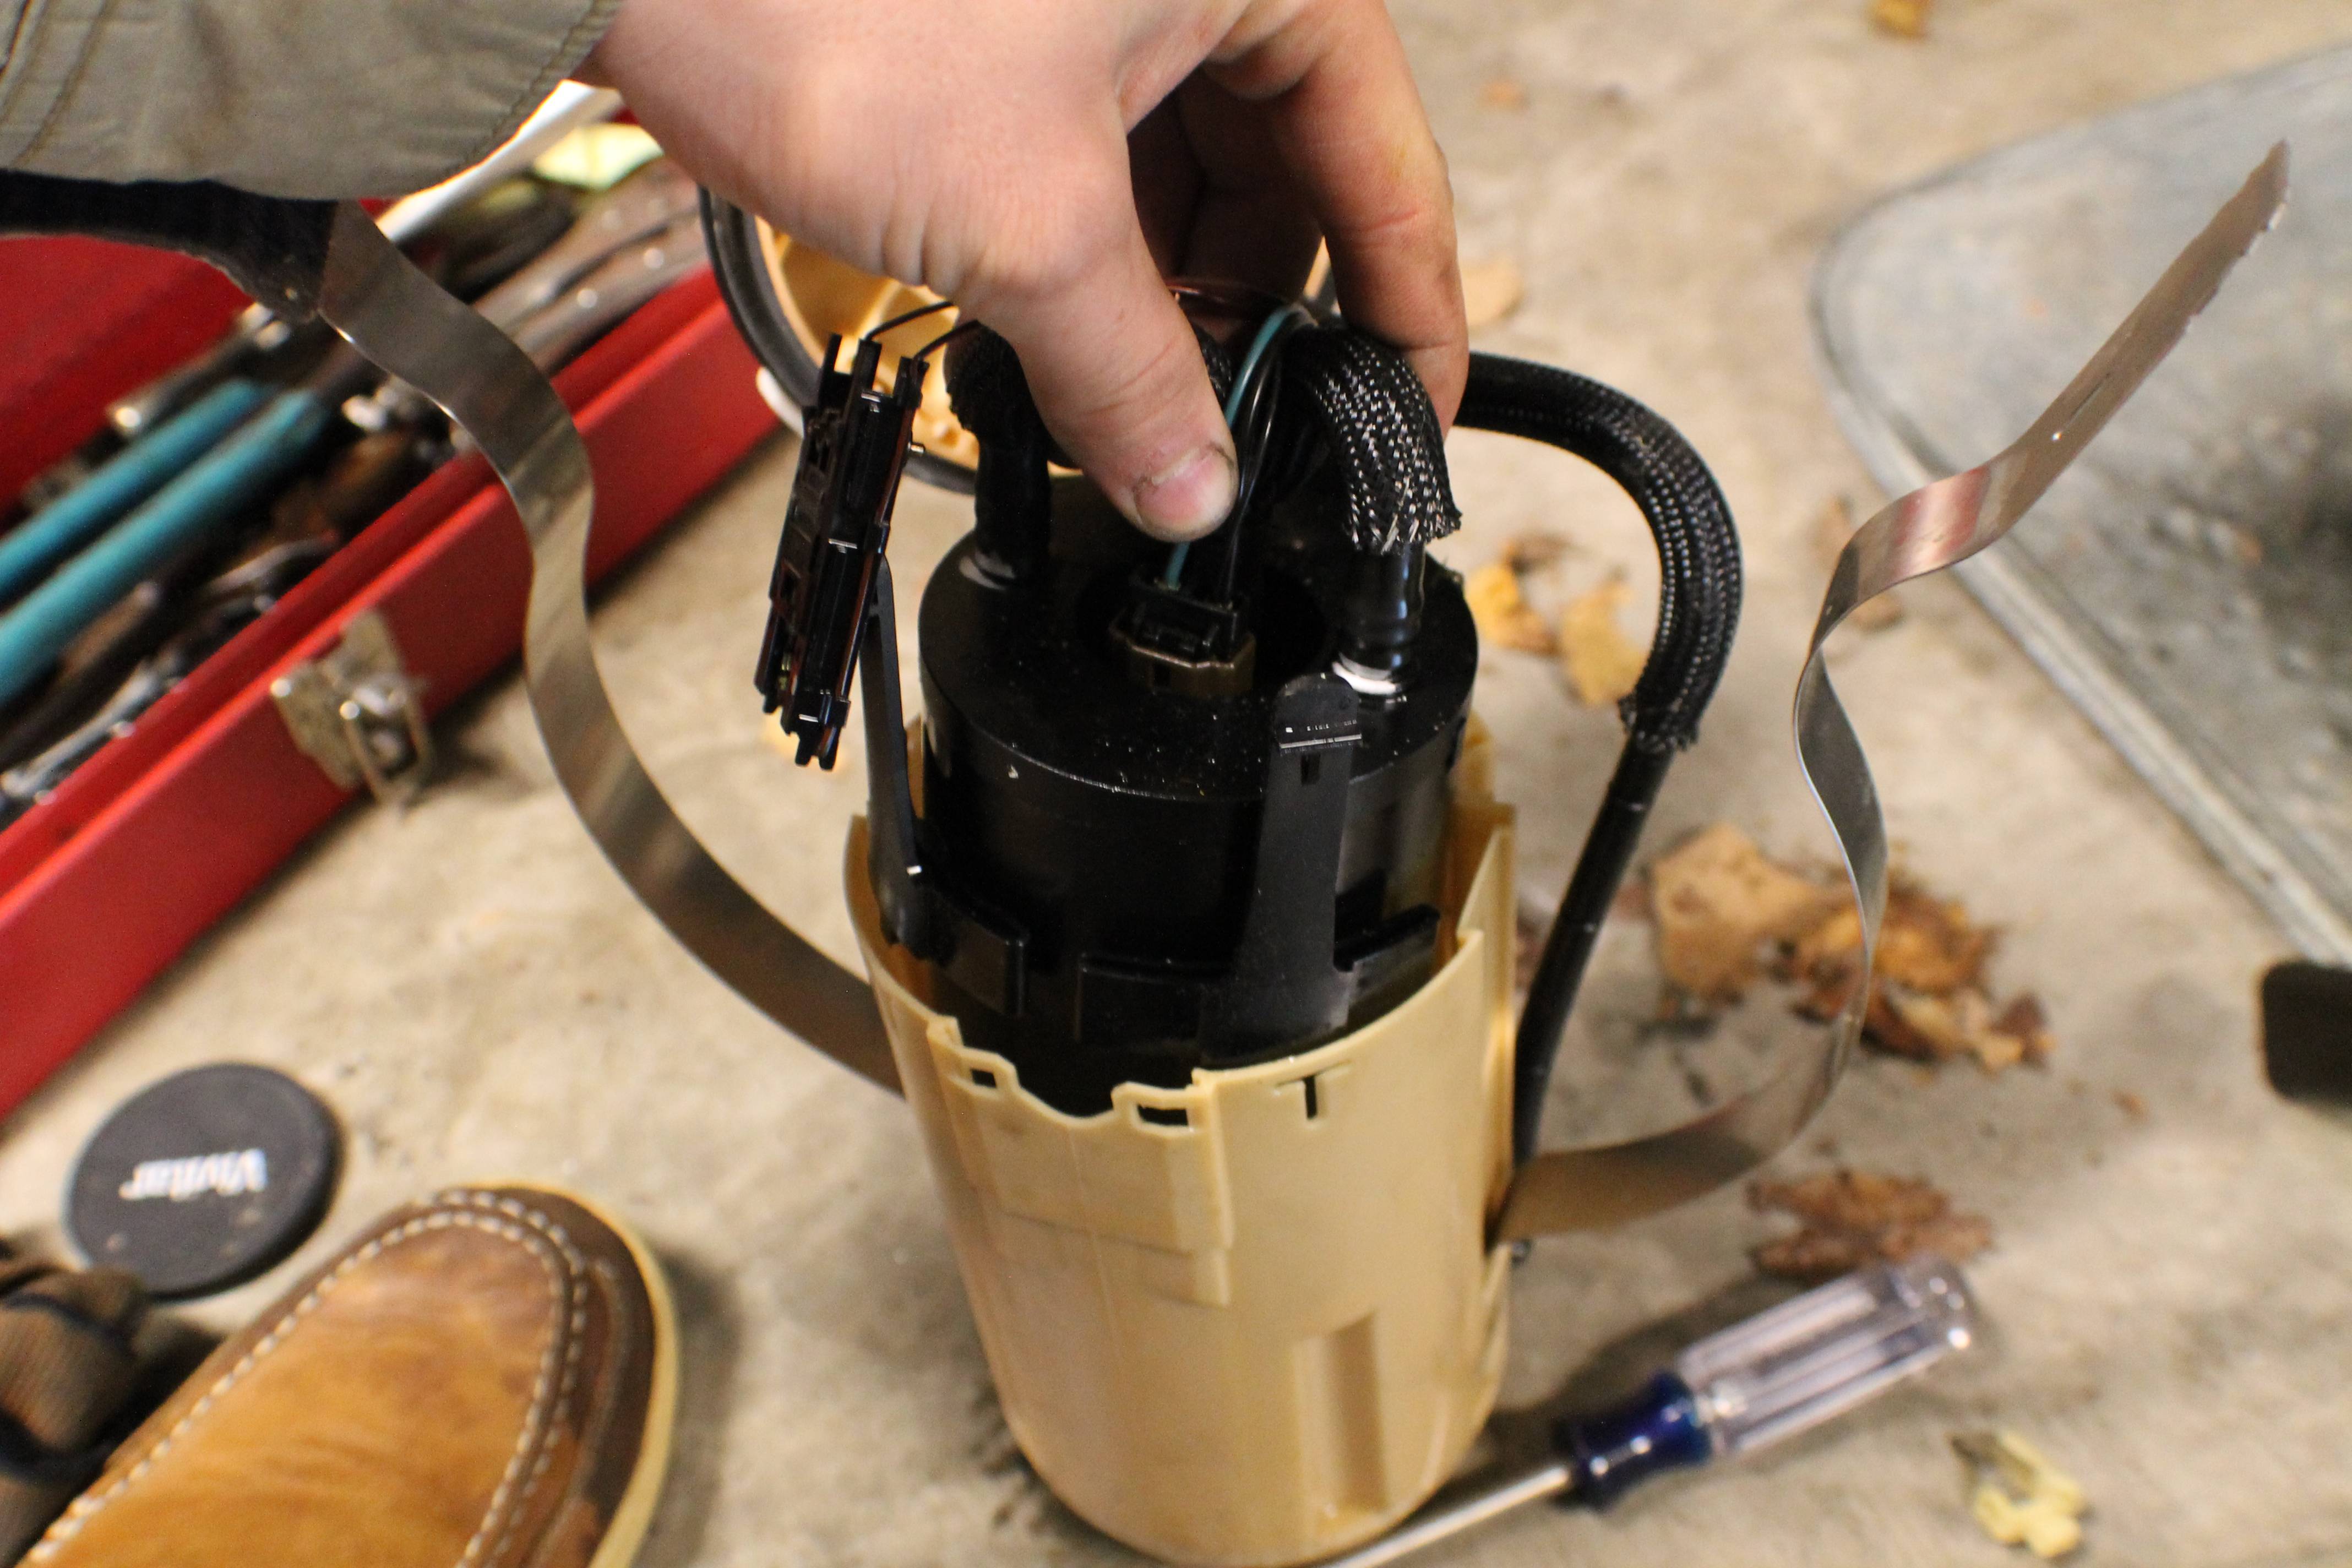
Once you get the ring removed, use your screwdriver to easily pry up on the side of the pump in the area shown. It will pop up easily.
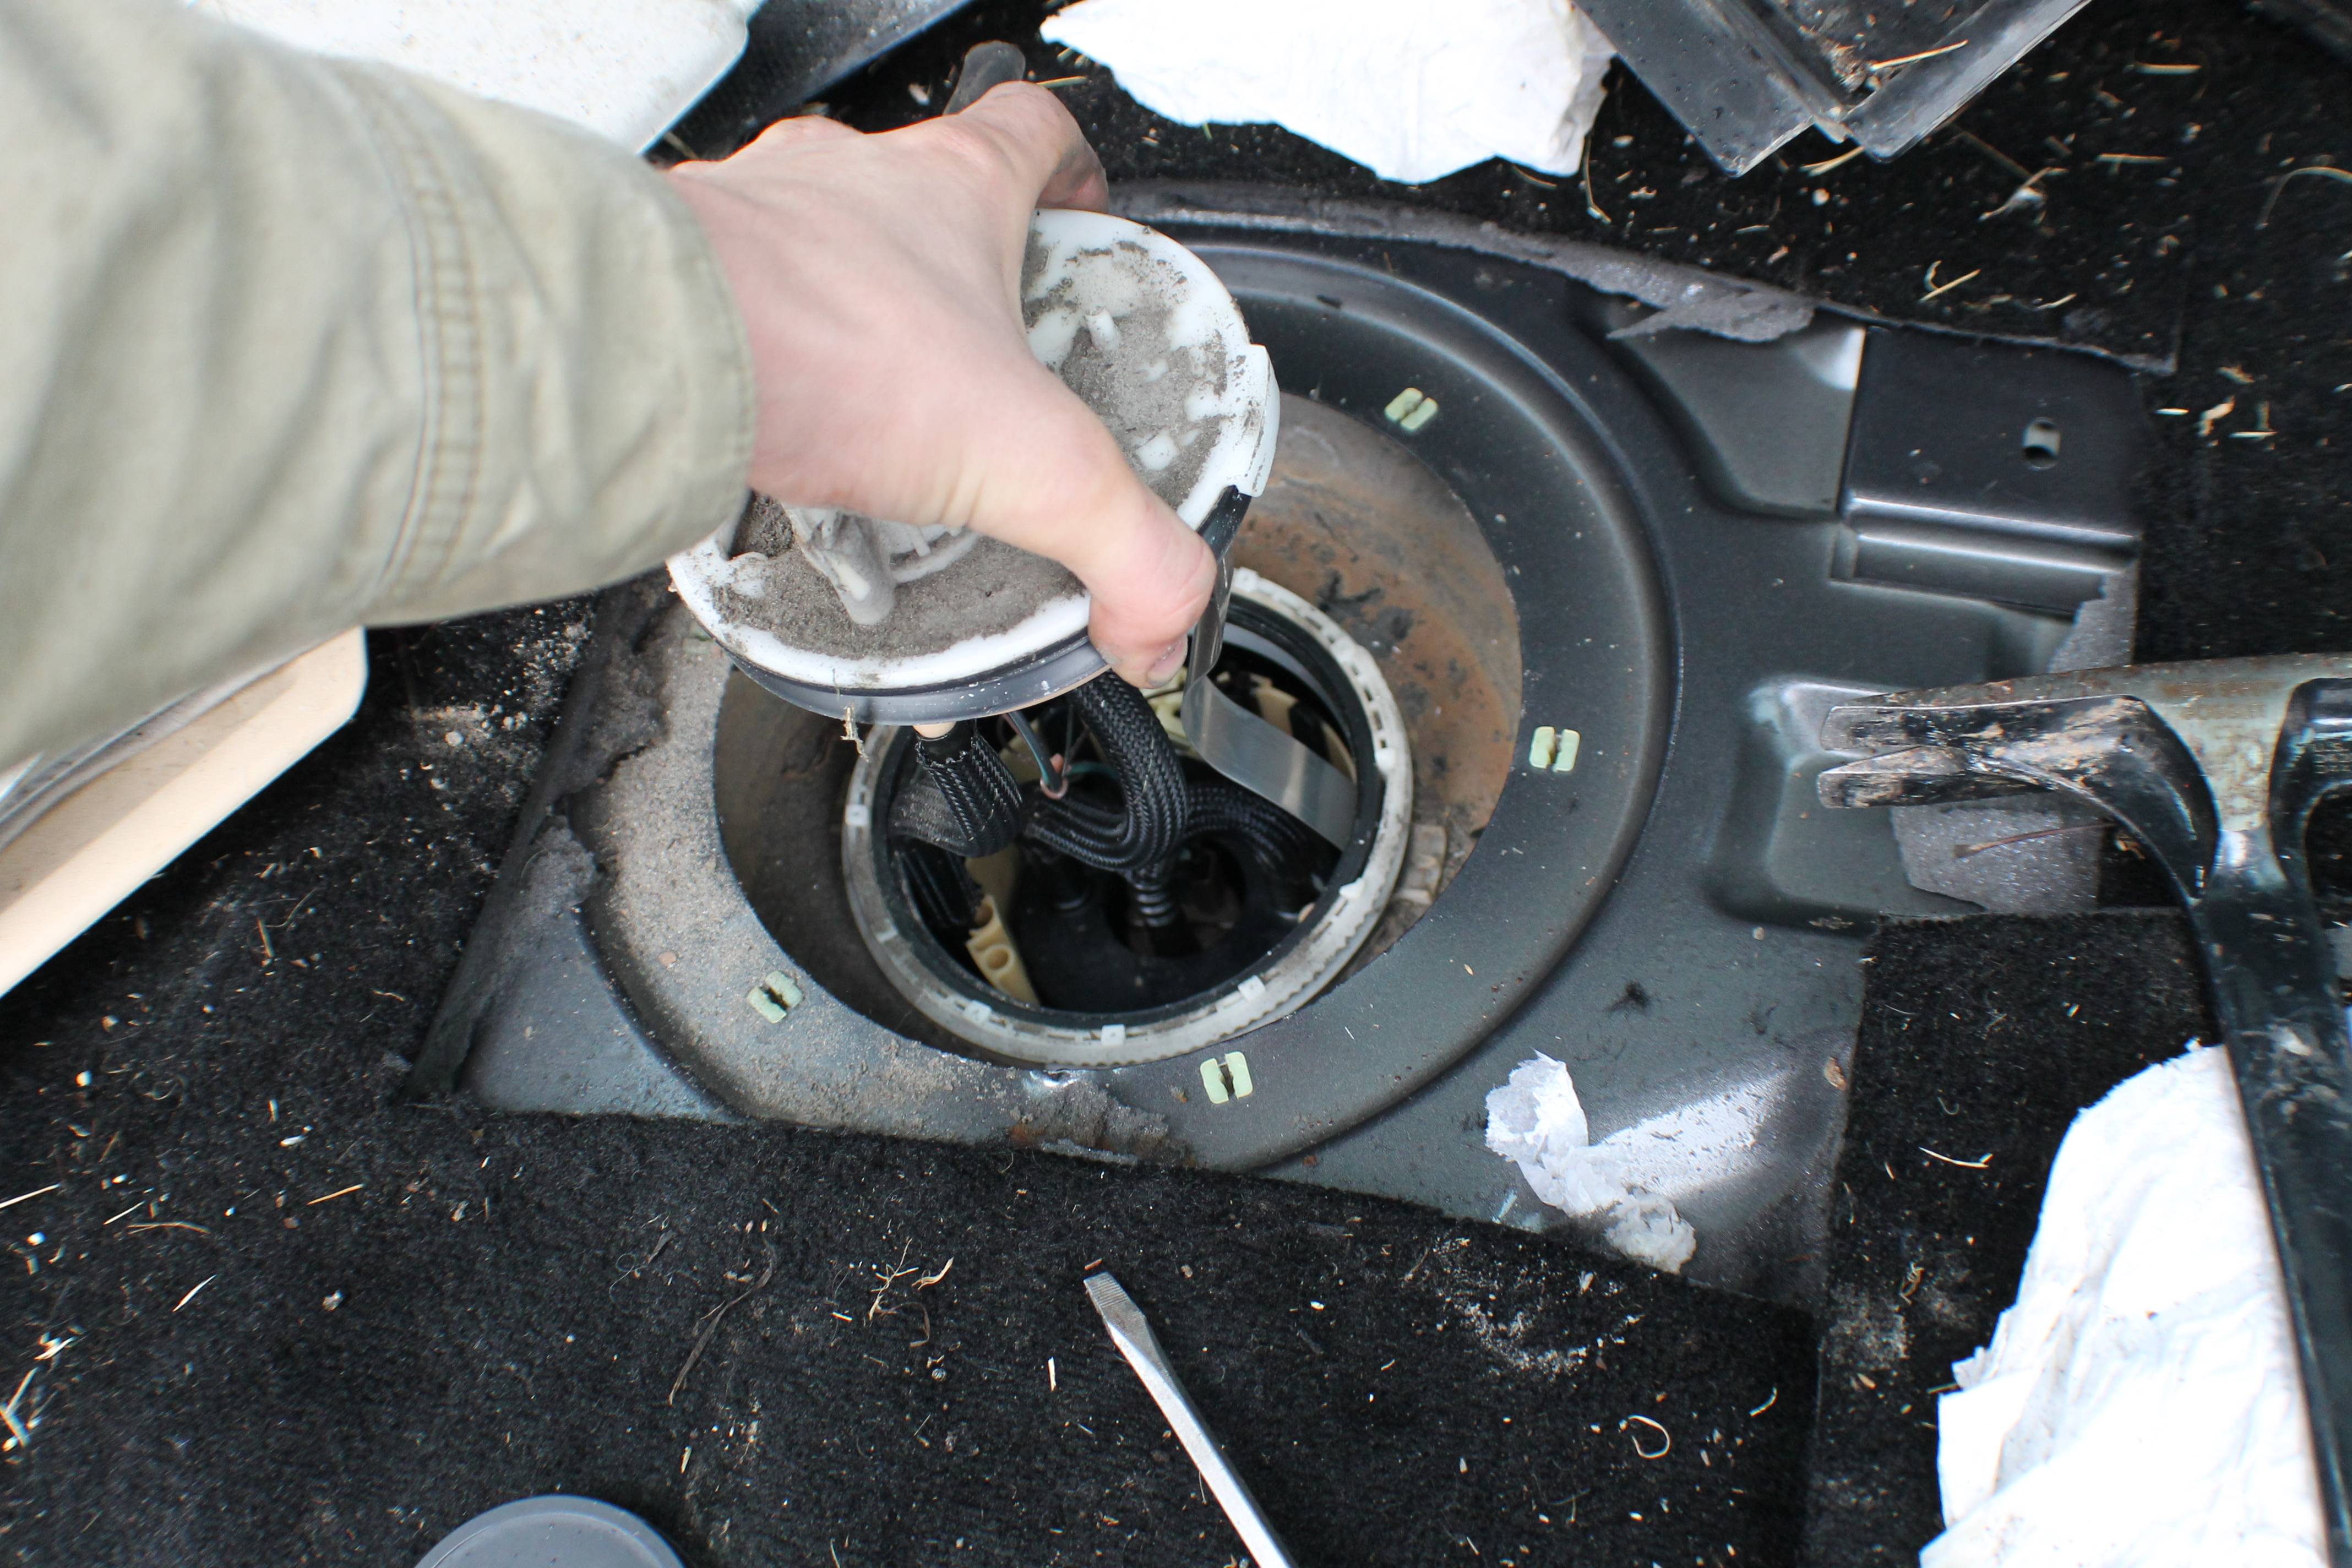
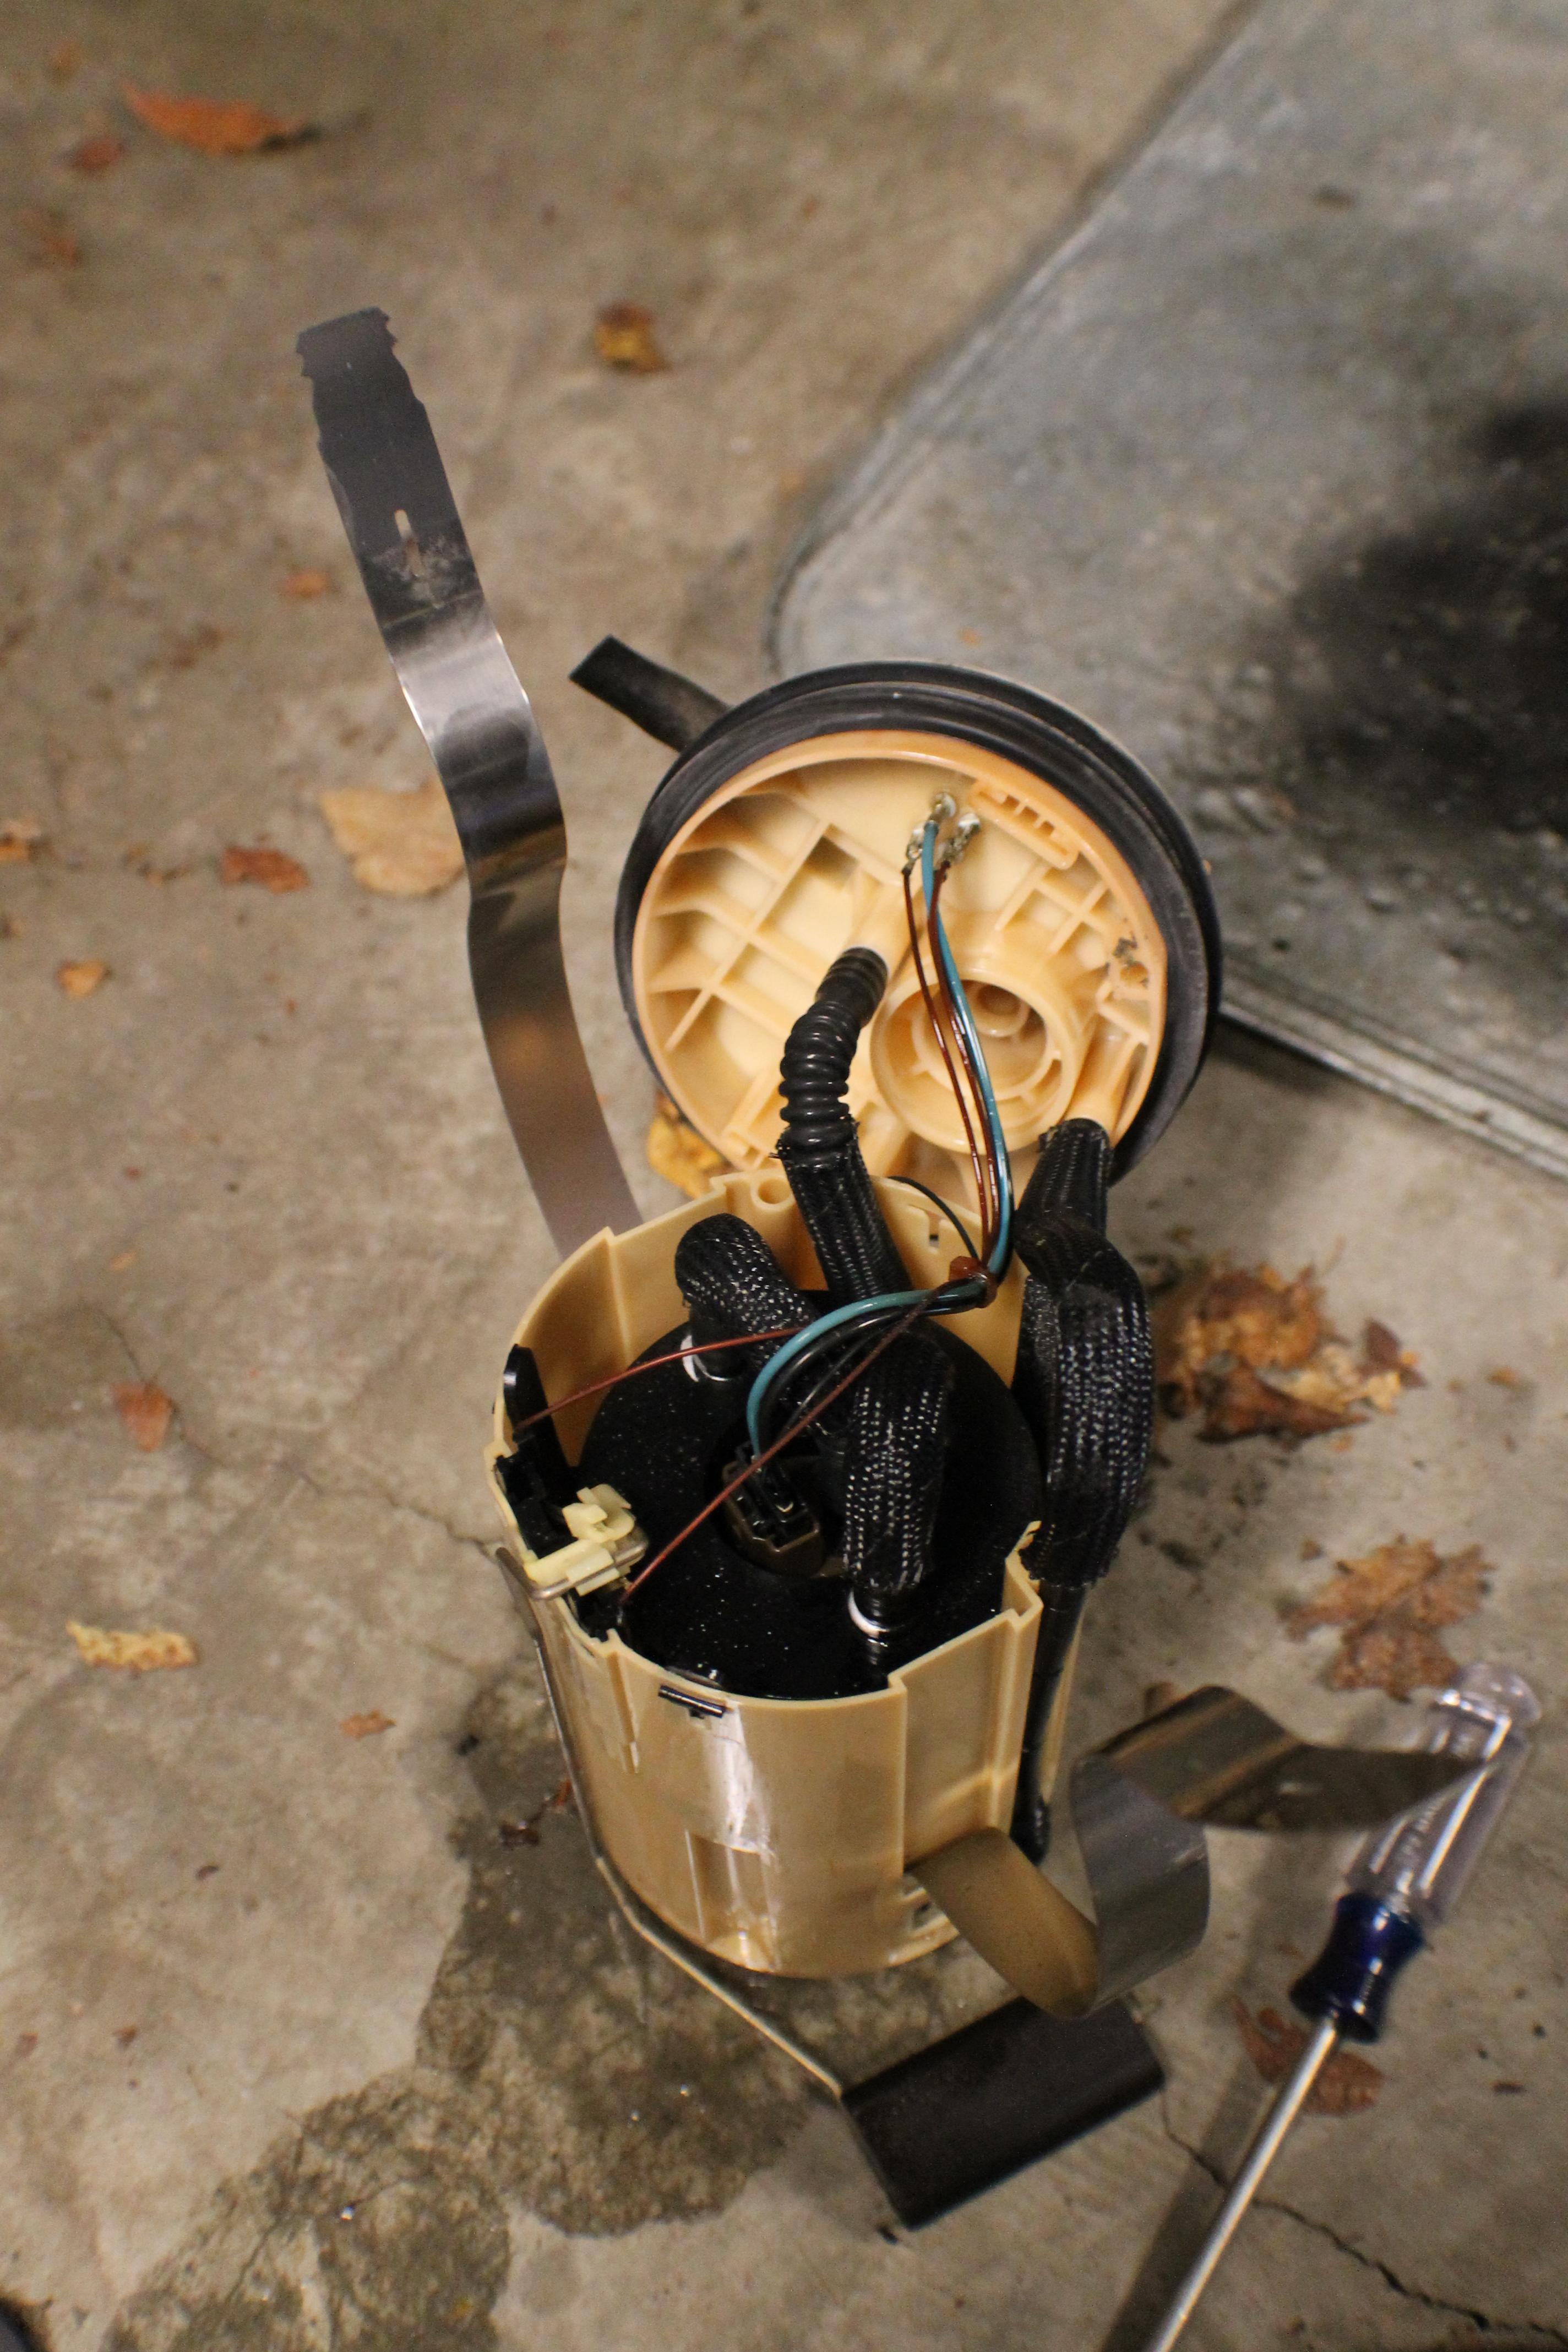
Now the pump will lift out. The springs will squeeze in and one or both may become unattached. Only one did for me, but if both do then reach in and grasp the springs to pull it out that way. Once you get it out it will spill some gasoline. There will be more gas inside the "cup" that you may wish to pour out once you get the pump outside the vehicle.
This completes the removal portion of the write up. To reinstall, just follow these steps in reverse. Super simple and no need to prime since the pump sits inside the tank.
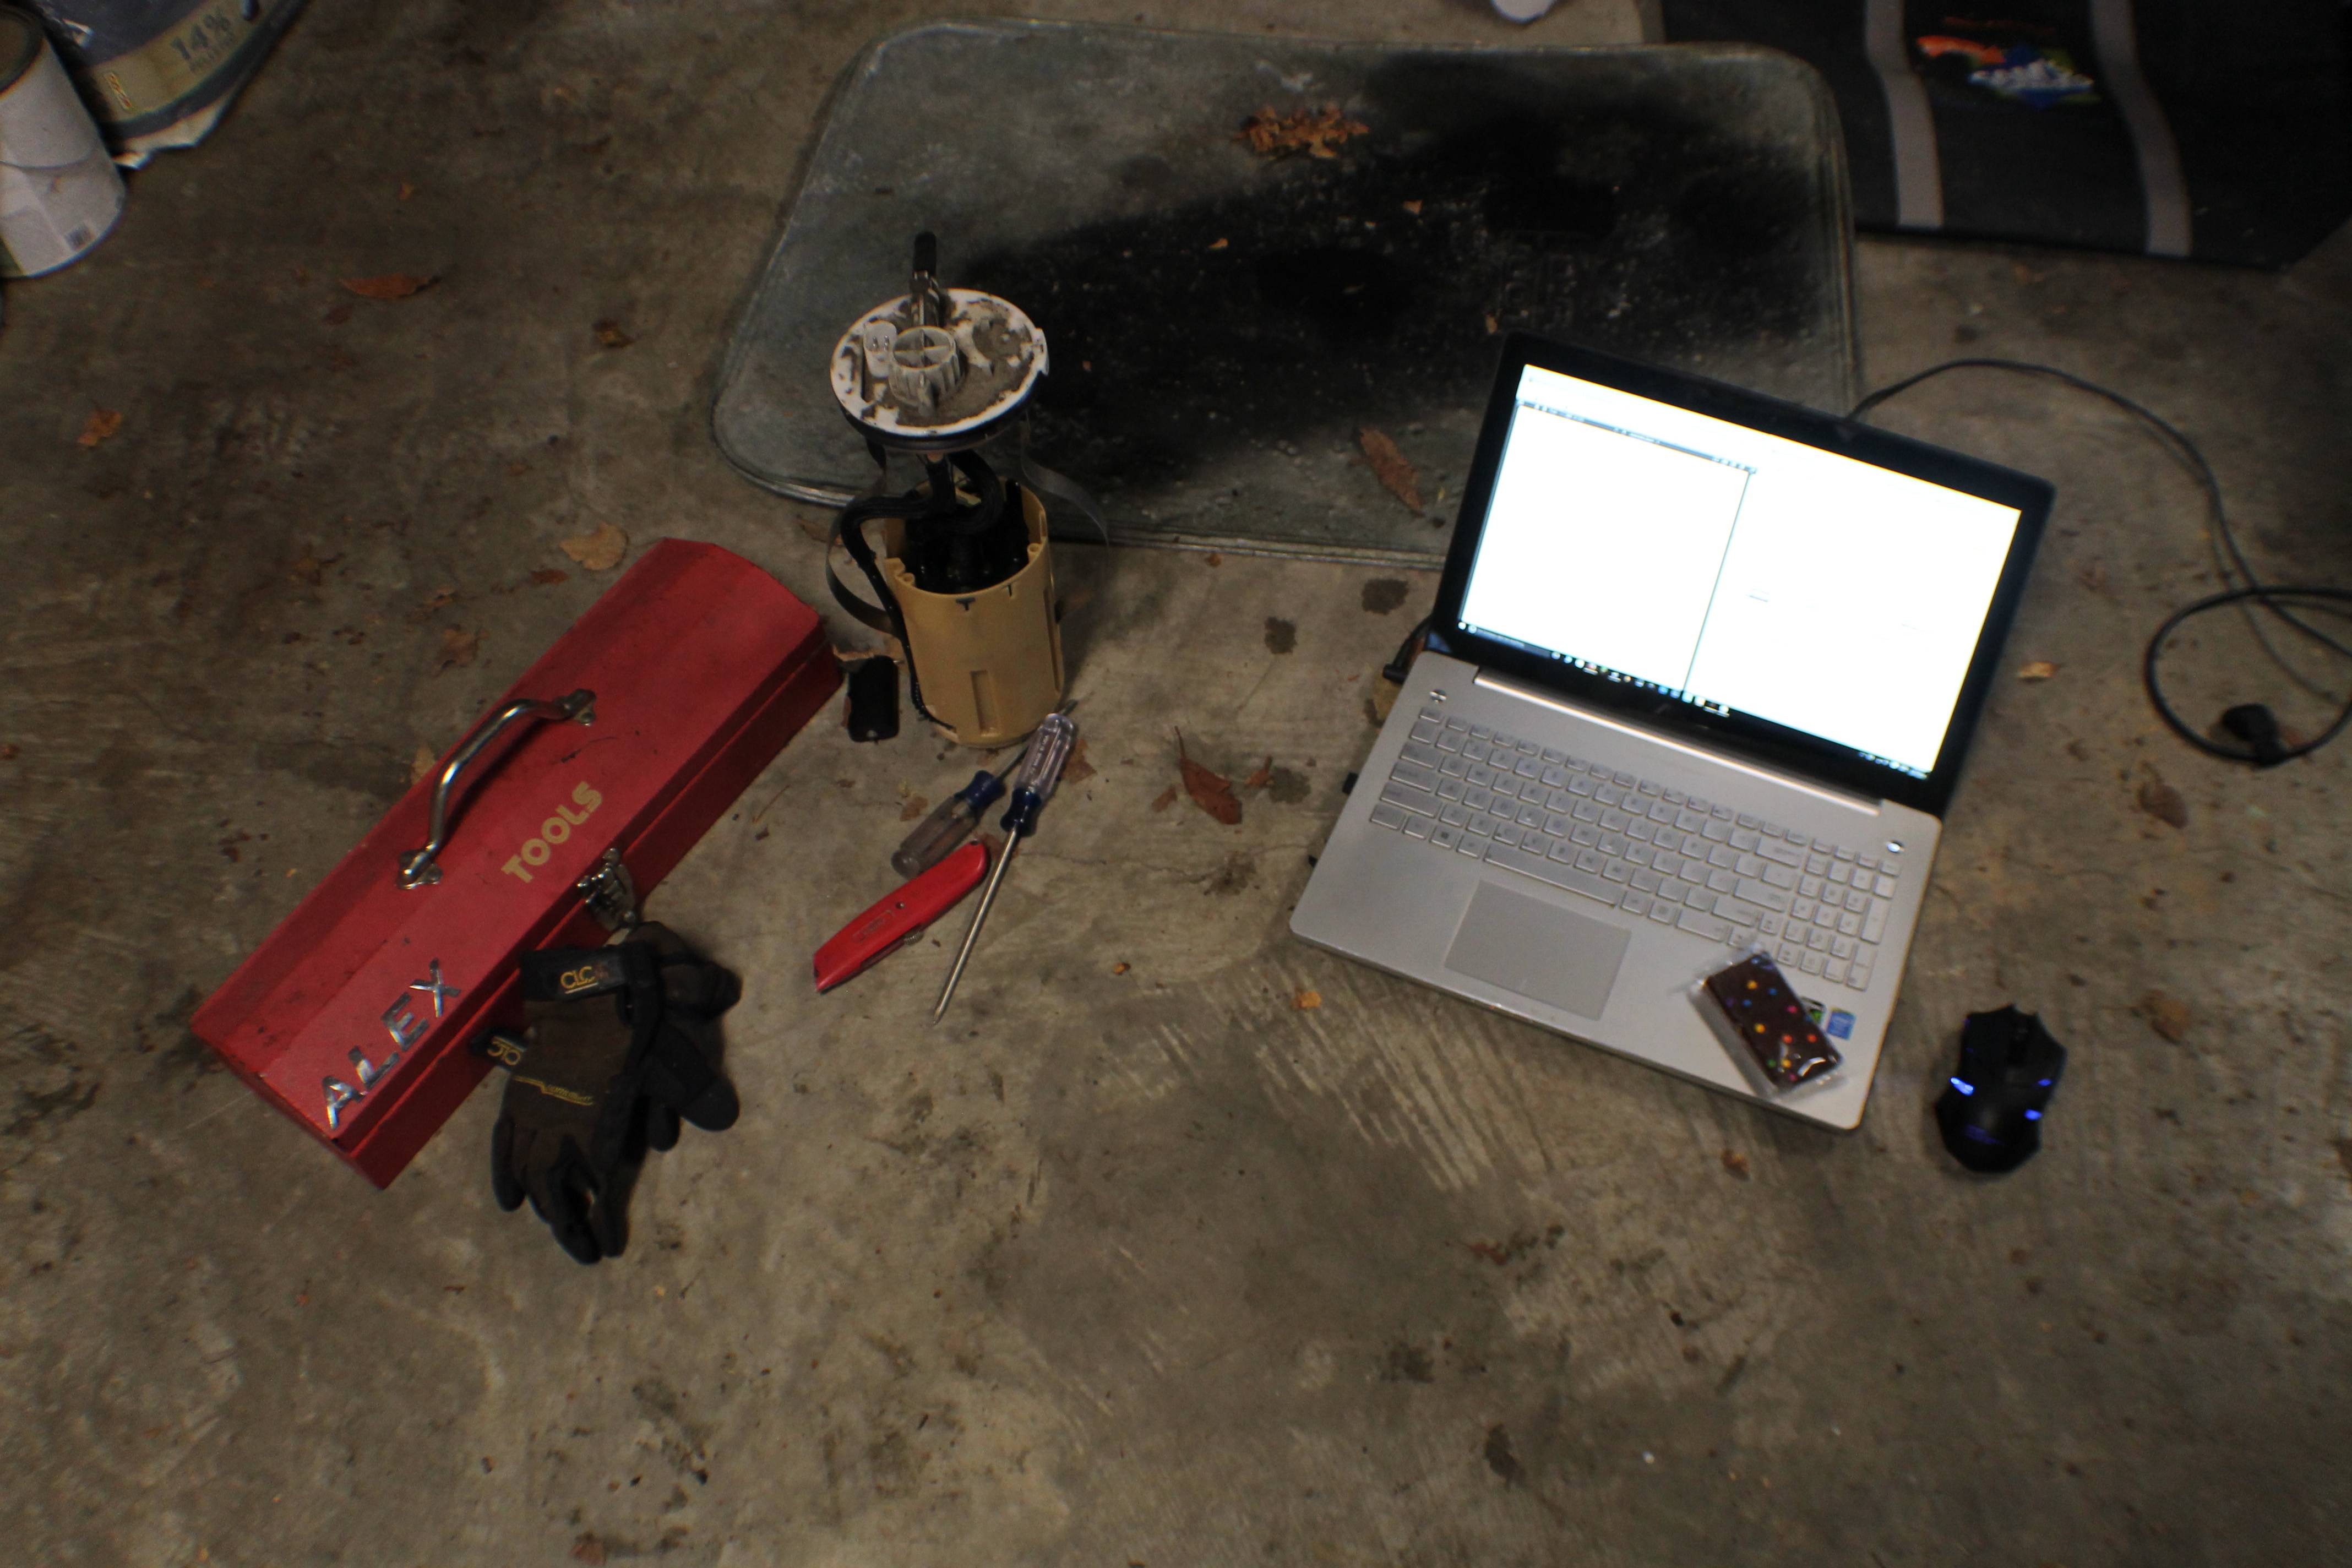
Now, to disassemble the pump assembly. Get yourself set up in your garage floor or, if you're more fancy than me, on a work bench. Bring tools, your laptop or tablet to look at the rave manual if you so desire, and snacks or beer (if you're over 21, or 19 in Canada, or whatever age is legal in your country of origin, or if you've got a good friend of age) because this is a suuuper difficult job that's going to take all of 10 minutes.
Now, if your springs didn't come out when removing the pump then start by pulling them out of the top. They should slide out very easily. I used one hand when I removed mine. This will also be a great time to bench test the pump if you've been having any fueling issues using a large 9v battery (I think. To be honest even a regular 9v may work, but neither may work. You might need to use a car battery or lawn mower battery but I doubt it) and two alligator clips. Just connect the clips to the battery and then to the larger black and blue wires (or rather their bare plugs at the pump top) and if you hear the pump working then you're golden. Don't run it for long because you will burn it up without gas running through it rather quickly.
Now, there is a clip holding in the regulator. I used a pair of channel locks to pull them out; pliers or vice-grips or anything will work fine. Once the clip is out then the regulator will slide right out by hand.
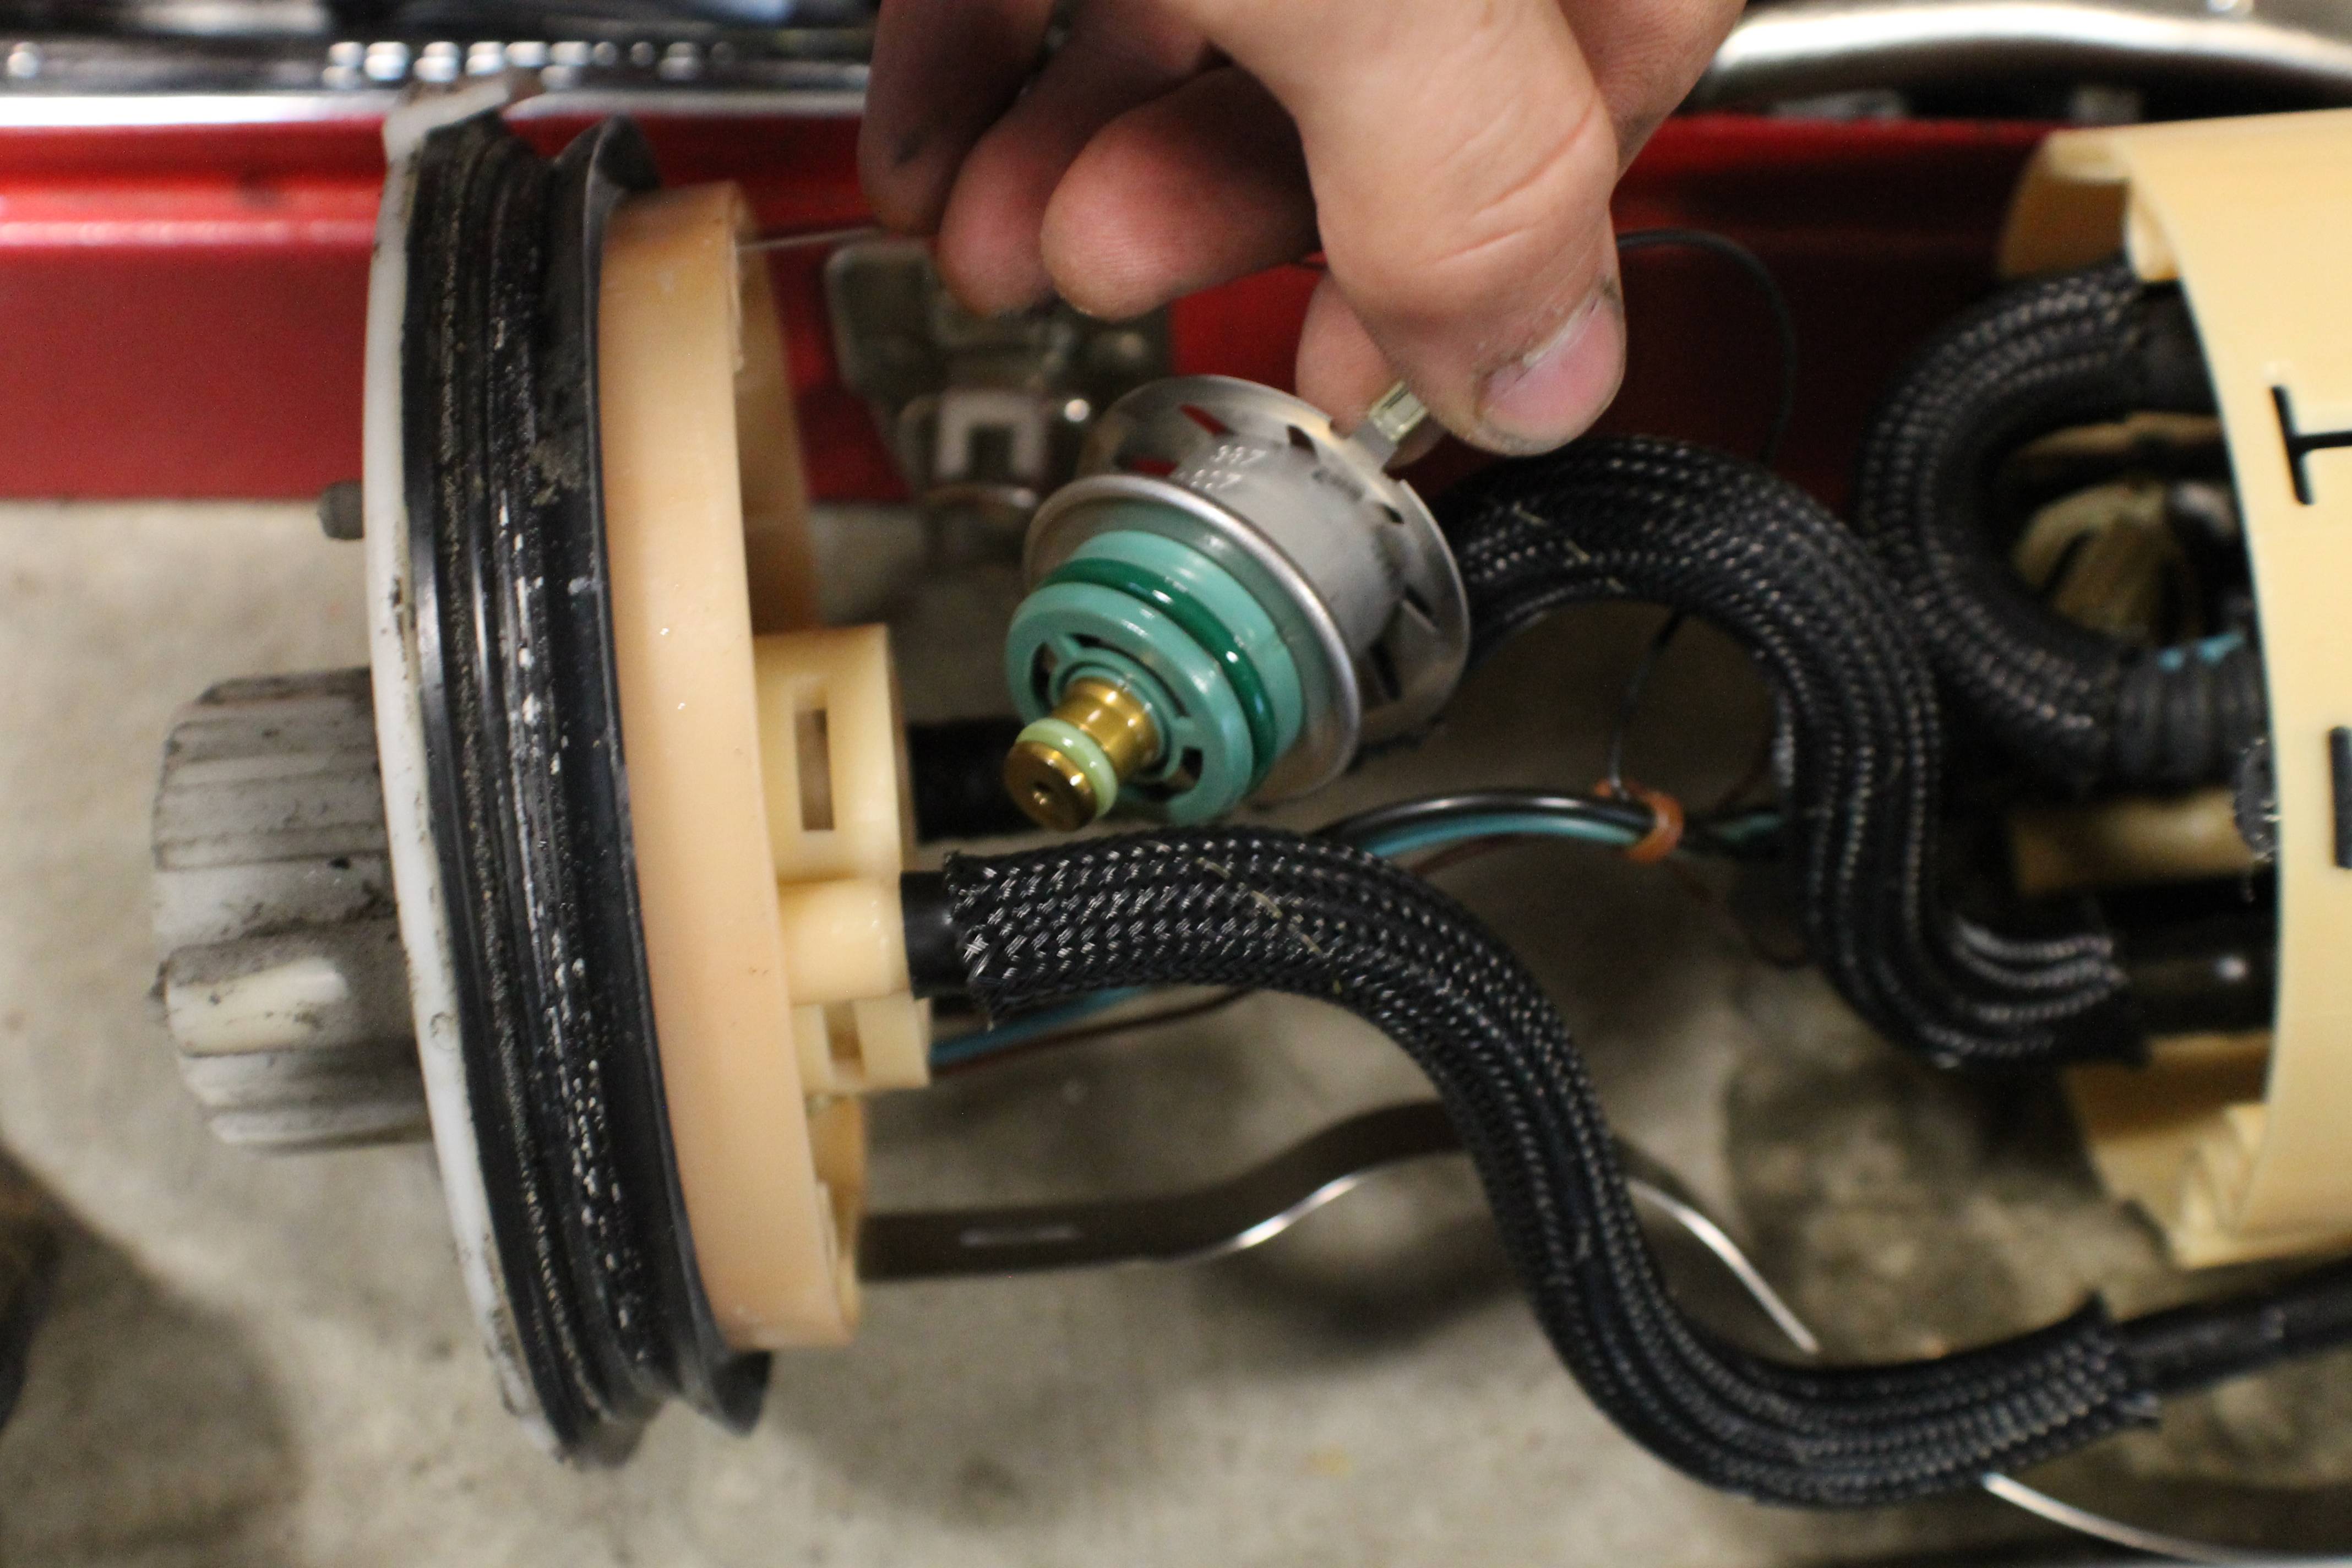
Ok, now we can remove the float. I used a screwdriver and it popped up very easily. That said, this step and the following one are completely unnecessary.

Now you can remove the little float hinge by gently prying the outside up with your trusty flat head screwdriver.
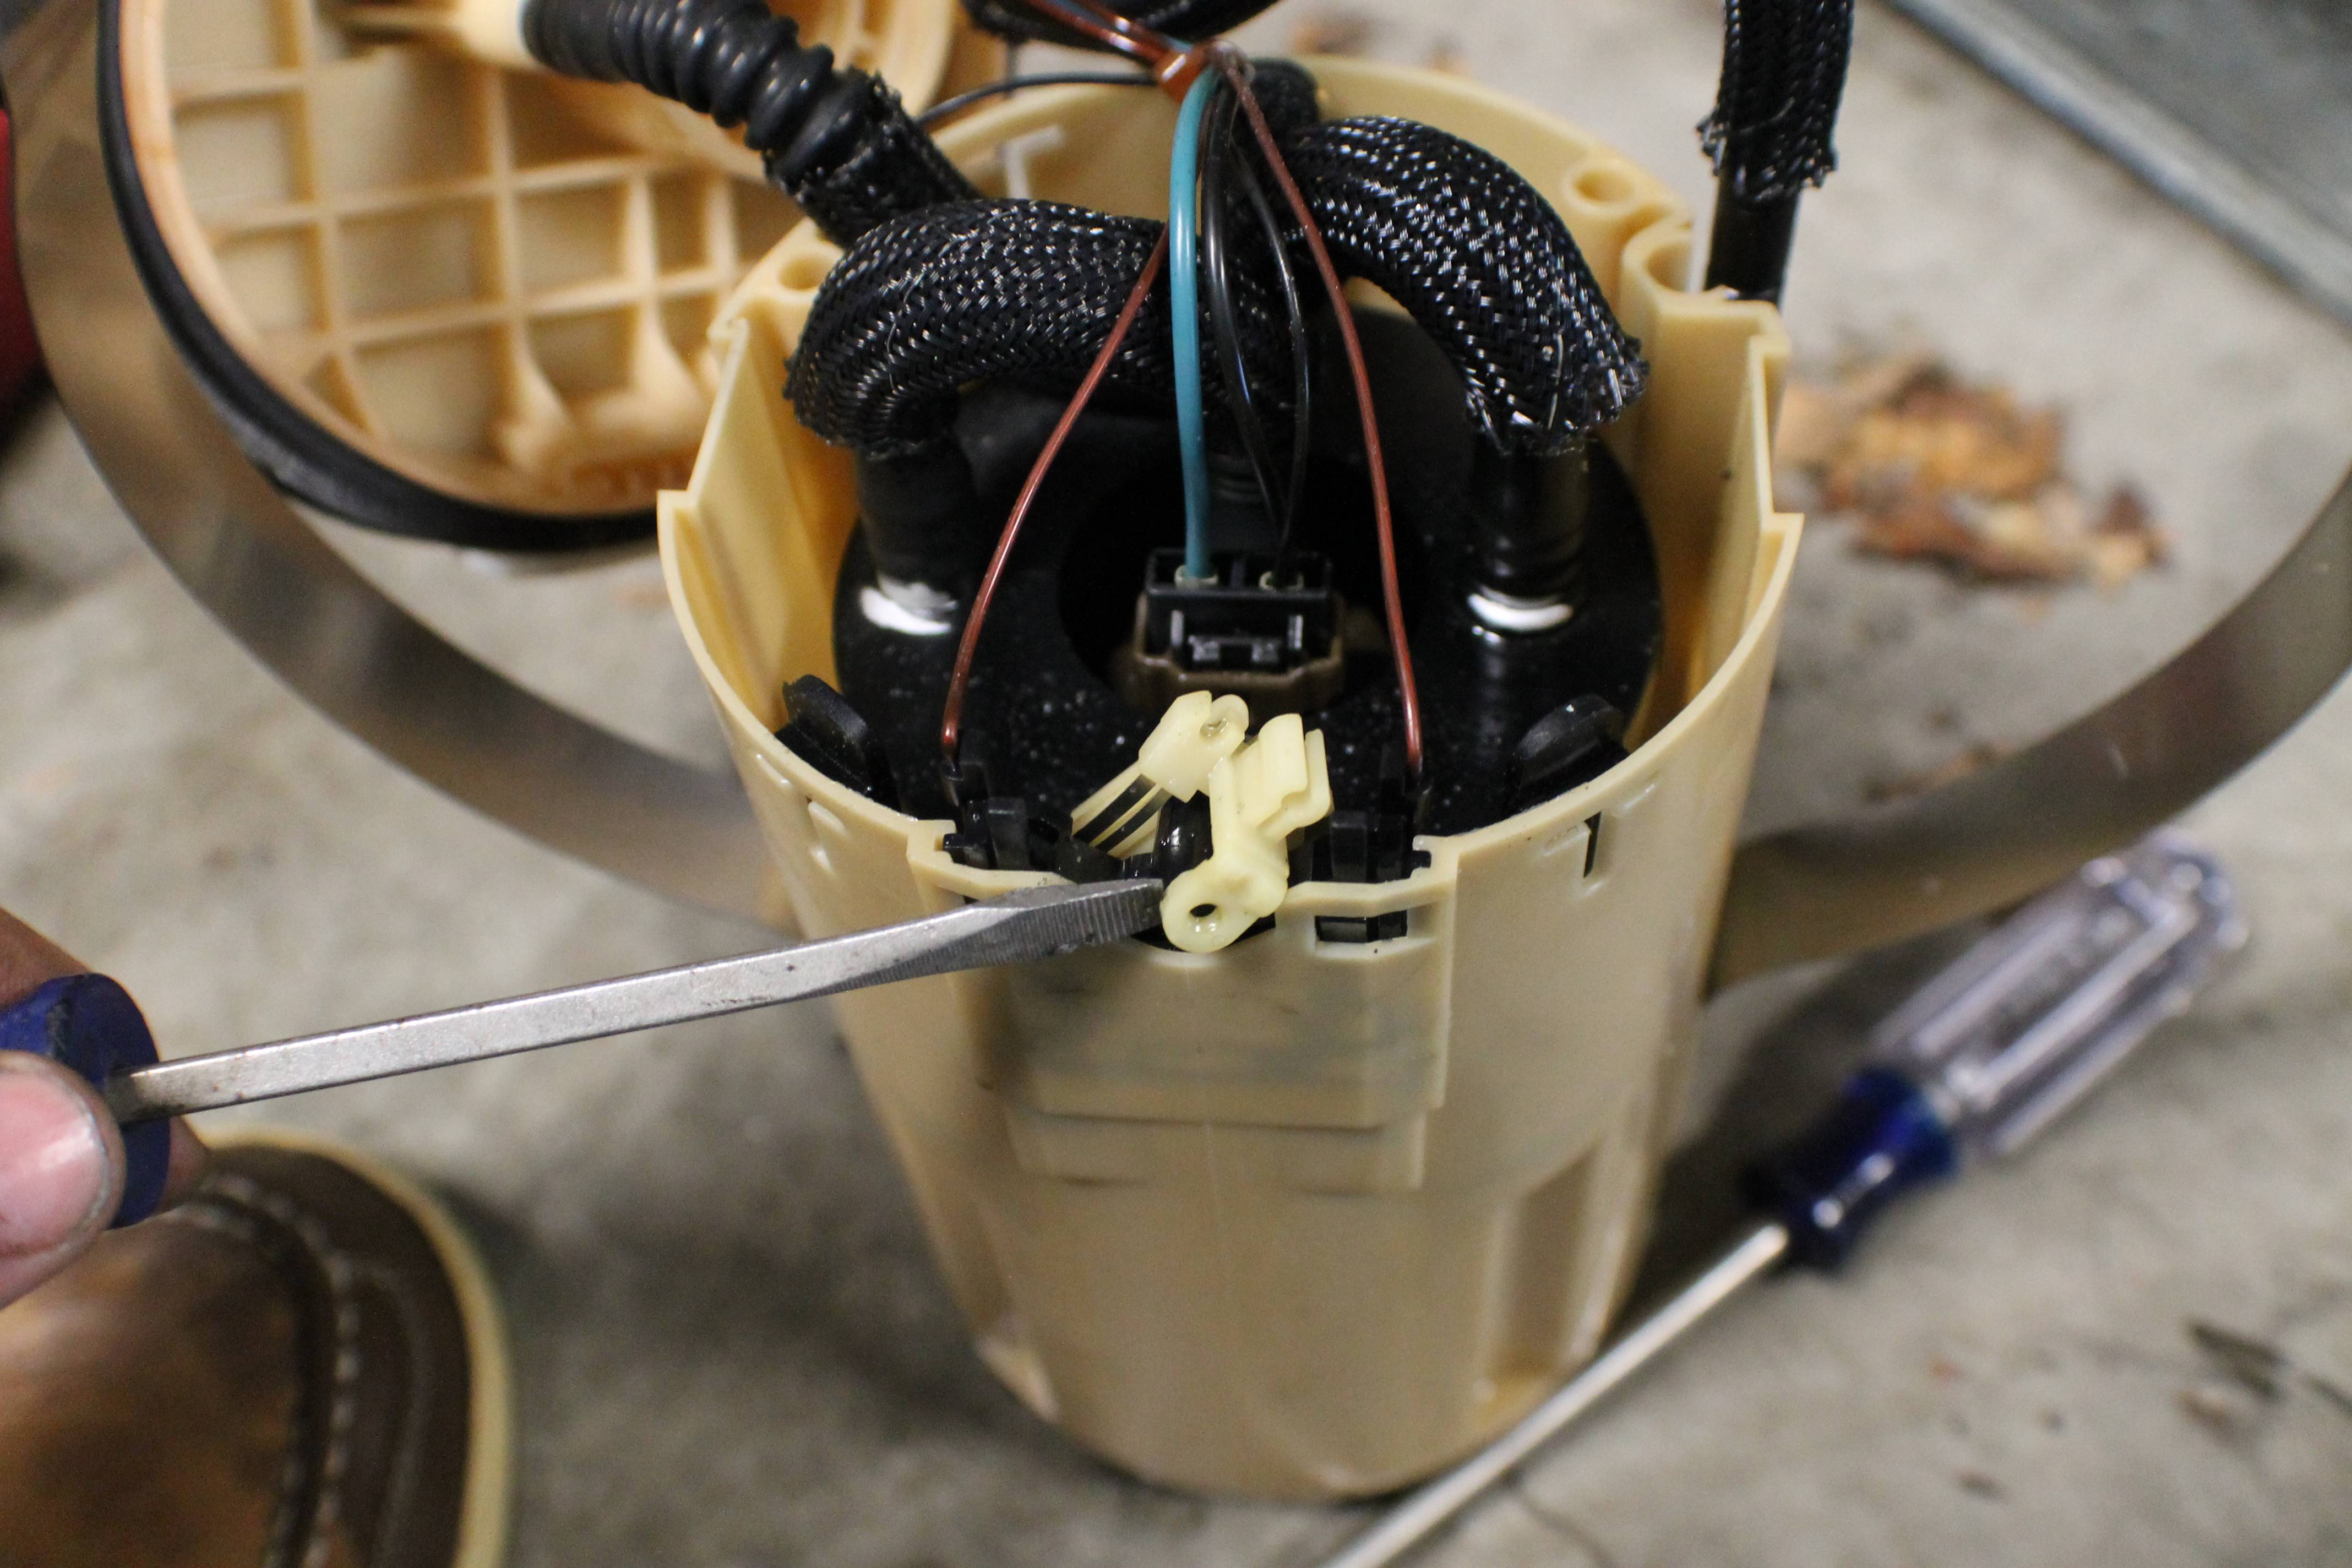
Now we're back to the necessary steps. You'll need to remove the sending unit. There are two clips that you need to press back using your thumbs and then lift it out. It will come easily.

Now, there are three clips that hold the fuel pump into the "cup". Again, using your flat head screwdriver, just pop the fuel pump retaining clips back so that they are no longer holding the pump in place.
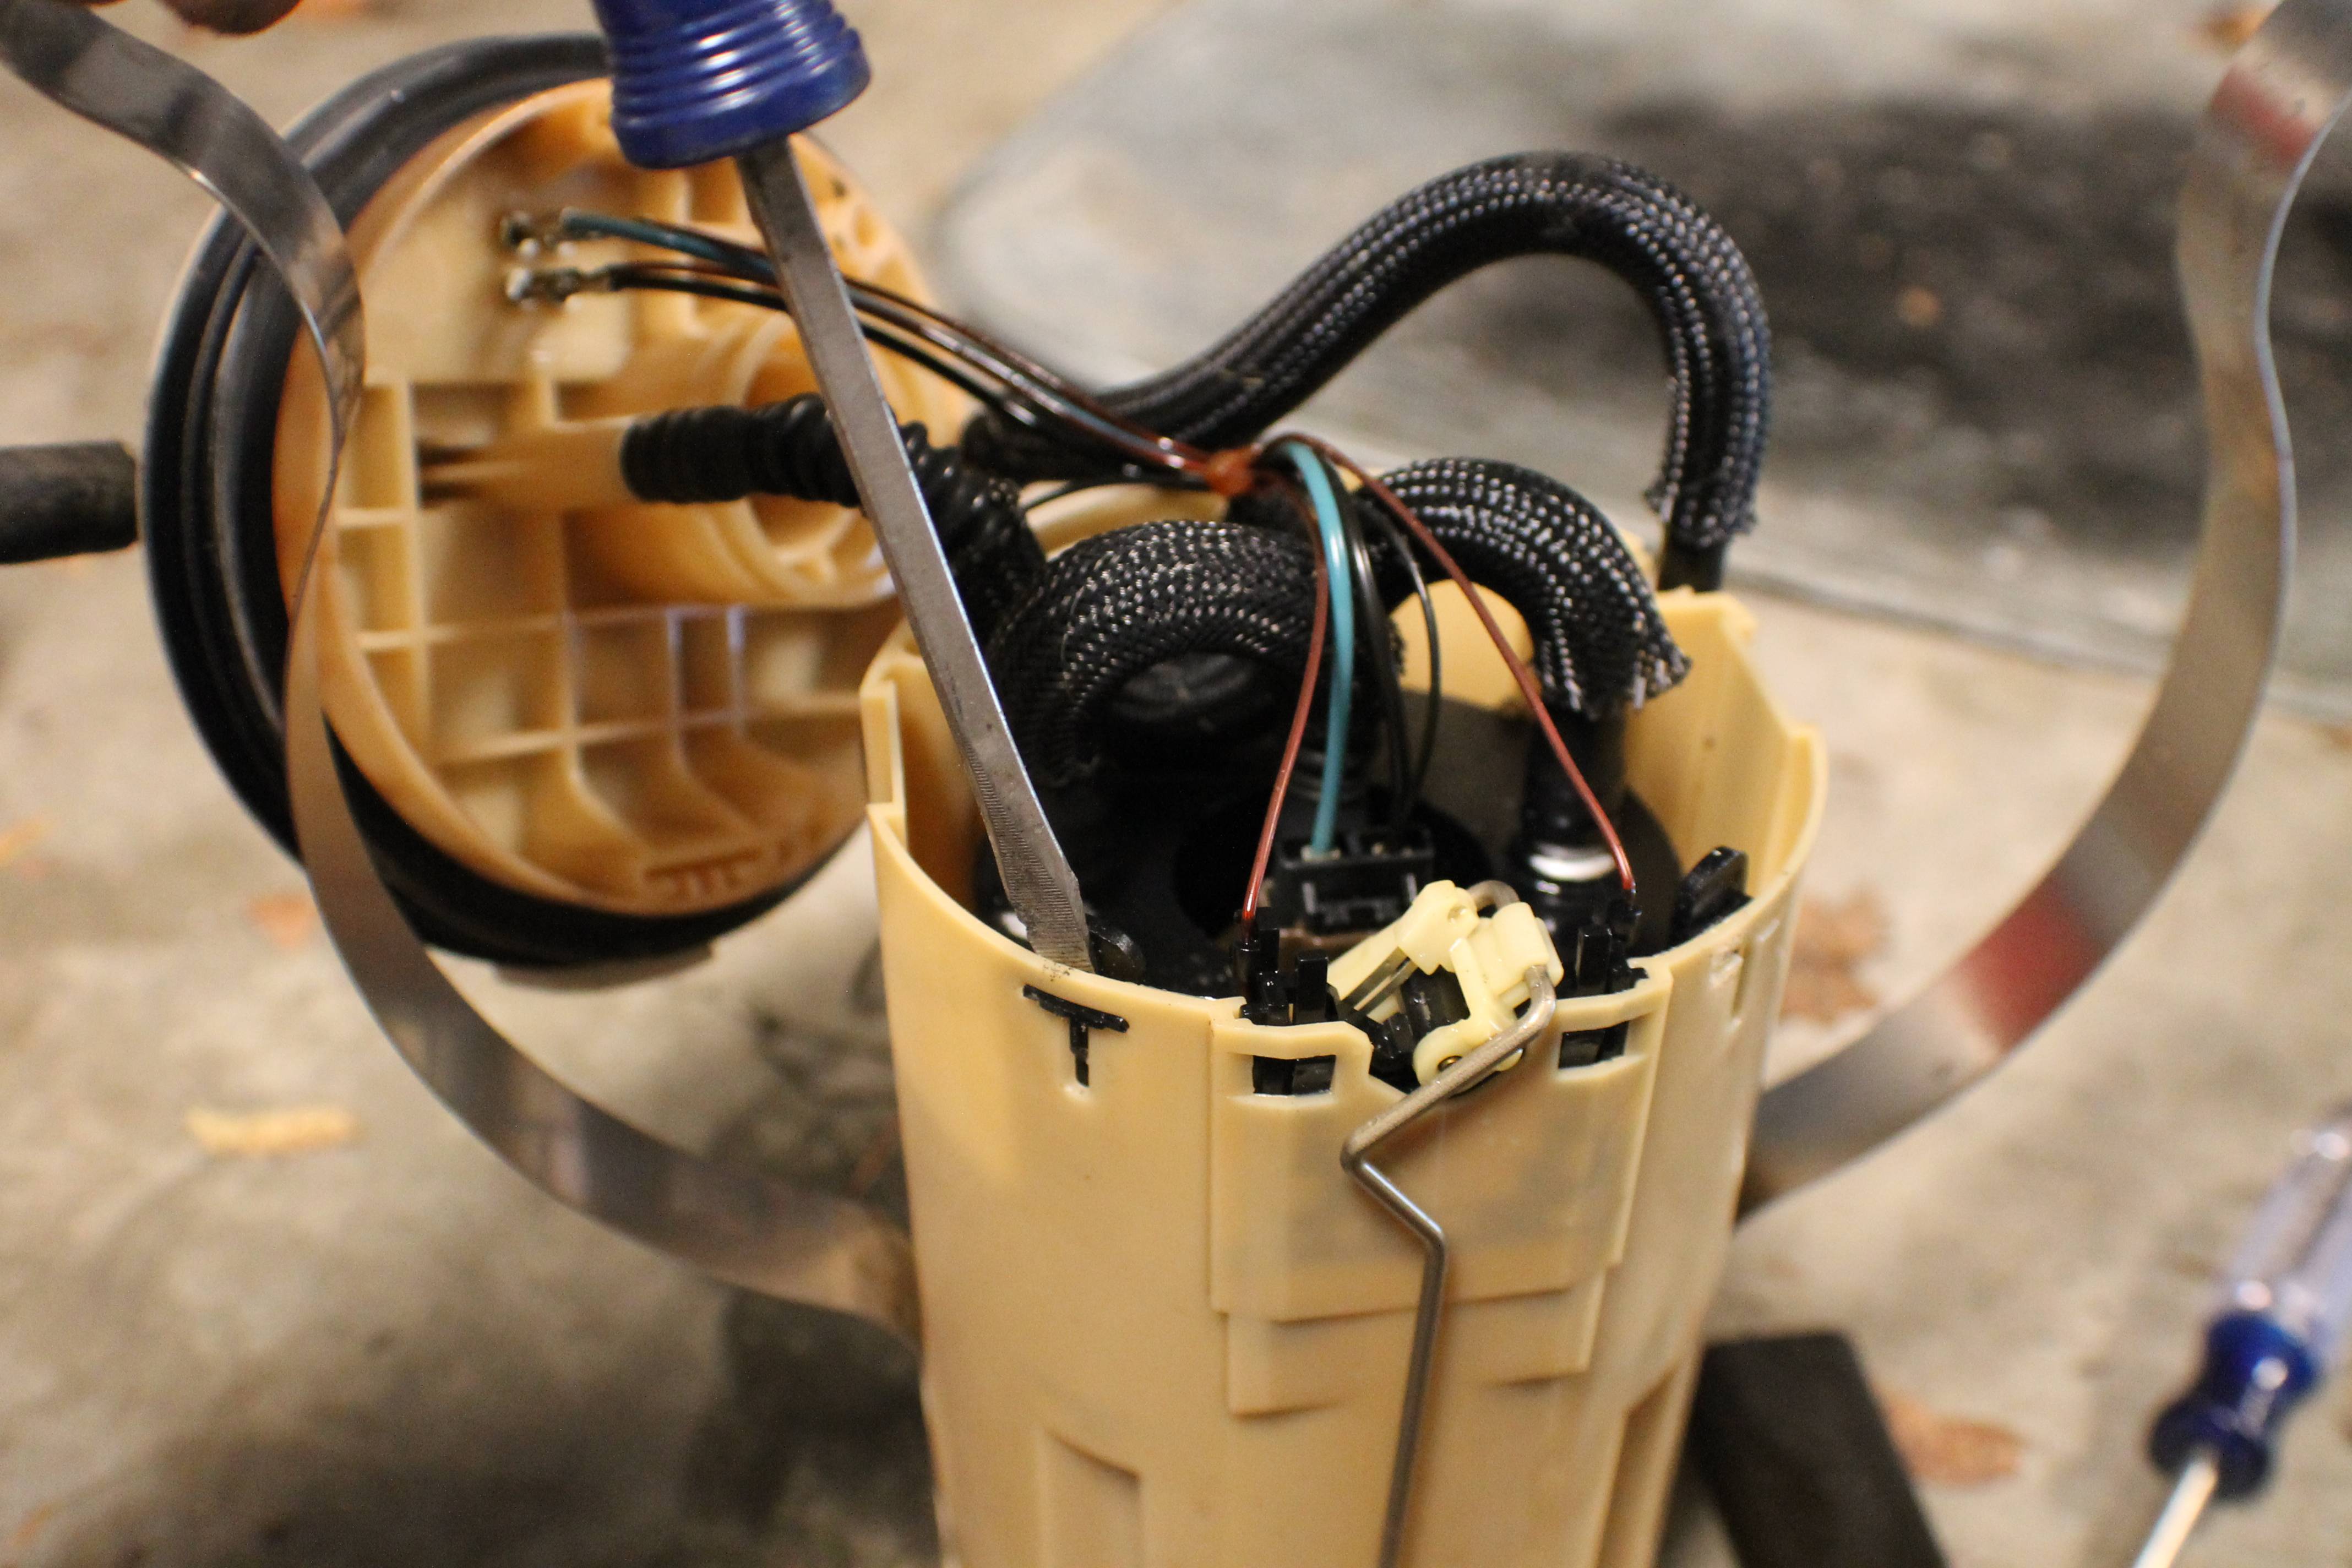
Once the three clips are undone the pump will lift straight out.
And you're done! Now go wash your hands so your wife/girlfriend/mother doesn't complain about the gas smell and also because repeated long term skin exposure to gasoline has been known to contribute to the development of skin cancer, so you don't really want it on your hands any longer than necessary.
Thanks for reading, hope it helped!
You've got to begin by removing the rear carpet. The fuel pump is related in the very center of the rear storage area's floor. I just cut the carpet out because this is a parts truck, but you would likely prefer to remove all of the rear trim followed by the carpet.
Next, remove the fuel line by pinching the white clip and pulling backwards. Then squeeze the electrical connector and pull up on the wires to remove the plug and place it to the side.
Now, there is a black retaining ring around the pump you have to remove. There is a special tool to remove it but it is not required. Just use a sturdy flat head screwdriver and a hammer to knock it around as shown. It won't move at first and you'll have to whack on it pretty good, but keep going and it will move. Don't place the screwdriver inside the raised metal but on the edge of it.
Once you get the ring removed, use your screwdriver to easily pry up on the side of the pump in the area shown. It will pop up easily.
Now the pump will lift out. The springs will squeeze in and one or both may become unattached. Only one did for me, but if both do then reach in and grasp the springs to pull it out that way. Once you get it out it will spill some gasoline. There will be more gas inside the "cup" that you may wish to pour out once you get the pump outside the vehicle.
This completes the removal portion of the write up. To reinstall, just follow these steps in reverse. Super simple and no need to prime since the pump sits inside the tank.
Now, to disassemble the pump assembly. Get yourself set up in your garage floor or, if you're more fancy than me, on a work bench. Bring tools, your laptop or tablet to look at the rave manual if you so desire, and snacks or beer (if you're over 21, or 19 in Canada, or whatever age is legal in your country of origin, or if you've got a good friend of age) because this is a suuuper difficult job that's going to take all of 10 minutes.
Now, if your springs didn't come out when removing the pump then start by pulling them out of the top. They should slide out very easily. I used one hand when I removed mine. This will also be a great time to bench test the pump if you've been having any fueling issues using a large 9v battery (I think. To be honest even a regular 9v may work, but neither may work. You might need to use a car battery or lawn mower battery but I doubt it) and two alligator clips. Just connect the clips to the battery and then to the larger black and blue wires (or rather their bare plugs at the pump top) and if you hear the pump working then you're golden. Don't run it for long because you will burn it up without gas running through it rather quickly.
Now, there is a clip holding in the regulator. I used a pair of channel locks to pull them out; pliers or vice-grips or anything will work fine. Once the clip is out then the regulator will slide right out by hand.
Ok, now we can remove the float. I used a screwdriver and it popped up very easily. That said, this step and the following one are completely unnecessary.
Now you can remove the little float hinge by gently prying the outside up with your trusty flat head screwdriver.
Now we're back to the necessary steps. You'll need to remove the sending unit. There are two clips that you need to press back using your thumbs and then lift it out. It will come easily.
Now, there are three clips that hold the fuel pump into the "cup". Again, using your flat head screwdriver, just pop the fuel pump retaining clips back so that they are no longer holding the pump in place.
Once the three clips are undone the pump will lift straight out.
And you're done! Now go wash your hands so your wife/girlfriend/mother doesn't complain about the gas smell and also because repeated long term skin exposure to gasoline has been known to contribute to the development of skin cancer, so you don't really want it on your hands any longer than necessary.
Thanks for reading, hope it helped!
Last edited by Alex_M; 12-17-2015 at 05:45 PM.
#2
12-17-2015, 05:39 PM

Baja
Another well done.
Ok, so because of my turbo thread I've decided to disassemble the fuel pump on my donor truck to see if there was a way for me to bypass the factory fuel regulator so that I could still use the factory pump. I figured I'd do a write up on the removal and disassembly of the pump while I was at it.
You've got to begin by removing the rear carpet. The fuel pump is related in the very center of the rear storage area's floor. I just cut the carpet out because this is a parts truck, but you would likely prefer to remove all of the rear trim followed by the carpet.
Next, remove the fuel line by pinching the white clip and pulling backwards. Then squeeze the electrical connector and pull up on the wires to remove the plug and place it to the side.
Now, there is a black retaining ring around the pump you have to remove. There is a special tool to remove it but it is not required. Just use a sturdy flat head screwdriver and a hammer to knock it around as shown. It won't move at first and you'll have to whack on it pretty good, but keep going and it will move. Don't place the screwdriver inside the raised metal but on the edge of it.

Once you get the ring removed, use your screwdriver to easily pry up on the side of the pump in the area shown. It will pop up easily.

Now the pump will lift out. The springs will squeeze in and one or both may become unattached. Only one did for me, but if both do then reach in and grasp the springs to pull it out that way. Once you get it out it will spill some gasoline. There will be more gas inside the "cup" that you may wish to pour out once you get the pump outside the vehicle.

This completes the removal portion of the write up. To reinstall, just follow these steps in reverse. Super simple and no need to prime since the pump sits inside the tank.
Now, to disassemble the pump assembly. Get yourself set up in your garage floor or, if you're more fancy than me, on a work bench. Bring tools, your laptop or tablet to look at the rave manual if you so desire, and snacks or beer (if you're over 21, I'm not) because this is a suuuper difficult job that's going to take all of 10 minutes.

Now, if your springs didn't come out when removing the pump then start by pulling them out of the top. They should slide out very easily. I used one hand when I removed mine. This will also be a great time to bench test the pump if you've been having any fueling issues using a large 9v battery (I think. To be honest even a regular 9v may work, but neither may work. You might need to use a car battery or lawn mower battery but I doubt it) and two alligator clips. Just connect the clips to the battery and then to the larger black and blue wires (or rather their bare plugs at the pump top) and if you hear the pump working then you're golden. Don't run it for long because you will burn it up without gas running through it rather quickly.

Now, there is a clip holding in the regulator. I used a pair of channel locks to pull them out; pliers or vice-grips or anything will work fine. Once the clip is out then the regulator will slide right out by hand.

Ok, now we can remove the float. I used a screwdriver and it popped up very easily. That said, this step and the following one are completely unnecessary.

Now you can remove the little float hinge by gently prying the outside up with your trusty flat head screwdriver.

Now we're back to the necessary steps. You'll need to remove the sending unit. There are two clips that you need to press back using your thumbs and then lift it out. It will come easily.

Now, there are three clips that hold the fuel pump into the "cup". Again, using your flat head screwdriver, just pop the fuel pump retaining clips back so that they are no longer holding the pump in place.

Once the three clips are undone the pump will lift straight out.

And you're done! Now go wash your hands so your wife/girlfriend/mother doesn't complain about the gas smell and also because repeated long term skin exposure to gasoline has been known to contribute to the development of skin cancer, so you don't really want it on your hands any longer than necessary.
Thanks for reading, hope it helped!
You've got to begin by removing the rear carpet. The fuel pump is related in the very center of the rear storage area's floor. I just cut the carpet out because this is a parts truck, but you would likely prefer to remove all of the rear trim followed by the carpet.
Next, remove the fuel line by pinching the white clip and pulling backwards. Then squeeze the electrical connector and pull up on the wires to remove the plug and place it to the side.
Now, there is a black retaining ring around the pump you have to remove. There is a special tool to remove it but it is not required. Just use a sturdy flat head screwdriver and a hammer to knock it around as shown. It won't move at first and you'll have to whack on it pretty good, but keep going and it will move. Don't place the screwdriver inside the raised metal but on the edge of it.
Once you get the ring removed, use your screwdriver to easily pry up on the side of the pump in the area shown. It will pop up easily.
Now the pump will lift out. The springs will squeeze in and one or both may become unattached. Only one did for me, but if both do then reach in and grasp the springs to pull it out that way. Once you get it out it will spill some gasoline. There will be more gas inside the "cup" that you may wish to pour out once you get the pump outside the vehicle.
This completes the removal portion of the write up. To reinstall, just follow these steps in reverse. Super simple and no need to prime since the pump sits inside the tank.
Now, to disassemble the pump assembly. Get yourself set up in your garage floor or, if you're more fancy than me, on a work bench. Bring tools, your laptop or tablet to look at the rave manual if you so desire, and snacks or beer (if you're over 21, I'm not) because this is a suuuper difficult job that's going to take all of 10 minutes.
Now, if your springs didn't come out when removing the pump then start by pulling them out of the top. They should slide out very easily. I used one hand when I removed mine. This will also be a great time to bench test the pump if you've been having any fueling issues using a large 9v battery (I think. To be honest even a regular 9v may work, but neither may work. You might need to use a car battery or lawn mower battery but I doubt it) and two alligator clips. Just connect the clips to the battery and then to the larger black and blue wires (or rather their bare plugs at the pump top) and if you hear the pump working then you're golden. Don't run it for long because you will burn it up without gas running through it rather quickly.
Now, there is a clip holding in the regulator. I used a pair of channel locks to pull them out; pliers or vice-grips or anything will work fine. Once the clip is out then the regulator will slide right out by hand.
Ok, now we can remove the float. I used a screwdriver and it popped up very easily. That said, this step and the following one are completely unnecessary.
Now you can remove the little float hinge by gently prying the outside up with your trusty flat head screwdriver.
Now we're back to the necessary steps. You'll need to remove the sending unit. There are two clips that you need to press back using your thumbs and then lift it out. It will come easily.
Now, there are three clips that hold the fuel pump into the "cup". Again, using your flat head screwdriver, just pop the fuel pump retaining clips back so that they are no longer holding the pump in place.
Once the three clips are undone the pump will lift straight out.
And you're done! Now go wash your hands so your wife/girlfriend/mother doesn't complain about the gas smell and also because repeated long term skin exposure to gasoline has been known to contribute to the development of skin cancer, so you don't really want it on your hands any longer than necessary.
Thanks for reading, hope it helped!


#8
12-17-2015, 10:27 PM
Anyways, good write up. I don't have the patience. Did you use your DSLR?
#9
12-17-2015, 10:43 PM
Yea, I try to avoid them when I can. Pretty much impossible when you're working on the fuel system though. Gojo is my stuff, that stuff works just as good as gasoline I swear.
Thanks! I did indeed use my DSLR. I figure I'll start doing write ups this way for everything I'm not in a rush with, atleast if there aren't any in-depth write ups with pictures already available.
Thanks! I did indeed use my DSLR. I figure I'll start doing write ups this way for everything I'm not in a rush with, atleast if there aren't any in-depth write ups with pictures already available.
#10
03-05-2021, 02:25 PM


Camel Trophy