
Glass 03/4 lenses


Thread Starter
|
Three Wheeling
Joined: Jan 2015
Posts: 84
Likes: 2
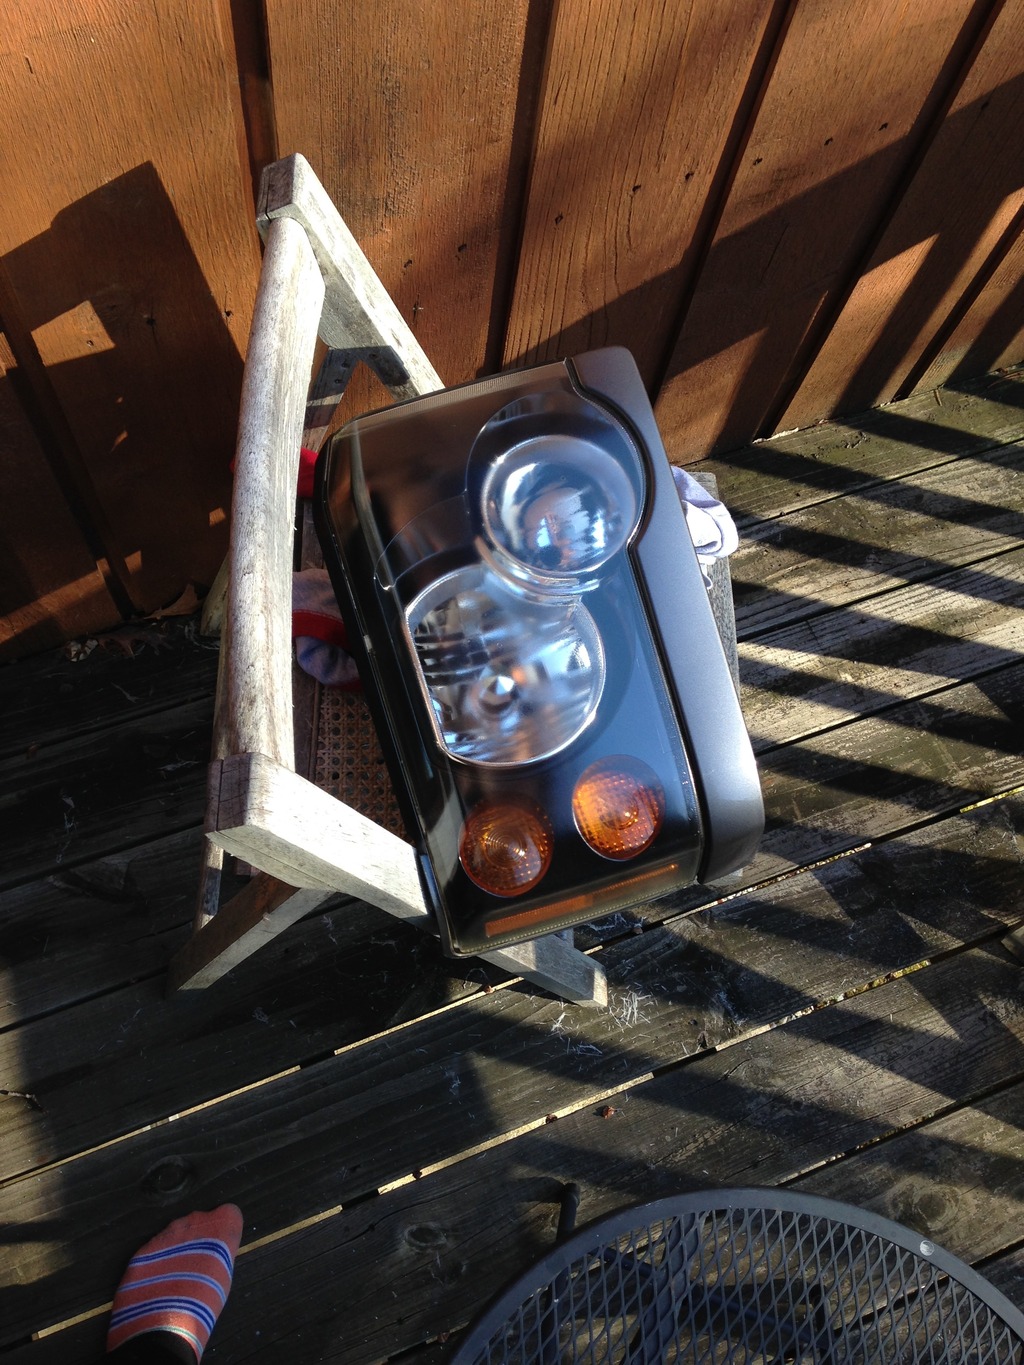
Started with 800 finished with 2000 grit. Sprayed with a gloss clear with uv protection
Before
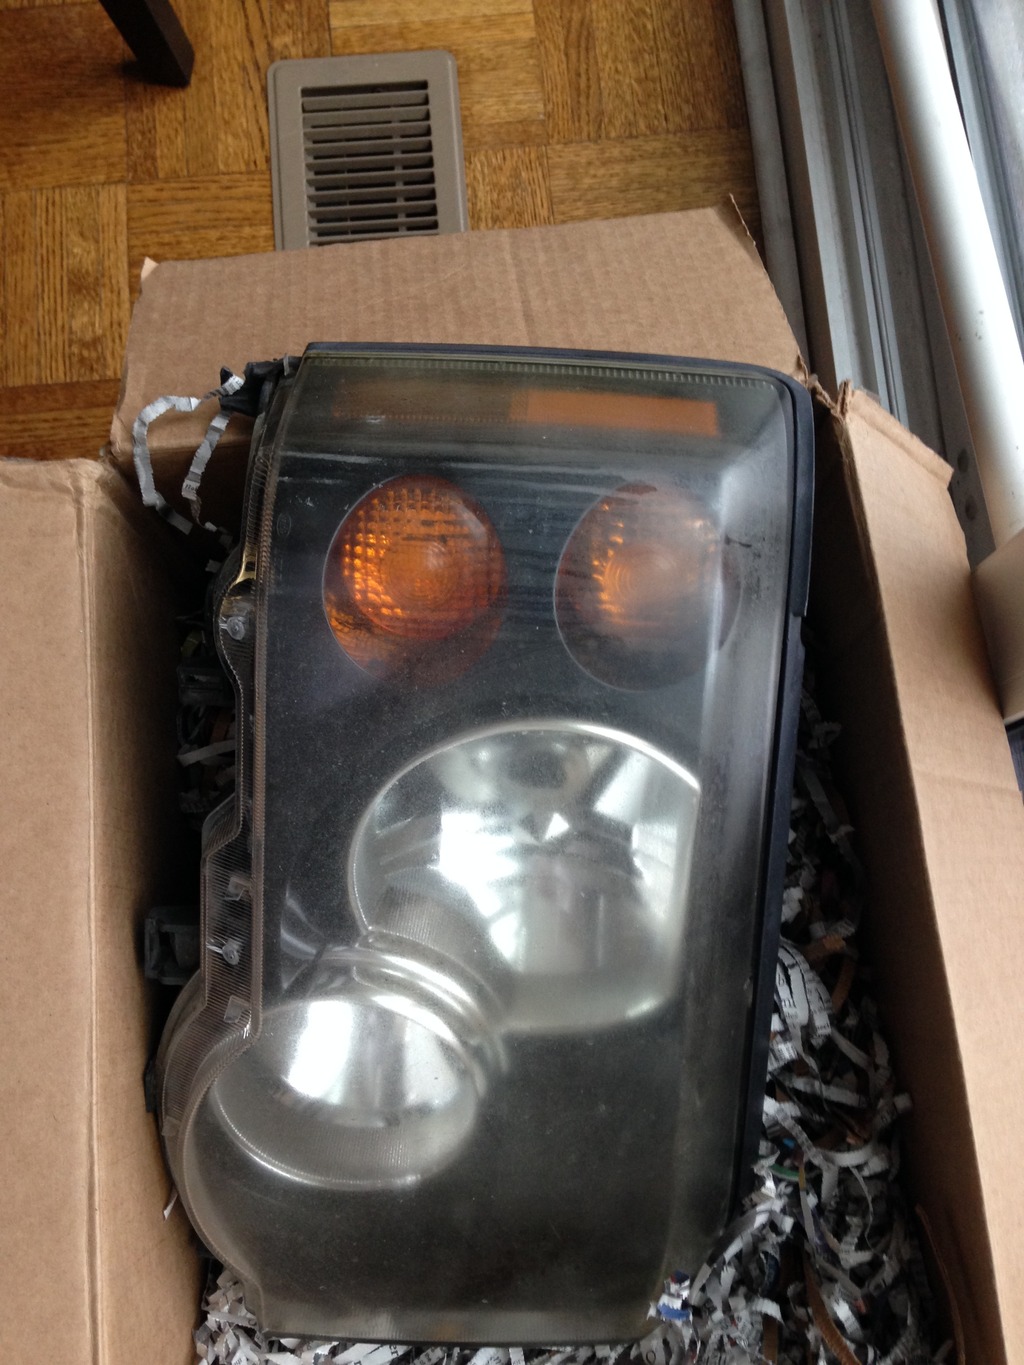
After
Will probably do a compound and seal once I've finished the conversion ( or when my wife gives me more time )
)
Before

After

Will probably do a compound and seal once I've finished the conversion ( or when my wife gives me more time
)

Baja
Joined: Aug 2013
Posts: 5,845
Likes: 368
From: Near Bordeaux, France


I know what mean about the wife
 "if you've got time to 'play' around with your cars you've got time to do this or that" how many time have I heard that said I'd like a dollar for every time
 PS. the hot summer sun and road grime together with the halogen bulbs is the worst thing for crudding up your polycarbonate headlamps. Consider replacing the halogen bulbs with LED's which emit far less heat.
Last edited by OffroadFrance; Mar 15, 2015 at 05:50 PM.

Overlanding
Joined: Feb 2015
Posts: 20
Likes: 2
From: Liberty Hill, TX
I had some fogging especially at the top of the lens. I used a 3M kit which had 2 levels of dry sanding disks followed by 3000 grit wet sanding and then a compound to finish it off. I then covered them with a 20% blackout film and they look great. Since it was the first time I used the film I got a few imperfections in it but it is easy enough to replace. I am hoping the film will protect the lenses from grit an UV. Looks so good I plan to do the tail lights next.

Camel Trophy
Joined: Aug 2014
Posts: 4,743
Likes: 985
From: Southwestern Virginia
I had some fogging especially at the top of the lens. I used a 3M kit which had 2 levels of dry sanding disks followed by 3000 grit wet sanding and then a compound to finish it off. I then covered them with a 20% blackout film and they look great. Since it was the first time I used the film I got a few imperfections in it but it is easy enough to replace. I am hoping the film will protect the lenses from grit an UV. Looks so good I plan to do the tail lights next.
By the way, Jnj, that looks great. I'm glad you were able to clean them up so well.
Overlanding
Joined: Feb 2015
Posts: 20
Likes: 2
From: Liberty Hill, TX
I had some fogging especially at the top of the lens. I used a 3M kit which had 2 levels of dry sanding disks followed by 3000 grit wet sanding and then a compound to finish it off. I then covered them with a 20% blackout film and they look great. Since it was the first time I used the film I got a few imperfections in it but it is easy enough to replace. I am hoping the film will protect the lenses from grit an UV. Looks so good I plan to do the tail lights next.
Baja
Joined: Aug 2013
Posts: 5,845
Likes: 368
From: Near Bordeaux, France
Re fogging of the facelift headlamps, this is also exacerbated by the heat generated by the halogen bulbs (lamps) and maybe using LED or HID LED lamps instead should reduce this fogging to the ploycarbonate lenses.
I used the 3M kit also, pure magic. I used a sealer to finish the paintwork and headlamps which is great.
I used the 3M kit also, pure magic. I used a sealer to finish the paintwork and headlamps which is great.


Baja
Joined: Aug 2013
Posts: 6,902
Likes: 791
From: Huntington Beach CA
Whats all this talk about projectors? Can you still keep the light sealed with original screw caps after adding them? I am interested but currently my daughters has HID with holes in the caps for pigtail and water finds its way into the lights.

