
How to Rebuild Brake Calipers


Thread Starter
|
Camel Trophy
Joined: Aug 2014
Posts: 4,743
Likes: 985
From: Southwestern Virginia
Hey all! Wanted to do a quick write up on rebuilding brake calipers. This is a good alternative to replacing if you're on a tight budget, or if you can't wait on one to come in on order.
This is a simple process and not too time consuming, but will be a bit messy. You'll want to go ahead and have extra brake fluid on hand before beginning.
You're going to begin, of course, by jacking up your disco and removing the wheel on the offending corner. Unbolt the caliper and remove it like you're changing brake pads. Do not un-do the brake hose yet.
You can do the next part (removing the piston) using compressed air, but I much prefer the following method. Using compressed air makes the piston shoot out (watch your fingers!) and sprays brake fluid all over.
Just start pumping the brakes. It will take a few pumps for the fluid to push the piston all the way out of the bore. Check every pump or two to see if the piston is loose yet.

Once the piston is out of the bore, it will still be held in place by the dust boot. When you pull the piston out all the brake fluid in the caliper will spill. Be ready with a catch pan.
Once the piston is out, you can remove the dust boot. It has a lip that seats into the bore of the caliper.
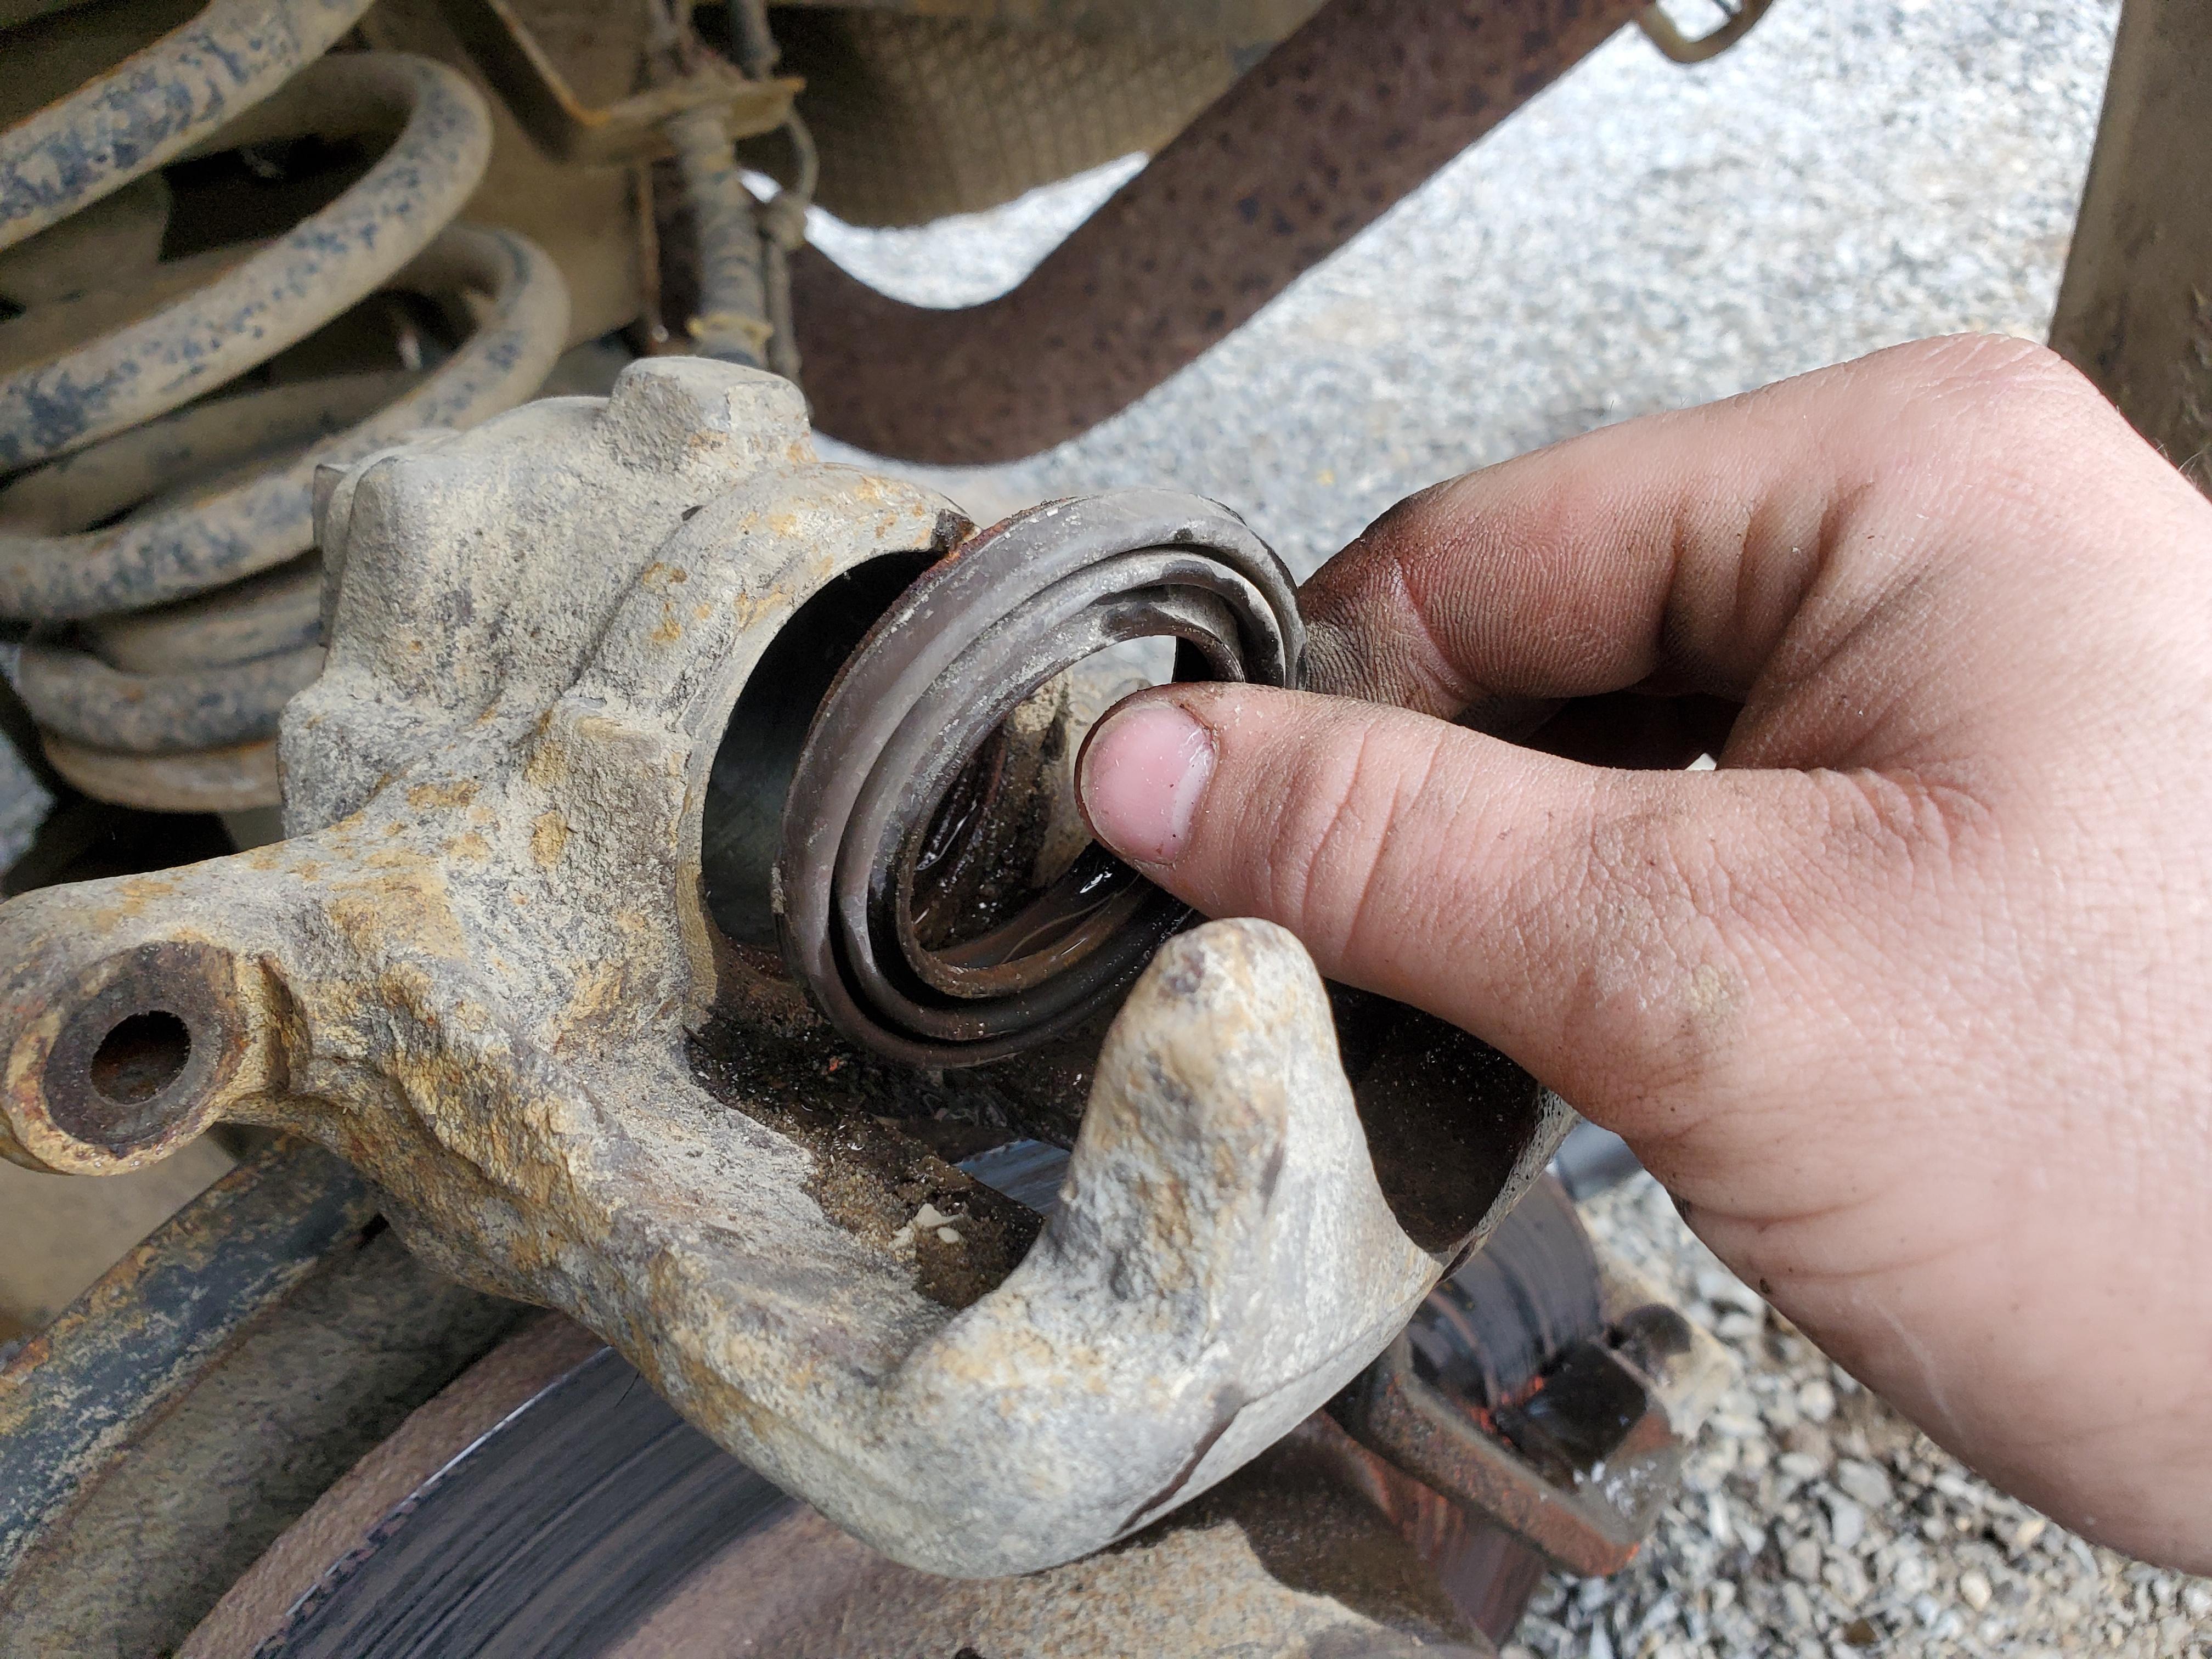
Next remove the o-ring inside the bore. I use a pick for this, but be careful not to nick or puncture it.


Now you're ready to clean up the bore. Brake caliper hones like this are usually available at your local auto parts store, but I have also just used sandpaper before.
You don't have to go wild here. All you want is for the bore to be cleaned up and nothing to interfere with the movement of the piston.


Now clean the bore out very well. Spray it out with brake cleaner and the wipe it out with paper towels.

Next up is the piston. This grime also needs to be removed for clear movement of the piston. Again, I've used sandpaper in the past. You can also use brake clean and steel wool. I just used a wire wheel on my bench grinder. As long as you're leaving a nice smooth, clean surface for that square o-ring to mate to. Then wipe it clean with a paper towel.


Now clean up your o-ring and reinstall in its recess in the caliper. For this I did nothing but wipe it with a paper towel, using my finger nail on some rust stuck to the outside. This rust was *not* on the surface mating to the piston. If that surface is damaged, you will need a new o-ring.


Now do the same with the dust seal.

This is the hardest part of the entire procedure. To begin reinstalling the piston, I use a pick and just work it up over the outside. This process took me a couple tries before I successfully got it all the way around. A small poke through the dust boot isn't the end of the world, but try to minimize them and don't tear the boot.

Now use a brake caliper spreader or a c-clamp to reinstall the piston and press it to the bottom of the bore. If you use a caliper spreader you'll probably only get about half way and then have to drop one pad in to finish pressing the piston.


Now put your brakes back together just the same as you took them apart. At this point you'll want to bleed the brakes. Thankfully on a D2 this is pretty simple to do alone with a length of wire so you can remotely jump the ABS relay while you're at the corner you need to bleed.
Hope this helps some of you all! I've done this a few times with good success.
I should say, this only works if your o-ring and dust boot are still soft. Most are, these are 22 years old and they still were, but if they're not then you'll want to track down replacements. The o-ring may be available locally, especially from a hydraulic shop. It does not have to be Land Rover specific as long as it is a square o-ring of the same size. The dust boot you may have more trouble with, but thankfully in a pinch one can run without the dust boot if you need to drive your vehicle while you wait on a replacement caliper to arrive.
If this does not solve your issue with your brakes holding, I would look to replace the brake hose. Sometimes they break down internally and make your brakes hold as though you have a stuck caliper. Also, while you have your caliper removed it is a good idea to remove your caliper guide pins in order to clean and re-grease them. I do this every time I do brake pads.
Anyway, I hope this helps or is at the very least an interesting read! If anyone has any questions or recommendations feel free to post below. Thanks!
This is a simple process and not too time consuming, but will be a bit messy. You'll want to go ahead and have extra brake fluid on hand before beginning.
You're going to begin, of course, by jacking up your disco and removing the wheel on the offending corner. Unbolt the caliper and remove it like you're changing brake pads. Do not un-do the brake hose yet.
You can do the next part (removing the piston) using compressed air, but I much prefer the following method. Using compressed air makes the piston shoot out (watch your fingers!) and sprays brake fluid all over.
Just start pumping the brakes. It will take a few pumps for the fluid to push the piston all the way out of the bore. Check every pump or two to see if the piston is loose yet.
Once the piston is out of the bore, it will still be held in place by the dust boot. When you pull the piston out all the brake fluid in the caliper will spill. Be ready with a catch pan.
Once the piston is out, you can remove the dust boot. It has a lip that seats into the bore of the caliper.
Next remove the o-ring inside the bore. I use a pick for this, but be careful not to nick or puncture it.
Now you're ready to clean up the bore. Brake caliper hones like this are usually available at your local auto parts store, but I have also just used sandpaper before.
You don't have to go wild here. All you want is for the bore to be cleaned up and nothing to interfere with the movement of the piston.
Now clean the bore out very well. Spray it out with brake cleaner and the wipe it out with paper towels.
Next up is the piston. This grime also needs to be removed for clear movement of the piston. Again, I've used sandpaper in the past. You can also use brake clean and steel wool. I just used a wire wheel on my bench grinder. As long as you're leaving a nice smooth, clean surface for that square o-ring to mate to. Then wipe it clean with a paper towel.
Now clean up your o-ring and reinstall in its recess in the caliper. For this I did nothing but wipe it with a paper towel, using my finger nail on some rust stuck to the outside. This rust was *not* on the surface mating to the piston. If that surface is damaged, you will need a new o-ring.
Now do the same with the dust seal.
This is the hardest part of the entire procedure. To begin reinstalling the piston, I use a pick and just work it up over the outside. This process took me a couple tries before I successfully got it all the way around. A small poke through the dust boot isn't the end of the world, but try to minimize them and don't tear the boot.
Now use a brake caliper spreader or a c-clamp to reinstall the piston and press it to the bottom of the bore. If you use a caliper spreader you'll probably only get about half way and then have to drop one pad in to finish pressing the piston.
Now put your brakes back together just the same as you took them apart. At this point you'll want to bleed the brakes. Thankfully on a D2 this is pretty simple to do alone with a length of wire so you can remotely jump the ABS relay while you're at the corner you need to bleed.
Hope this helps some of you all! I've done this a few times with good success.
I should say, this only works if your o-ring and dust boot are still soft. Most are, these are 22 years old and they still were, but if they're not then you'll want to track down replacements. The o-ring may be available locally, especially from a hydraulic shop. It does not have to be Land Rover specific as long as it is a square o-ring of the same size. The dust boot you may have more trouble with, but thankfully in a pinch one can run without the dust boot if you need to drive your vehicle while you wait on a replacement caliper to arrive.
If this does not solve your issue with your brakes holding, I would look to replace the brake hose. Sometimes they break down internally and make your brakes hold as though you have a stuck caliper. Also, while you have your caliper removed it is a good idea to remove your caliper guide pins in order to clean and re-grease them. I do this every time I do brake pads.
Anyway, I hope this helps or is at the very least an interesting read! If anyone has any questions or recommendations feel free to post below. Thanks!
Last edited by Alex_M; Feb 18, 2022 at 05:59 AM.
Rock Crawling
Joined: Jan 2020
Posts: 374
Likes: 122
From: NEW FOREST, UK
HI I have done similar tin the past but can you tell me, did you use a brake pipe clamp as I do as I can not see one in your photos, this is how I do it, I get some on else (my Wife) to push out the piston using the brake peddle,pumping slow and steady holding the peddle down at the end of each stroke, if you cant hear each other use a Mob Phone for this section as you don't want any more strokes than you need and spill more fliud than is necessary as the piston comes out hold the peddle down, to prevent any air getting in the system,, now fit the brake hose clamp, when it tight remove the caliper to the bench and work on it there, do all the required cleaning and fitting of the new seals and dust cover, with the caliper still on the bench push the piston fully back in the caliper now refit the caliper to the car, attache a brake bleed hose with a one way valve, with the end in fresh brake fluid and attache it to the bleed nipple,get some one to push the brake peddle down and the peddle should be hard, at that time release the brake hose clamp, and allow the fluid to go in to the now refurbished caliper, continue to bleed the brake until no more air can be seen coming out of the bleed hose tighten the bleed nipple up and test the brakes are firm
but a nice post as you say there is no need to keep buying new all the time
but a nice post as you say there is no need to keep buying new all the time
Thread Starter
|
Camel Trophy
Joined: Aug 2014
Posts: 4,743
Likes: 985
From: Southwestern Virginia
Nope! I didn't do anything with the hose. I was actually schooled on that recently myself by.... The Deputy I think? Essentially, when you clamp off the brake hose you are damaging the lining inside it. It can then start to act like a check valve itself and make it so the brakes can be applied, but then they won't release after.
I didn't list this in the write up because it makes an awful mess, but I also re-filled the caliper with brake fluid before reinstalling the piston. I was in a hurry, had to go pick up the little one, and that prevented me from having to bleed the brakes. This of course allows a little bit of air in, but not much. The pedal was a little soft but not bad. still plenty of brakes, and I was replacing all the brake hoses anyway so I can bleed it all after that is complete.
Also, on the D2 you can prevent the need of another person to help you bleed, or prevent the need of a bleeder hose, by jumping the ABS relay which will activate the ABS pump pushing brake fluid through the system without allowing any air back in. Because of that, D2s are one of the easiest vehicles that I regularly work on to bleed the brakes on.
Thanks!


Thread
Thread Starter
Forum
Replies
Last Post