
Power Seat Switch Repair


Thread Starter
|
TReK
Joined: Aug 2008
Posts: 2,740
Likes: 11
From: Soldotna, AK
About a week after I bought my Rover one of the directions of movement quit working. I dealt with it for a long time but finally decided to get a used seat switch off ebay for half the price of the new one. Well, you get what you pay for is true. The used switch I bought had more problems than the one I was replacing. Now having 2 bad switches I decided i had nothing to lose by opening one up and seeing if I could fix it. It turned out to be a pretty simple fix but there are a few things to look out for. I took pictures so that anyone who decides to try this can see what I mean.
Inside the switch, there are ball bearing and springs that are used to make the contacts. Of course I did not know that going in so when I split the case open springs and ball bearings went flying everywhere. Just be aware of that. Unfortunately I did not get a picture of the inside before I disassembled it because of parts going flying.
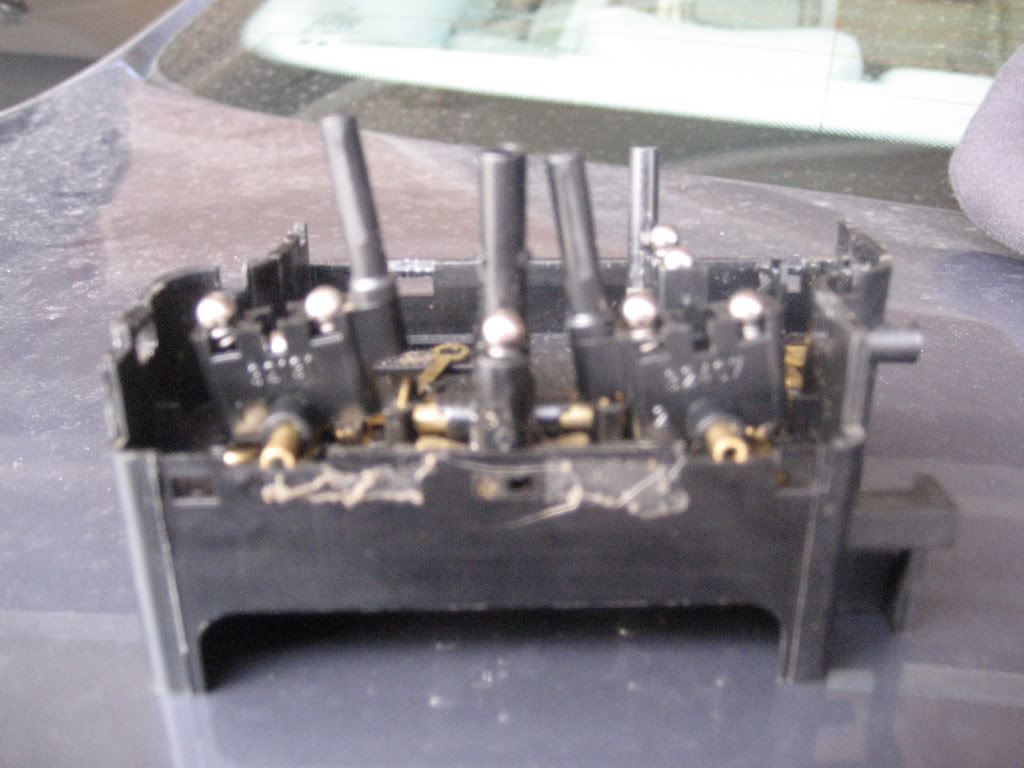
Switch disassembled and ball bearings, springs and contacts removed. I used q-tips to remove the carbon on the contacts to make sure they made good contact before reassembling. The switch and contacts for forward and aft movement did not come out when I dumped the switch over so I worked around them.
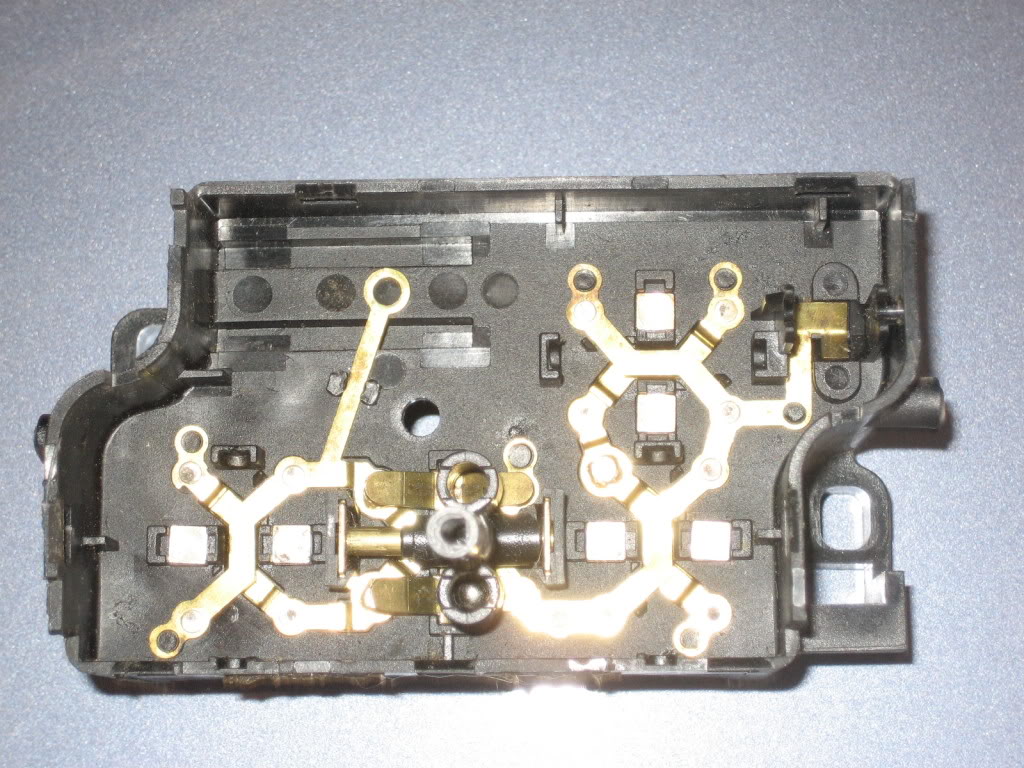
In the low spot of each of the V shaped contacts I placed one of the ball bearings.
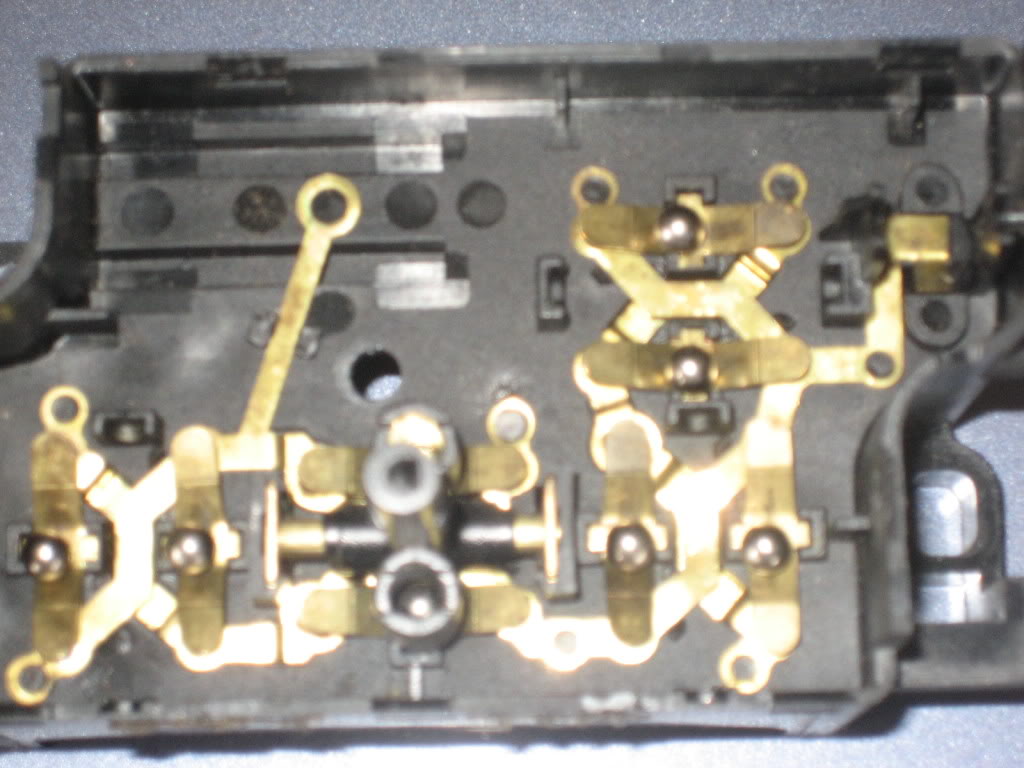
Then I placed the switch down over the ball bearings in their correct locations. The switches can be put in then the ball bearings dropped down through if you choose.
Next step was to place the springs in each side of the switch on top of the ball bearings.
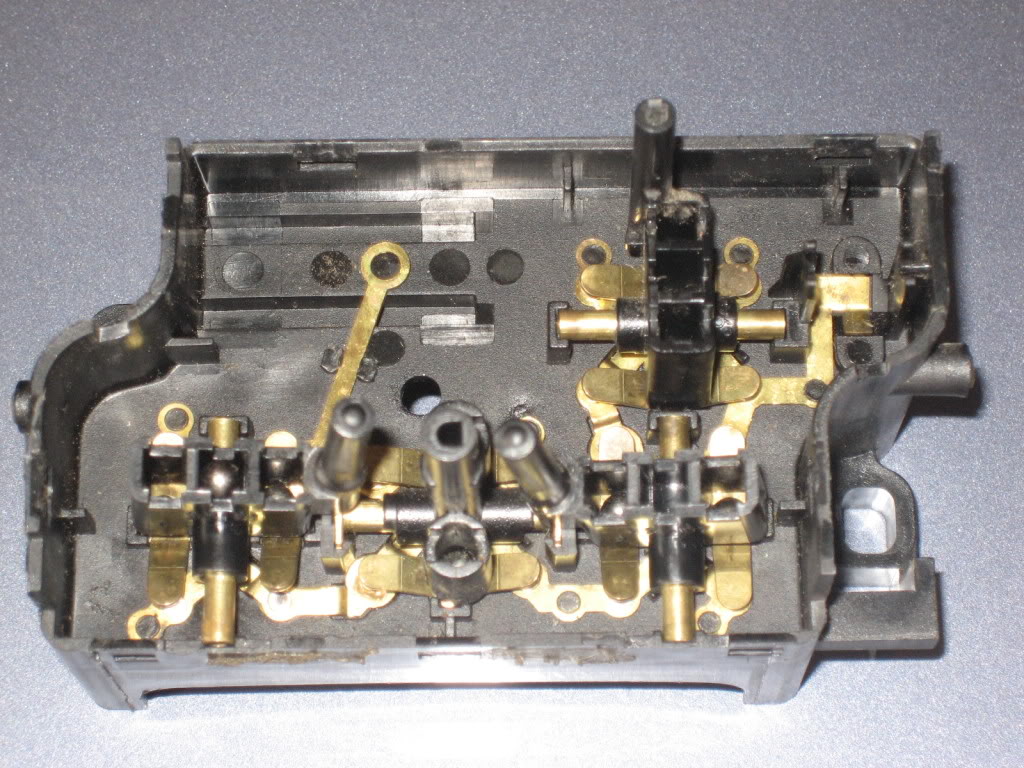
The last step before putting the top back on is to rest the remaining ball bearing on top of each spring. It's tougher than it sounds if you don't have steady hands. I kept bumping the table or the switch housing and the ball bearing I already had in place would fall off and I have to start over.
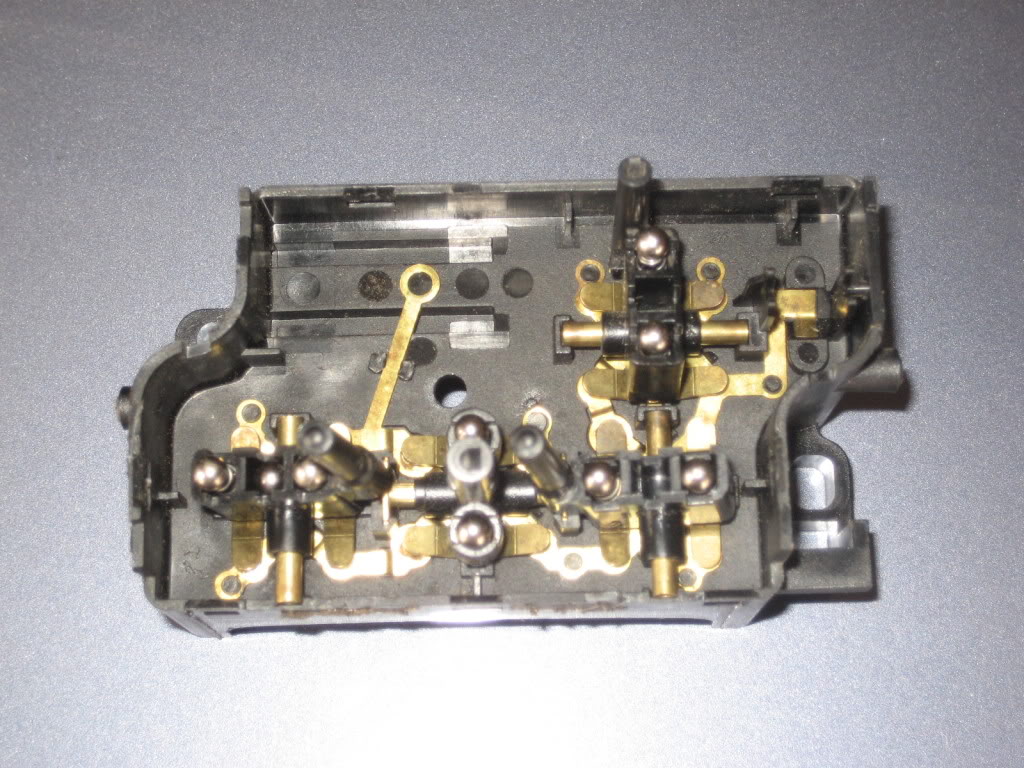
Putting the case top back on without knocking any of the ball bearings off their spring can be a challenge but with patience can be accomplished. It took me a few tries taking the switch apart before I got it right and got all the directions of movement working. I found that I wasn't getting the contacts clean enough so they weren't working.
So, that's all there is to it. May not fix every problem with the seat switch but definitely worth trying before laying out money for a new switch.
Inside the switch, there are ball bearing and springs that are used to make the contacts. Of course I did not know that going in so when I split the case open springs and ball bearings went flying everywhere. Just be aware of that. Unfortunately I did not get a picture of the inside before I disassembled it because of parts going flying.
Switch disassembled and ball bearings, springs and contacts removed. I used q-tips to remove the carbon on the contacts to make sure they made good contact before reassembling. The switch and contacts for forward and aft movement did not come out when I dumped the switch over so I worked around them.
In the low spot of each of the V shaped contacts I placed one of the ball bearings.
Then I placed the switch down over the ball bearings in their correct locations. The switches can be put in then the ball bearings dropped down through if you choose.
Next step was to place the springs in each side of the switch on top of the ball bearings.
The last step before putting the top back on is to rest the remaining ball bearing on top of each spring. It's tougher than it sounds if you don't have steady hands. I kept bumping the table or the switch housing and the ball bearing I already had in place would fall off and I have to start over.
Putting the case top back on without knocking any of the ball bearings off their spring can be a challenge but with patience can be accomplished. It took me a few tries taking the switch apart before I got it right and got all the directions of movement working. I found that I wasn't getting the contacts clean enough so they weren't working.
So, that's all there is to it. May not fix every problem with the seat switch but definitely worth trying before laying out money for a new switch.


1st Gear
Joined: Jun 2010
Posts: 1
Likes: 0
Got registered just to say thanks. Bought my first Rover (1998 Discovery with 174,000) a month ago and the seat bottom was stuck with the back tilted foward. It's been driving me crazy. Your post with all the pics was great! I think I'm gonna like this thing as long as I can find helpful posts like yours when something craps out.

Mudding
Joined: Apr 2010
Posts: 140
Likes: 2
From: With the boss
AK: the "*****" are kept in place with grease.
There's the problem: the contact heats up the grease and it cakes hard decreasing the area of contact, which increases the contact heat. It's the same with the headlights switch at the steering column.
When you repack the switch, use vaseline to hold the ***** in place, vaseline is not an electrical conductor and does not cake hard.
Note on headlight switch: the springs that push on the contact sliders are not pushing enough so the contact is weak and heats up.
When rebuilding this switch, also stretch the springs by 2 mm.
SD


4wd Low
Joined: Nov 2015
Posts: 12
Likes: 0
Following this guide now, just picked up a new to me 98 Disco and only about 1/2 the seat adjustments work. Though I will say, I had the switch upside down when I split it, so even though I was expecting the springs/ball bearings to come loose, I still spilled them everywhere >.<
Also, a pencil eraser does wonder, as well as a small piece of fine grit sand paper to clean the contacts.
Also, a pencil eraser does wonder, as well as a small piece of fine grit sand paper to clean the contacts.
Last edited by BlueB3; Nov 30, 2015 at 09:56 AM.
Drifting
Joined: Oct 2015
Posts: 26
Likes: 1
From: Windsor, Virginia USA
Following this guide now, just picked up a new to me 98 Disco and only about 1/2 the seat adjustments work. Though I will say, I had the switch upside down when I split it, so even though I was expecting the springs/ball bearings to come loose, I still spilled them everywhere >.<
Also, a pencil eraser does wonder, as well as a small piece of fine grit sand paper to clean the contacts.
Also, a pencil eraser does wonder, as well as a small piece of fine grit sand paper to clean the contacts.
Great write up. Its good to know things will fly out when you open the switch! Might be a good idea to open it in a plastic bag so everything gets caught.


1st Gear
Joined: Jul 2019
Posts: 1
Likes: 0
Just repaired my seat adjustment switch using various tips from this page. Took it apart inside a plastic bag,cleaned all contacts with a Dremel (although a small screwdriver would have done the job), assembled everything on a stretched out white towel. Only tip I would add is to keep the pressure on the lid of the switch as you guide it down onto the tabs. Did this in one go and it all works perfectly - in fact better than before.
Thank you to all the contributors to this thread - you saved me �129 + VAT. !!
Woo - hoo!
Thank you to all the contributors to this thread - you saved me �129 + VAT. !!
Woo - hoo!

1st Gear
Joined: Aug 2019
Posts: 1
Likes: 0
Just did this on my 93 Range Rover. Getting all the bearings lined up and balanced then pressing the top on feels like a carnival game. Very frustrating. I was able to get the top attached without dropping any bearings by making sure the switches were just barely poking through the top cover then very quickly pressing the cover down and snapping it shut. This prevented any bearings from rolling off their springs.

Thread
Thread Starter
Forum
Replies
Last Post