
Sagging headliner


Baja
Joined: Aug 2013
Posts: 5,845
Likes: 368
From: Near Bordeaux, France


Three Wheeling
Joined: Jan 2015
Posts: 84
Likes: 2
I give up on installing this fabric. Ripped everything off. Sometimes it's best to just pay the pro's. Ordering 3 more yards and will take it someplace.
On a positive note during the time I thought the glue was tacking I replaced my passenger window motor so that's good haha
On a positive note during the time I thought the glue was tacking I replaced my passenger window motor so that's good haha
Baja
Joined: Aug 2013
Posts: 5,845
Likes: 368
From: Near Bordeaux, France
I give up on installing this fabric. Ripped everything off. Sometimes it's best to just pay the pro's. Ordering 3 more yards and will take it someplace.
On a positive note during the time I thought the glue was tacking I replaced my passenger window motor so that's good haha
On a positive note during the time I thought the glue was tacking I replaced my passenger window motor so that's good haha
Three Wheeling
Joined: Jan 2015
Posts: 84
Likes: 2
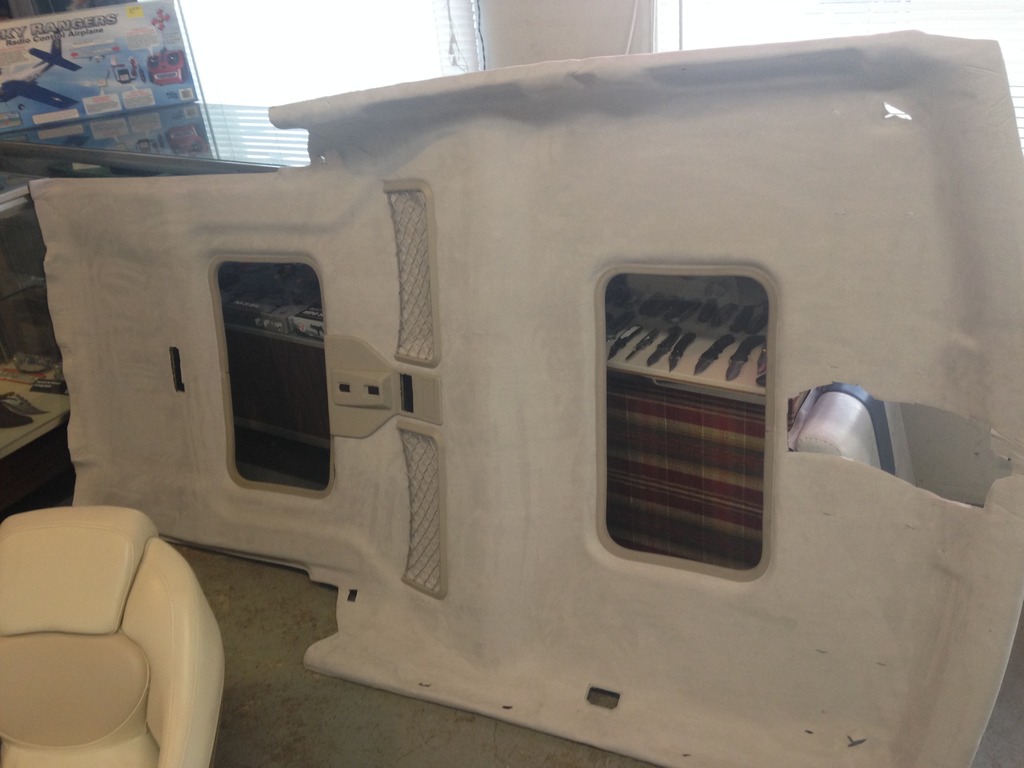
Taking the headliner out was easy. Putting it back in will be just as easy. It's gluing this foam backed material proving to be difficult. If I had used a regular piece of cloth or painted it I would be done by now.
I have inspected my drain tubes and no problems with them. I also installed 04 roof rails since I had the liner out.
I have inspected my drain tubes and no problems with them. I also installed 04 roof rails since I had the liner out.

Pro Wrench
Joined: Oct 2013
Posts: 1,512
Likes: 172
From: Central Minnesota
"Ya gots to know your limitations" I have done a few headliners and I was never satisfied with the end results. I don't fit in some of those tight spots. I think I will leave the new liner installation to the pros on this truck. Looks too nice otherwise.
My other projects I didn't really care too much about them and I sprayed some glue up in there only to have it let go a few weeks later. So out came the Straight pins (not a good choice either) I like the idea of the upholstery pins.
I believe I have an aftermarket sunroof that doesn't open. I think to fix it, I need to have the glass open. Not too sure how that is going to work yet...
Three Wheeling
Joined: Jan 2015
Posts: 84
Likes: 2
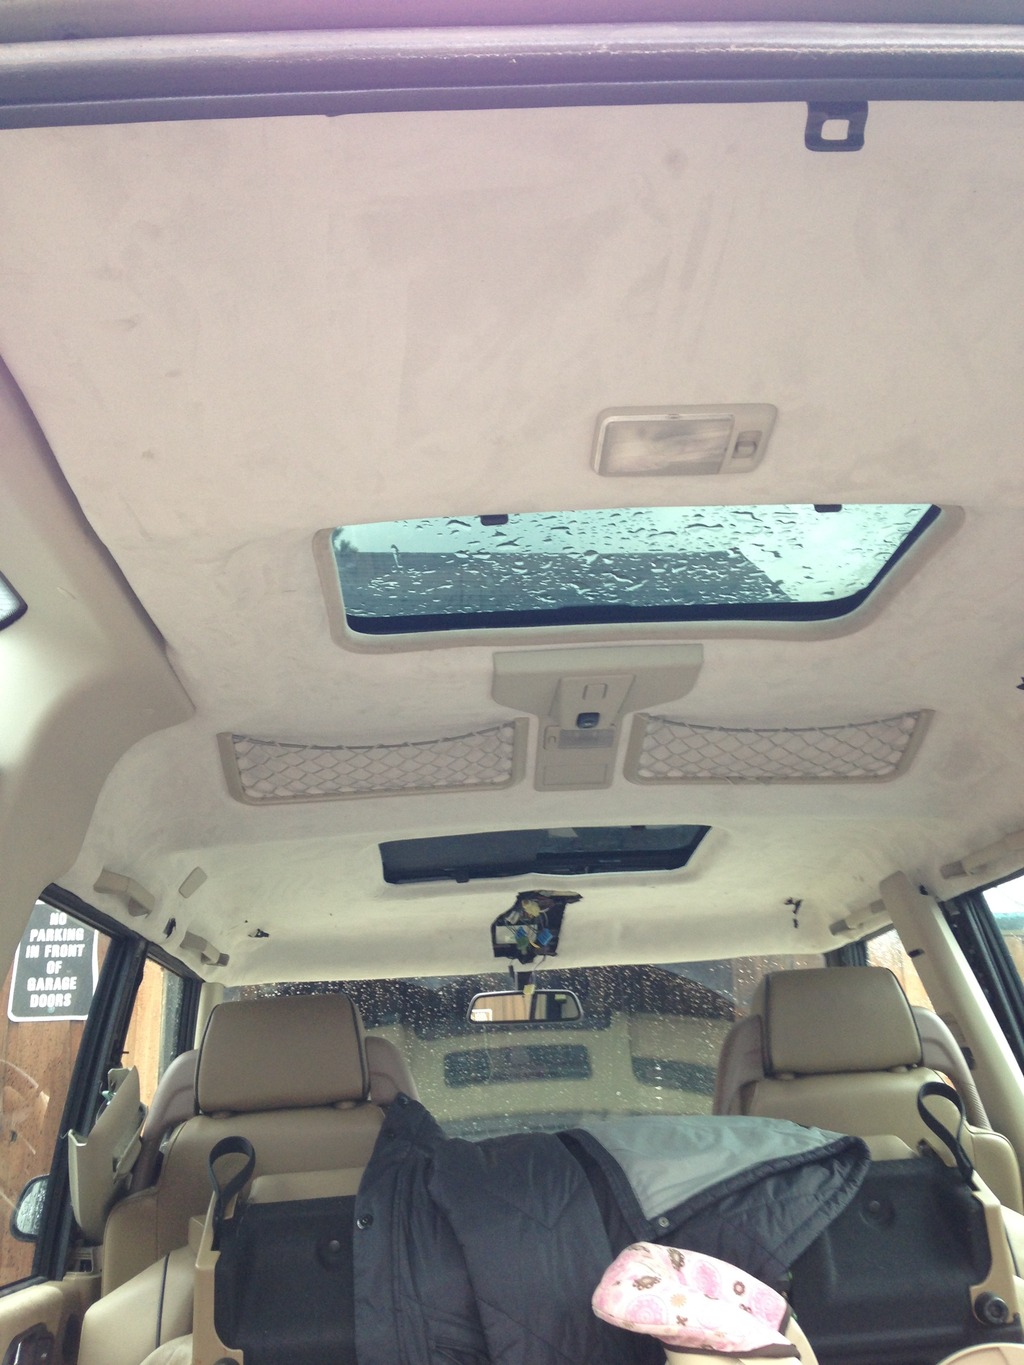
Finally got my headliner installed. Paid to have the fabric glued and then I installed back in. Here's two shots. I have to say, I LOVE having suede as my headliner. It really makes the roof seem complete and its so classy


Rock Crawling
Joined: Oct 2014
Posts: 347
Likes: 6
From: Colorado Springs
Looks great! Quick question, how complicated was it to remove the headliner? I am going to have to do this sometime soon... do I need any special tools?
Hope mine turns out as nice as yours
Hope mine turns out as nice as yours

Baja
Joined: Feb 2011
Posts: 9,298
Likes: 318
From: Boston Strong
Very nice

Camel Trophy
Joined: Dec 2009
Posts: 3,890
Likes: 955
From: Charlotte
Guys, guys, guys. For the gazillionth time, just strip off the old fabric and foam and adhesive and paint the headliner. Denatured alcohol strips it clean and the fiberglass shell has a wonderful pebbled finish for the paint. Prime it with kills and then use two coats of a good exterior latex.I painted mine several years ago and it still looks perfect. And it will never, ever sag again.
Last edited by mln01; Apr 5, 2015 at 05:49 AM.