
Simple Crank holder tool


Thread Starter
|
Drifting
Joined: Mar 2013
Posts: 31
Likes: 5
For anyone that needs to remove the harmonic dampener from their D2 you may have noticed that the bolt that holds it on there is really tight.
If you have a nice air supply and a fancy impact then this is not a issue.
However.
If you do not then you are left to either rig a tool to lock the flywheel, get someone to crawl under your ride and hold a prybar while you bust the bolt loose or build a tool that is similar to the land rover tool used to keep the crank from spinning.
Since I did not have a helper and I did not feel like crawling under my ride to rig up a flywheel holder I decided on a simple and effective crank holding tool that bolts to the pulley and lock up against the frame to keep the crank from turning while I bust the bolt loose.
For anyone that cares, here is what I did.
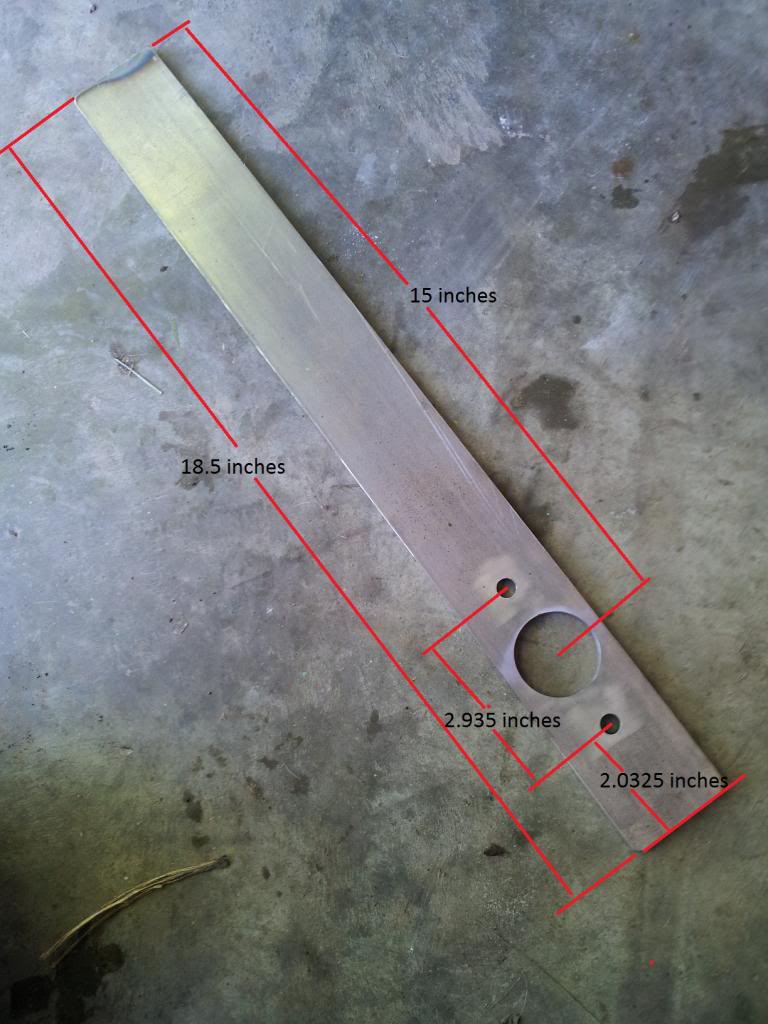
I started with a 1/4" thick 2" wide flat bar of general purpose steel.
I simply drilled (2) 9mm holes that match the pattern on the crank pulley.
I then used a 38mm hole saw and made a big hole in the center of those two holes for my socket to pass through.
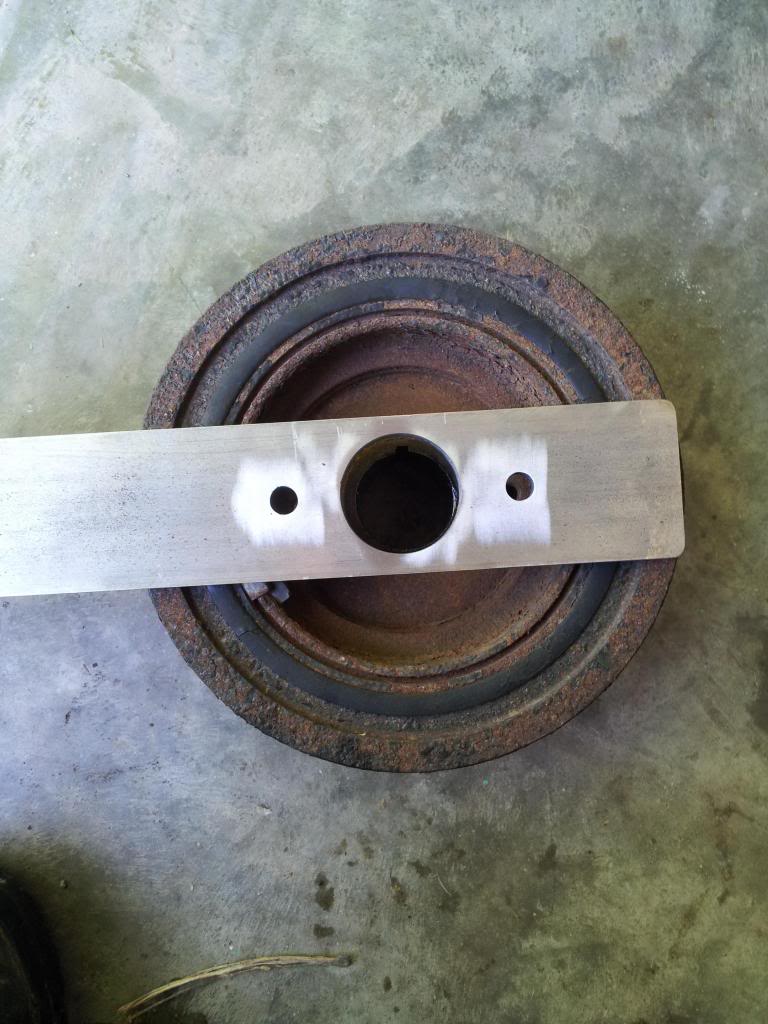
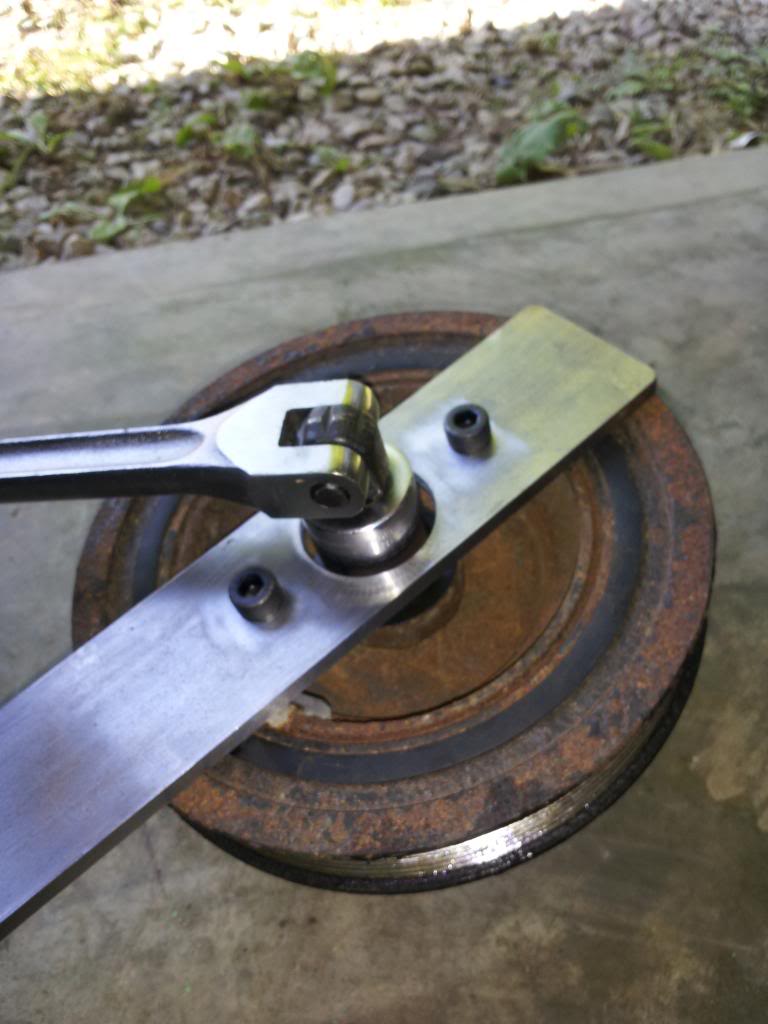
You can then use your breaker bar and socket to rotate the crank so the bolts in the crank pulley are in the position to allow you to bolt you bar on so it will be against the left frame rail.
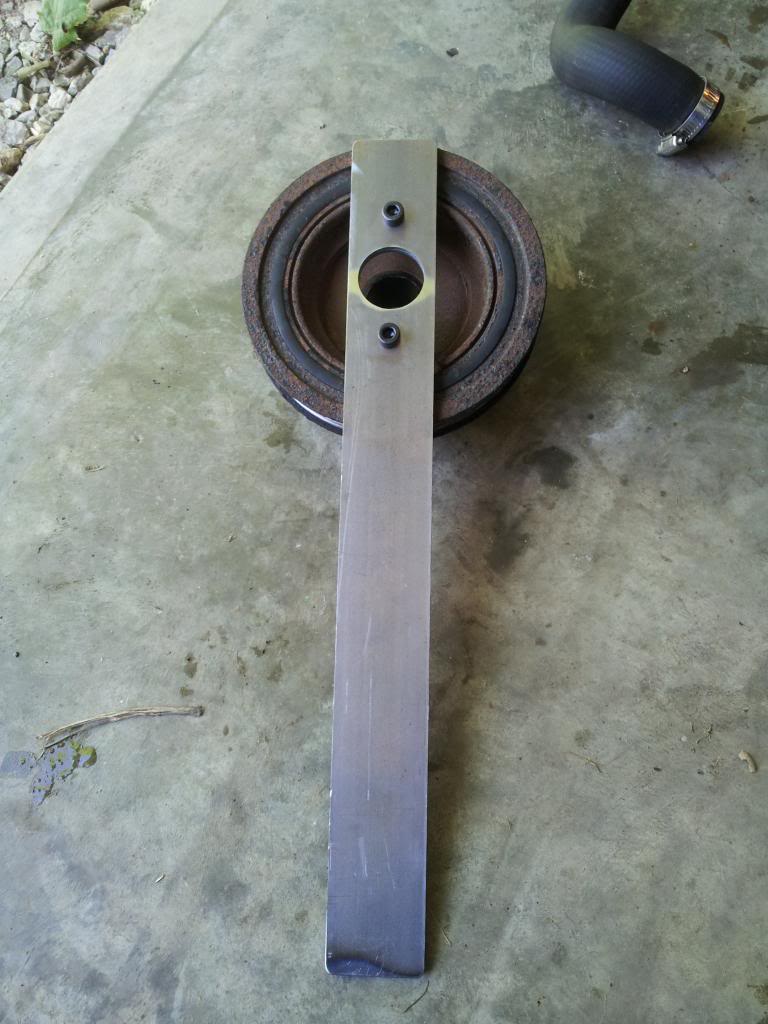
You bolt the bar to the pulley using two M8 bolts about 45mm long.
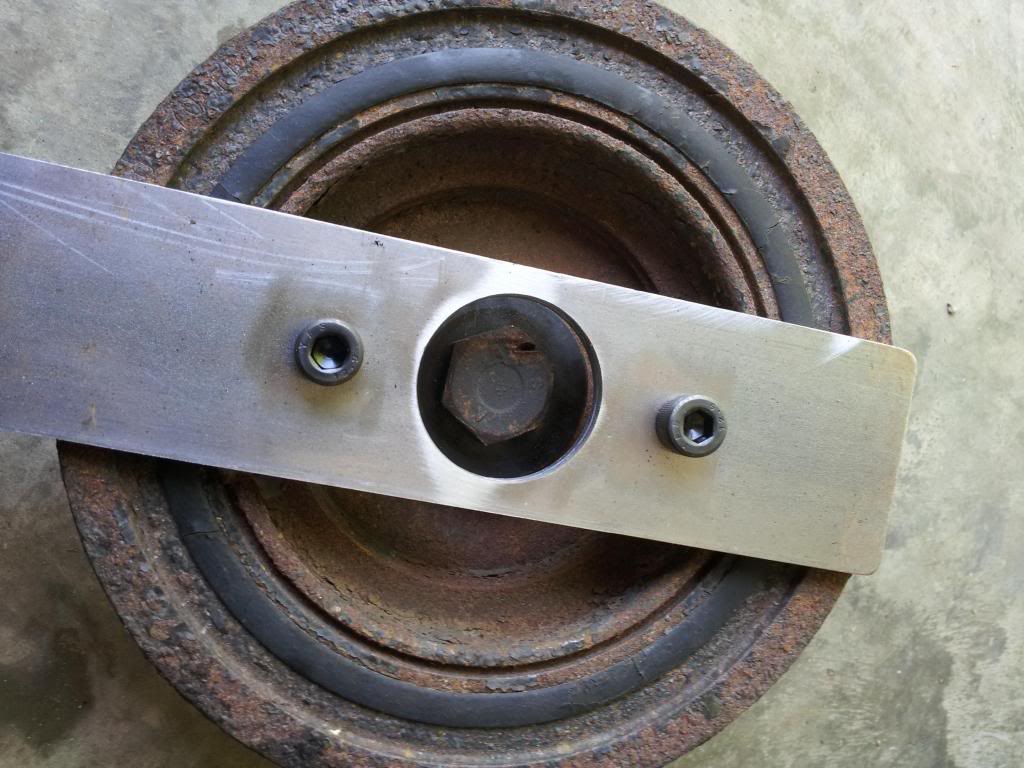
Then you put your socket through the big hole and slide an extra bit of pipe over your breaker bar for leverage and it give it a tug. (the breaker bar that is)
Now your bolt is loose and you use a puller to remove the pulley.
This tool will also work when it comes time to re-install the pulley.
The steel cost me $16 from McMaster-Carr but there are very likely cheaper places you can get it.
The hole sizes and locations do not have to be real exact so you could probably do it in the garage with a plain old hand drill and some random bits and a hole saw.
Make the holes big enough to give you a little wiggle room with the bolts and the socket so you can bolt it on and still get your socket on there.
Good luck in your repairs.
If you have a nice air supply and a fancy impact then this is not a issue.
However.
If you do not then you are left to either rig a tool to lock the flywheel, get someone to crawl under your ride and hold a prybar while you bust the bolt loose or build a tool that is similar to the land rover tool used to keep the crank from spinning.
Since I did not have a helper and I did not feel like crawling under my ride to rig up a flywheel holder I decided on a simple and effective crank holding tool that bolts to the pulley and lock up against the frame to keep the crank from turning while I bust the bolt loose.
For anyone that cares, here is what I did.

I started with a 1/4" thick 2" wide flat bar of general purpose steel.
I simply drilled (2) 9mm holes that match the pattern on the crank pulley.
I then used a 38mm hole saw and made a big hole in the center of those two holes for my socket to pass through.
You can then use your breaker bar and socket to rotate the crank so the bolts in the crank pulley are in the position to allow you to bolt you bar on so it will be against the left frame rail.
You bolt the bar to the pulley using two M8 bolts about 45mm long.
Then you put your socket through the big hole and slide an extra bit of pipe over your breaker bar for leverage and it give it a tug. (the breaker bar that is)


Now your bolt is loose and you use a puller to remove the pulley.
This tool will also work when it comes time to re-install the pulley.
The steel cost me $16 from McMaster-Carr but there are very likely cheaper places you can get it.
The hole sizes and locations do not have to be real exact so you could probably do it in the garage with a plain old hand drill and some random bits and a hole saw.
Make the holes big enough to give you a little wiggle room with the bolts and the socket so you can bolt it on and still get your socket on there.
Good luck in your repairs.

Thread Starter
|
Drifting
Joined: Mar 2013
Posts: 31
Likes: 5
You might if you were trying to blast through it with a hand drill but I used the mill at work and set the speeds appropriately.
And it is just low carbon general purpose mild steel that I chose specifically for its ease of machining.
I don't have any doubts that it could be done at home but you could trash a bit if you do not go slowly.
Especially the hole saw.
And it is just low carbon general purpose mild steel that I chose specifically for its ease of machining.
I don't have any doubts that it could be done at home but you could trash a bit if you do not go slowly.
Especially the hole saw.
Last edited by vwhammer; Jun 5, 2013 at 08:26 AM.

Drifting
Joined: Apr 2013
Posts: 25
Likes: 0
From: Tallahassee
Thanks for the plans. It looks really simple to build and use.
Did you have any problems with it slipping with just the two M8 cap screws? Any worries breaking them off while breaking loose the crank bolt (350 ft-lbs!).
By the way, what kind of torque wrench do you have to tighten the crank bolt back up when done?
Did you have any problems with it slipping with just the two M8 cap screws? Any worries breaking them off while breaking loose the crank bolt (350 ft-lbs!).
By the way, what kind of torque wrench do you have to tighten the crank bolt back up when done?
Thread Starter
|
Drifting
Joined: Mar 2013
Posts: 31
Likes: 5
I bolted it down so it is tight against the pulley.
I had no issues with breaking it loose with a 2 foot breaker bar and a 2 foot pipe slid over the bar a bit.
After looking at the RAVE manual it only says 200ftlbs for that bolt.
I do have a way to tighten bolts with big torque numbers but I will have to show pics when I get that far.
It does involve another home made tool and a little math.
Drifting
Joined: Apr 2013
Posts: 25
Likes: 0
From: Tallahassee
Thanks for the correction and the note on your tools performance. I'm squirreling away the picture with the dimensions for future reference. The forum says I'll need it on some occasion, without a doubt.


Thread
Thread Starter
Forum
Replies
Last Post