
The Ultimate Cooling System; Complete System Upgrade


Thread Starter
|
Camel Trophy
Joined: Aug 2014
Posts: 4,743
Likes: 985
From: Southwestern Virginia
EDIT: [Some of this information is out of date, and I have since learned it may not be possible to retain your AC with this. If you do you may have to retain your mechanical fan. I am not sure. I have done two more since, in too much of a rush on both to do much figuring on the AC, so I have just removed it.
If I ever get the opportunity I may try it again. If someone else wishes to try it in the mean time I'd love a message and pictures. It's possible it may work if you keep the mechanical fan. Just an idea.
Thanks all. ]
Hey all! After Years of frustration and frustration towards the inadequacies of the factory cooling system, such as the weakness of the expansion tanks and the y couplings in the lower hose, I decided to do something about it.
Let me note this is not a full write up, but there's plenty of information here for anyone to get it done. I did this setup with a 180 degree thermostat and she runs 177-185 degrees, depending on weather and whether or not I'm towing a trailer.
Building off of the in-line thermostat mod, the following setup is what I've come up with. First though, here's the parts list.
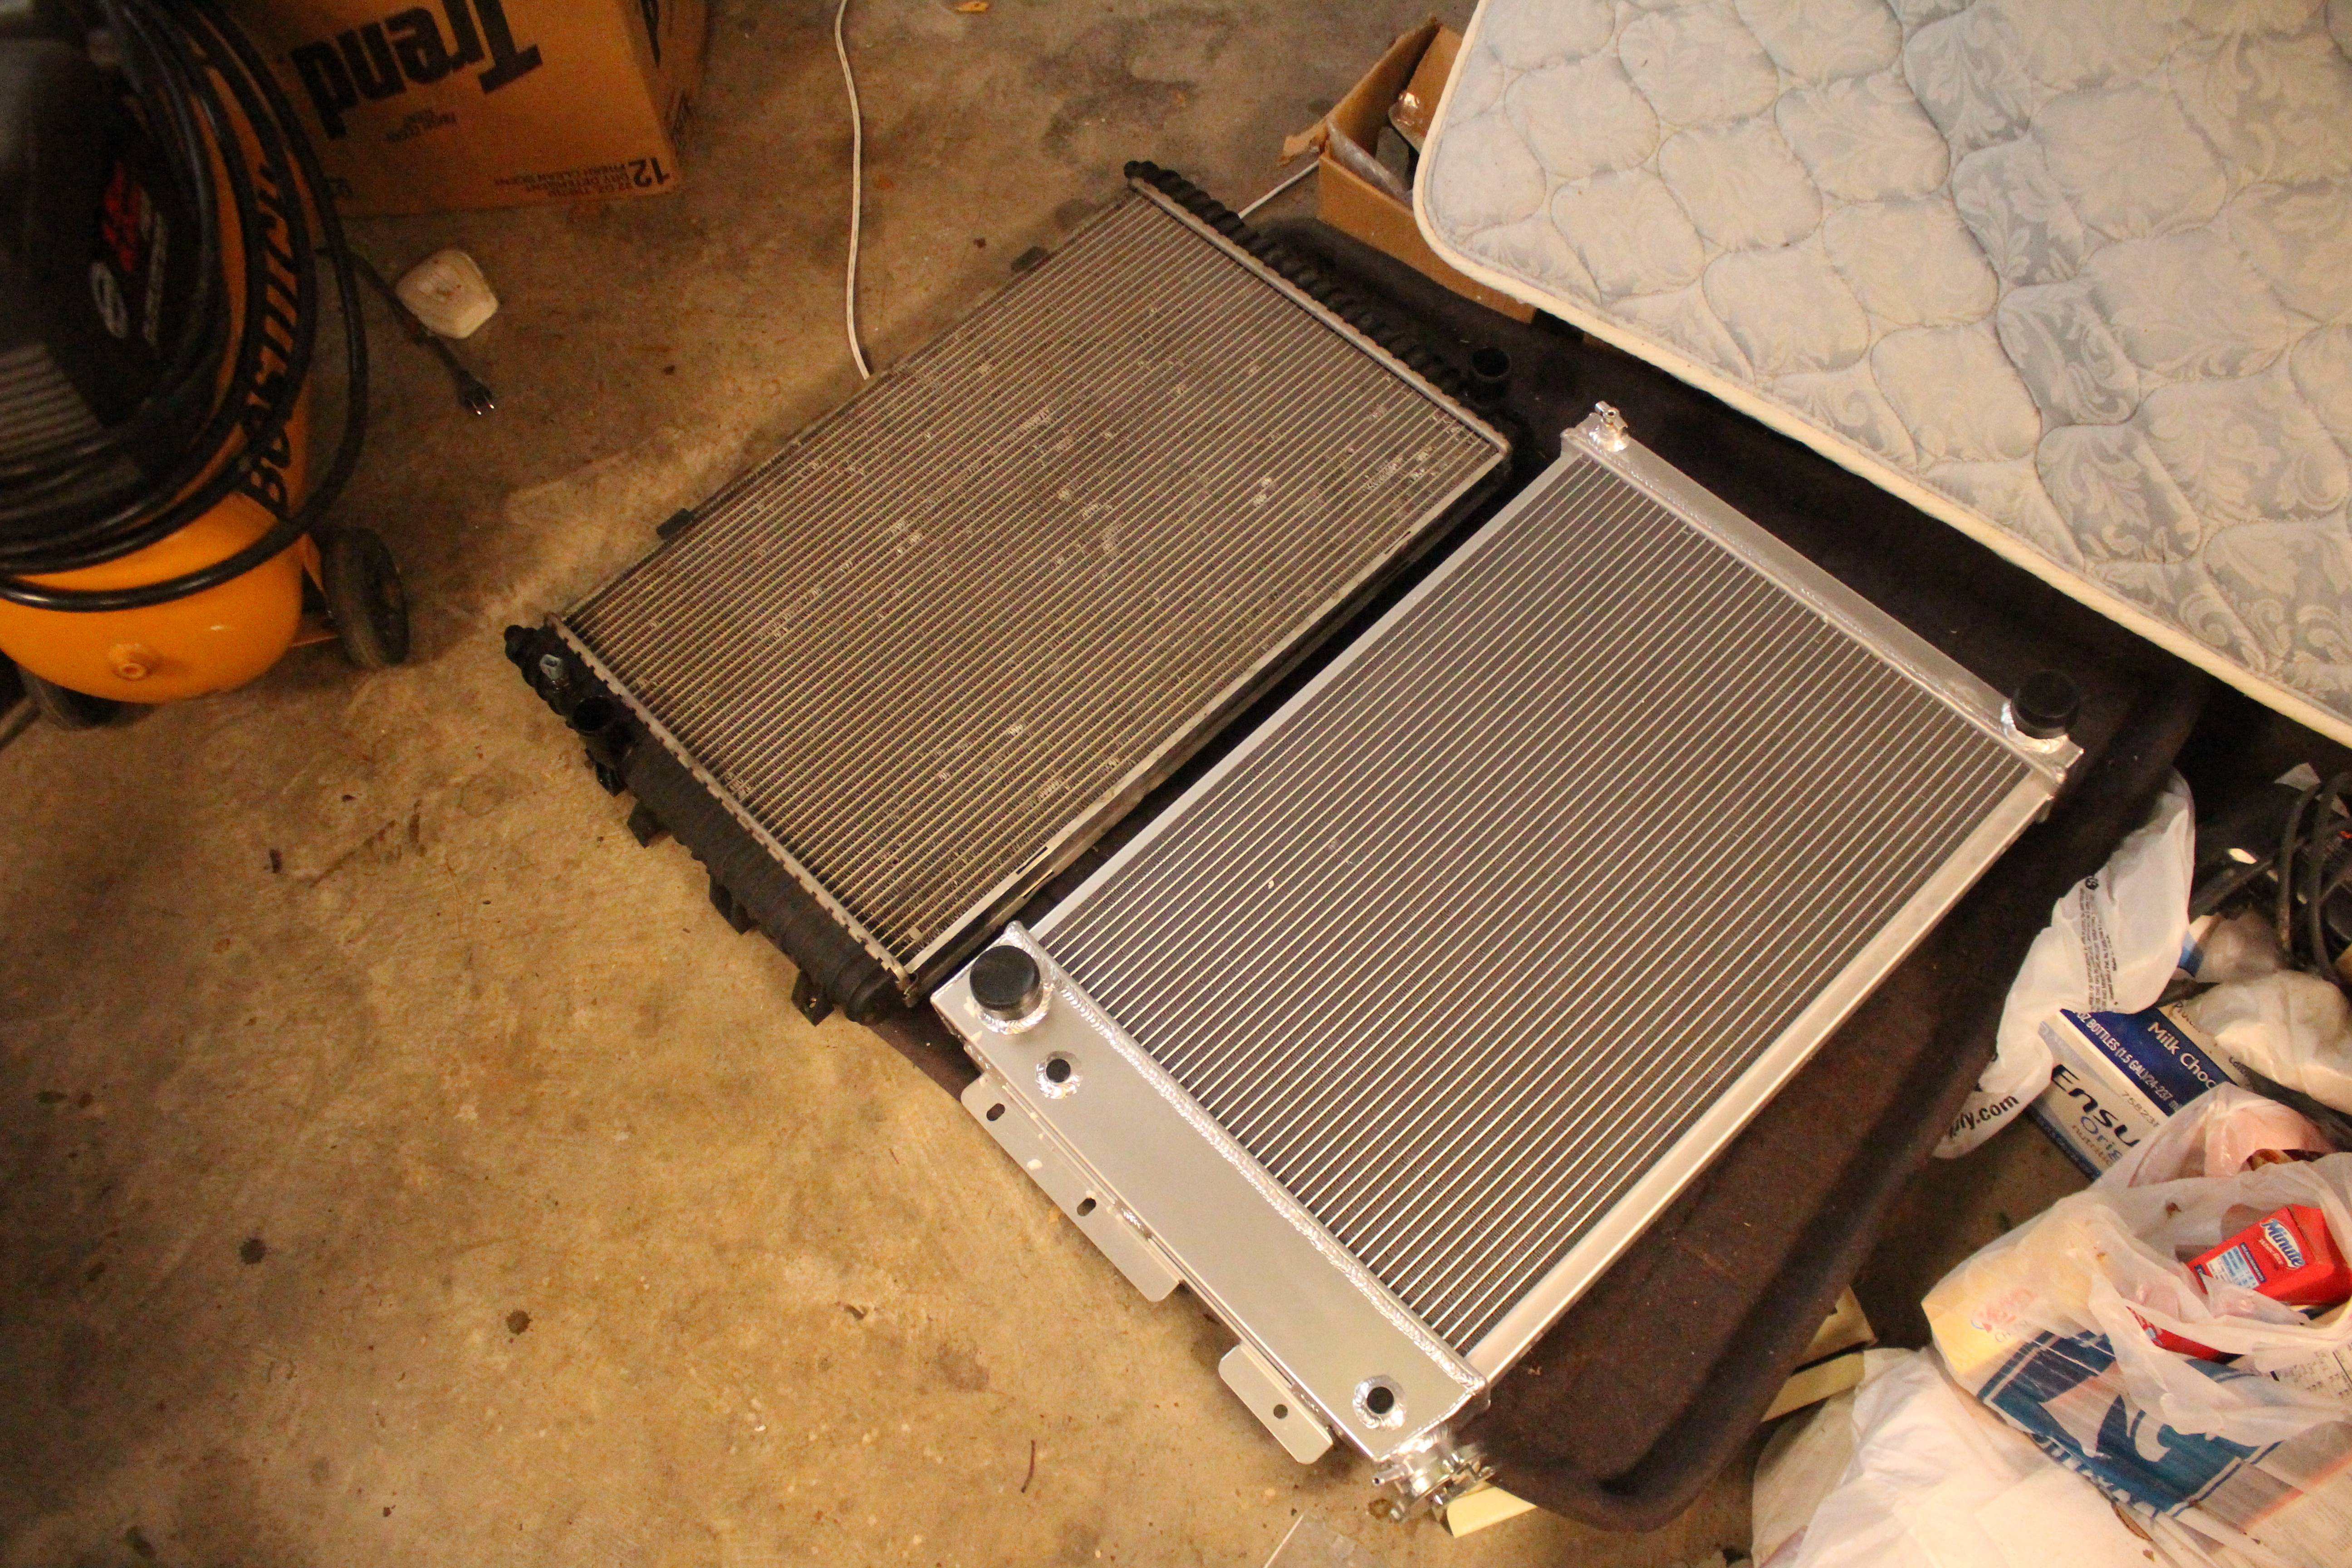
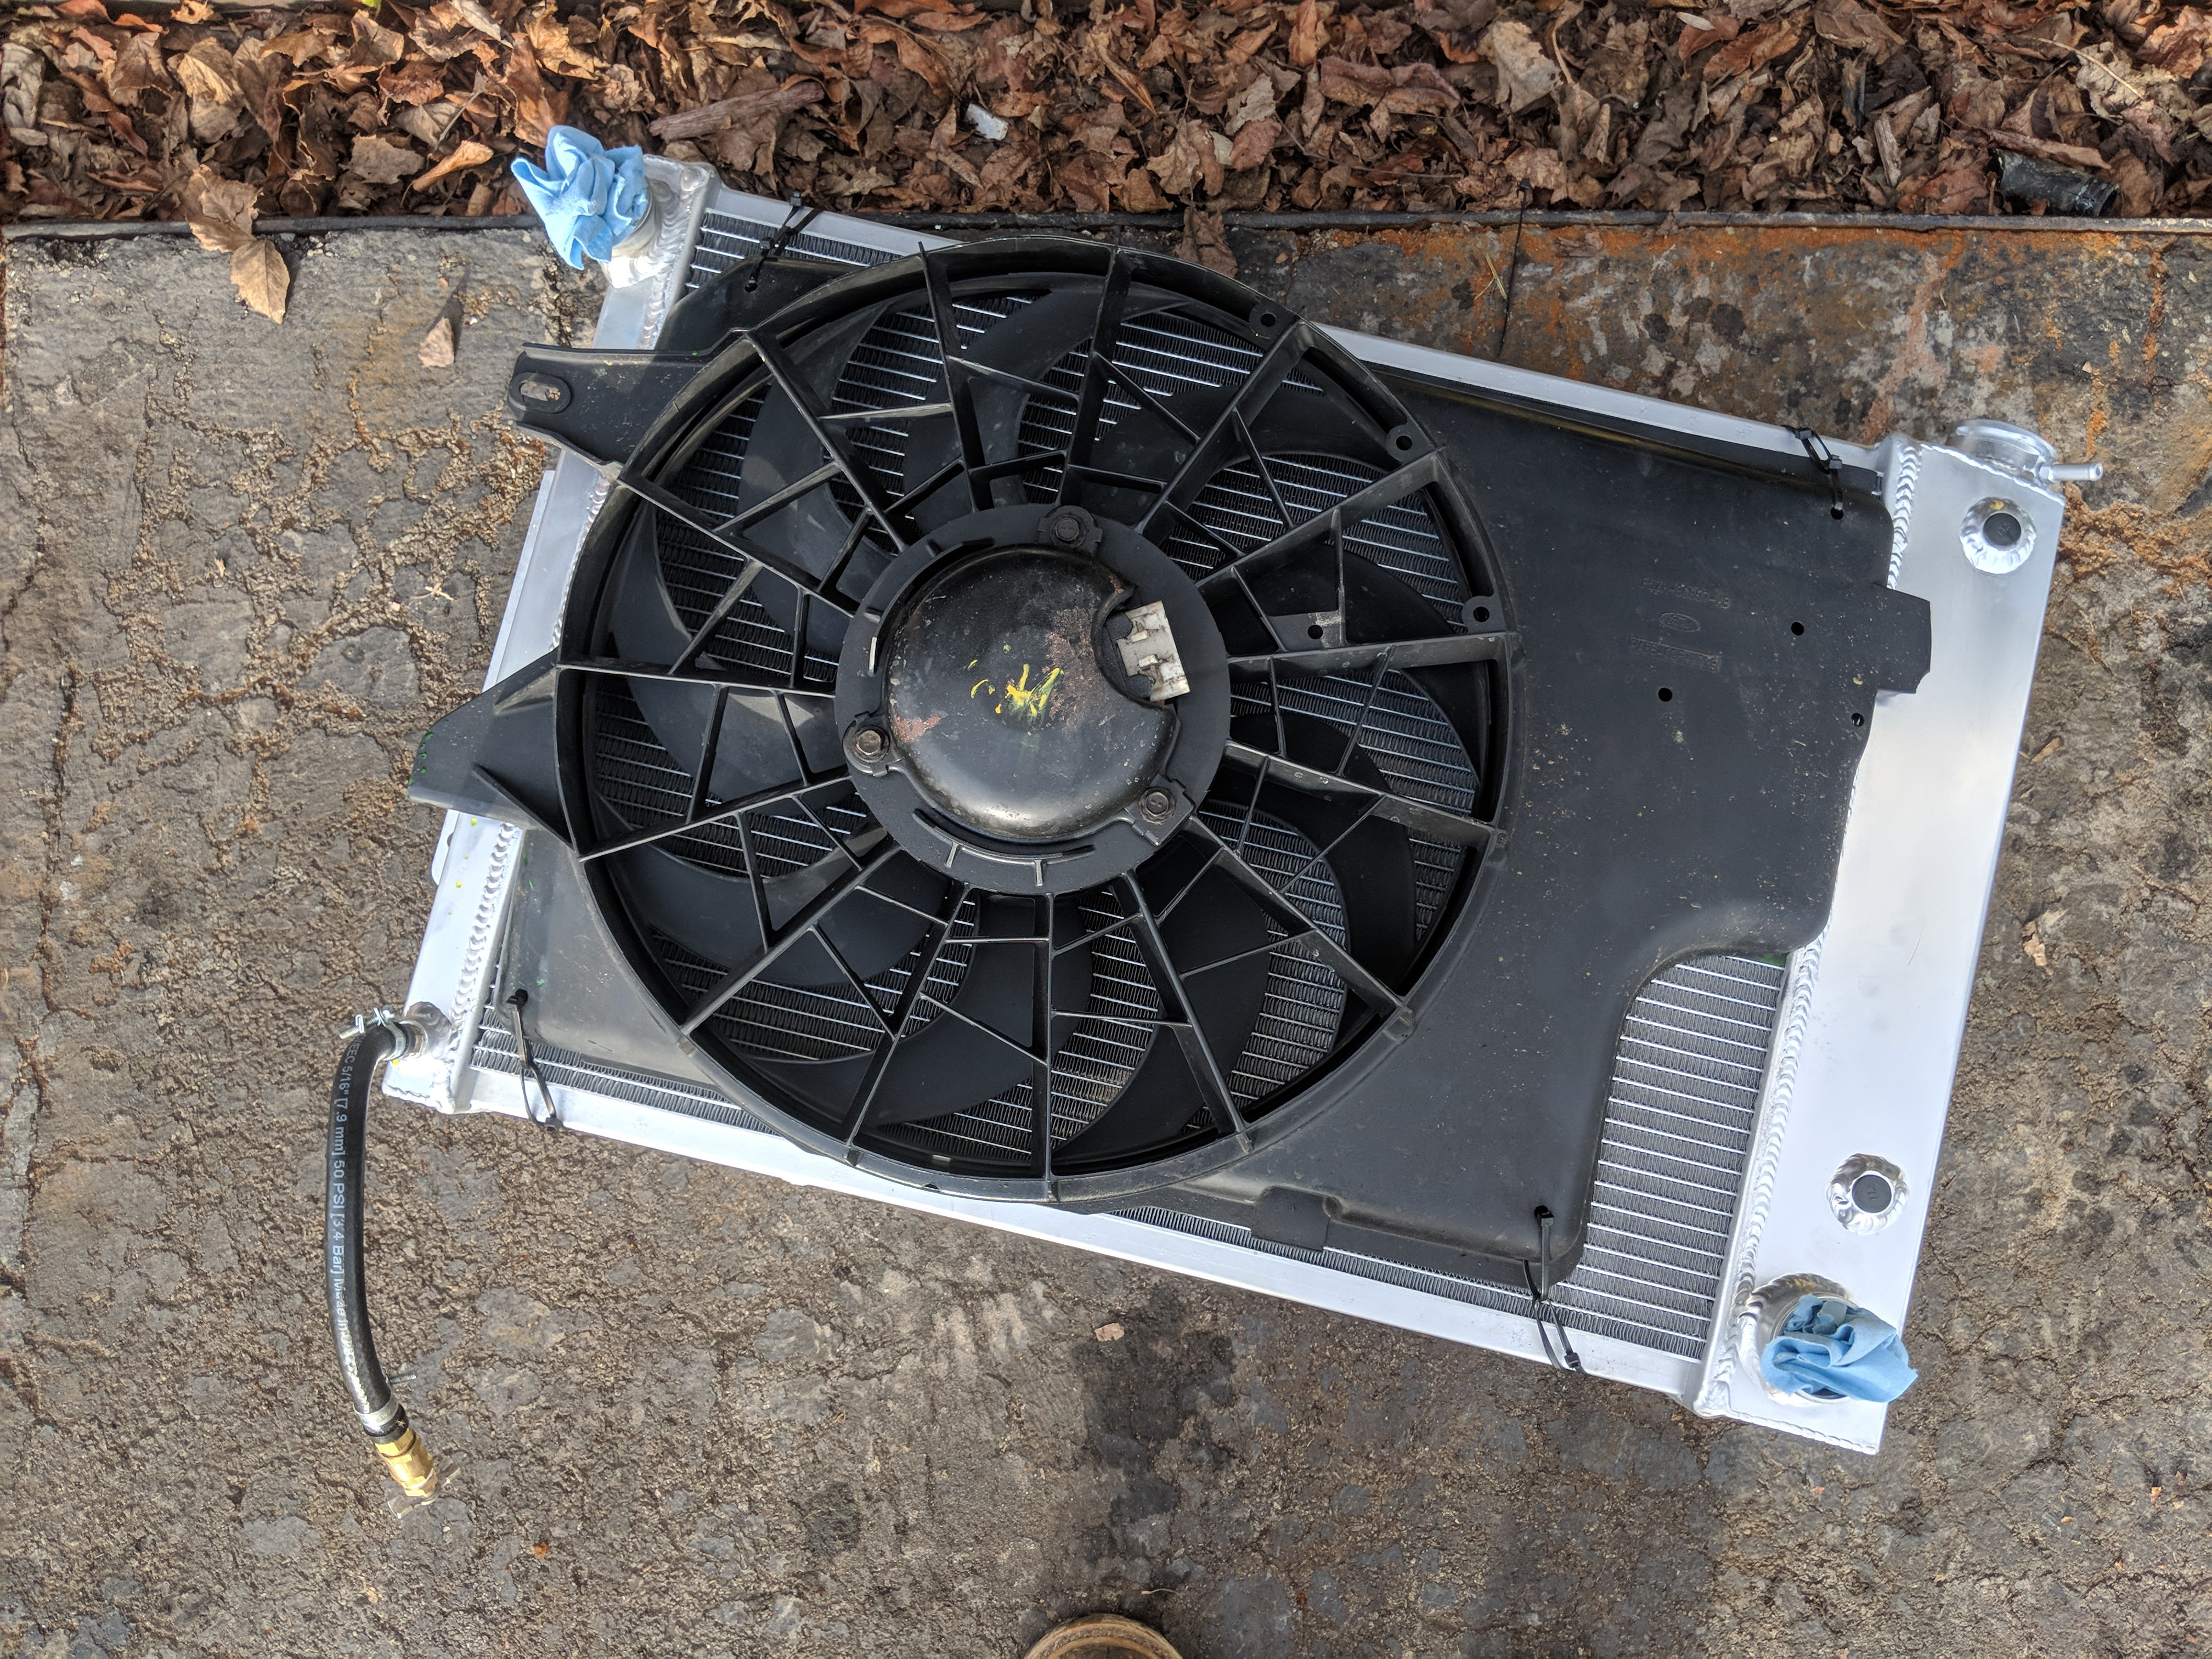
This is the radiator I used laying next to the old, repeatedly patched, factory radiator. Poor rad had 150k miles on it. No clogs and still cooled alright, but the plastic ends had been patched three or four times with epoxy and was finally just too far gone.
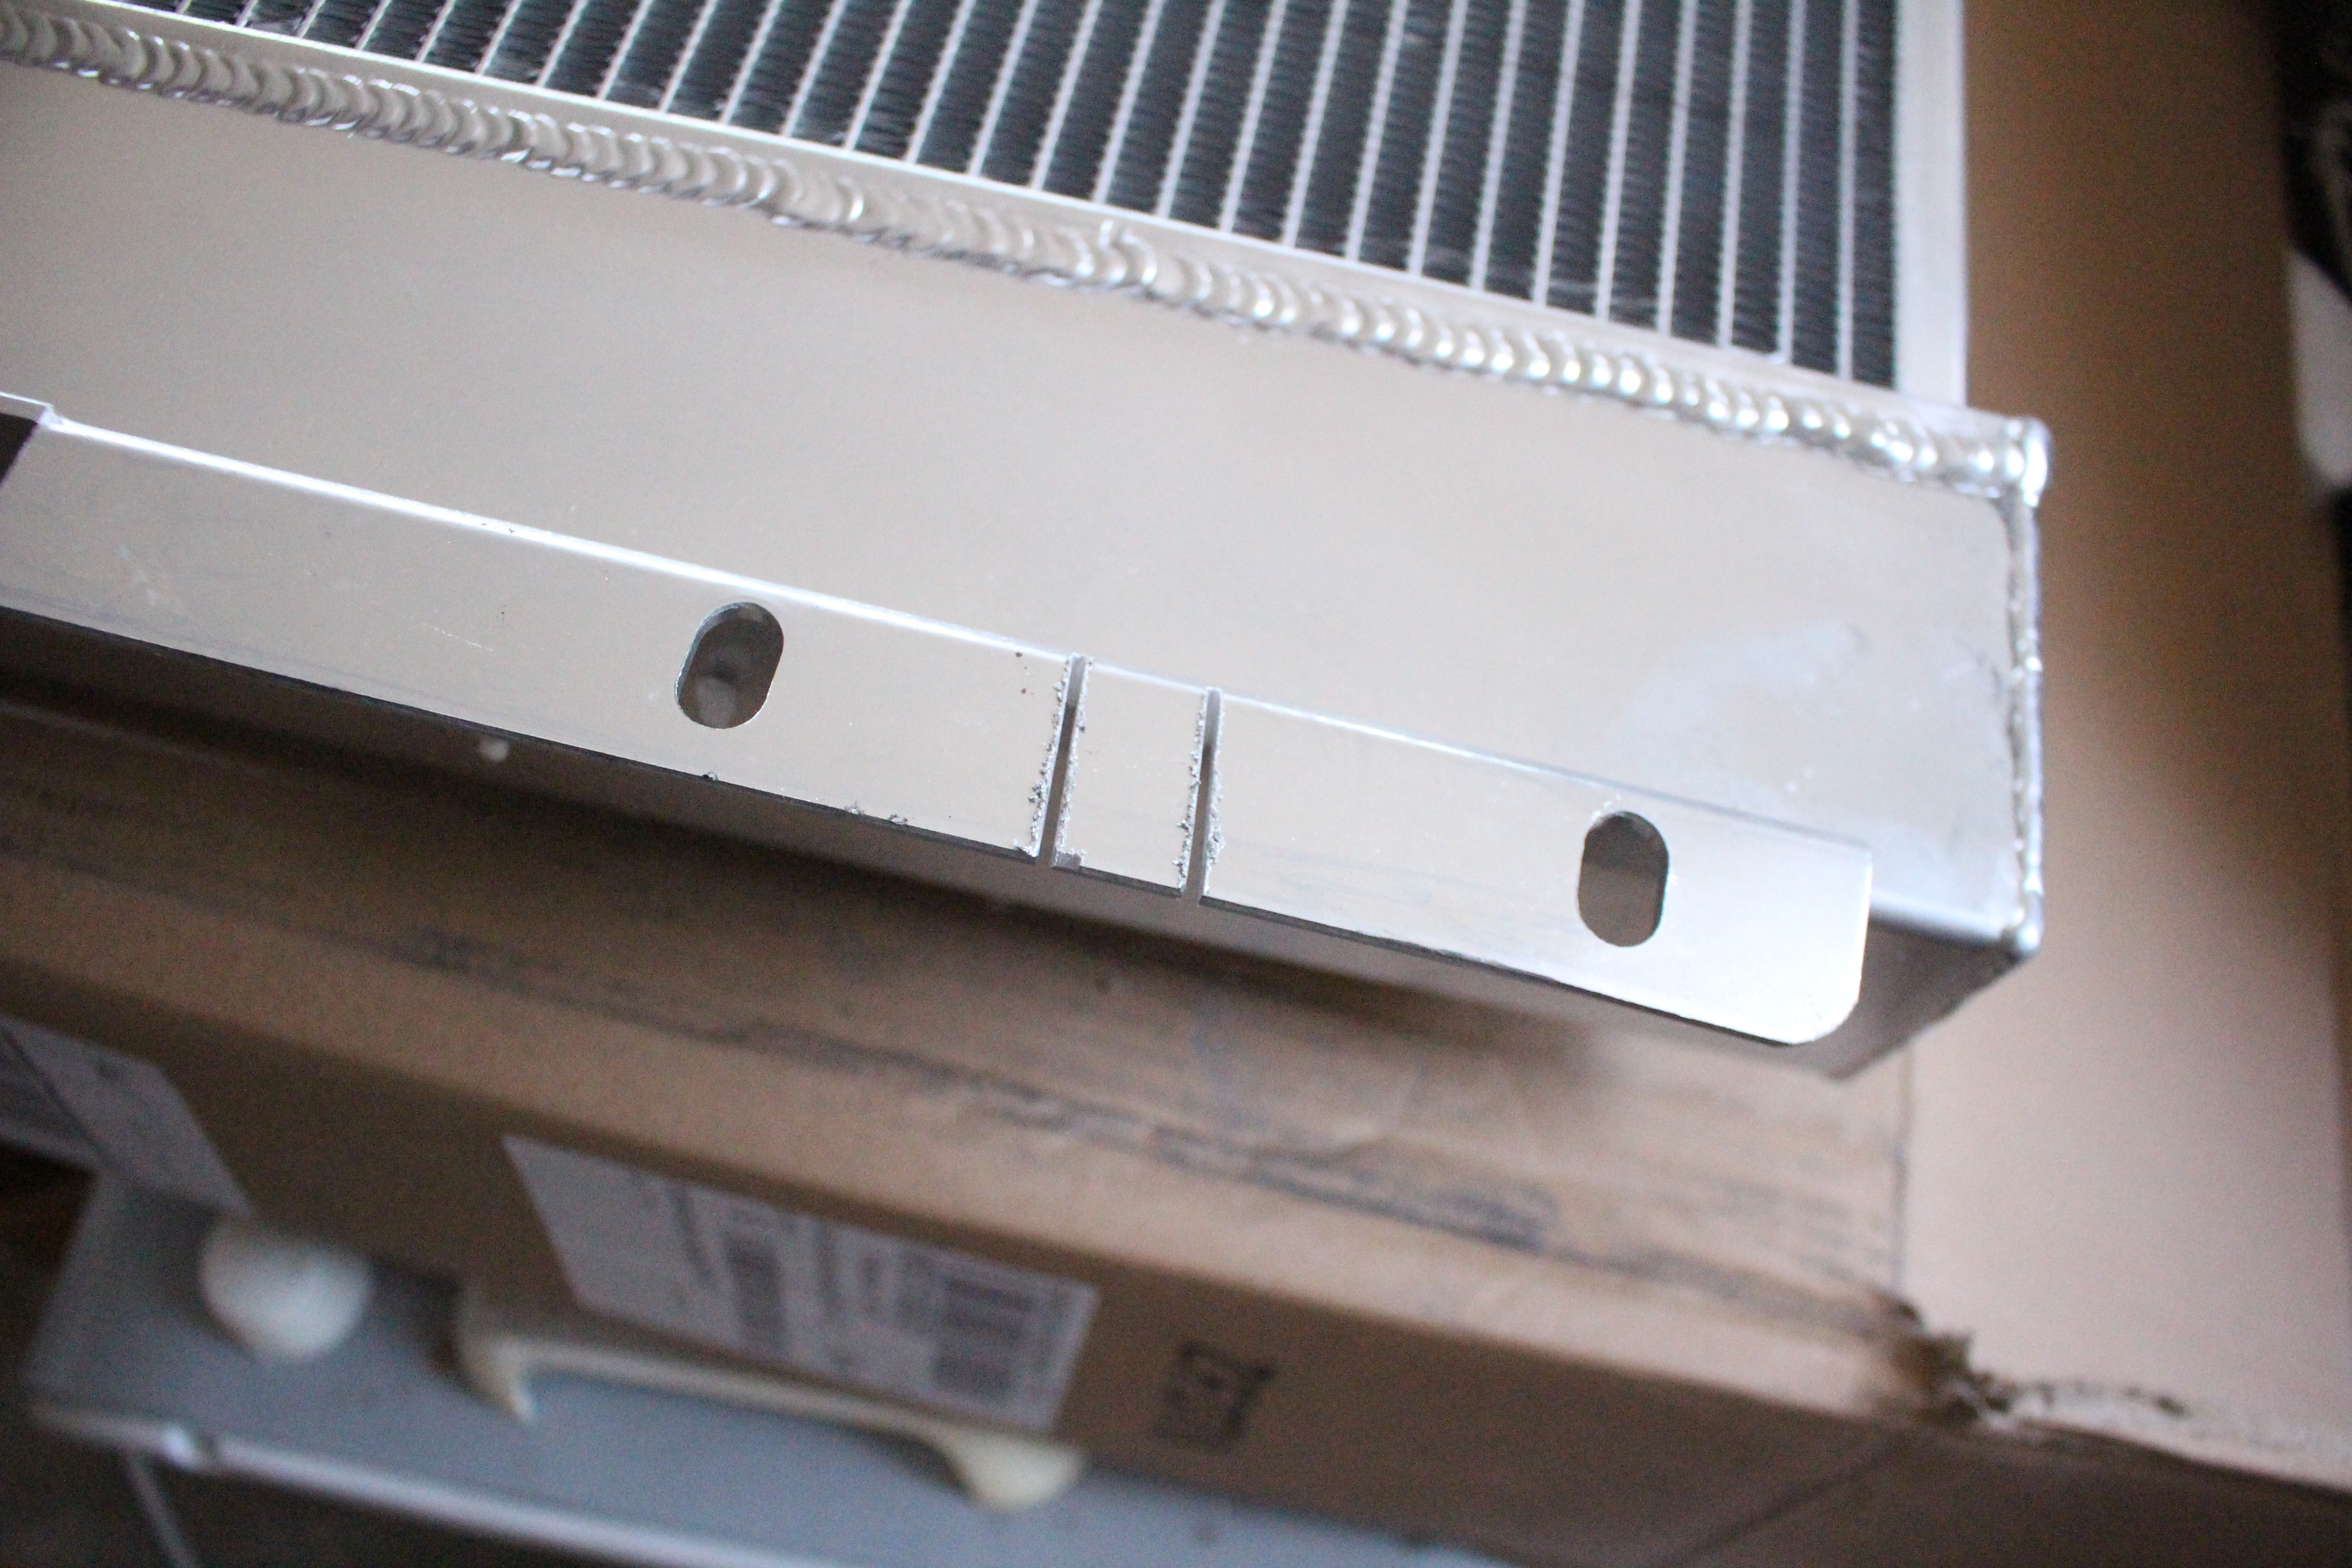
The radiator did require one small modification. I had to trim a bit off of each end in order for it to accept the factory transmission cooler. I run two factory transmission coolers since I tow a lot so I cut out four tabs. People who run an oil cooler will need to o the same. You'll also want to drill a couple holes and use a nut and bolt on each oil cooler tab to hold it in place.
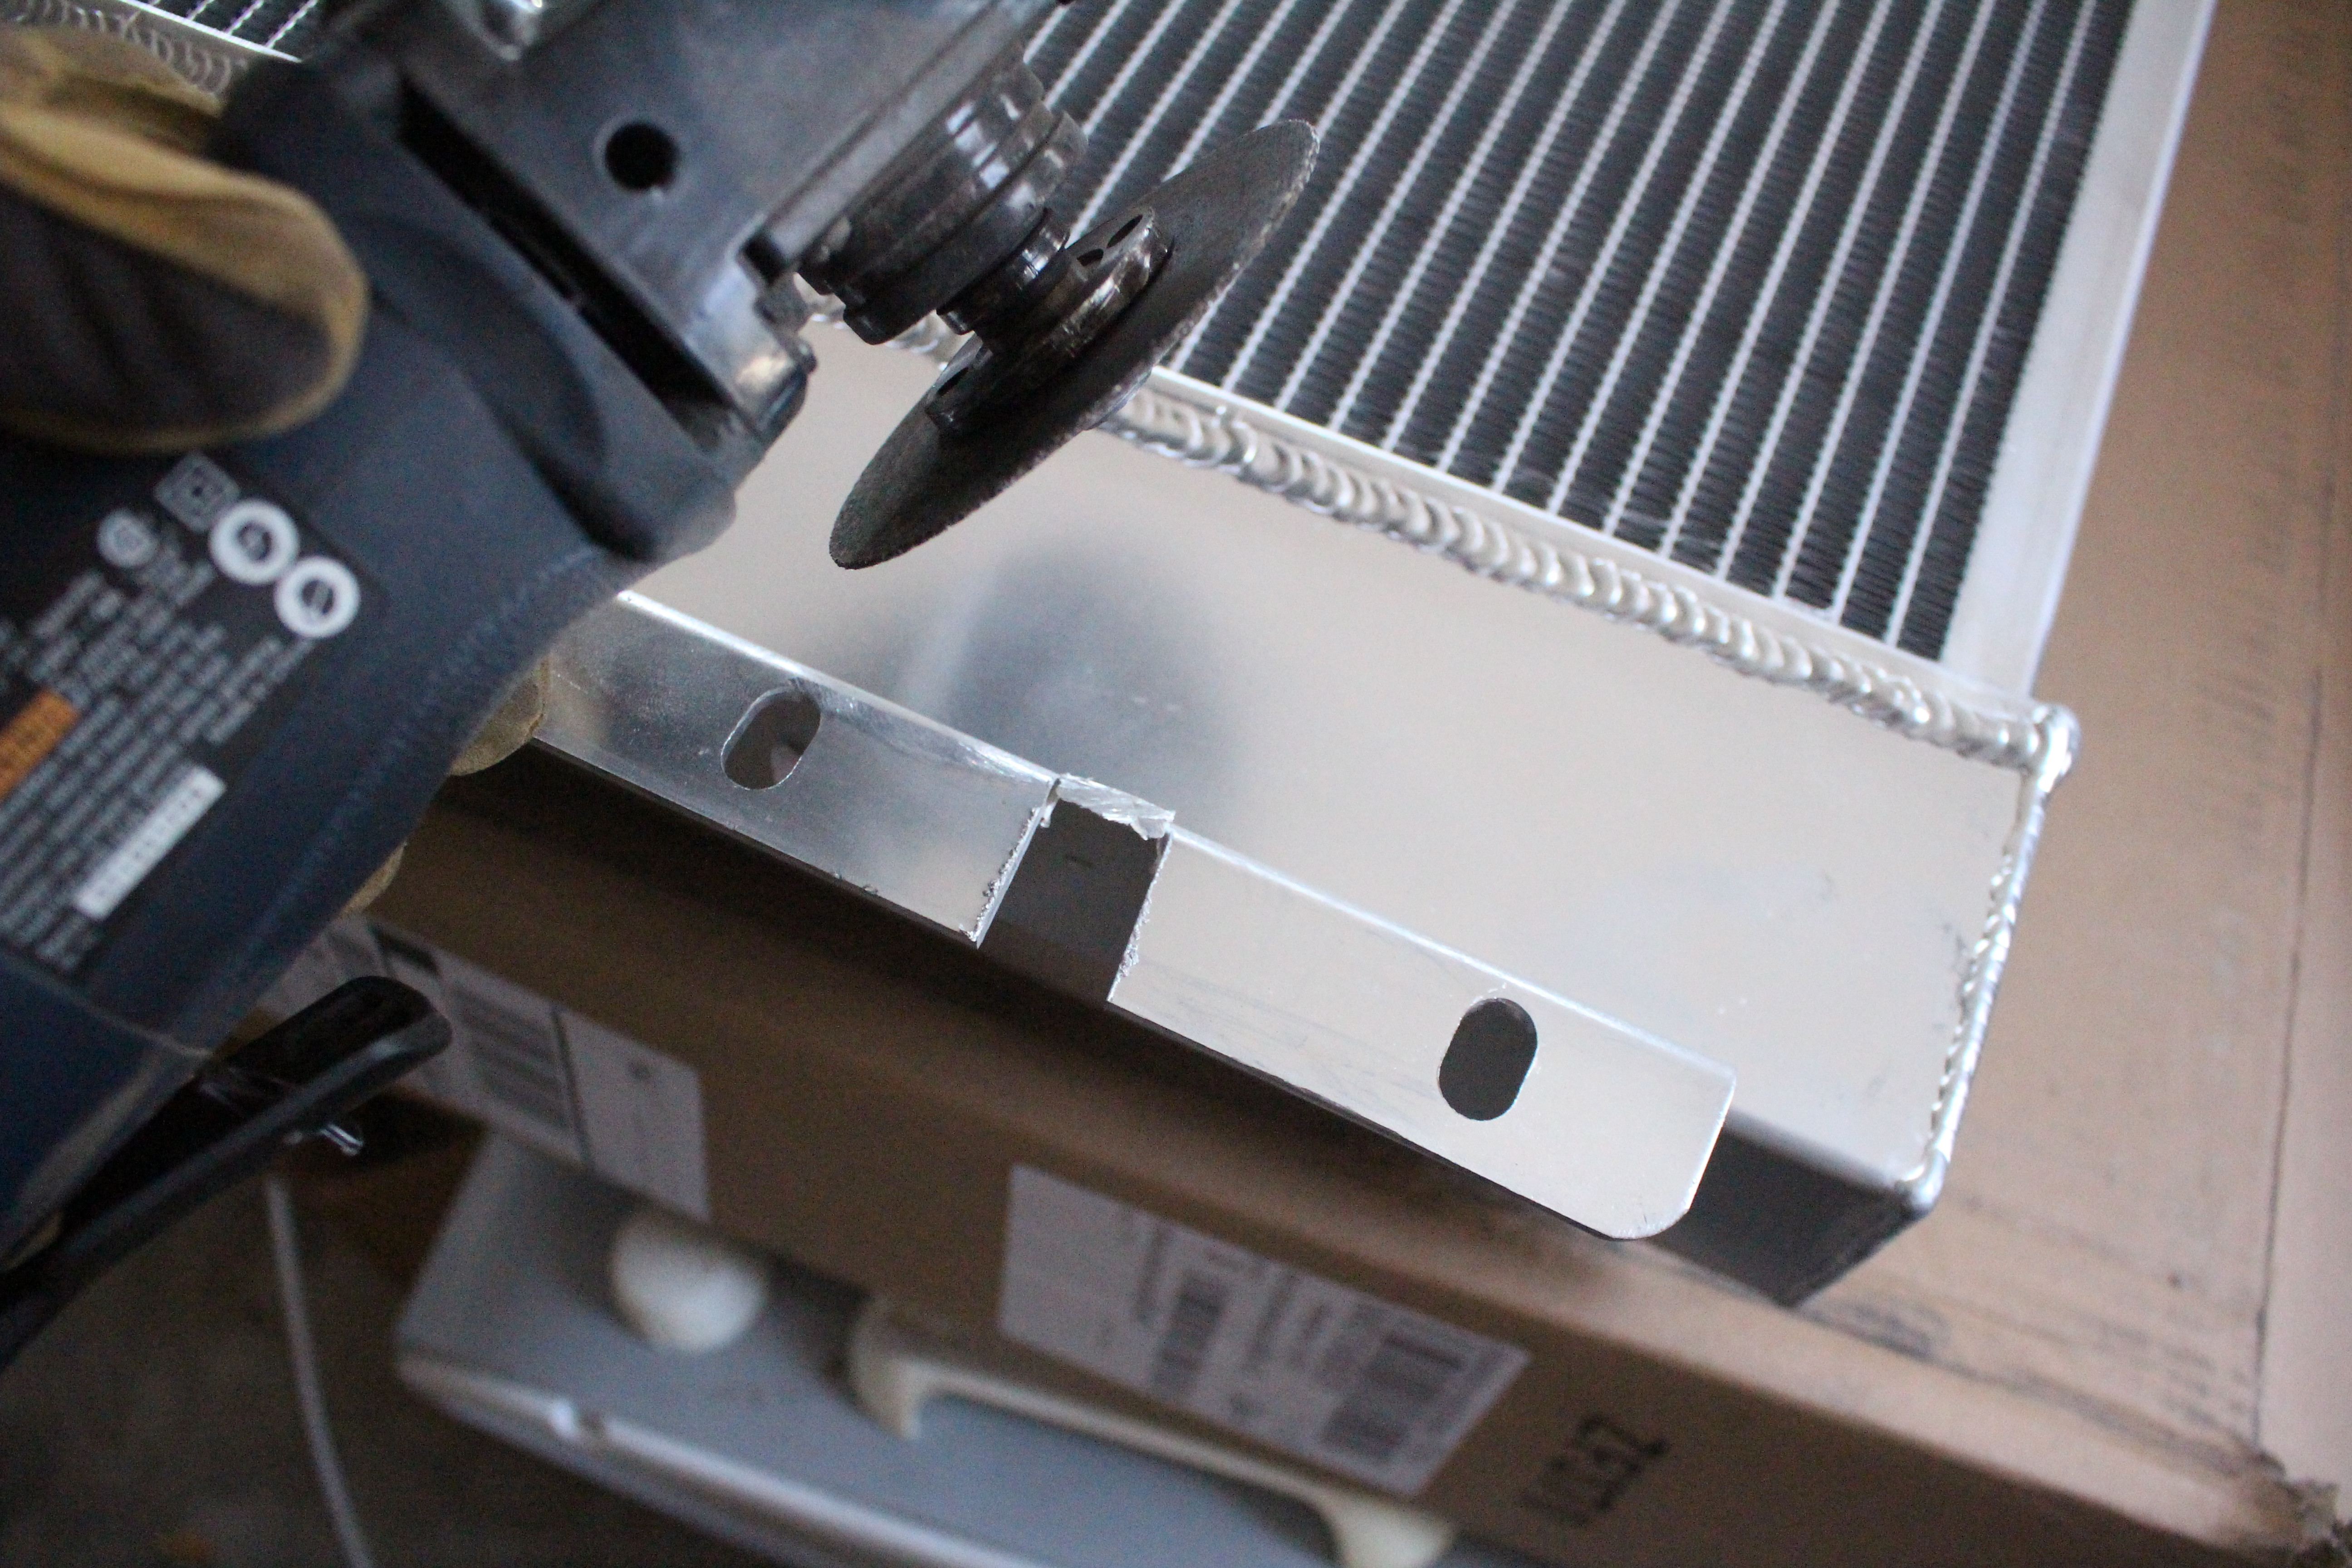
I cut the sides, bent it up, and cut off the tab with an angle grinder. Then I used a sanding disc on the die grinder to clean up the edges. Not completely necessary, but it made it a lot nicer not having sharp edges.
This is the lower hose setup, in its entirety. 90 degree (this is out of the Masterpro hose, you'll have to trim it some. Utility knife makes it easy work.), followed by your tee coupling to connect the heater core, followed by a 45 degree cut out of the Dayco hose. That will connect from the radiator outlet to the water pump inlet.
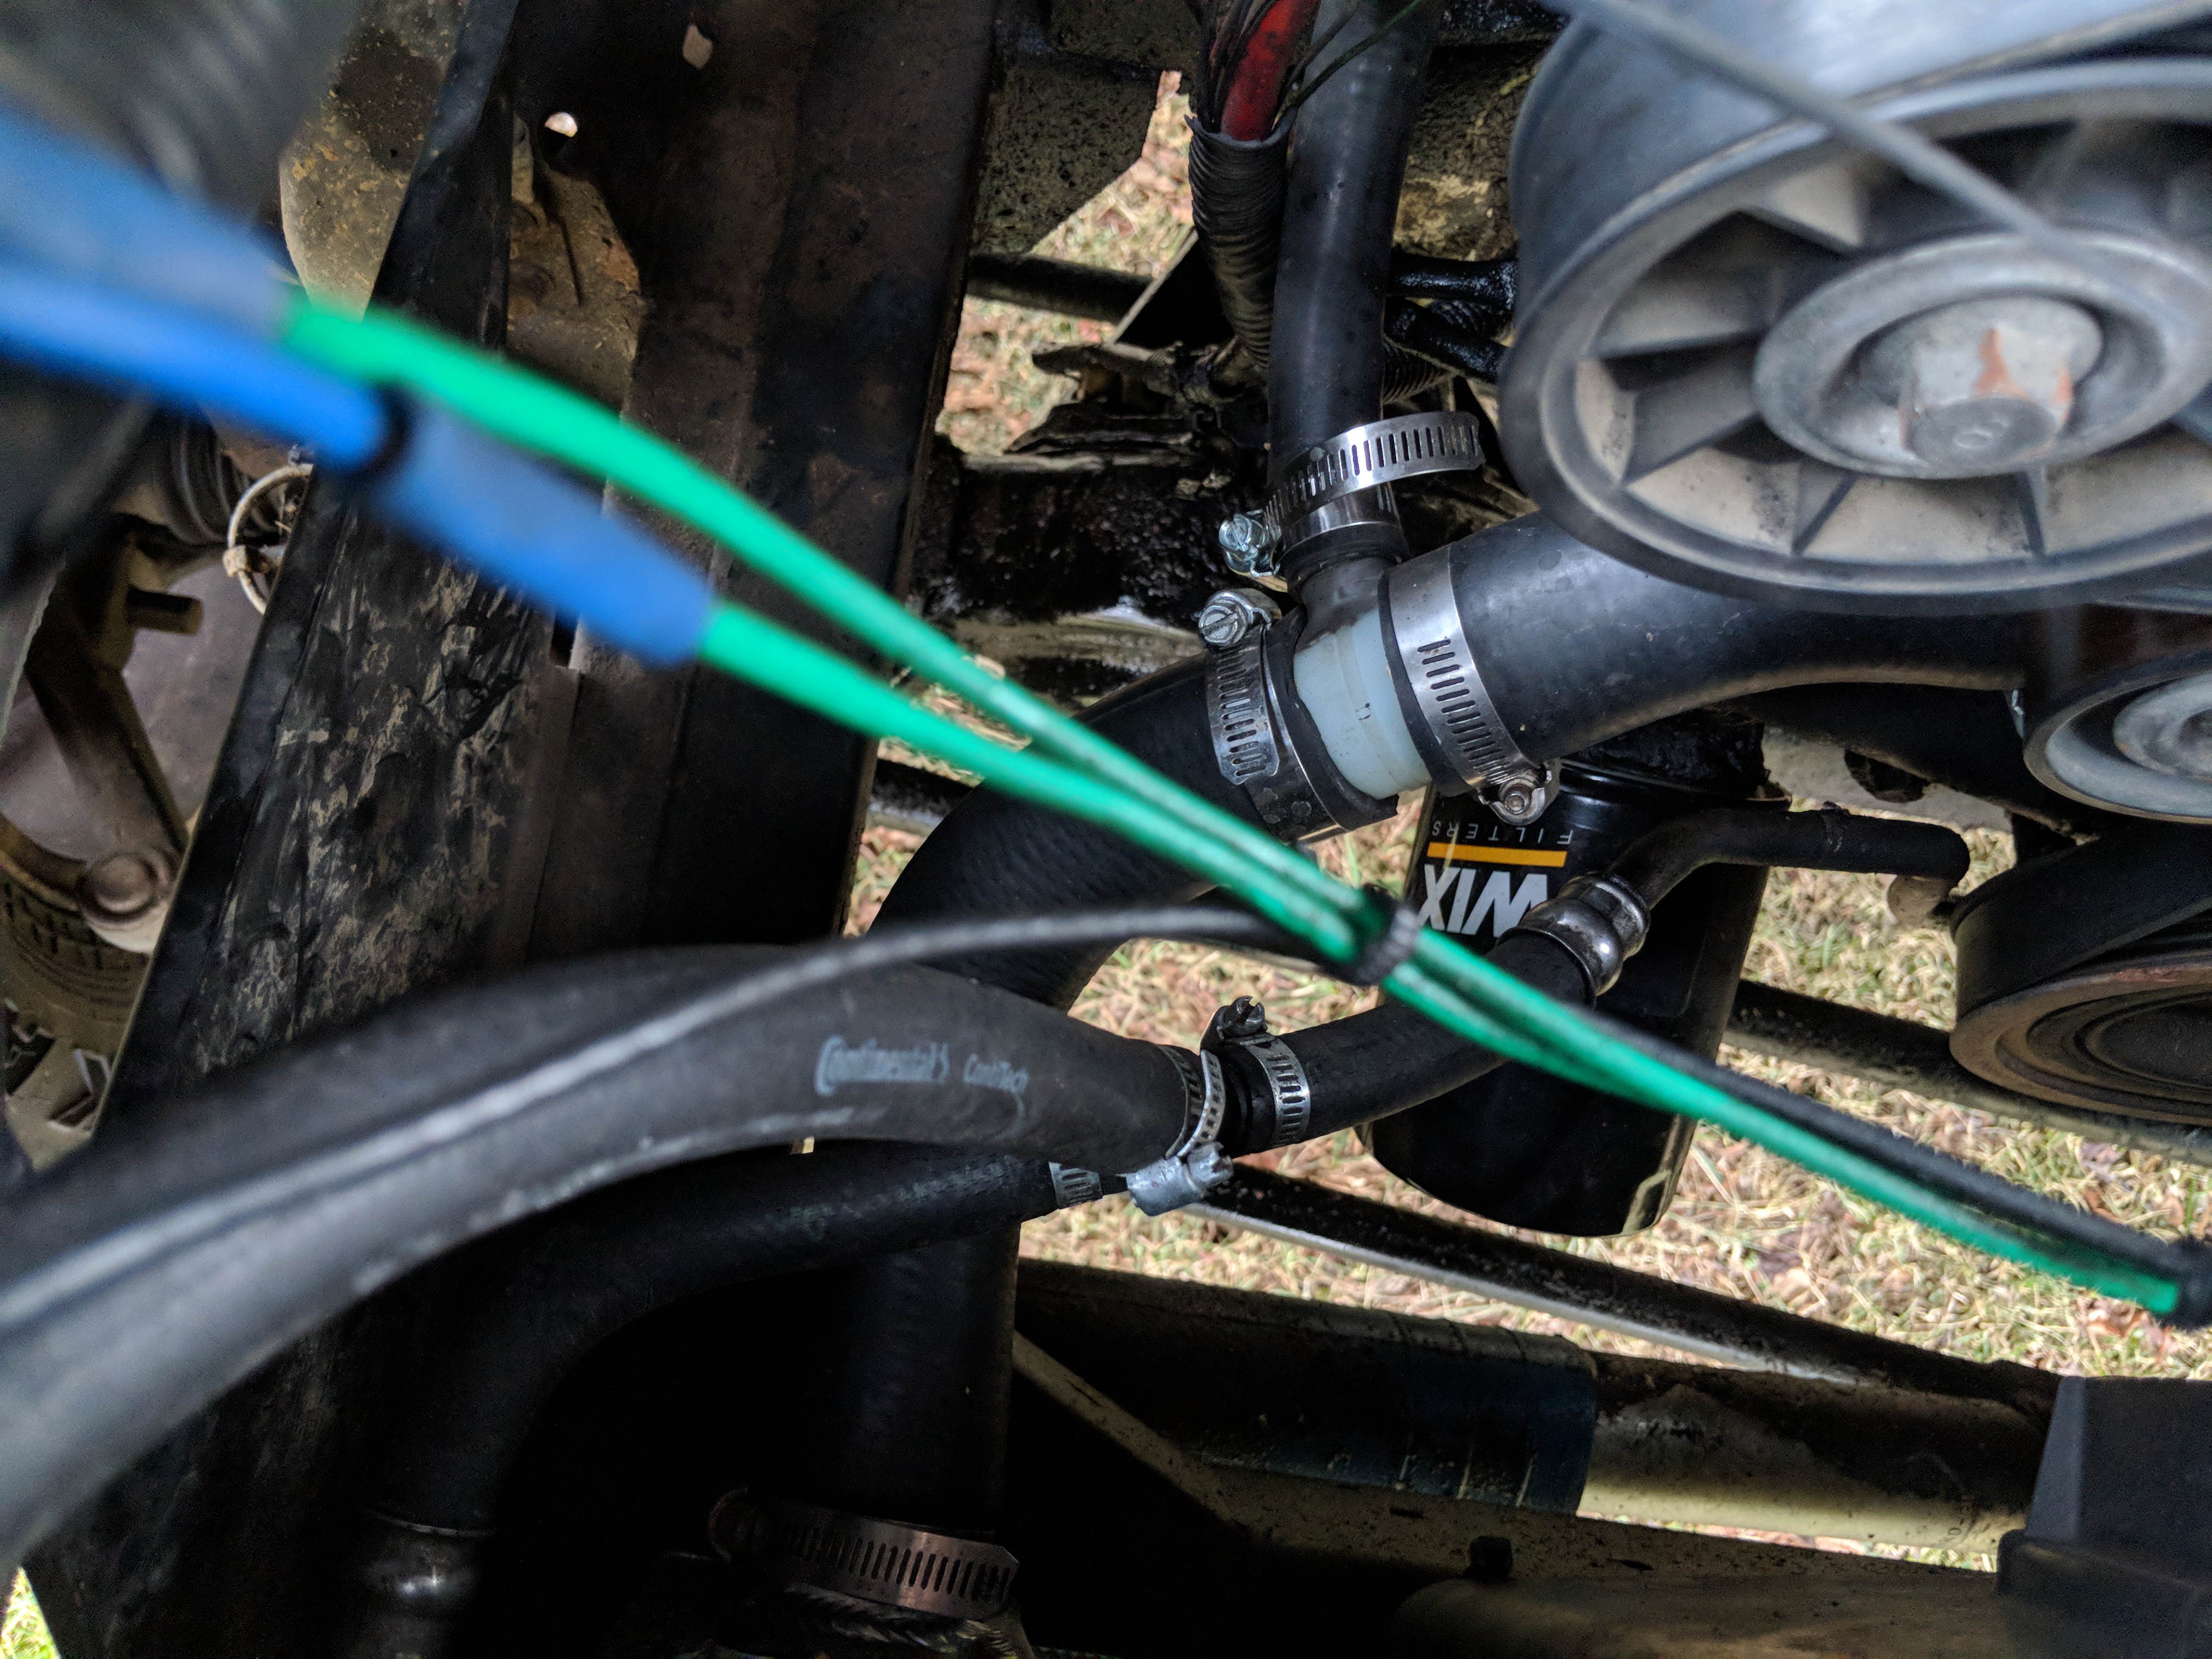
Here's the lower hose installed. As you can see I accidentally cut the hose a little short making it a little less than a 90 degree angle. Cut yours a little longer and it should be a perfect fit.
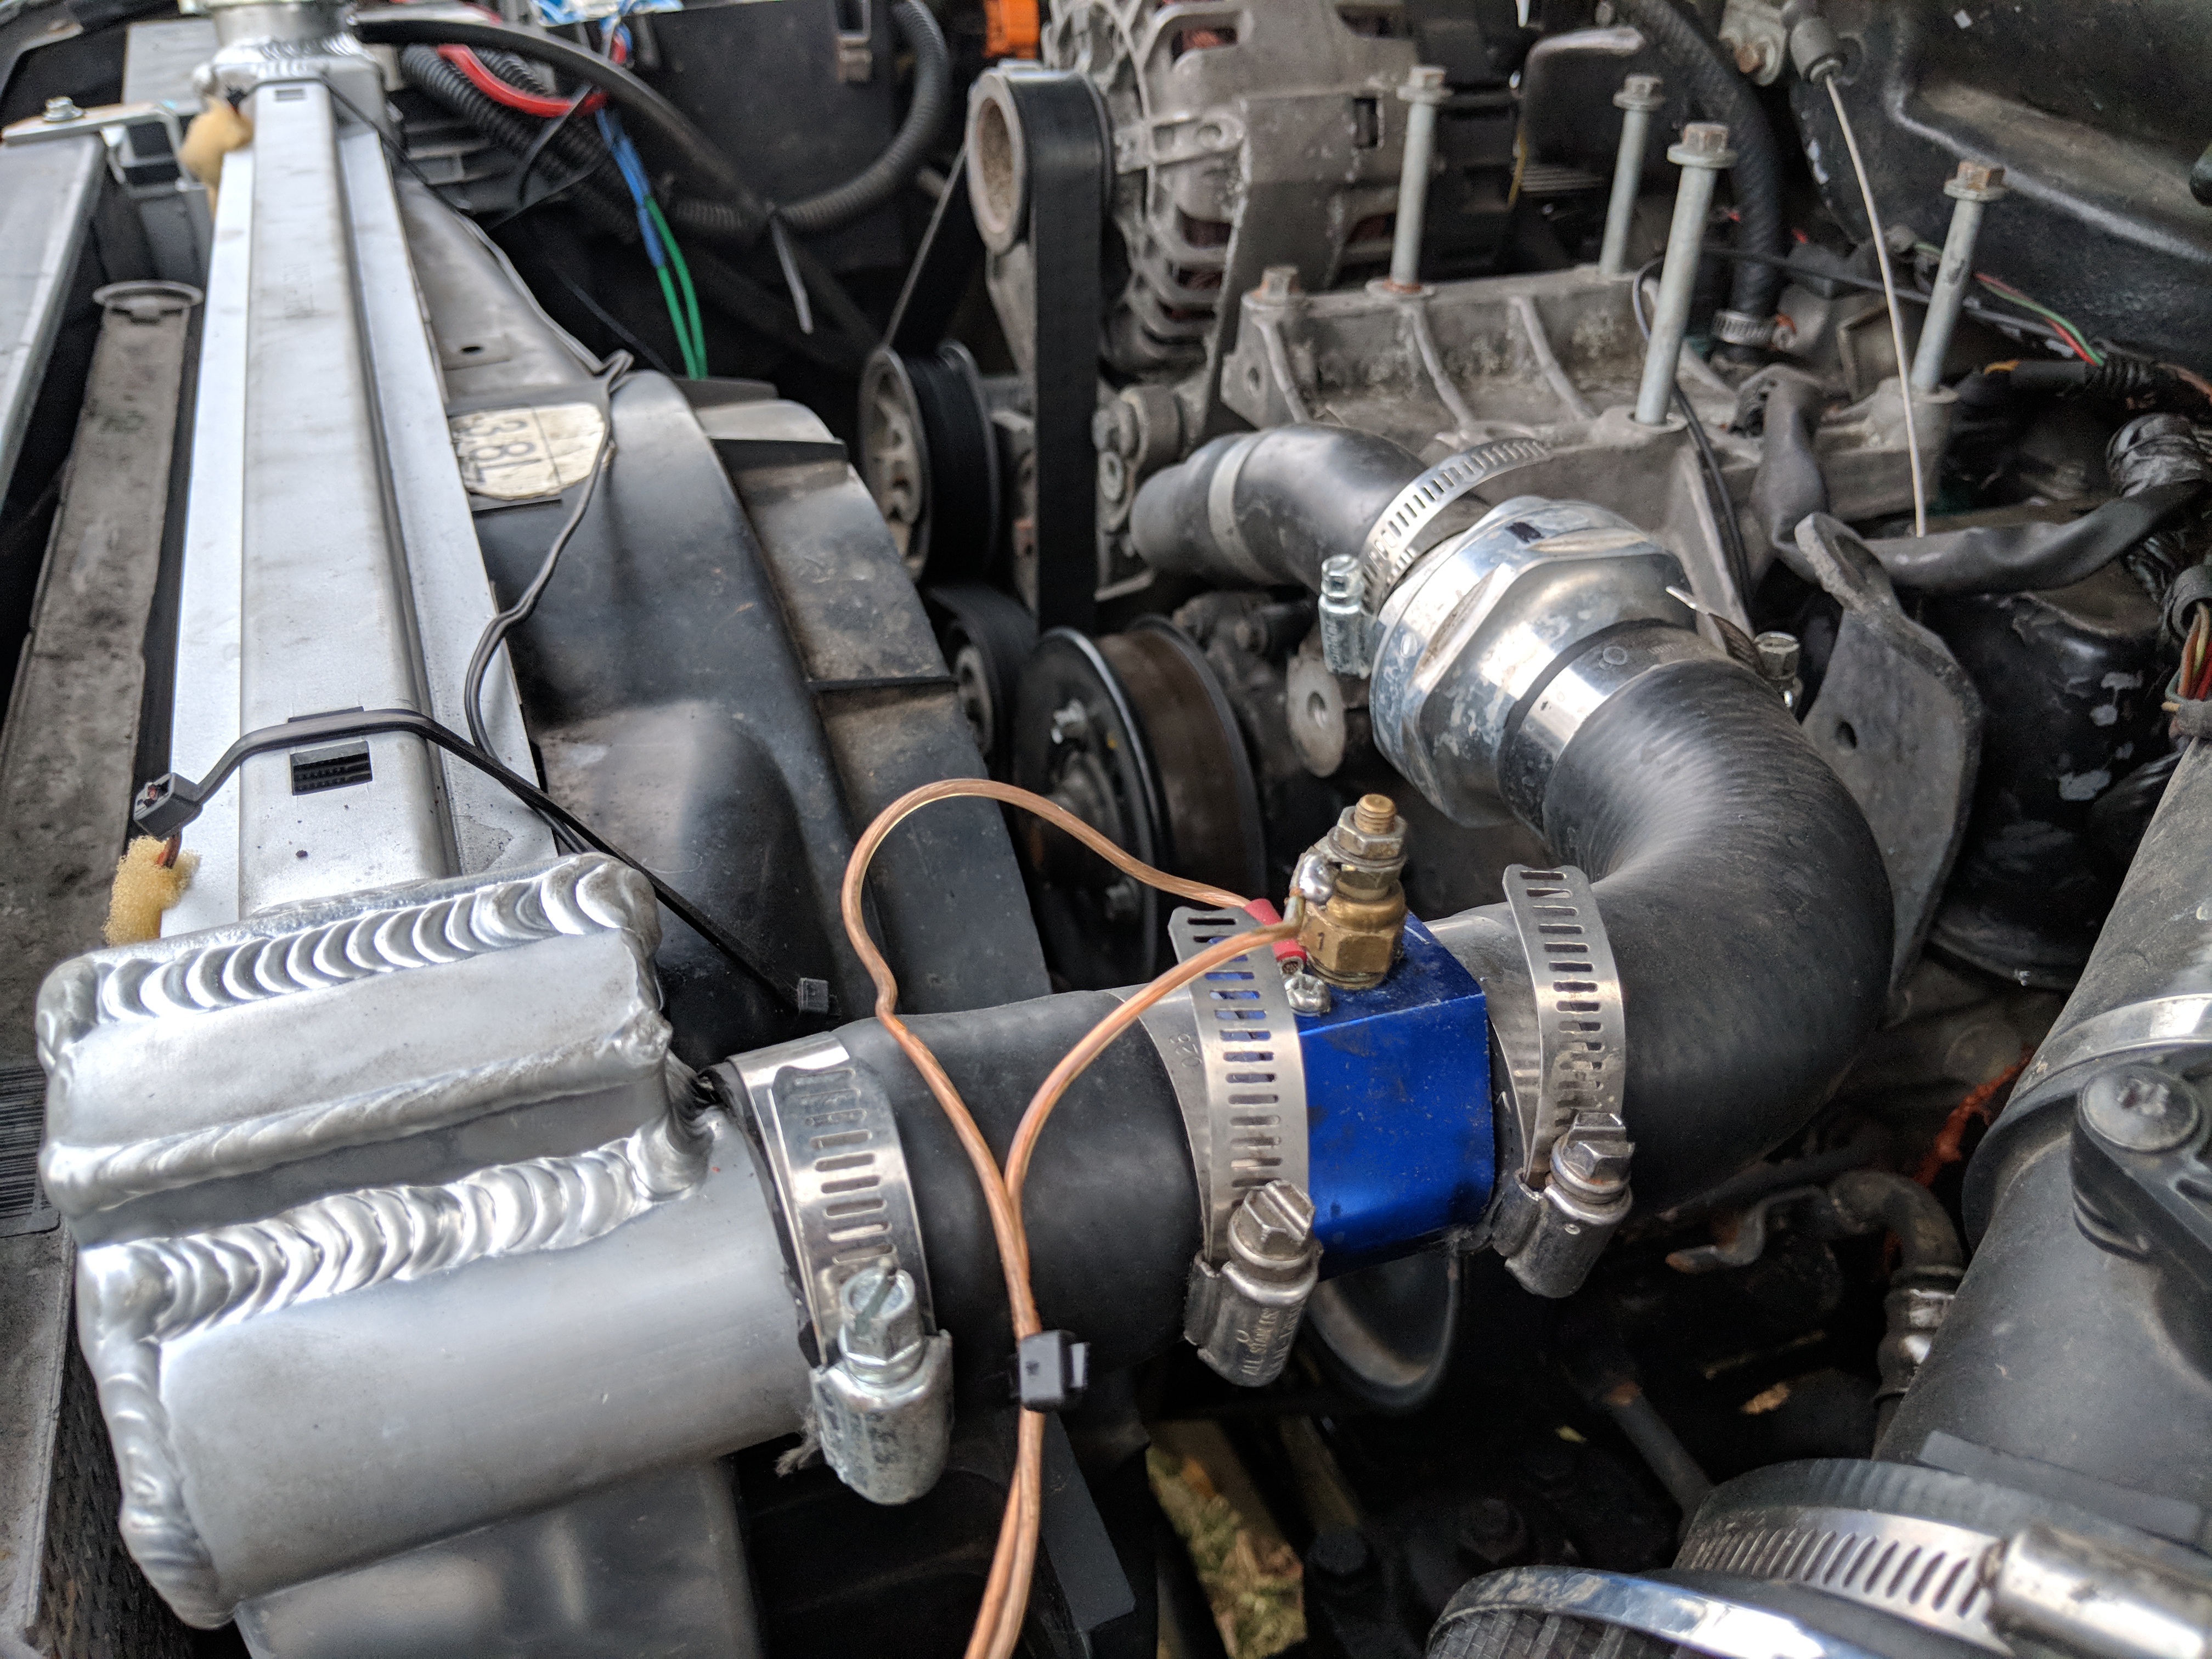
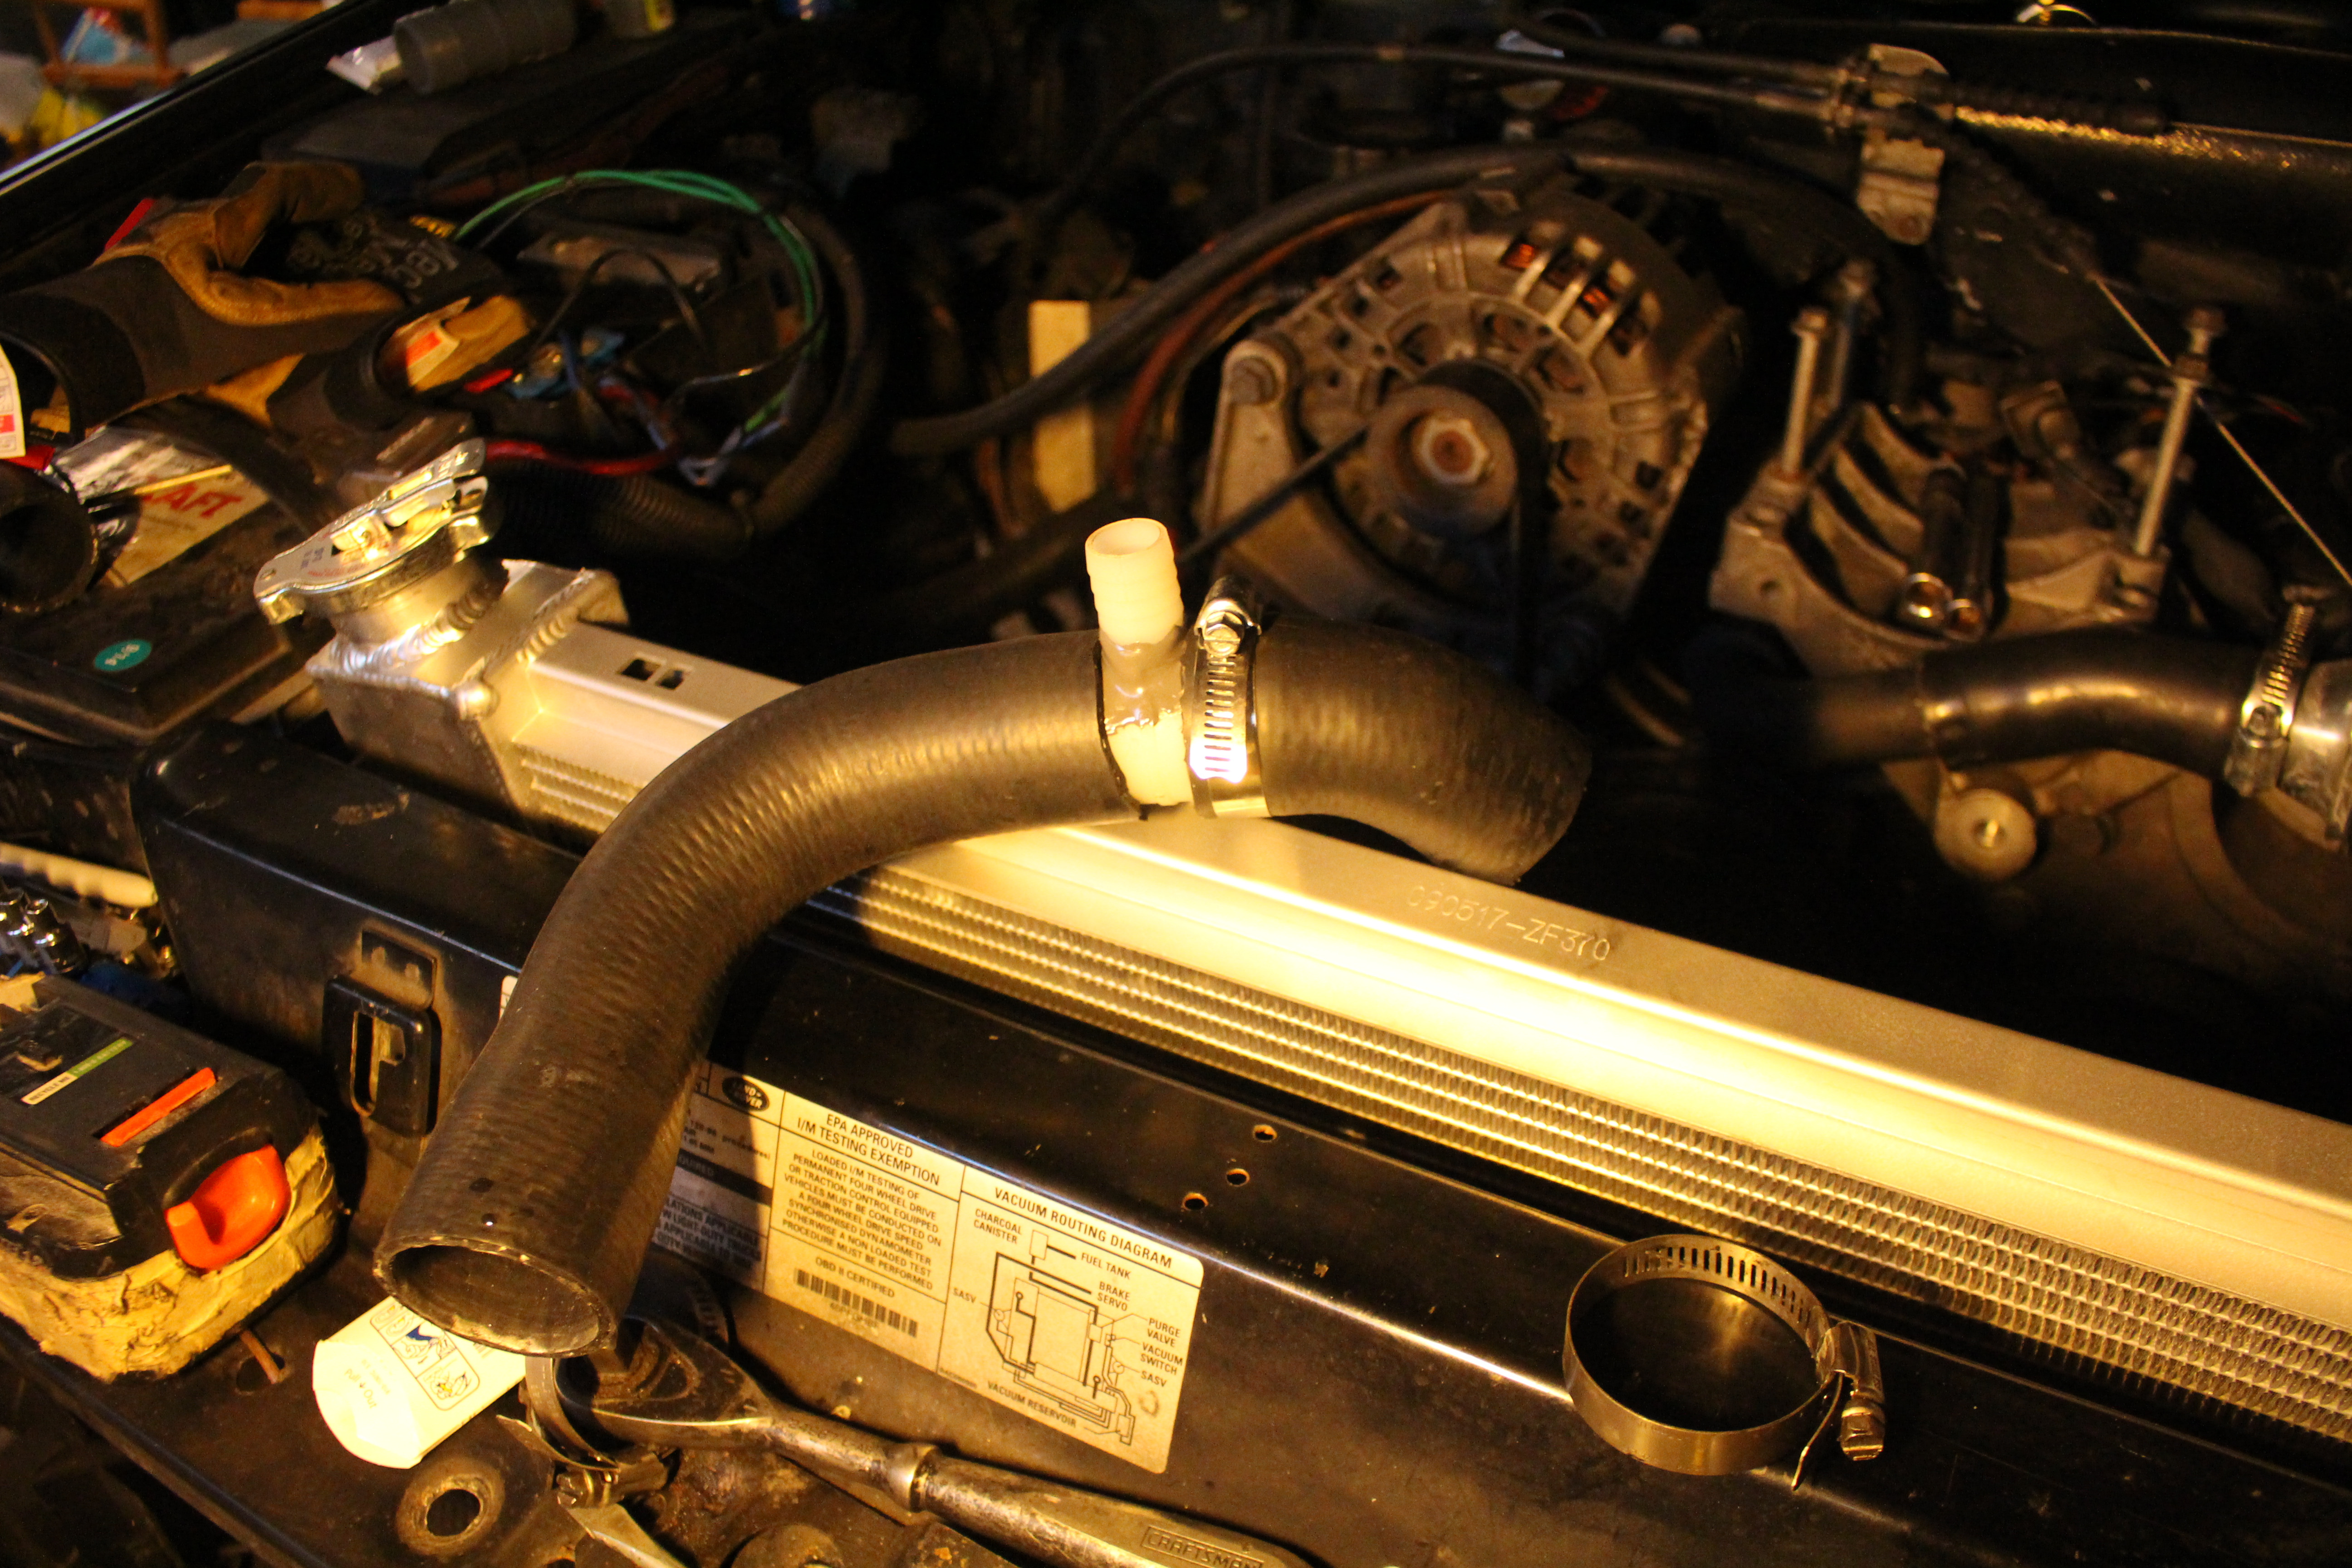
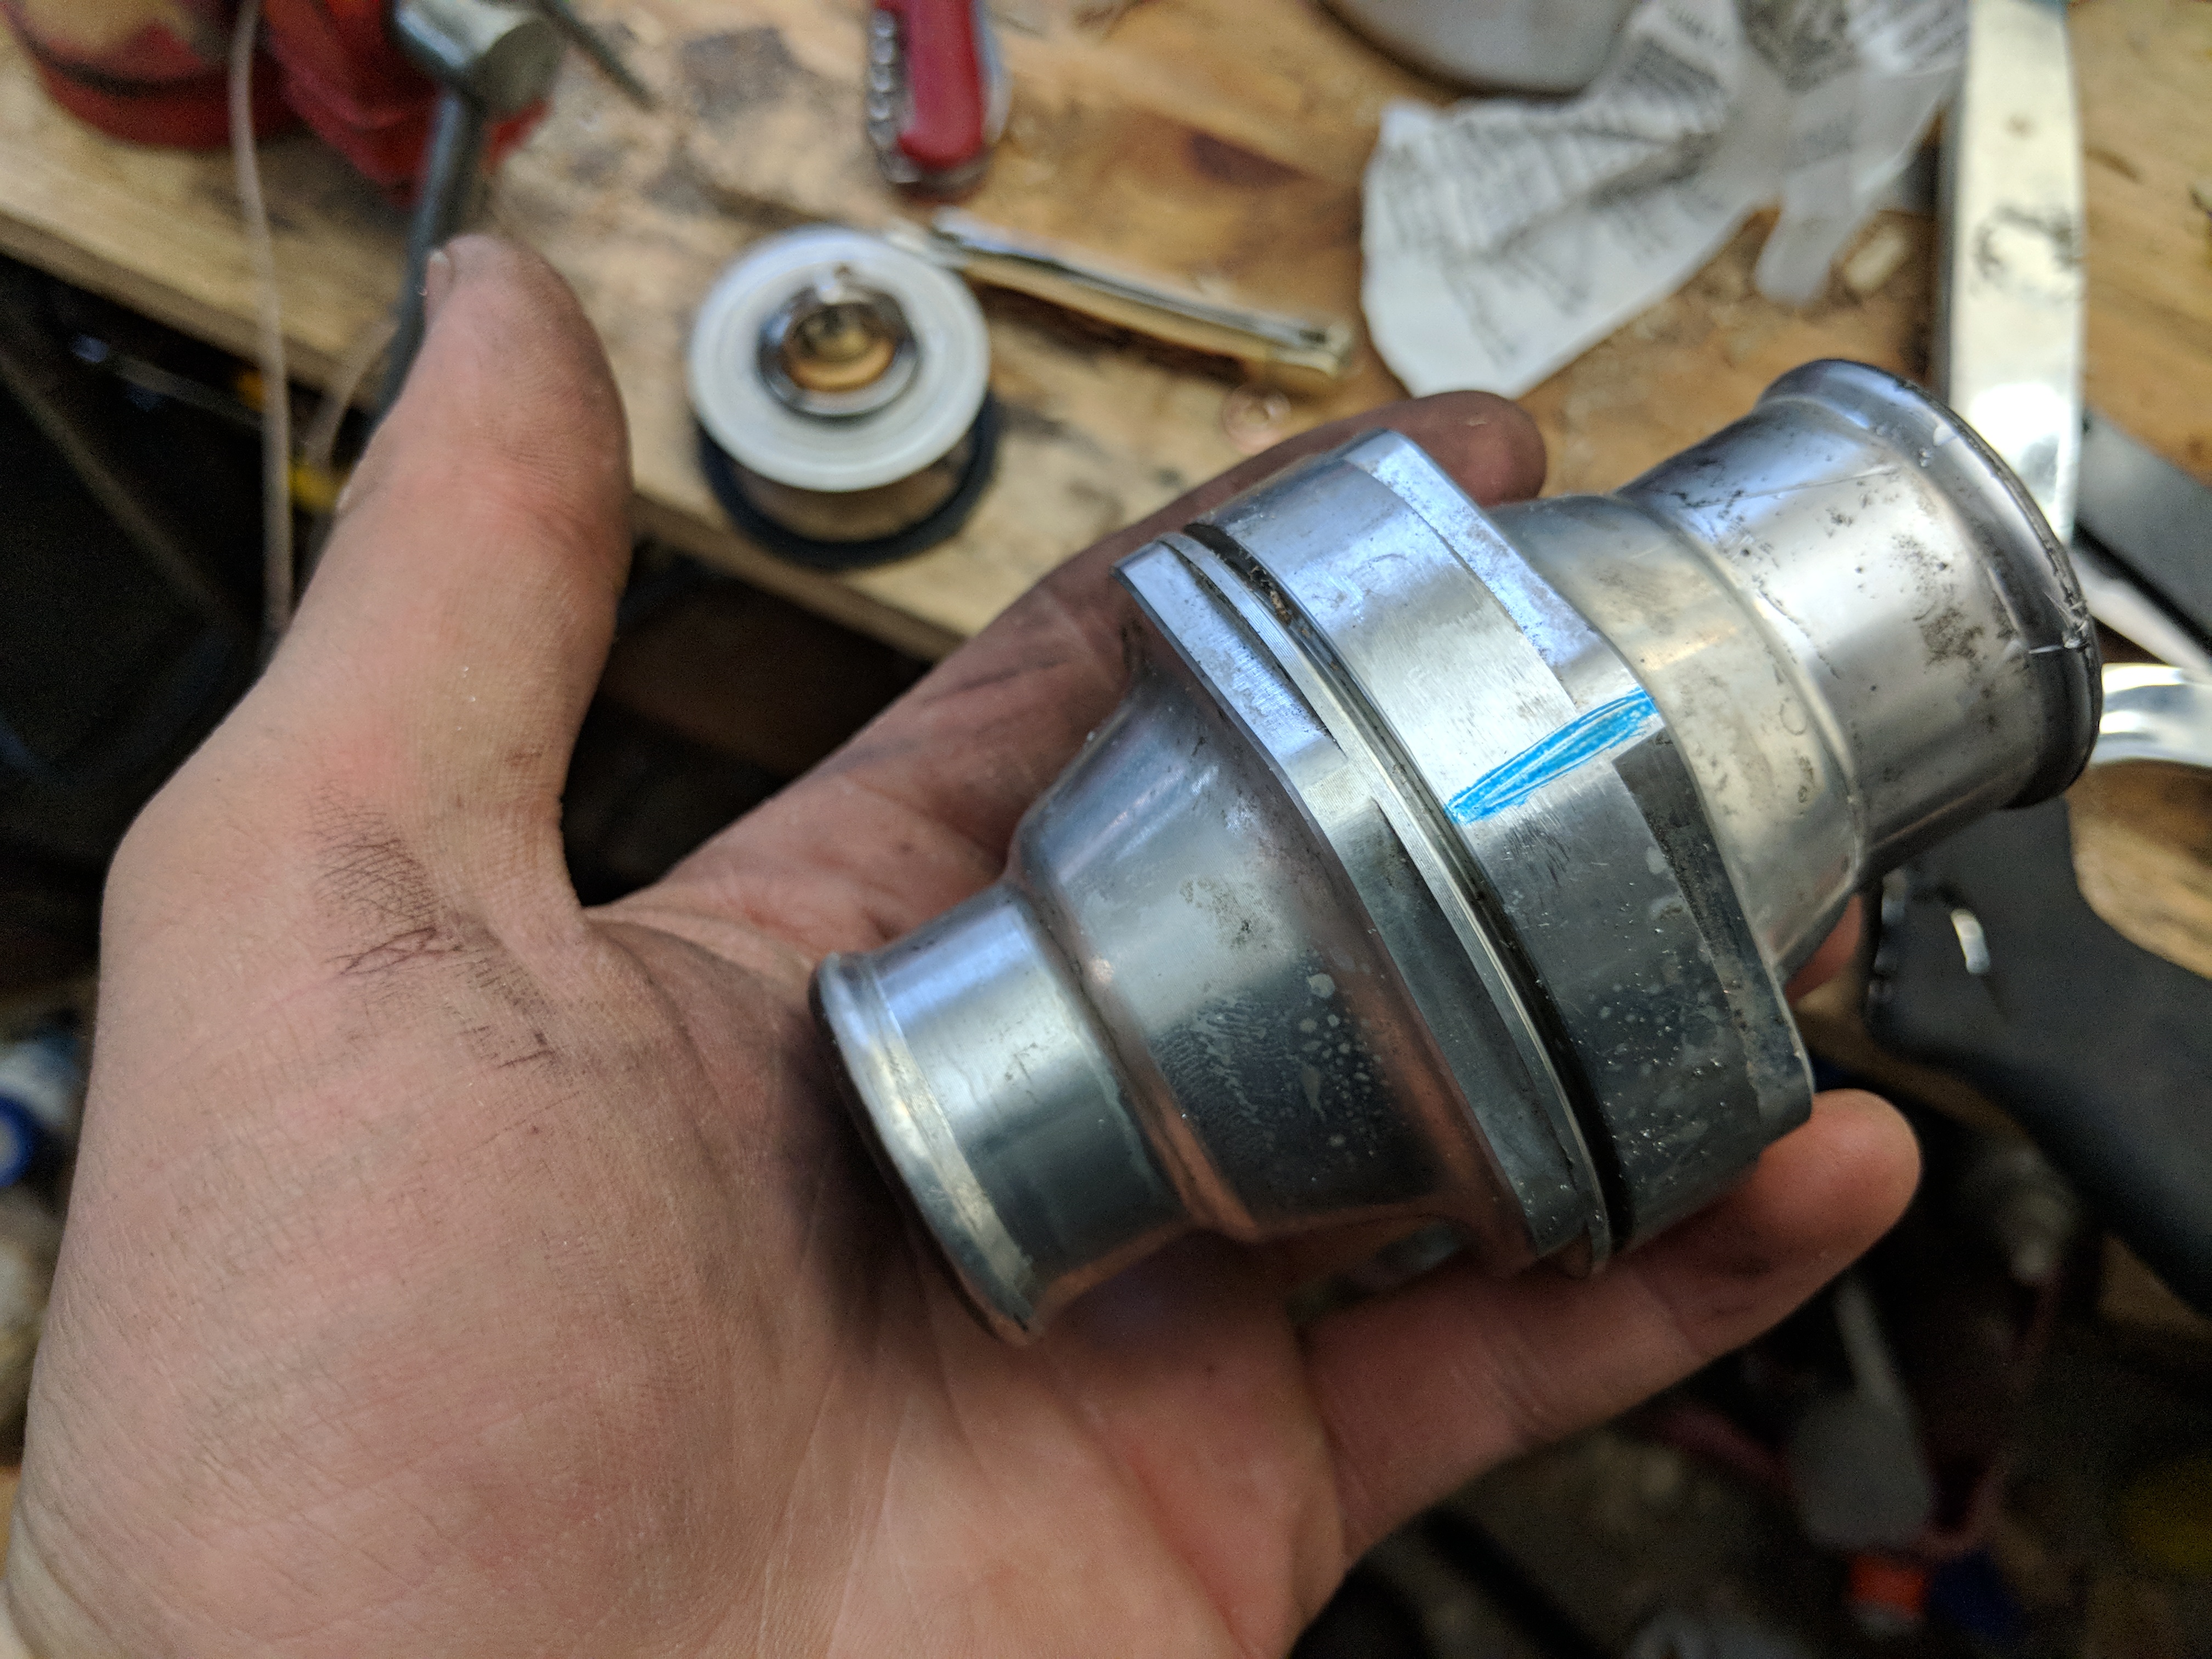
Now, my upper hose setup is a little unique. You wouldn't be able to do this exactly if you still have AC installed, as most do. That said, if you retain the first section of the factory radiator hose, into the thermostat housing, and then into the Dayco hose pieces, and then into the radiator. If you wish to install an aftermarket thermostat as I have, this would be the place to do it.
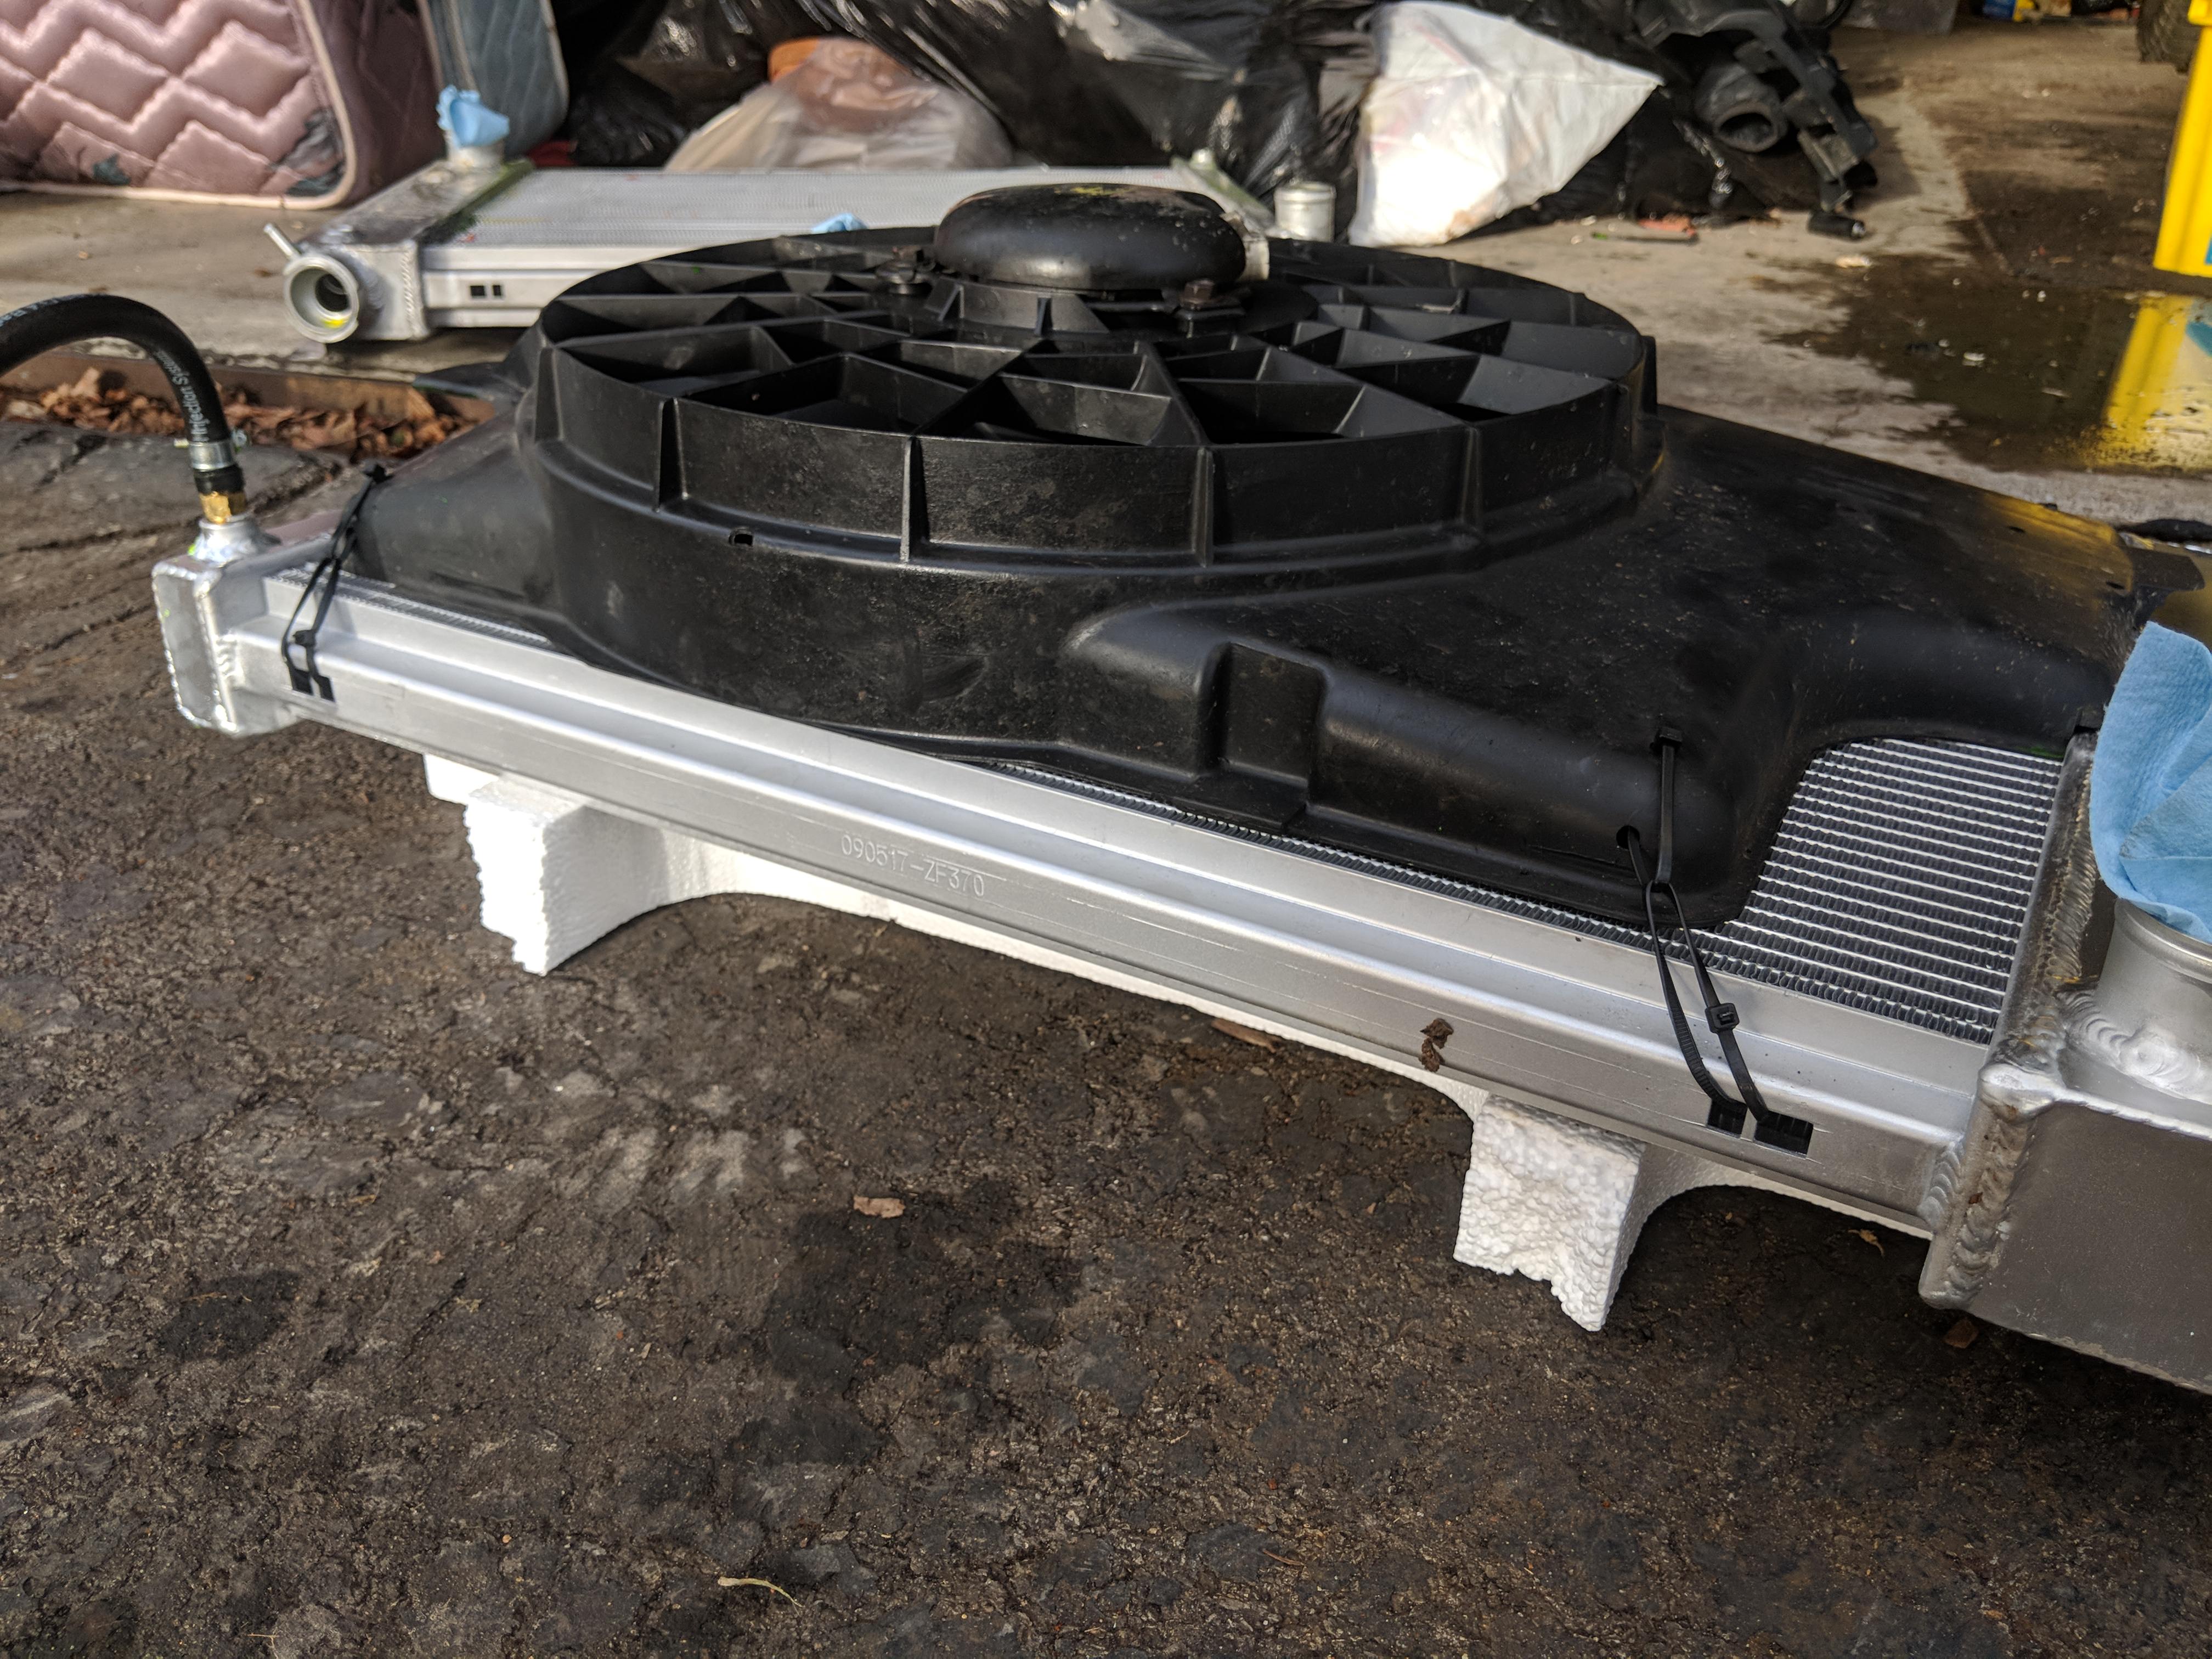
Here you can see where I installed the transmission coolers into the tabs I cut out. Mine are only zip tied right now, not bolted, but eventually I'll buy bolts and stick in them.
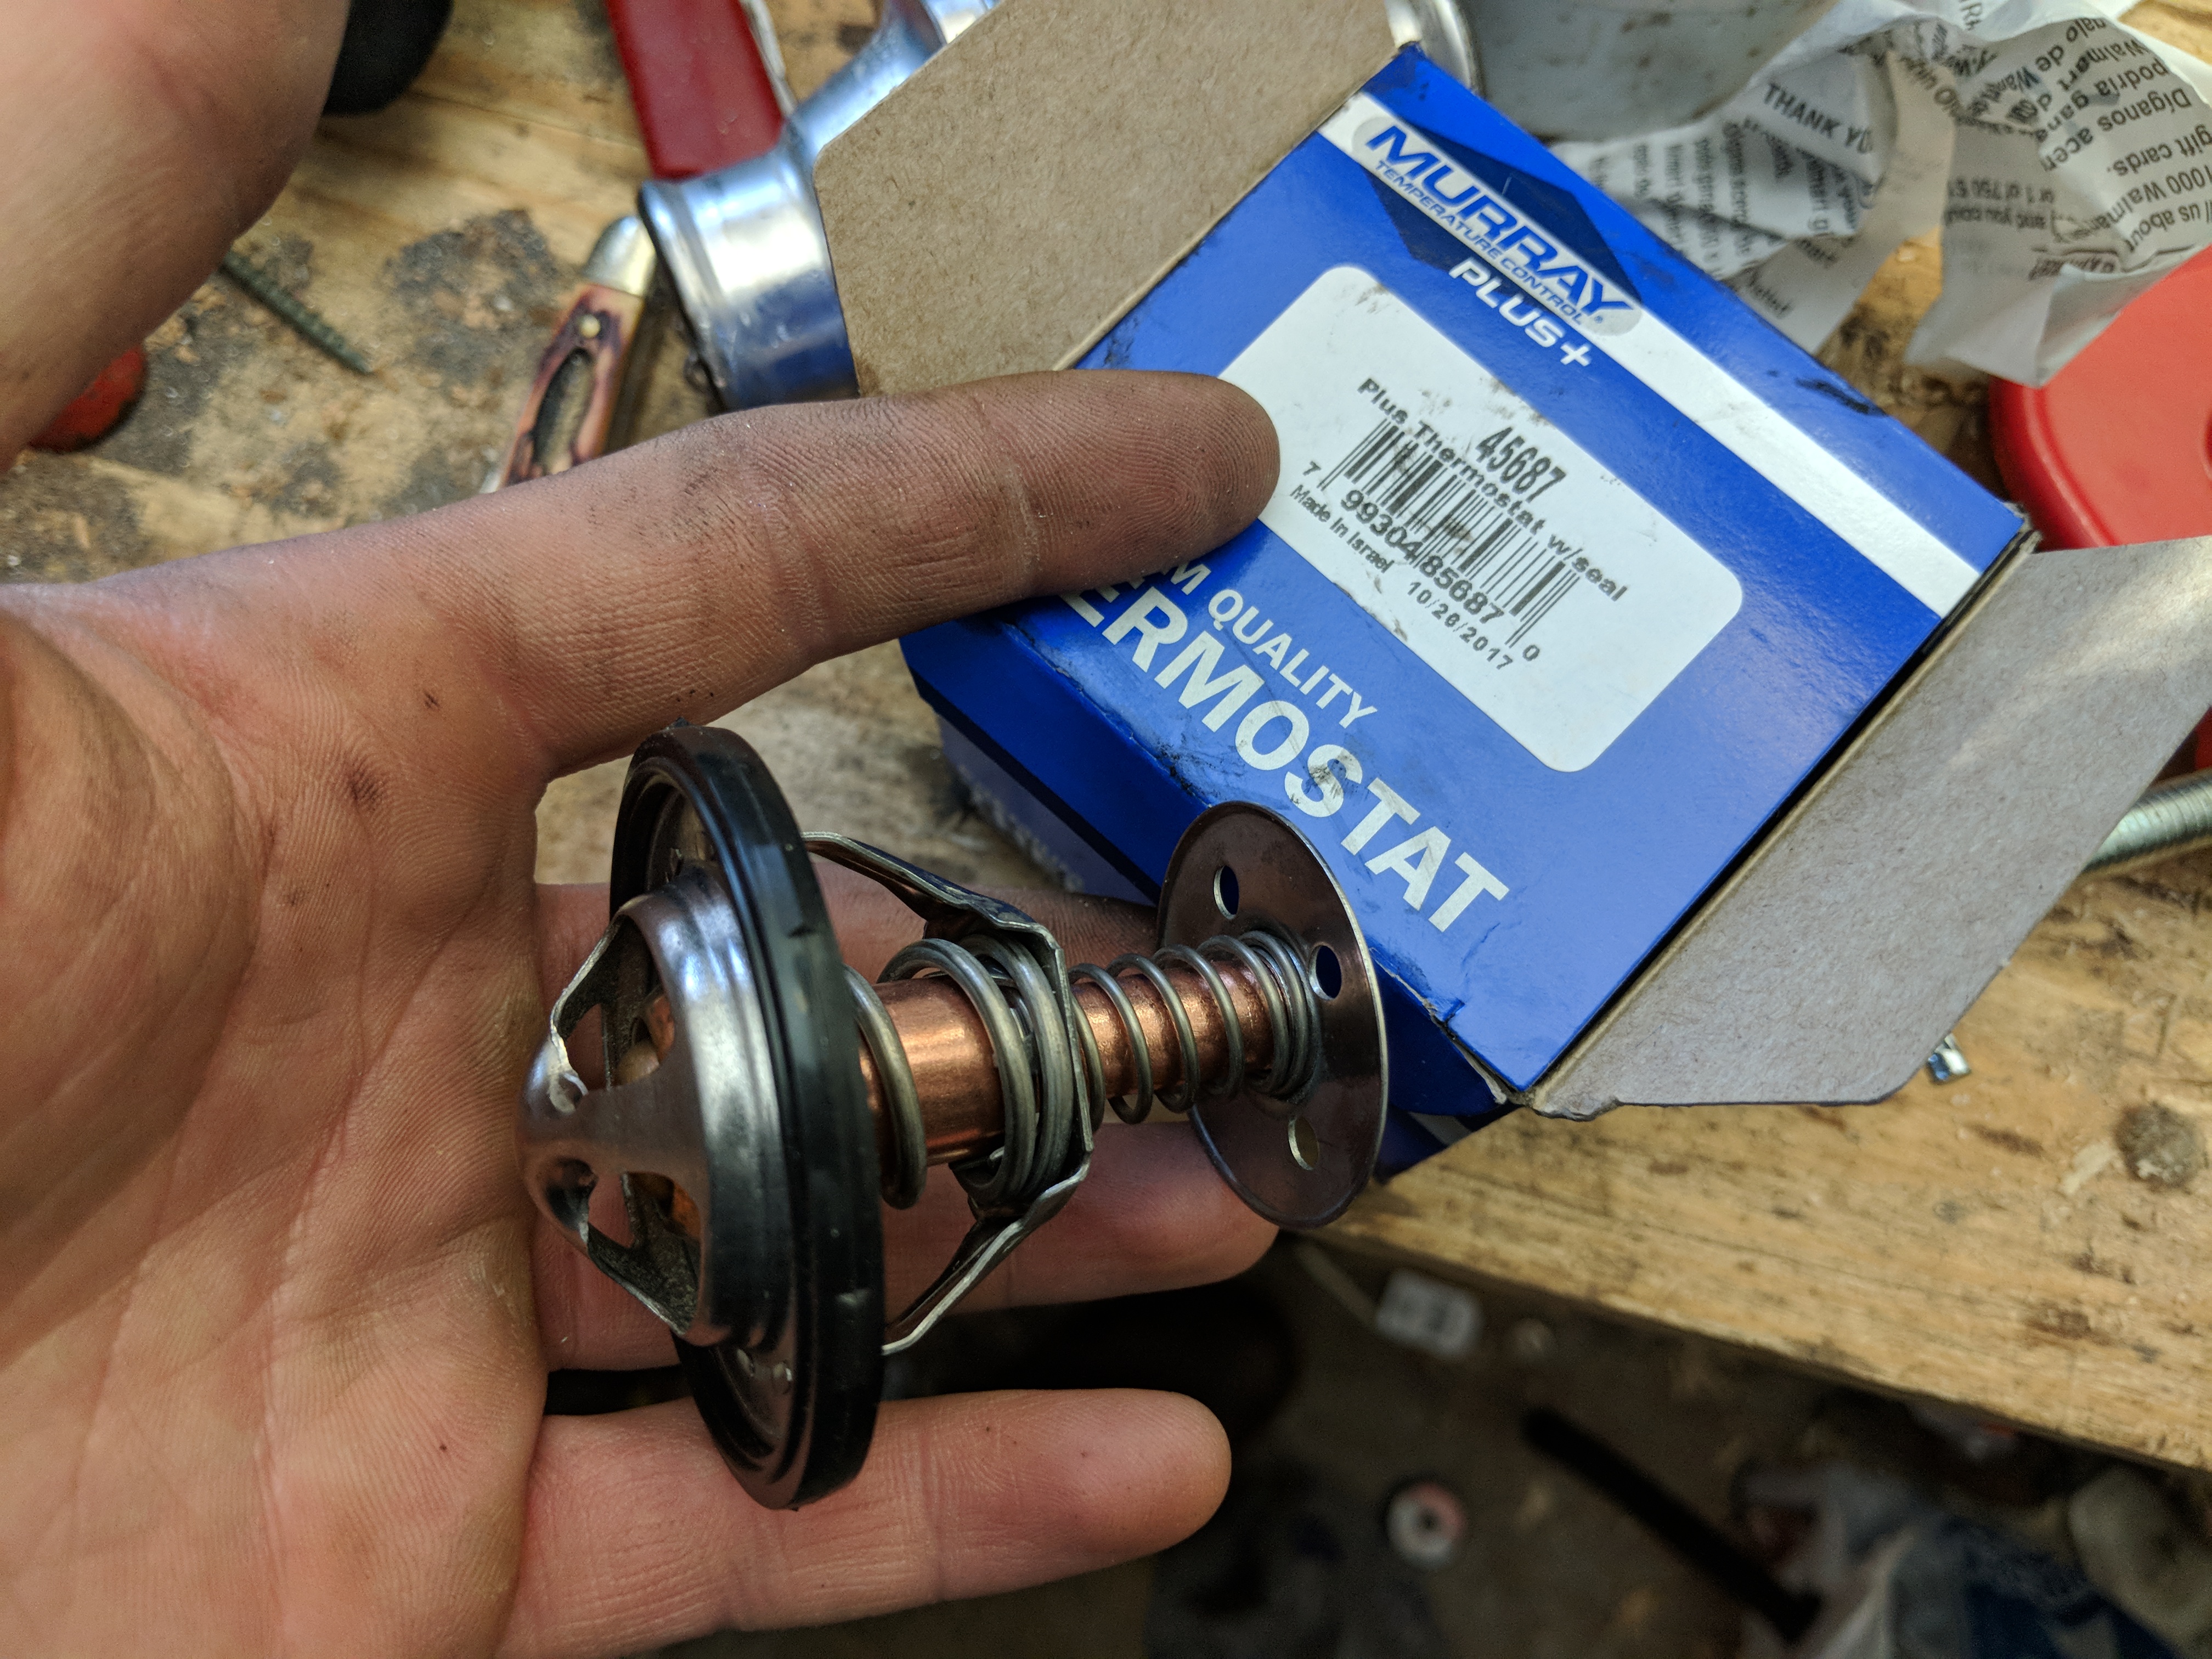
The 180 degree small block thermostat was actually running too cold, making her stay in open loop and burning a lot of fuel. The next jump up in temp for a small block thermostat is 195 degree, which is too hot for my liking. I opted for this LS engine thermostat which is 187 degrees. They're the same size other than the extra relief on the back which is, I believe, for the heater core.
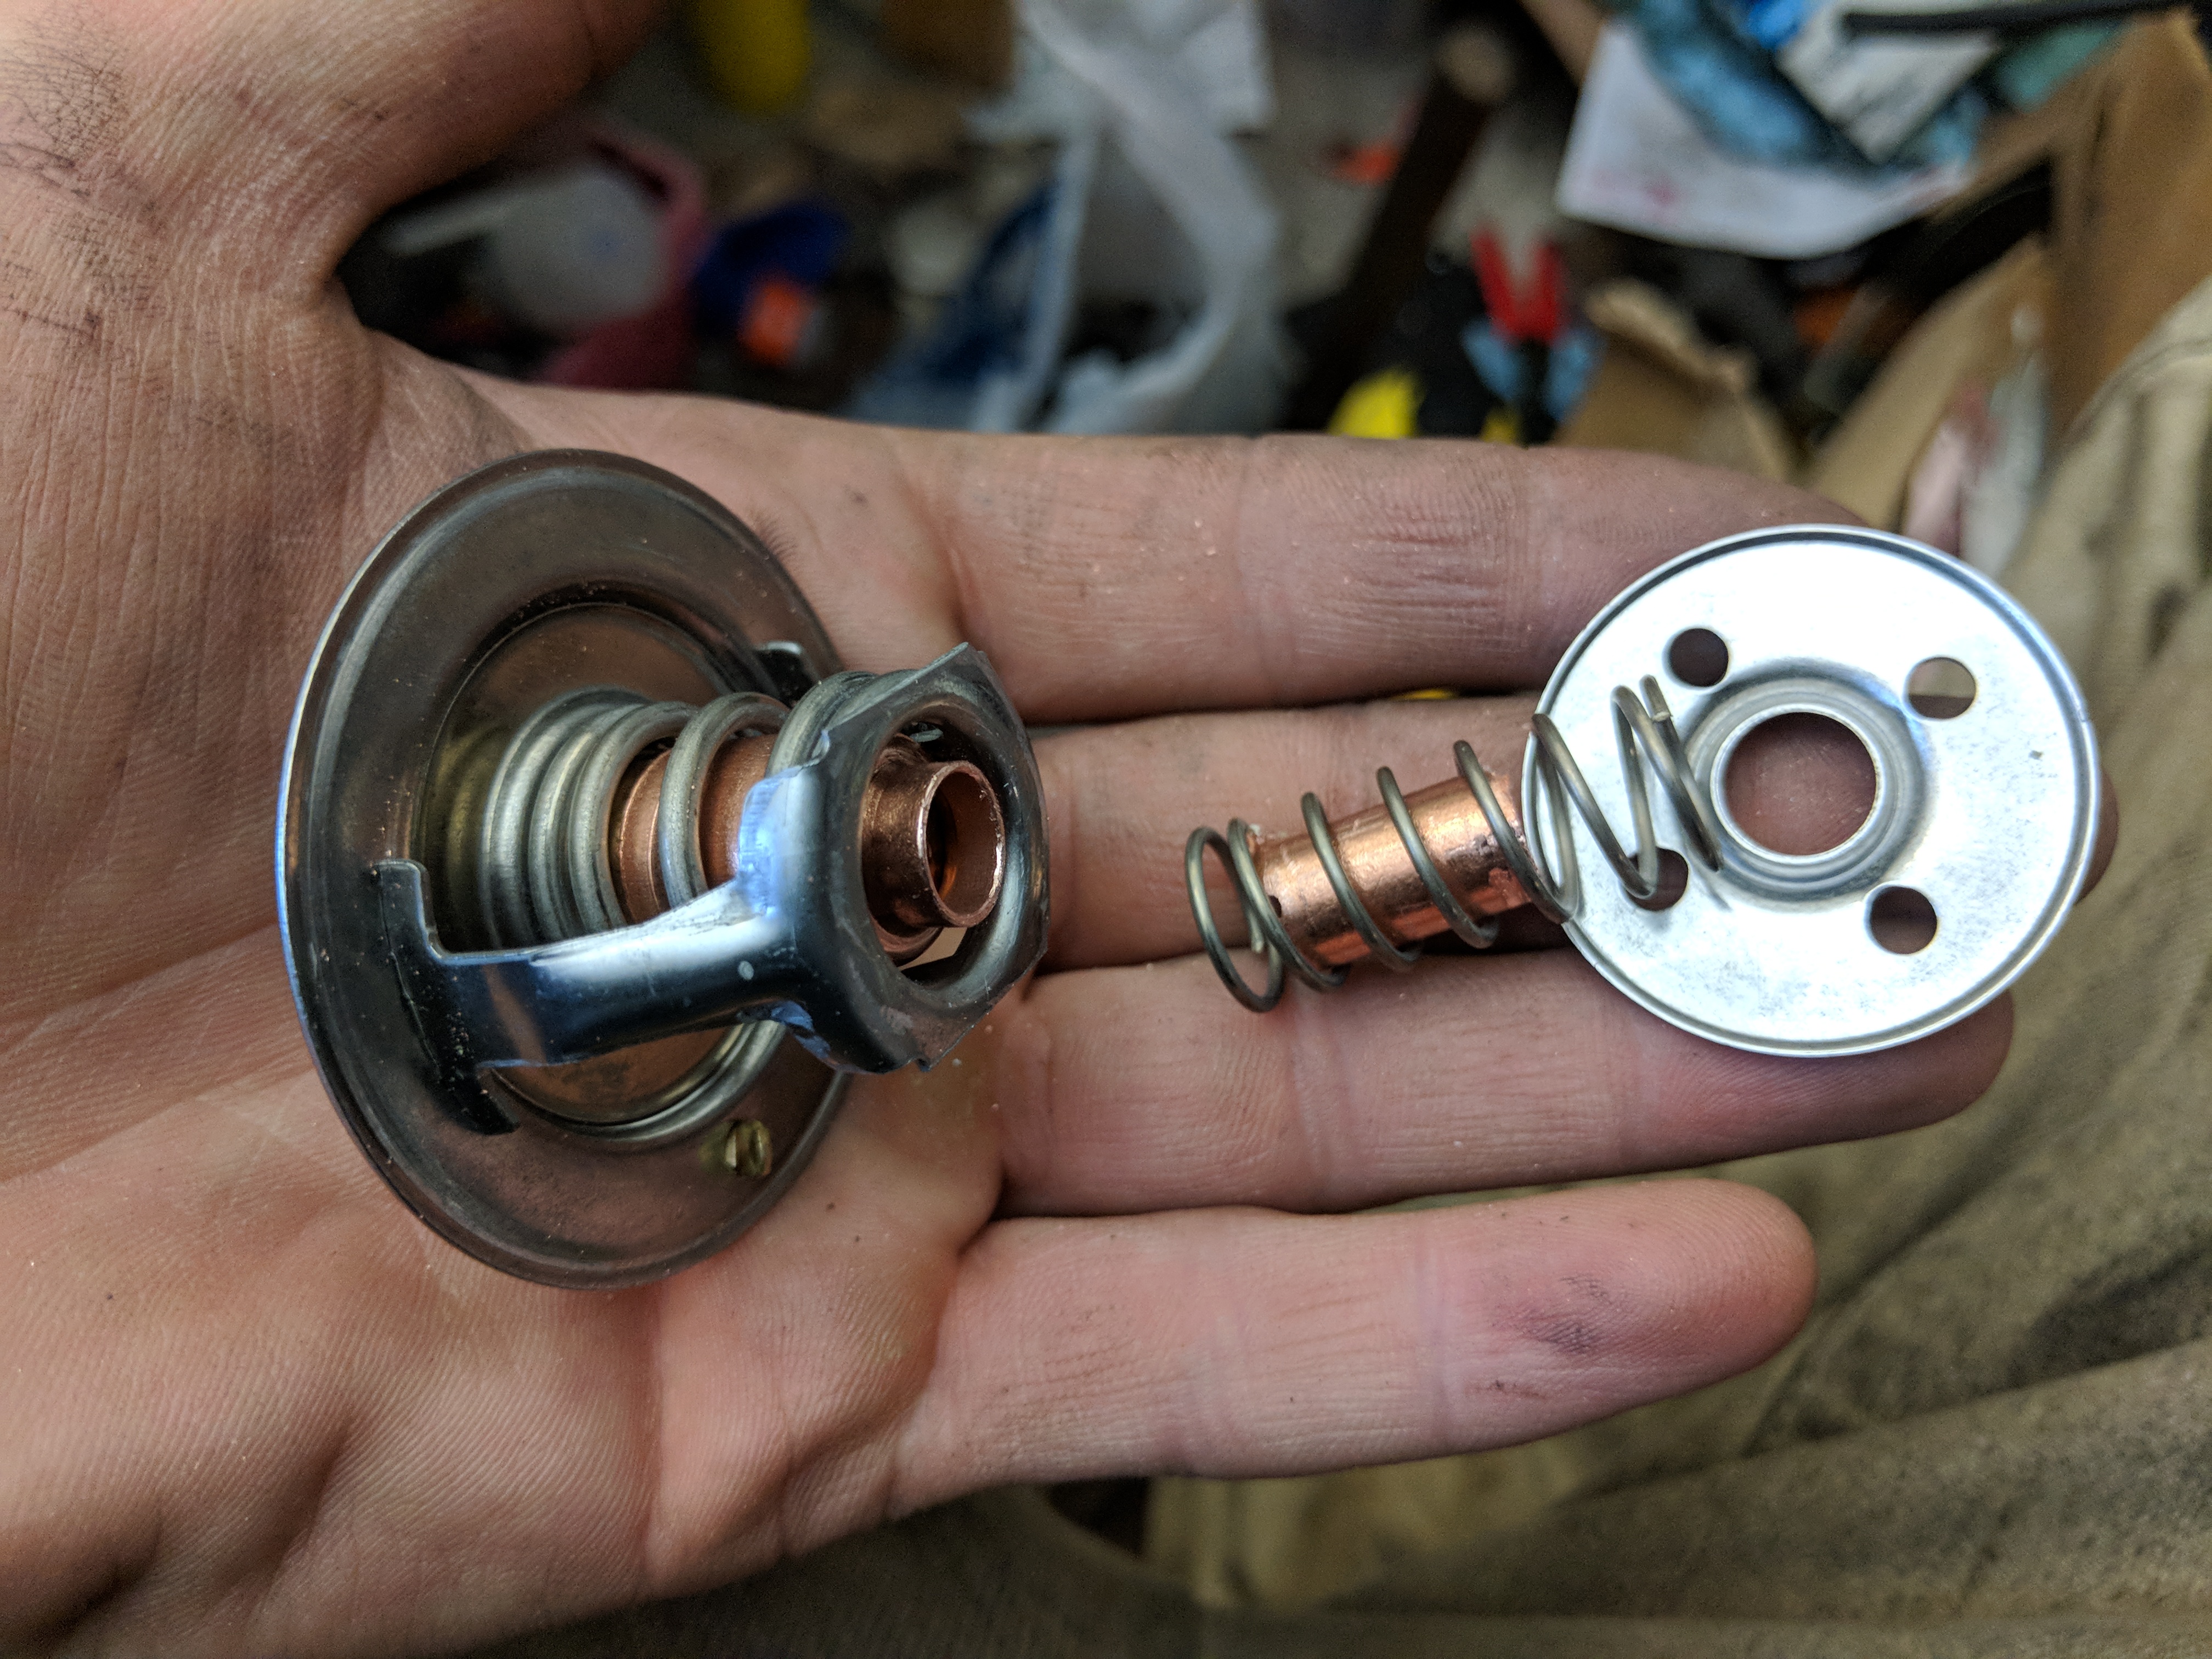
I just cut the relief on the back off with an angle grinder and cleaned up the burrs with a file. This allowed it to drop right in the in line housing.
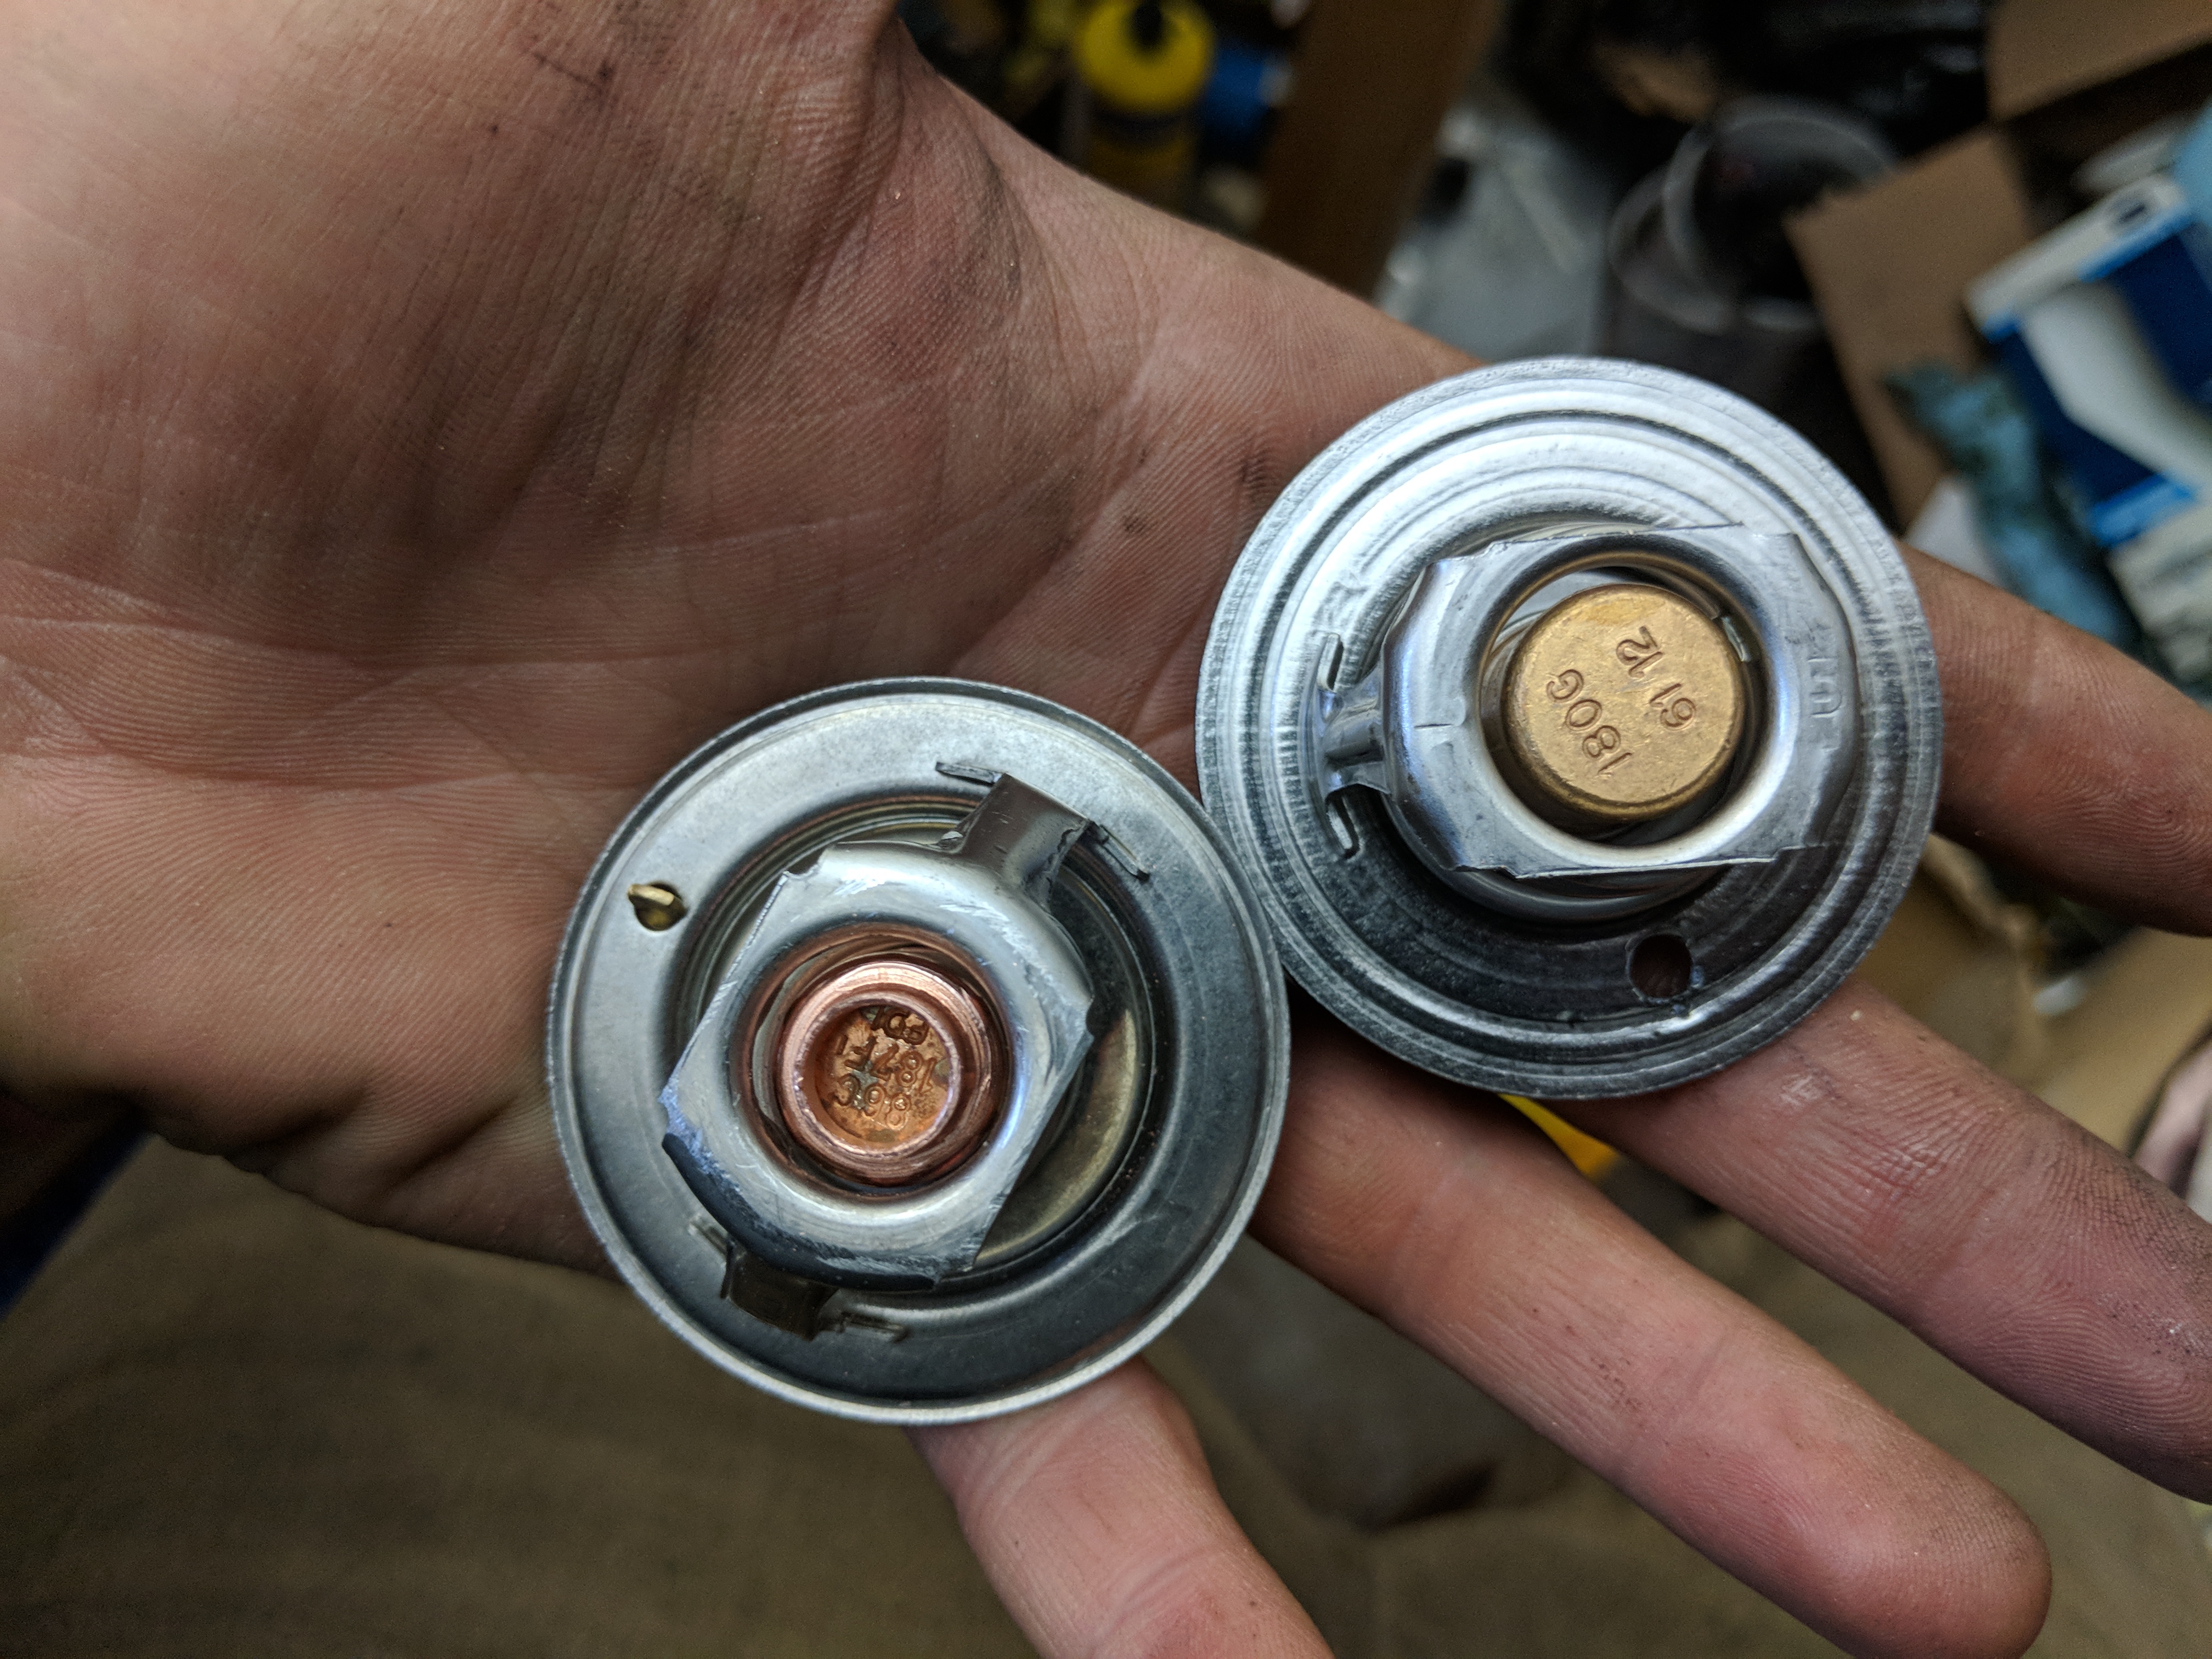
As you can see, they're now the same dimensions and will fit/function perfectly.
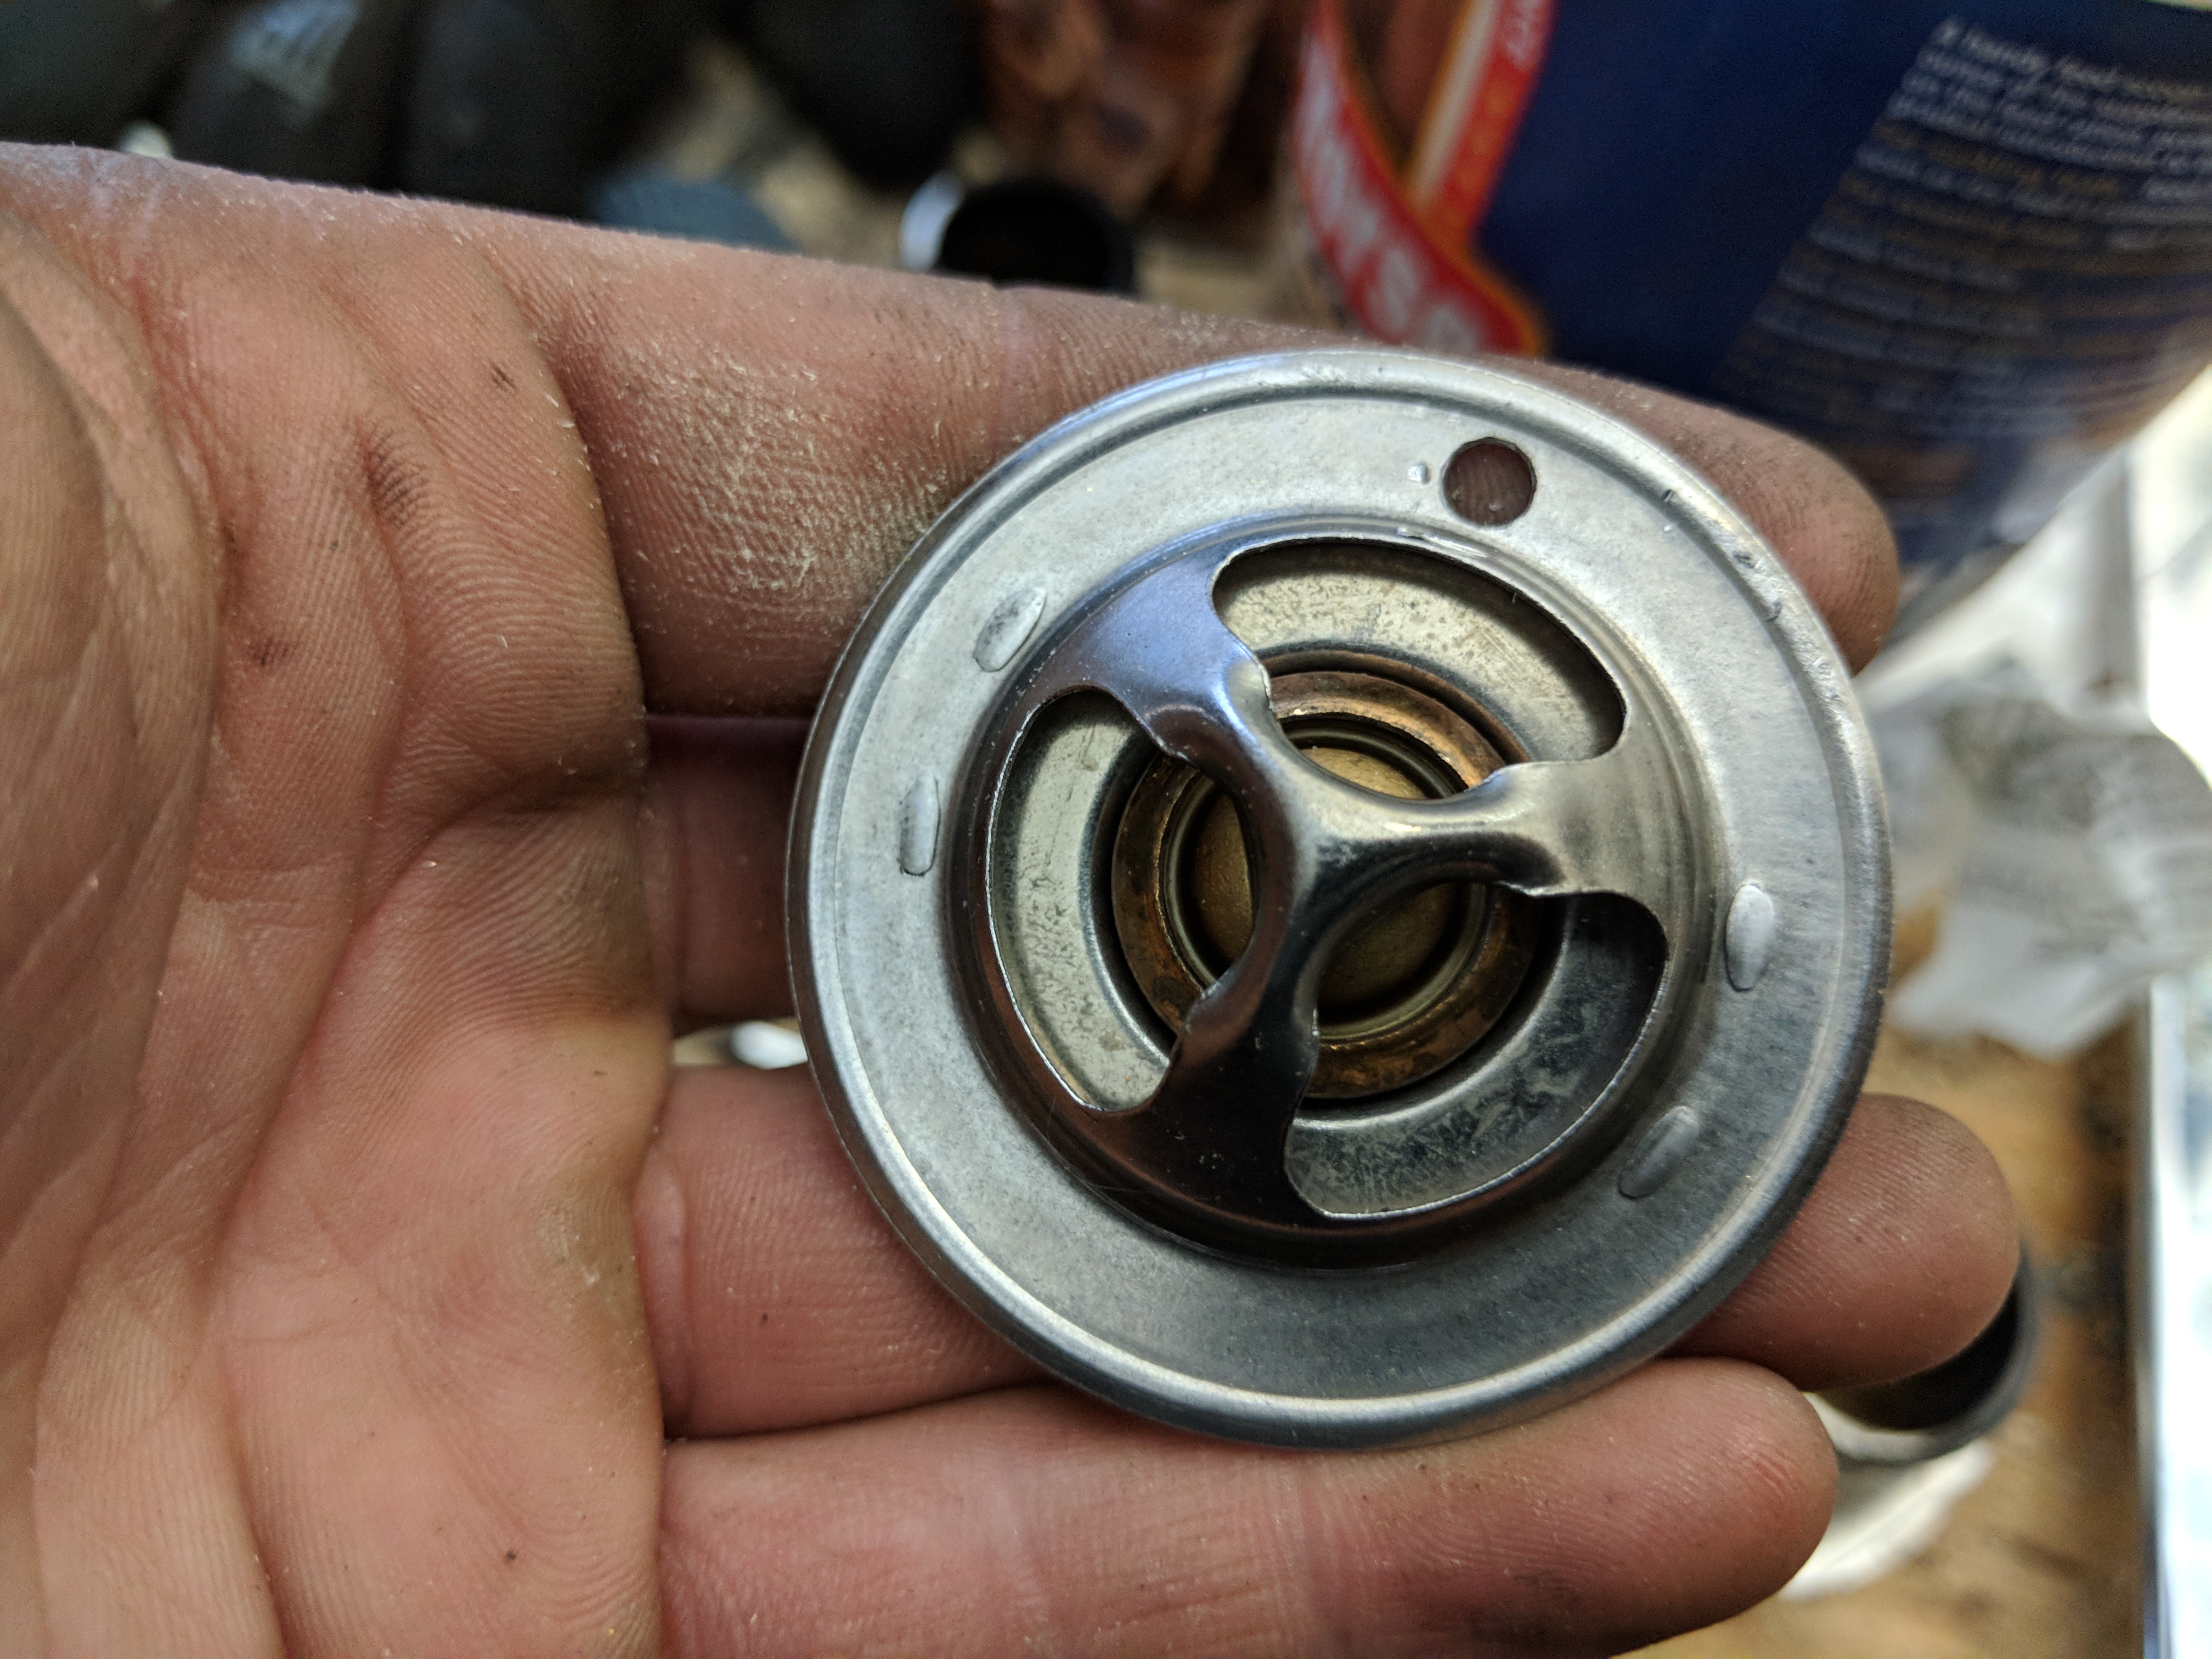
It did have a jiggle pin in it, but I opted to remove it and slightly enlarge the hole so that hot water would get to the thermostat quicker since it's no longer installed directly in the engine as it was designed.
I like to mark where the hole is on the outside of the housing. That way I can orient it on the top so that air bubbles can escape.
I'll install it tomorrow and report back with updated operating temperatures.
If anyone has any questions, comments, concerns, please post them below! I've been extremely happy with this setup and will add more to this post tomorrow as I'm sure theres some I'm forgetting.
EDIT:
From my most recent reply to this thread:
"Had a small issue a week or so ago. The radiator developed a little bit of a leak. I patched it with JB weld and shot the seller a message, not expecting much of a response since it was outisde eBay's protection period.
Surprisingly enough, the seller responded asking for a picture. I sent them one showing the leak (I had put UV dye in the coolant, so you could see it). They responded pretty quickly and said they had sent another out.
I received it and installed it a few days ago. I improved my fan mounting system, added a lower restraint so it couldn't slide forward, and installed it. I've had zero issues and I'm adding a couple pictures to the changes to the original post very shortly."
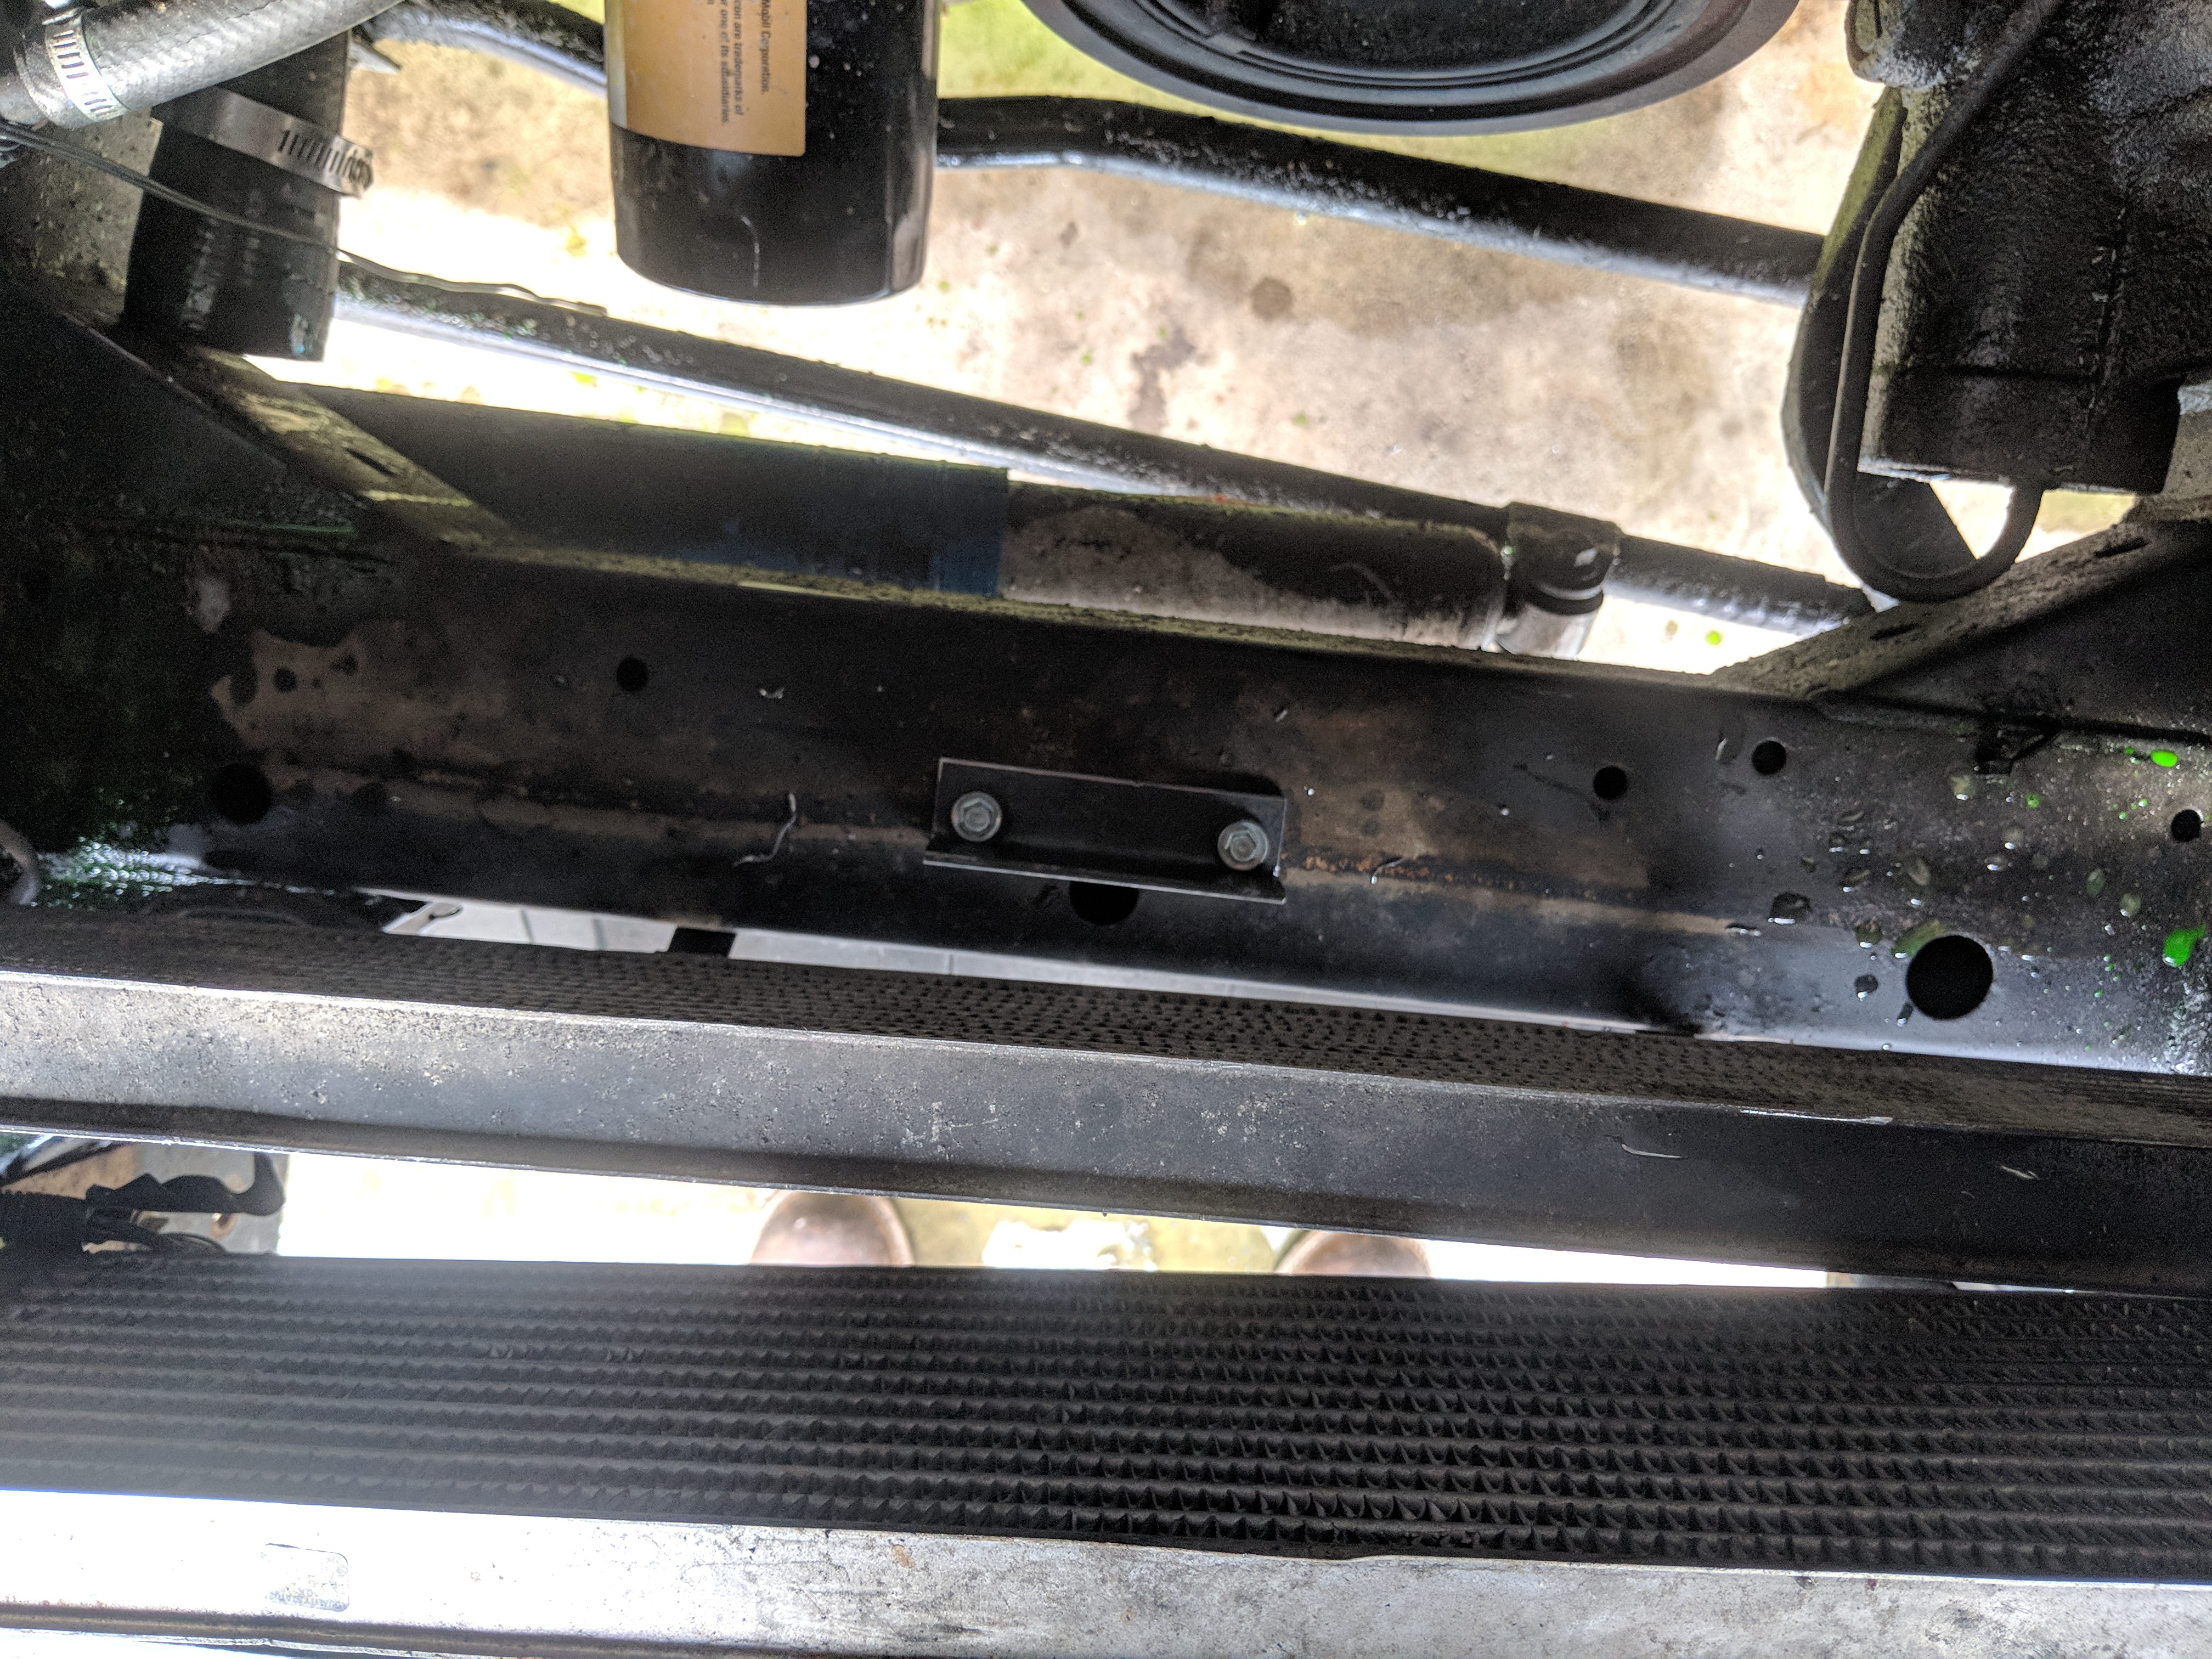
Ok, so the first thing I changed was adding this small piece of angle iron to the frame crossmember. This acts as a stopper so the radiator can not move too far forward and hit the power steering line mounts. The first radiator interfered with those, I learned after I pulled it. They had nothing to do with the leaking, but likely eventually would have caused an issue.
I just used a small piece; 4 inches I think, I had it sitting on a shelf, and two self tapping screws. I should've put some paint on it... Anywho.
I also changed my fan mounting. I didn't put anything through the core this time, which I think will prolong the radiator's life. This may not be the best option, but it makes me happy enough.
Also, I added a piece of hose to the drain valve so I could drain it without making as much of a mess in the future.
Also, I've still been very happy with the 187* thermostat even as high as 70* ambient. I look forward to continuing to see how it acts through spring and into summer, and of course will update.
If I ever get the opportunity I may try it again. If someone else wishes to try it in the mean time I'd love a message and pictures. It's possible it may work if you keep the mechanical fan. Just an idea.
Thanks all. ]
Hey all! After Years of frustration and frustration towards the inadequacies of the factory cooling system, such as the weakness of the expansion tanks and the y couplings in the lower hose, I decided to do something about it.
Let me note this is not a full write up, but there's plenty of information here for anyone to get it done. I did this setup with a 180 degree thermostat and she runs 177-185 degrees, depending on weather and whether or not I'm towing a trailer.
Building off of the in-line thermostat mod, the following setup is what I've come up with. First though, here's the parts list.
- Two hoses. One I already had for an 01 Mustang GT, and another I picked out of the back room at the local O'Reilly's. The first is a Dayco 71911 and the second is a Masterpro 20573.
- Meziere WN0073 In-line thermostat housing. This is not the same housing typically used for the in-line thermostat housing. The typical housing is 1-1/4" on inlet and outlet. This housing is 1-1/4" inlet and 1-1/2" outlet. EDIT: There is now a housing made by Jegs. I like that one better functionally and it's a little cheaper.
- '67-'69 Camaro 3 row radiator, all aluminum, with the 23" core. It MUST be the one with a 23" core. I used this one specifically ($119), though I don't know if this link will still work a few years down the road.
- 1.5"x.75" tee coupling. I made my own out of a couple seperate nylon couplings and some epoxy to get me on the road, but you can get a single piece brass or aluminum coupler here. That's what I did shortly thereafter.
This is the radiator I used laying next to the old, repeatedly patched, factory radiator. Poor rad had 150k miles on it. No clogs and still cooled alright, but the plastic ends had been patched three or four times with epoxy and was finally just too far gone.
The radiator did require one small modification. I had to trim a bit off of each end in order for it to accept the factory transmission cooler. I run two factory transmission coolers since I tow a lot so I cut out four tabs. People who run an oil cooler will need to o the same. You'll also want to drill a couple holes and use a nut and bolt on each oil cooler tab to hold it in place.
I cut the sides, bent it up, and cut off the tab with an angle grinder. Then I used a sanding disc on the die grinder to clean up the edges. Not completely necessary, but it made it a lot nicer not having sharp edges.
This is the lower hose setup, in its entirety. 90 degree (this is out of the Masterpro hose, you'll have to trim it some. Utility knife makes it easy work.), followed by your tee coupling to connect the heater core, followed by a 45 degree cut out of the Dayco hose. That will connect from the radiator outlet to the water pump inlet.
Here's the lower hose installed. As you can see I accidentally cut the hose a little short making it a little less than a 90 degree angle. Cut yours a little longer and it should be a perfect fit.
Now, my upper hose setup is a little unique. You wouldn't be able to do this exactly if you still have AC installed, as most do. That said, if you retain the first section of the factory radiator hose, into the thermostat housing, and then into the Dayco hose pieces, and then into the radiator. If you wish to install an aftermarket thermostat as I have, this would be the place to do it.
Here you can see where I installed the transmission coolers into the tabs I cut out. Mine are only zip tied right now, not bolted, but eventually I'll buy bolts and stick in them.
The 180 degree small block thermostat was actually running too cold, making her stay in open loop and burning a lot of fuel. The next jump up in temp for a small block thermostat is 195 degree, which is too hot for my liking. I opted for this LS engine thermostat which is 187 degrees. They're the same size other than the extra relief on the back which is, I believe, for the heater core.
I just cut the relief on the back off with an angle grinder and cleaned up the burrs with a file. This allowed it to drop right in the in line housing.
As you can see, they're now the same dimensions and will fit/function perfectly.
It did have a jiggle pin in it, but I opted to remove it and slightly enlarge the hole so that hot water would get to the thermostat quicker since it's no longer installed directly in the engine as it was designed.
I like to mark where the hole is on the outside of the housing. That way I can orient it on the top so that air bubbles can escape.
I'll install it tomorrow and report back with updated operating temperatures.
If anyone has any questions, comments, concerns, please post them below! I've been extremely happy with this setup and will add more to this post tomorrow as I'm sure theres some I'm forgetting.
EDIT:
From my most recent reply to this thread:
"Had a small issue a week or so ago. The radiator developed a little bit of a leak. I patched it with JB weld and shot the seller a message, not expecting much of a response since it was outisde eBay's protection period.
Surprisingly enough, the seller responded asking for a picture. I sent them one showing the leak (I had put UV dye in the coolant, so you could see it). They responded pretty quickly and said they had sent another out.
I received it and installed it a few days ago. I improved my fan mounting system, added a lower restraint so it couldn't slide forward, and installed it. I've had zero issues and I'm adding a couple pictures to the changes to the original post very shortly."
Ok, so the first thing I changed was adding this small piece of angle iron to the frame crossmember. This acts as a stopper so the radiator can not move too far forward and hit the power steering line mounts. The first radiator interfered with those, I learned after I pulled it. They had nothing to do with the leaking, but likely eventually would have caused an issue.
I just used a small piece; 4 inches I think, I had it sitting on a shelf, and two self tapping screws. I should've put some paint on it... Anywho.
I also changed my fan mounting. I didn't put anything through the core this time, which I think will prolong the radiator's life. This may not be the best option, but it makes me happy enough.
Also, I added a piece of hose to the drain valve so I could drain it without making as much of a mess in the future.
Also, I've still been very happy with the 187* thermostat even as high as 70* ambient. I look forward to continuing to see how it acts through spring and into summer, and of course will update.
Last edited by Alex_M; Jul 12, 2020 at 08:36 AM.


Thread Starter
|
Camel Trophy
Joined: Aug 2014
Posts: 4,743
Likes: 985
From: Southwestern Virginia
Thanks, Lisa! The sensor tee is probably a replica of the glowshift unit, but it's just a cheap Chinese unit I got on Amazon for 7-8 dollars.
My truck was originally an SAI truck but I removed it. That said, I could look into making it work with SAI trucks. I'm willing to bet you could easily get another sensor tee like the one I used and put it in the lower hose for the SAI sensor.
My truck was originally an SAI truck but I removed it. That said, I could look into making it work with SAI trucks. I'm willing to bet you could easily get another sensor tee like the one I used and put it in the lower hose for the SAI sensor.
Thread Starter
|
Camel Trophy
Joined: Aug 2014
Posts: 4,743
Likes: 985
From: Southwestern Virginia
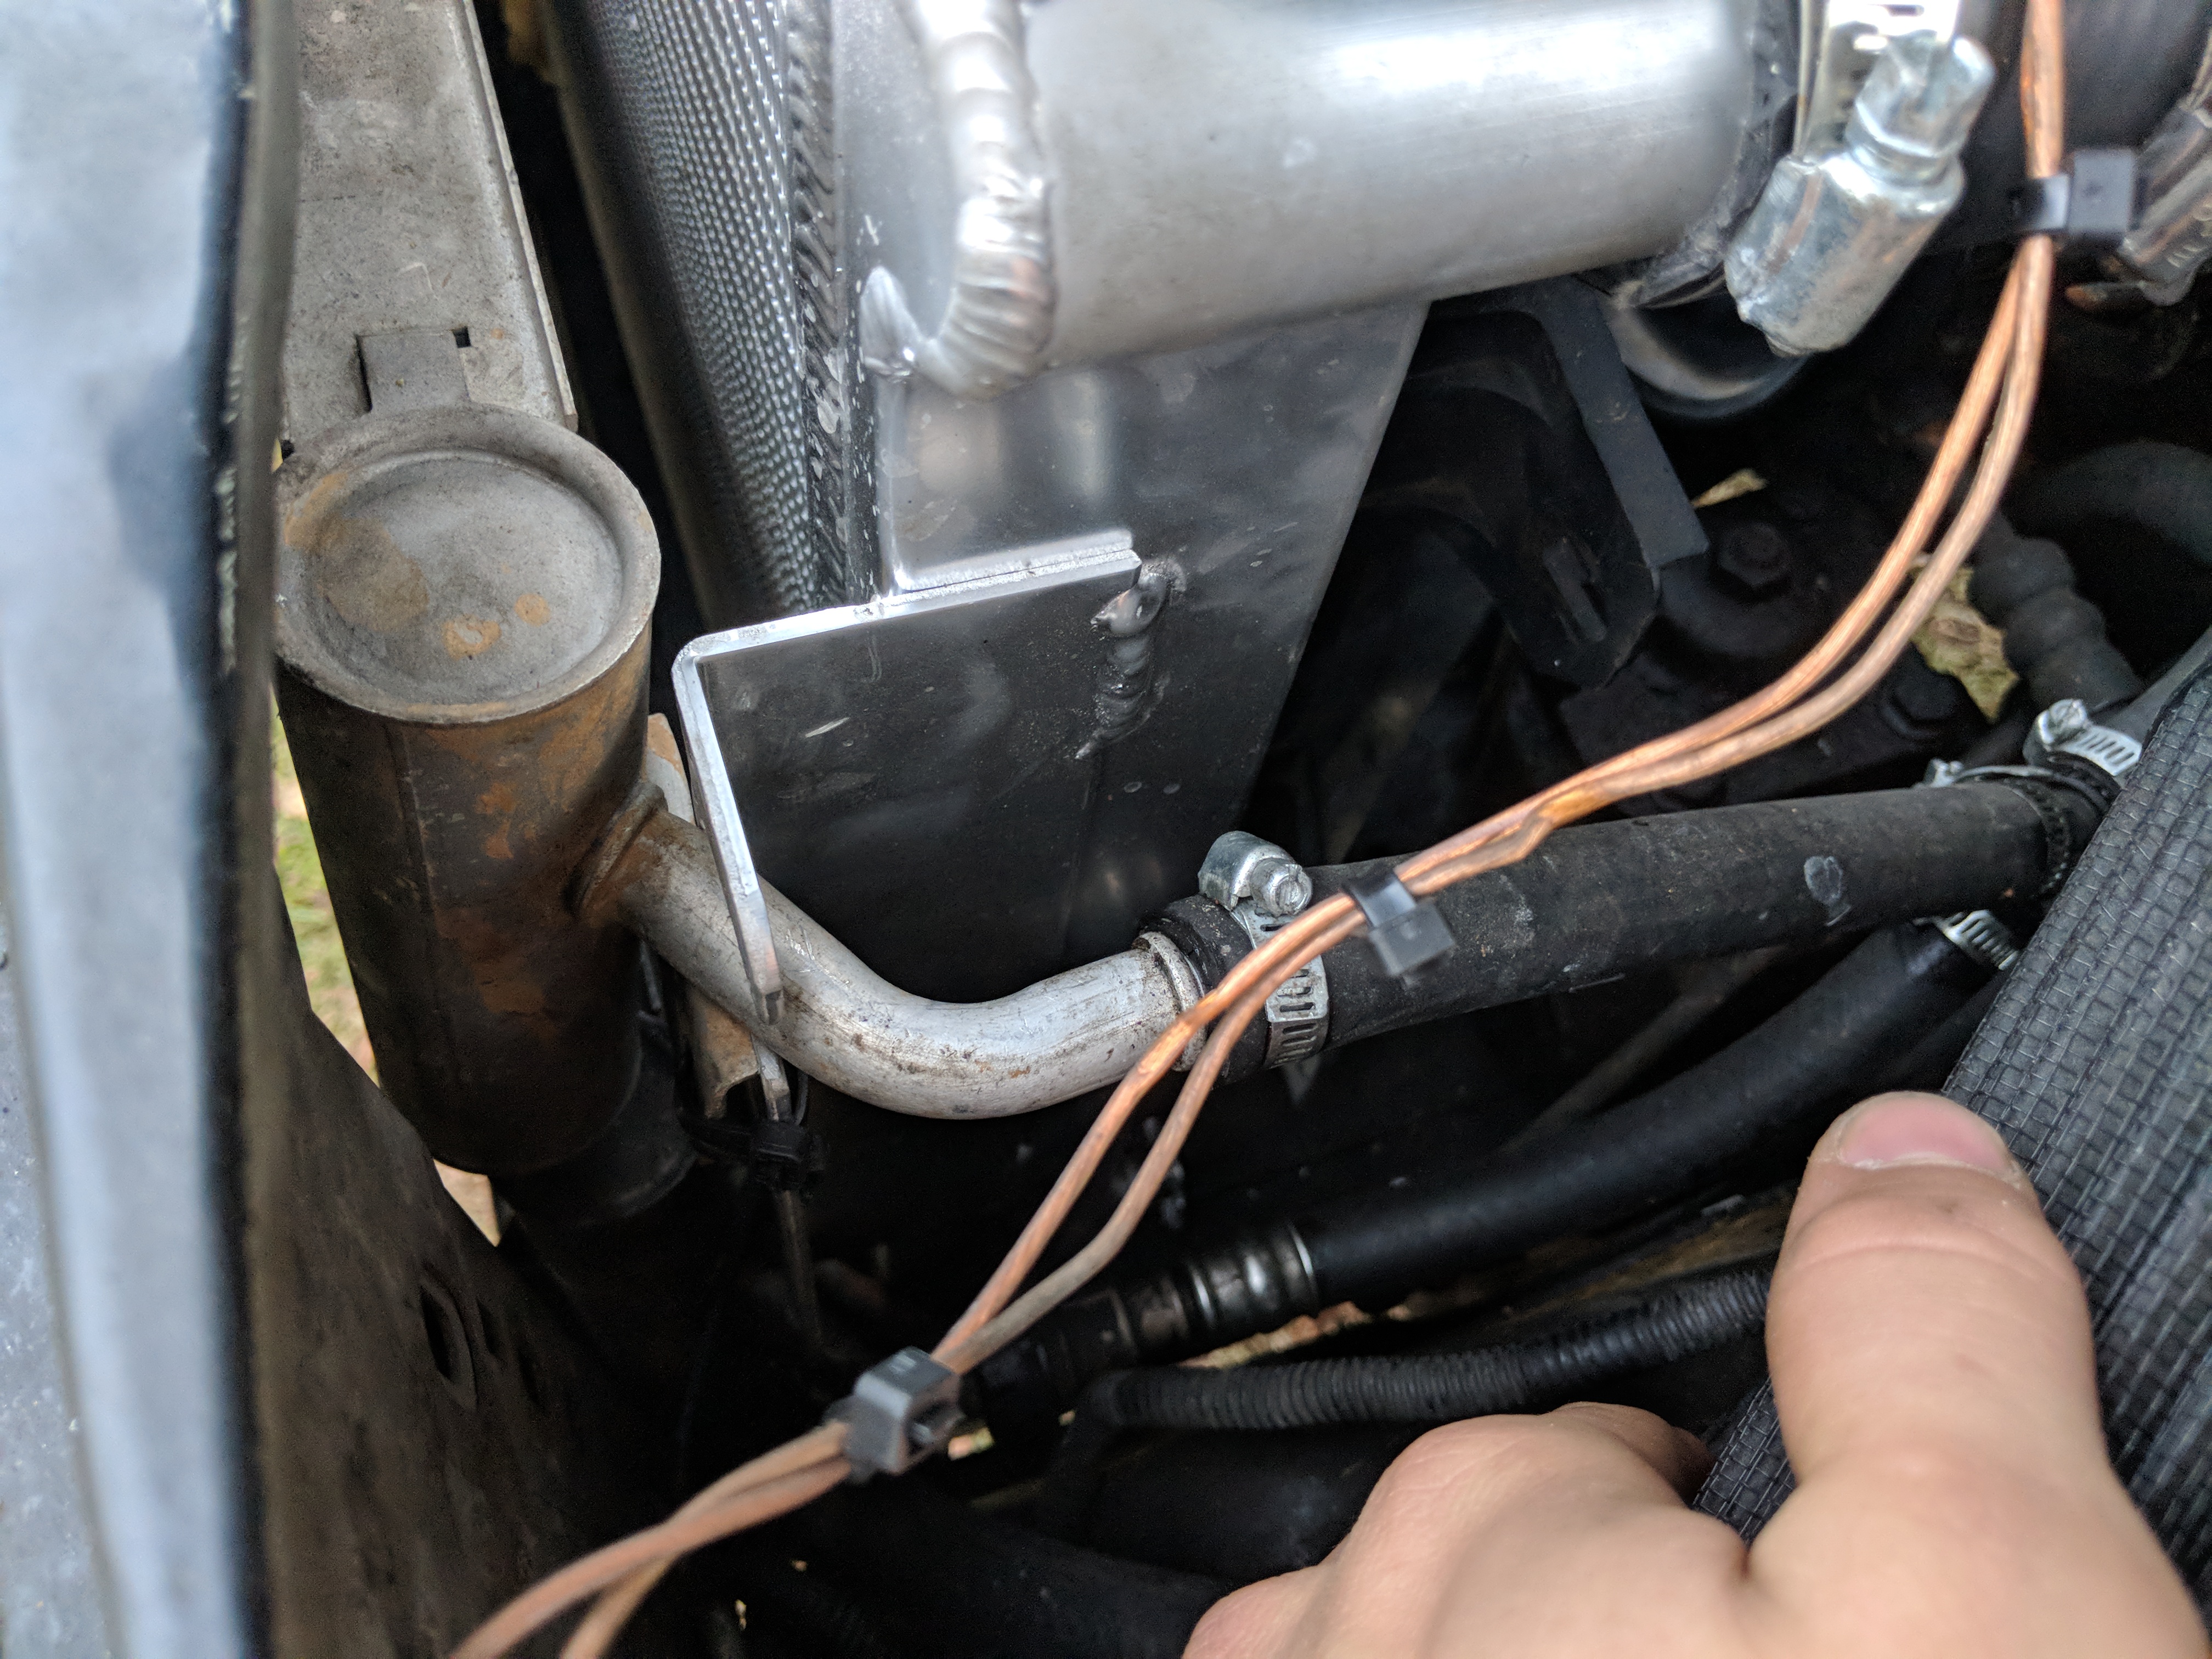
Oh! And I completely removed the reservoir/degas bottle. They're not really important as vehicles went without them for decades until they were invented, and some vehicles (such as Toyota Tundras) still don't have them. I just fill straight into the radiator.

Rock Crawling
Joined: Jun 2016
Posts: 469
Likes: 193
Alex, another great writeup. I've been looking at doing something similar for a while. I'd probably leave the expansion tank just for my own sanity so I could see the coolant level, since I check it practically daily. But seems like a good solution.
Thread Starter
|
Camel Trophy
Joined: Aug 2014
Posts: 4,743
Likes: 985
From: Southwestern Virginia
Thanks, Aaron! That's really good knowledge. I unplugged mine and removed it, but I may plug it back in and zip tie it to see if the code disappears. Actually, I should check and see if there is a code in the first place... Anywho.
Removing the expansion tank was actually a big part of the reason I chose this radiator. I can understand wanting to check the coolant level, but with as many people who seem to have their tanks fail... I wanted to remove that failure point. Same with the y-coupling in the lower hose that connects it. I check mine by giving the upper hose a few squeezes and listening to see where the water level is.
Removing the expansion tank was actually a big part of the reason I chose this radiator. I can understand wanting to check the coolant level, but with as many people who seem to have their tanks fail... I wanted to remove that failure point. Same with the y-coupling in the lower hose that connects it. I check mine by giving the upper hose a few squeezes and listening to see where the water level is.
I like this mod because it gives you many options for t-stat temps and radiator cap poundages. I think there is a 7#, 13#, and 16# available. Reducing system pressure extends gasket and seal life. Have you tried different cap/t-stat combos? We have great swings in temps in AZ, between summer and winter, even 50 degrees in 1 day.