
Lucky 8’s Project P38

Rock Crawling
Joined: Apr 2008
Posts: 372
Likes: 5
From: Winfield, Alabama
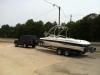
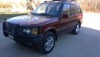
Ive got a 1999 p38 I use for wheeling. It's completely stock except for the EAS to coil spring conversion kit and oversized Goodyear Wranglers. Not sure of how much lift as these mods where in place when I bought the truck, but it's obviously not stock height. It is a BEAST offroad, but I can't keep fog lights in it. I bust the glass on them pretty regular. May be time for an ARB bumper.

Thread Starter
|
Winching
Joined: Jan 2009
Posts: 628
Likes: 18
Project Update : Recap with a Splash
When we started out with this truck we made a list of things to accomplish. Let's revisit it and see how we are doing.
3-5 in lift / 4 inch lift installed
Dump the 20in dubs for 16in and 33in mud tires / 33in Nittos installed
Front and rear bumpers / In production, just waiting on the first run.
Sliders / Installed
Front and rear lockers / They need to be installed
HD drag link and track rod / In production
Rear links that are not made from Fiberglass / Nothing yet
Lock the Borg Tcase some way some how. / Locked and working on a selectable option
HD rear shaft / Produced and waiting to be installed
HD CV and shafts / Out for pricing and possible production
Disconnect the BCM from the ECU "incase of failure the truck will still run" / I had a confirmation that this can be done just waiting on software to do it.
There was one more thing on the list and will get to that in a minute. Out of the 11 things listed above.
6 are complete
2 are in production
2 have a promising future
and one we did not even look at yet.
I feel like we're doing a pretty good job thus far.
Now that brings us to the last thing on the list waterproof the BECM.
I think we may have come up with something that could change the way we all think about our automotive computers and water. Here is a sneak peek at our new water guard system.
The water guard system is a chemically bonded bit of magic to the outside of the board that prevents water molecules from penetrating. The advantage is air can flow naturally over the board and it will not cause overheating issues.
What do you guys think?
Rock Crawling
Joined: Nov 2007
Posts: 420
Likes: 4
From: Spring Grove,IL
It seams like a good solution to protect from water migration. Is it just me or did the idle raise when you dipped the treated side in the water? Also it would appear to be a good way to water proof connectors .
Thread Starter
|
Winching
Joined: Jan 2009
Posts: 628
Likes: 18
Project Update : Top to Bottom
New Rack
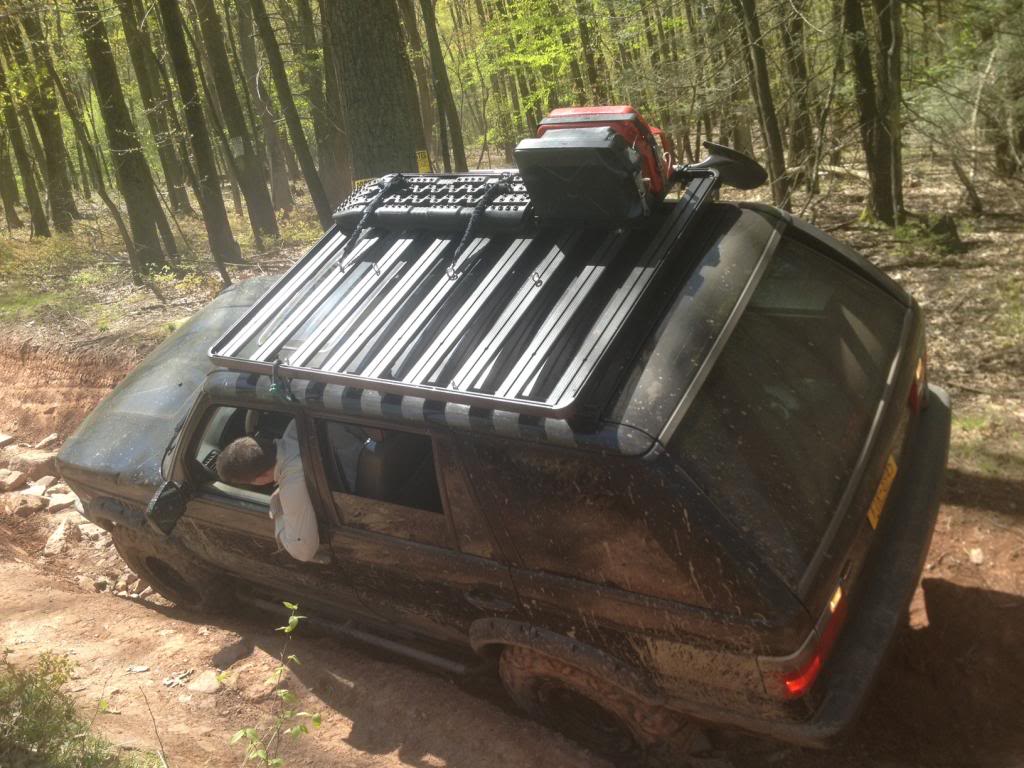
As much as we love the P38 SD rack, they are not very practical when compared to the modern racks on the market. So we stripped off the SD and slapped on a Front Runner unit.
We went with the Front Runner rack for a few reasons, but the main one was it can be swapped over to the the L322 Project truck or the LR3 for that matter. All you need to do is change the mounting feet.
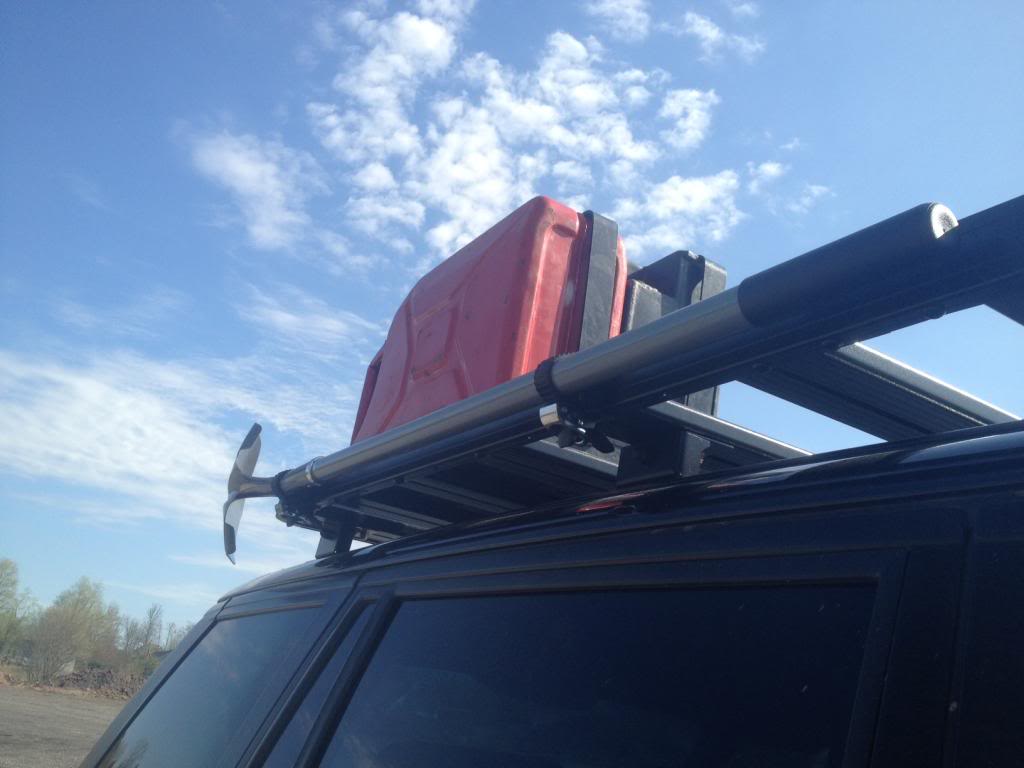
The second factor is you can add almost anything to a front runner rack without drillling any holes. For example this double Jerry can holder. To mount it all you need to do is simply drop in the hardware to the pre existing locations and tighten down. It is that easy.

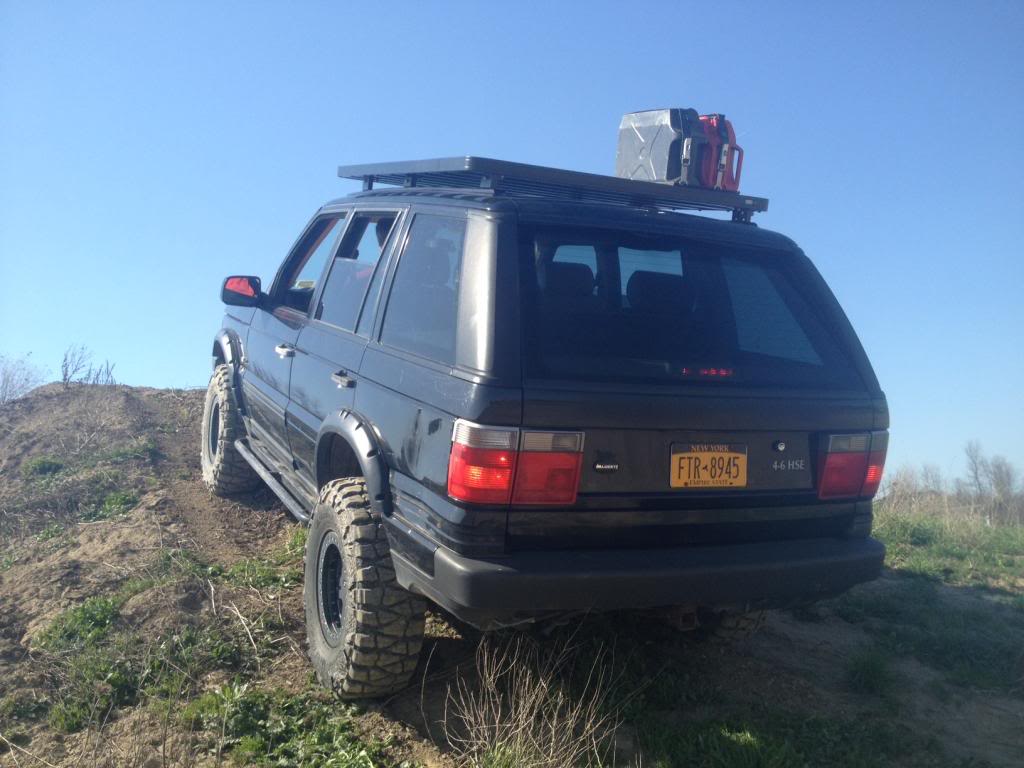
The shovel/ax holder is brilliant.
Moving down
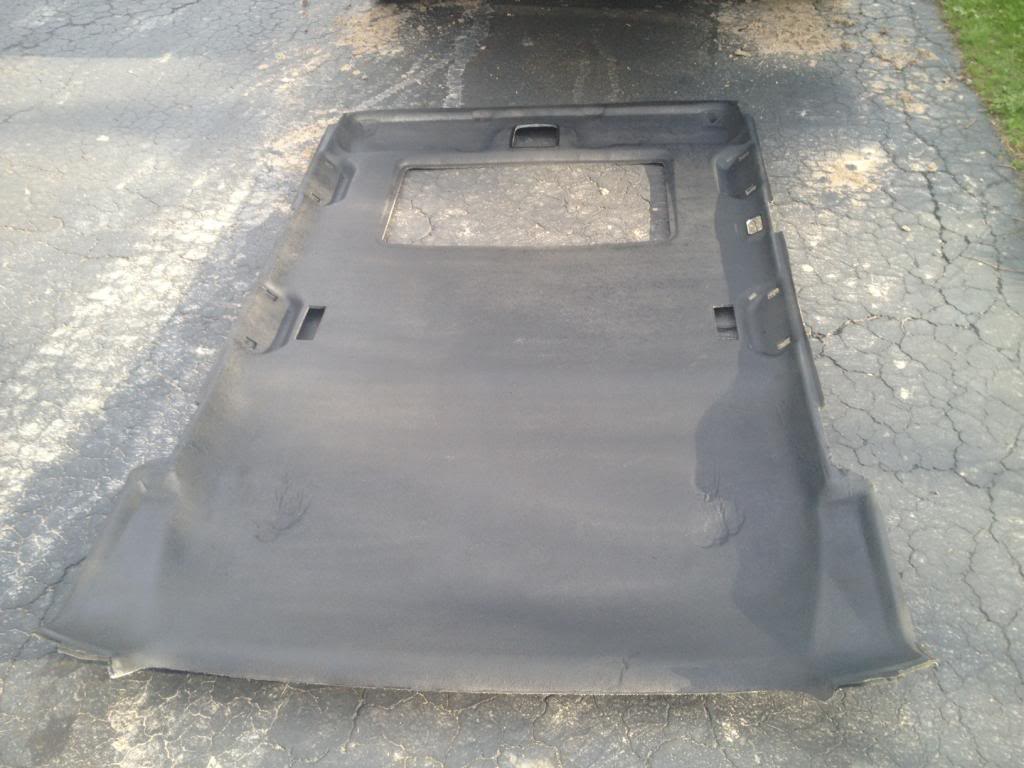
The head liner in the P38 was coming apart from every corner. We pulled the liner out and and ripped off the fabric. This is what we were left with.
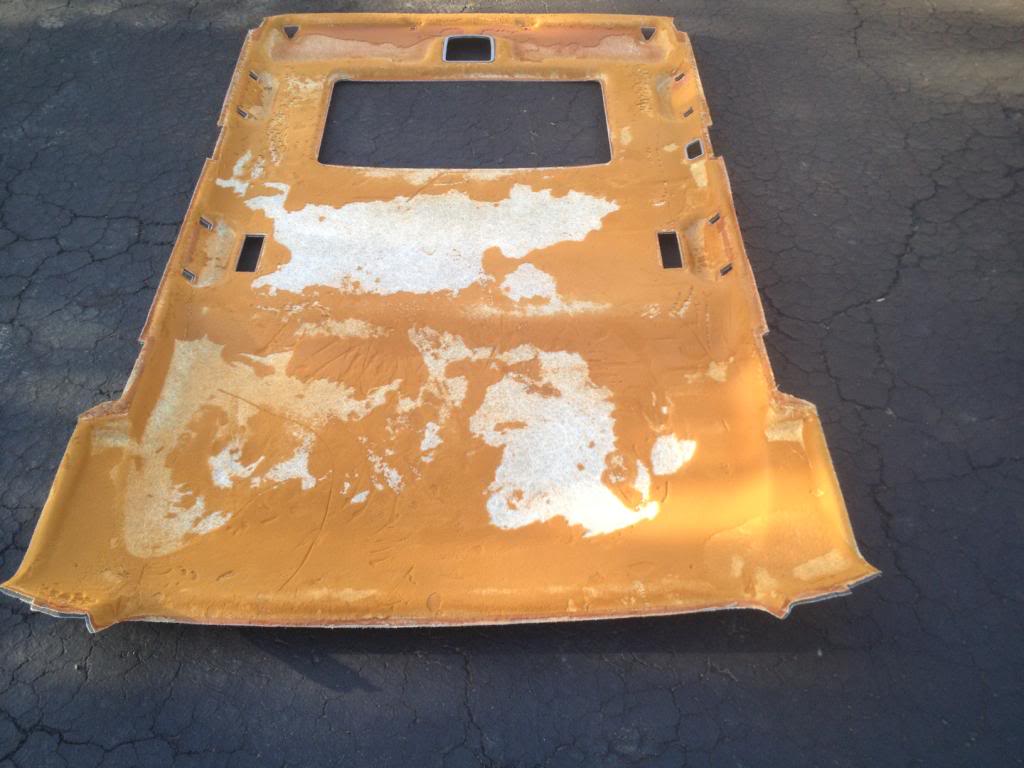
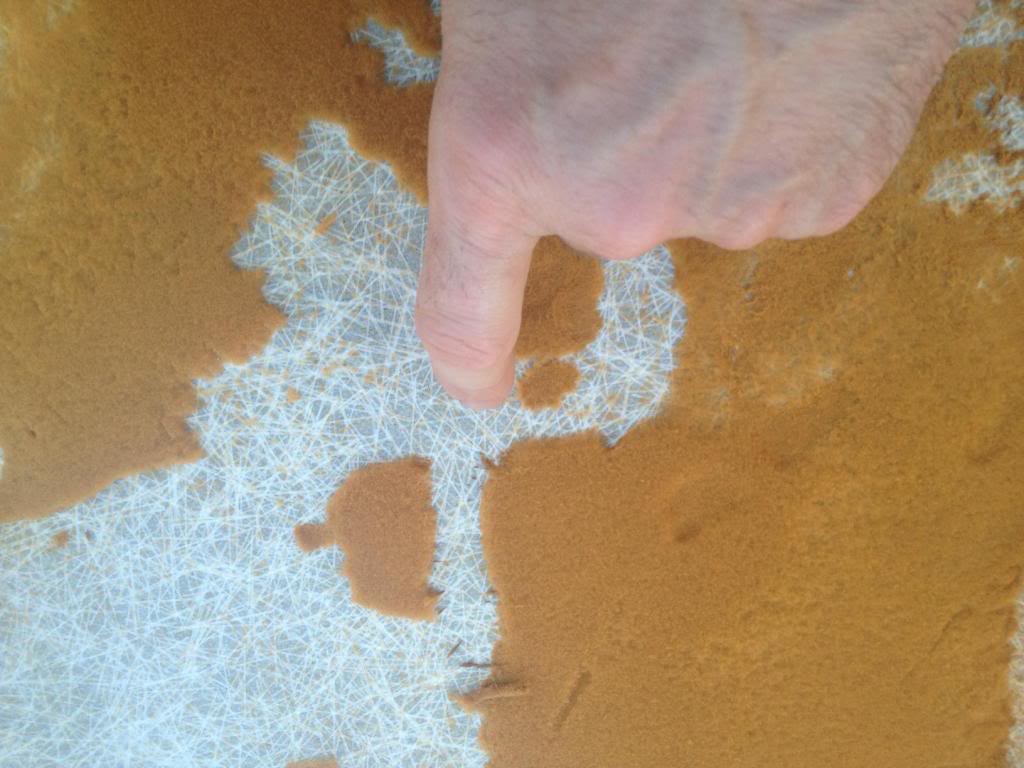
The fiberglass liner was still in good shape but it was covered in the remains of the fabric liner.

To remove the old liner film and glue from the fiberglass all you have to do is wipe it off, but we used a power washer and made quick work of the debris
With all the foam and glue removed it was time for the new liner. We stole this idea from Aarongregor on landroverforums. He did his headliner with a plastic / rubber paint and we thought it would be the best option.
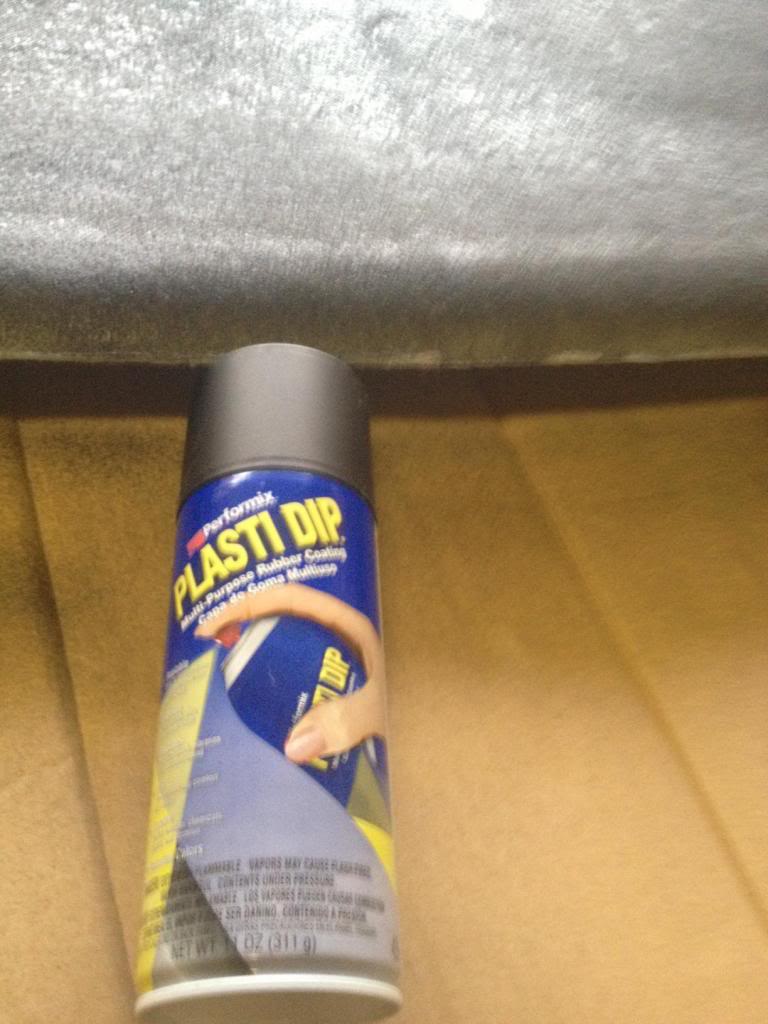
After 3 cans we got this.
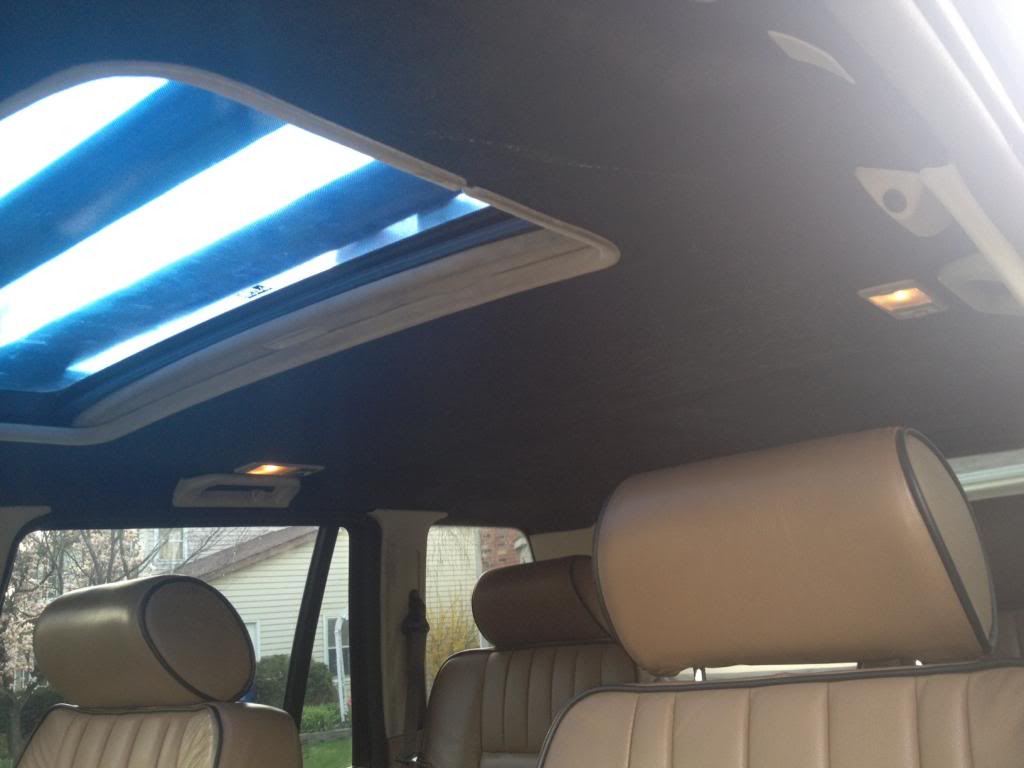
And in the truck
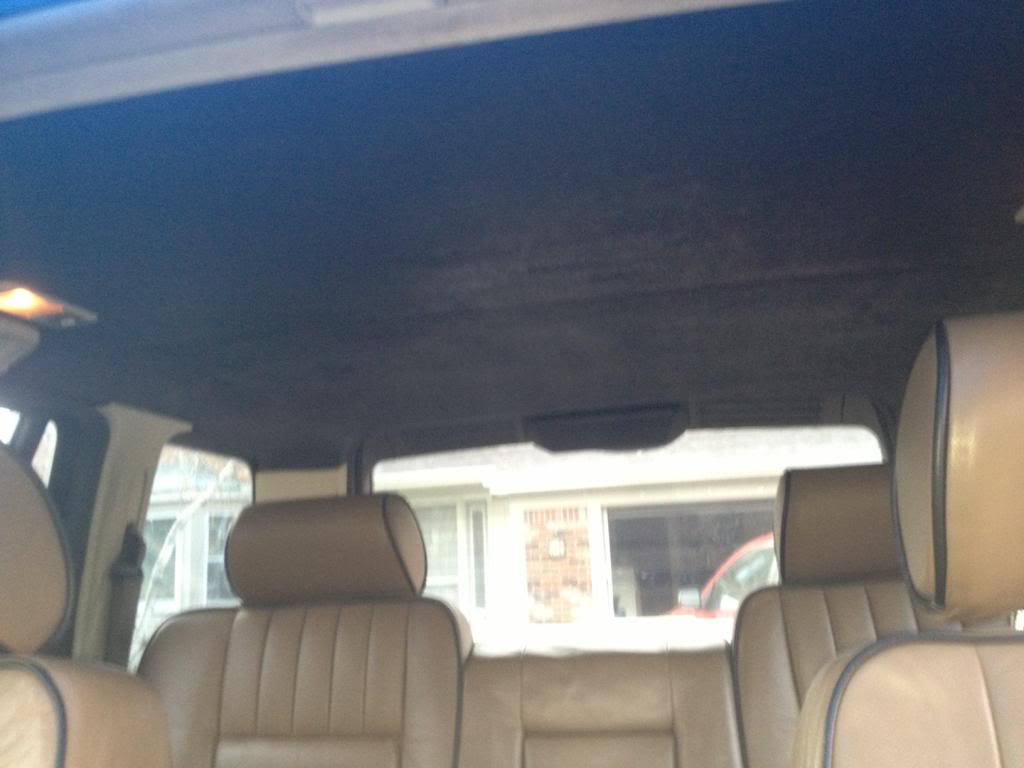
The P38 is being build for a hard life. A water and mud resistant headliner seemed like a better choice over fabric.
A little lower
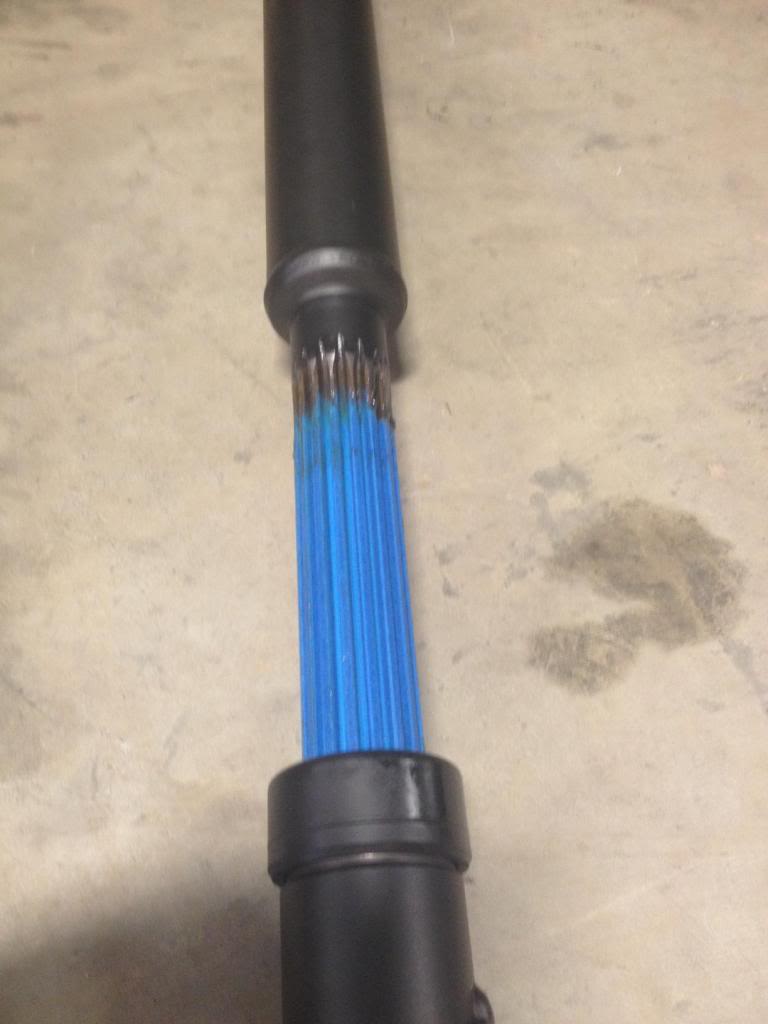
With the truck on the lift we took this oppertunity to change the front drive shaft over to an L8 edition Tom Woods
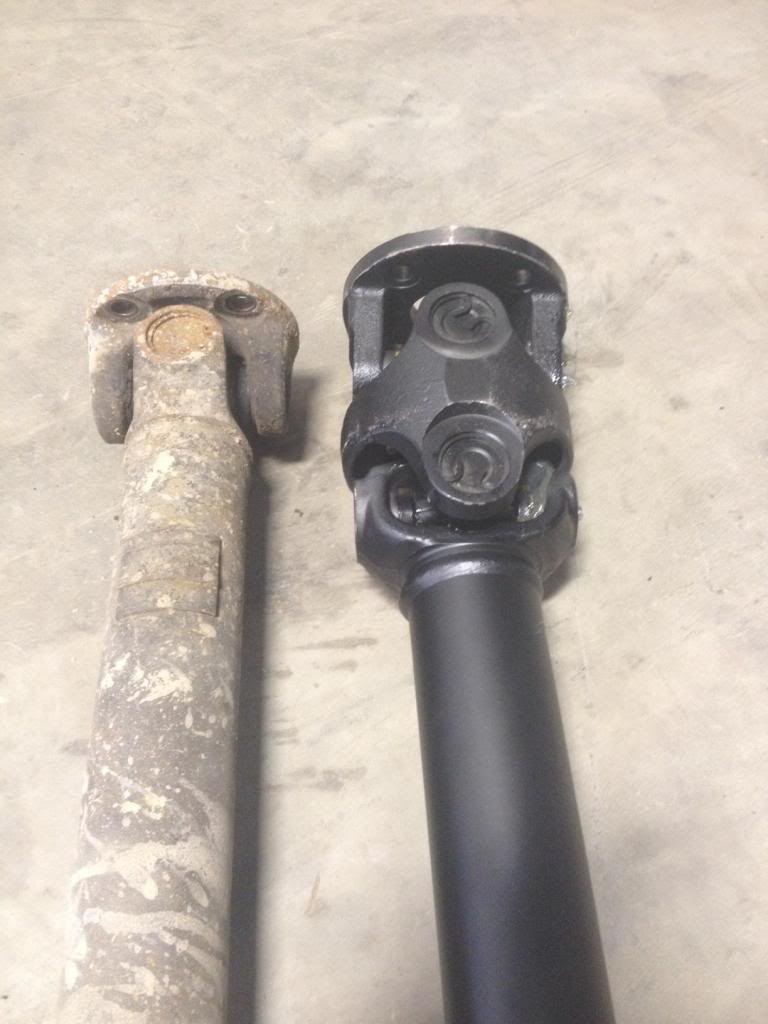
Tom always makes our shafts with the super extended splines. This is extremely important when you have a truck with flex. It allows the driveshaft to extend during full articulation and still give enough room for complete compression
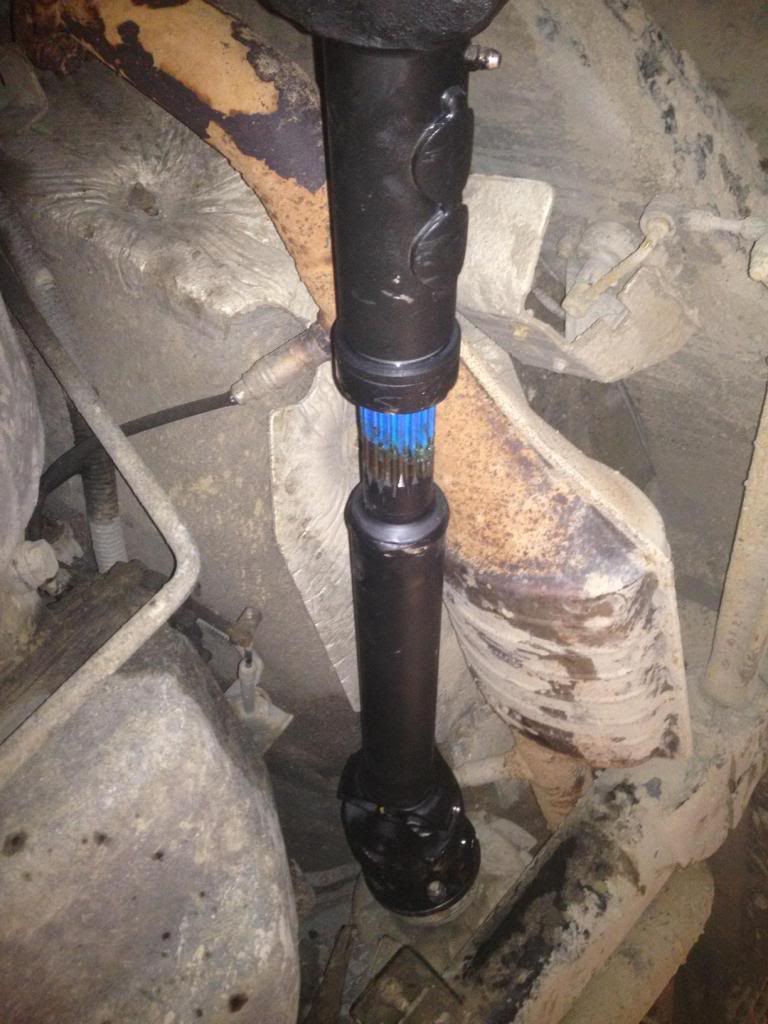
On the truck pic
How low can you go
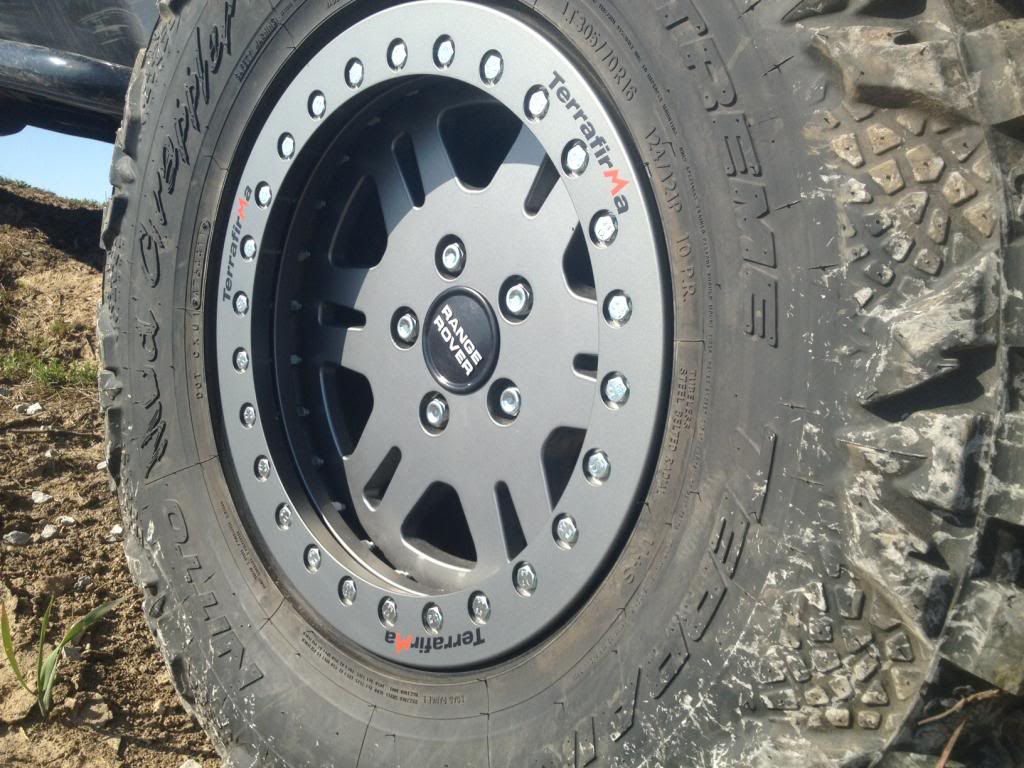
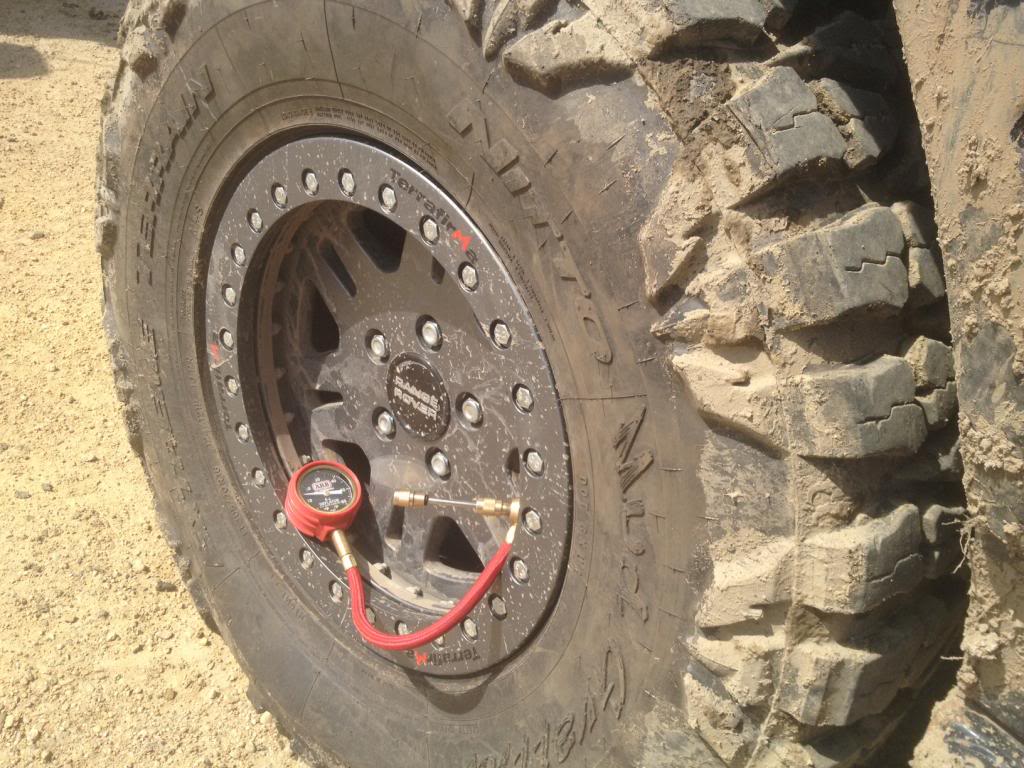
Low tire pressure can be an asset on the trails. Unfortunately with low pressure you run the risk of popping the tire off the bead. To help prevent this ill side effect we install the Terrafirma bead lock rings.
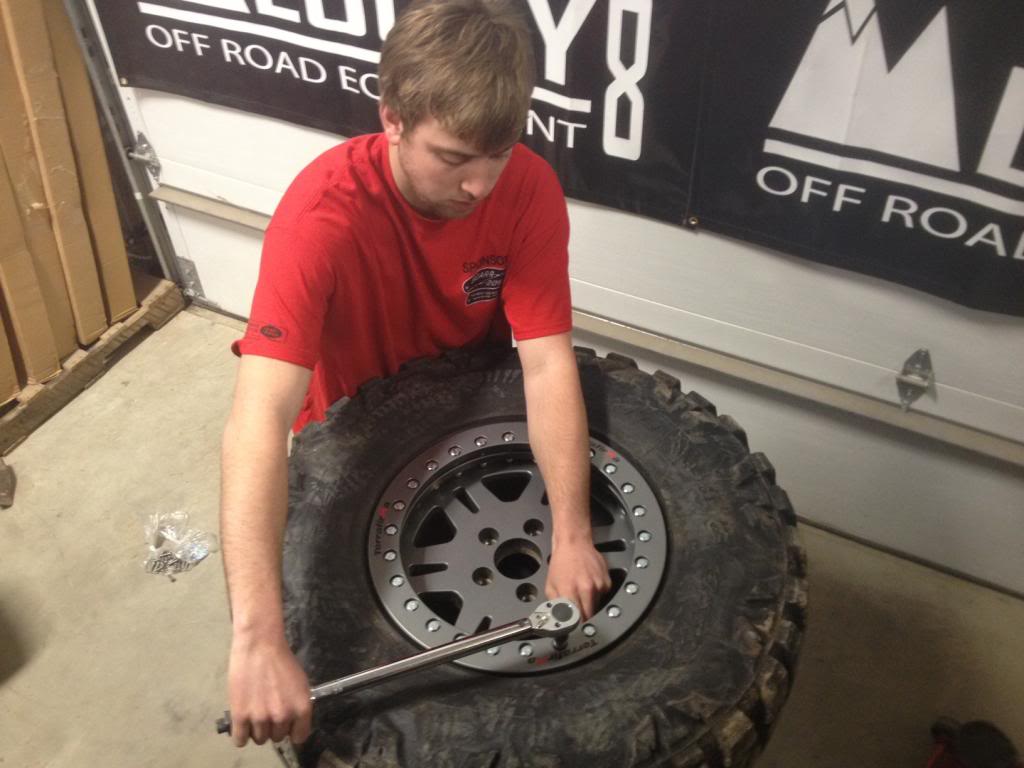
After carefully torquing down all the rings for what seemed like an eternity we arrived at pure beauty
New Rack
As much as we love the P38 SD rack, they are not very practical when compared to the modern racks on the market. So we stripped off the SD and slapped on a Front Runner unit.

We went with the Front Runner rack for a few reasons, but the main one was it can be swapped over to the the L322 Project truck or the LR3 for that matter. All you need to do is change the mounting feet.

The second factor is you can add almost anything to a front runner rack without drillling any holes. For example this double Jerry can holder. To mount it all you need to do is simply drop in the hardware to the pre existing locations and tighten down. It is that easy.


The shovel/ax holder is brilliant.

Moving down
The head liner in the P38 was coming apart from every corner. We pulled the liner out and and ripped off the fabric. This is what we were left with.

The fiberglass liner was still in good shape but it was covered in the remains of the fabric liner.

To remove the old liner film and glue from the fiberglass all you have to do is wipe it off, but we used a power washer and made quick work of the debris

With all the foam and glue removed it was time for the new liner. We stole this idea from Aarongregor on landroverforums. He did his headliner with a plastic / rubber paint and we thought it would be the best option.

After 3 cans we got this.

And in the truck

The P38 is being build for a hard life. A water and mud resistant headliner seemed like a better choice over fabric.

A little lower
With the truck on the lift we took this oppertunity to change the front drive shaft over to an L8 edition Tom Woods

Tom always makes our shafts with the super extended splines. This is extremely important when you have a truck with flex. It allows the driveshaft to extend during full articulation and still give enough room for complete compression

On the truck pic

How low can you go
Low tire pressure can be an asset on the trails. Unfortunately with low pressure you run the risk of popping the tire off the bead. To help prevent this ill side effect we install the Terrafirma bead lock rings.

After carefully torquing down all the rings for what seemed like an eternity we arrived at pure beauty

Thread Starter
|
Winching
Joined: Jan 2009
Posts: 628
Likes: 18
Project update : Springs and things
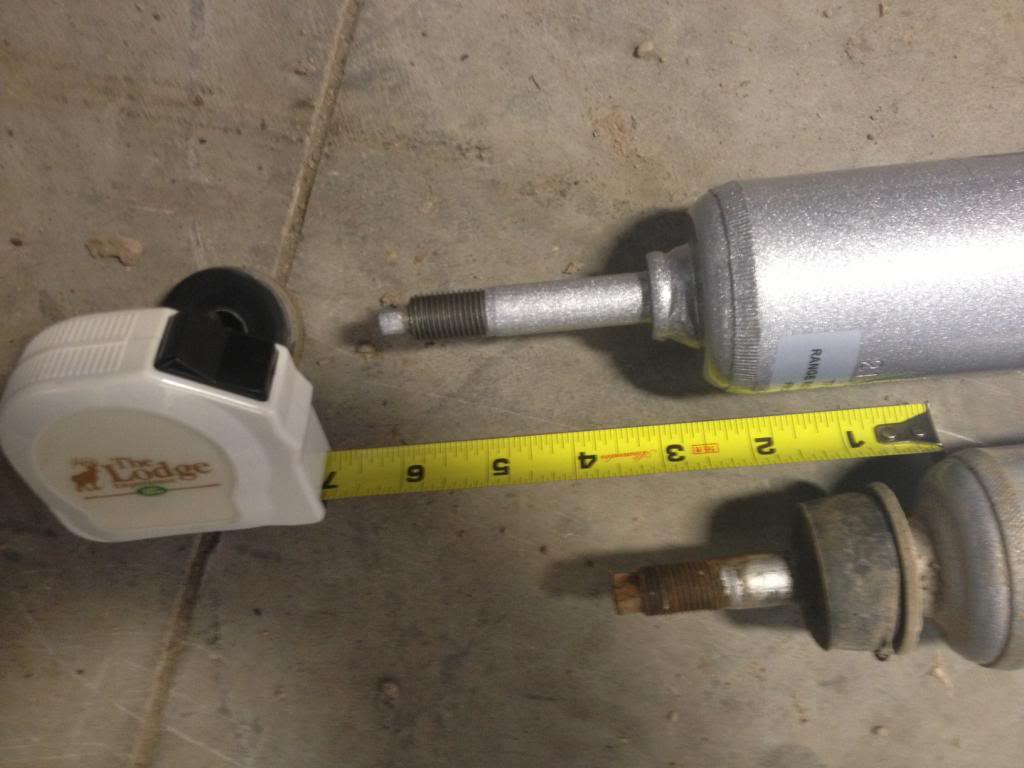
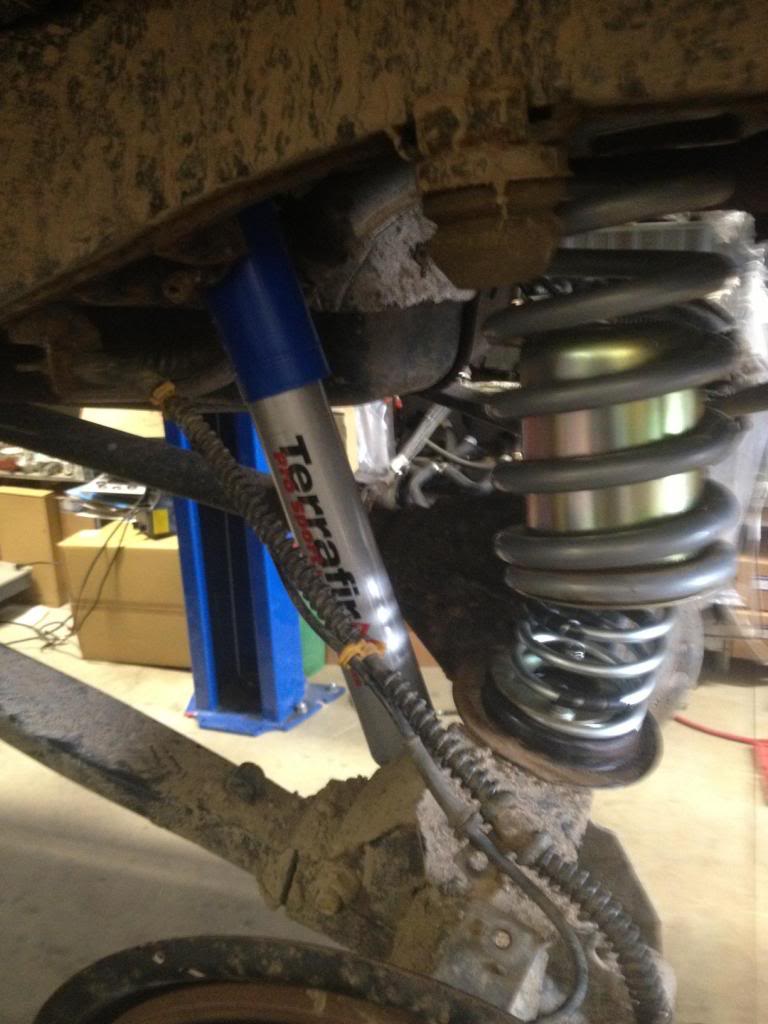
It is a little known fact that the shocks in the front of a P38 are generally 2 inches longer than the shocks in the rear.
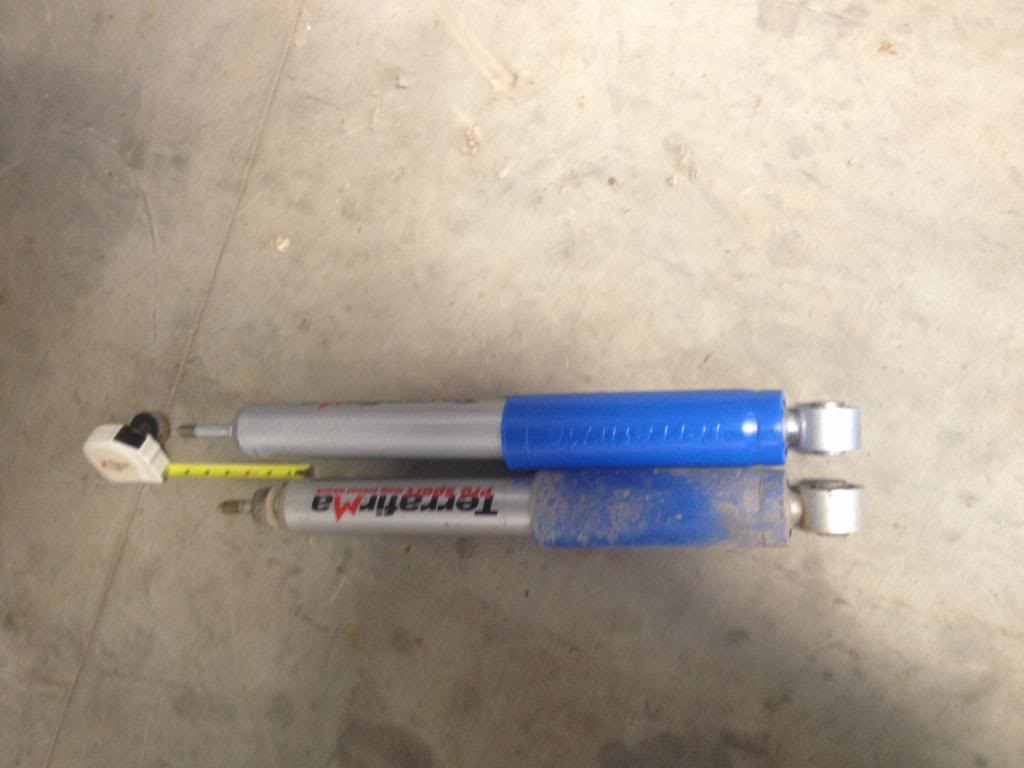
We decided to take advantage of this by swapping in a set of front shocks to the rear.
On the upside we would gain more down travel from the shocks and this would allow the rear axel to flex like the Hulk on steroids. Okay, the Hulk thing may be a little much but you get the idea. The downside is the spring would definitely fall off the lower perch or come out of the upper bucket. To remedy this issue we reached deep into our bag of tricks and pulled out a set of X springs from our friends at X Eng.
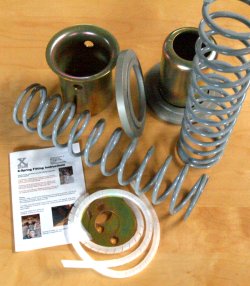
The X spring will not only act like a cone, it will also provide downforce to help keep the axle on the ground. With both wheels on the ground longer you maintain traction and stability. Above and beyond the intended use of the X spring it was extremely advantageous given the limited space and lack of cones for the P38.
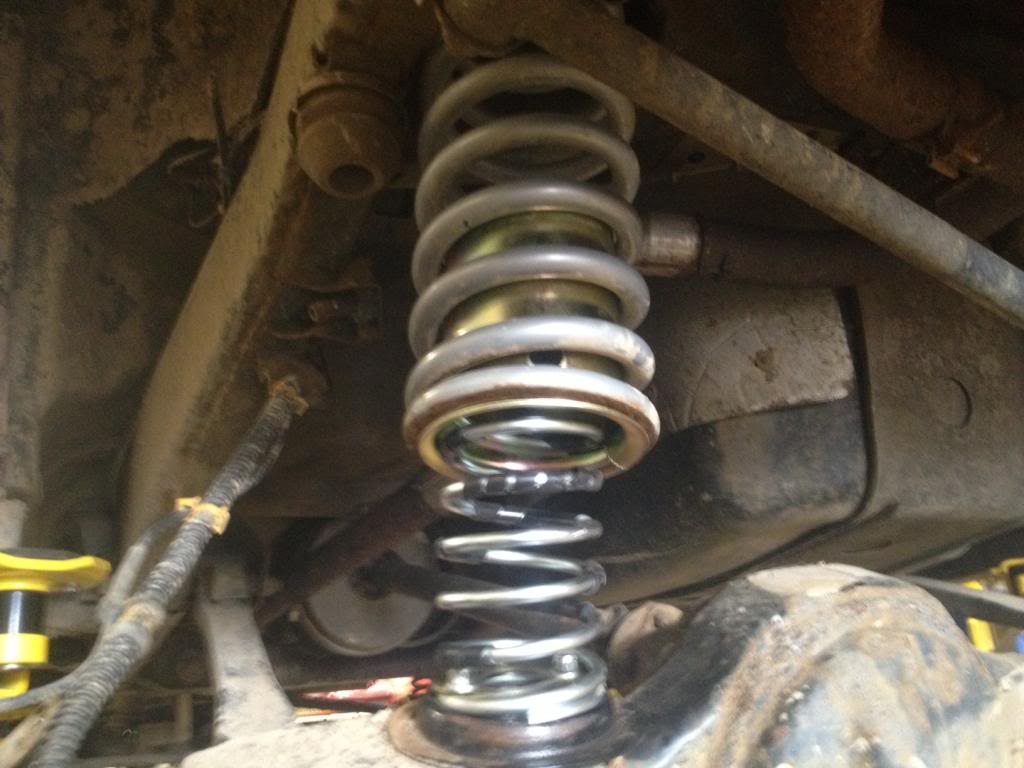
The X springs axel mounting configuration offered us another advantage over traditional cones.
As you lift the truck the axel tends to wrap or point the diff up. This will cause the spring perches to sit at an angle. With the Spring perches at an angle it makes it extremely difficult to keep the spring on the perch. Most people will strap the springs to the perch. This will cause the spring to sit constantly in the shape of the letter C. With the X spring in place this was no longer an issue. As you can see the Lower spring and bucket allow the spring perch to twist without fear of becoming disconnected.
Here is a few forklift flex pictures and the articulation is quite good.
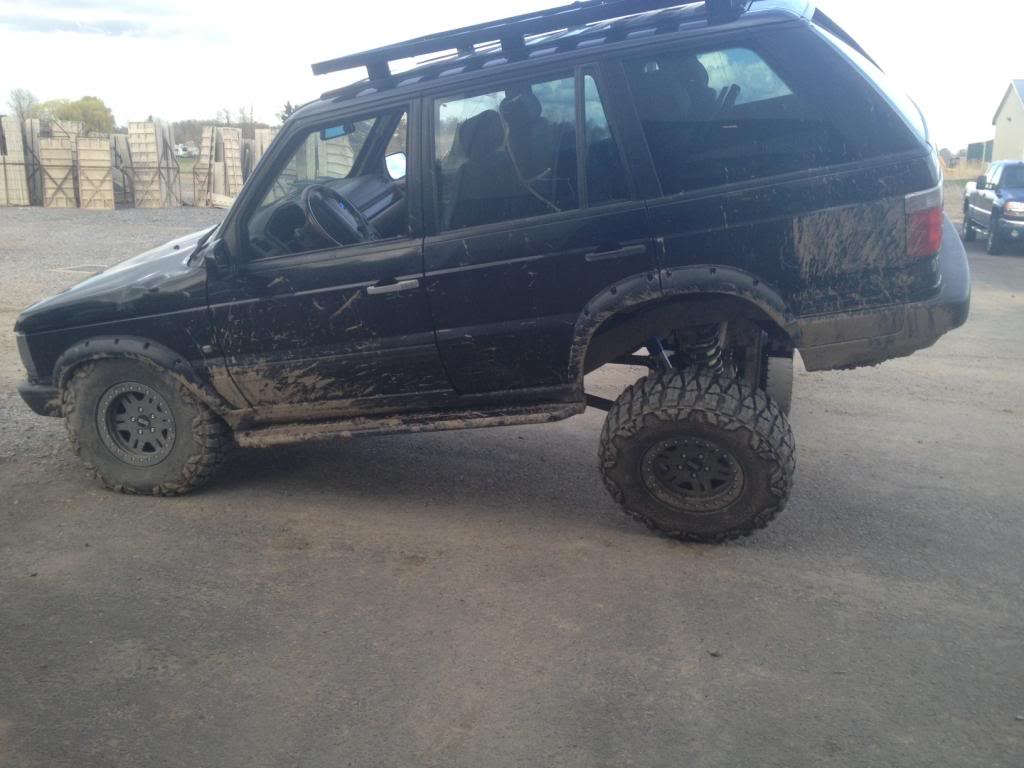
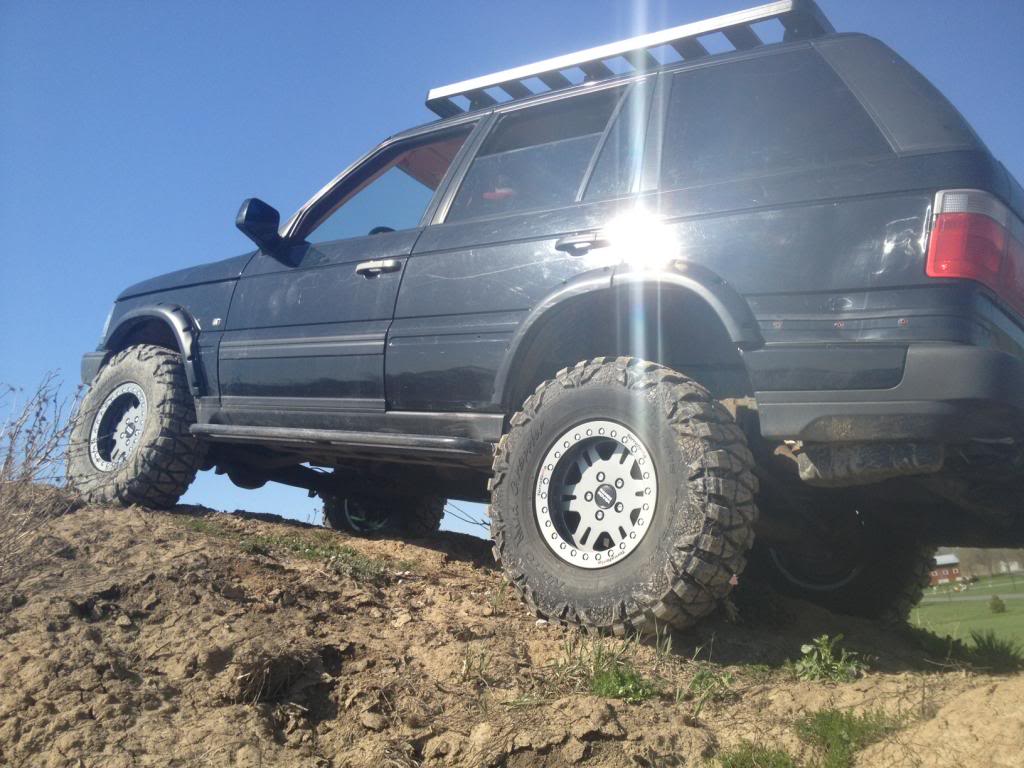
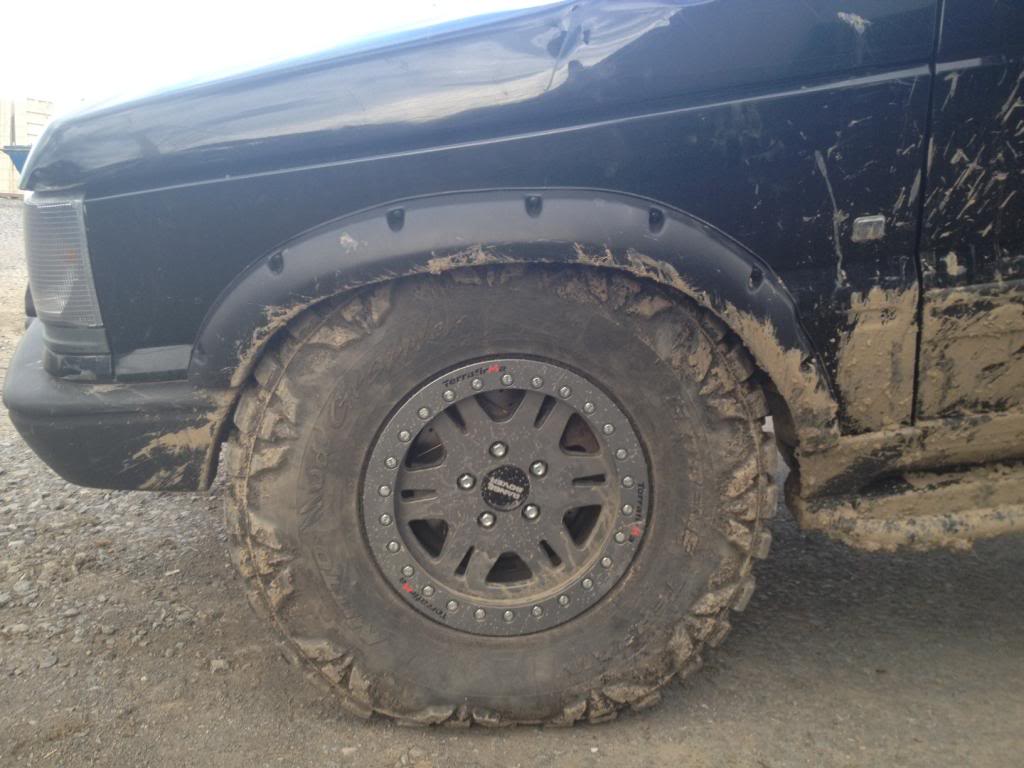
Front fender flares earning their keep
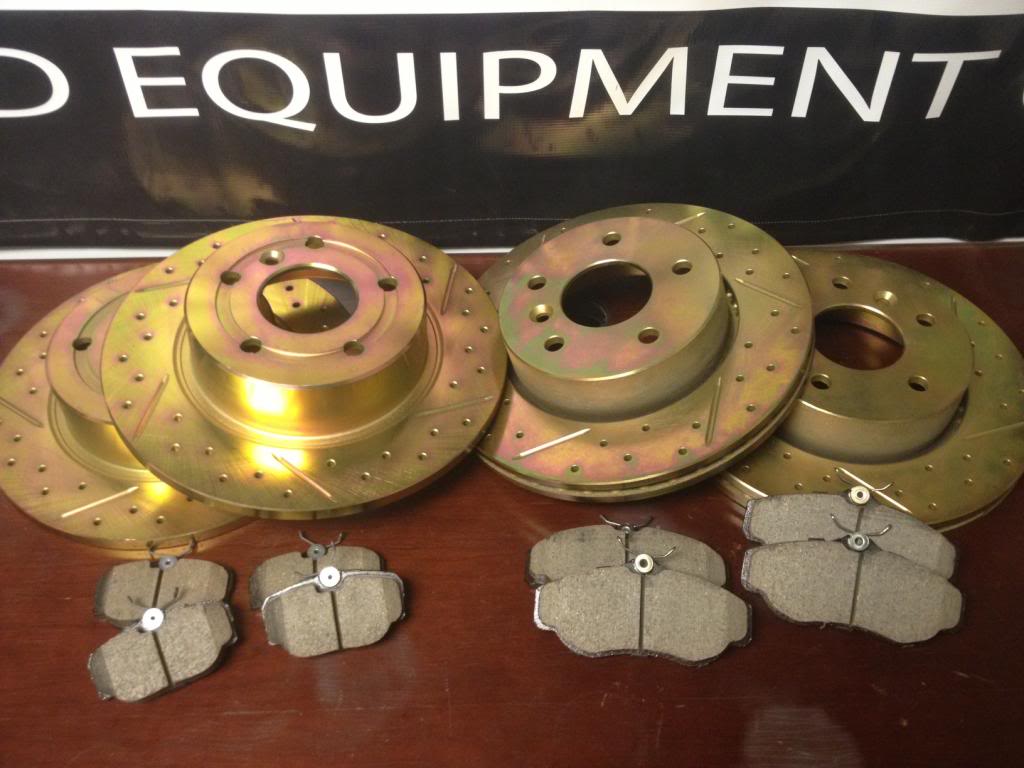
With the truck in the air we decided it was a good time to put on a set of Terrafirma drilled and slotted rotors. I cannot say enough good things about these rotors. We have used them on every project truck thus far and they have preformed above our expectations.
Here is a video of the X spring working
And the poser pic

It is a little known fact that the shocks in the front of a P38 are generally 2 inches longer than the shocks in the rear.

We decided to take advantage of this by swapping in a set of front shocks to the rear.

On the upside we would gain more down travel from the shocks and this would allow the rear axel to flex like the Hulk on steroids. Okay, the Hulk thing may be a little much but you get the idea. The downside is the spring would definitely fall off the lower perch or come out of the upper bucket. To remedy this issue we reached deep into our bag of tricks and pulled out a set of X springs from our friends at X Eng.

The X spring will not only act like a cone, it will also provide downforce to help keep the axle on the ground. With both wheels on the ground longer you maintain traction and stability. Above and beyond the intended use of the X spring it was extremely advantageous given the limited space and lack of cones for the P38.

The X springs axel mounting configuration offered us another advantage over traditional cones.
As you lift the truck the axel tends to wrap or point the diff up. This will cause the spring perches to sit at an angle. With the Spring perches at an angle it makes it extremely difficult to keep the spring on the perch. Most people will strap the springs to the perch. This will cause the spring to sit constantly in the shape of the letter C. With the X spring in place this was no longer an issue. As you can see the Lower spring and bucket allow the spring perch to twist without fear of becoming disconnected.

Here is a few forklift flex pictures and the articulation is quite good.


Front fender flares earning their keep

With the truck in the air we decided it was a good time to put on a set of Terrafirma drilled and slotted rotors. I cannot say enough good things about these rotors. We have used them on every project truck thus far and they have preformed above our expectations.

Here is a video of the X spring working
And the poser pic

Thread Starter
|
Winching
Joined: Jan 2009
Posts: 628
Likes: 18
Project update : Something to prove
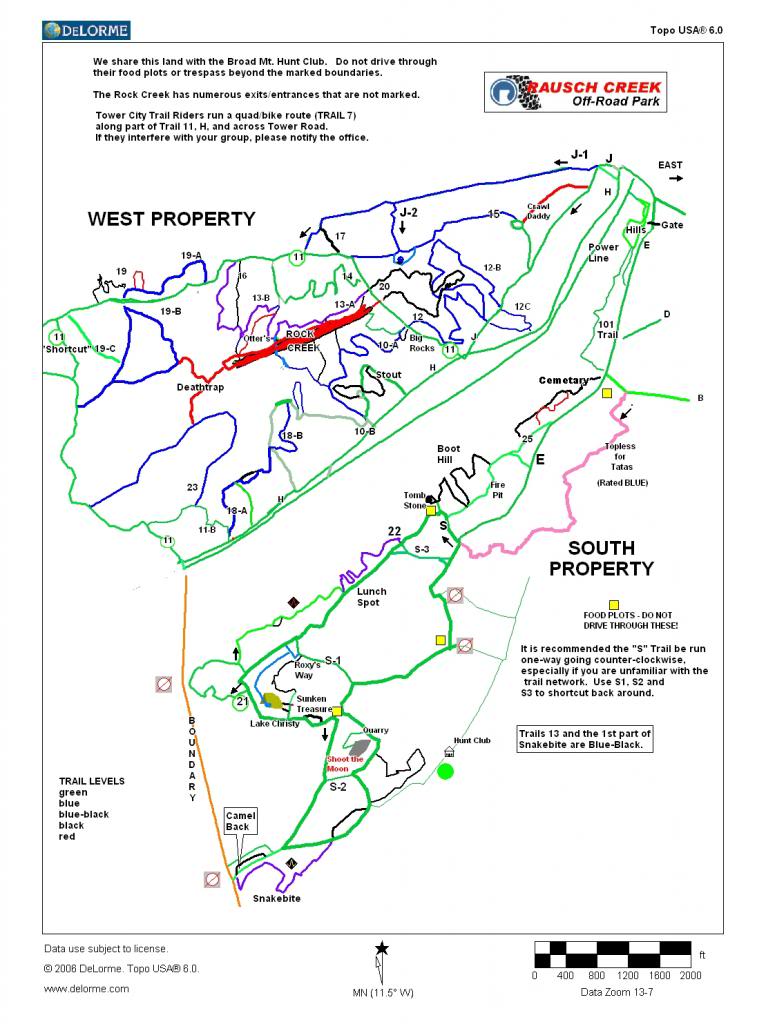
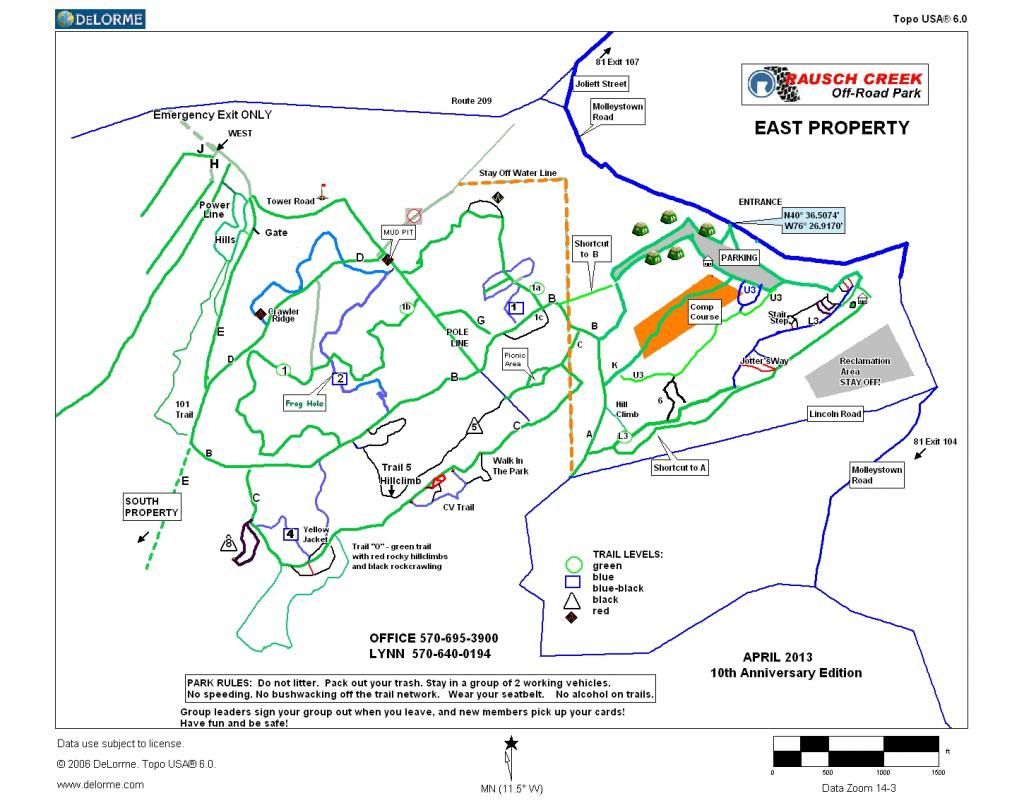
With the recent upgrades to the roof rack, suspension, and wheels we decided to head to Rausch Creek for some testing.

The first thing we did was air down the tires lower than we normally would to test out the bead locks. The pressure was set to 9 lbs.
With the tires ready to go and everything strapped to the roof rack we hit the trails.
What would a test be if we did not push the vehicle. In doing so the front CV blew up sending little metal ***** everywhere.
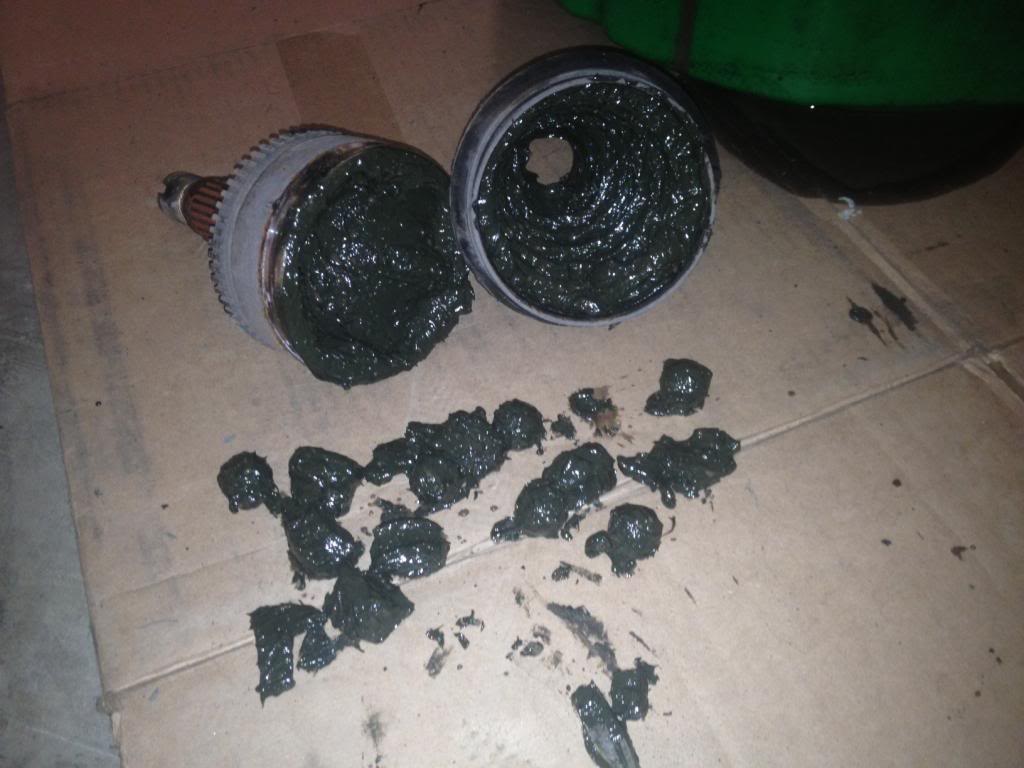
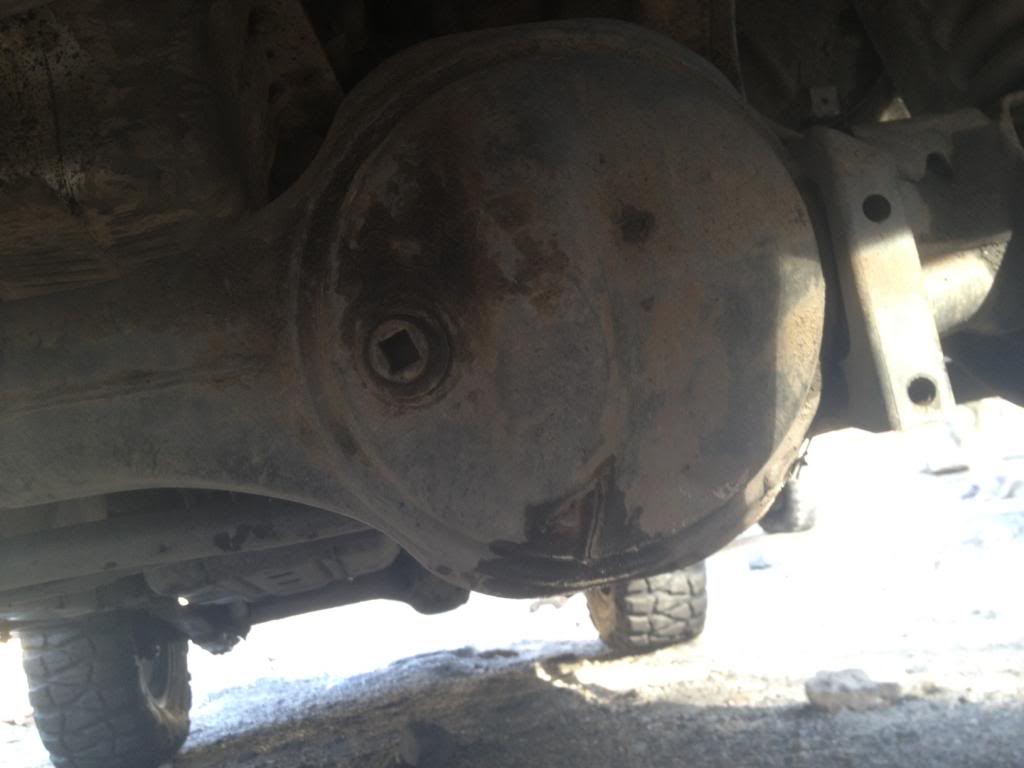
In a normal P38 this little trip would be over. The center diff with its viscous coupling would send all the power to the broken axle leaving the vehicle motionless. Thankfully project P38 has a locked centered diff. This modification provided us the opportunity to continue on. Unfortunately we only made it another 10 foot before puncturing a hole in the front diff cover.
With a "I don't have time to bleed" attitude we decided to press on in one wheel drive.

At the end of the first day people were amused that the P38 was able to keep up in RWD. To be honest we did keep mostly to greens and some EZ blues. On Saturday morning when I fired up the P38 with an almost empty front diff the crew of hardened off road vets may have snickered at the notion it was going out on the second day. Unfortunately for me yesterday's kindness of sticking to easy trails was not going to be spread over to today. Our groups plan was to eat up every blue in the park and wash them down with some blacks.
In order for the P38 to have a chance of keeping up it would need to rely on it's best features.
1 Excellent tires air down for maximum traction
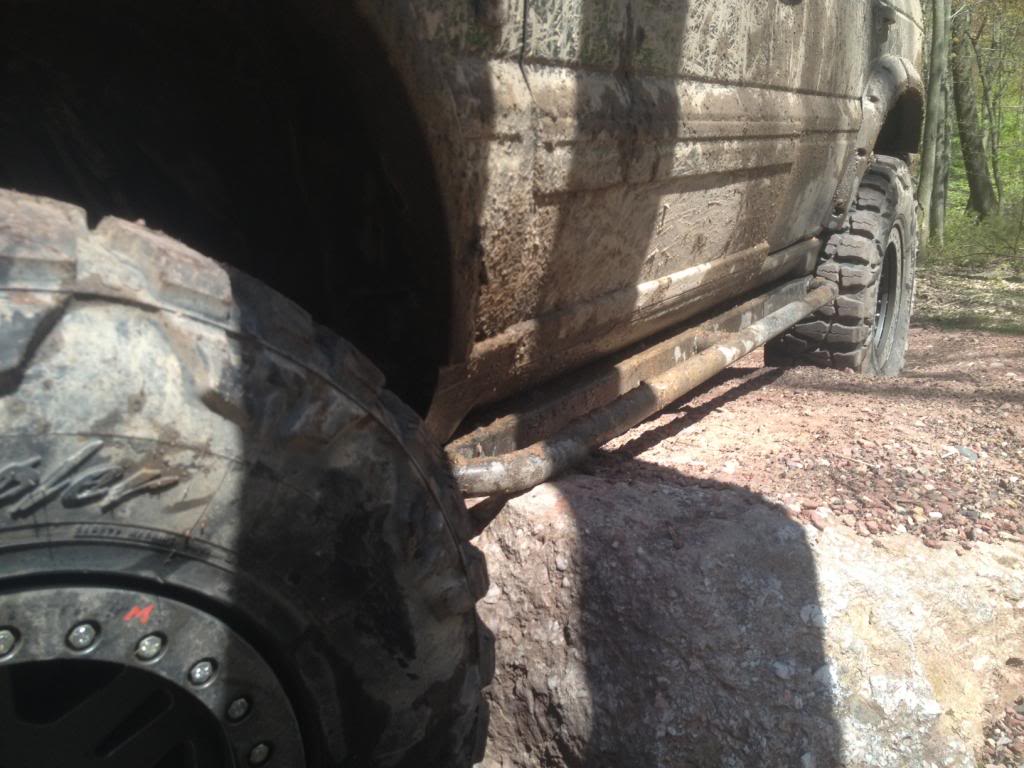
2 Bomb proof sliders with tree bars
3 Newly installed flexy suspension
4 A lot of go pedal connected to the fresh 4 dot 6
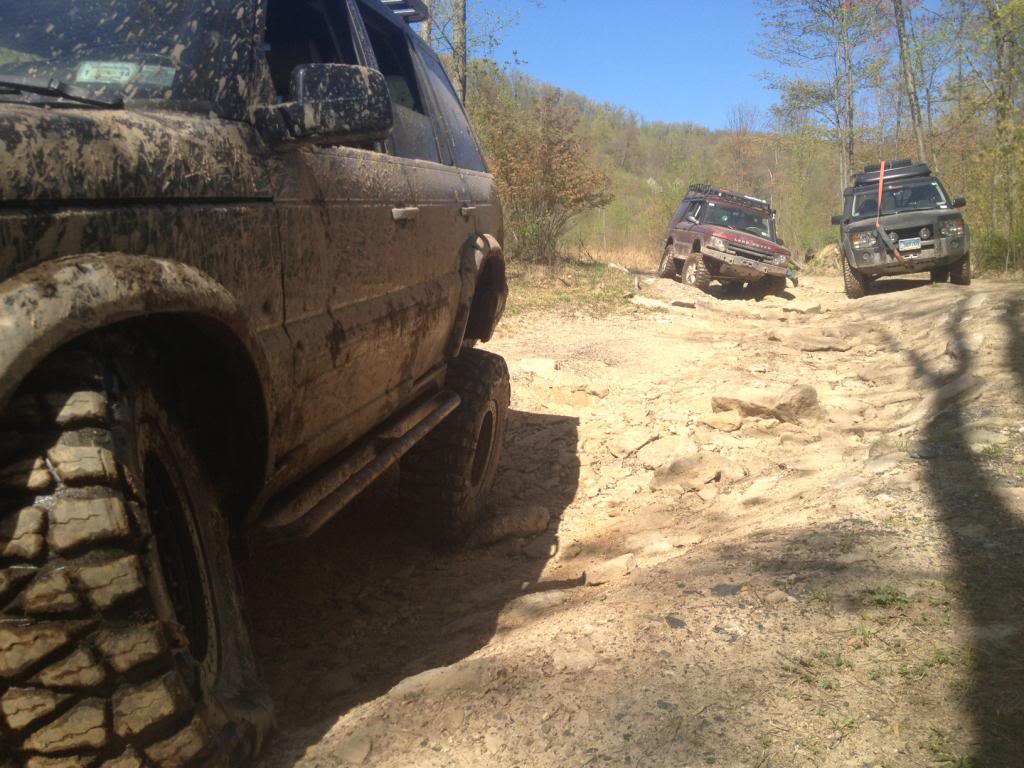
This is a typical blue trail at Rausch Creek
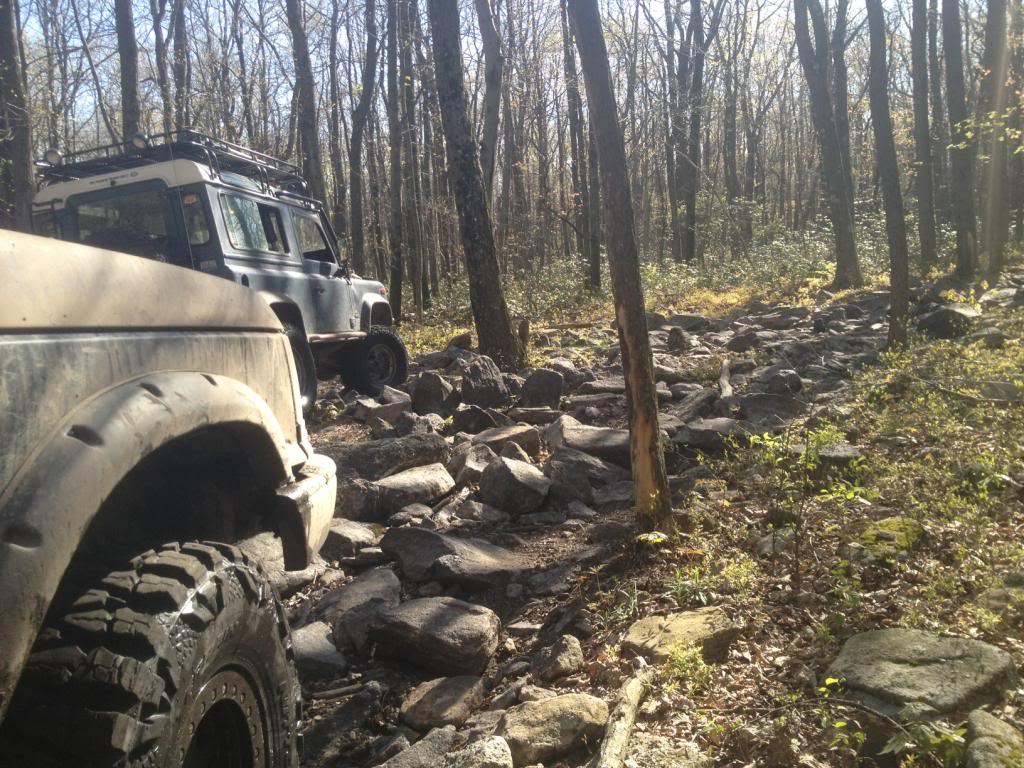
As I type this update my back is still in pain from the beating my body absorb. Lest anybody think that Range Rover seats are not comfortable, they are exquisitely comfortable. My pain comes from continuously smashing the rocks with the rock sliders. In all my years of off-roading I have never used a set of sliders so aggressively.

As we carried on the trails did not become any easier. In fact the difficulty started to rise.
You will only get so far relying on a heavy foot and sliders. At some point you must bow to the fact that traction is the king. Luckily the new installed X-springs provided an unbelievable advantage over the normal suspension we had.
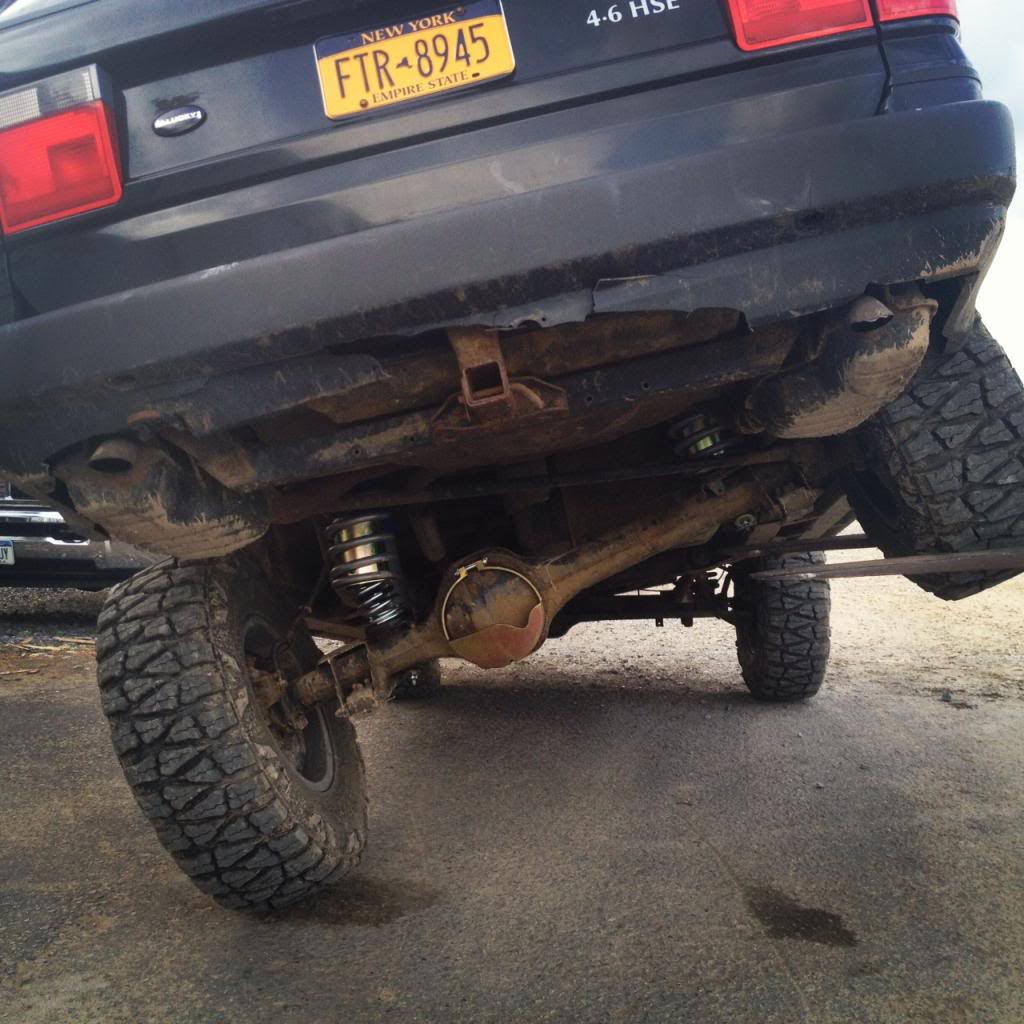
With the X spring constantly providing a bit of downforce on the un sprung side of the axel it allowed the tire to stay in contact with the ground longer. By doing so the open differential was forced to send power to both axles. This was the key to our success for the remainder of the weekend. Have a look at this next picture. You will notice that both rear wheels are on the ground.

Here is a close up picture from the same spot.
Notice how the X-spring is forcing the axle down allowing the tire to retain traction. Because of that little bit of magic we were able to complete every blue trail on the map in one wheel peel.
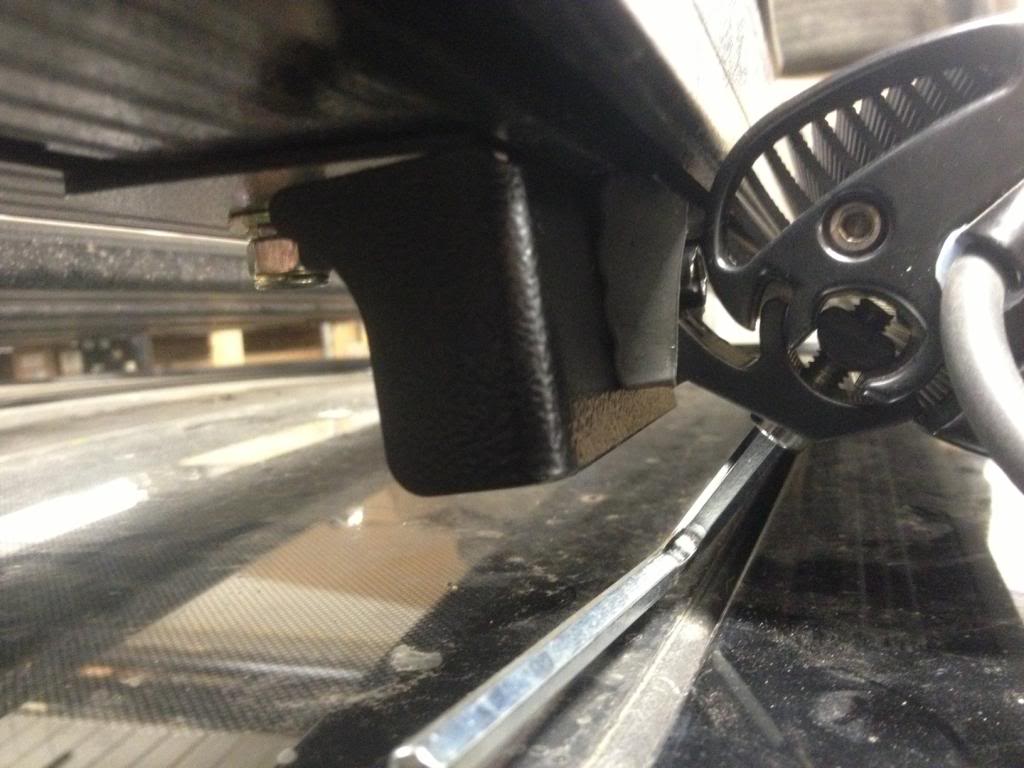
No poser pics today but I will leave you with this little trick. In case of emergency you can always use your Terrafirma steering damper bracket as a twisted spline half shaft removal tool.

With the recent upgrades to the roof rack, suspension, and wheels we decided to head to Rausch Creek for some testing.

The first thing we did was air down the tires lower than we normally would to test out the bead locks. The pressure was set to 9 lbs.

With the tires ready to go and everything strapped to the roof rack we hit the trails.

What would a test be if we did not push the vehicle. In doing so the front CV blew up sending little metal ***** everywhere.

In a normal P38 this little trip would be over. The center diff with its viscous coupling would send all the power to the broken axle leaving the vehicle motionless. Thankfully project P38 has a locked centered diff. This modification provided us the opportunity to continue on. Unfortunately we only made it another 10 foot before puncturing a hole in the front diff cover.

With a "I don't have time to bleed" attitude we decided to press on in one wheel drive.

At the end of the first day people were amused that the P38 was able to keep up in RWD. To be honest we did keep mostly to greens and some EZ blues. On Saturday morning when I fired up the P38 with an almost empty front diff the crew of hardened off road vets may have snickered at the notion it was going out on the second day. Unfortunately for me yesterday's kindness of sticking to easy trails was not going to be spread over to today. Our groups plan was to eat up every blue in the park and wash them down with some blacks.


In order for the P38 to have a chance of keeping up it would need to rely on it's best features.
1 Excellent tires air down for maximum traction
2 Bomb proof sliders with tree bars
3 Newly installed flexy suspension
4 A lot of go pedal connected to the fresh 4 dot 6
This is a typical blue trail at Rausch Creek

As I type this update my back is still in pain from the beating my body absorb. Lest anybody think that Range Rover seats are not comfortable, they are exquisitely comfortable. My pain comes from continuously smashing the rocks with the rock sliders. In all my years of off-roading I have never used a set of sliders so aggressively.


As we carried on the trails did not become any easier. In fact the difficulty started to rise.

You will only get so far relying on a heavy foot and sliders. At some point you must bow to the fact that traction is the king. Luckily the new installed X-springs provided an unbelievable advantage over the normal suspension we had.
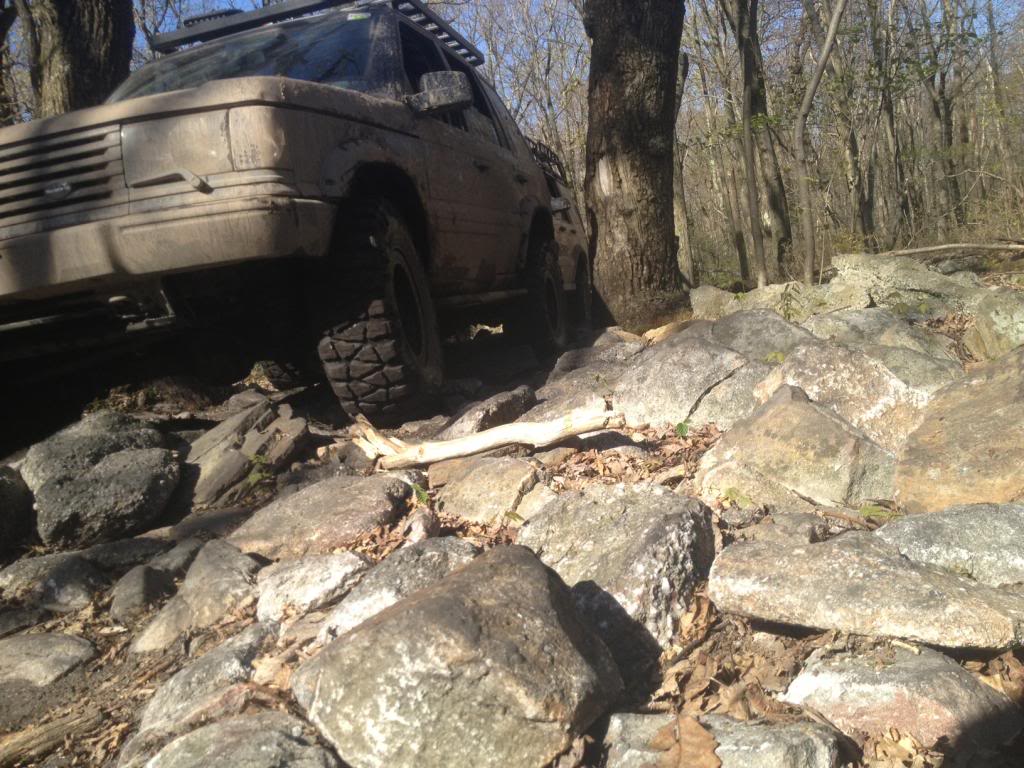
With the X spring constantly providing a bit of downforce on the un sprung side of the axel it allowed the tire to stay in contact with the ground longer. By doing so the open differential was forced to send power to both axles. This was the key to our success for the remainder of the weekend. Have a look at this next picture. You will notice that both rear wheels are on the ground.

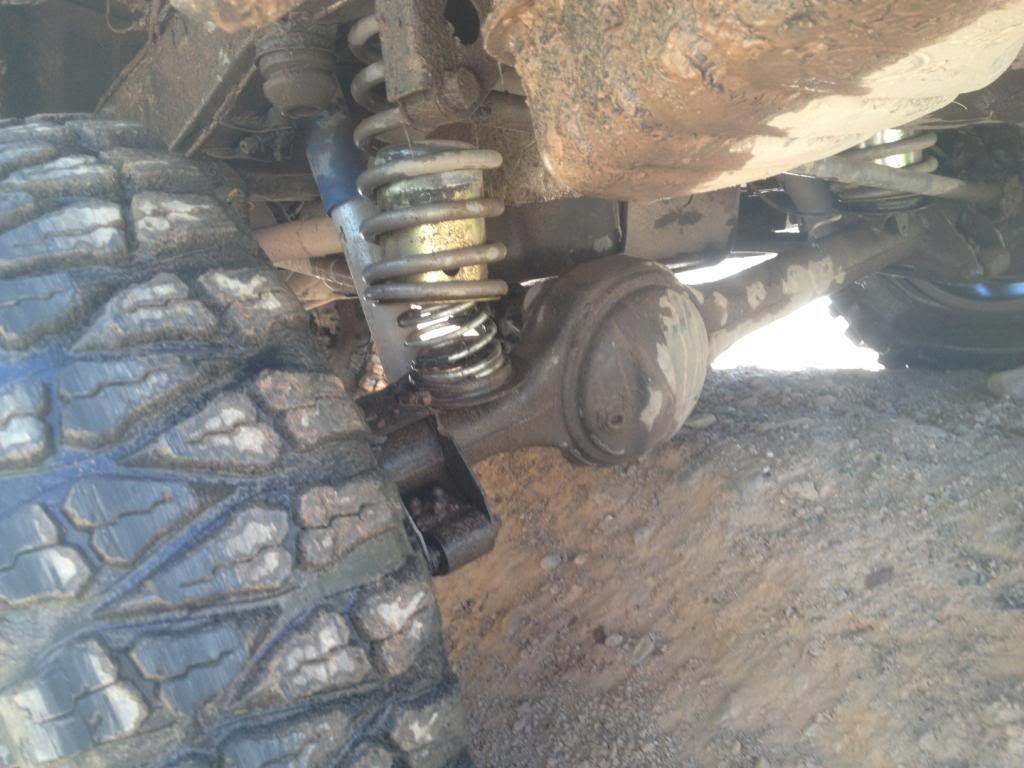
Here is a close up picture from the same spot.

Notice how the X-spring is forcing the axle down allowing the tire to retain traction. Because of that little bit of magic we were able to complete every blue trail on the map in one wheel peel.
No poser pics today but I will leave you with this little trick. In case of emergency you can always use your Terrafirma steering damper bracket as a twisted spline half shaft removal tool.

Thread Starter
|
Winching
Joined: Jan 2009
Posts: 628
Likes: 18
Project Update : Nice Rack
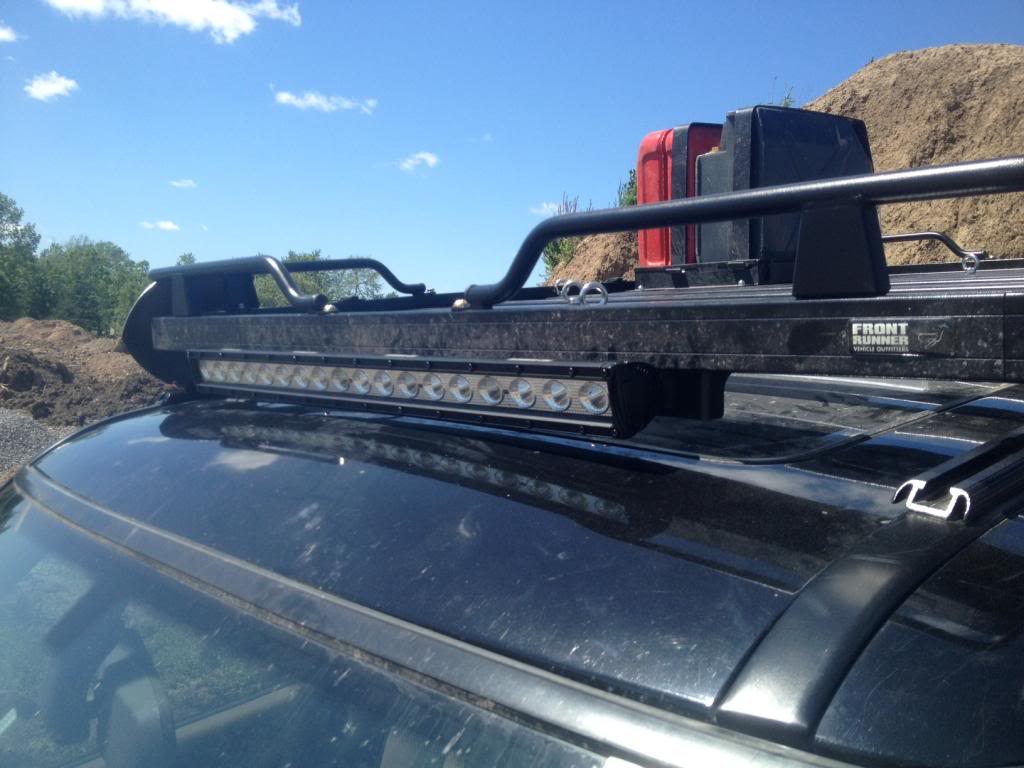
Everybody loves a sexy rack and L8 is no exception. In it's standard form the front runner rack looked kind of plain, But as we started to add accessories the rack took on a whole new look.
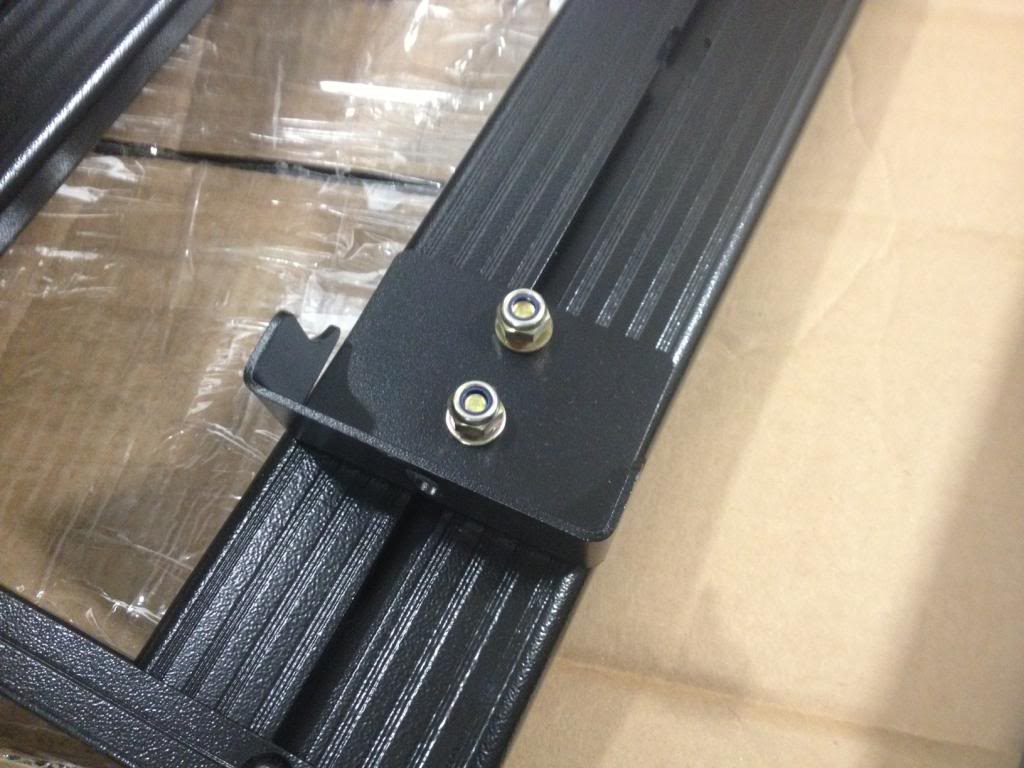
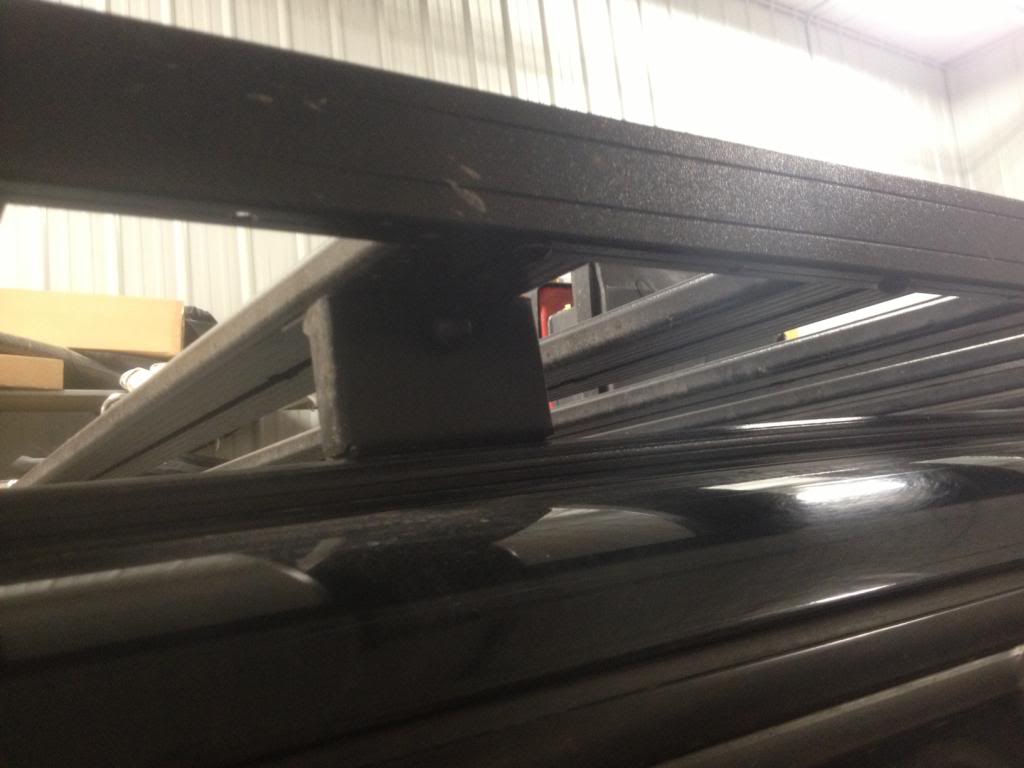
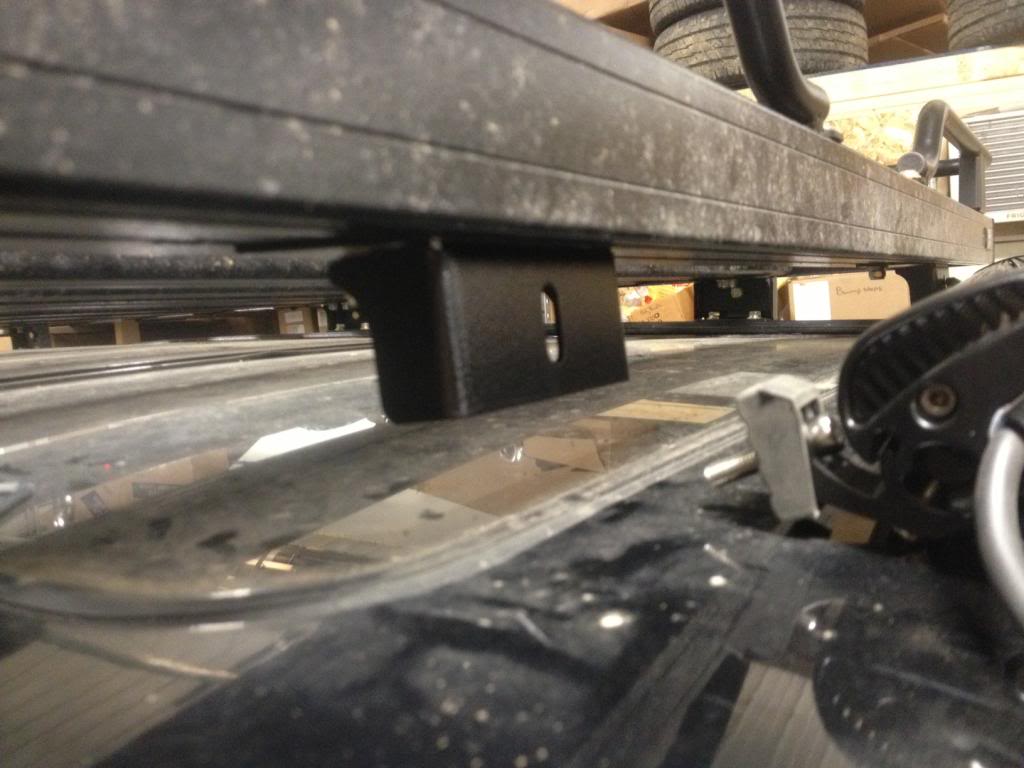
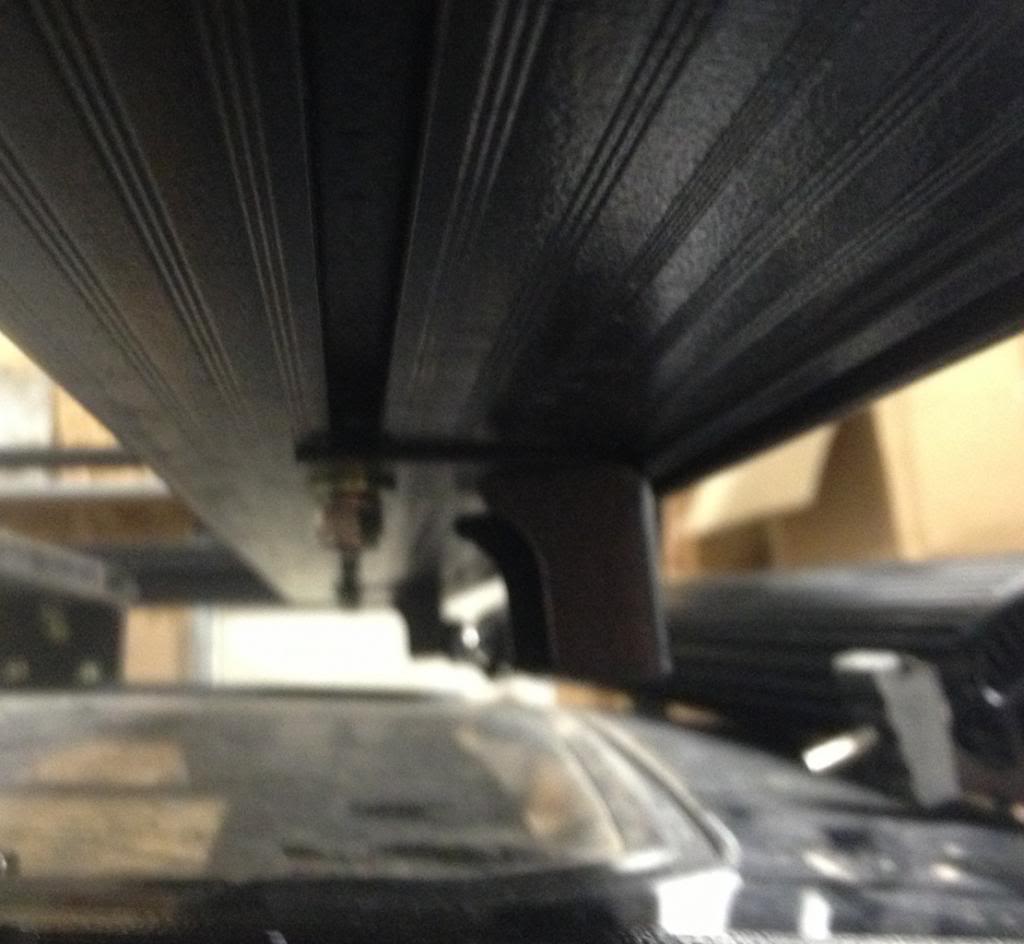
The first thing we wanted to do was lower the front of the rack down so it looked level across the truck. Front Runner keeps the front a little bit higher then the rear so you can open the sunroof. Knowing full well that the sunroof will not be used anymore we decided to bring the front of the rack down. One of the greatest things about the Front Runner rack is it's modular construction. To lower the front all we had to do was swap out this bracket.
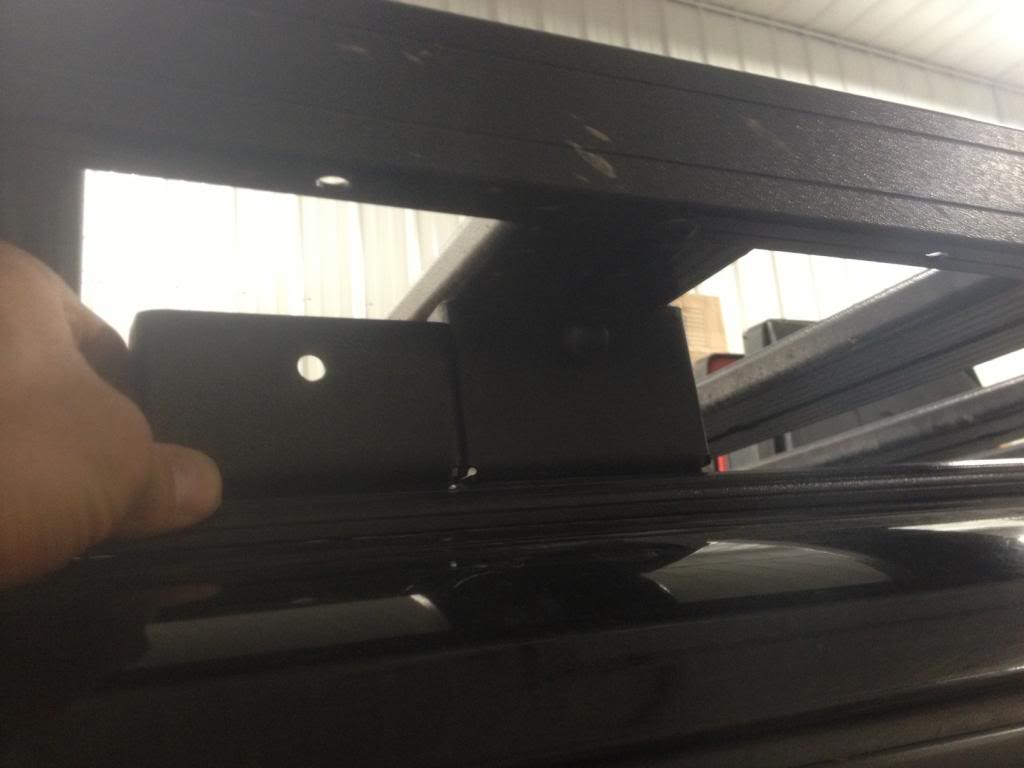
A few bolts later and boom the new foot is installed. We did not even have to take the rack off the roof.
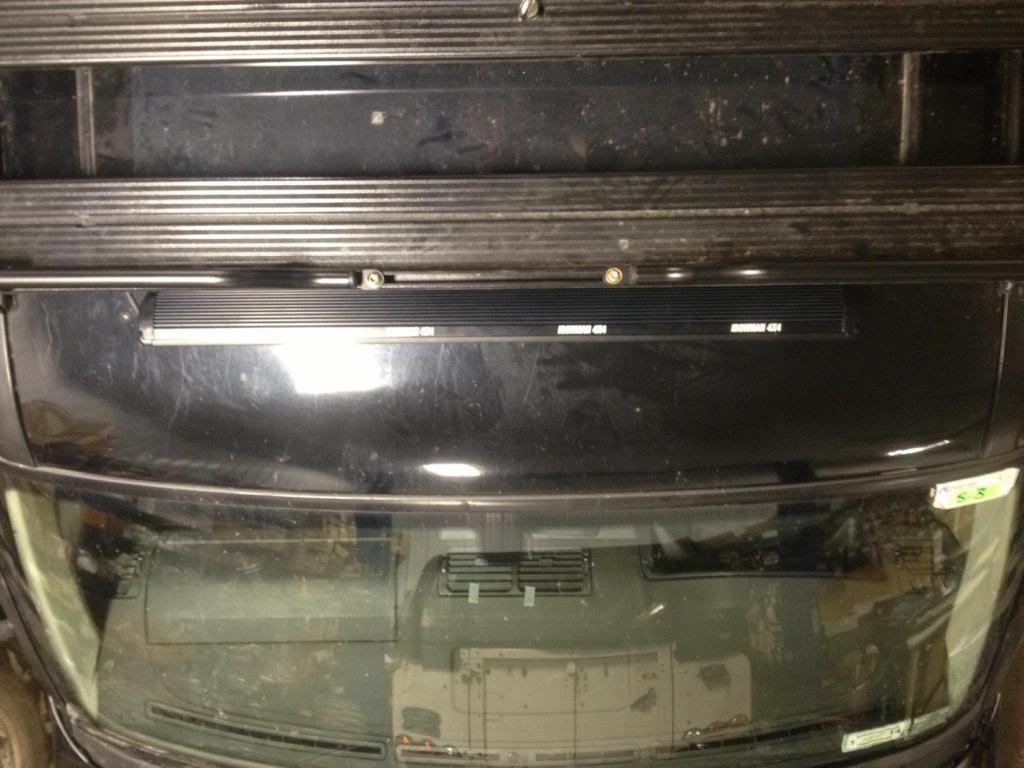
Next on the list was to put some lights on the front. Ironman 4 x 4 has released their own brand of LED light bars and we thought this was a perfect place for one.
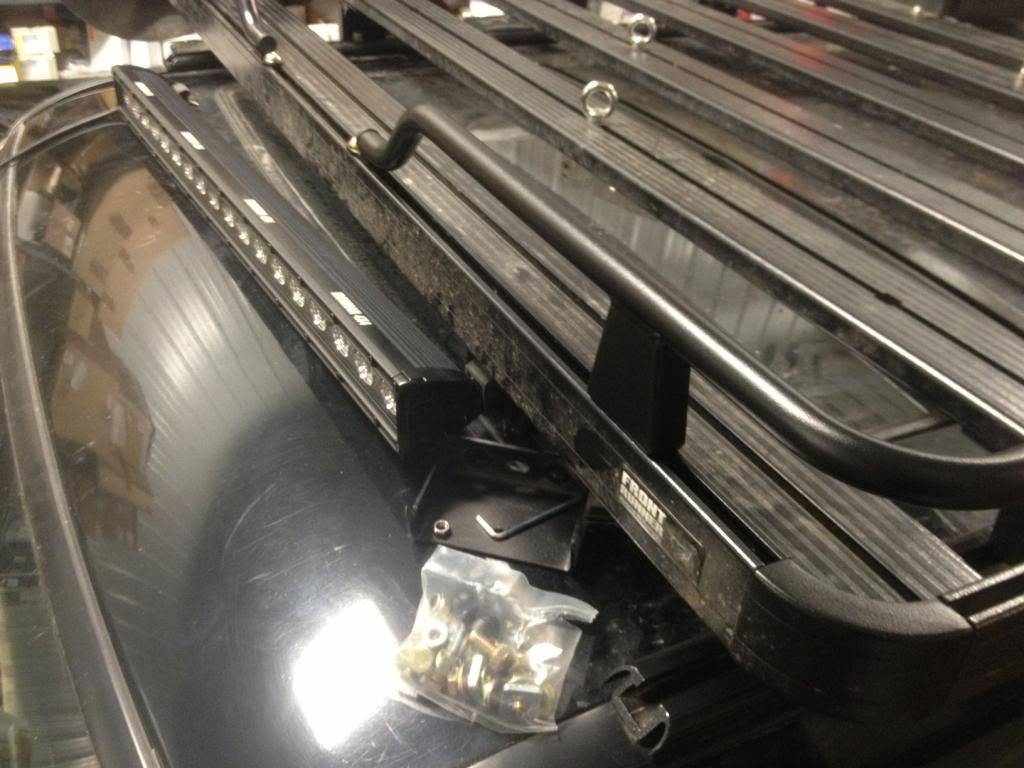
Again to stress how convenient this rack is we used the spare foot as a light mount bracket.
All we had to do was drop a bolt into the track and tighten the bracket down.
The Ironman LED uses a convenient multiple angle mount. All you have to do is adjust it to your liking and tighten it down with the provided Allen wrench.
The lightbar tucked up perfectly against the rack, hopefully keeping it out of harms way.

With the LEDs done it was time to move out back. I must admit I was as excited as a little kid on Christmas for this upgrade. It's one of those stupid things that you say why hasn't anybody thought of it before. If another rack manufacturer has done this I have never seen it. Front Runner designed a table holder that bolted to the bottom of the rack. It allows you to adjust for width to fit a multitude of tables. This was extremely useful because the P38 has less cargo room then any of the project vehicles we have used.
This is one of the track legs that need to be mounted to the bottom.
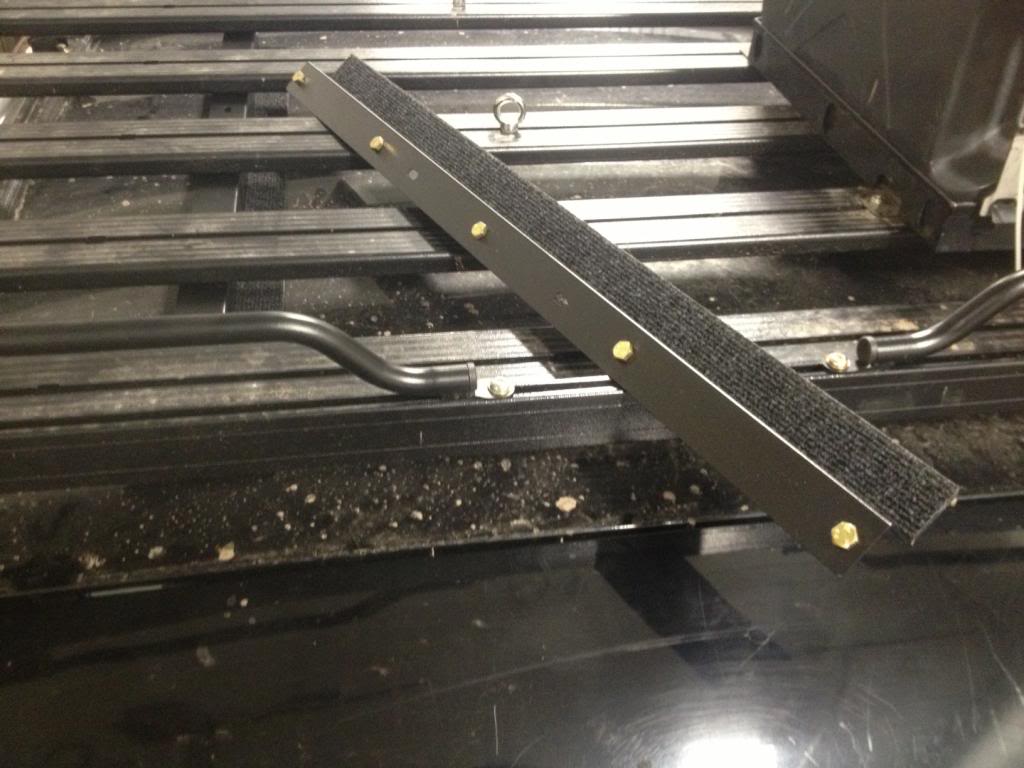
Simply slide the bolts into the lower track.
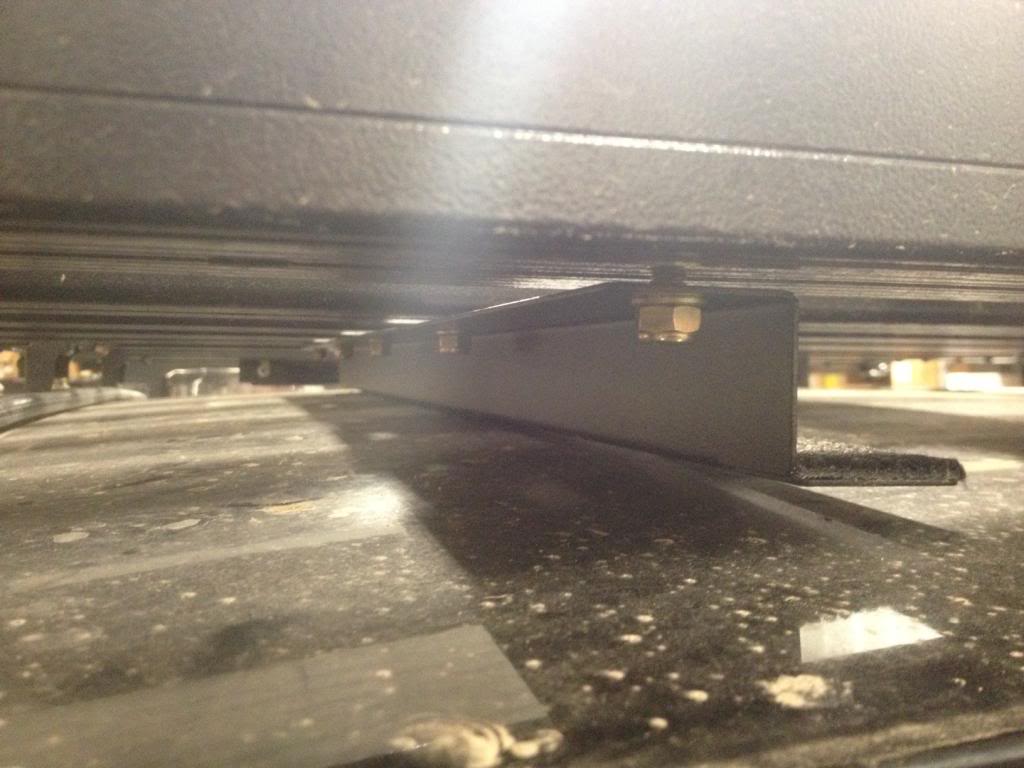
Adjust to size and tighten down.
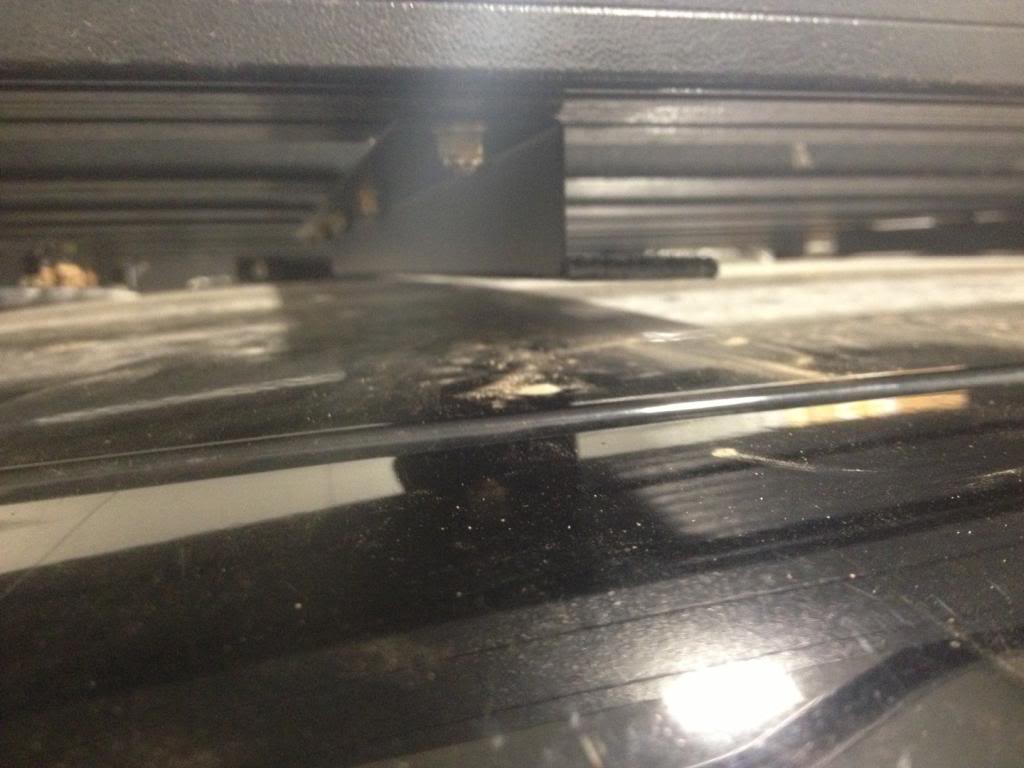
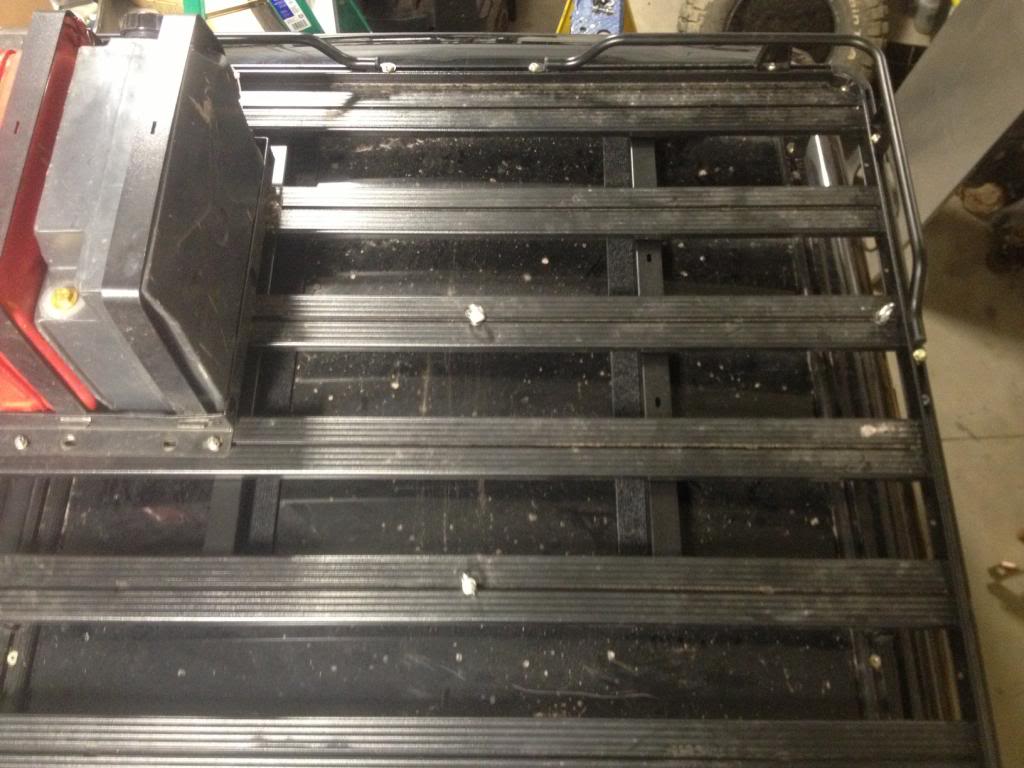
Top view of the tracks installed waiting for the table.
I know what you guys are thinking because I thought the same thing. What holds the table in place? The table mounting kit comes with a securing latch. First you bolt this ring to your table.
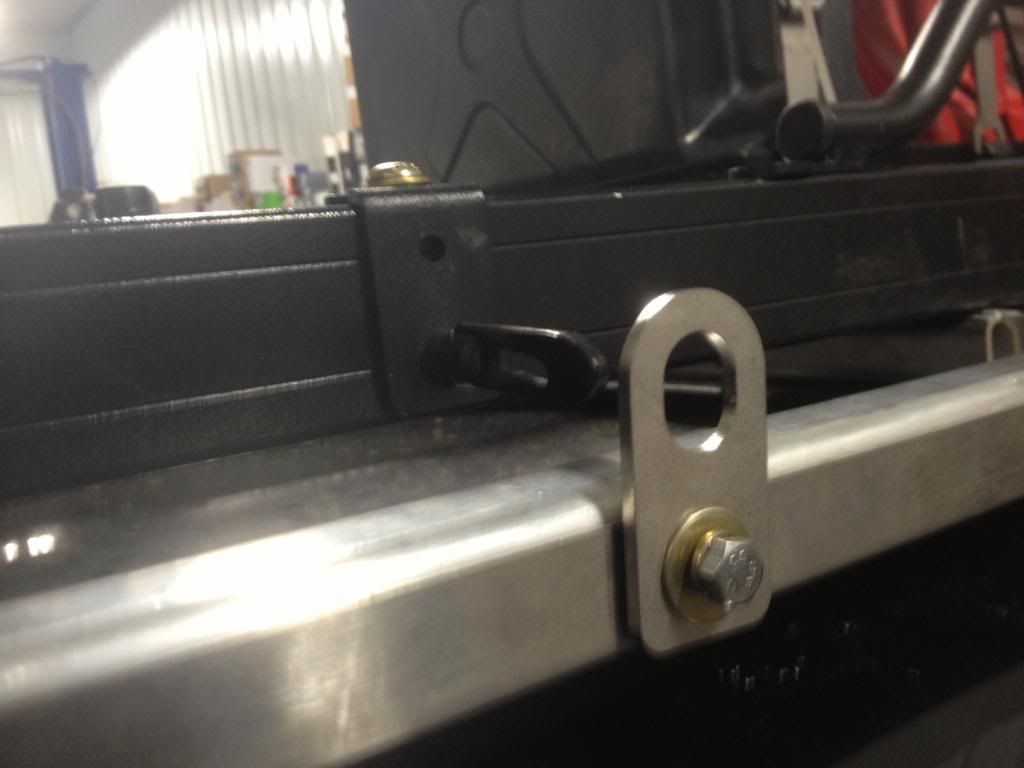
Then mount the locking pin bracket to the rack.
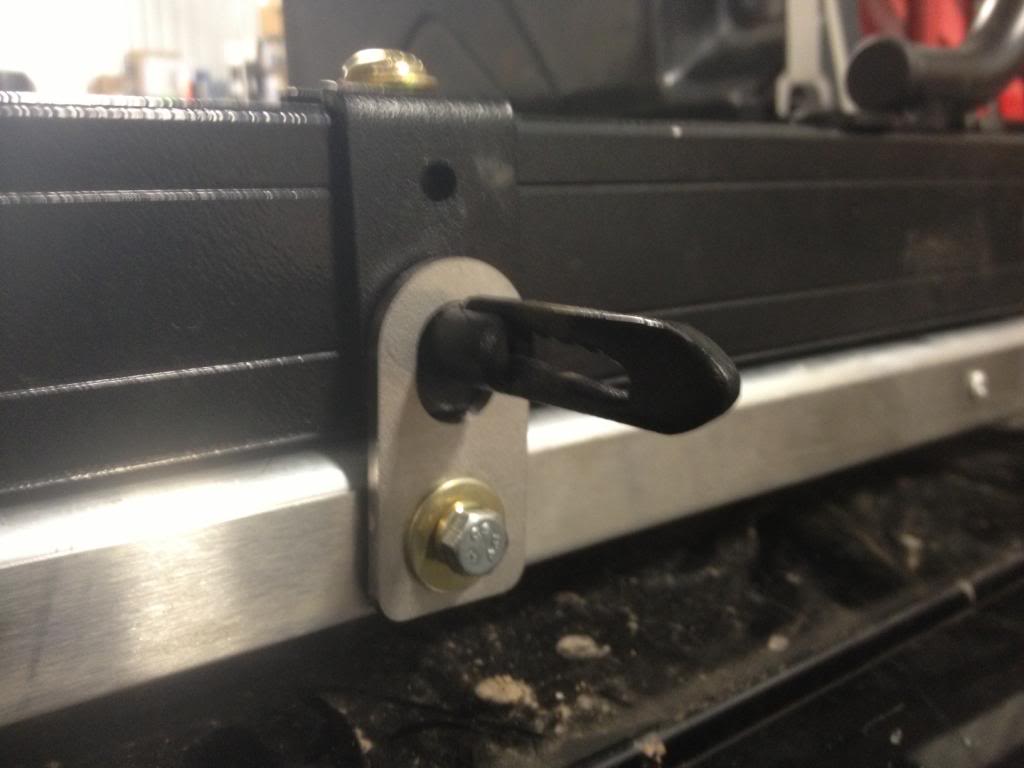
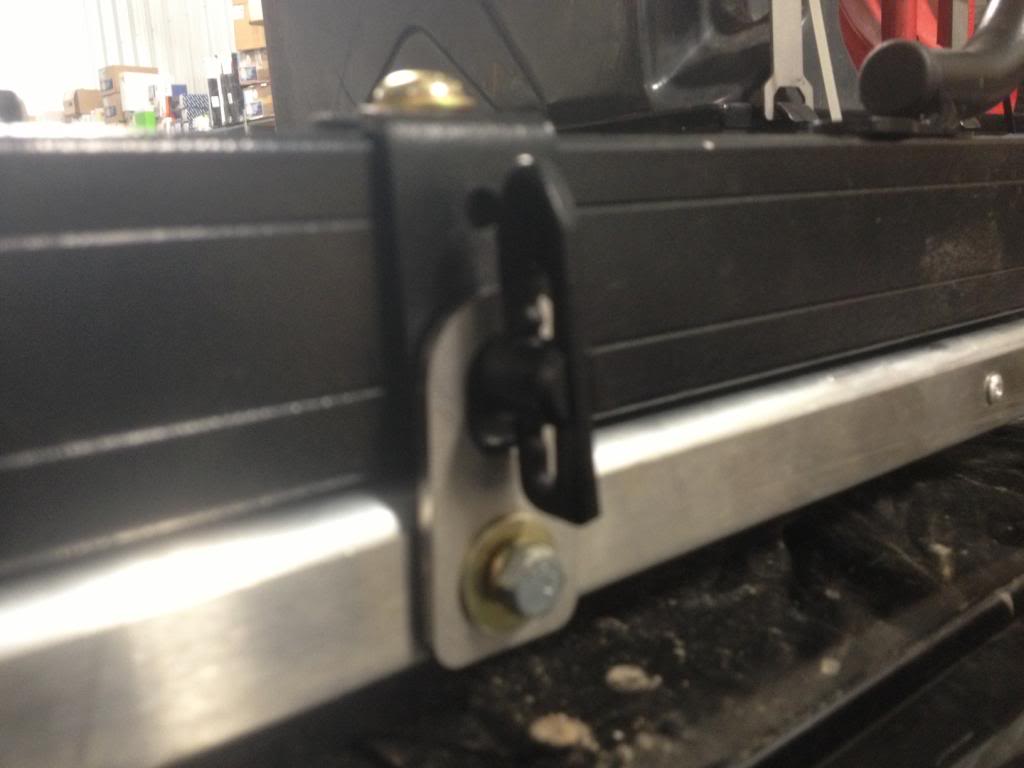
Drop the pin in place to secure the table from moving.
Here is a top view of the table in place. It is securely stored and out-of-the-way until needed. Keep in mind we mounted all of these accessories without drilling a single hole.
Everybody loves a sexy rack and L8 is no exception. In it's standard form the front runner rack looked kind of plain, But as we started to add accessories the rack took on a whole new look.
The first thing we wanted to do was lower the front of the rack down so it looked level across the truck. Front Runner keeps the front a little bit higher then the rear so you can open the sunroof. Knowing full well that the sunroof will not be used anymore we decided to bring the front of the rack down. One of the greatest things about the Front Runner rack is it's modular construction. To lower the front all we had to do was swap out this bracket.

A few bolts later and boom the new foot is installed. We did not even have to take the rack off the roof.

Next on the list was to put some lights on the front. Ironman 4 x 4 has released their own brand of LED light bars and we thought this was a perfect place for one.

Again to stress how convenient this rack is we used the spare foot as a light mount bracket.

All we had to do was drop a bolt into the track and tighten the bracket down.

The Ironman LED uses a convenient multiple angle mount. All you have to do is adjust it to your liking and tighten it down with the provided Allen wrench.

The lightbar tucked up perfectly against the rack, hopefully keeping it out of harms way.


With the LEDs done it was time to move out back. I must admit I was as excited as a little kid on Christmas for this upgrade. It's one of those stupid things that you say why hasn't anybody thought of it before. If another rack manufacturer has done this I have never seen it. Front Runner designed a table holder that bolted to the bottom of the rack. It allows you to adjust for width to fit a multitude of tables. This was extremely useful because the P38 has less cargo room then any of the project vehicles we have used.
This is one of the track legs that need to be mounted to the bottom.

Simply slide the bolts into the lower track.

Adjust to size and tighten down.

Top view of the tracks installed waiting for the table.

I know what you guys are thinking because I thought the same thing. What holds the table in place? The table mounting kit comes with a securing latch. First you bolt this ring to your table.

Then mount the locking pin bracket to the rack.

Drop the pin in place to secure the table from moving.

Here is a top view of the table in place. It is securely stored and out-of-the-way until needed. Keep in mind we mounted all of these accessories without drilling a single hole.

Thread Starter
|
Winching
Joined: Jan 2009
Posts: 628
Likes: 18
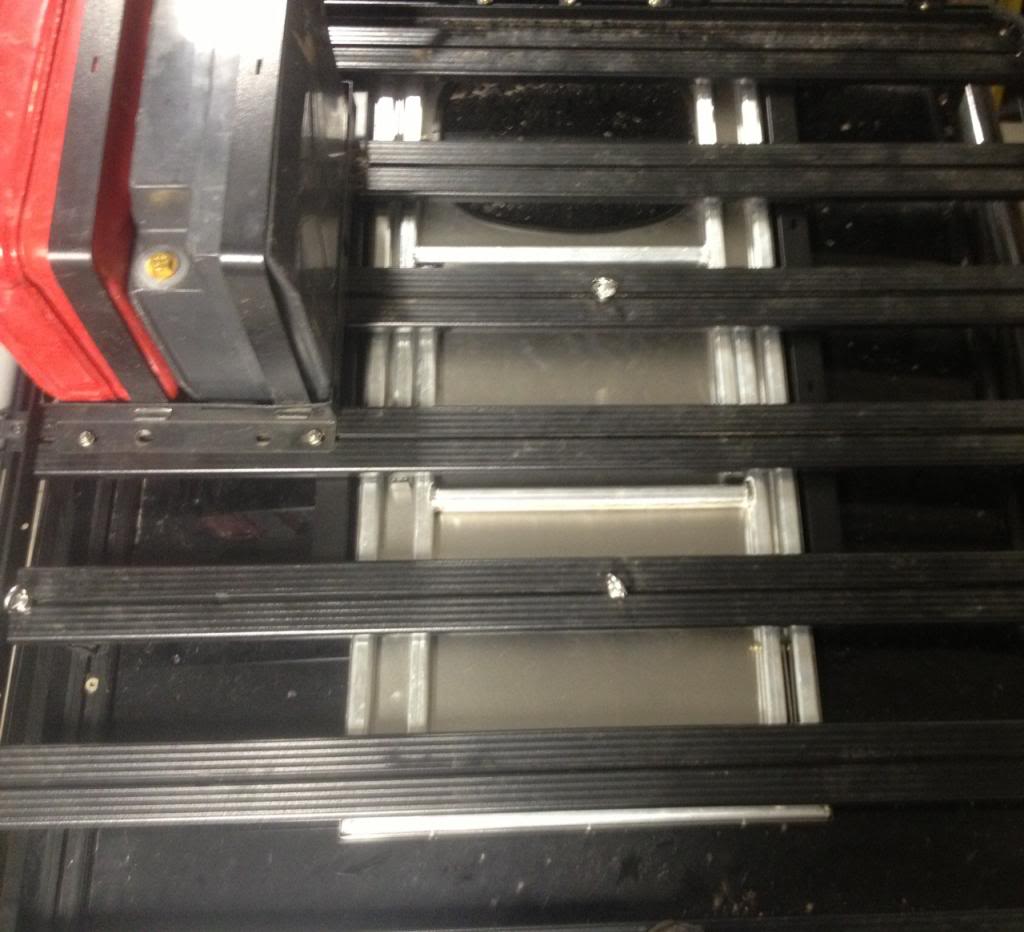
With all this cool stuff on the rack we needed a way to get there. Scott from BECM Doctor WWW.BECMDOCTOR.COM had a few of his SD style ladders left and sent us one.
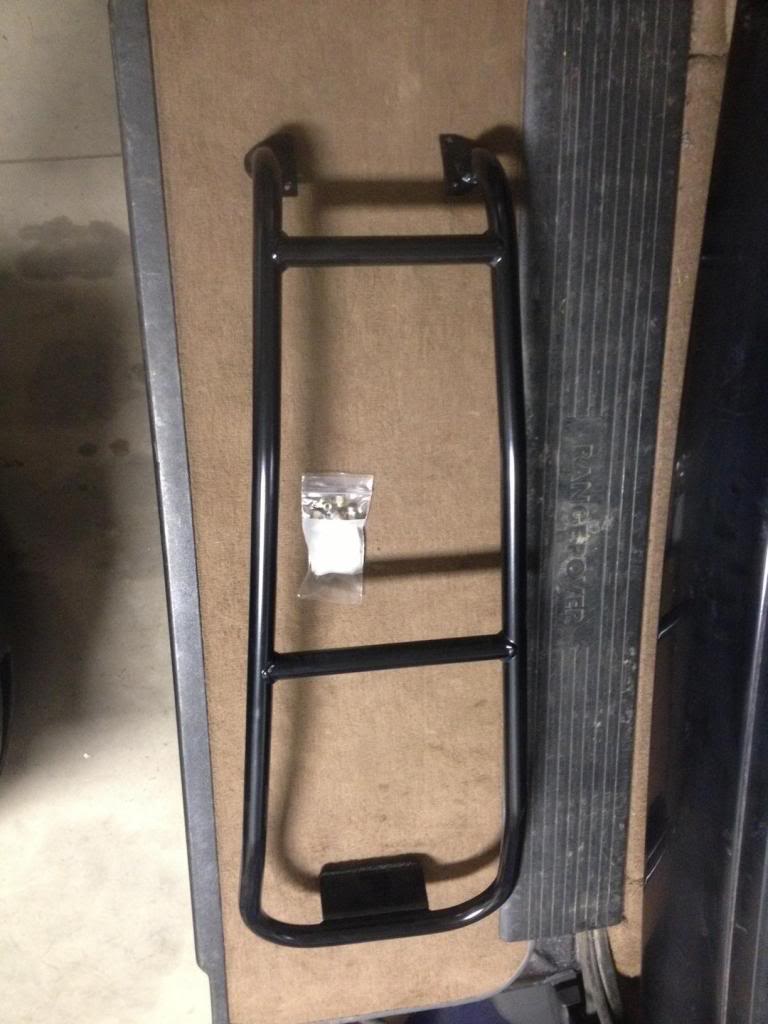
Not only is Scott extremely knowledgeable about the inner workings of the BECM he's a cool guy to work with. I highly recommend him if you need a spare BECM or yours repaired. He also offered to do another run of ladders if we can get eight people interested. The price for the ladder is $200. And one more thing before we get back to the ladder. Scott is also trying to find a way to divorce the BECM from the ECU. With him on the case we have a good chance of success.
Mounting the latter was extremely easy. All we needed to do was drill some holes.
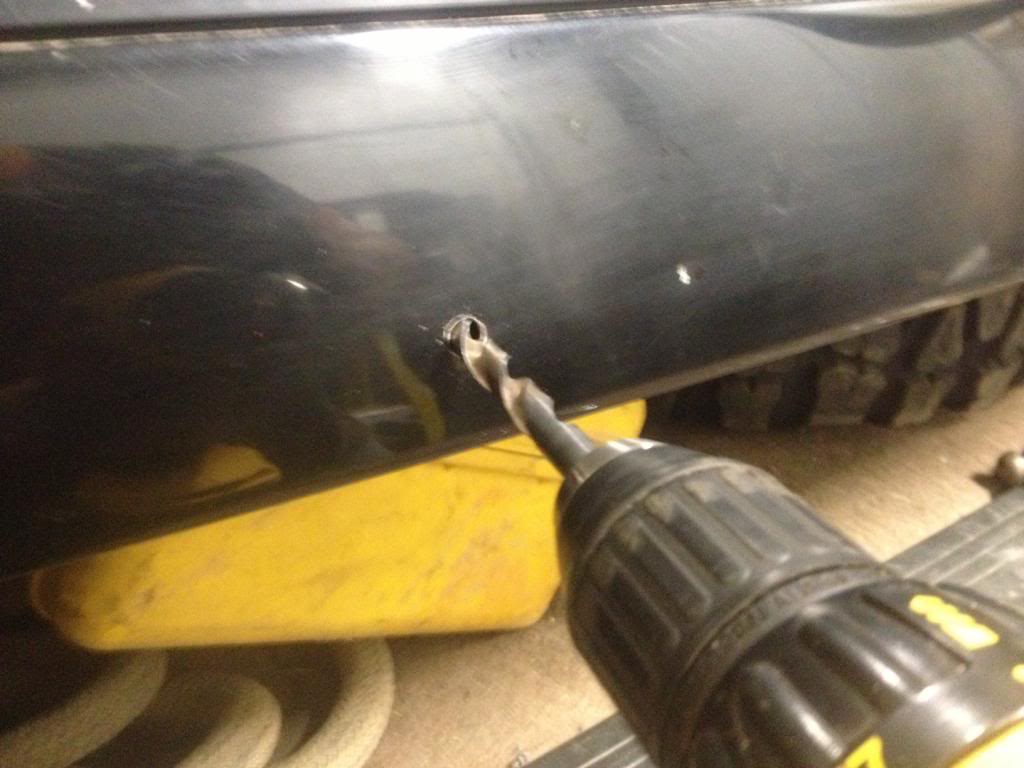
Install some Riv Nuts and tighten down.

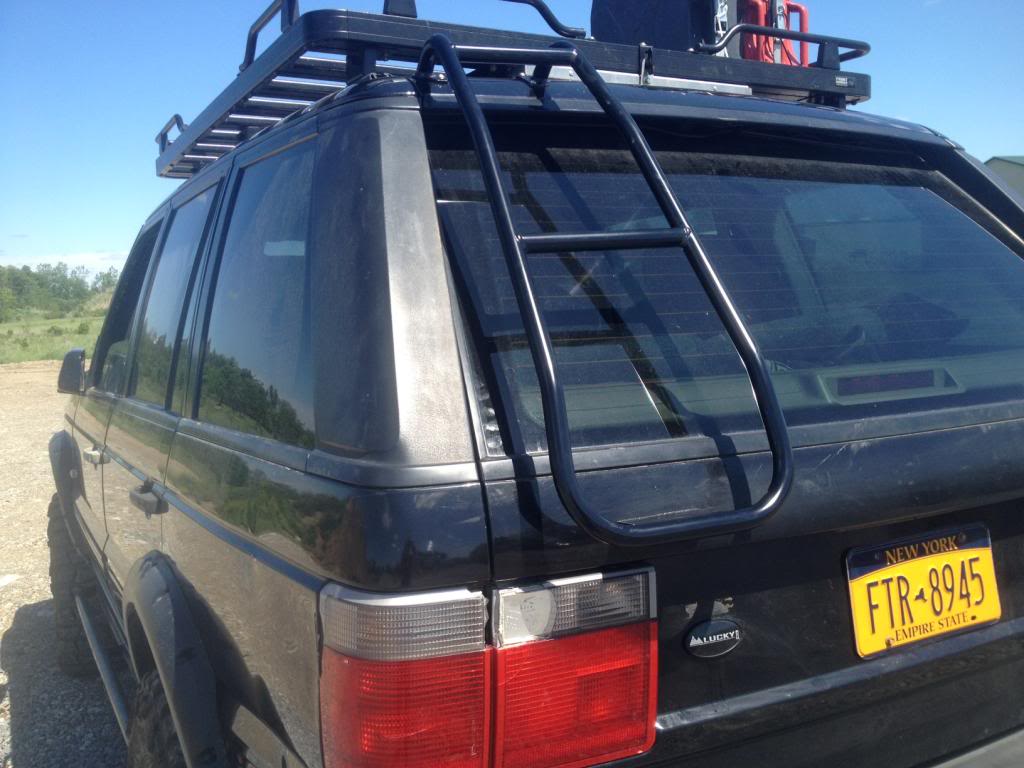
Poser shot
