When you click on links to various merchants on this site and make a purchase, this can result in this site earning a commission. Affiliate programs and affiliations include, but are not limited to, the eBay Partner Network.
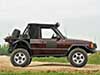
New shoes... BFG T/A KO2. 265 60 18. First impressions, at all speeds up to 70 for a few miles, extremely happy. Pleasantly surprised that they are as quiet as they are. Will probably not be going back to a less aggressive Tire, based on first impressions. Purchased Tires and installation from Discount Tires, including $35 per Tire 'replacement certificate'.
Last week, my local trusted indy mechanic replaced a leaking Transmission line. Not a job that I wanted to handle myself. They also did a complete Transmission fluid swap. Long overdue!! Luckily, Transmission is still silky smooth. I supplied my own fluid, bought a case of 12 bottles, so was much cheaper.
Did an oil change and front Diff fluid change - no signs of any wear.
Will be doing rear (Locking) Diff fluid in a few days, same time as I have the rear end up in the air, to swap out Rear Upper Control Arms - The large Bushing on both sides of vehicle has finally started to wear out. Will also swap out Sway Bar Bushings and Sway Bar Links at same time. May also swap out Rear Lower Control Arms - might as well, since I'm back there anyway.
Will do some rust control and prevention at same time.
Also need to swap out the plastic Thermostat Housing Assembly - Mine has a small leak. Had this in stock for at least a year - picked it up very cheap from Amazon Warehouse.
Will also do a few other bits and bobs, in preparation for a solo National Forest trip later in October - Nicolet National Forest, Northern Wisconsin. Will be pretty much 'off-grid' for a week. Tested new 0 (zero) degree F sleeping bag outside, the other night - was far too warm, which is a great sign that the bag will be warm enough when it gets cold.
Swapped out the entire plastic Thermostat Assembly unit, because I had a couple of small leaks. It was probably original. 180,000 miles at this point. The only thing that took a long time was the removal of some of the Torx bolts. You will need a Torx 30. A few of them are tricky to get to, and some of mine were badly corroded. Not a good combination, for Torx bolts. Fortunately got them all out without stripping them. Pleasantly surprised. Upon reassembly, I swapped out all Torx bolts for hex-head bolts. M6 x 1.0, 25mm long. Lots of hoses and connectors were taken apart - made sure I labelled everything, and also made sure that I sealed all electrical connections, to protect from fluids and dirt. All new o-rings, with a dab of silicone grease.
Took advantage of having the Coolant system opened up, and did a thorough drain, refill with critic Acid solution, flush, etc. The coolant that I removed was very clean, and the original Thermostat also looked very clean, which was nice to see. Was very much trial and error getting all of the air out of the system though. Finally enough coolant was sucked through the system, and all air bubbles eliminated.
As the Belts were loosened, I checked for belt and bearing-wear - all good. The Idler Pulley, both Tensioners, water pump, AC Compressor pump, and Alternator all seemed good, smooth and tight, no noise or play.
Sidenote - Was going to fit a new Water Pump, because why not, but discovered the one that was sent to me was the wrong type - It only has 5 Bolts, whereas the one on the vehicle has 7 bolts, I think. Beware of this! Lots of webaites list the 'wrong' one. At least for my vehicle. Anybody else experienced this?
Also cleaned MAF Sensor, EGR valve, PCV Valve, and entire air intake / throttle body assembly.
I did still have the crappy plastic T-bleeder valve (top of engine) - will run to hardware store later today to get some brass fittings.
Been driving around for couple hours, including on interstate, and so far so good - No sign of any Coolant leaks, post-repair.
What size bolts did you need to replace them? Its a good idea, so maybe I will pick some up in stainless ahead of time.
The water pumps for the 4.4 come in two styles, some are two pieces like OEM but some replacements are single cast. The single cast have 2 less bolts because they are no two halves to join. Single cast also means one less gasket to fail.
Water Pump - Once I started to undo the Bolts, I noticed my new replacement one was 'different' - At that point, I decided to leave the old one on, since I was concerned about the original Gasket failing, if I pulled the Pump off. Original Pump seems to be working well, and I have zero leaks, following yesterday's work, so I'm going to leave this alone for now.
Thermostat Housing Bolts - You will need 8, same size, M6x1.0, and I recommend a length of 25mm. Because 25mm is about 2mm shorter than the ones I pulled off, (not al all concerned) but 30mm is too long. I purchased Grade 10.9 bolts form auto parts store - Did not want to risk generic bolts from a hardware store. Here's the link to the housing that I purchased -
Picked up a new family member. My 17 year old son needed a car so I found a 2005 LR3 SE with low mileage. Being a dad I feel so much better knowing he is riding around in a steel tank compared to a plastic turtle shell. I�m going to detail it and give it to him this weekend. This is his first car I think he should be pretty happy. My first car was a damn 1986 Nissan Pickup
Washington, looks like a wonderful purchase! Appears like a warm place to be, we just had about 2" (5cm) of snow today and we are sharpening our snow shovels...I'm not complaining though...
Hello Friends, today I properly secured the front passenger (right) side black plastic wheel arch trim piece. Needed to do a small amount of plastic welding, as summarized in this video - https://photos.app.goo.gl/gXUyLKjjUbJejpjQ6

 09-30-2020, 06:20 PM