
Super Model With Bad Crack Habit Rehab Build-


Thread Starter
|
Recovery Vehicle
Joined: Apr 2015
Posts: 951
Likes: 39
From: AWESOMEVILLE, MAINE
The past 2 Halloween's I had written FREE CANDY on it's side. ;-)
The van had it's own secrets as well.....took a while to figure it out but 3/4" of the driver's side had been replaced at some point.....I thought it was the rear but after some time, figured out it was the front. Needed front end work, over came a major ECU issue (crap diodes), needed fresh tires and a new exhaust manifold gasket......While rust free from Washington state, it was a 92....I upgraded the headlights, built the bumper......little bit on the interior, and that was it......Never even changed it's oil.....(oooops) While it looked nice, it had a book value of 8-900 bucks....
Had I known there may be a patch panel market prior to installing, I would have documented & duplicated.....pretty sensitive area in my eyes, keeping the welder out of the cab I think was pretty smart......Let's see what the drivers side looks like......the floor area where it kicks up was not a single bend, heavy seam sealer area.....real heavy from factory.
I would think we'd want such a panel 'oversized', trimmed to fit by user?
(14 ga steel)
Thread Starter
|
Recovery Vehicle
Joined: Apr 2015
Posts: 951
Likes: 39
From: AWESOMEVILLE, MAINE
As it sat, the van was 2wd, the plan was to convert it as I had a line on a full 4x4 rolling chassis with drivetrain in PA for $1,800.......Ridge-Runner design was just over sized tires on a small body lift meant to travel not much more than rough dirt roads.
If it was 4wd, it would still be in my driveway.
 It was the perfect 4wd pedo van just needed free candy on the sides
If it was 4wd, it would still be in my driveway.
Thread Starter
|
Recovery Vehicle
Joined: Apr 2015
Posts: 951
Likes: 39
From: AWESOMEVILLE, MAINE
As far as rust goes, I've worked on much, much worse.......frame looks good! LOL, need to stay positive. ;-)
Even better......No one has done any previous repair work so I'm still dealing with factory steel....
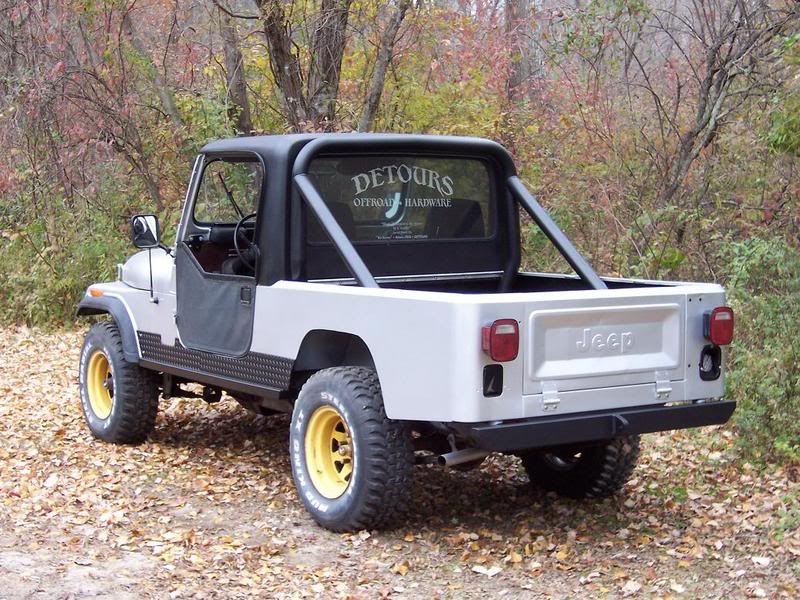
This was my last rust repair bought & painted within 7 weeks after hours...
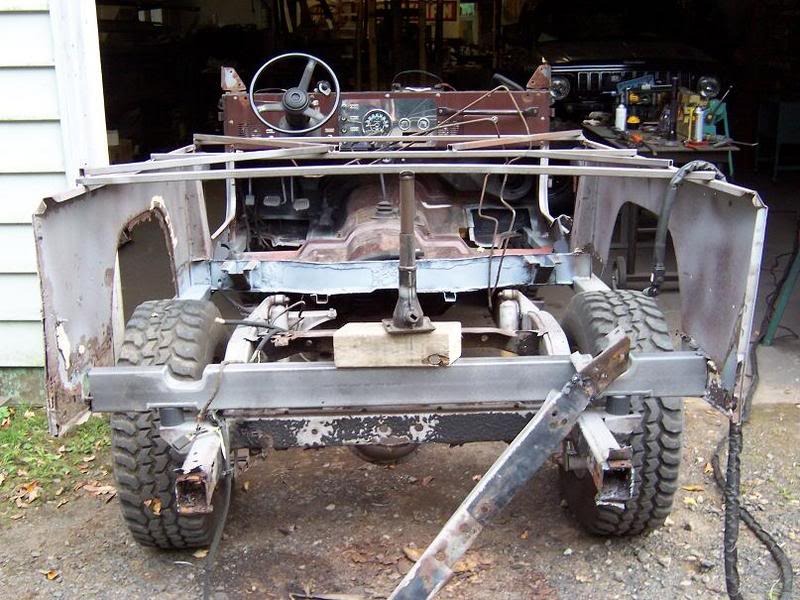
It's a CJ8, everything from the cowl back was pretty much hand made, I actually had to force the cowl back upward as it was collapsing.....I only bought & rebuilt the CJ to get away from my everyday work, needed a distraction......it was a fun project, you get to use all those tools you've purchased over the years and put your brain to work figuring out the puzzle....
LOL....I actually removed 4 layers of traffic sign repairs under the 2 front seats in that truck......to include a "Do Not Dig' sign.....thought it was funny!
Even better......No one has done any previous repair work so I'm still dealing with factory steel....
This was my last rust repair bought & painted within 7 weeks after hours...

It's a CJ8, everything from the cowl back was pretty much hand made, I actually had to force the cowl back upward as it was collapsing.....I only bought & rebuilt the CJ to get away from my everyday work, needed a distraction......it was a fun project, you get to use all those tools you've purchased over the years and put your brain to work figuring out the puzzle....

LOL....I actually removed 4 layers of traffic sign repairs under the 2 front seats in that truck......to include a "Do Not Dig' sign.....thought it was funny!

Thread Starter
|
Recovery Vehicle
Joined: Apr 2015
Posts: 951
Likes: 39
From: AWESOMEVILLE, MAINE
Let's take a step backwards, I was looking forward to jamming out to the Disco's vintage Hi-Fi system..........
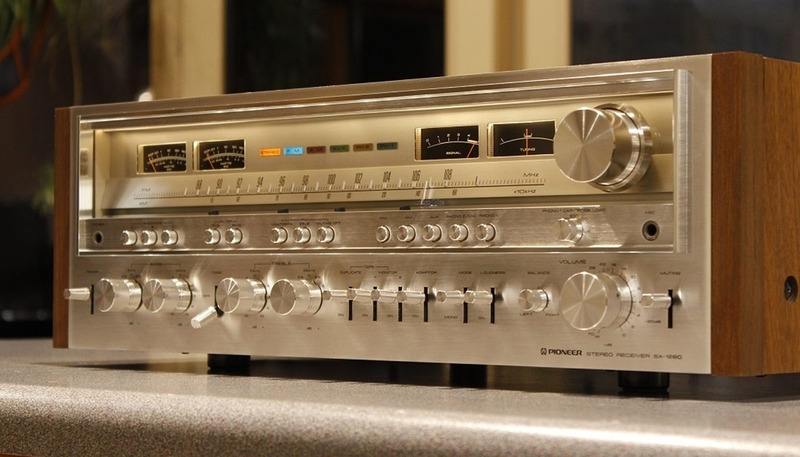
This could very much justify why I've held onto over 300 cassettes over the years, it was meant to be!!
Having the original code card in hand....I punched in the numbers 13432.....nothing...13432.....nothing........this went every day, several times a day until....BAM!....2 weeks later....IT'S ALIVE.......Quick, find a Huey Lewis cassette!
That was a high point......
Thread Starter
|
Recovery Vehicle
Joined: Apr 2015
Posts: 951
Likes: 39
From: AWESOMEVILLE, MAINE
Next I checked out the CD changer.......no worky.....but hey, the weather band was a pretty cool feature! The system sounded pretty bad, turns out the speakers were all dry rotted......Ugh, time to upgrade with what I previously had installed in the van.....little trimming and waallaaa!
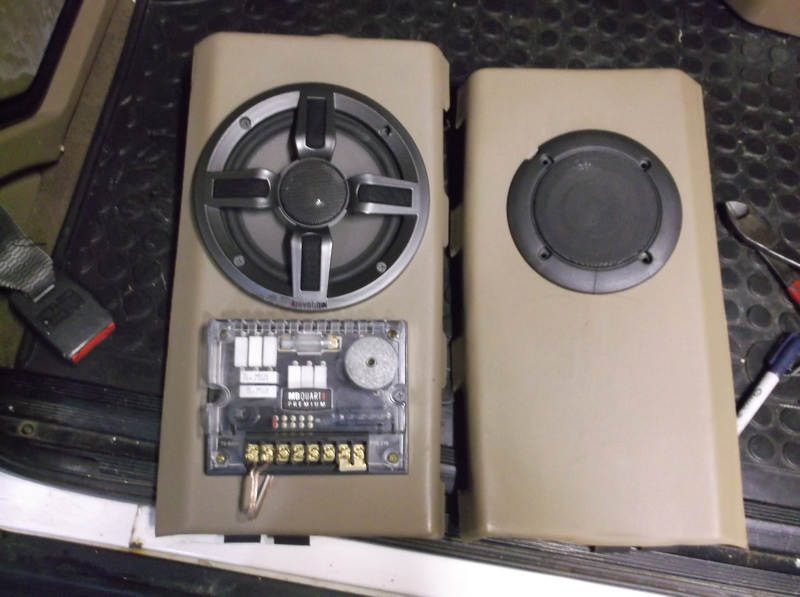
Getting ready to plug it all up......I noticed some splicing, extra wires, little mystery boxes........Hmmm...
This is when it all went down hill.........
There was part of an old 'add-on' system left in the truck........left in the truck and not fully disconnected......
POOOF!!
That about sums up my factory radio experience...........
Bummer, didn't even get to play my Frampton Comes Alive cassette yet!

Thread Starter
|
Recovery Vehicle
Joined: Apr 2015
Posts: 951
Likes: 39
From: AWESOMEVILLE, MAINE
BWAAHAAAAHAAAAAAAAAAAAAAAA.......Can't stop laughing in amazement......So my bushings showed up a couple weeks ago, ran out of welding wire a little early so I decided I would replace the bushings in the panard/track bar......How hard could this be?.....I have an hour......lol..

AMAZING ENGINEERING! I hope the engineer's behind this cluster didn't breed....Never seen anything like this......seems if the drivers side bolt was simply reversed, one would not need to dick around with the ridiculously engineered cast steel bracket some one engineered to justify their paycheck.......WOW!

Alright, long story short.......removed panard/trackbar, pressed out the old bushings...used a 13/16" socket, worked well......looked over my hardware removed prior to reinstalling.....of course one of the 9/16" bolts was worn becoming a 1/2" bolt at the bushing body...(really?? Never saw this before even on older vehicles..)....Started reinstalling, of course the upper nut on the funky bracket up along the radiator that you can hardly reach was swallowed by the frame.......grabbed a 1/2"-20 Jeep lug nut to replace the swallowed nut.....got everything back in place except for that one bolt which needs replacing this morning.........what an experience for such a simply functioning item, after 2.25 hours I ended up on the front porch laughing....WOW....I don't know what I'm going to fix next, but whatever it is......I think I'll just drop it off here next time and laugh my butt off in the waiting room.......
I've determined '1' thing so far..........it's definitely female!

AMAZING ENGINEERING! I hope the engineer's behind this cluster didn't breed....Never seen anything like this......seems if the drivers side bolt was simply reversed, one would not need to dick around with the ridiculously engineered cast steel bracket some one engineered to justify their paycheck.......WOW!

Alright, long story short.......removed panard/trackbar, pressed out the old bushings...used a 13/16" socket, worked well......looked over my hardware removed prior to reinstalling.....of course one of the 9/16" bolts was worn becoming a 1/2" bolt at the bushing body...(really?? Never saw this before even on older vehicles..)....Started reinstalling, of course the upper nut on the funky bracket up along the radiator that you can hardly reach was swallowed by the frame.......grabbed a 1/2"-20 Jeep lug nut to replace the swallowed nut.....got everything back in place except for that one bolt which needs replacing this morning.........what an experience for such a simply functioning item, after 2.25 hours I ended up on the front porch laughing....WOW....I don't know what I'm going to fix next, but whatever it is......I think I'll just drop it off here next time and laugh my butt off in the waiting room.......

I've determined '1' thing so far..........it's definitely female!

Thread Starter
|
Recovery Vehicle
Joined: Apr 2015
Posts: 951
Likes: 39
From: AWESOMEVILLE, MAINE
LOL....OUCH!
But in all honesty, I've never met a heater core I liked.
Hopefully we won't need to go down that road!