
So what did you do to your Disco today?


Three Wheeling
Joined: Jun 2012
Posts: 62
Likes: 0
From: Helena , AL
din't do crap
stared longingly under the hood instead of studying for nursing school finals
3 days and its on
diff and tc service
pulling radiator and having it rodded
new water pump, tstat, hoses and coolant,
full lube job including steering
valve cover gasket replace and
who the hell else knows what
I have a ton of parts and no time til finals are over
been buying them a few at a time to keep DW off my a$$

Today I installed my newly recovered black headliner and wired up my oil pressure gauge. The headliner took me 5 hours....
Tomorrow is lift kit and differential guard day, woo hoo! I'm just having the alignment place install the panhard, I don't want to start messing with geometry stuff
Recovery Vehicle
Joined: Mar 2011
Posts: 1,016
Likes: 2
From: Ankeny IA
Well dudes it's been a while so I will give you the week report.
Installed 5" RTE lifts to get rid of TF 2" coils and 2" spacers. Gonna need some longer brake hoses.

Installed pic

New ballistic joint on the center link. Getting rid of poly joint helped with the axle wrap.

A-arm extension installed in the rear. A double cardan rear shaft is going in tomorrow.

And last but not least, bought a cart for the welder. Harbor Freight $75

Installed 5" RTE lifts to get rid of TF 2" coils and 2" spacers. Gonna need some longer brake hoses.
Installed pic
New ballistic joint on the center link. Getting rid of poly joint helped with the axle wrap.
A-arm extension installed in the rear. A double cardan rear shaft is going in tomorrow.
And last but not least, bought a cart for the welder. Harbor Freight $75

Camel Trophy
Joined: Nov 2009
Posts: 4,079
Likes: 227
From: IL
It's actually aluminum. I made it from a large street sign that wasn't being used. Thickness is approx 3/16".
Today I completed a head gasket job start to finish on a buddy's truck. And replaced his tensioner pulley bearing.
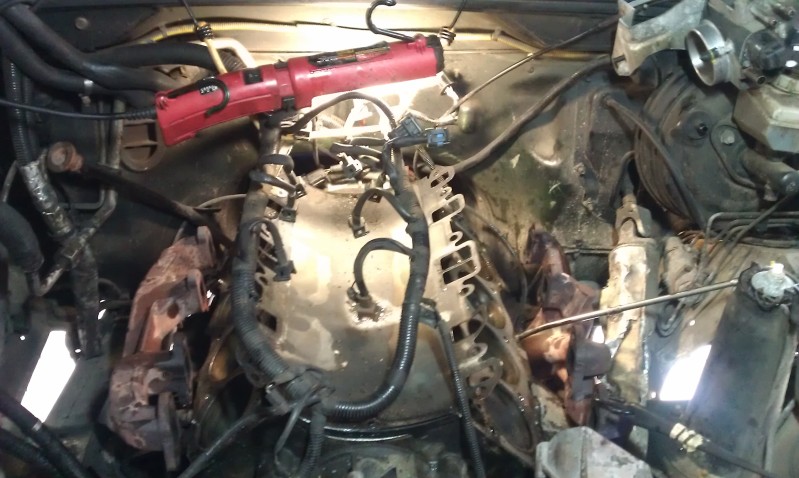
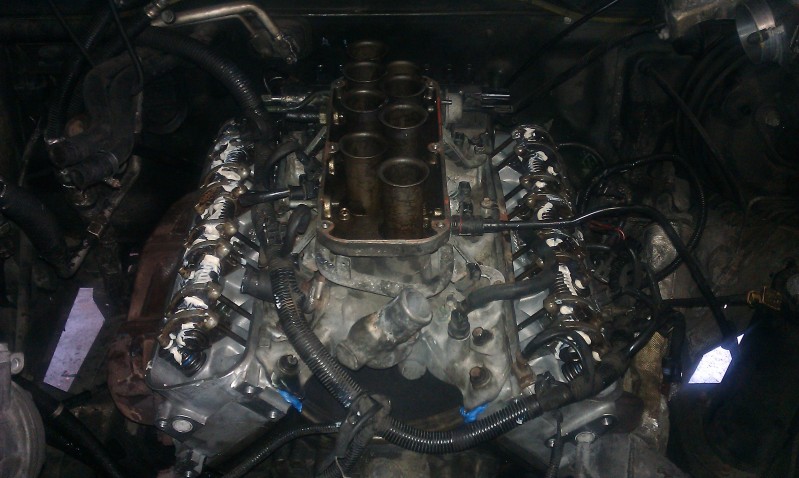
Today I completed a head gasket job start to finish on a buddy's truck. And replaced his tensioner pulley bearing.

Camel Trophy
Joined: Nov 2009
Posts: 4,079
Likes: 227
From: IL
You're about the third person to say that, LOL. Heads aren't actually that hard. You just have to treat it like a bunch of small projects, removing and labeling one part at a time. The Rover engine is quite simple and everything really only fits one way. Take pictures before you remove anything, then you can refer back to the pic when reassembling if needed. Go through the RAVE and make yourself a cheat sheet of torque values and tightening sequence. Here's my list of must haves:
-RAVE
-In Search of the Experience DVD by Elias Christeas(Rover documentary and gives a great step by step of head gasket and swivel ball repairs)
-5/16" 12pt socket, 1/4" drive deepwell preferred
-Torque Wrench
-Good assortment of sockets, extensions, universal joints.
-3' cheater bar for your breaker bar
-5/8" 6pt sockets, one deep and one shallow. 6pt is an absolute MUST for the head bolts.
-Gold or silver paint pen from a crafts store. This is for marking the new head bolts. You'll tighten them to 15ft/lbs, then 90*, then another 90*. You draw a straight line across the head bolts to help with orientation when tightening the 90*. I draw the line on the bolts once they have all been torqued to 15ft/lbs and before turning 90*.
Most all of that is in the ISOTE DVD which I HIGHLY recommend.
Take your time, have a few clean working surfaces, keep everything organized.
Ask Will Tillery about his head gasket special. All new head bolts and seals, and machines heads with a valve job. Just send your old heads back when your done. Going this route you can get the job done in 1-2 days with no downtime waiting on your heads from a machine shop.
Reassembly will take twice the time it took to strip everything.
You can do it!!!!!
Camel Trophy
Joined: Nov 2009
Posts: 4,079
Likes: 227
From: IL
