Busy Few Days
#13
That looks great!
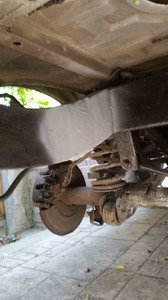
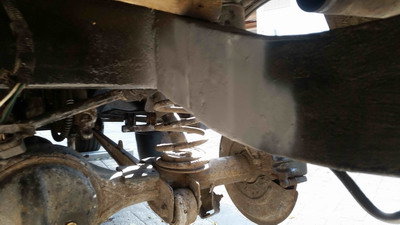
Do the new frame sections slip over the old?
I had read that they slip over, and can be drilled and bolted in place, then welded. But, if the bolts/holes are off just a little, then off course the frame isn't straight.
Did you just put the back half roughly in place and tack it, then push, pull, and tack along the way?
I'm just curious as the best way to make sure that piece goes on square.
The back half on my frame is shot, I can't get rid of it as is, and it's looking more and more like this is my only practical option.
My Dad is a retired engineer, and could do the welding at his house.
Any more info/alignment tricks would be greatly appreciated.
Thanks
#14
Hi Sixpack577
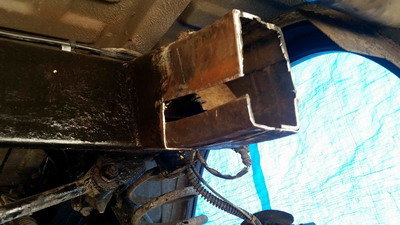
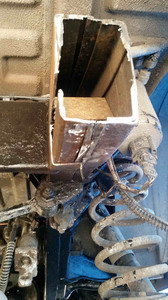
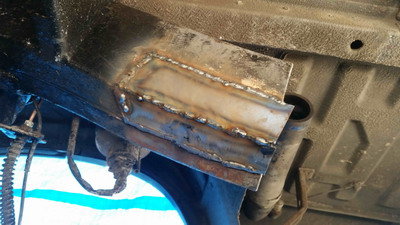
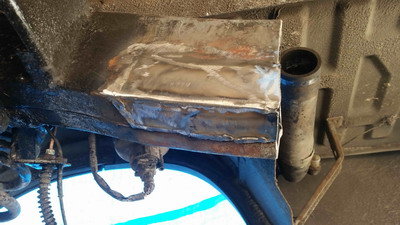
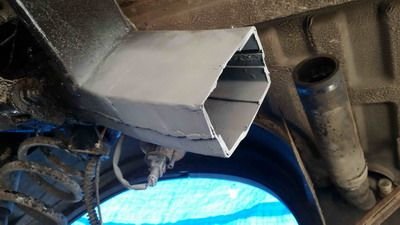
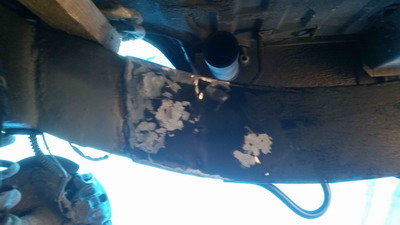
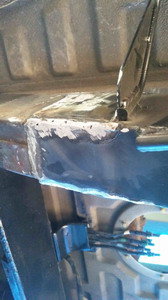
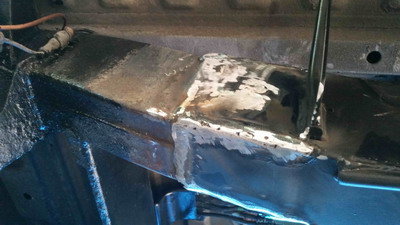
Basicaly, you measure 565 mm from the centre of the rear mounting bolt, that the weld point, I did two cuts, one about 100 mm from the back cross member on both sides and removed the cross member, then after my new section arrived did a final check for my second cut, pointing is 500mm, this way it was easier to remove one side ata time the new section slides over the original if you look at the photos I posted you can see the weld end is splayed out to go over, once fitted, bolt the new section back up at the rear of the body this lines it all up the clamp the top and bottom on both sides to get it lined up finally clamp up the sides so you will need 6 -8 clamps, once its all clamped up, weld it up, to be honest the hardest part was removing the fuel form the tank,
it all went very well after I had emptied the tank it was not difficult to do
have fun , Im just installing my new steel front bumper
Last edited by frostythor; 06-02-2020 at 03:16 PM.
The following users liked this post:
Sixpack577 (06-02-2020)
#15
Hi Sixpack577
Basicaly, you measure 565 mm from the centre of the rear mounting bolt, that the weld point, I did two cuts, one about 100 mm from the back cross member on both sides and removed the cross member, then after my new section arrived did a final check for my second cut, pointing is 500mm, this way it was easier to remove one side ata time the new section slides over the original if you look at the photos I posted you can see the weld end is splayed out to go over, once fitted, bolt the new section back up at the rear of the body this lines it all up the clamp the top and bottom on both sides to get it lined up finally clamp up the sides so you will need 6 -8 clamps, once its all clamped up, weld it up, to be honest the hardest part was removing the fuel form the tank,
it all went very well after I had emptied the tank it was not difficult to do
have fun , Im just installing my new steel front bumper
Basicaly, you measure 565 mm from the centre of the rear mounting bolt, that the weld point, I did two cuts, one about 100 mm from the back cross member on both sides and removed the cross member, then after my new section arrived did a final check for my second cut, pointing is 500mm, this way it was easier to remove one side ata time the new section slides over the original if you look at the photos I posted you can see the weld end is splayed out to go over, once fitted, bolt the new section back up at the rear of the body this lines it all up the clamp the top and bottom on both sides to get it lined up finally clamp up the sides so you will need 6 -8 clamps, once its all clamped up, weld it up, to be honest the hardest part was removing the fuel form the tank,
it all went very well after I had emptied the tank it was not difficult to do
have fun , Im just installing my new steel front bumper
I appreciate you explaining that.
Fortunately I drained the gas tank a couple years ago, and it was no fun.
I figure I'll troubleshoot and curse why my engine won't run after it goes back in...until I remember there's no gas in it, lol.
I go back and forth on getting rid of my D2(mainly because no one will buy it, lmao), because of it's frame rot. But, you are the first person I've seen post in detail on replacing the back half of the frame, which gives me some hope.
I'll get it running and go from there.
Again, ThankYou! This is a Great contribution and resource to this site!
#16
#17
#18
Thread
Thread Starter
Forum
Replies
Last Post


