
Differential Replacement Write Up (Front or Rear)


Thread Starter
|
Camel Trophy
Joined: Aug 2014
Posts: 4,743
Likes: 985
From: Southwestern Virginia
Ok, this is a write up for how to replace your differential if you have determined that yours is broken in some way. I have done this with a rear diff, but the front diff will be extremely similar with the only differences I can think of off the top of my head is that there is no weight to unbolt from the diff itself, the wheels/axles can turn for easier or harder access, and dual piston calipers.
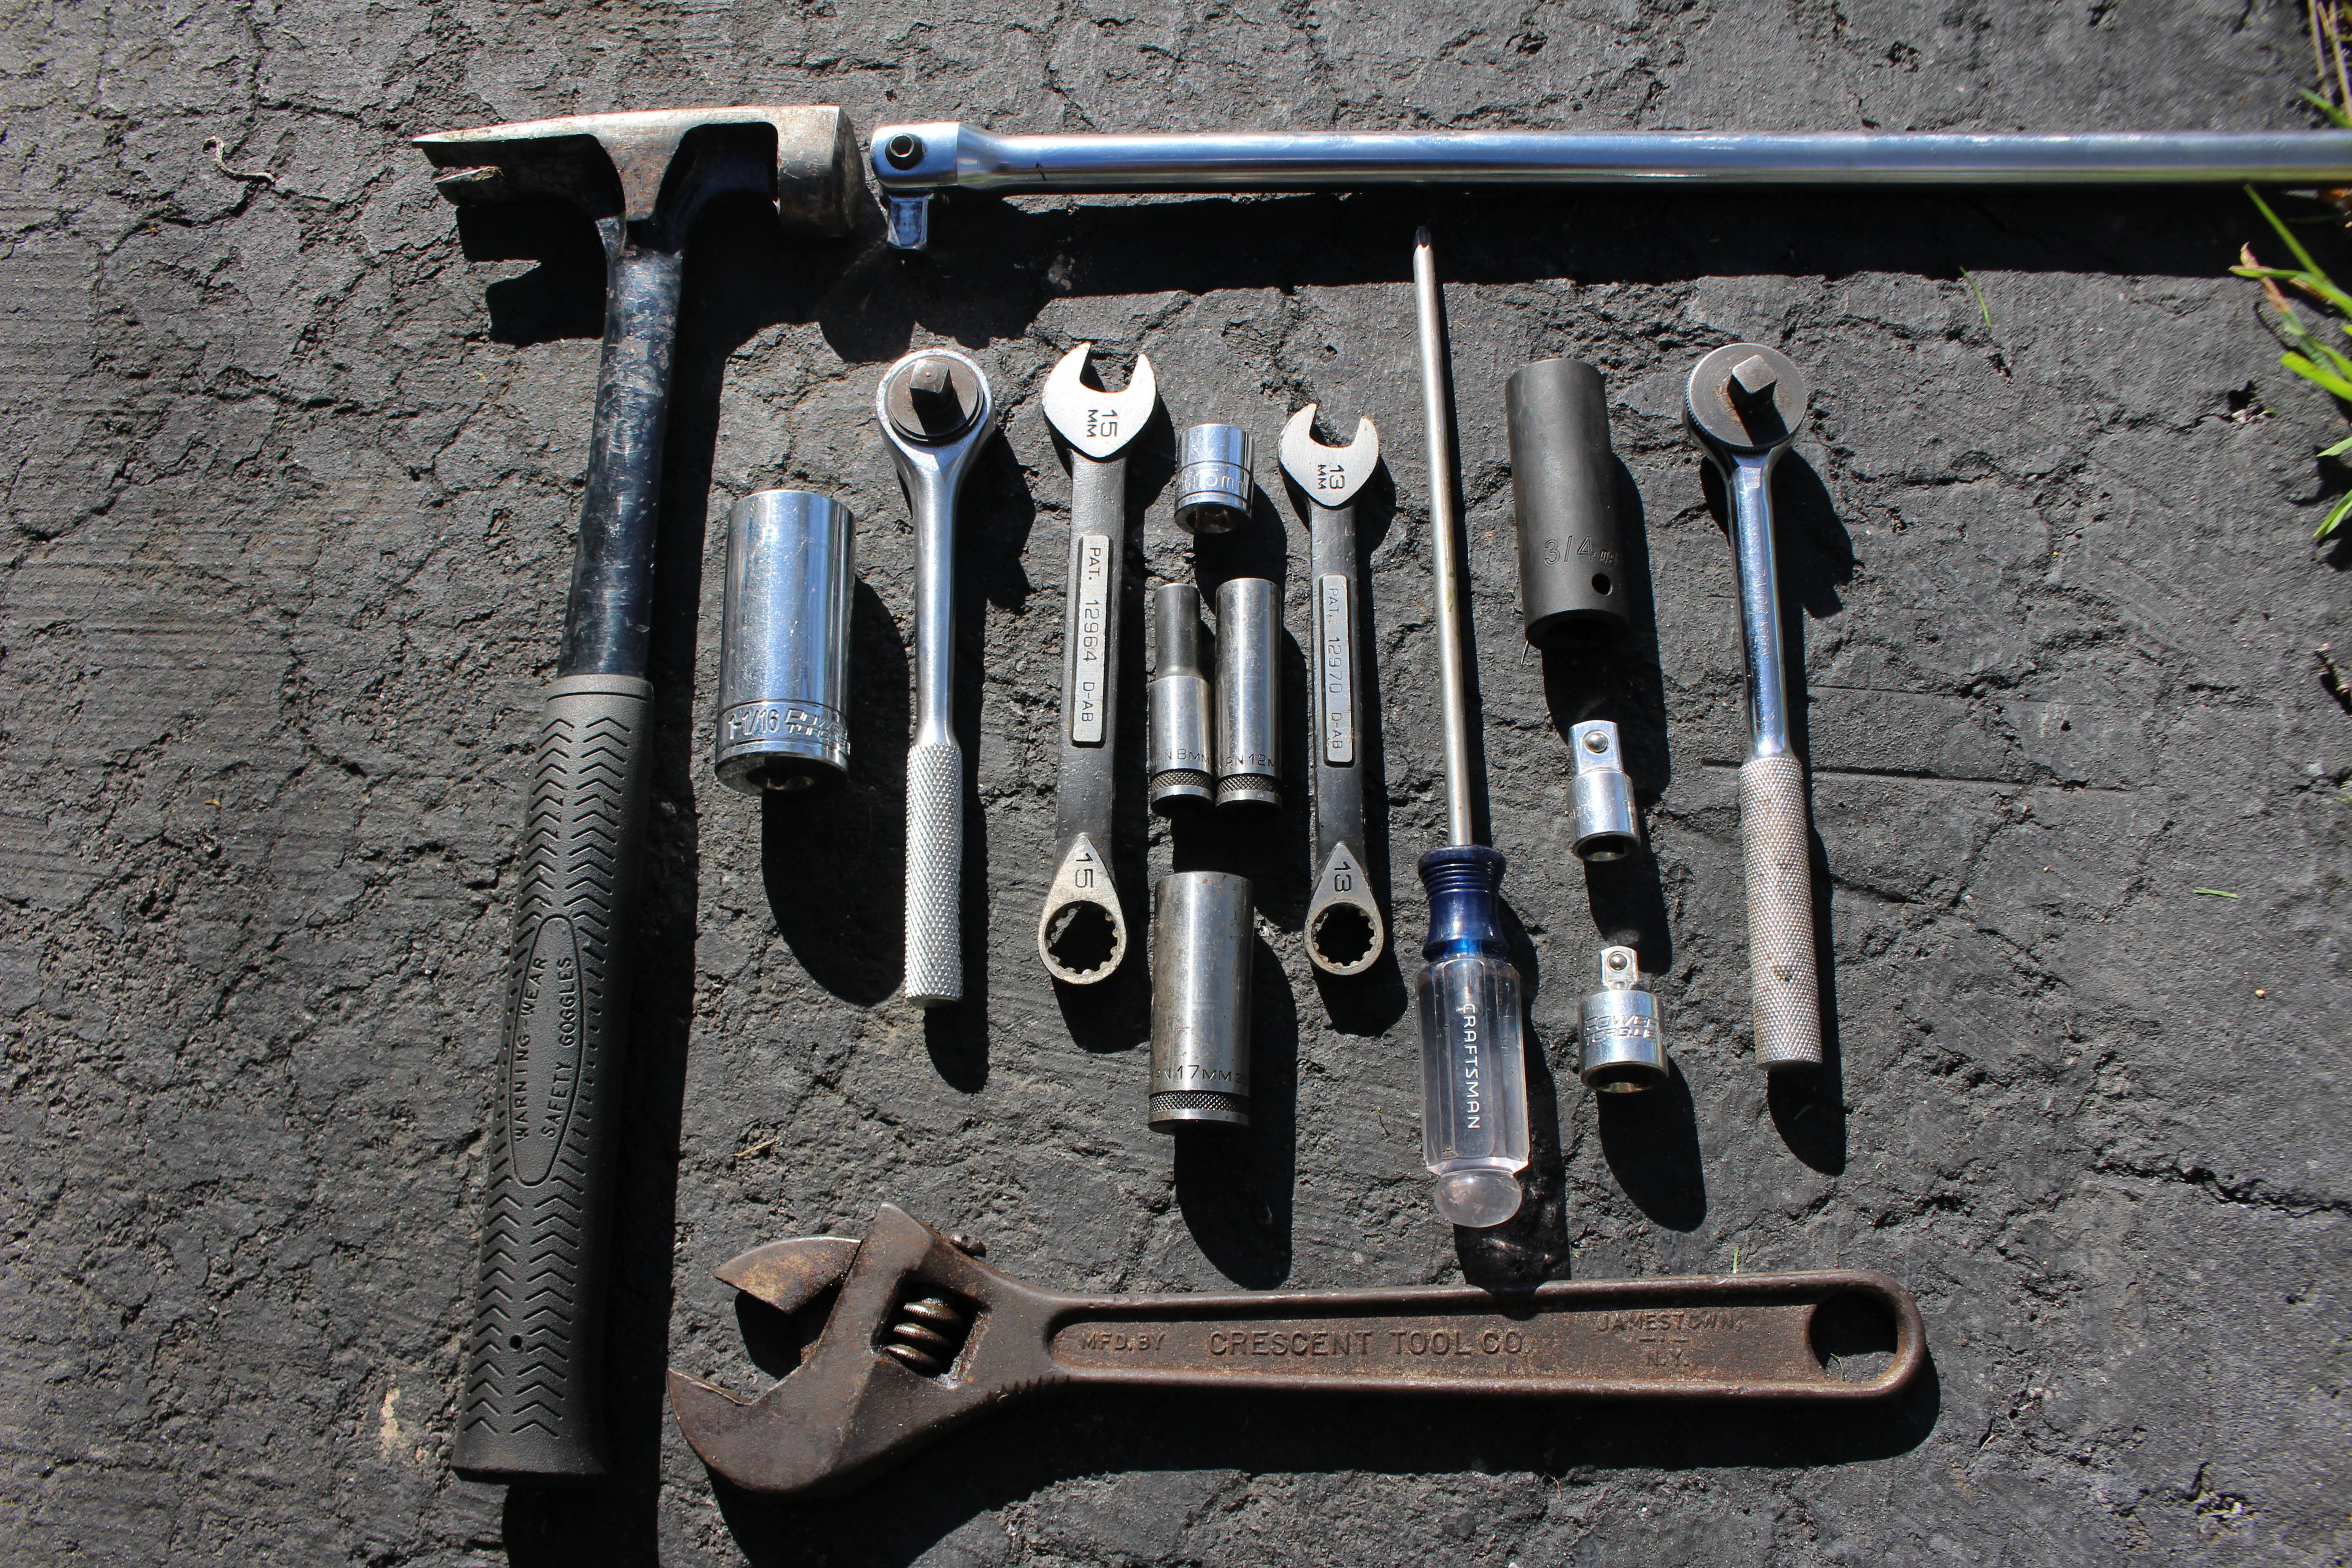
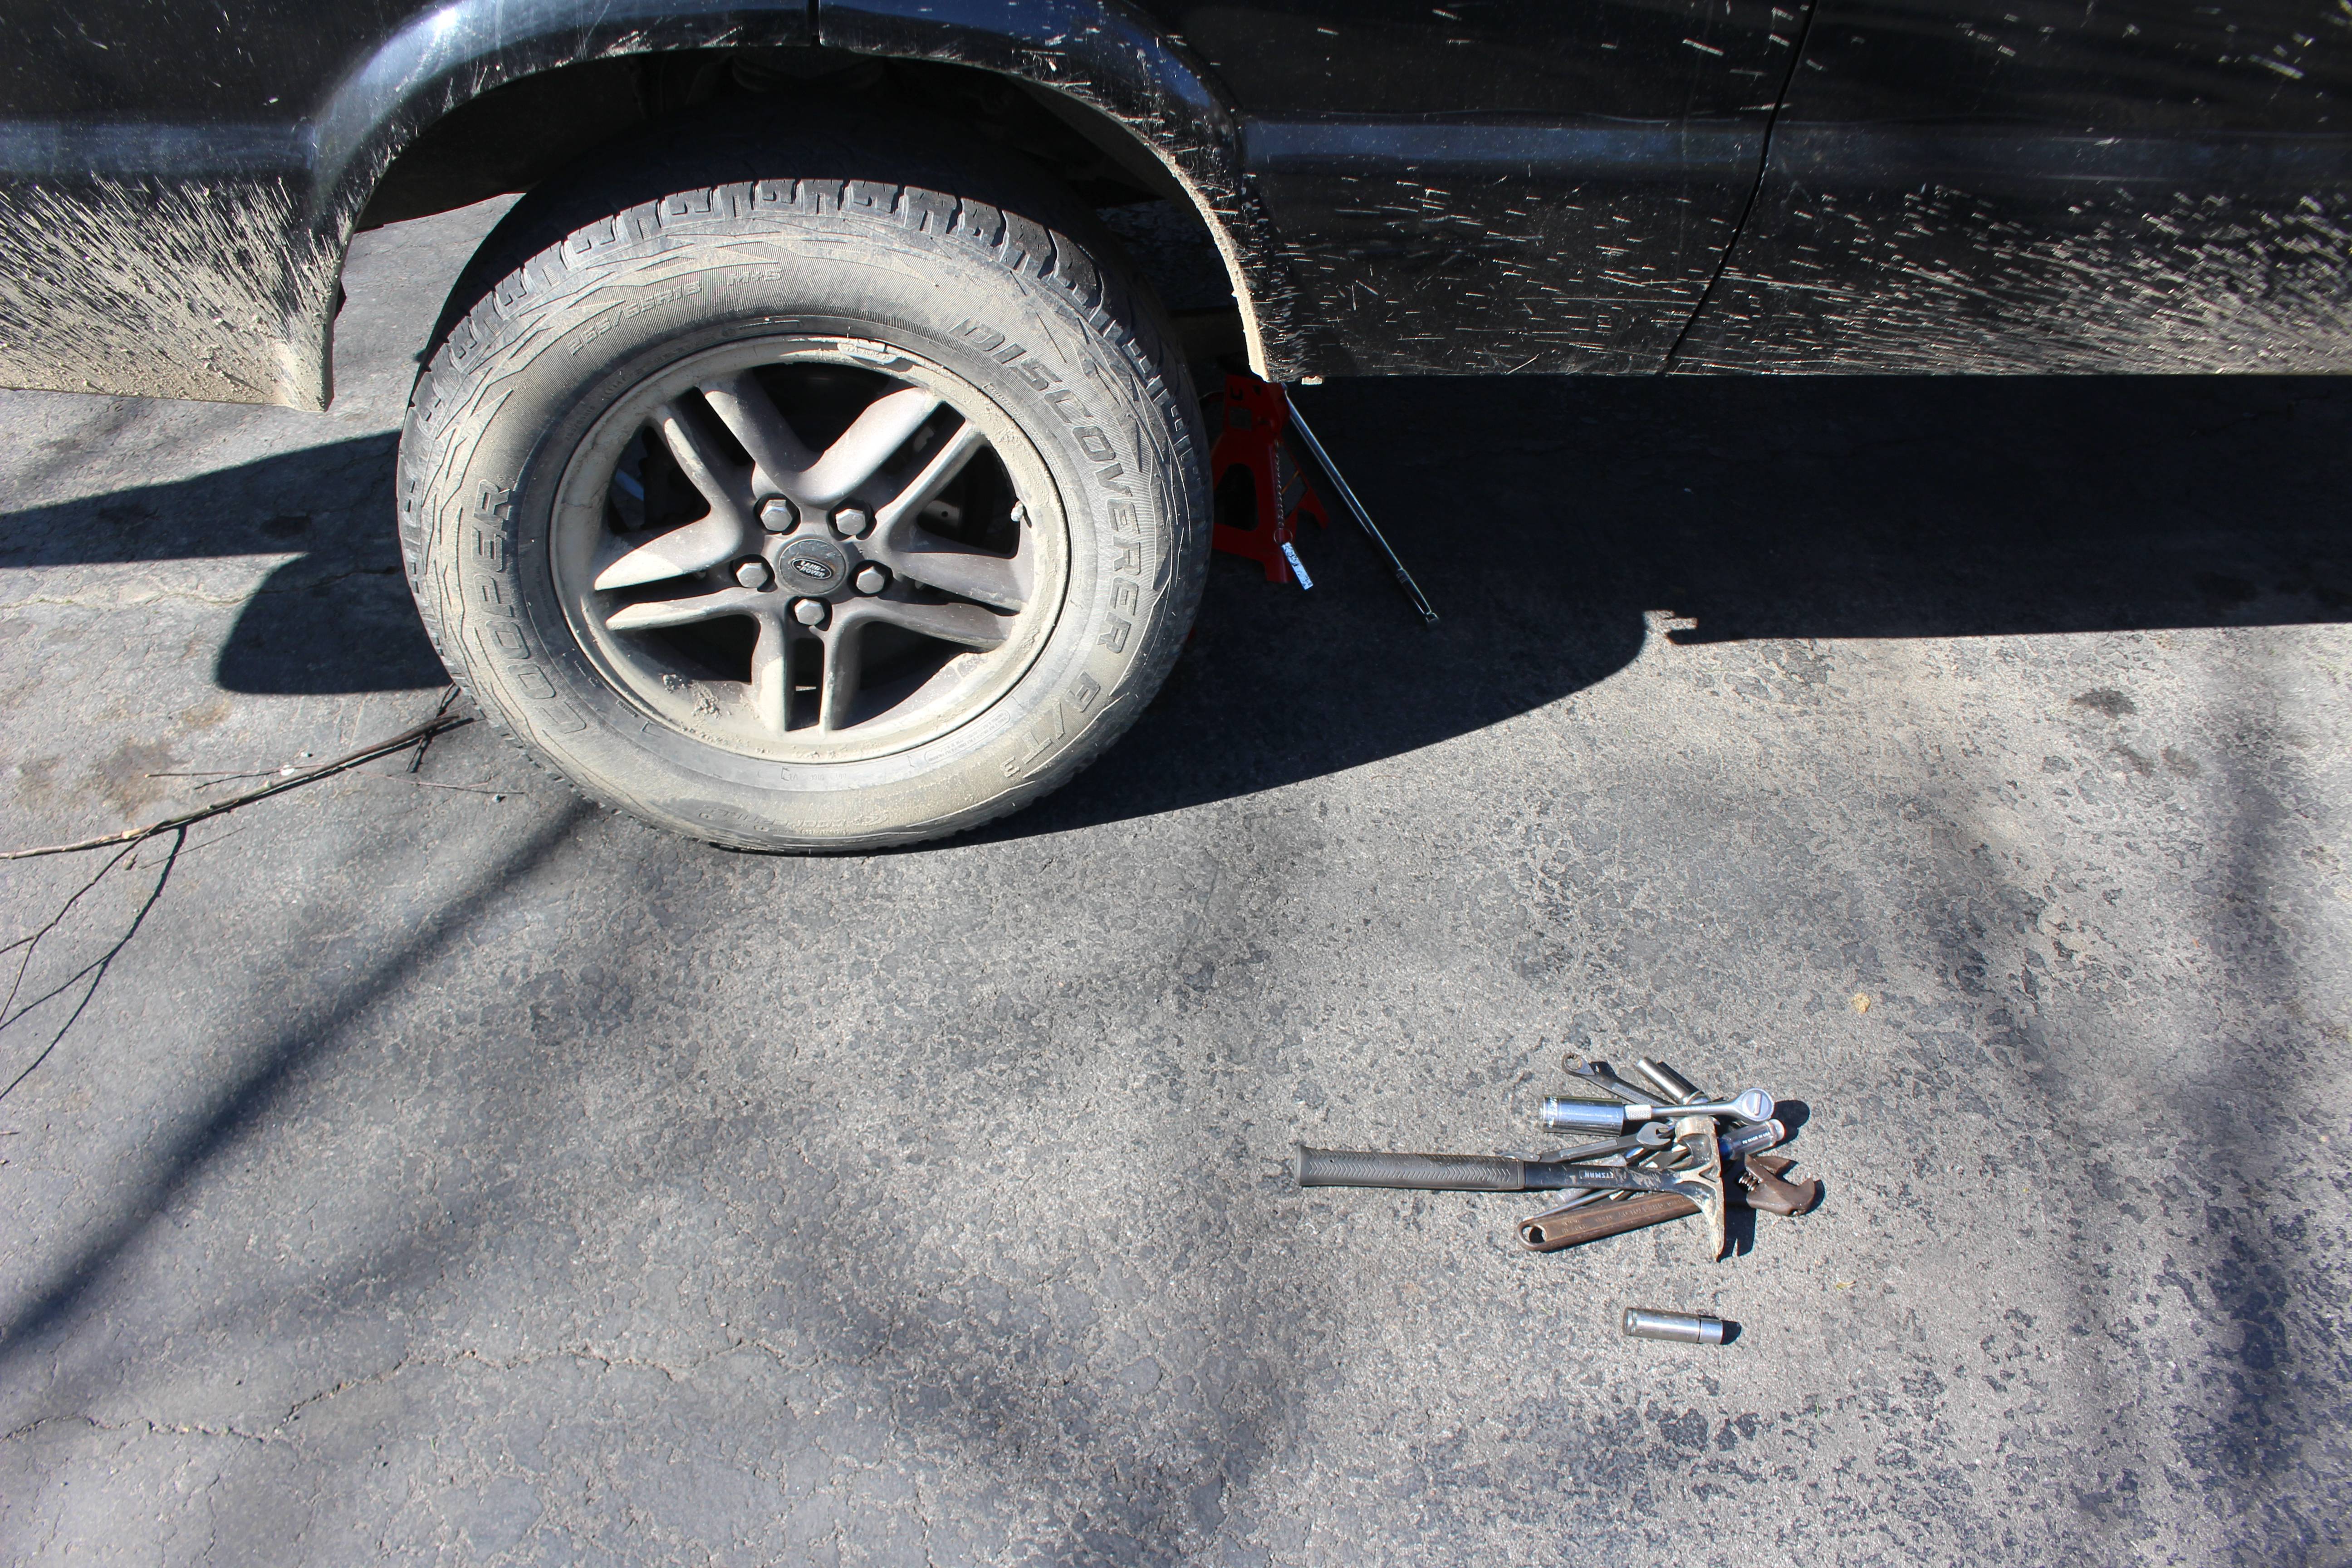
First, you need some supplies. Two jack stands, one jack, black RTV, an oil drain pan, and the pictured tools. Of course, you'll also need oil. The weight depends on application and driving style. I off road, have oversize tires, tow trailers, and drive hard. With that in mind I chose an 85w140 oil.
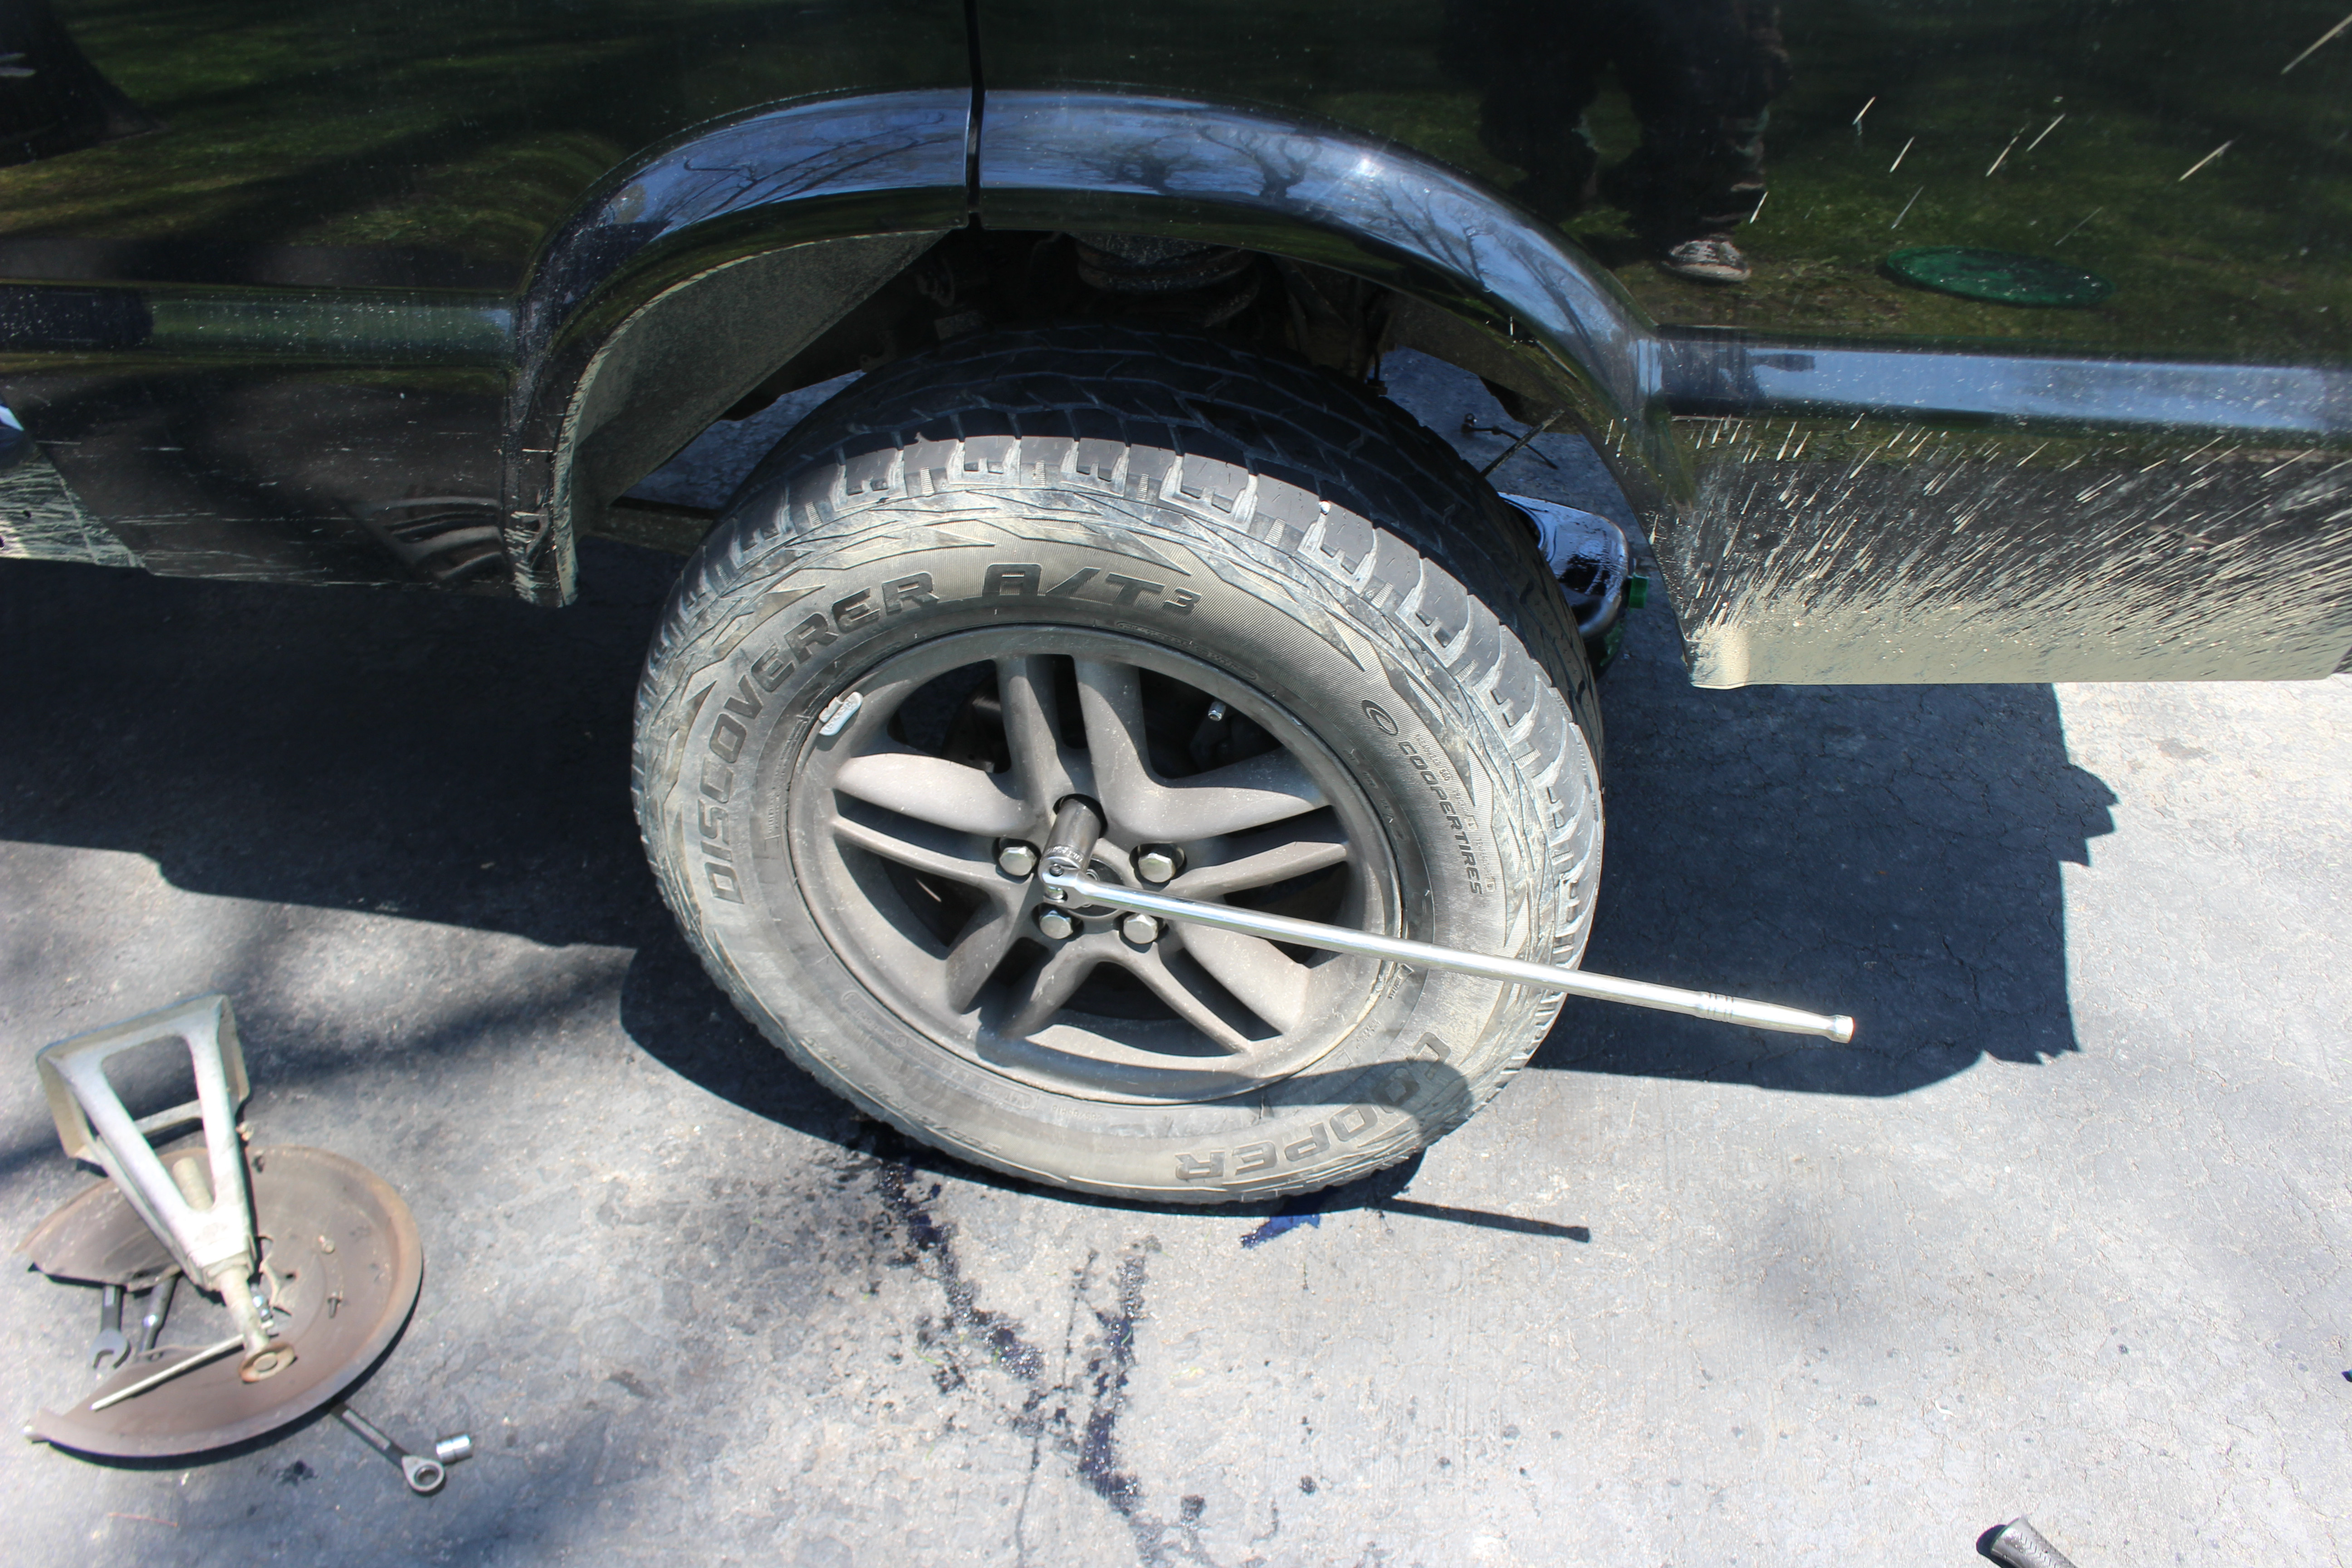
Now to start. Begin by chocking your front wheels then jacking up one side, placing the axle on a jack stand, and removing your wheel. If you don't know how to do that then you should not be doing this job yourself. You will be greeted by the sight of your hub and brakes.

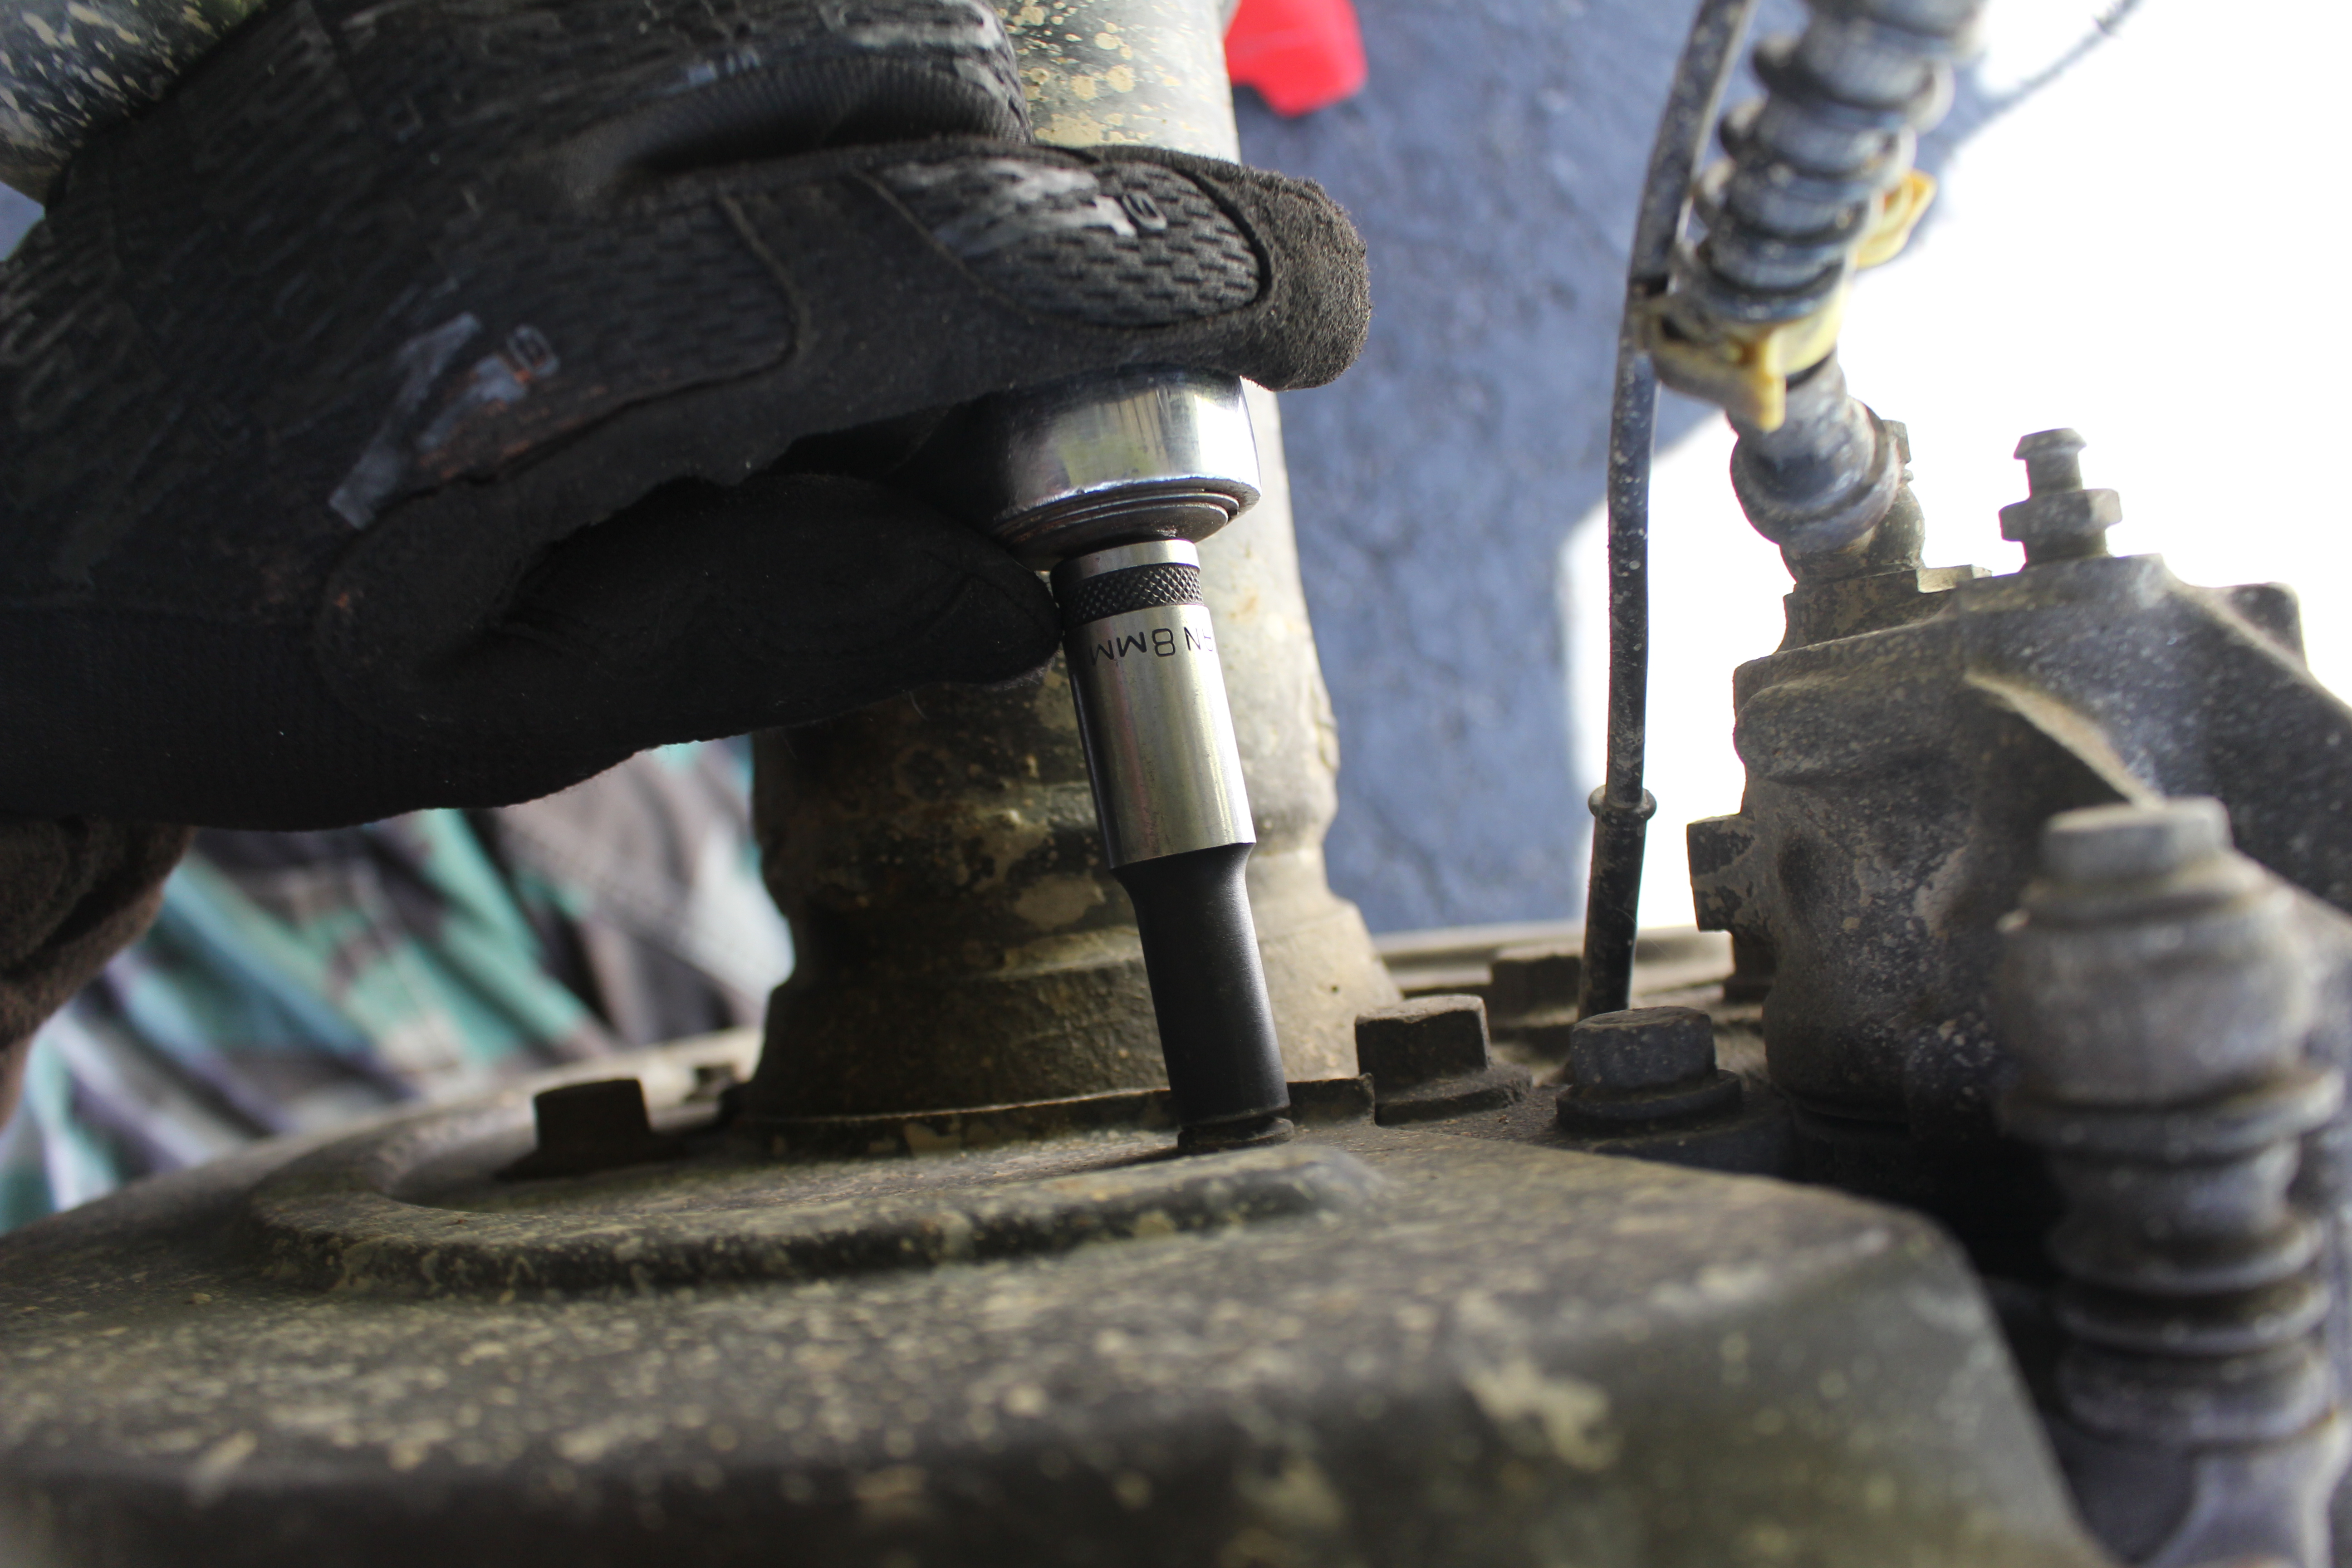
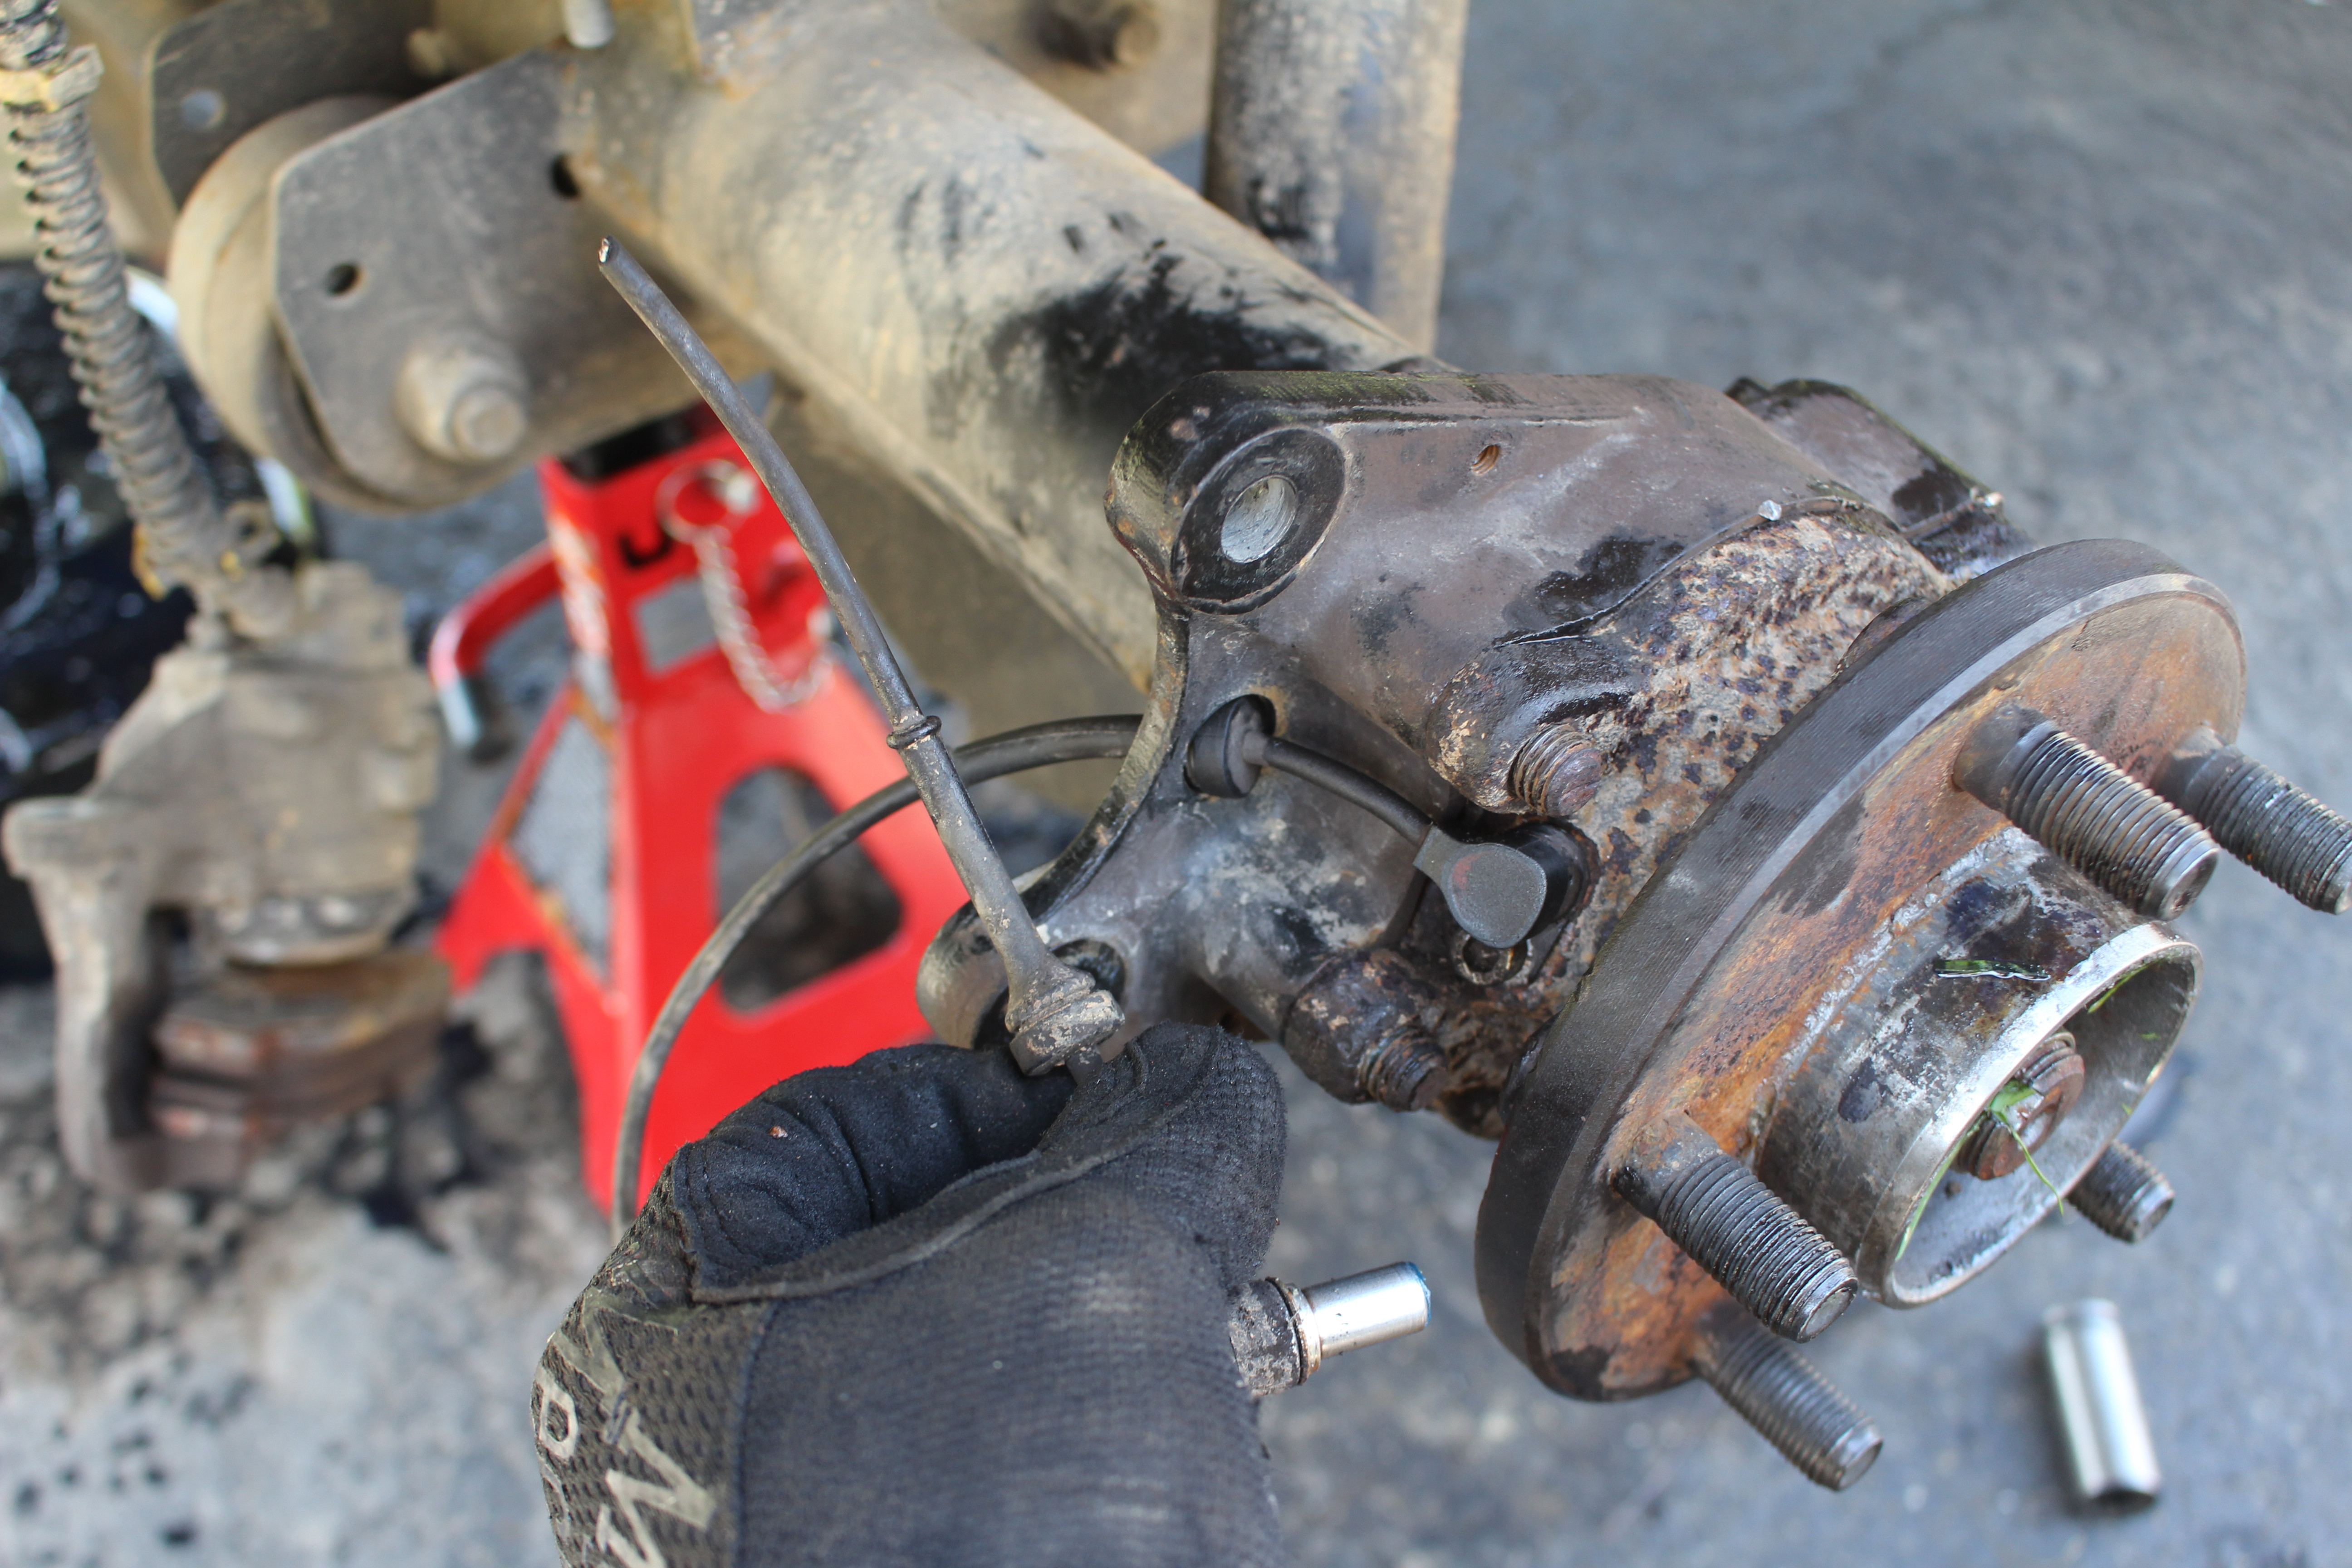
Now to begin disassembly. Start by removing the three bolts holding the gravel shield on. If you like you can dispose of these. I ended up not reinstalling the gravel shields, but it's up to you. The bolts are 8mm.
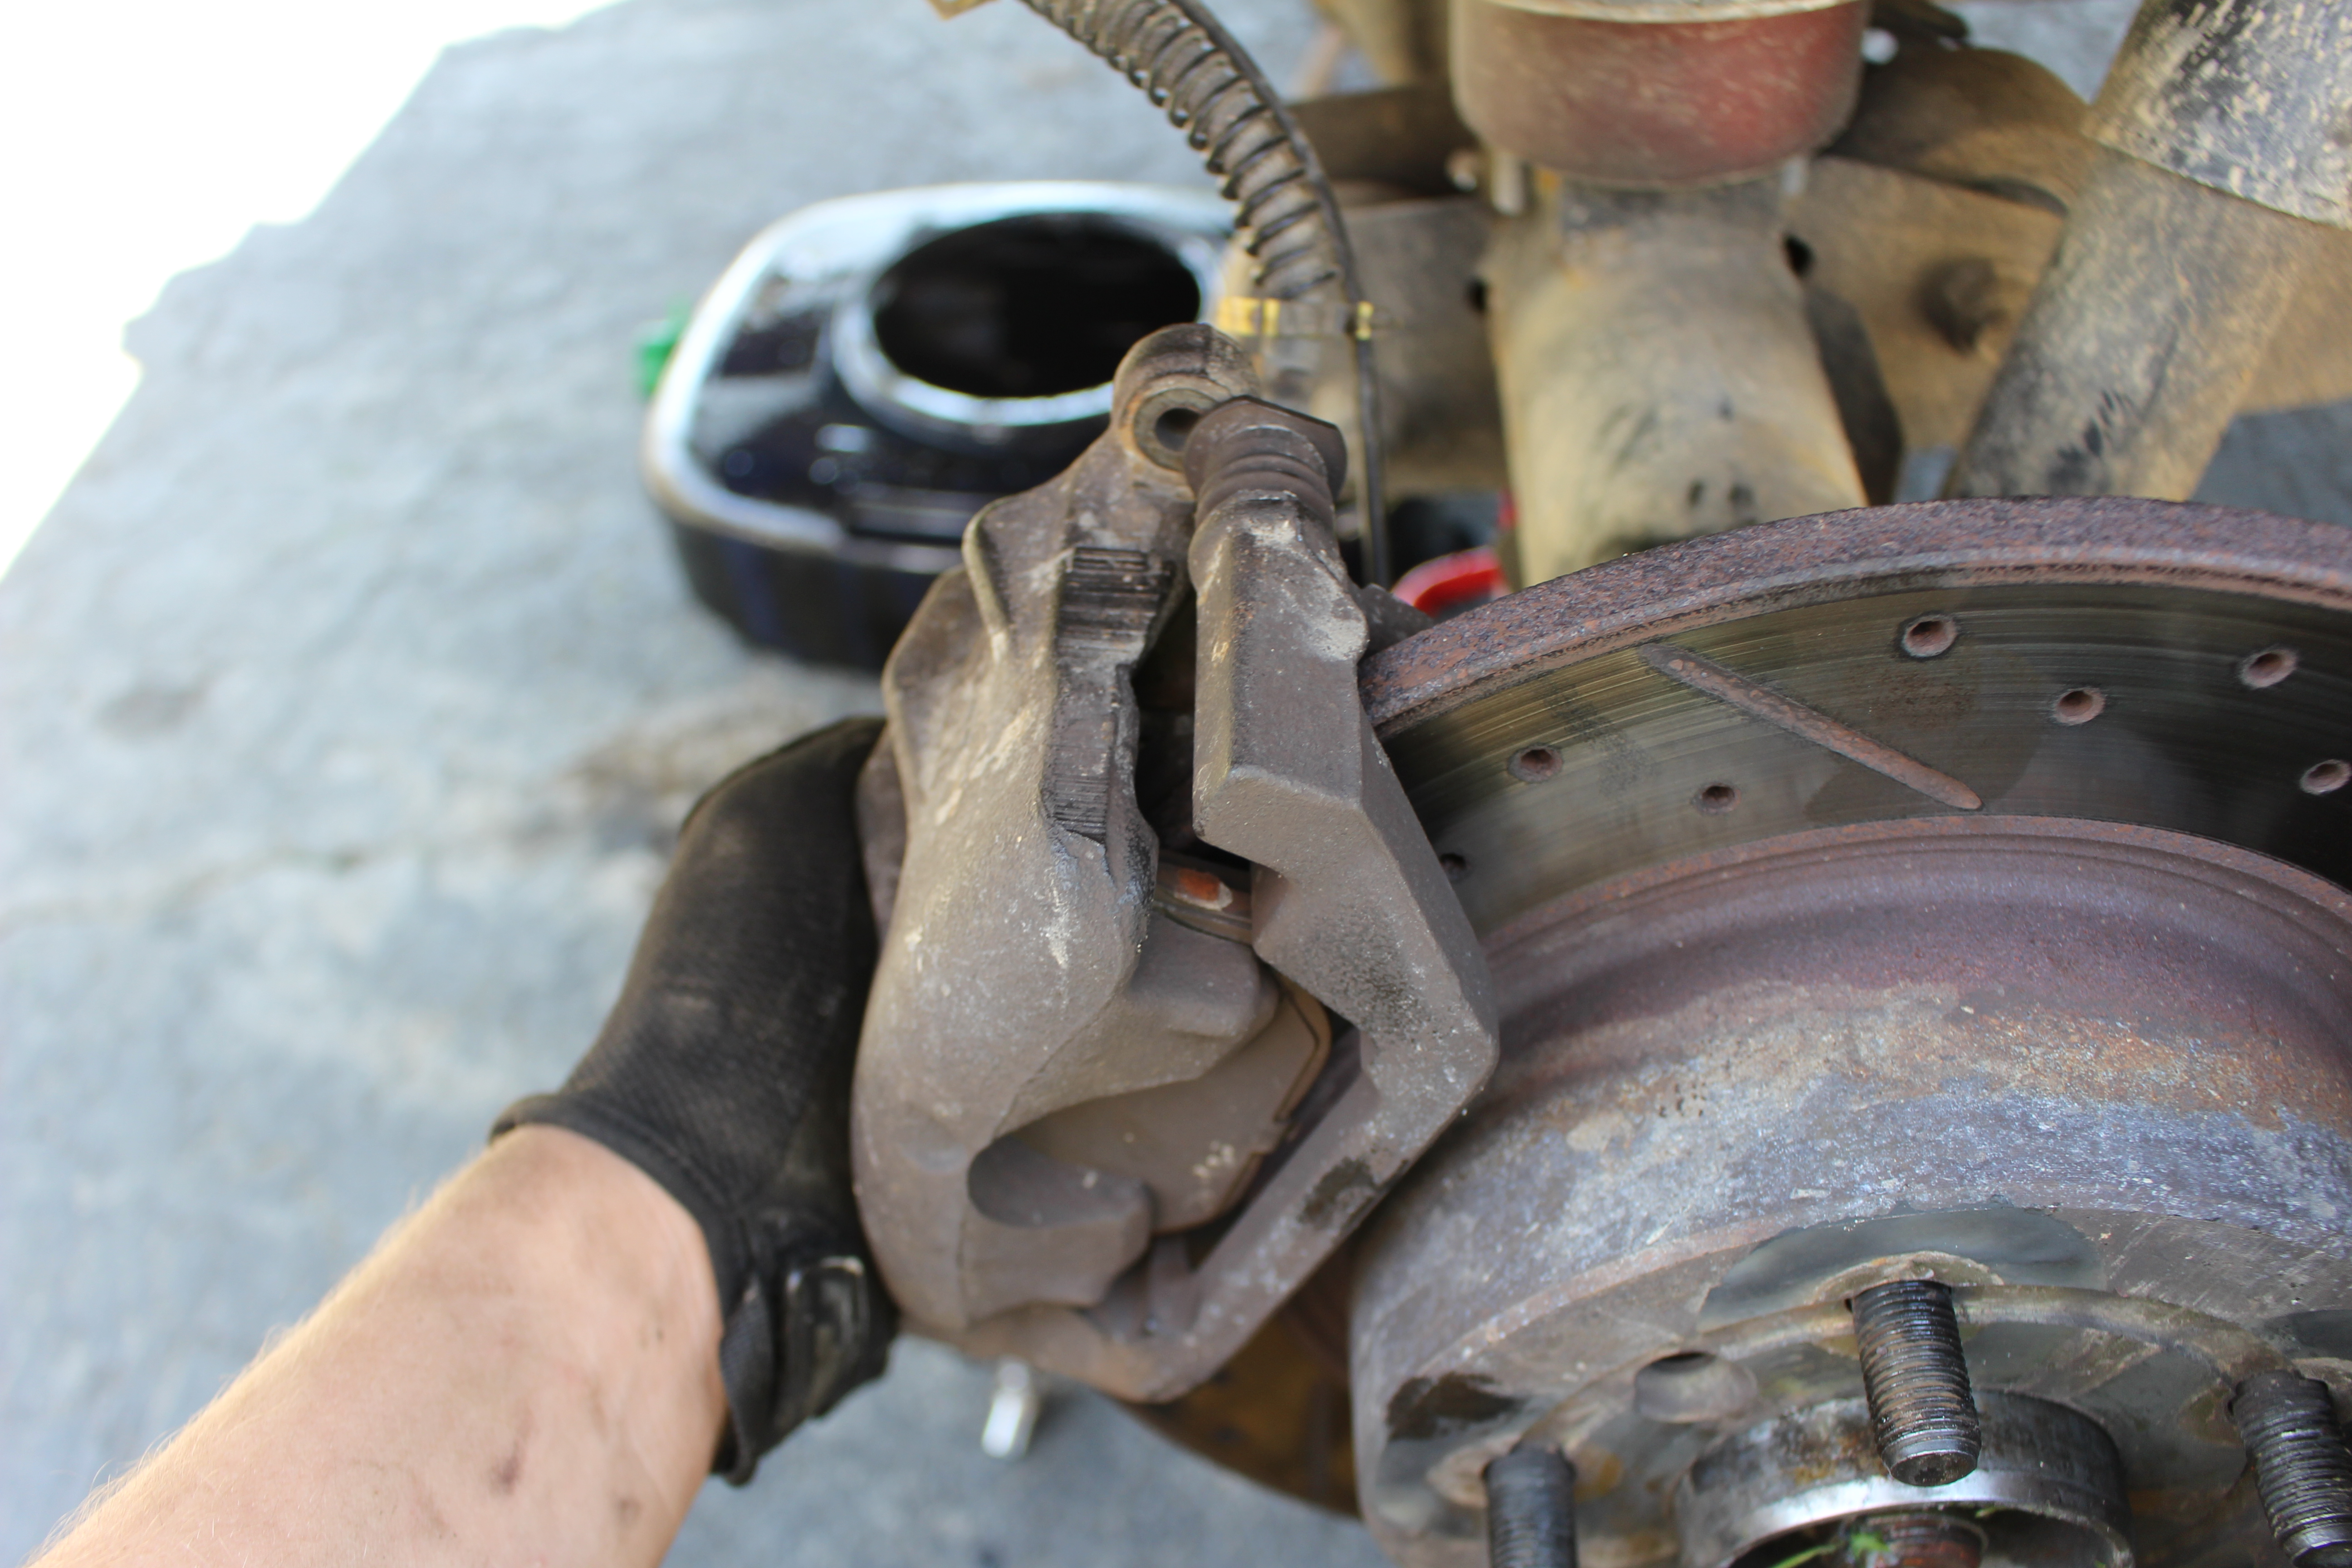
Now remove your brake caliper. That a 12mm and there are two bolts. Once both are removed it should rotate off without too much resistance.
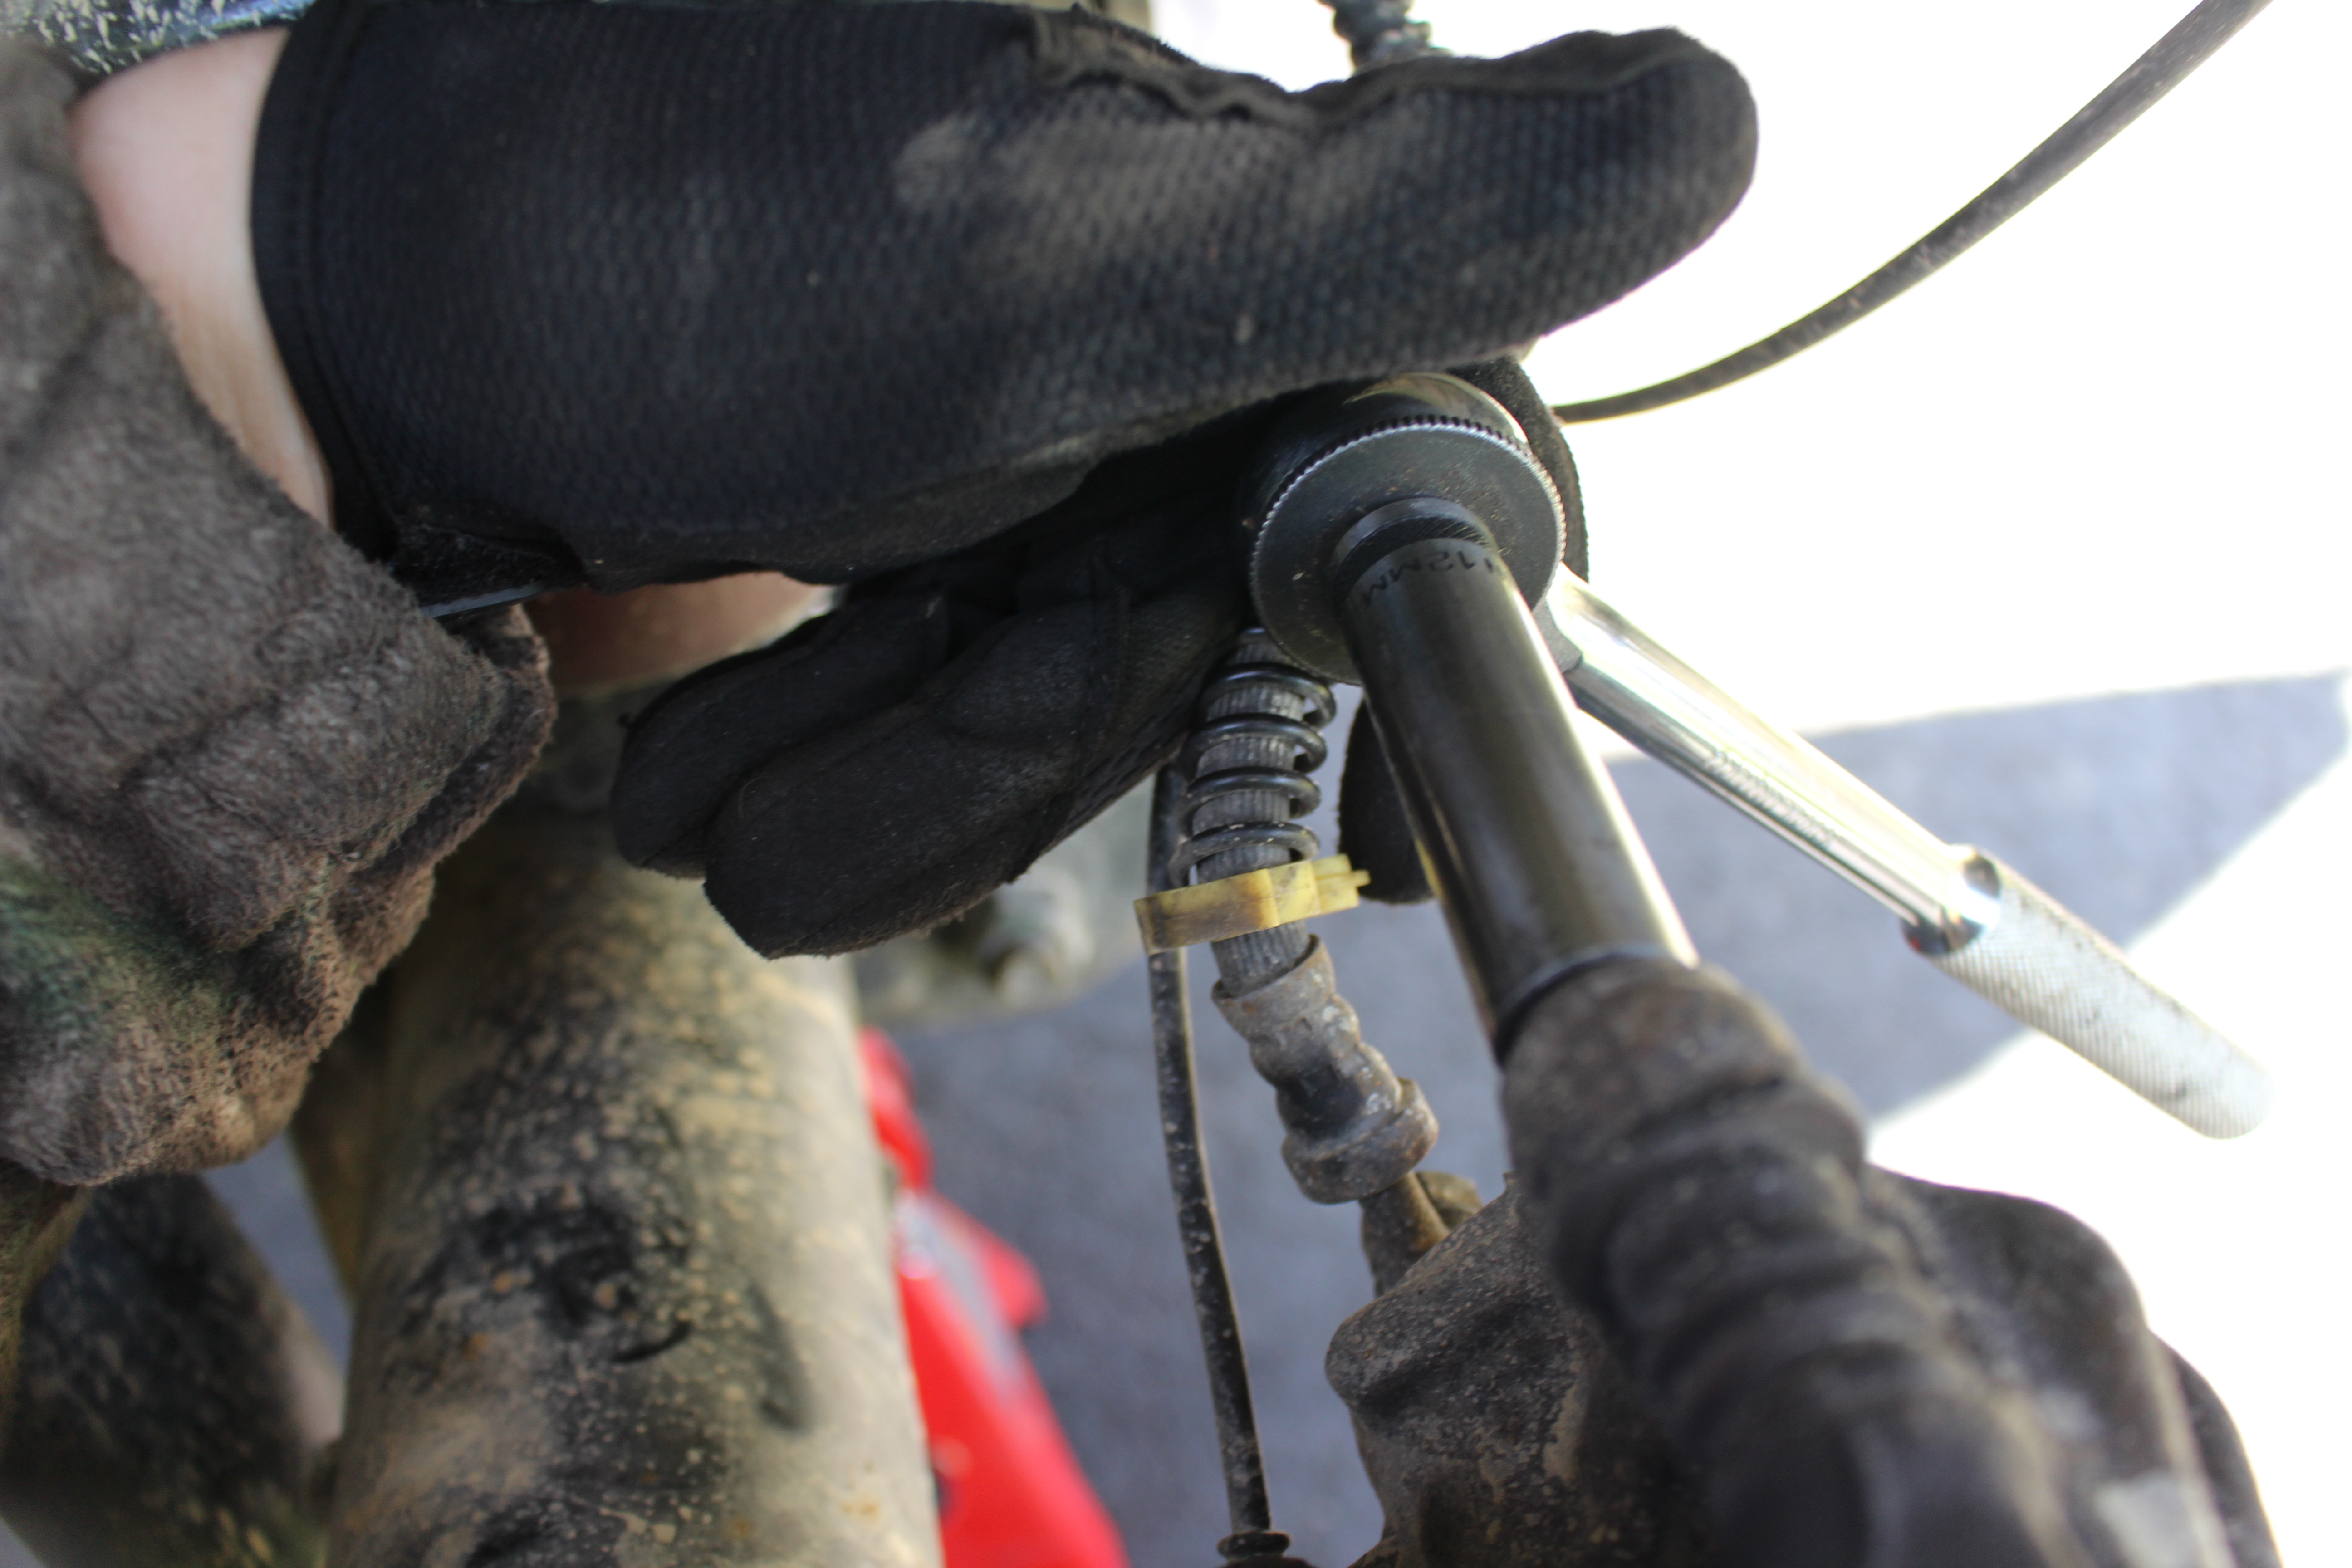
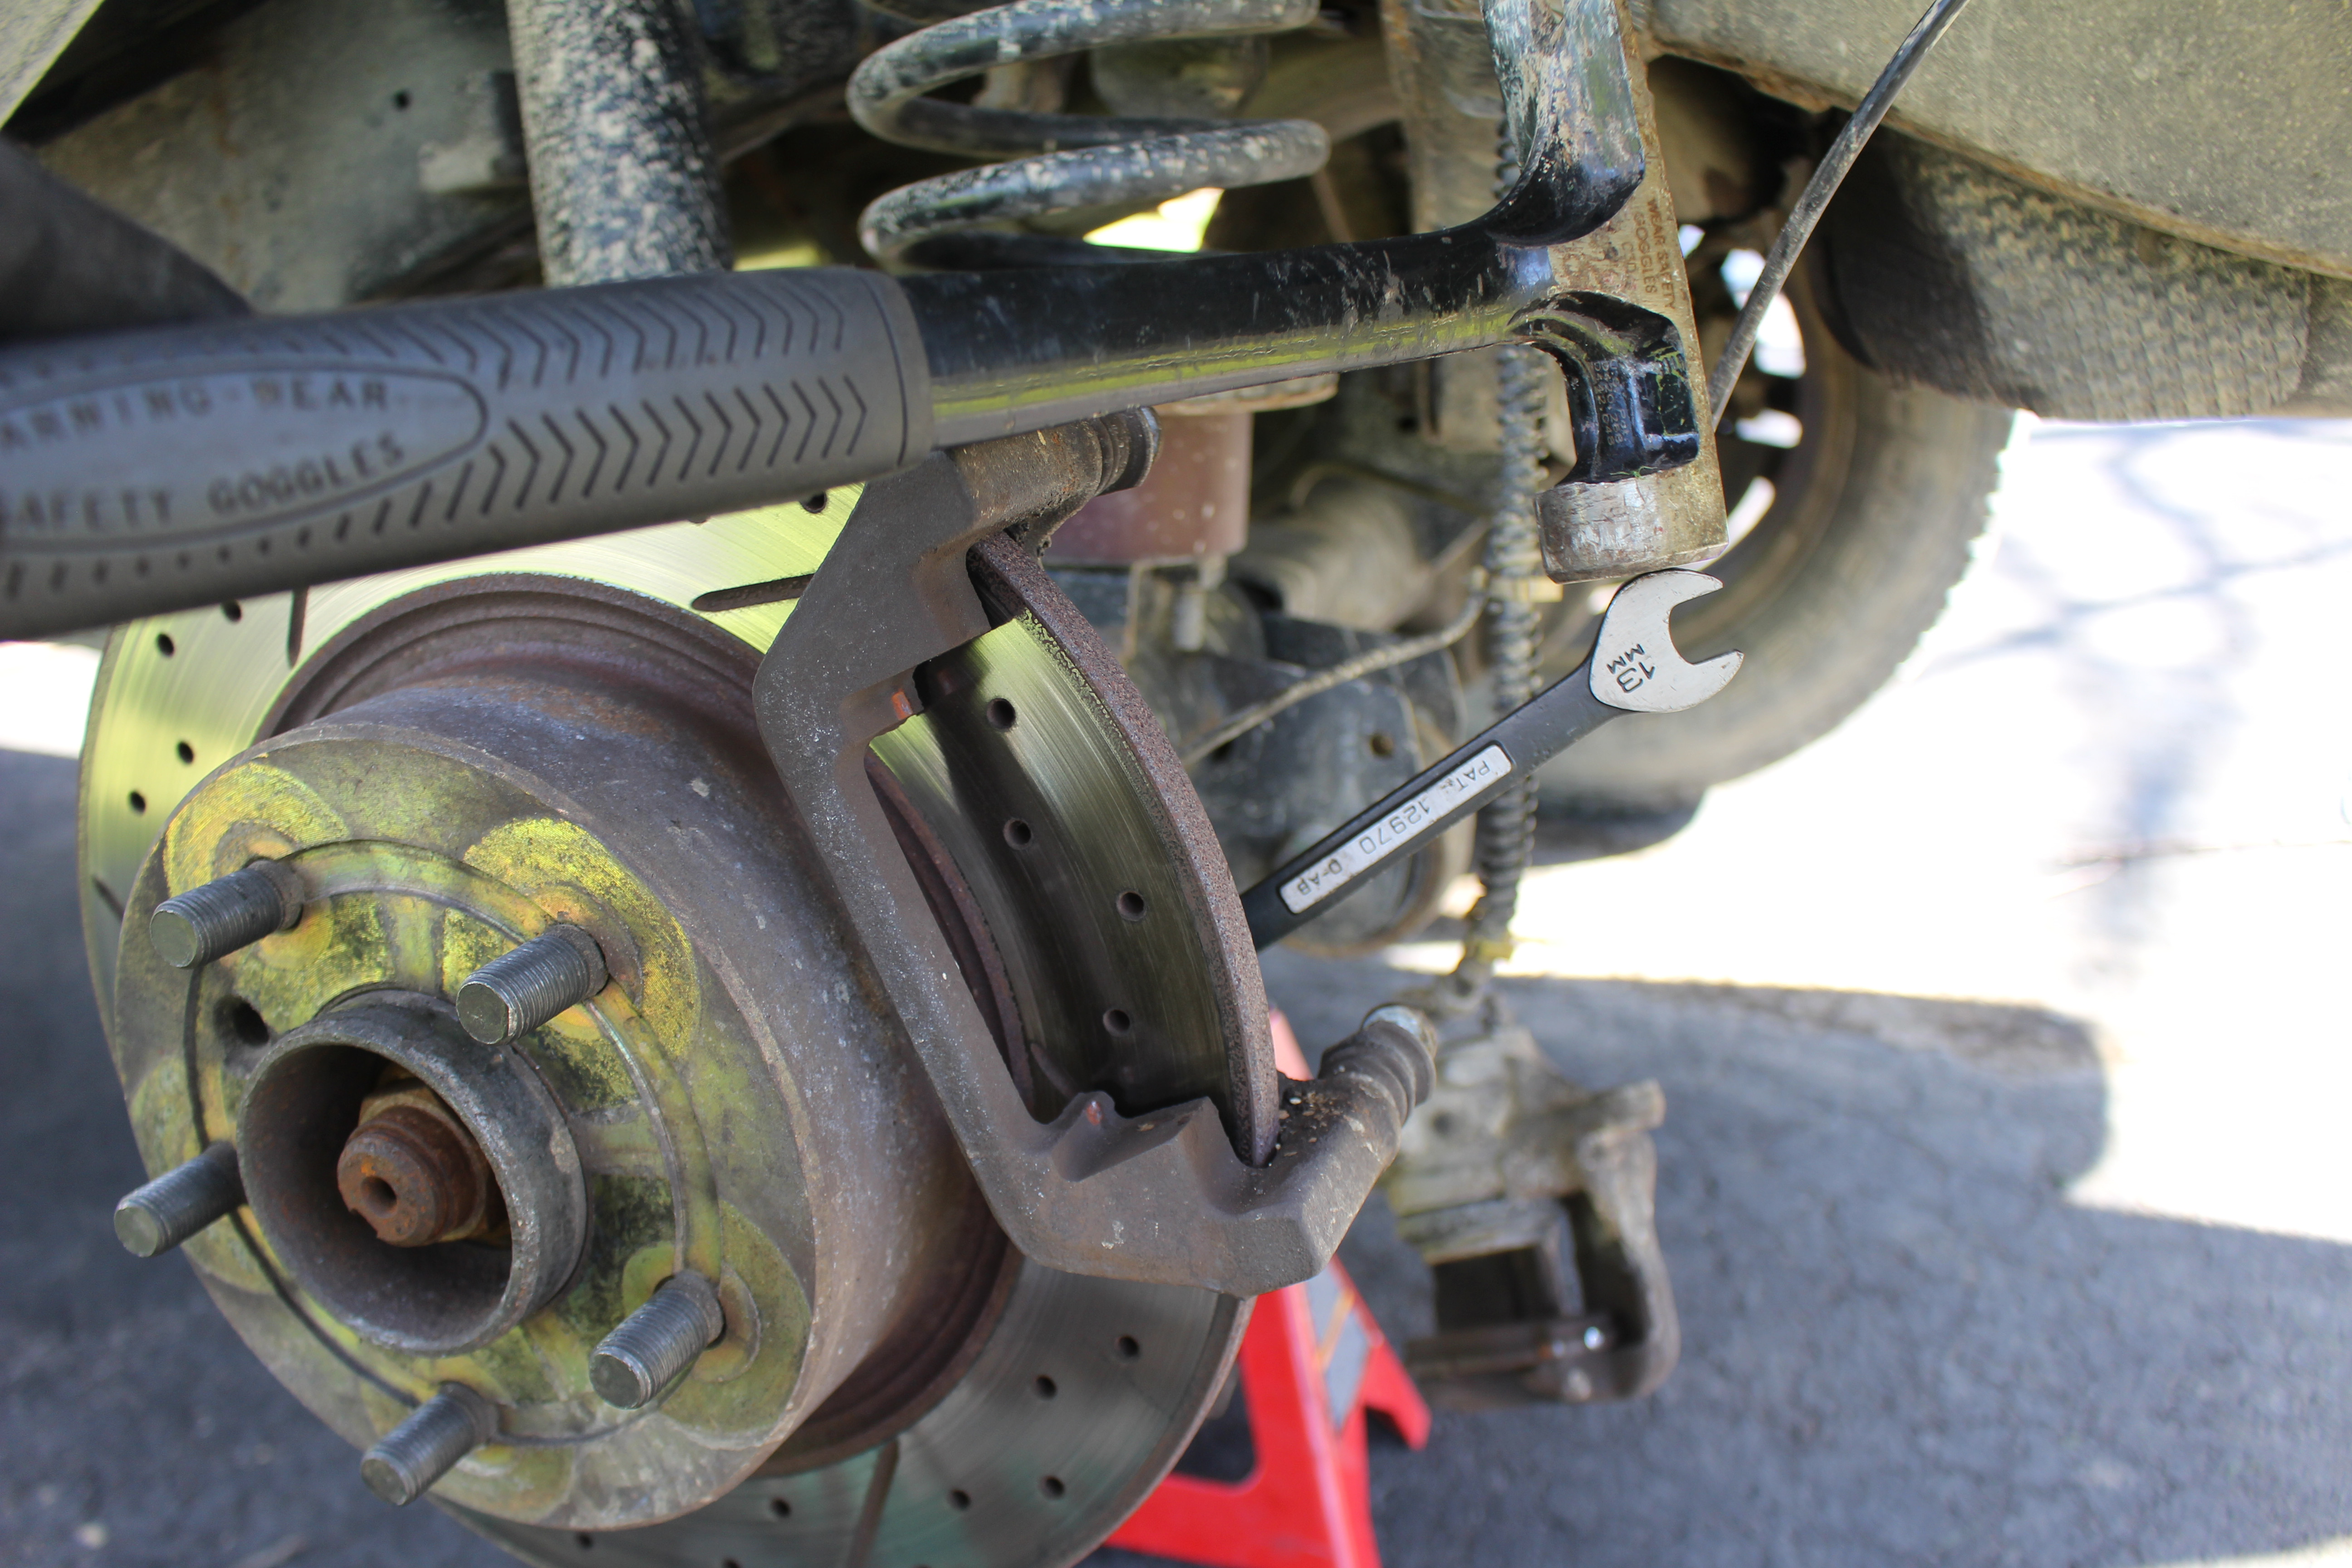
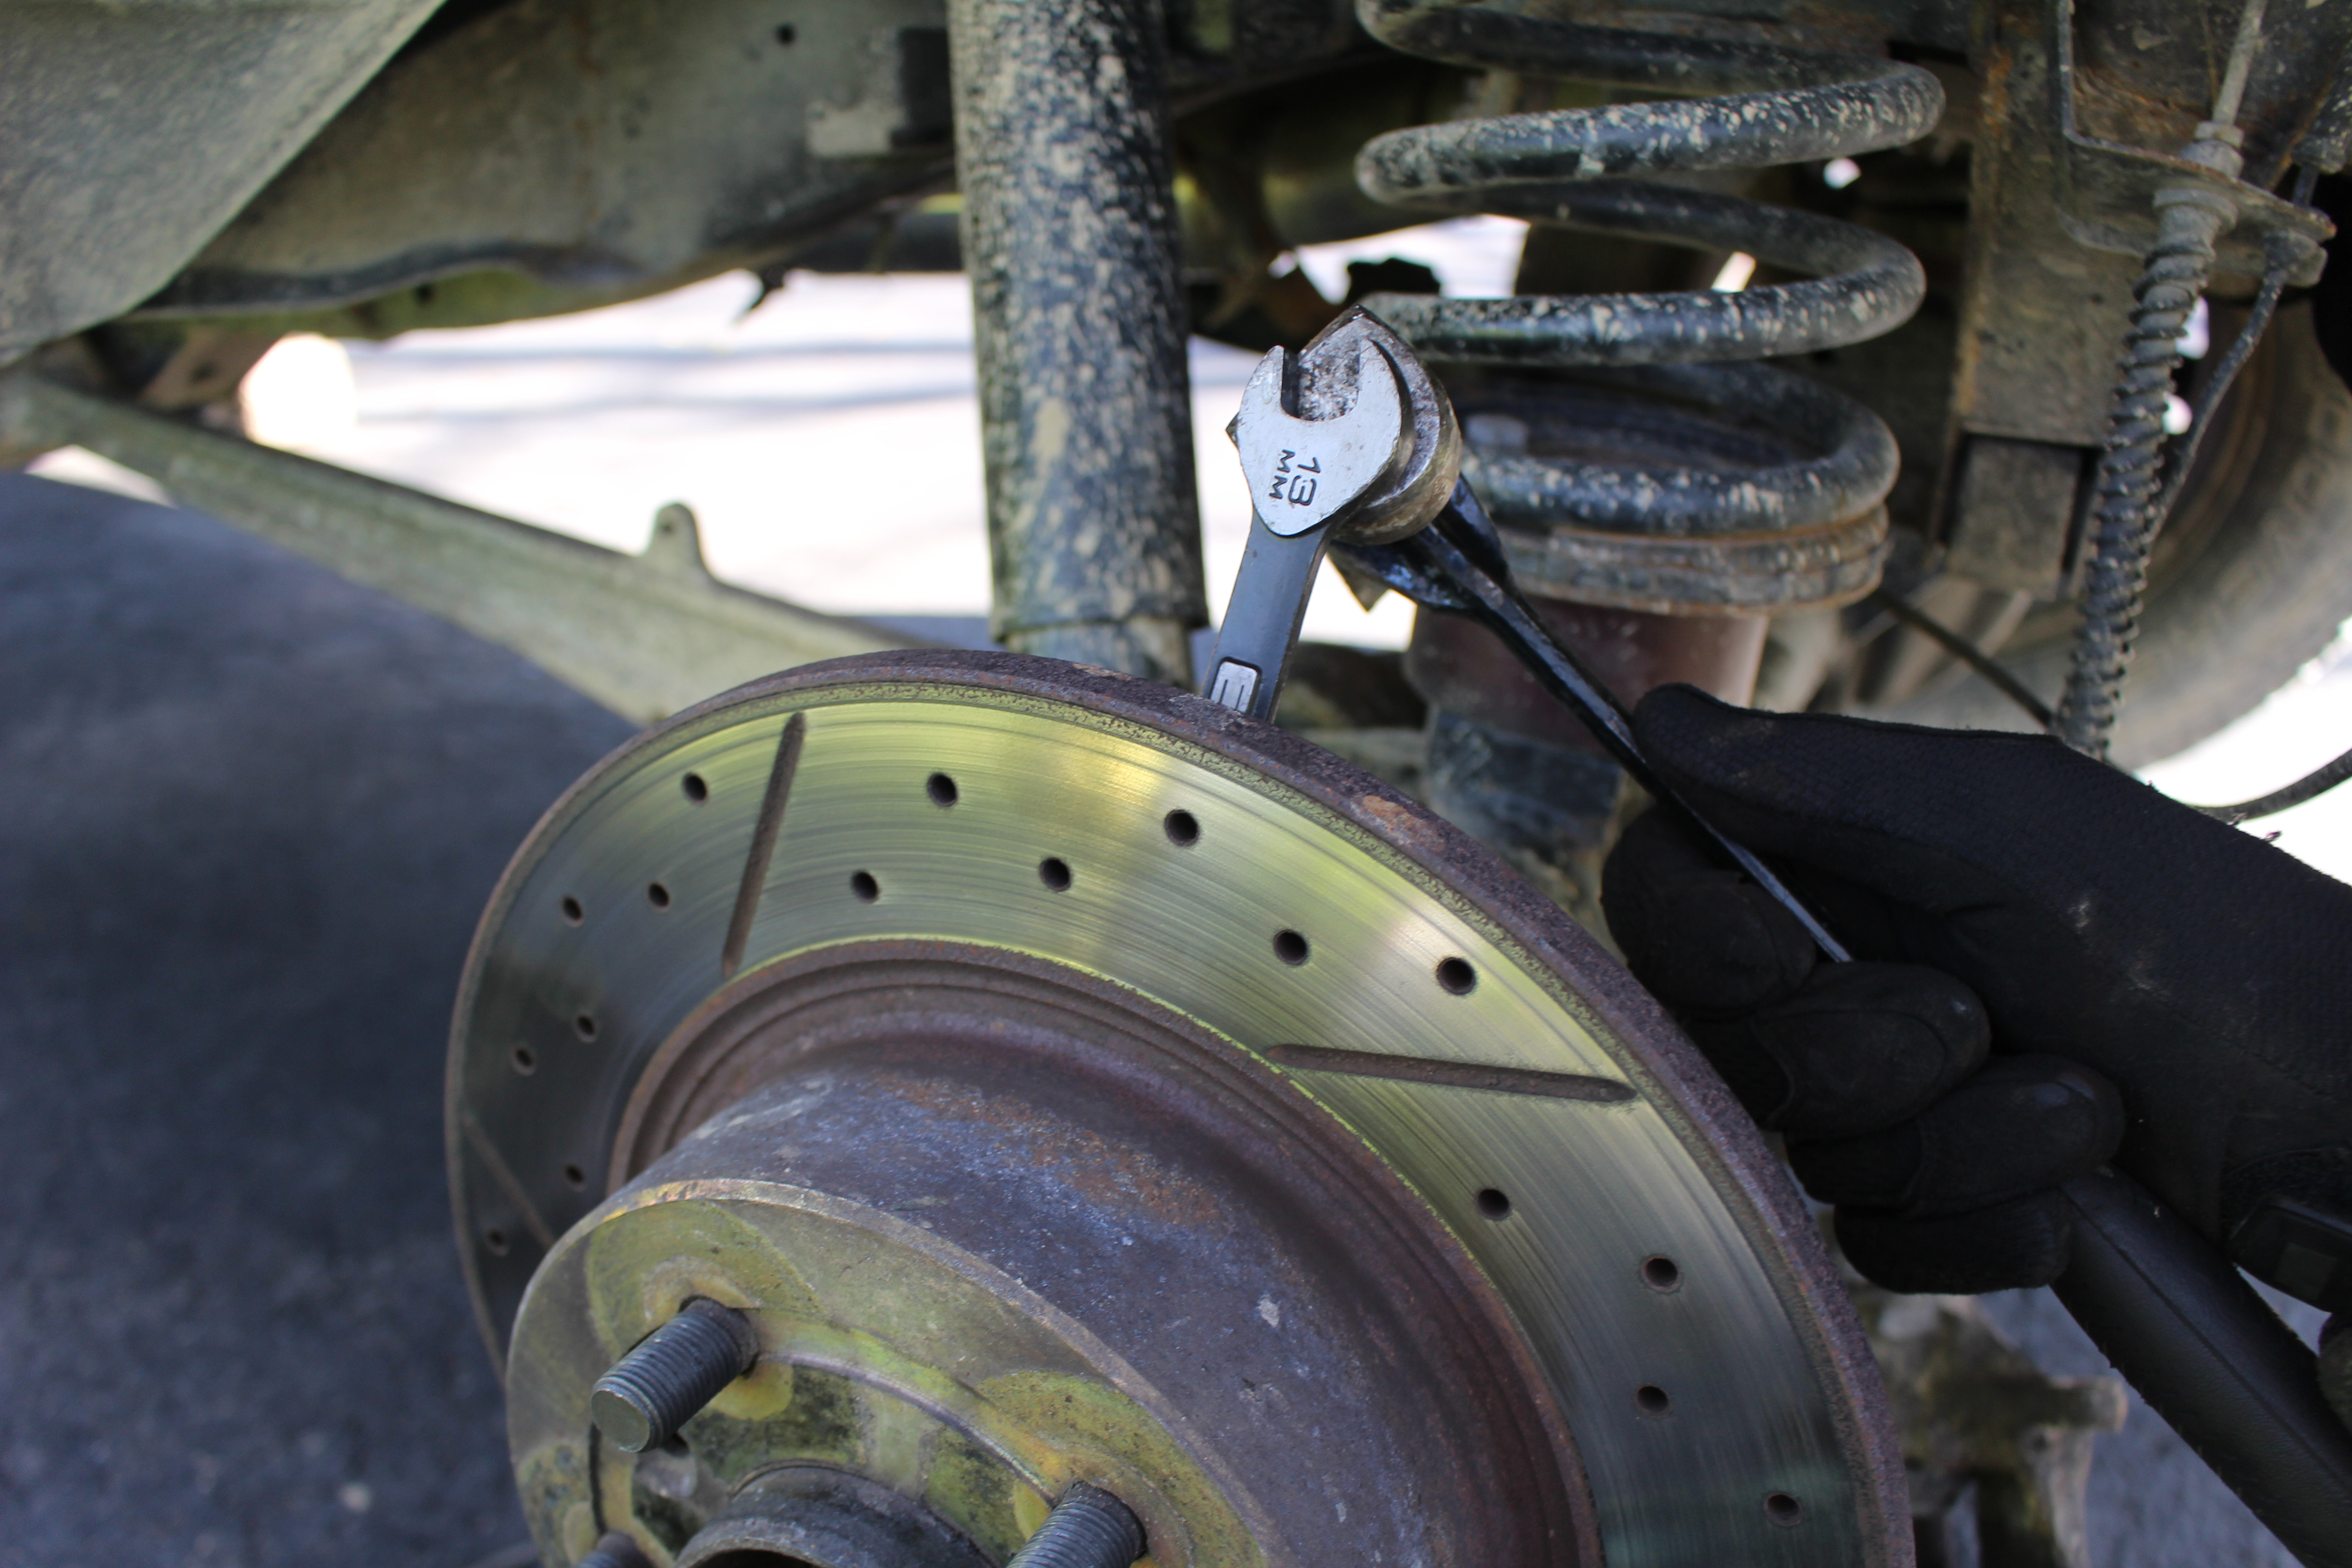
Now for the caliper bracket which is held on by two pretty stout 13mm 12 point bolts.
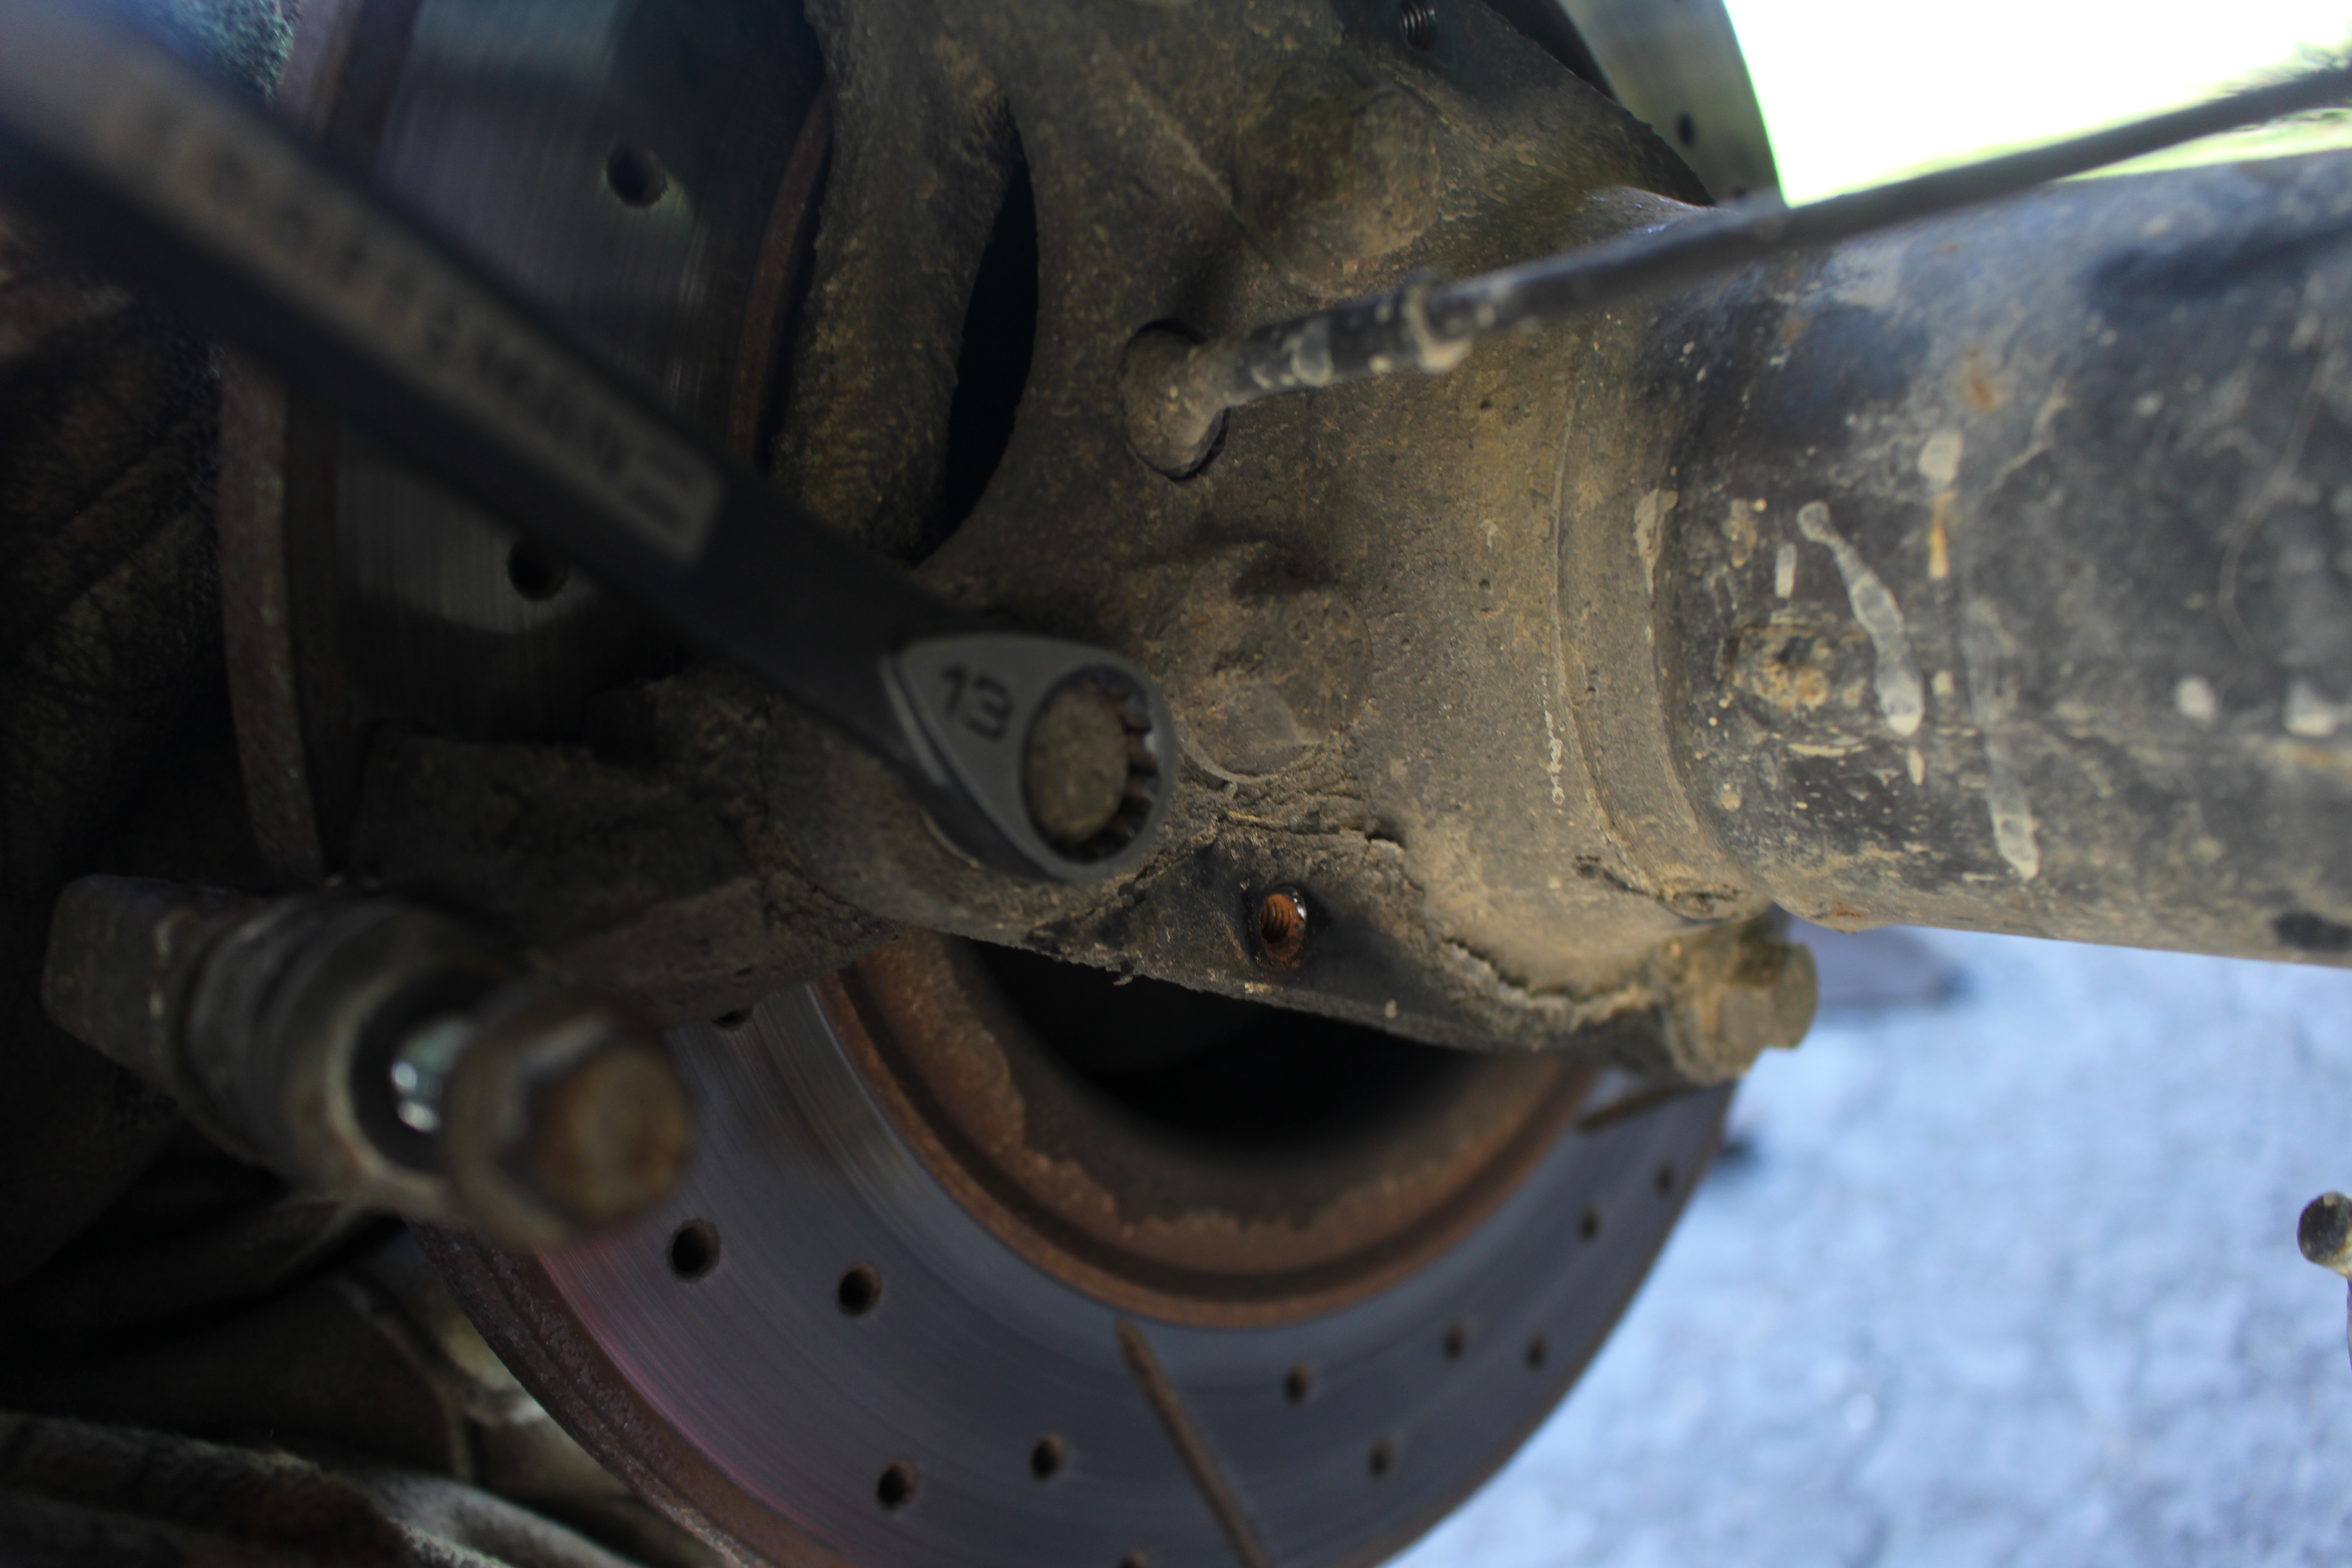
As I said, these are pretty stout. I ended up taking a box wrench and hitting it with a hammer to break them loose. Remember, these are inside out, so right is loose and left is tight instead of righty tighty lefty loosy.
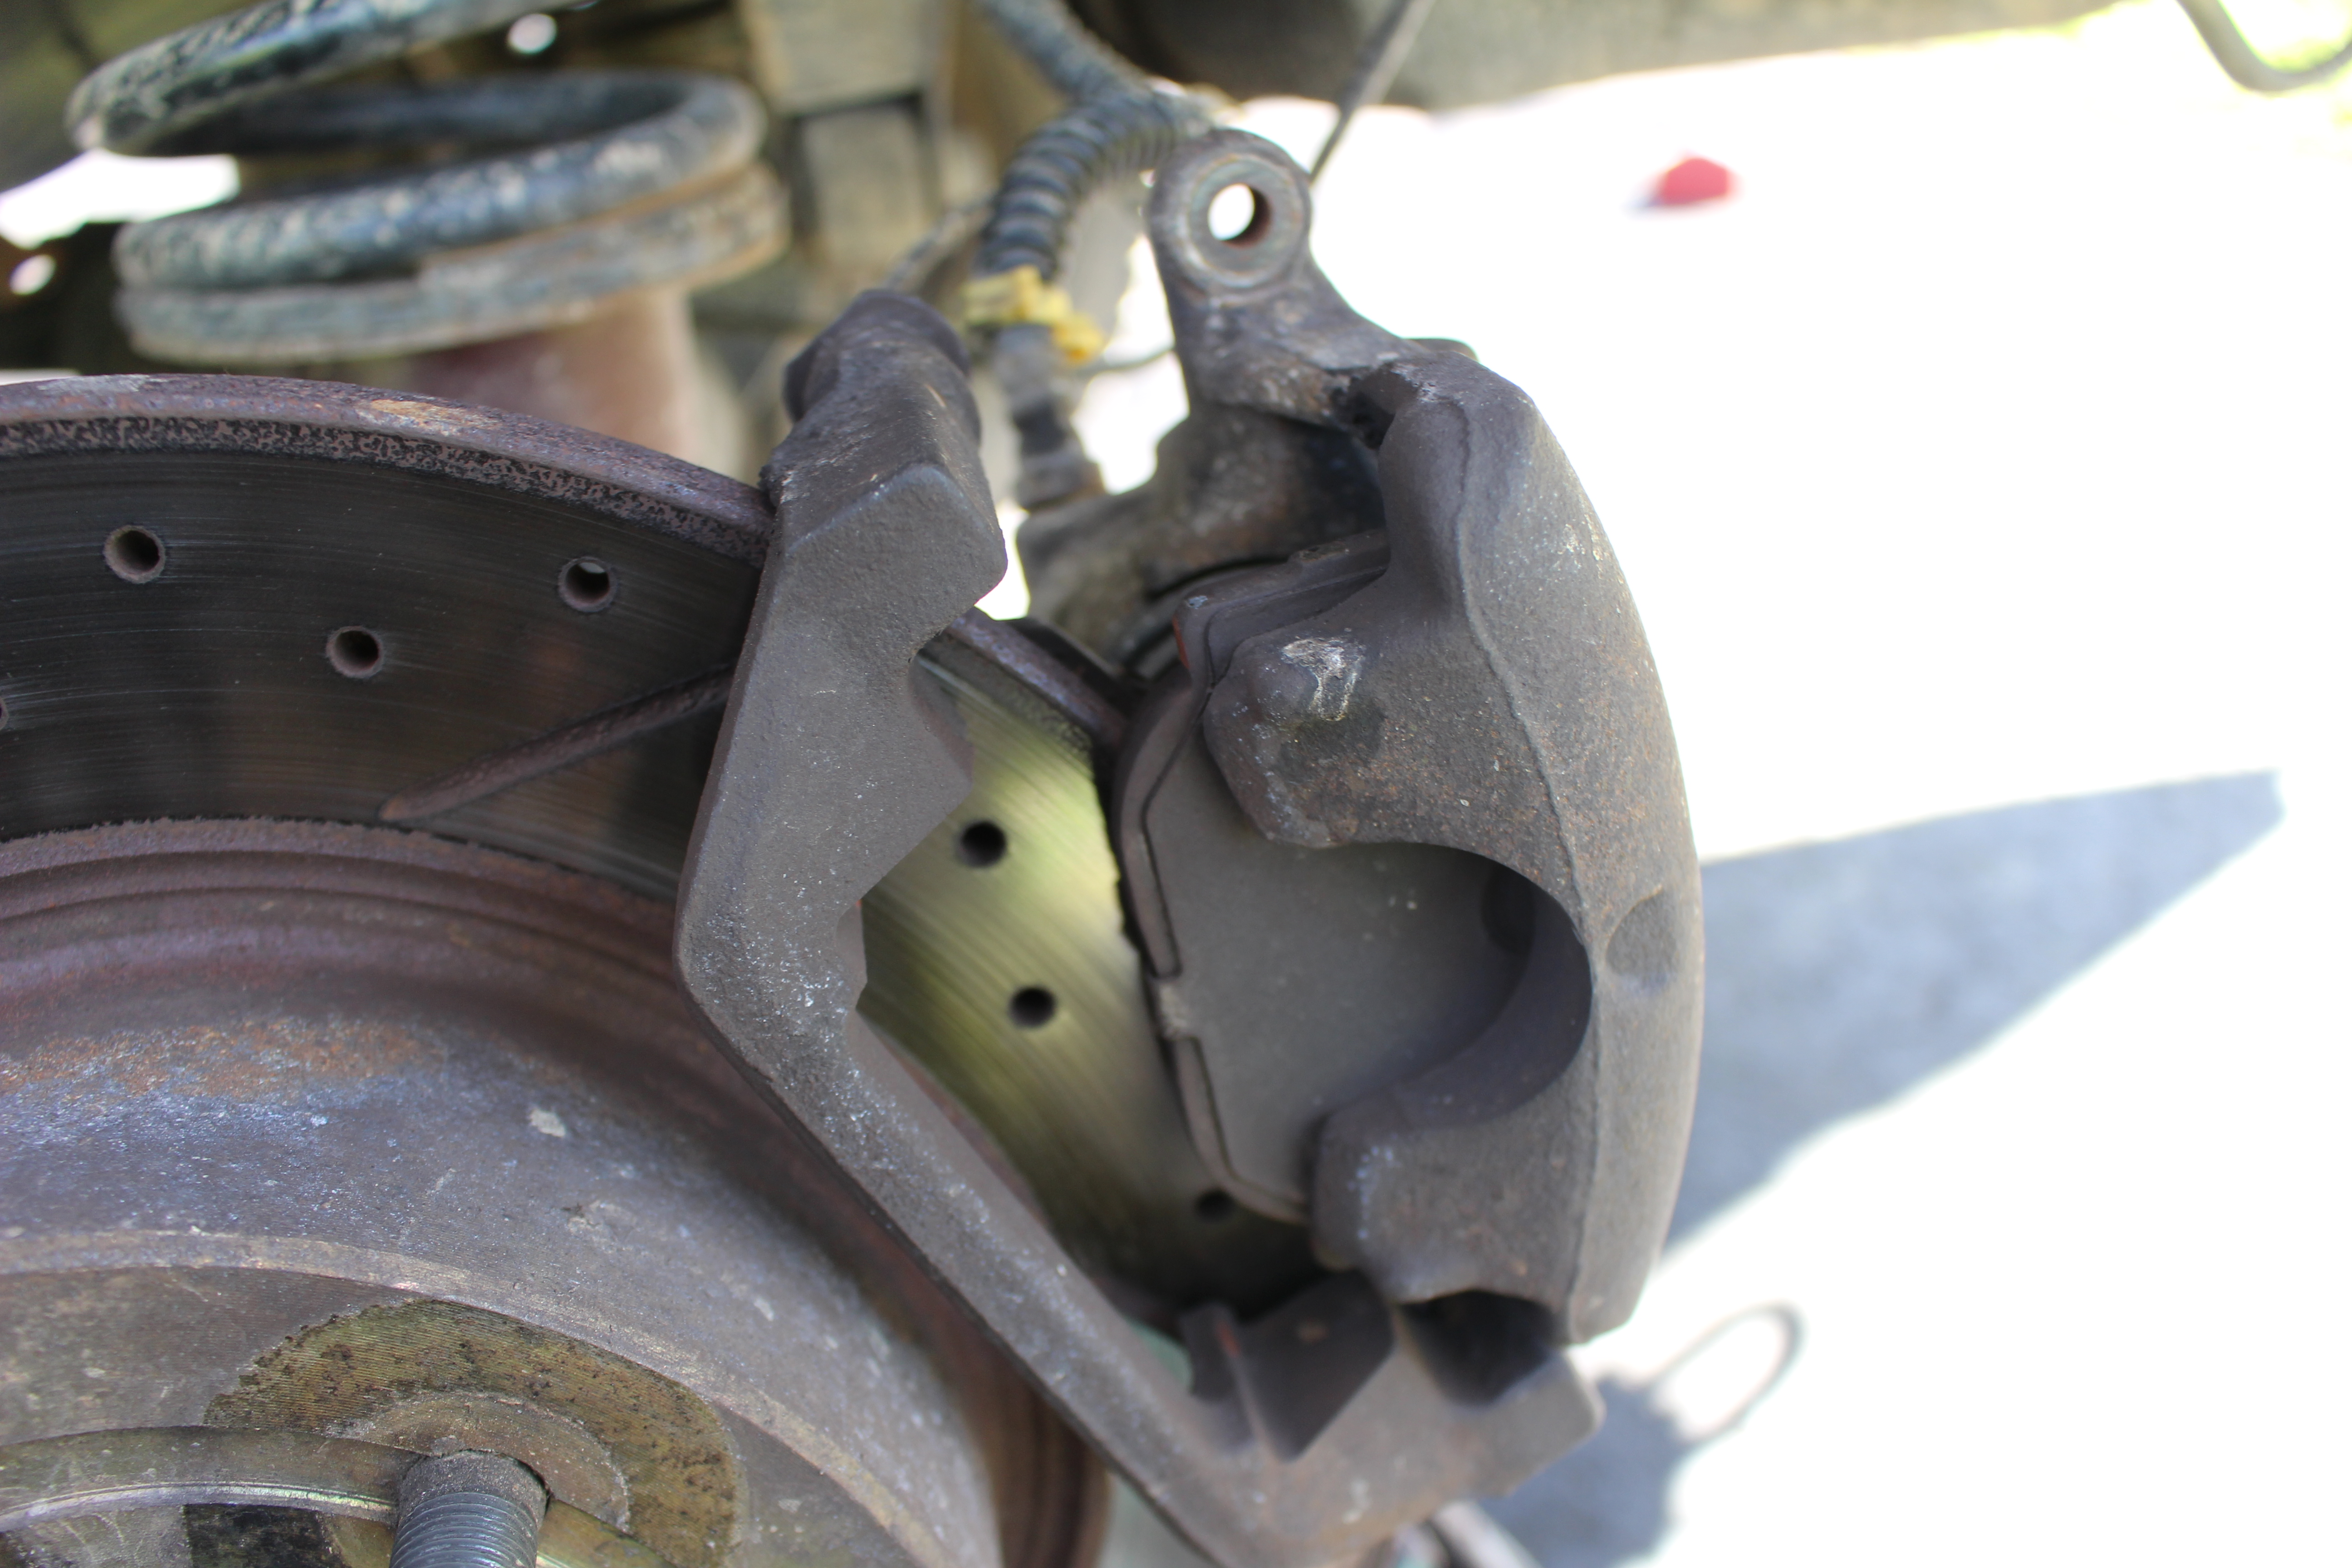
Your caliper should fall right off once the second bolt is out. I recommend taking all four bolts that came out of it and lightly threading them in so you don't loose them.
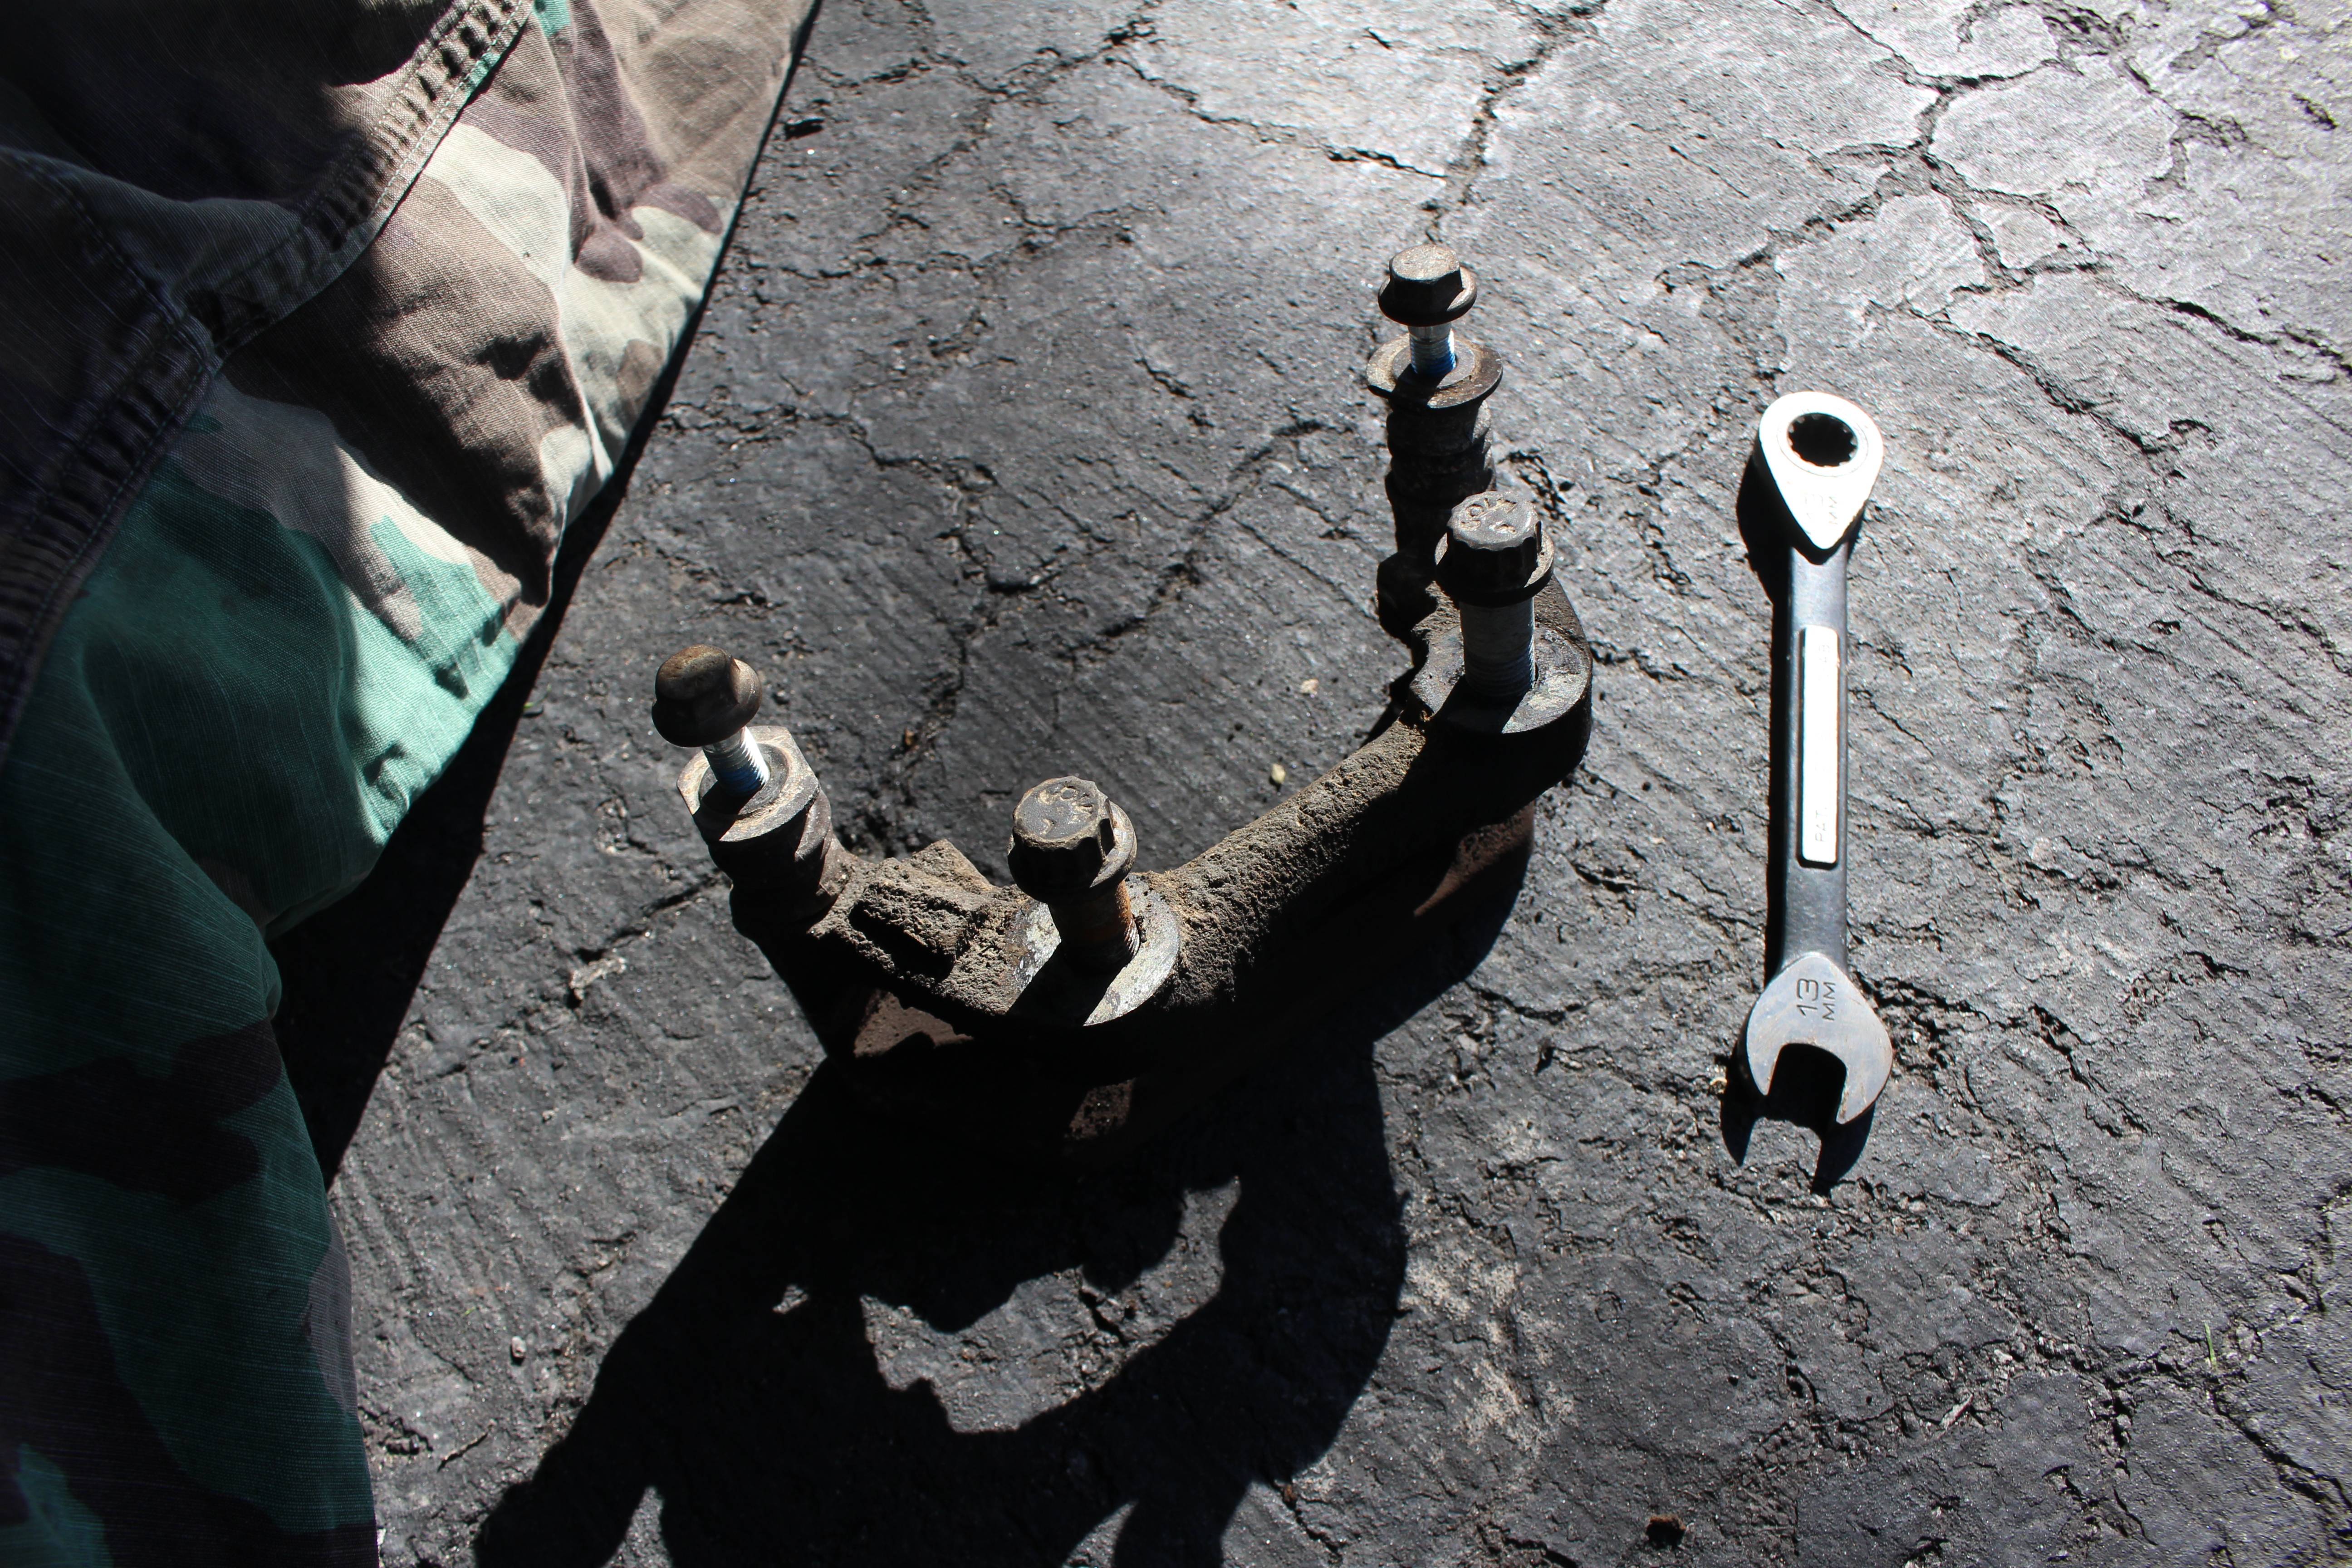
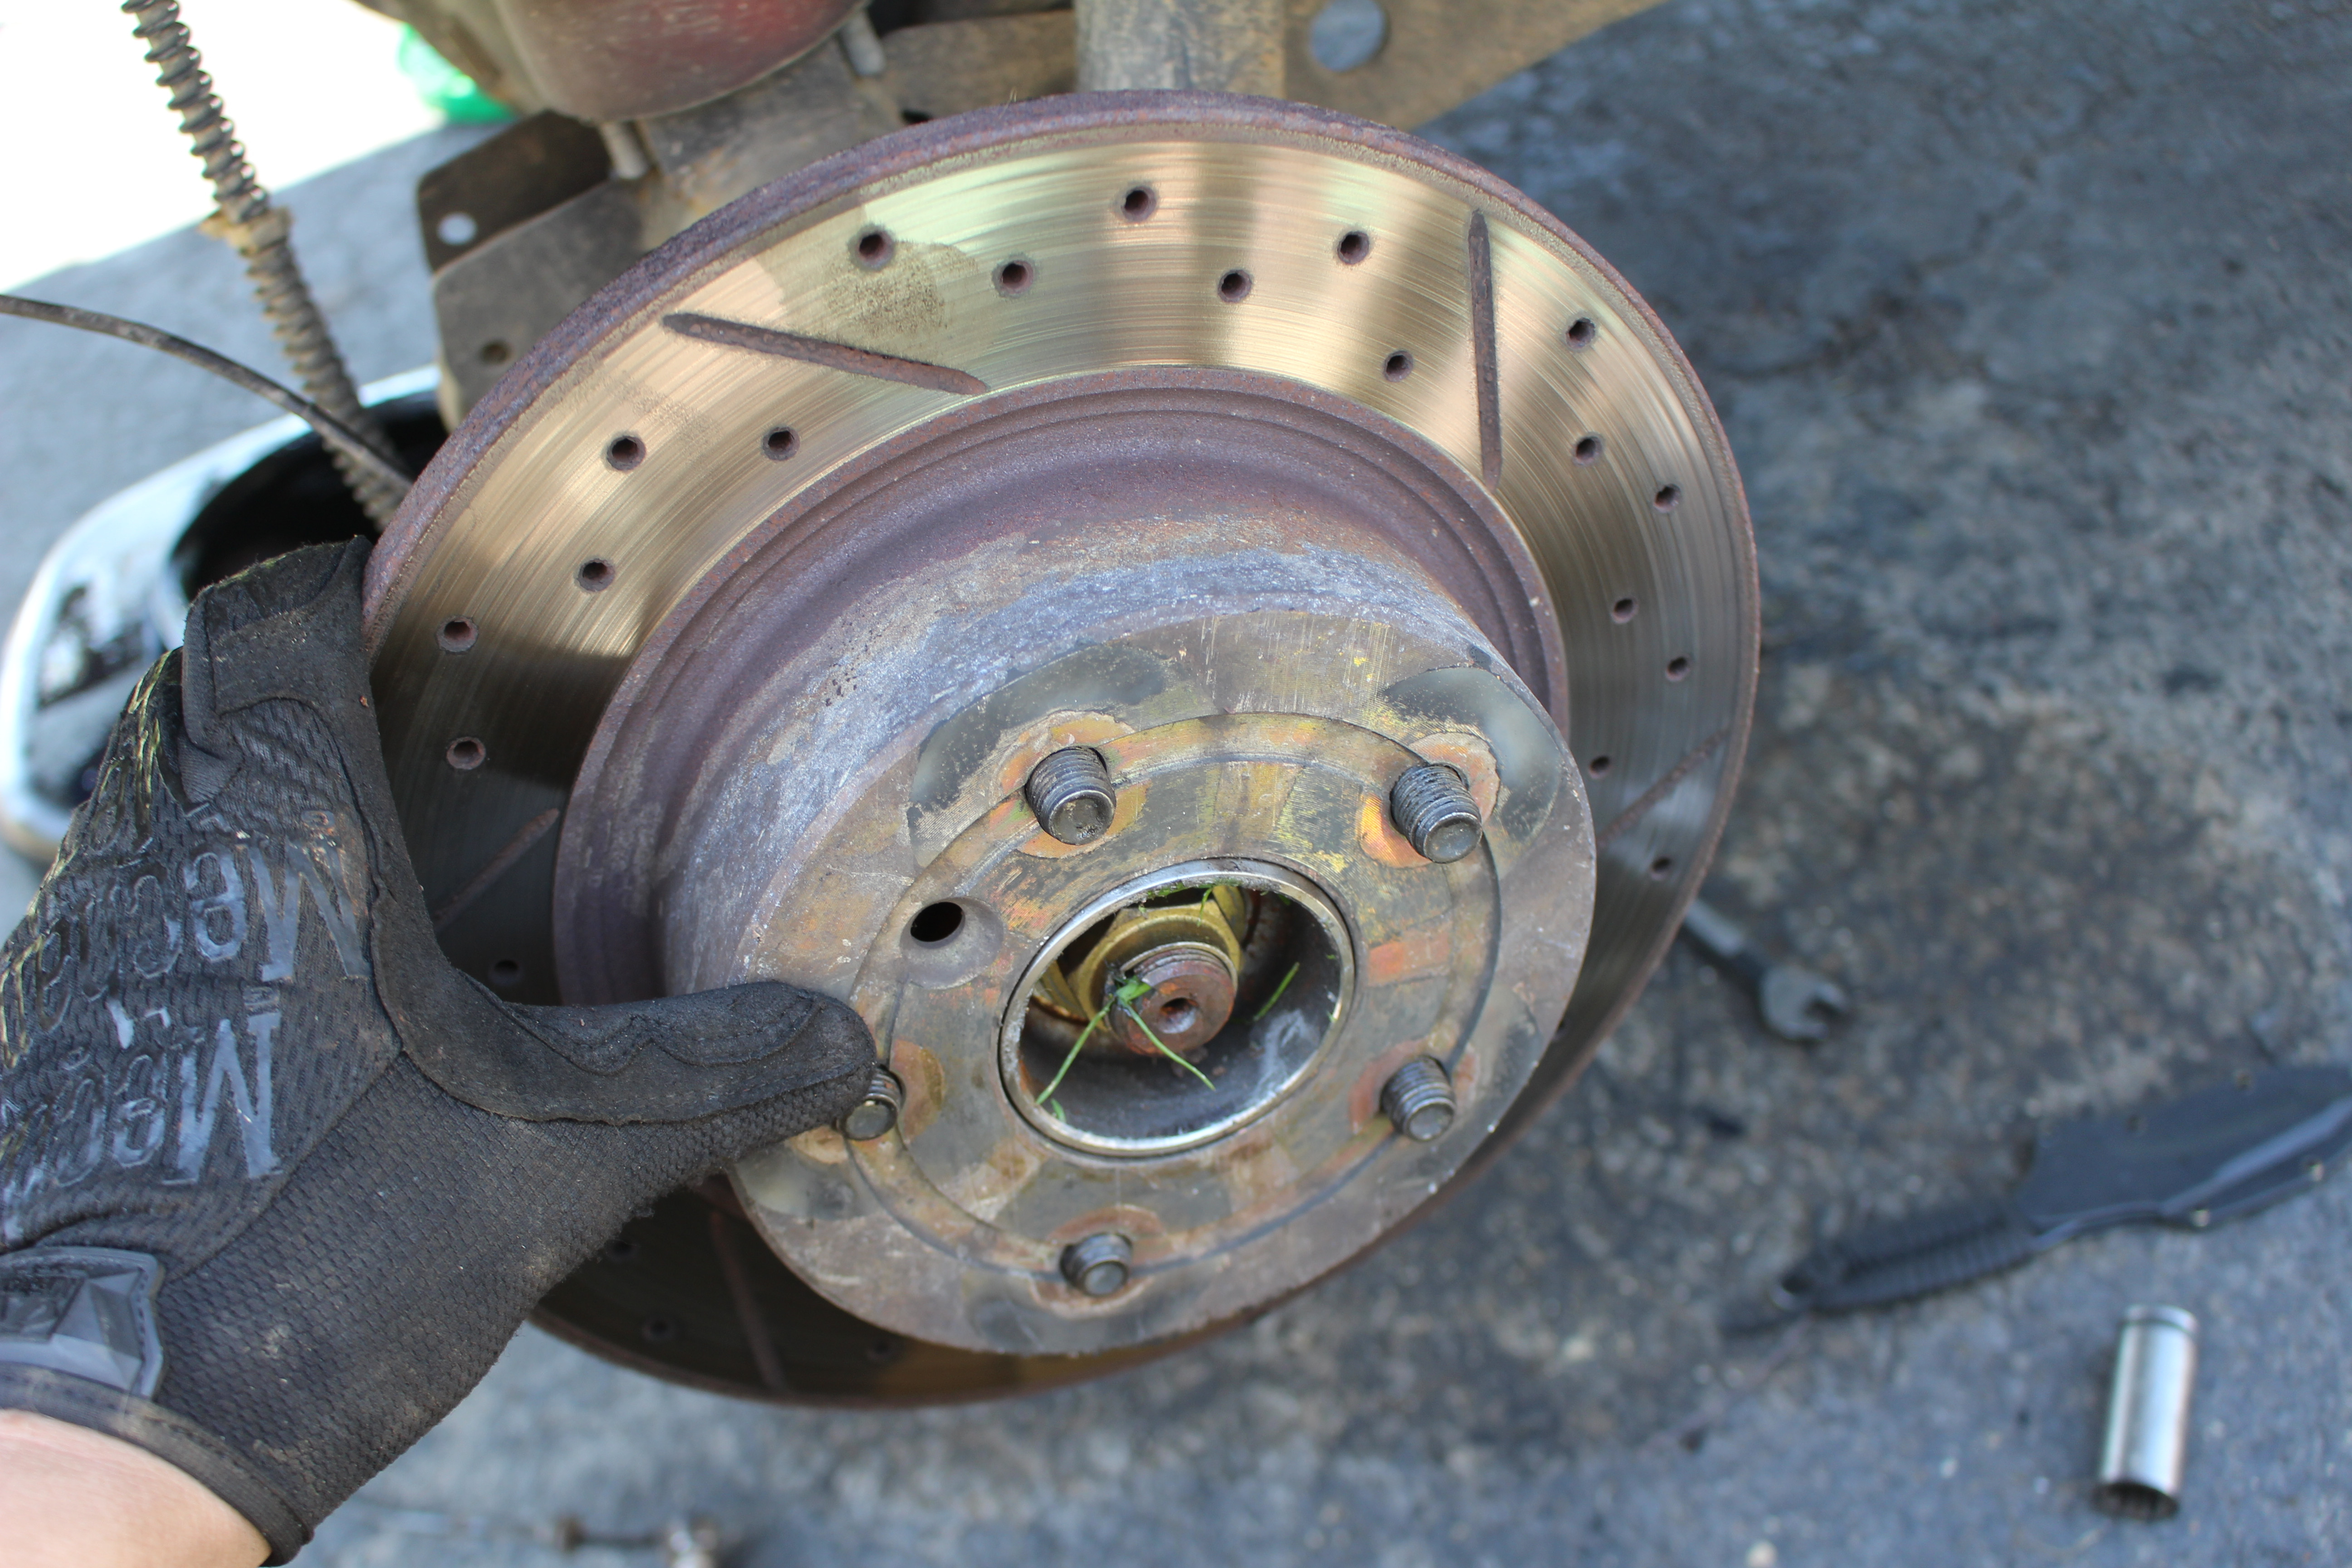
If you have the rotor retainer screw still installed, remove it and go ahead and toss it with the gravel shields. They're useless and always got in my way. I have never reinstalled one.
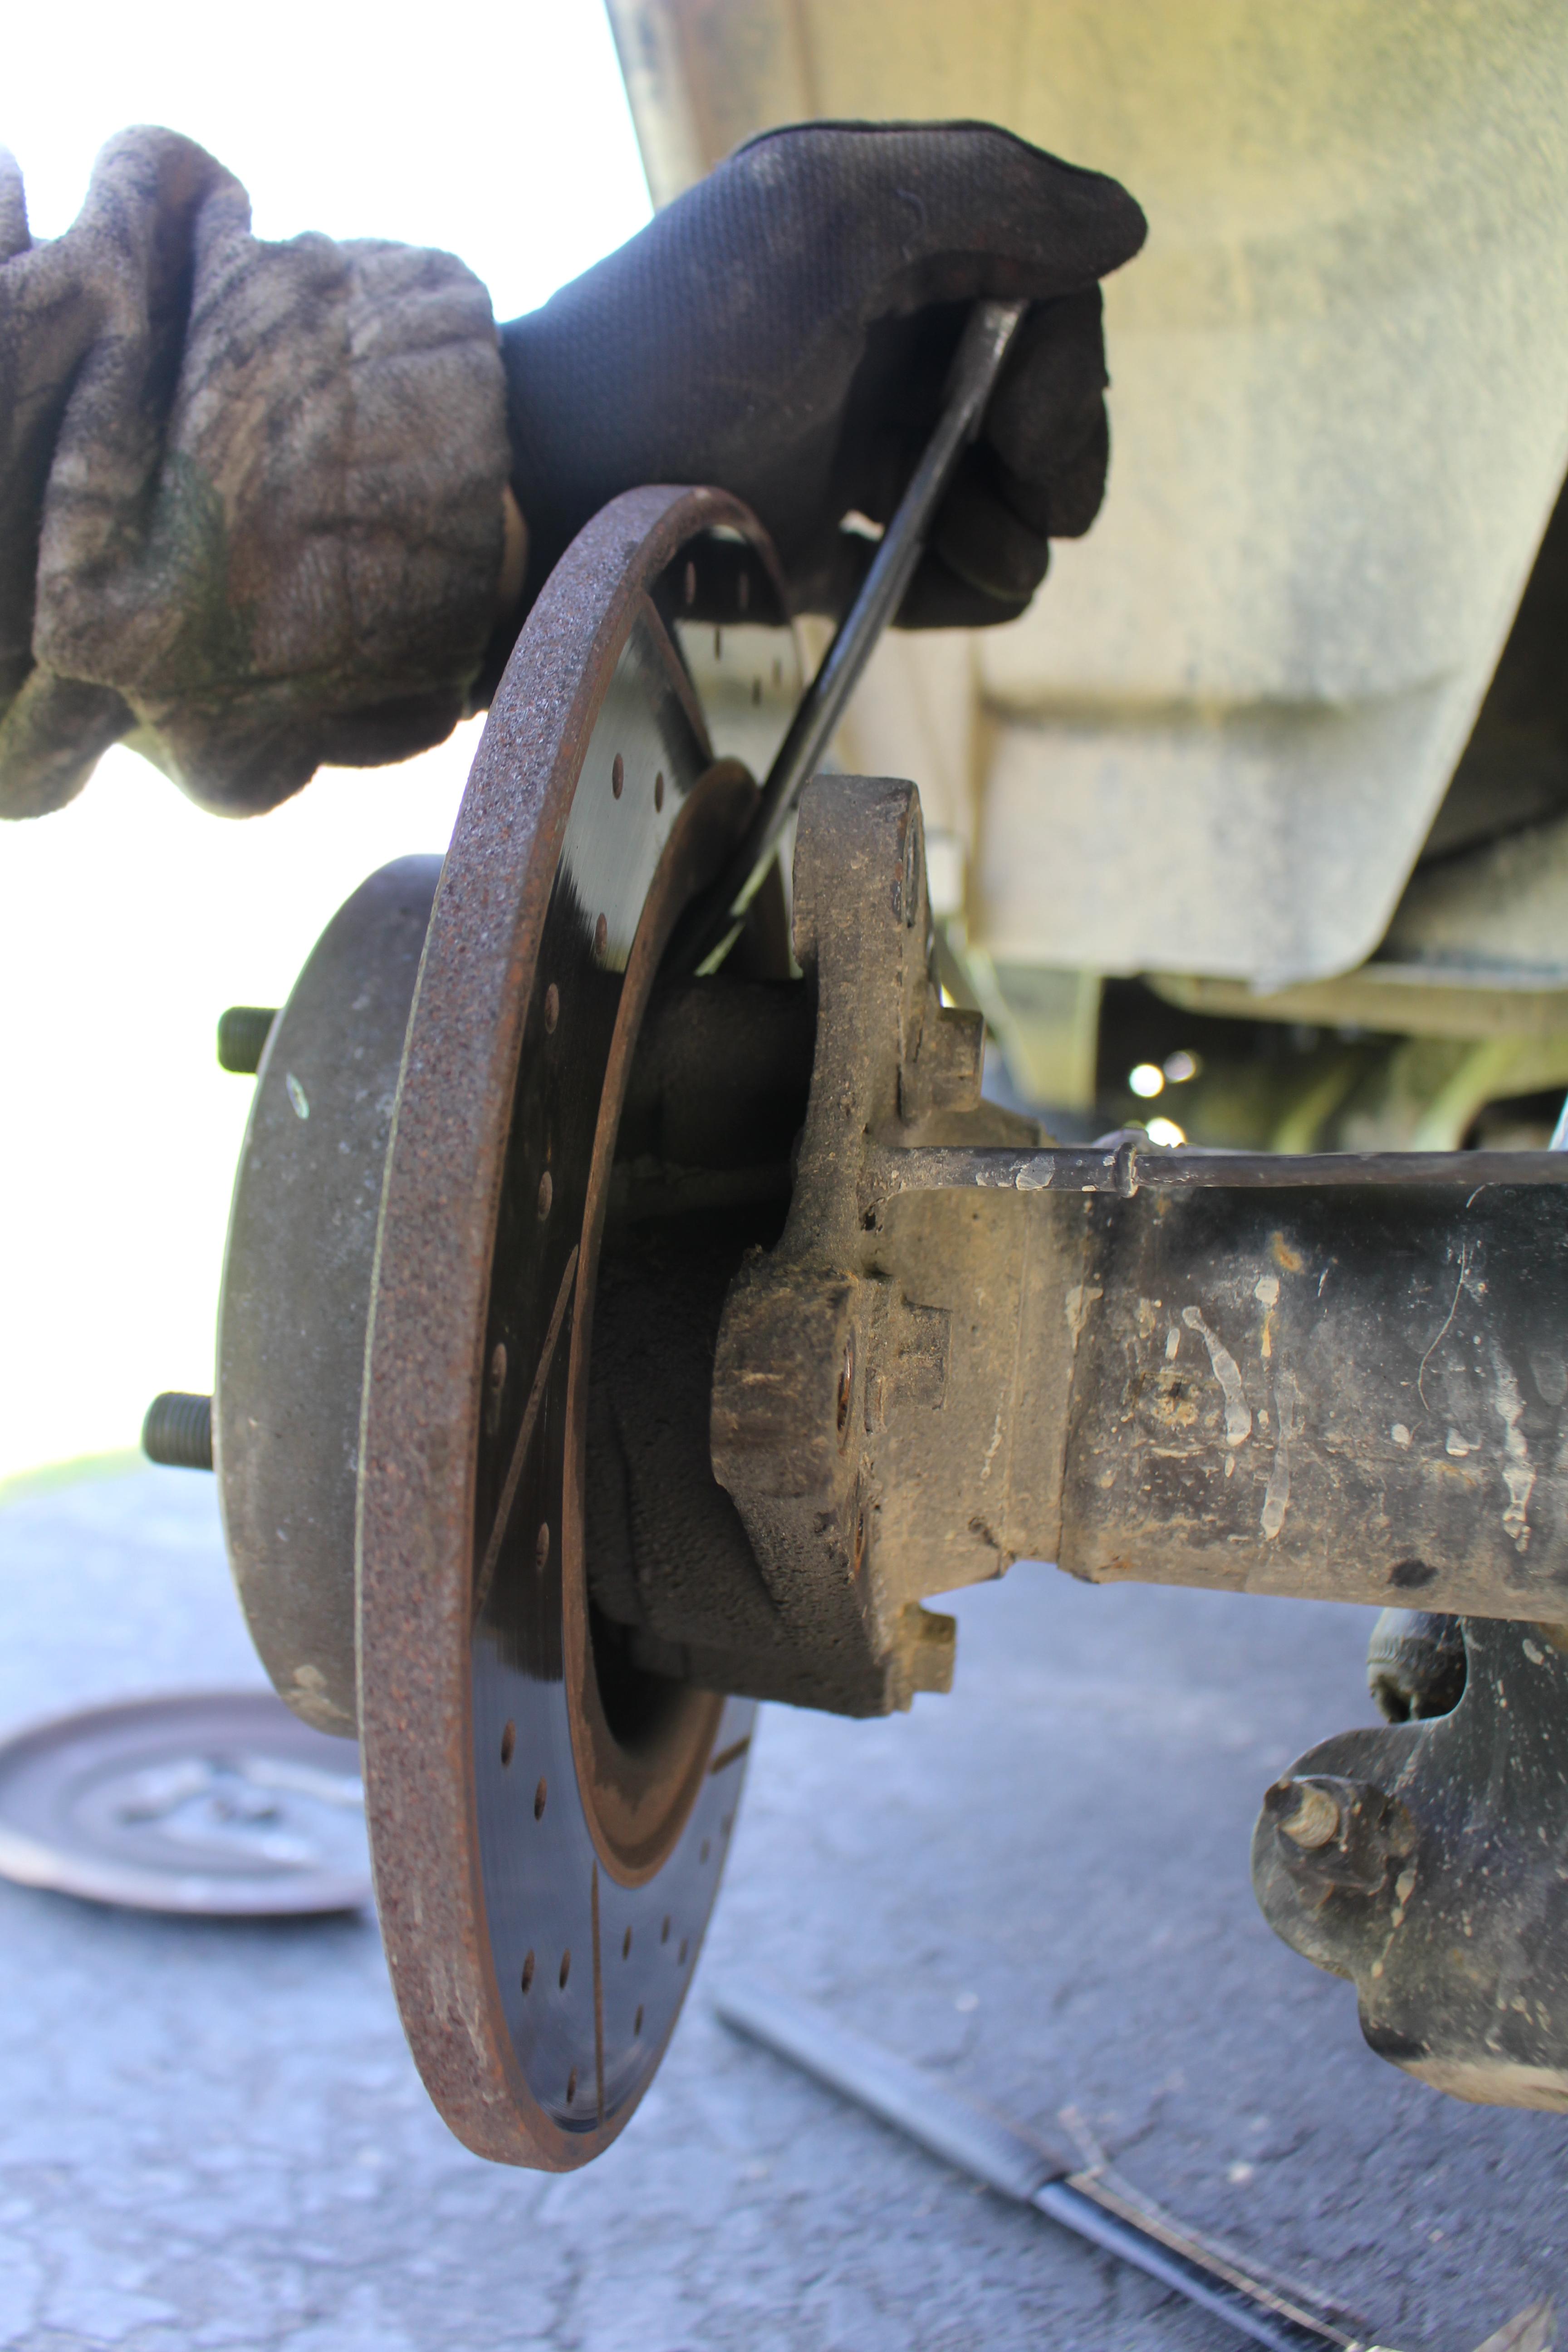
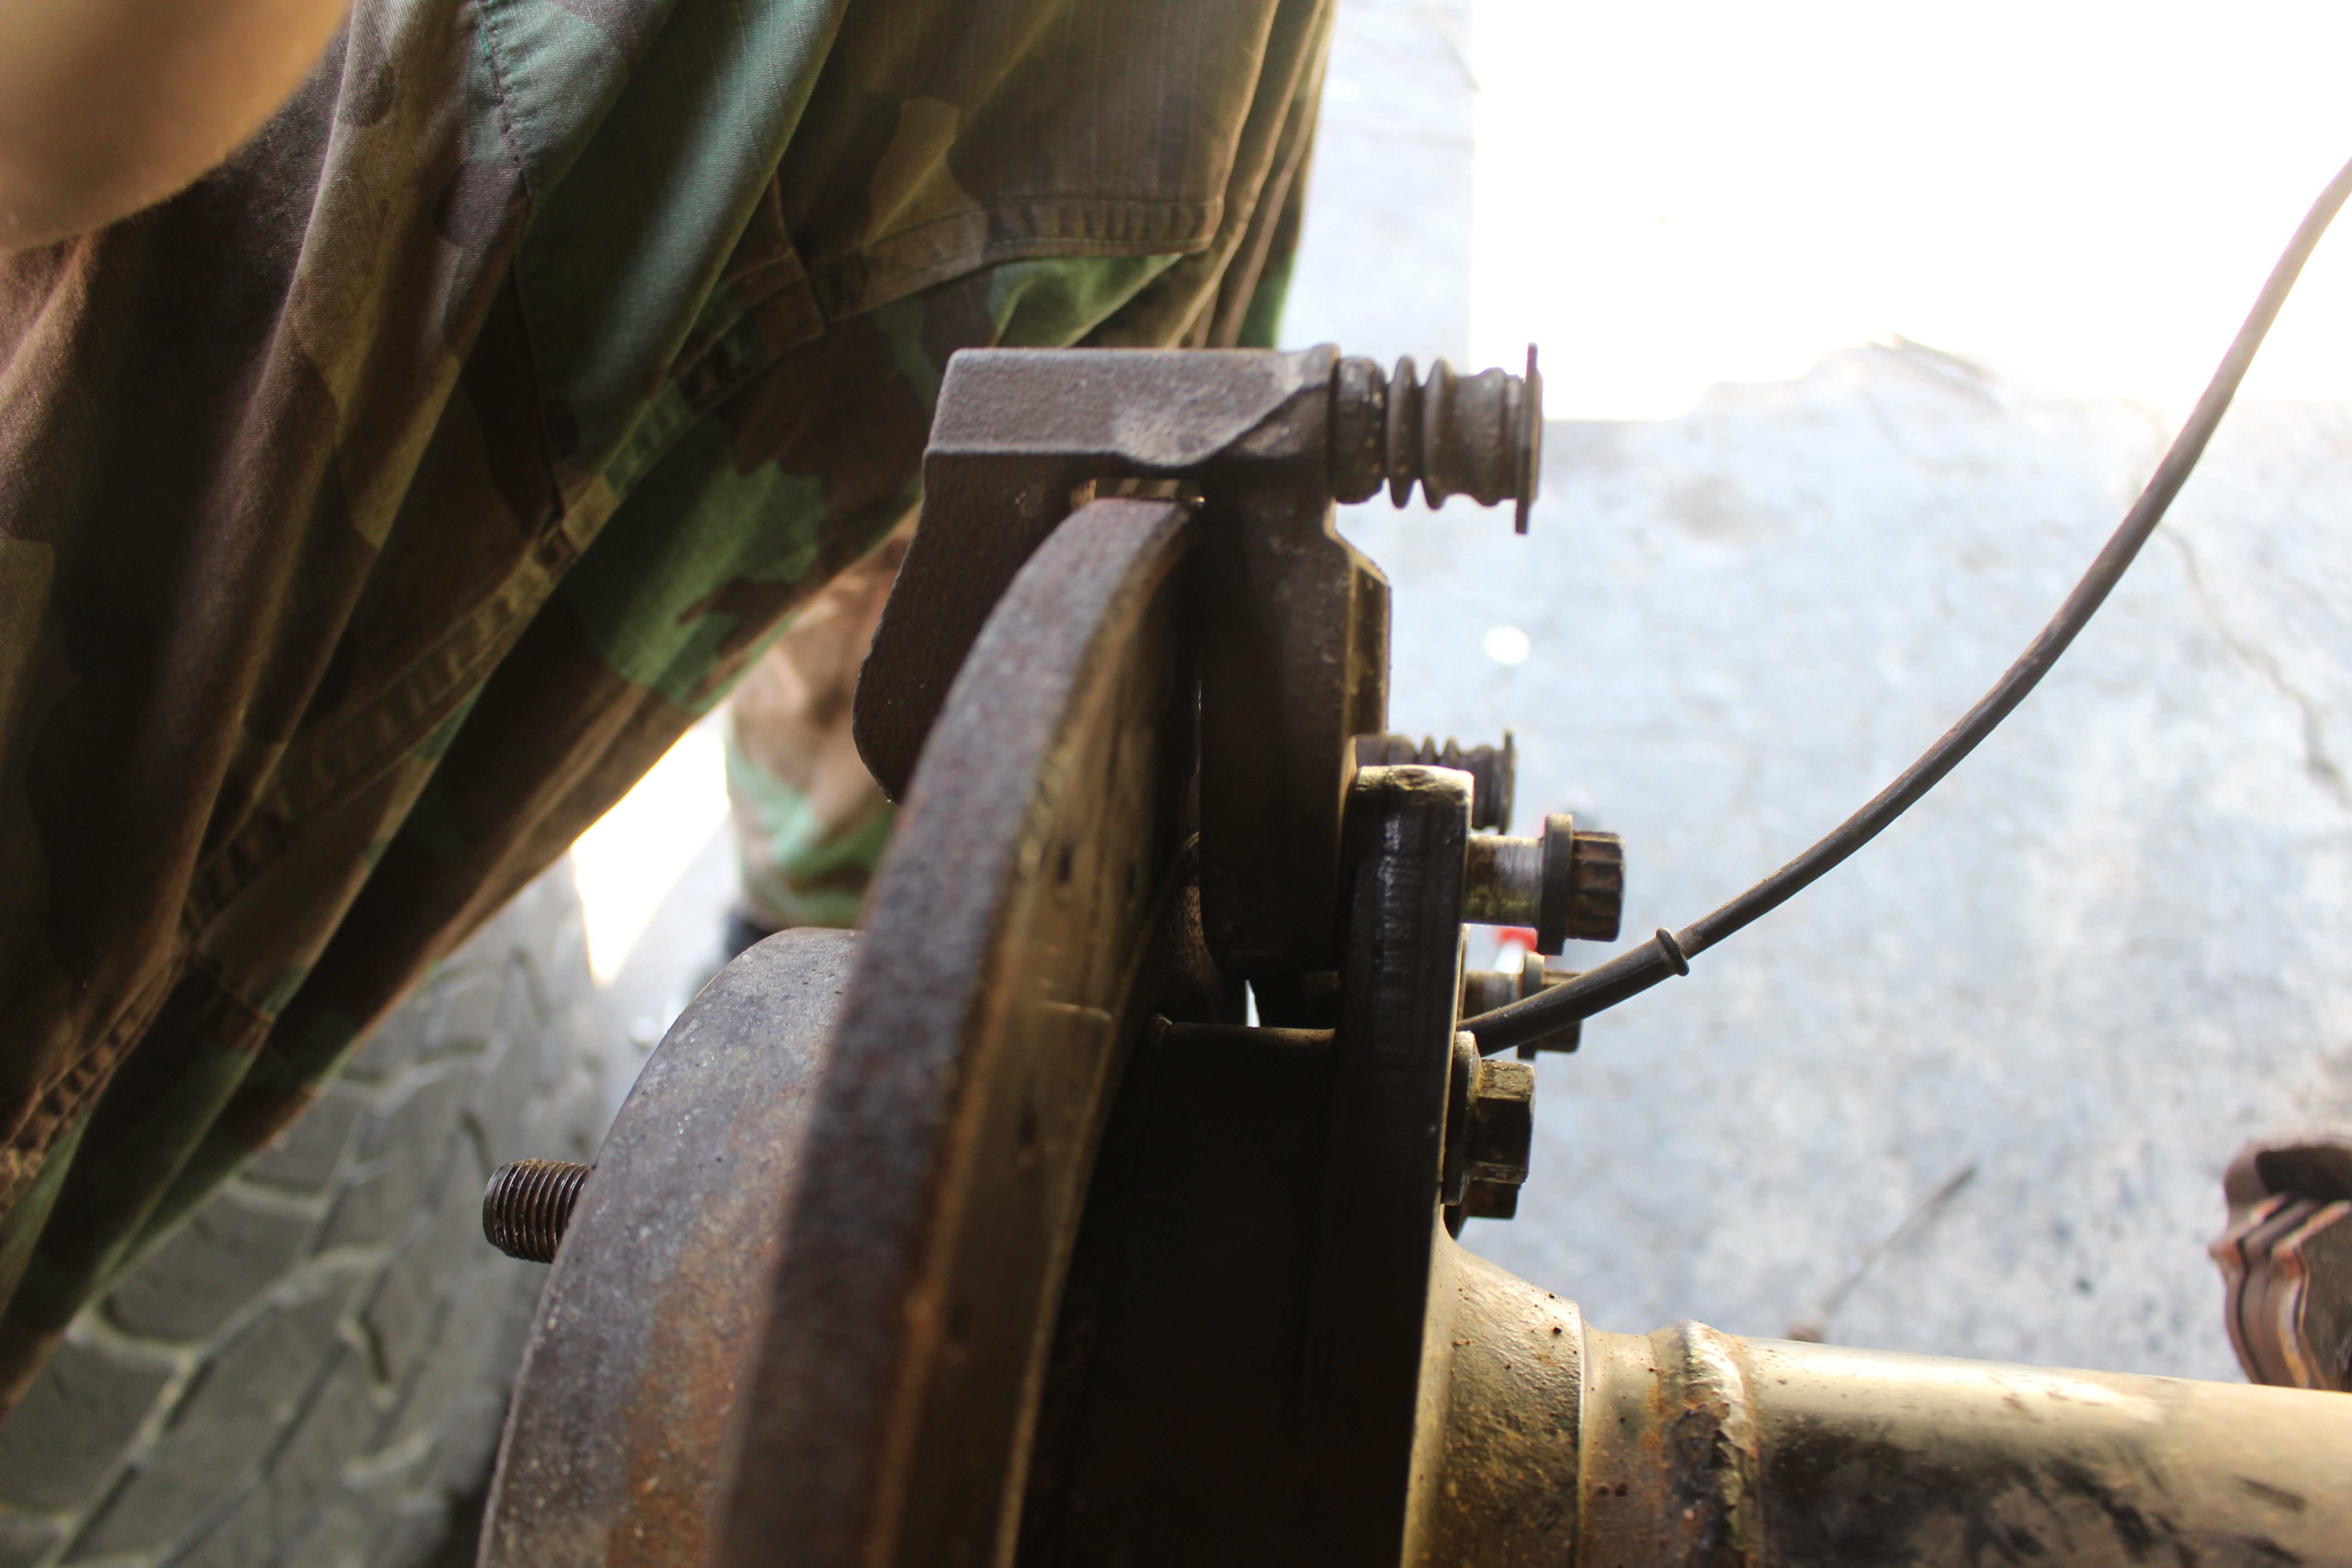
Now, if you're like me, your rotors are on there pretty d*mn tight but you don't want to scar it up with a hammer. Here is your solution. Take a box wrench and hammer. Use the box wrench as a lever and just work your way around the rotor slowly working it off as shown.
The happy medium between speed and ease seems to be using three separate lever points. You can probably get 2-3 solid hits on each before you move on to the next.
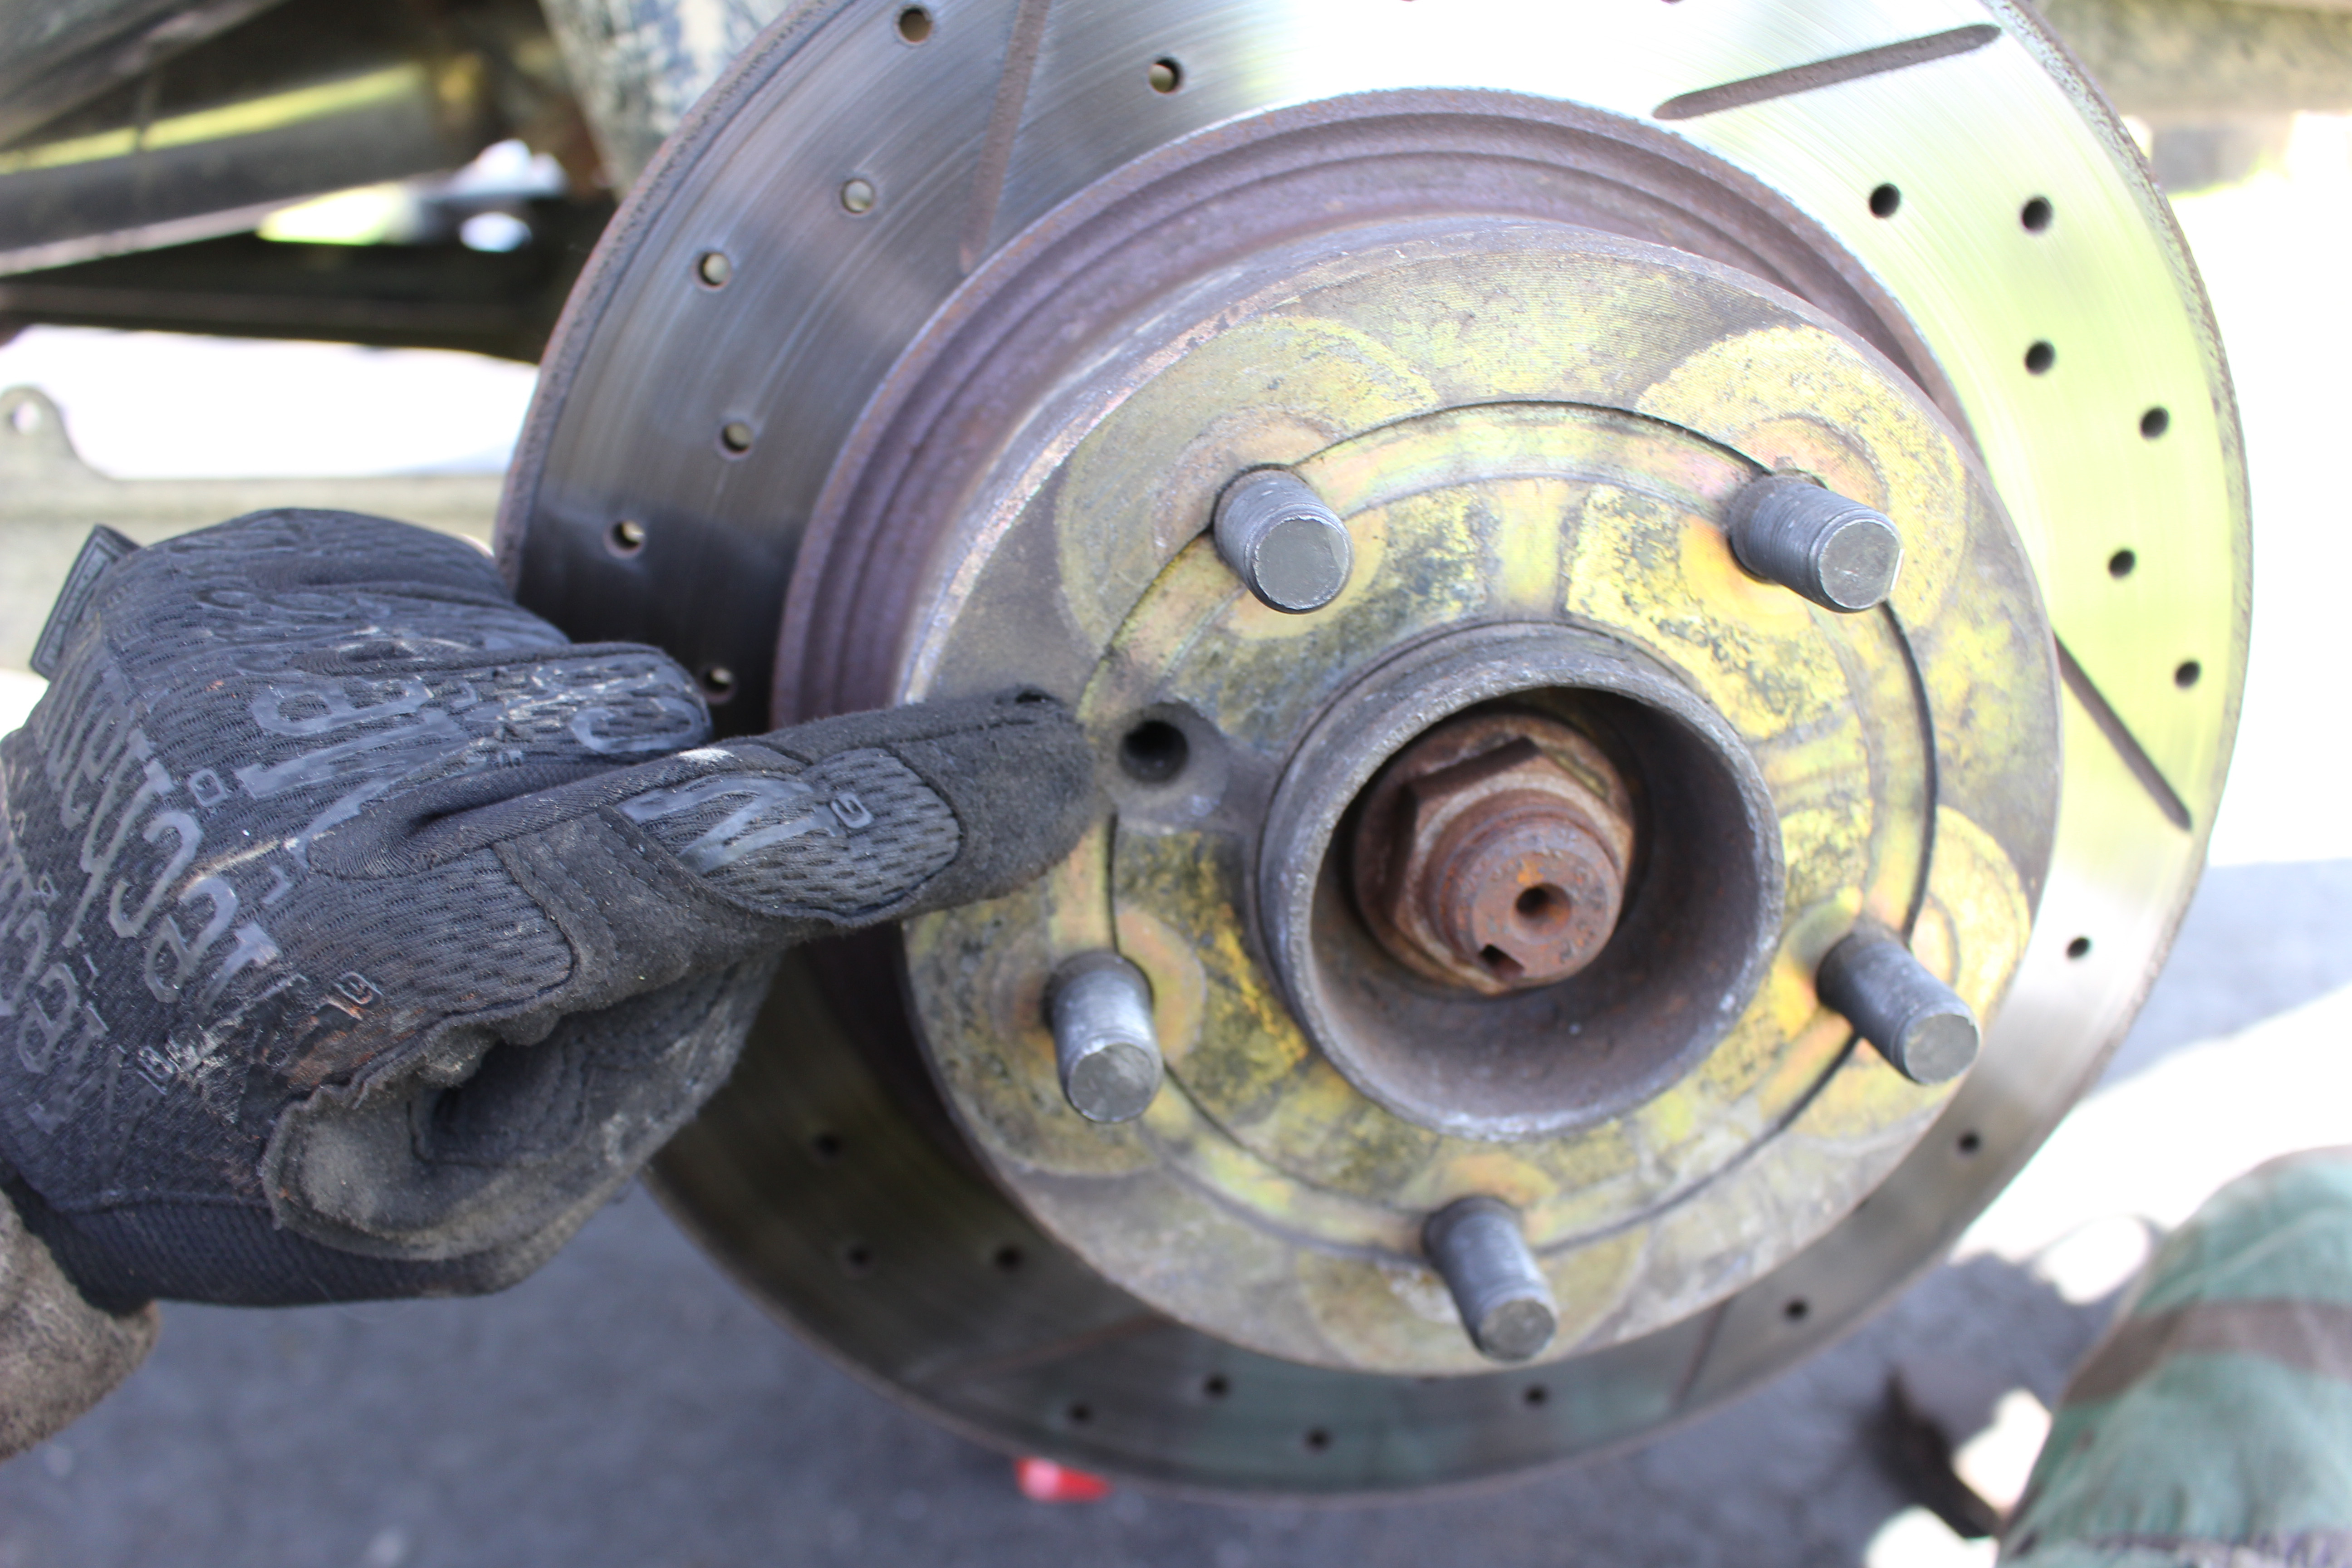
Now for the hub bolts; there are four and they are 15 mm. Again, take a hammer and a closed box wrench and just break them loose.
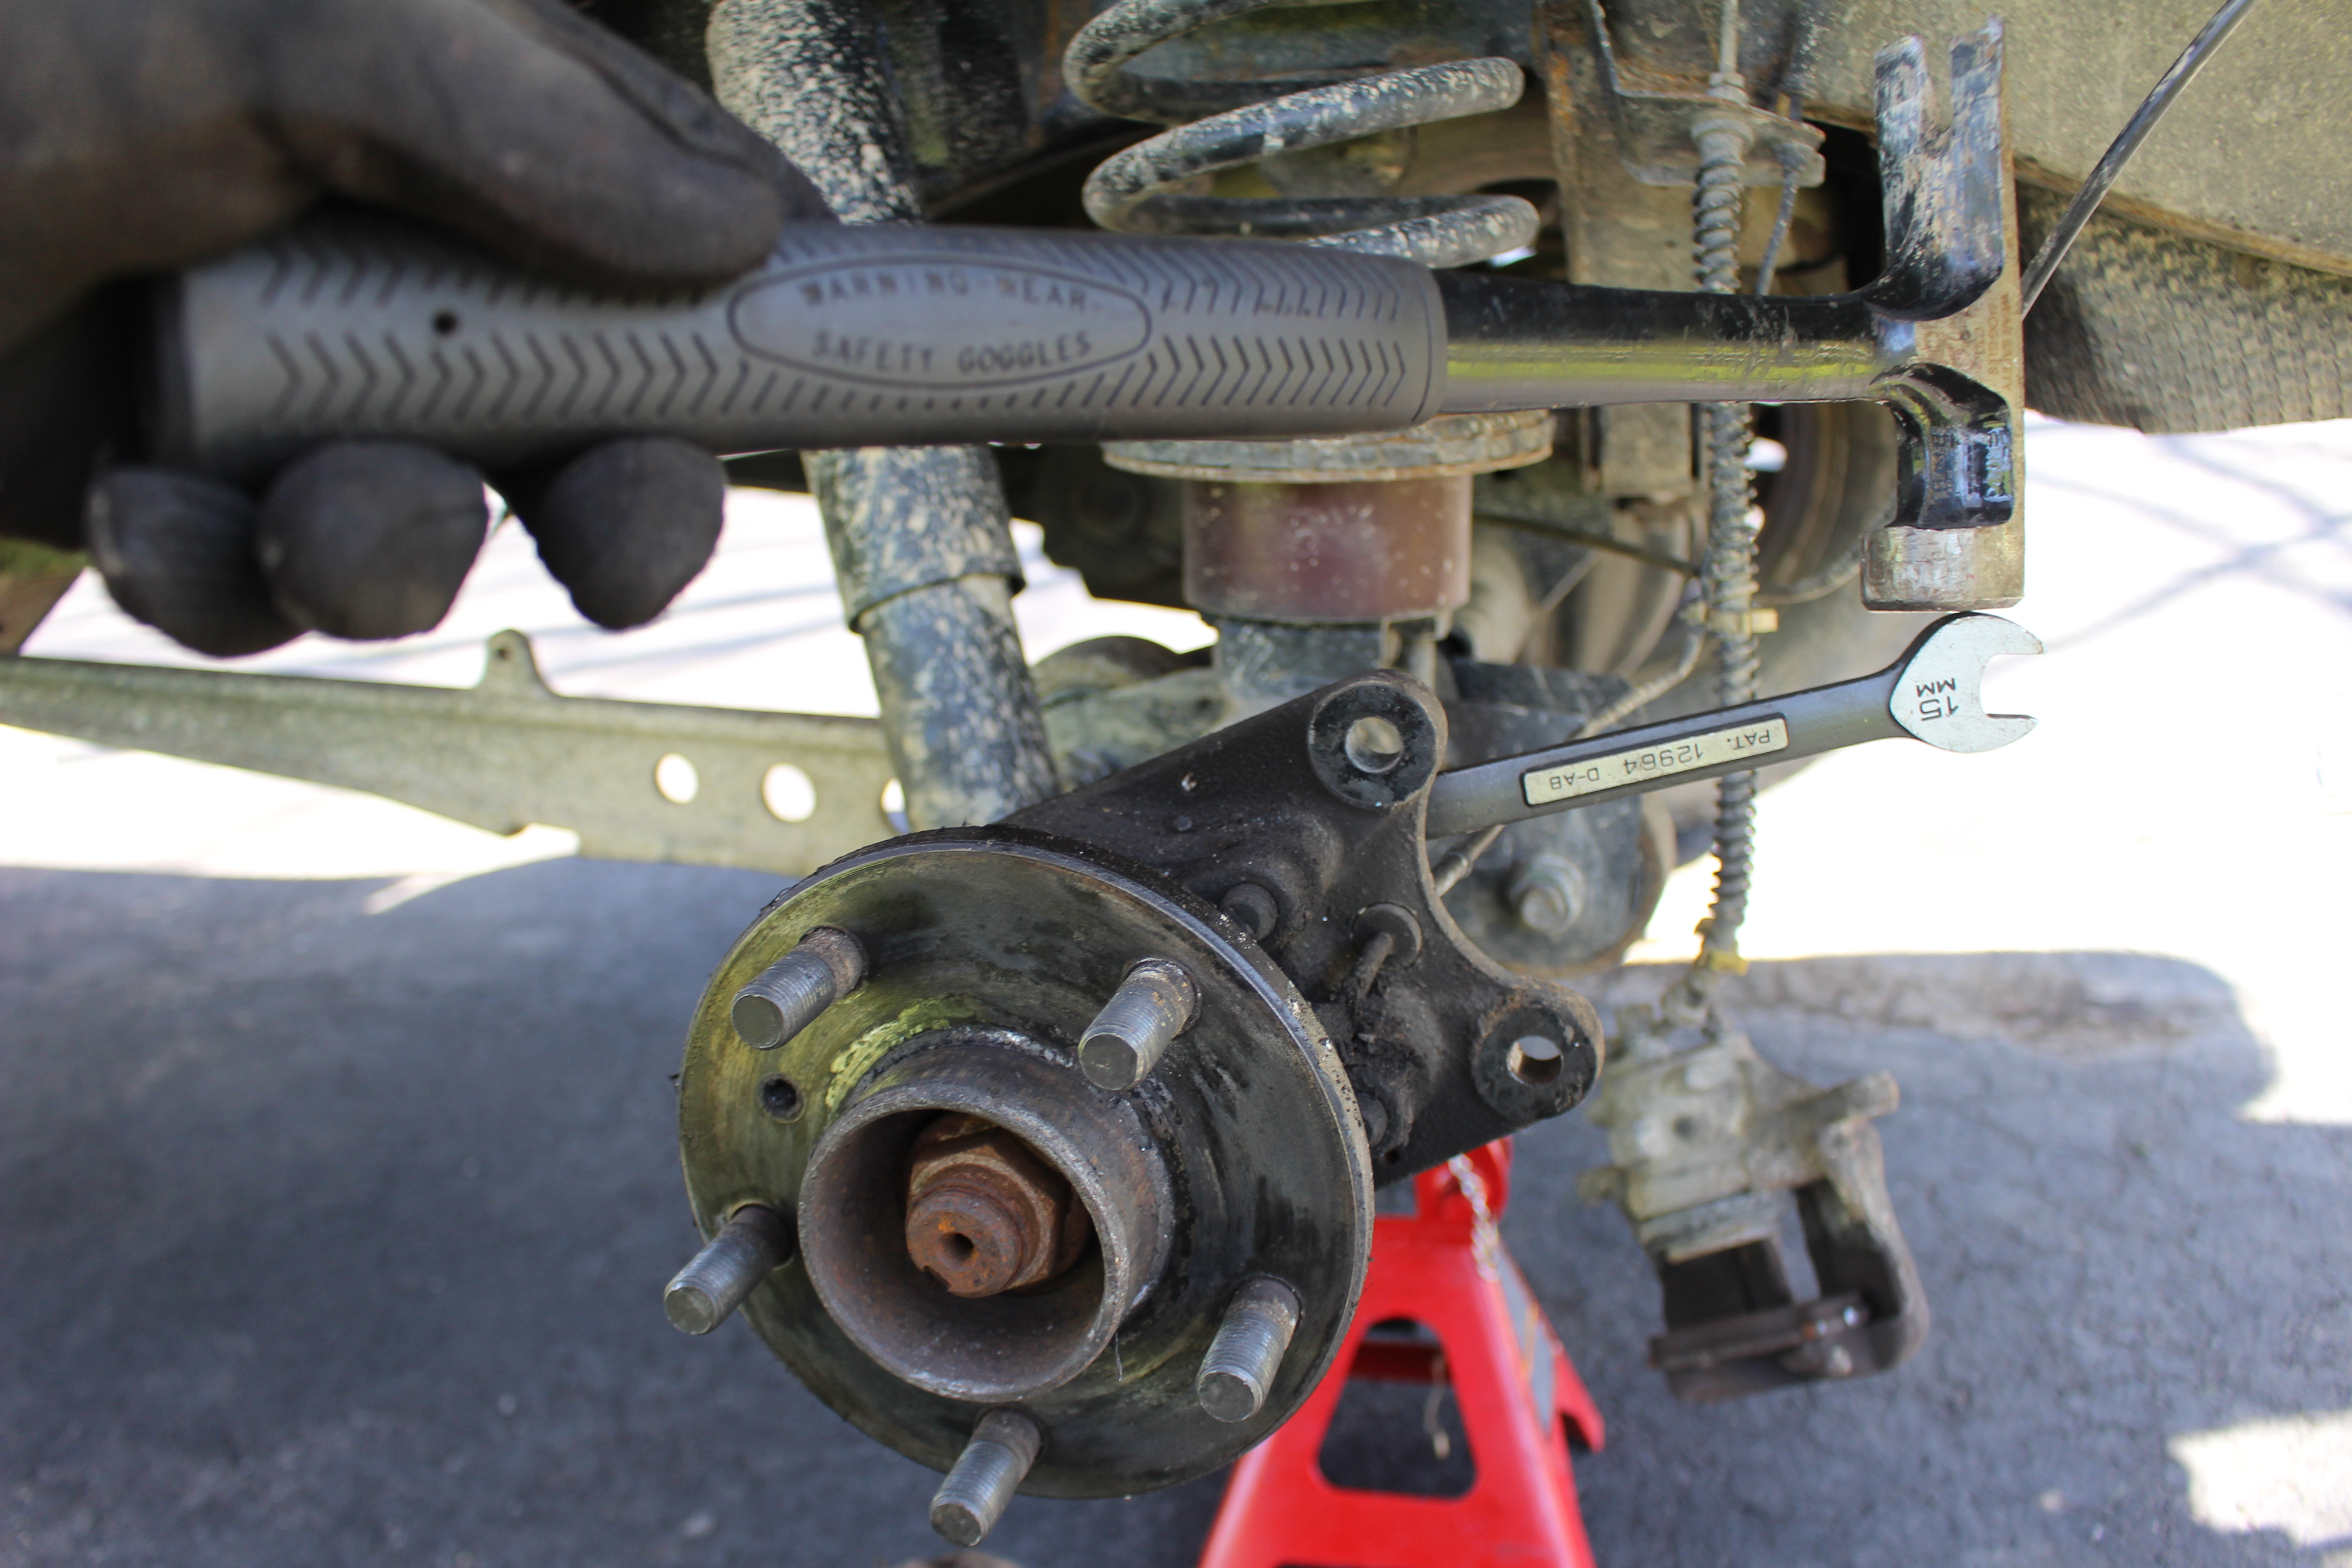
Once they're broken loose they will still be pretty stout, so you won't be able to thread them out by hand. Just use your ratchet and socket combo.

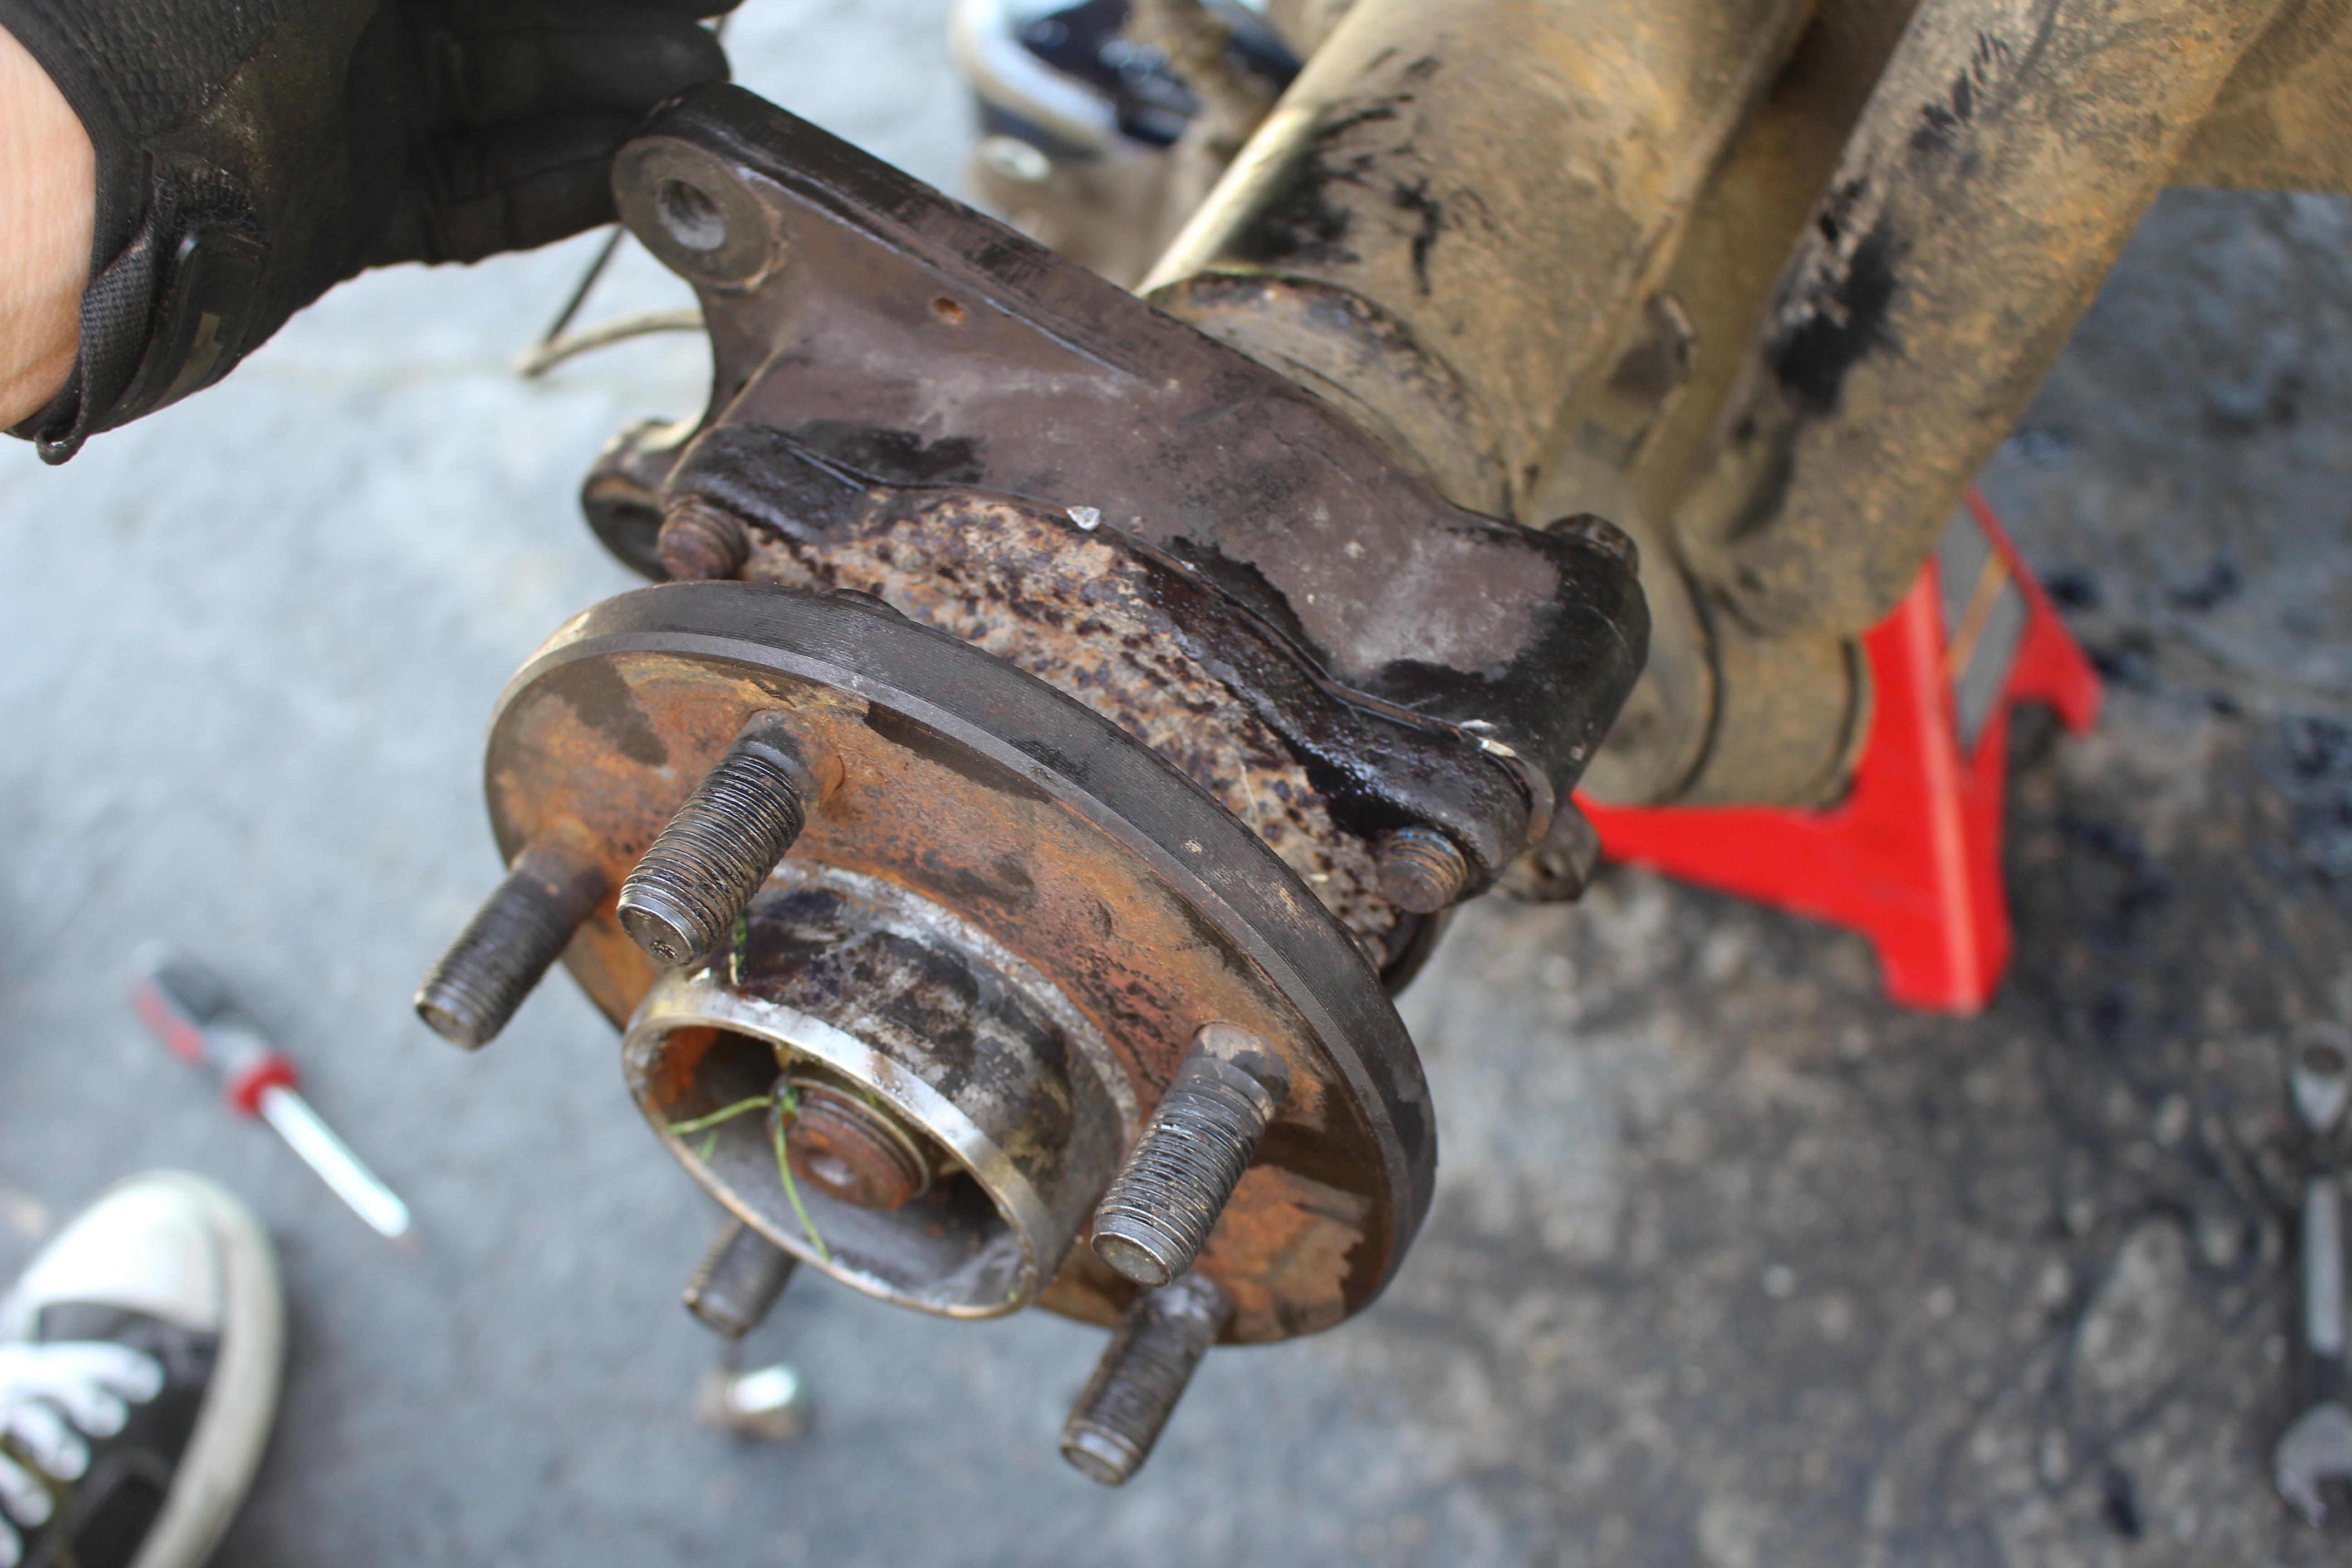
Once all four of those are out, you need to remove your hub and axle. DO NOT REMOVE THE AXLE NUT unless you also have to replace a hub. If that is the case, you should have broken the nut loose before you removed everything. Take your hammer and just work your way around the back of the hub.
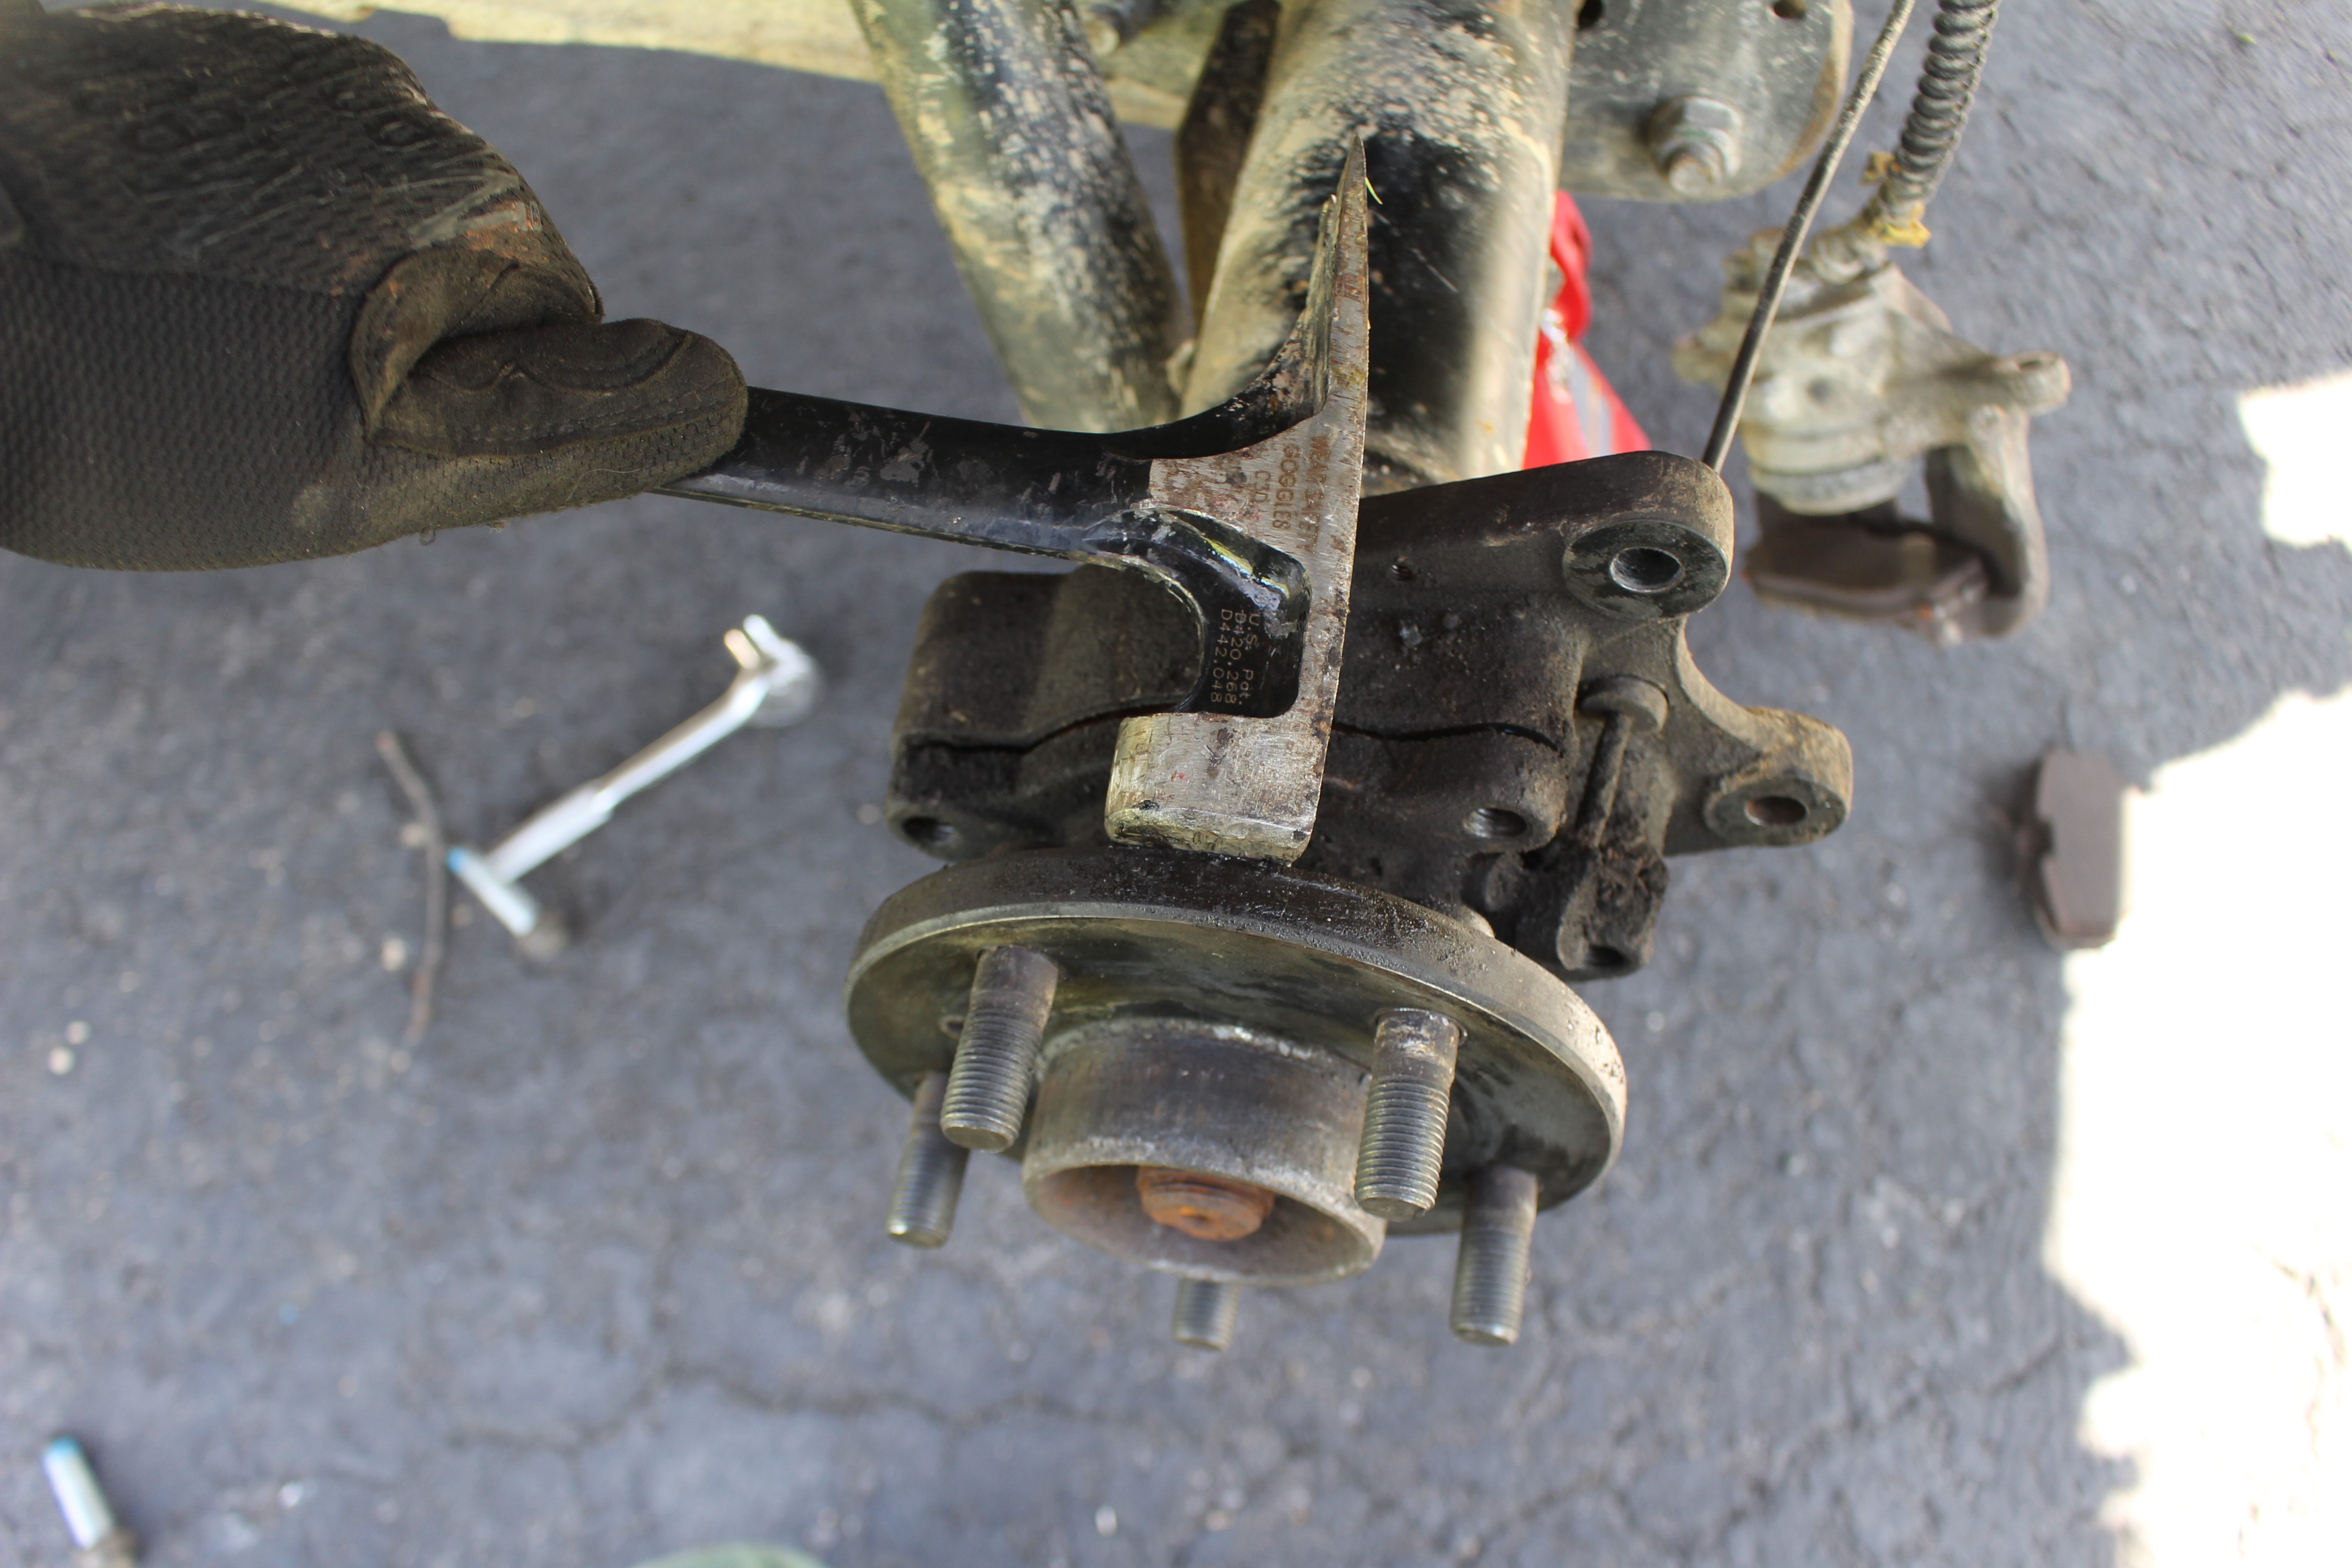
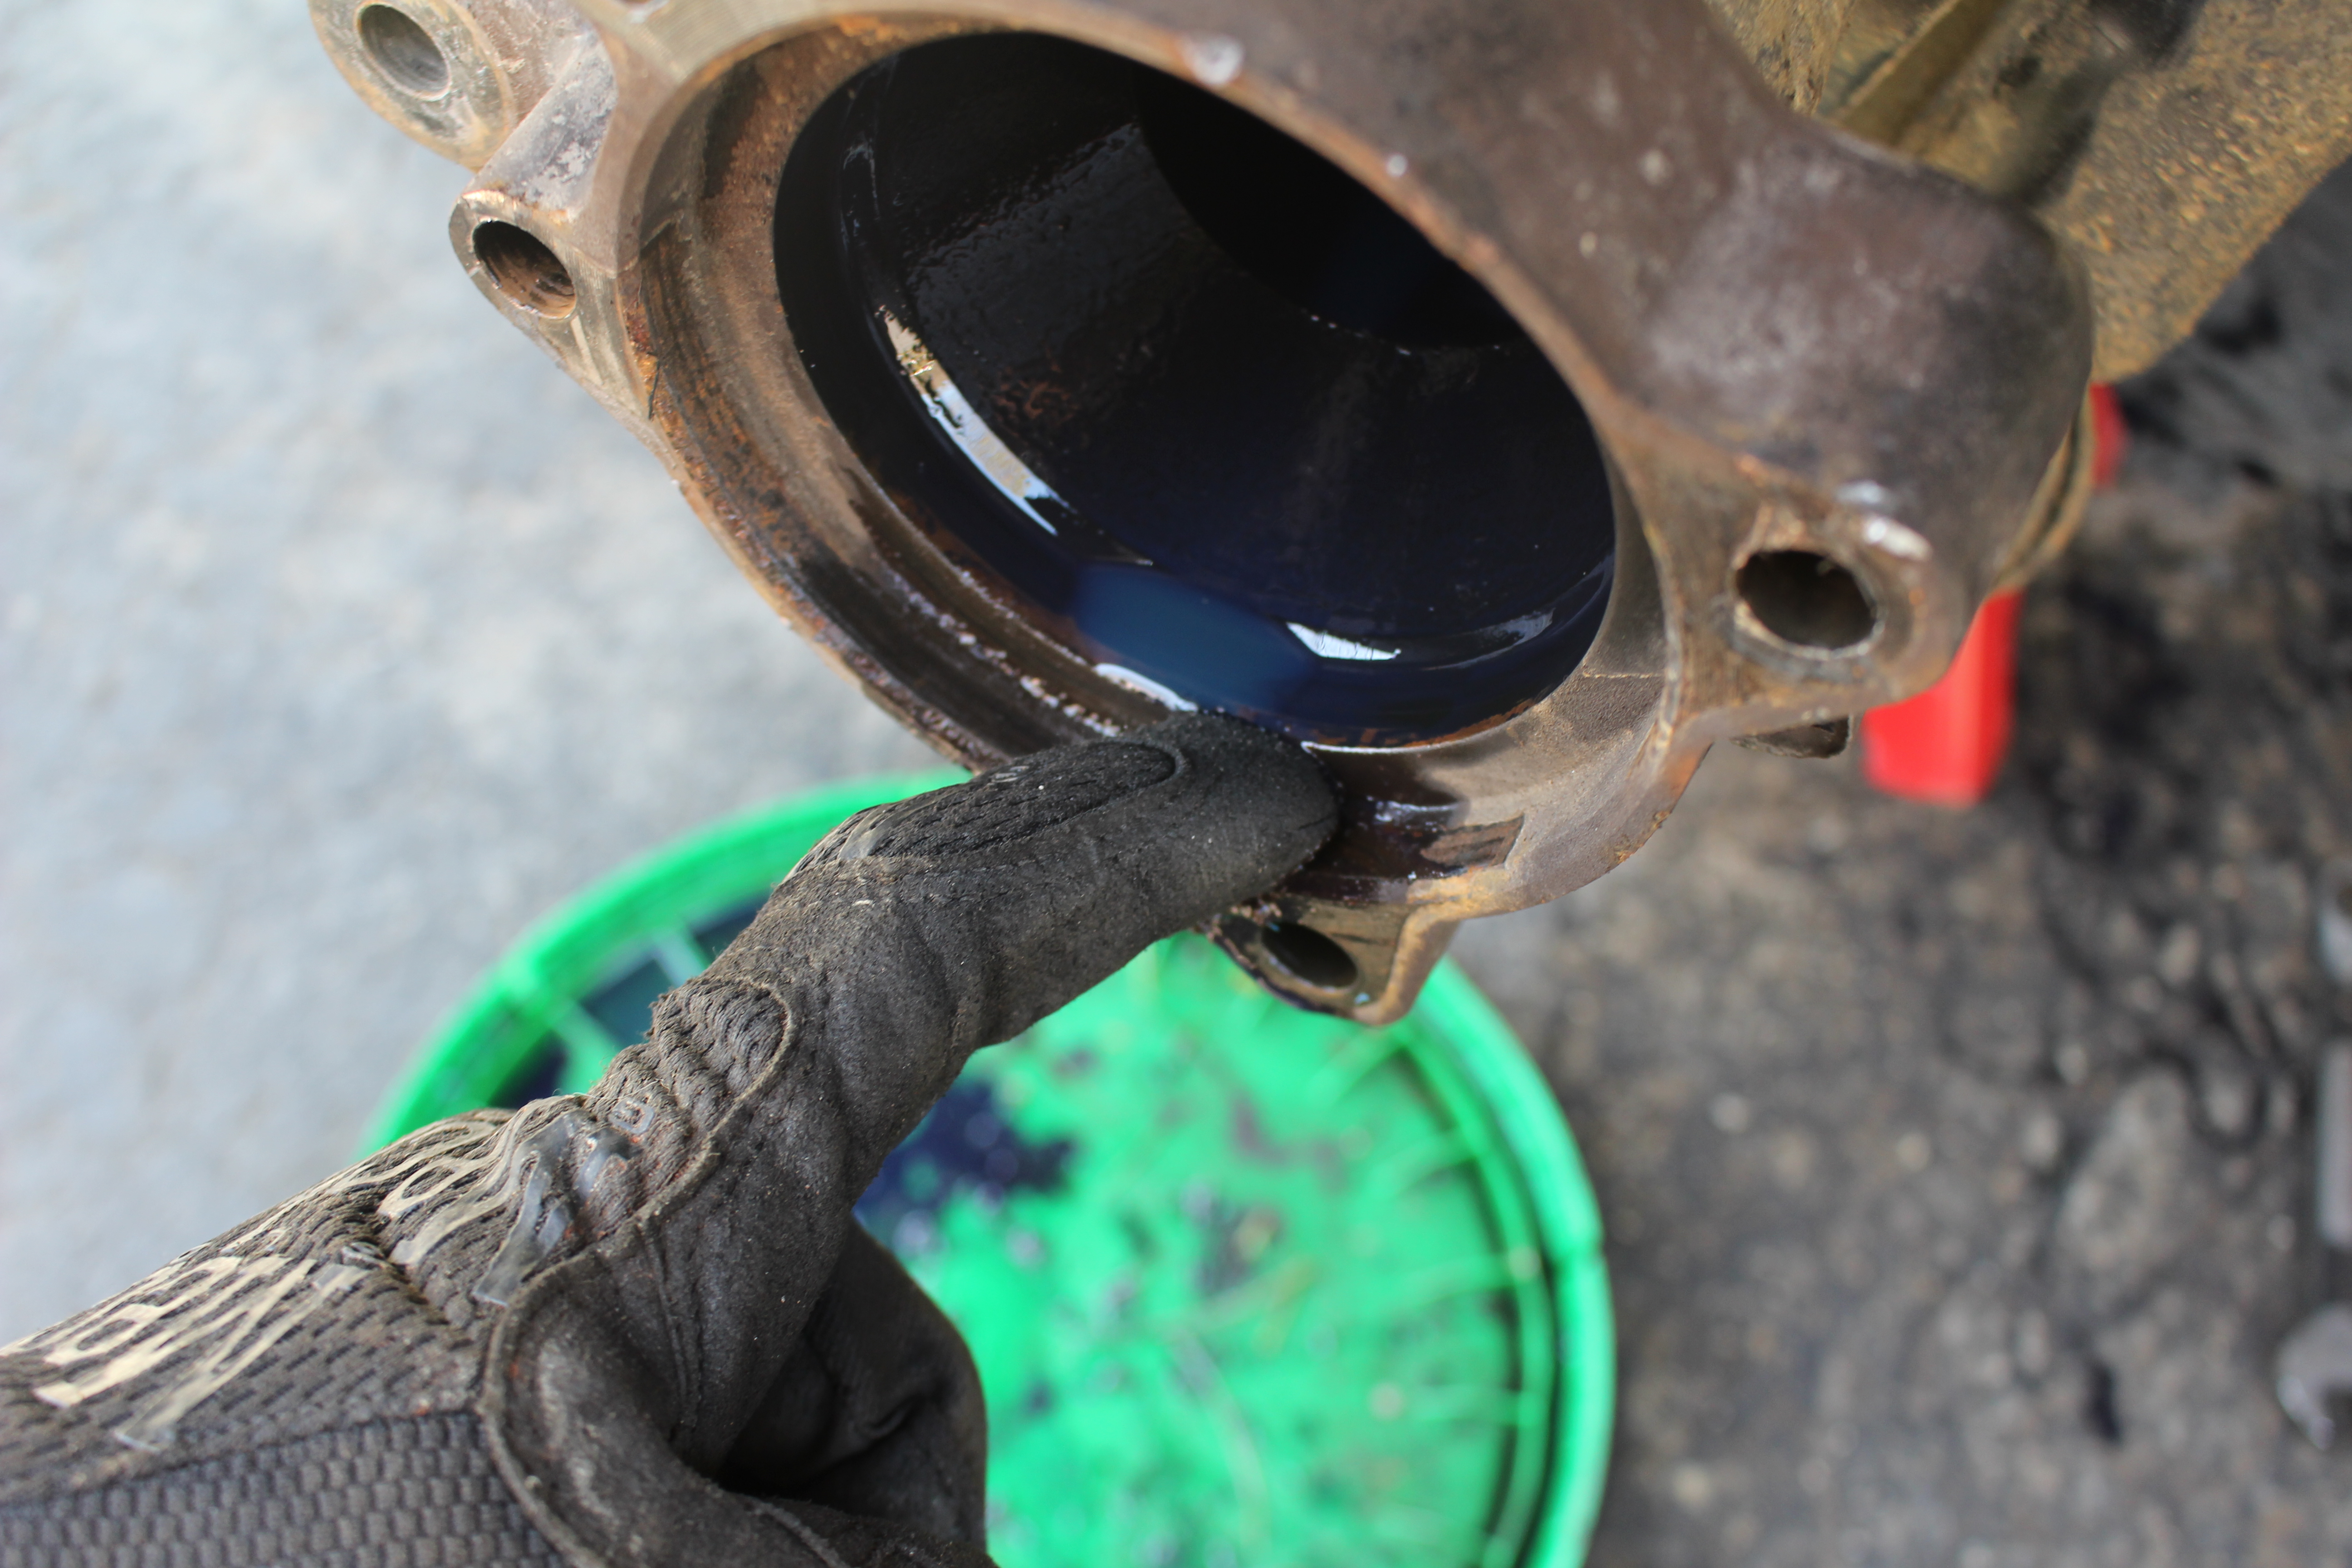
Slowly but surely it will start to work its way out. Be sure to have something laying under it to catch the majority of the oil that comes out.
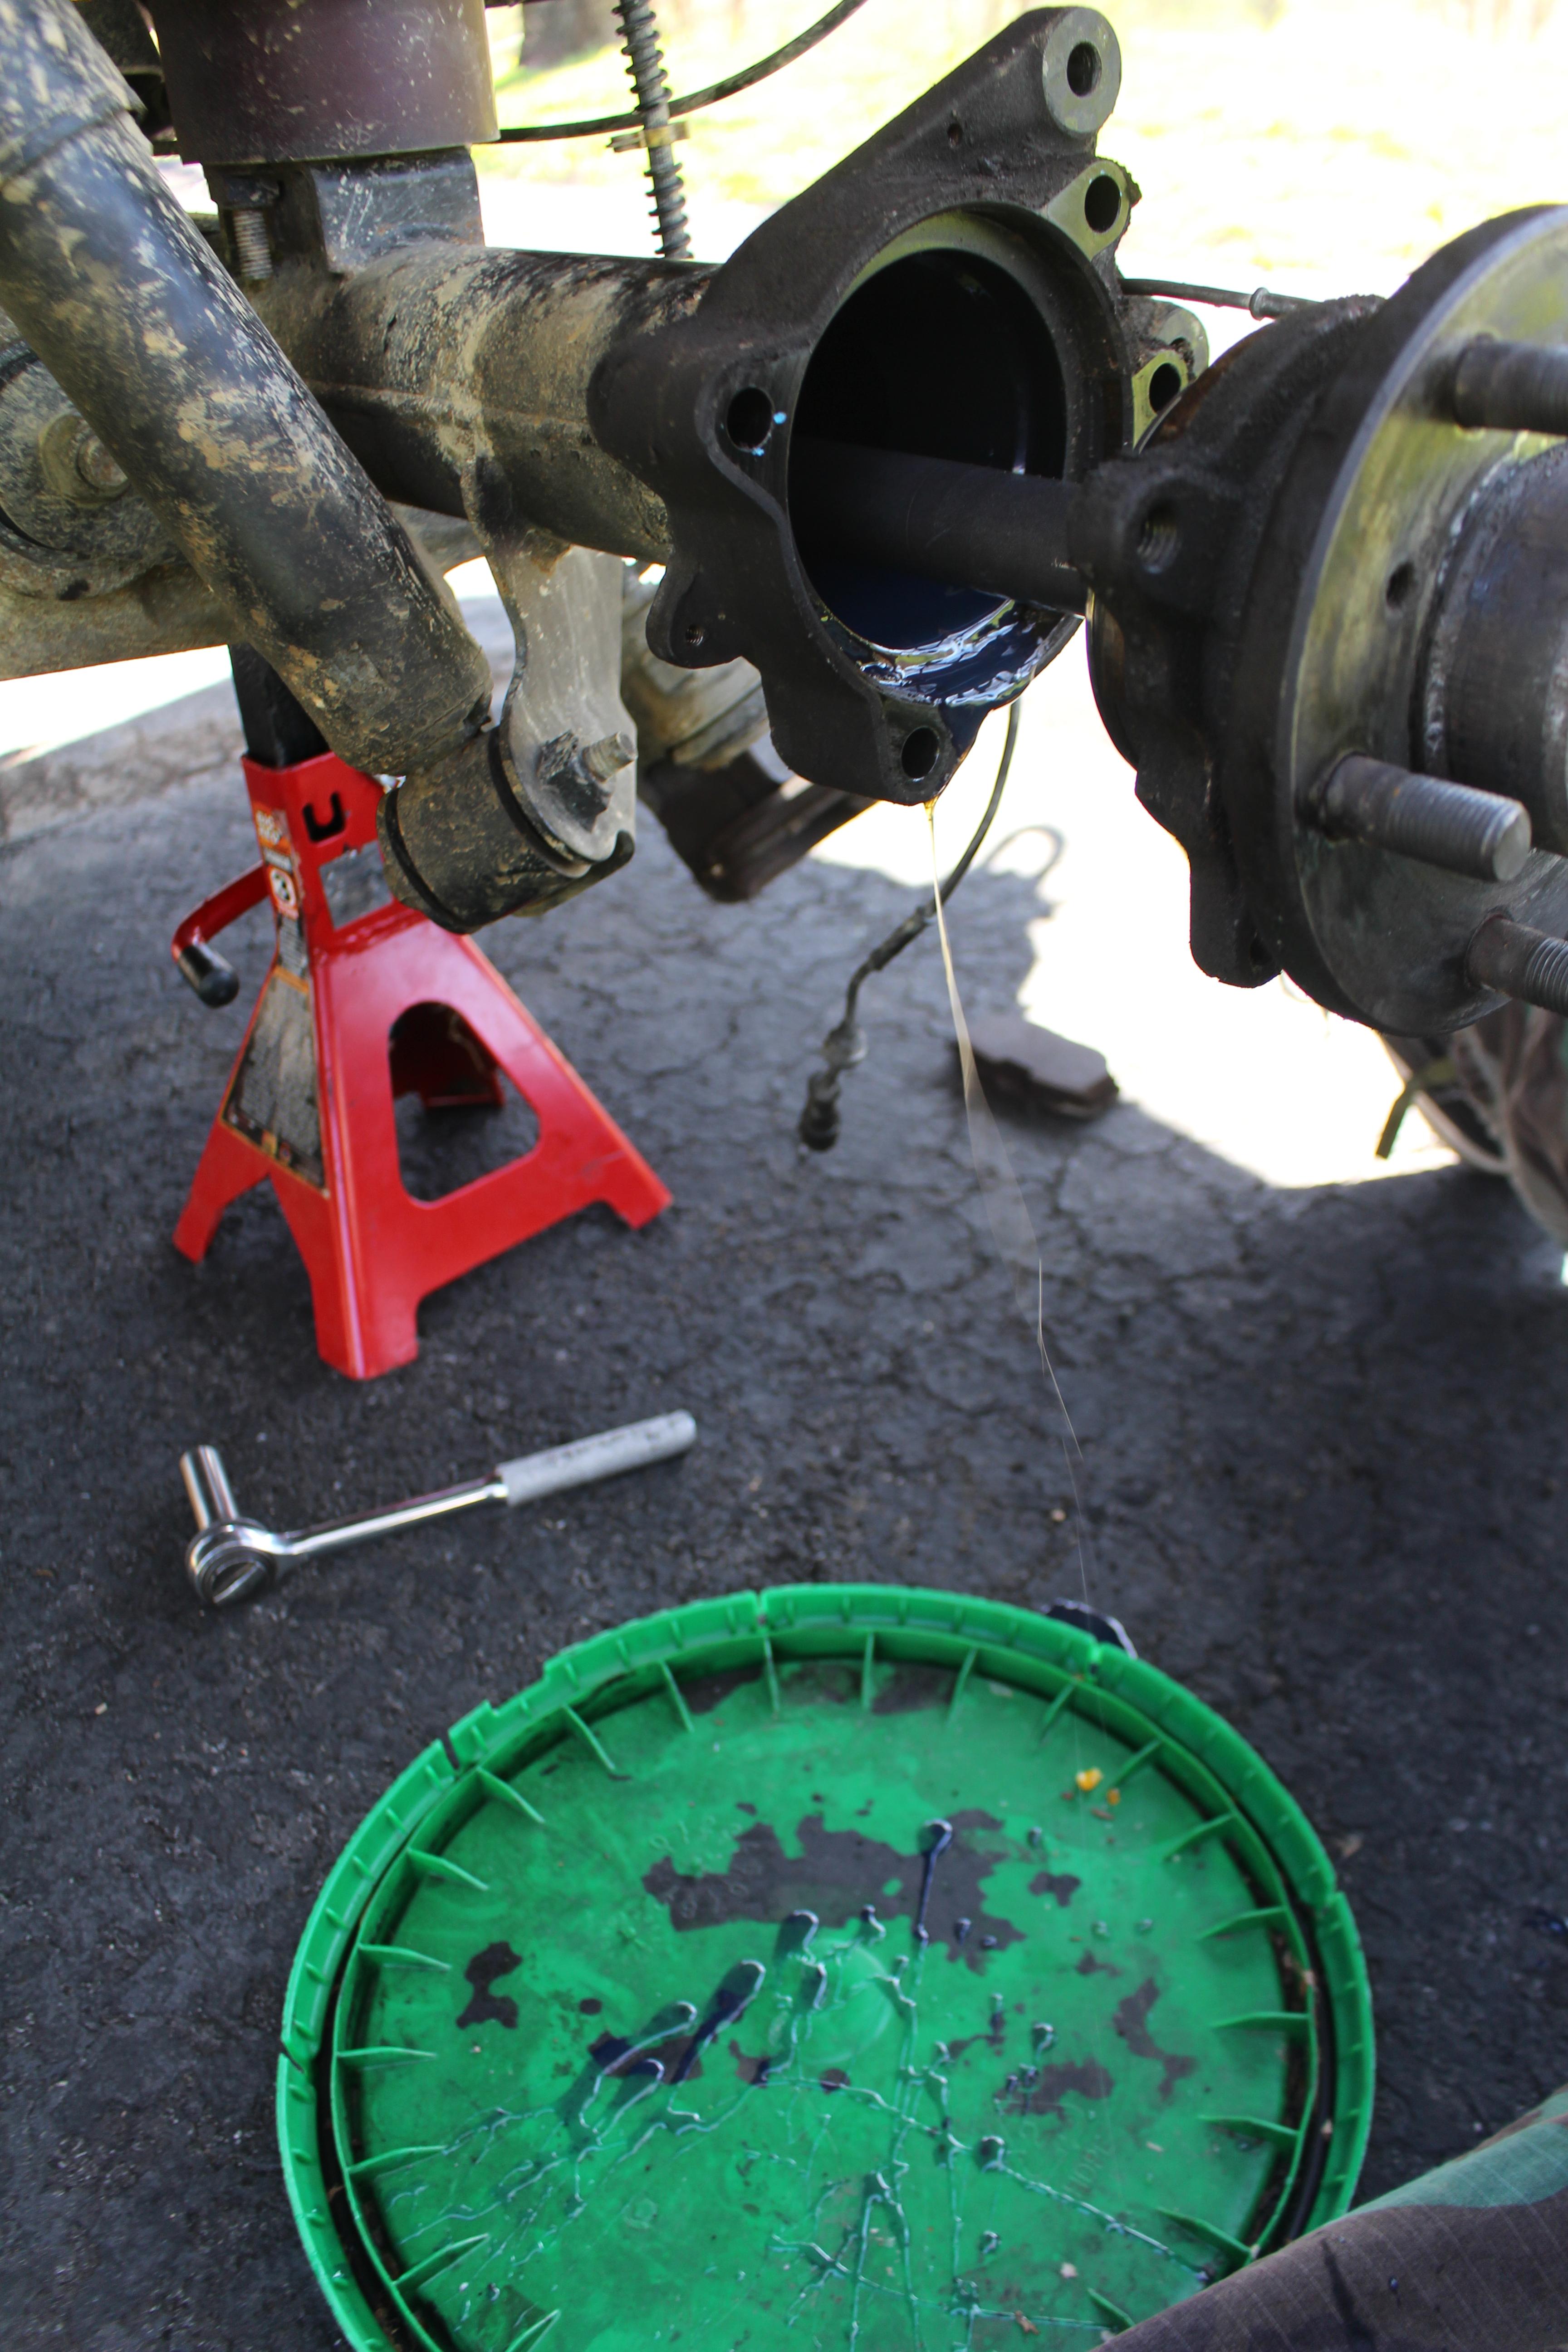
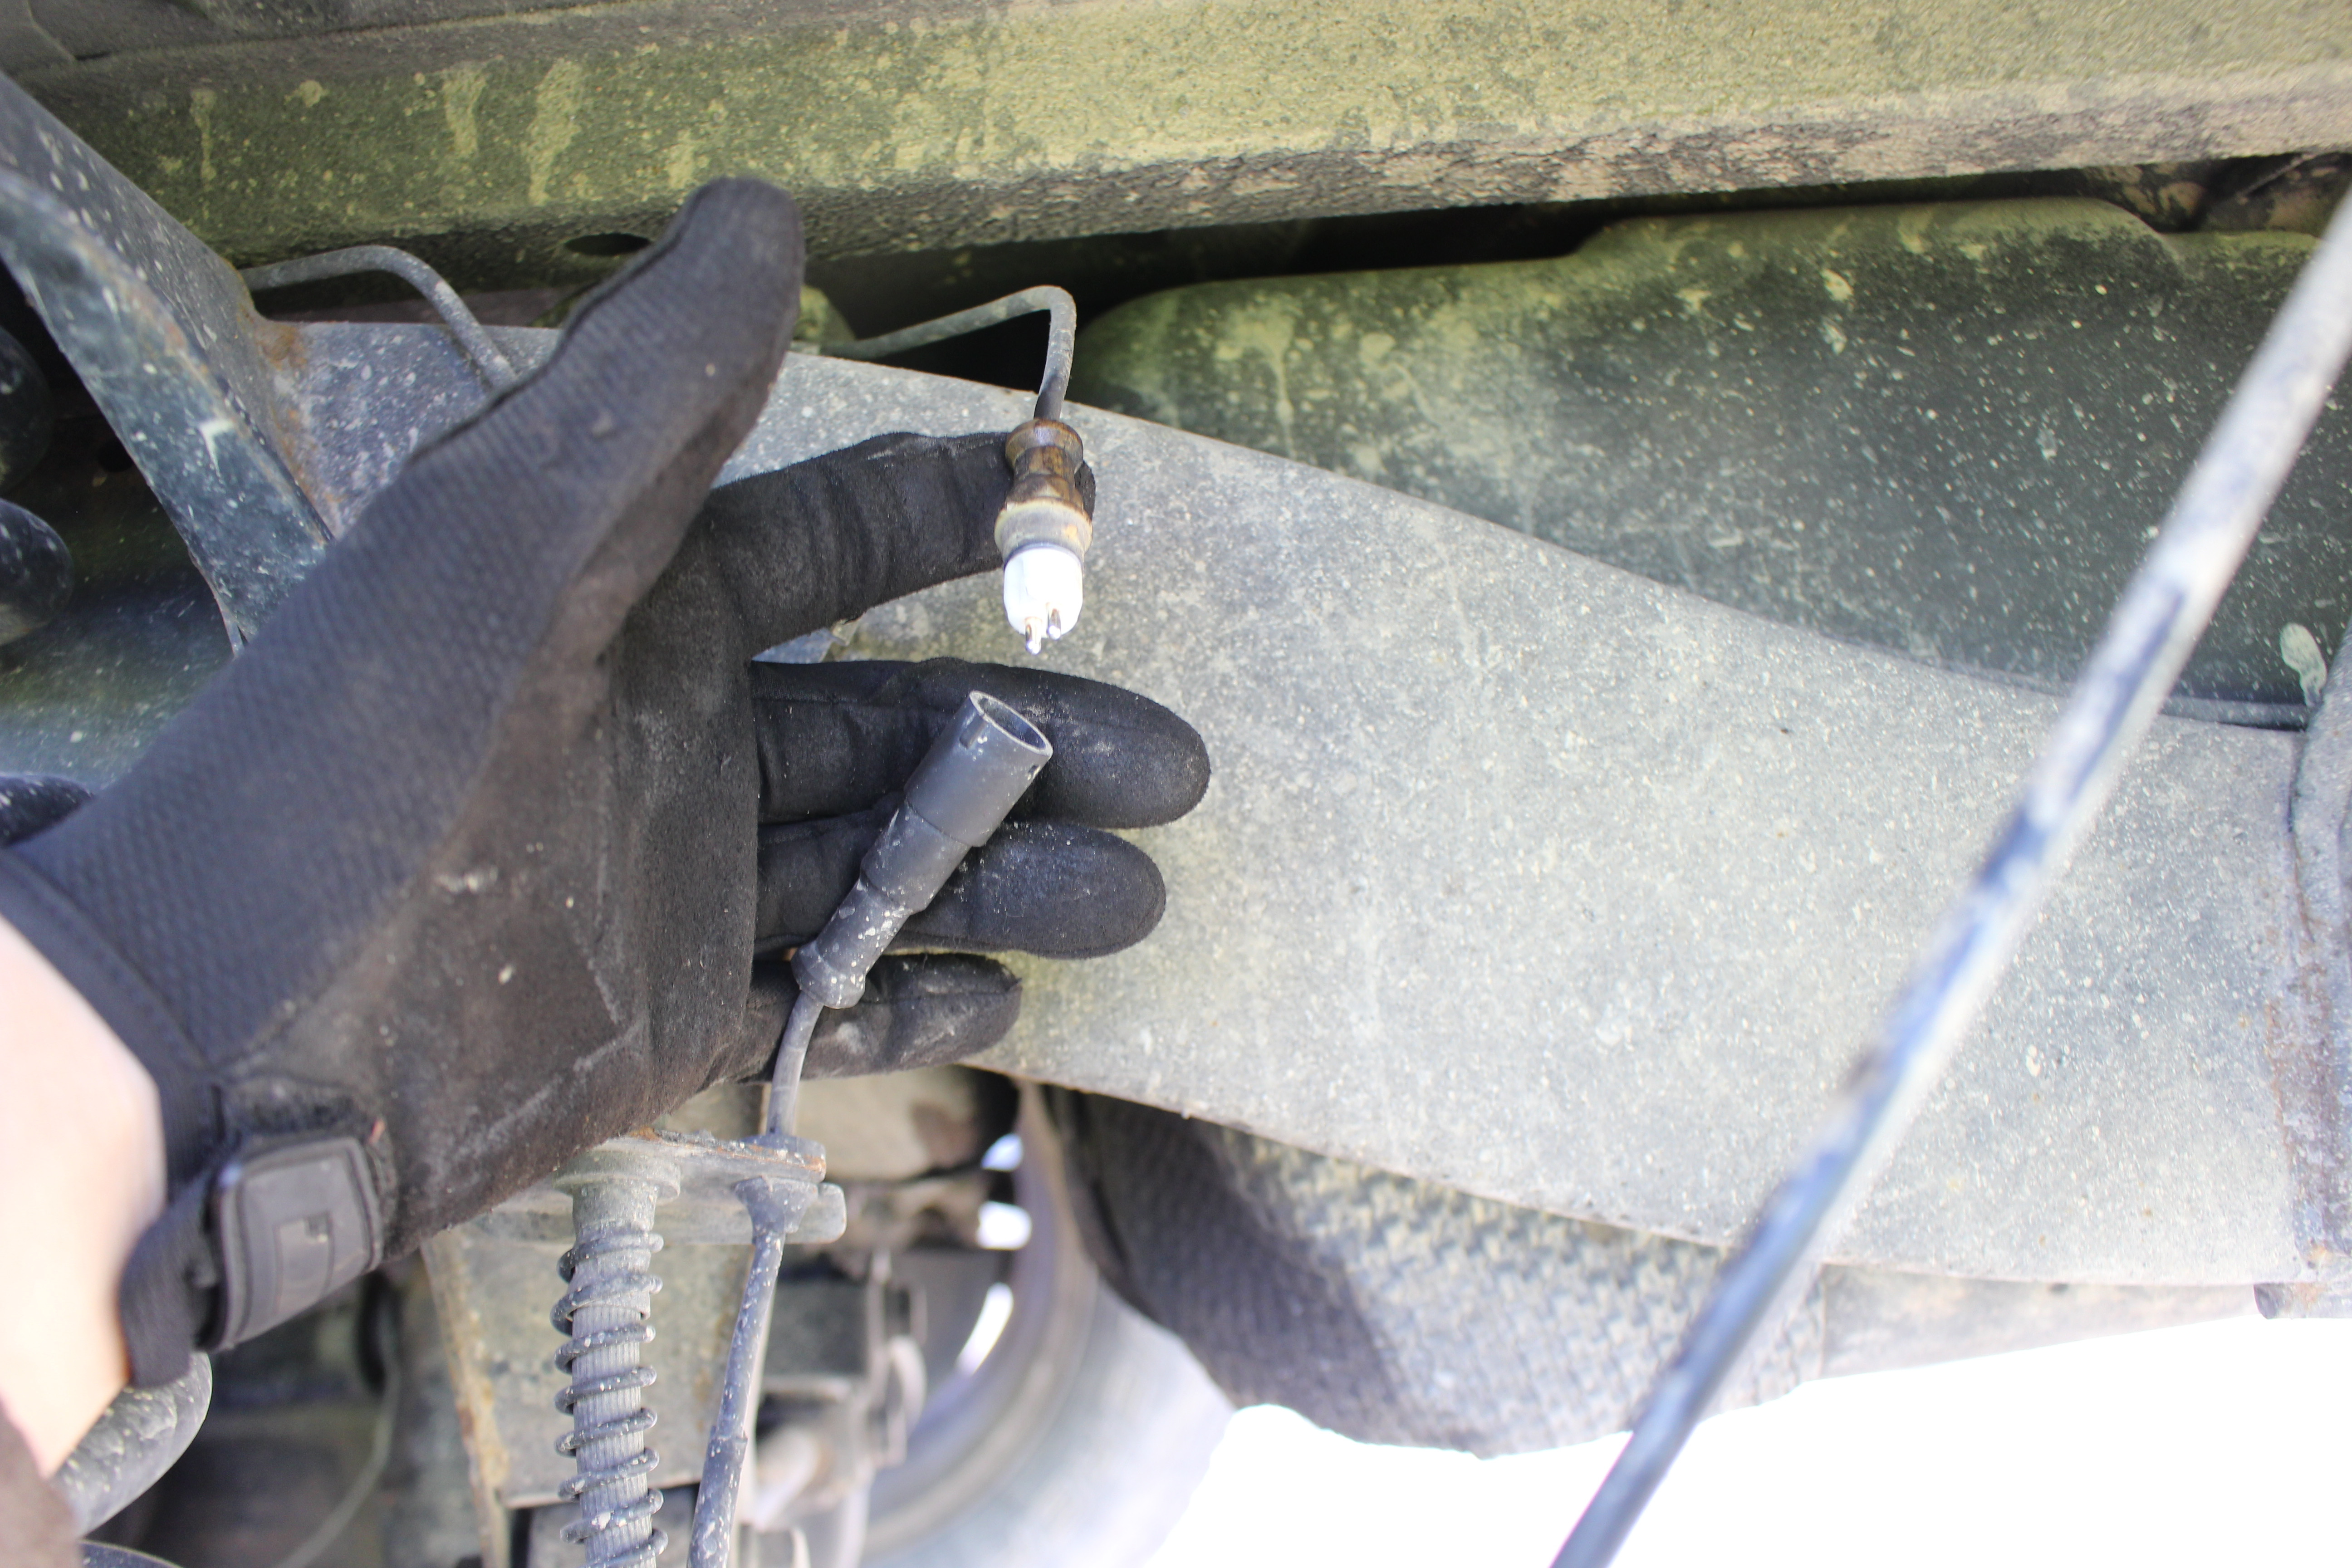
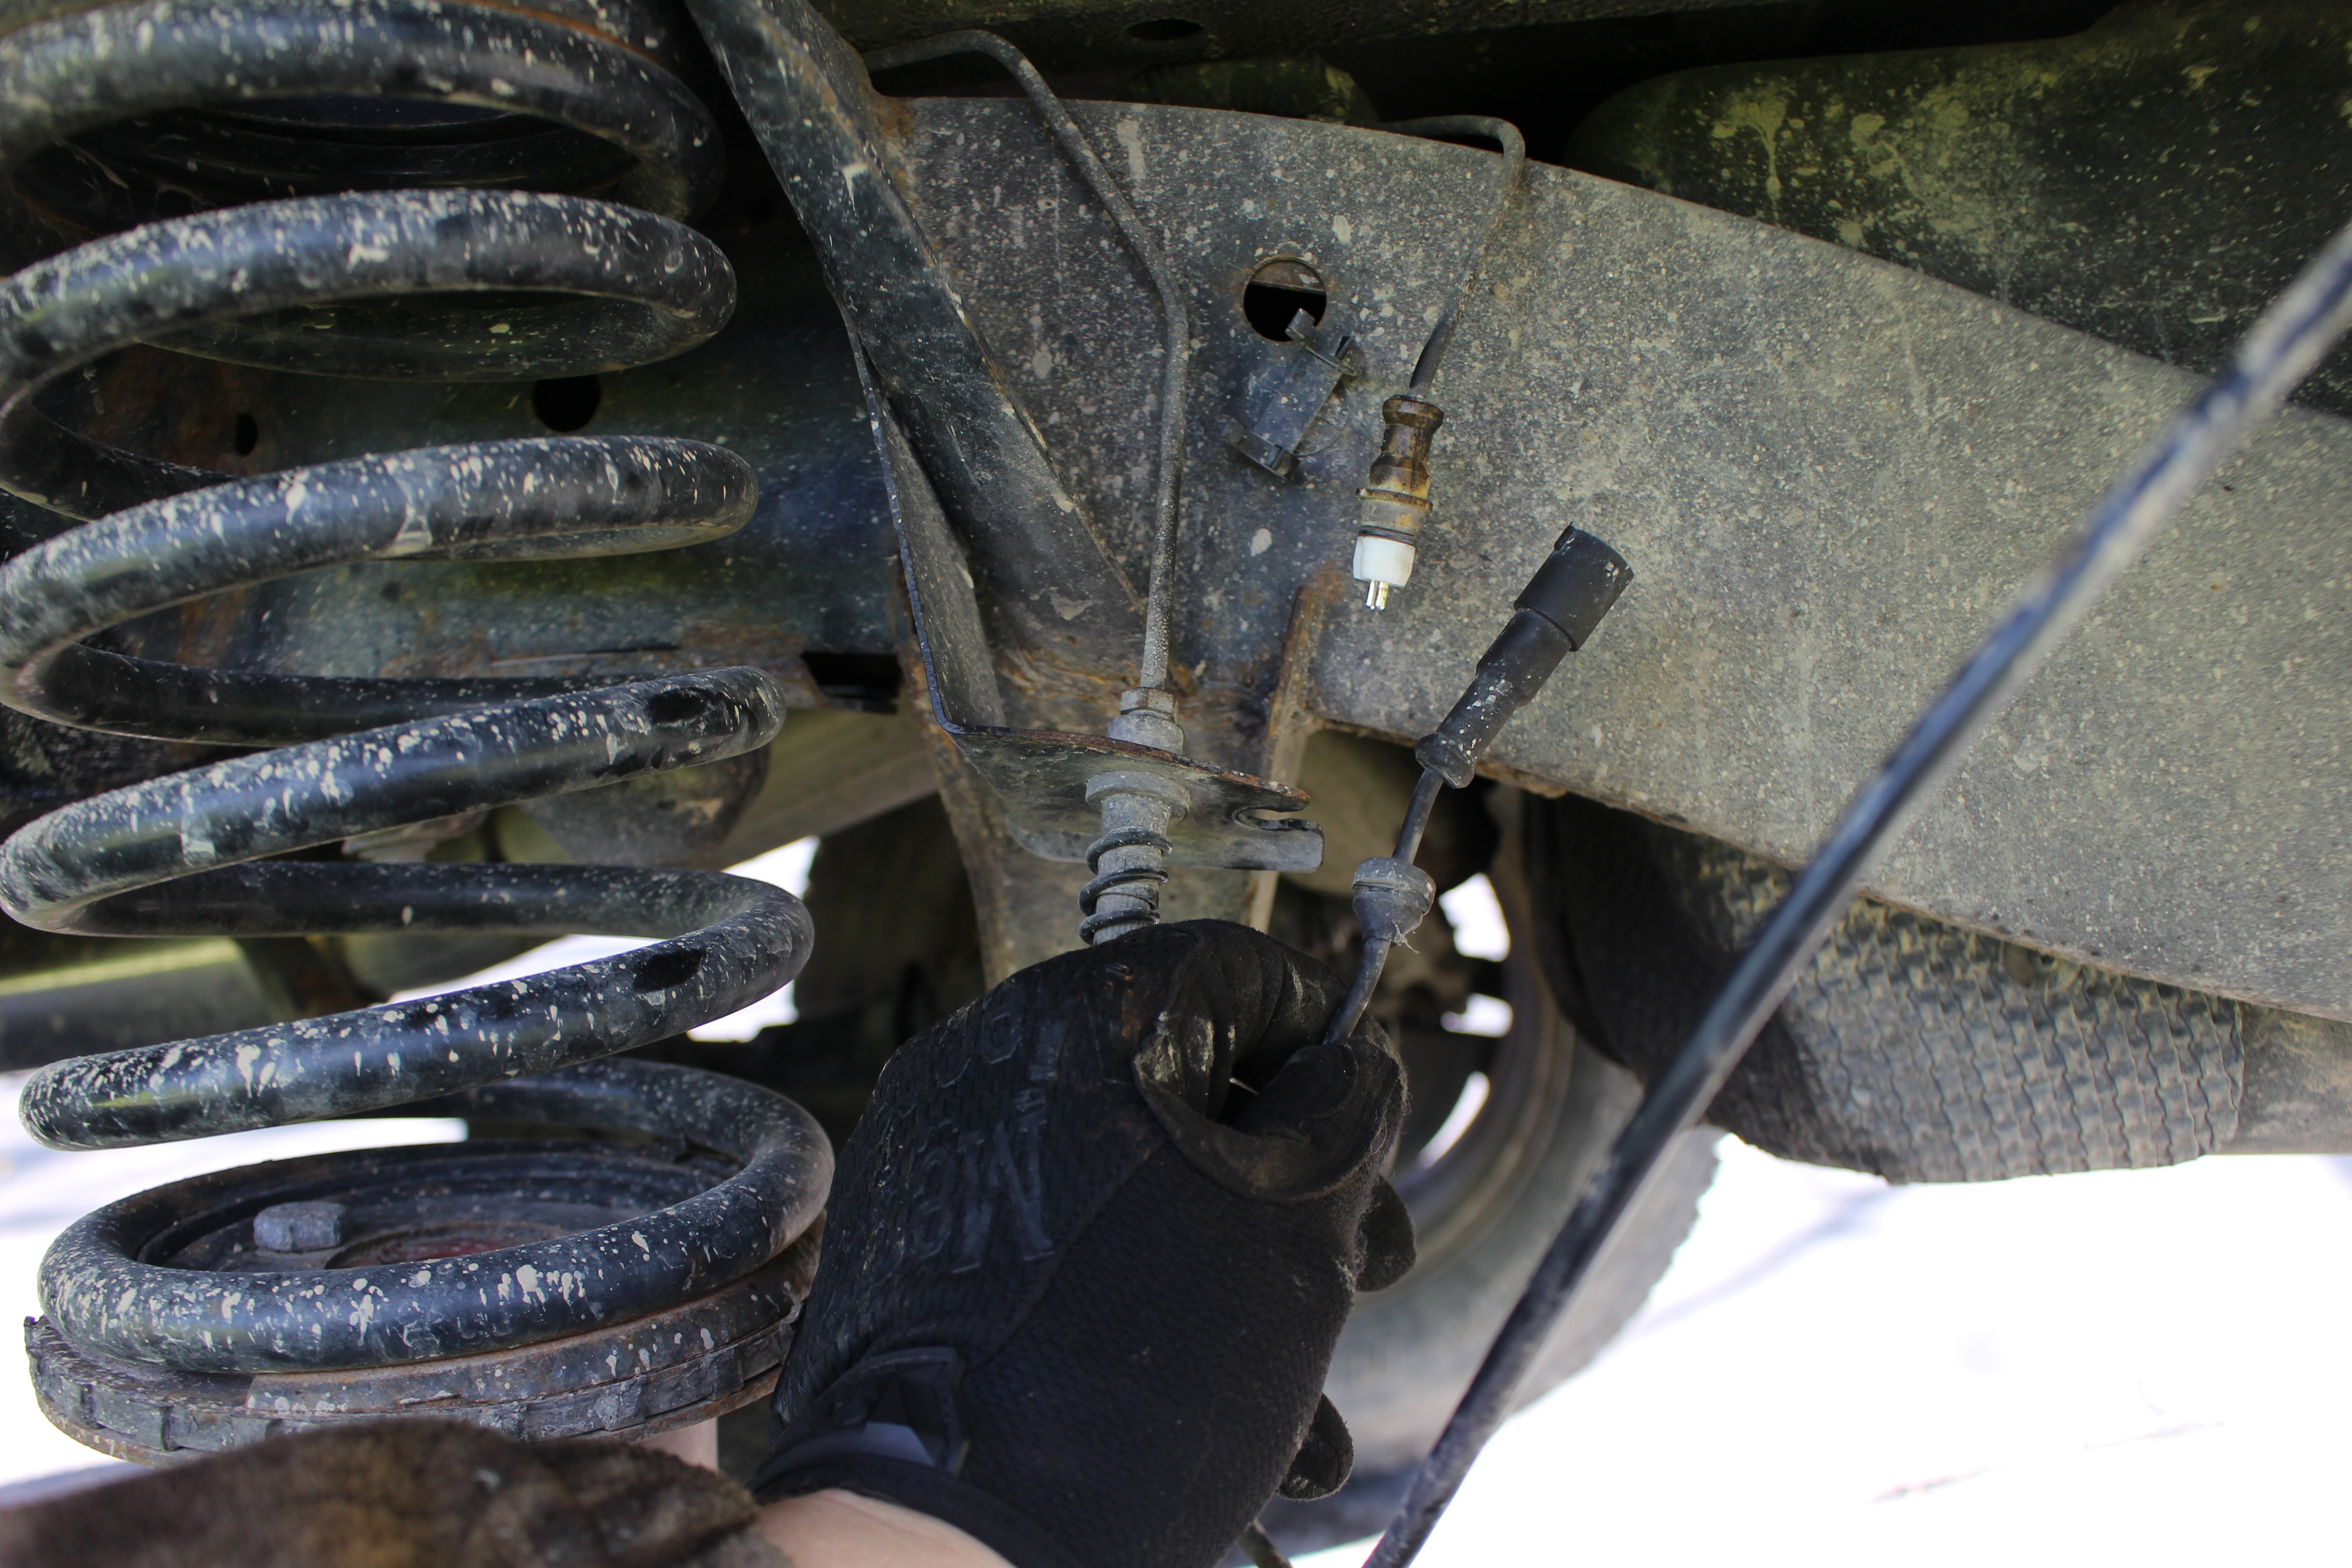
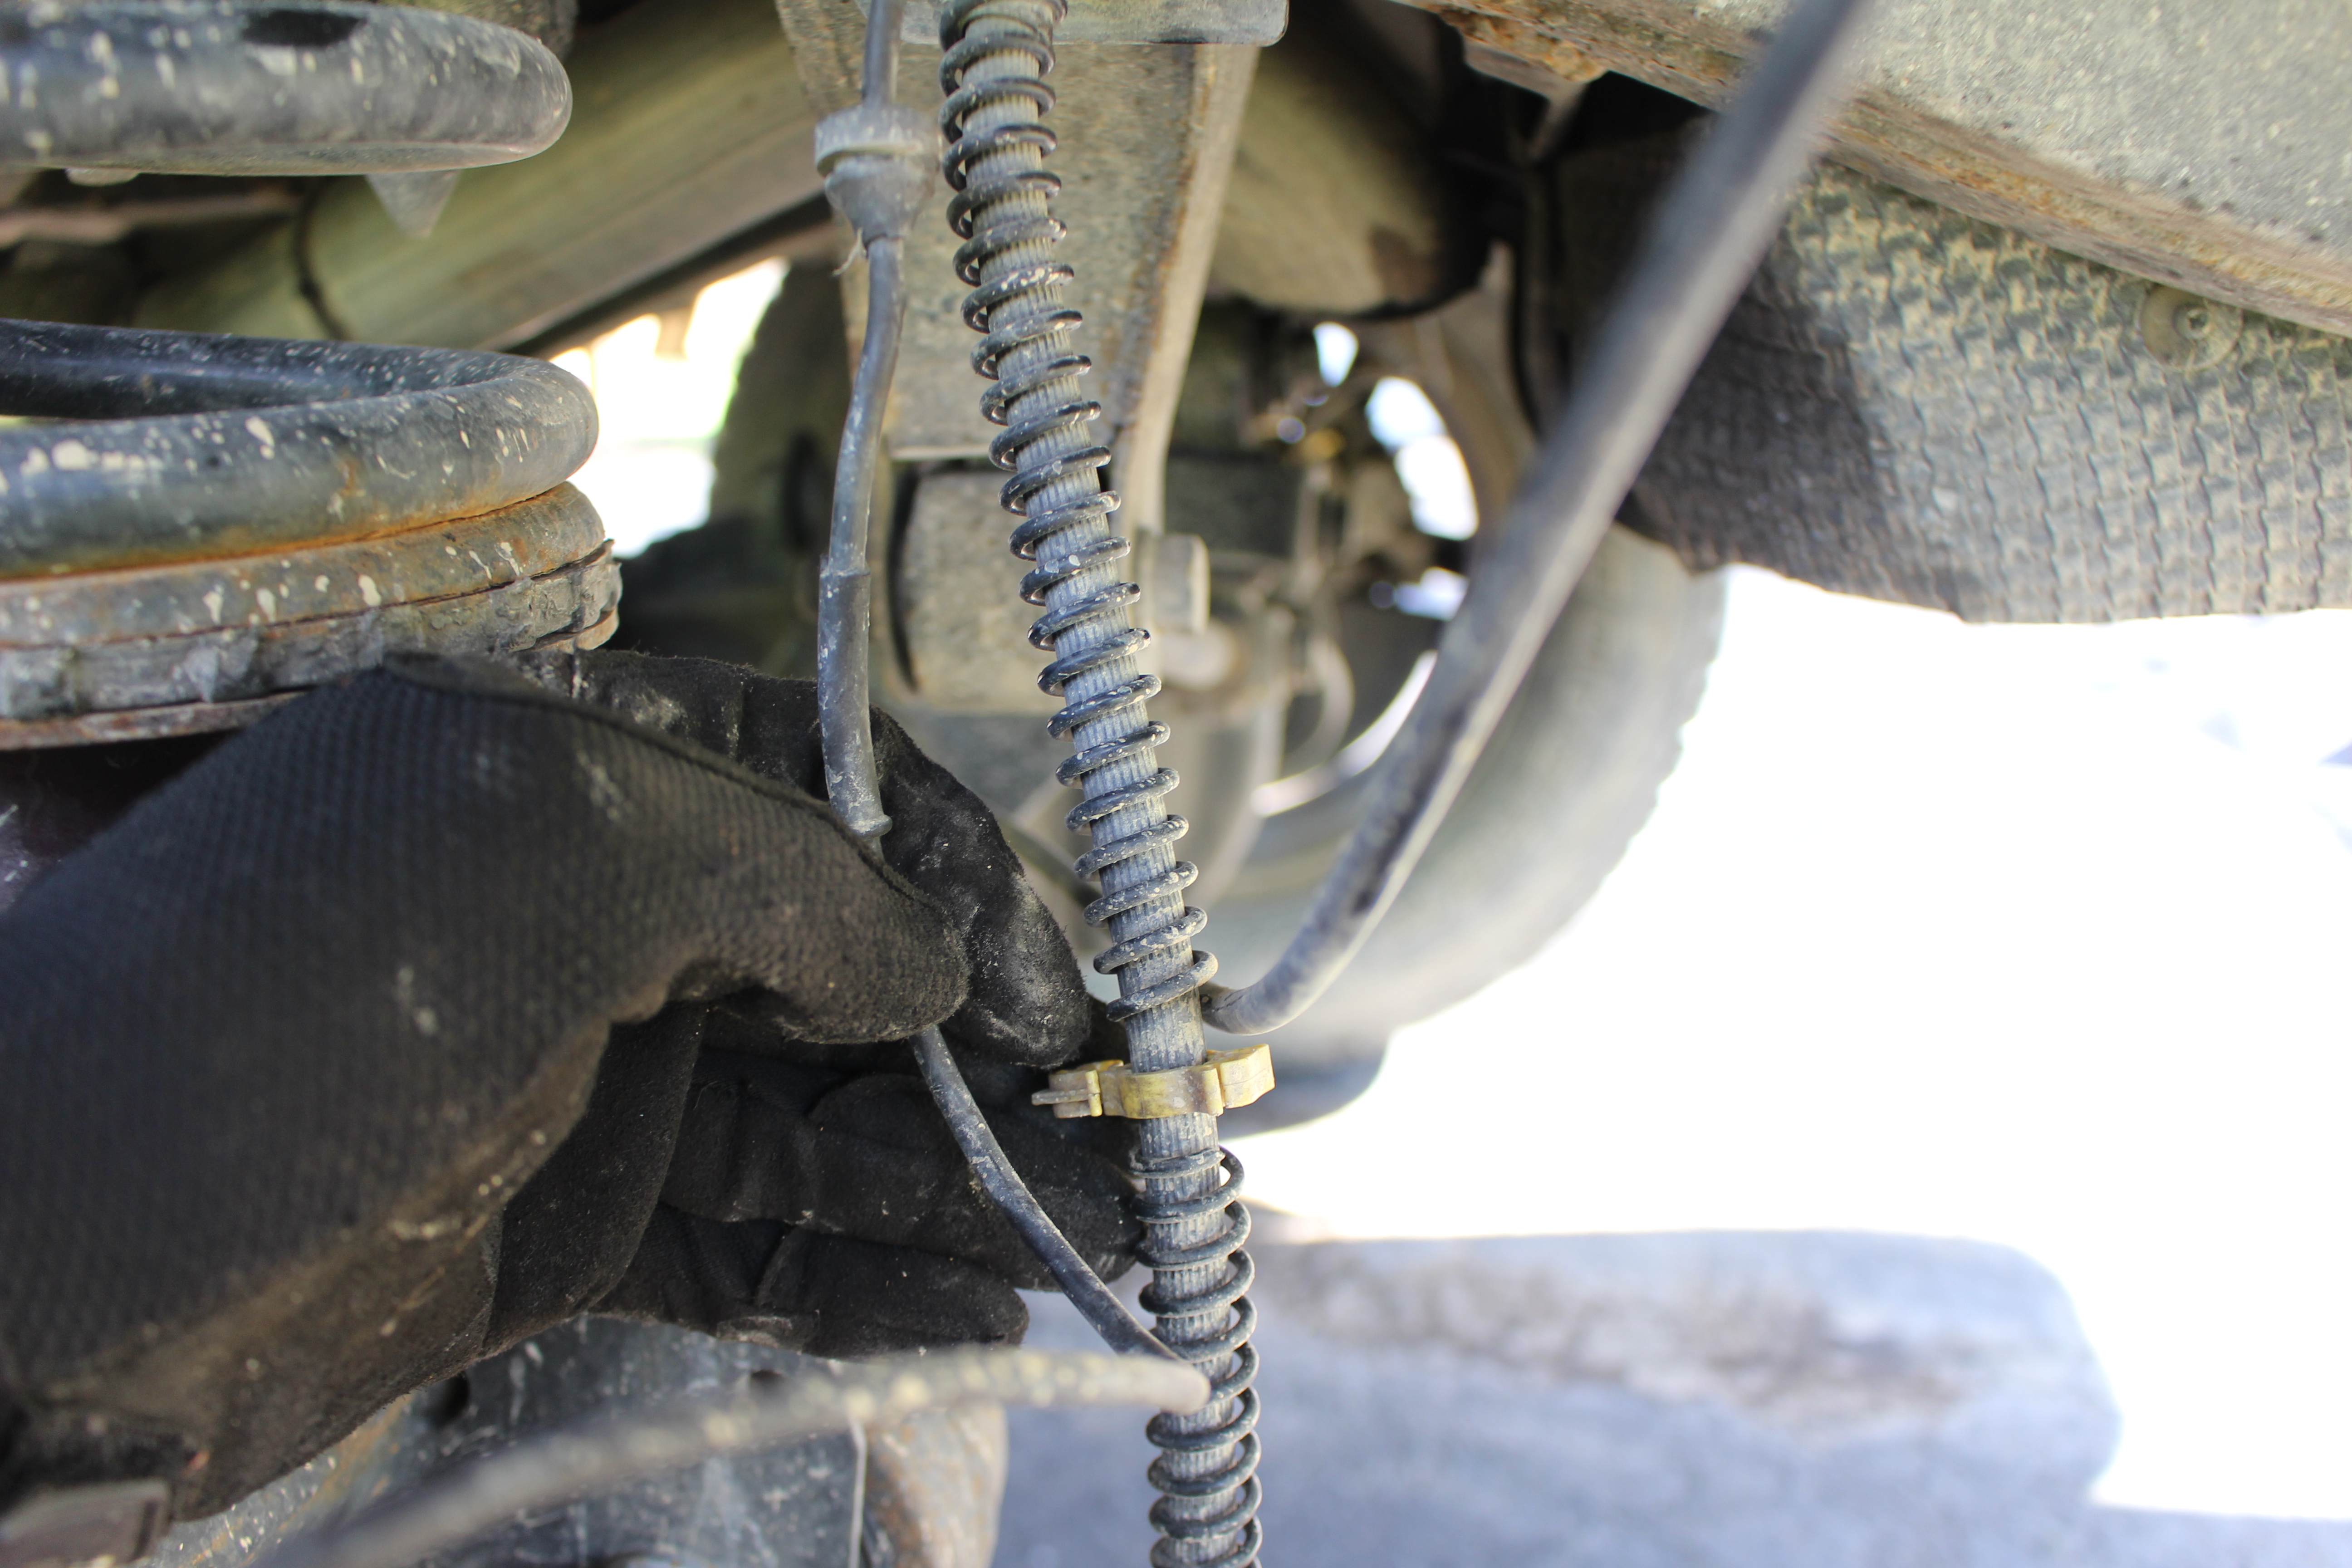
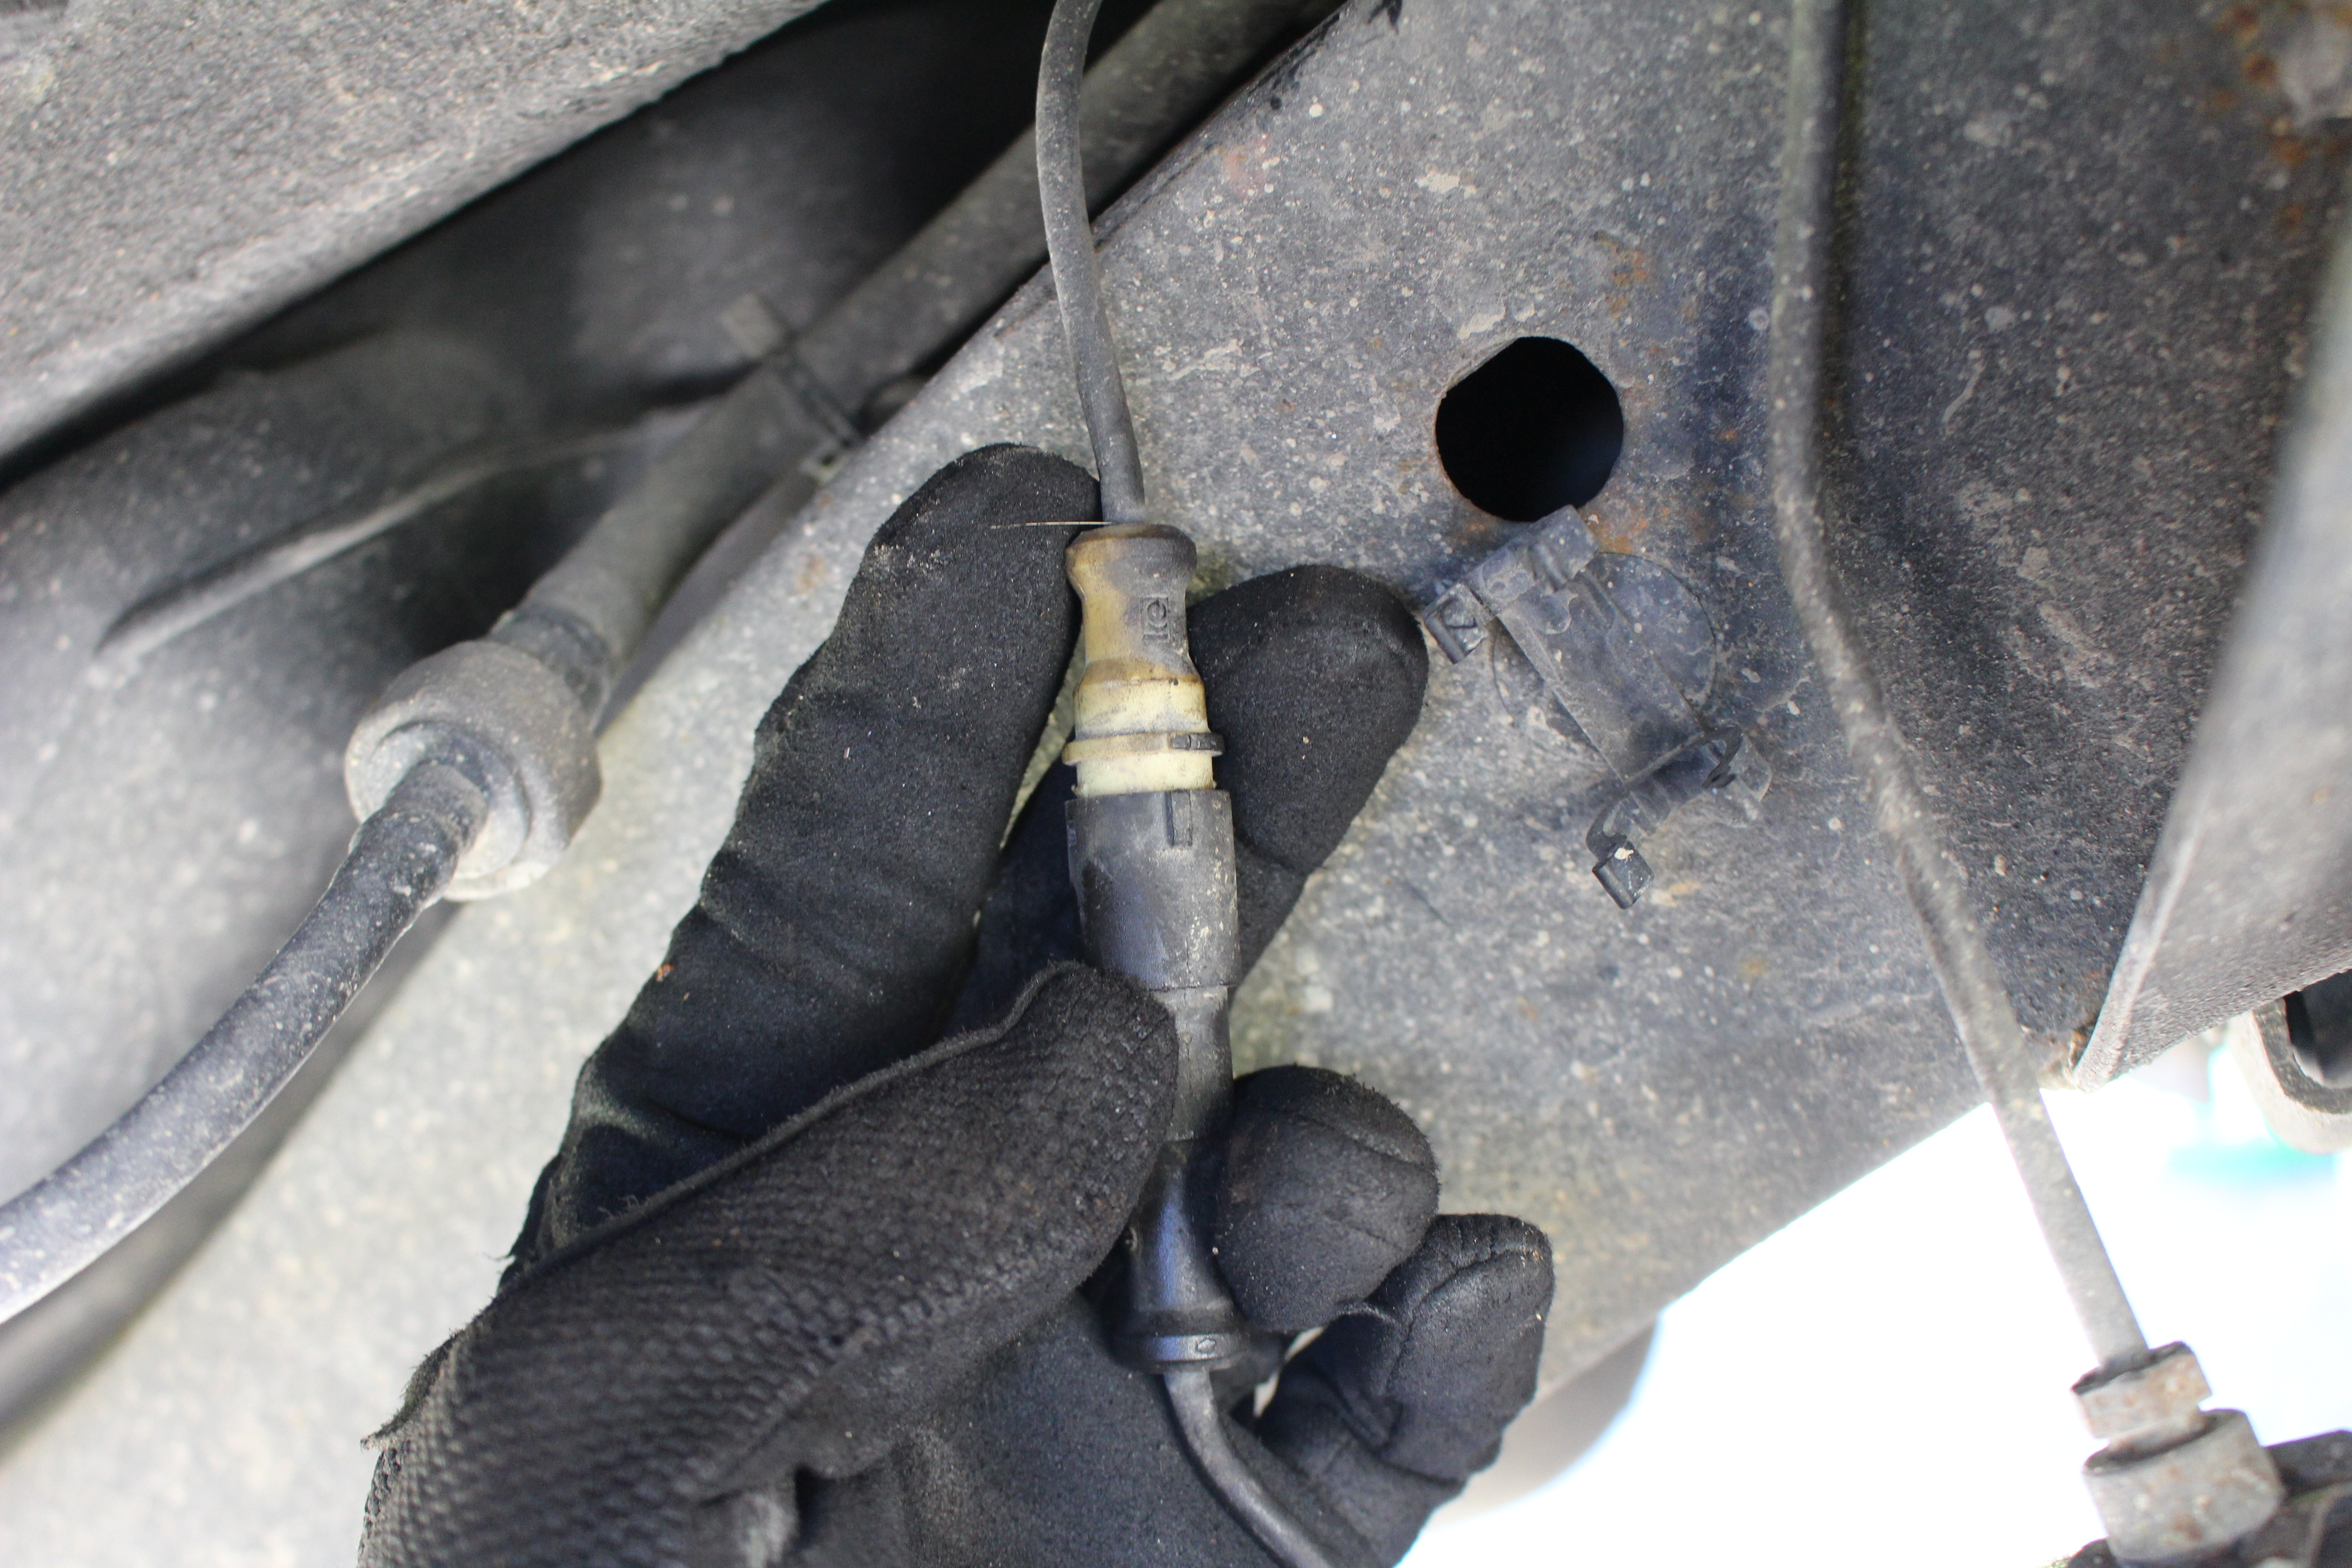
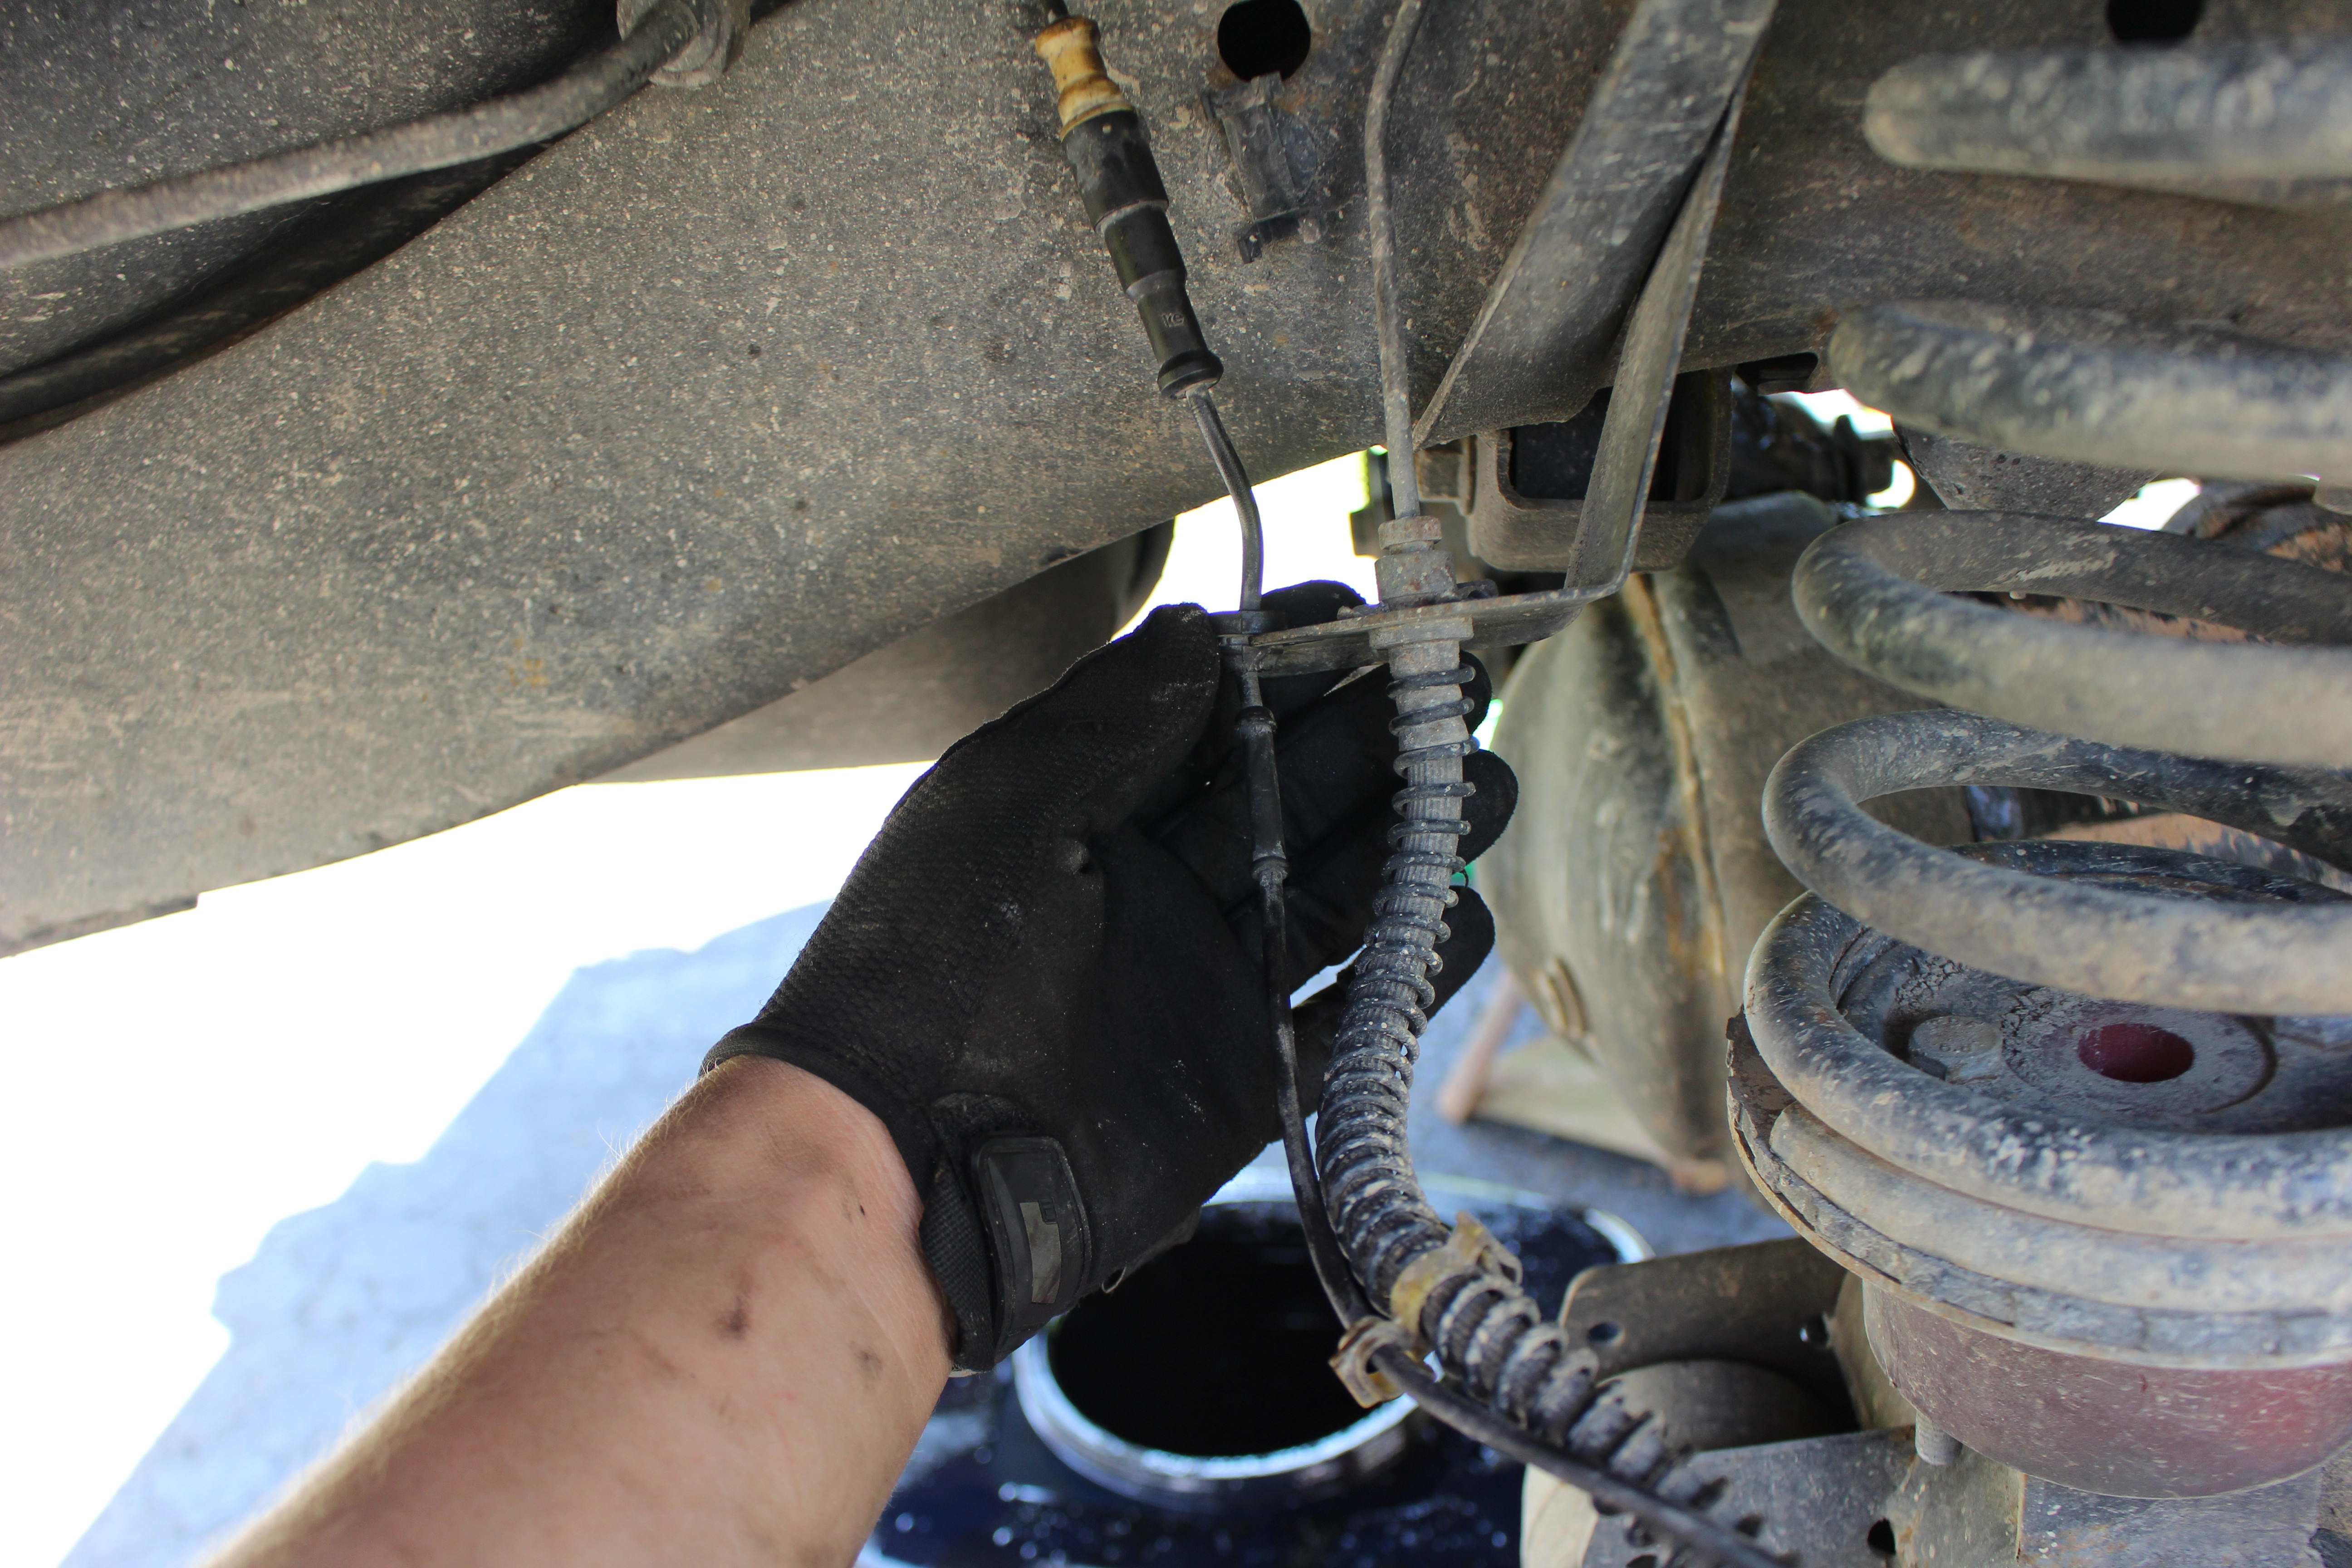
Now, before you pull your axle and hub out all the way, be sure to undo the ABS sensor from it's plug and from all of the clips holding it to the brake line.
Now slide the axle the rest of the way out, sit it to the side where it won't get (too) dirty, and it's time to move to the other side to repeat the same process.
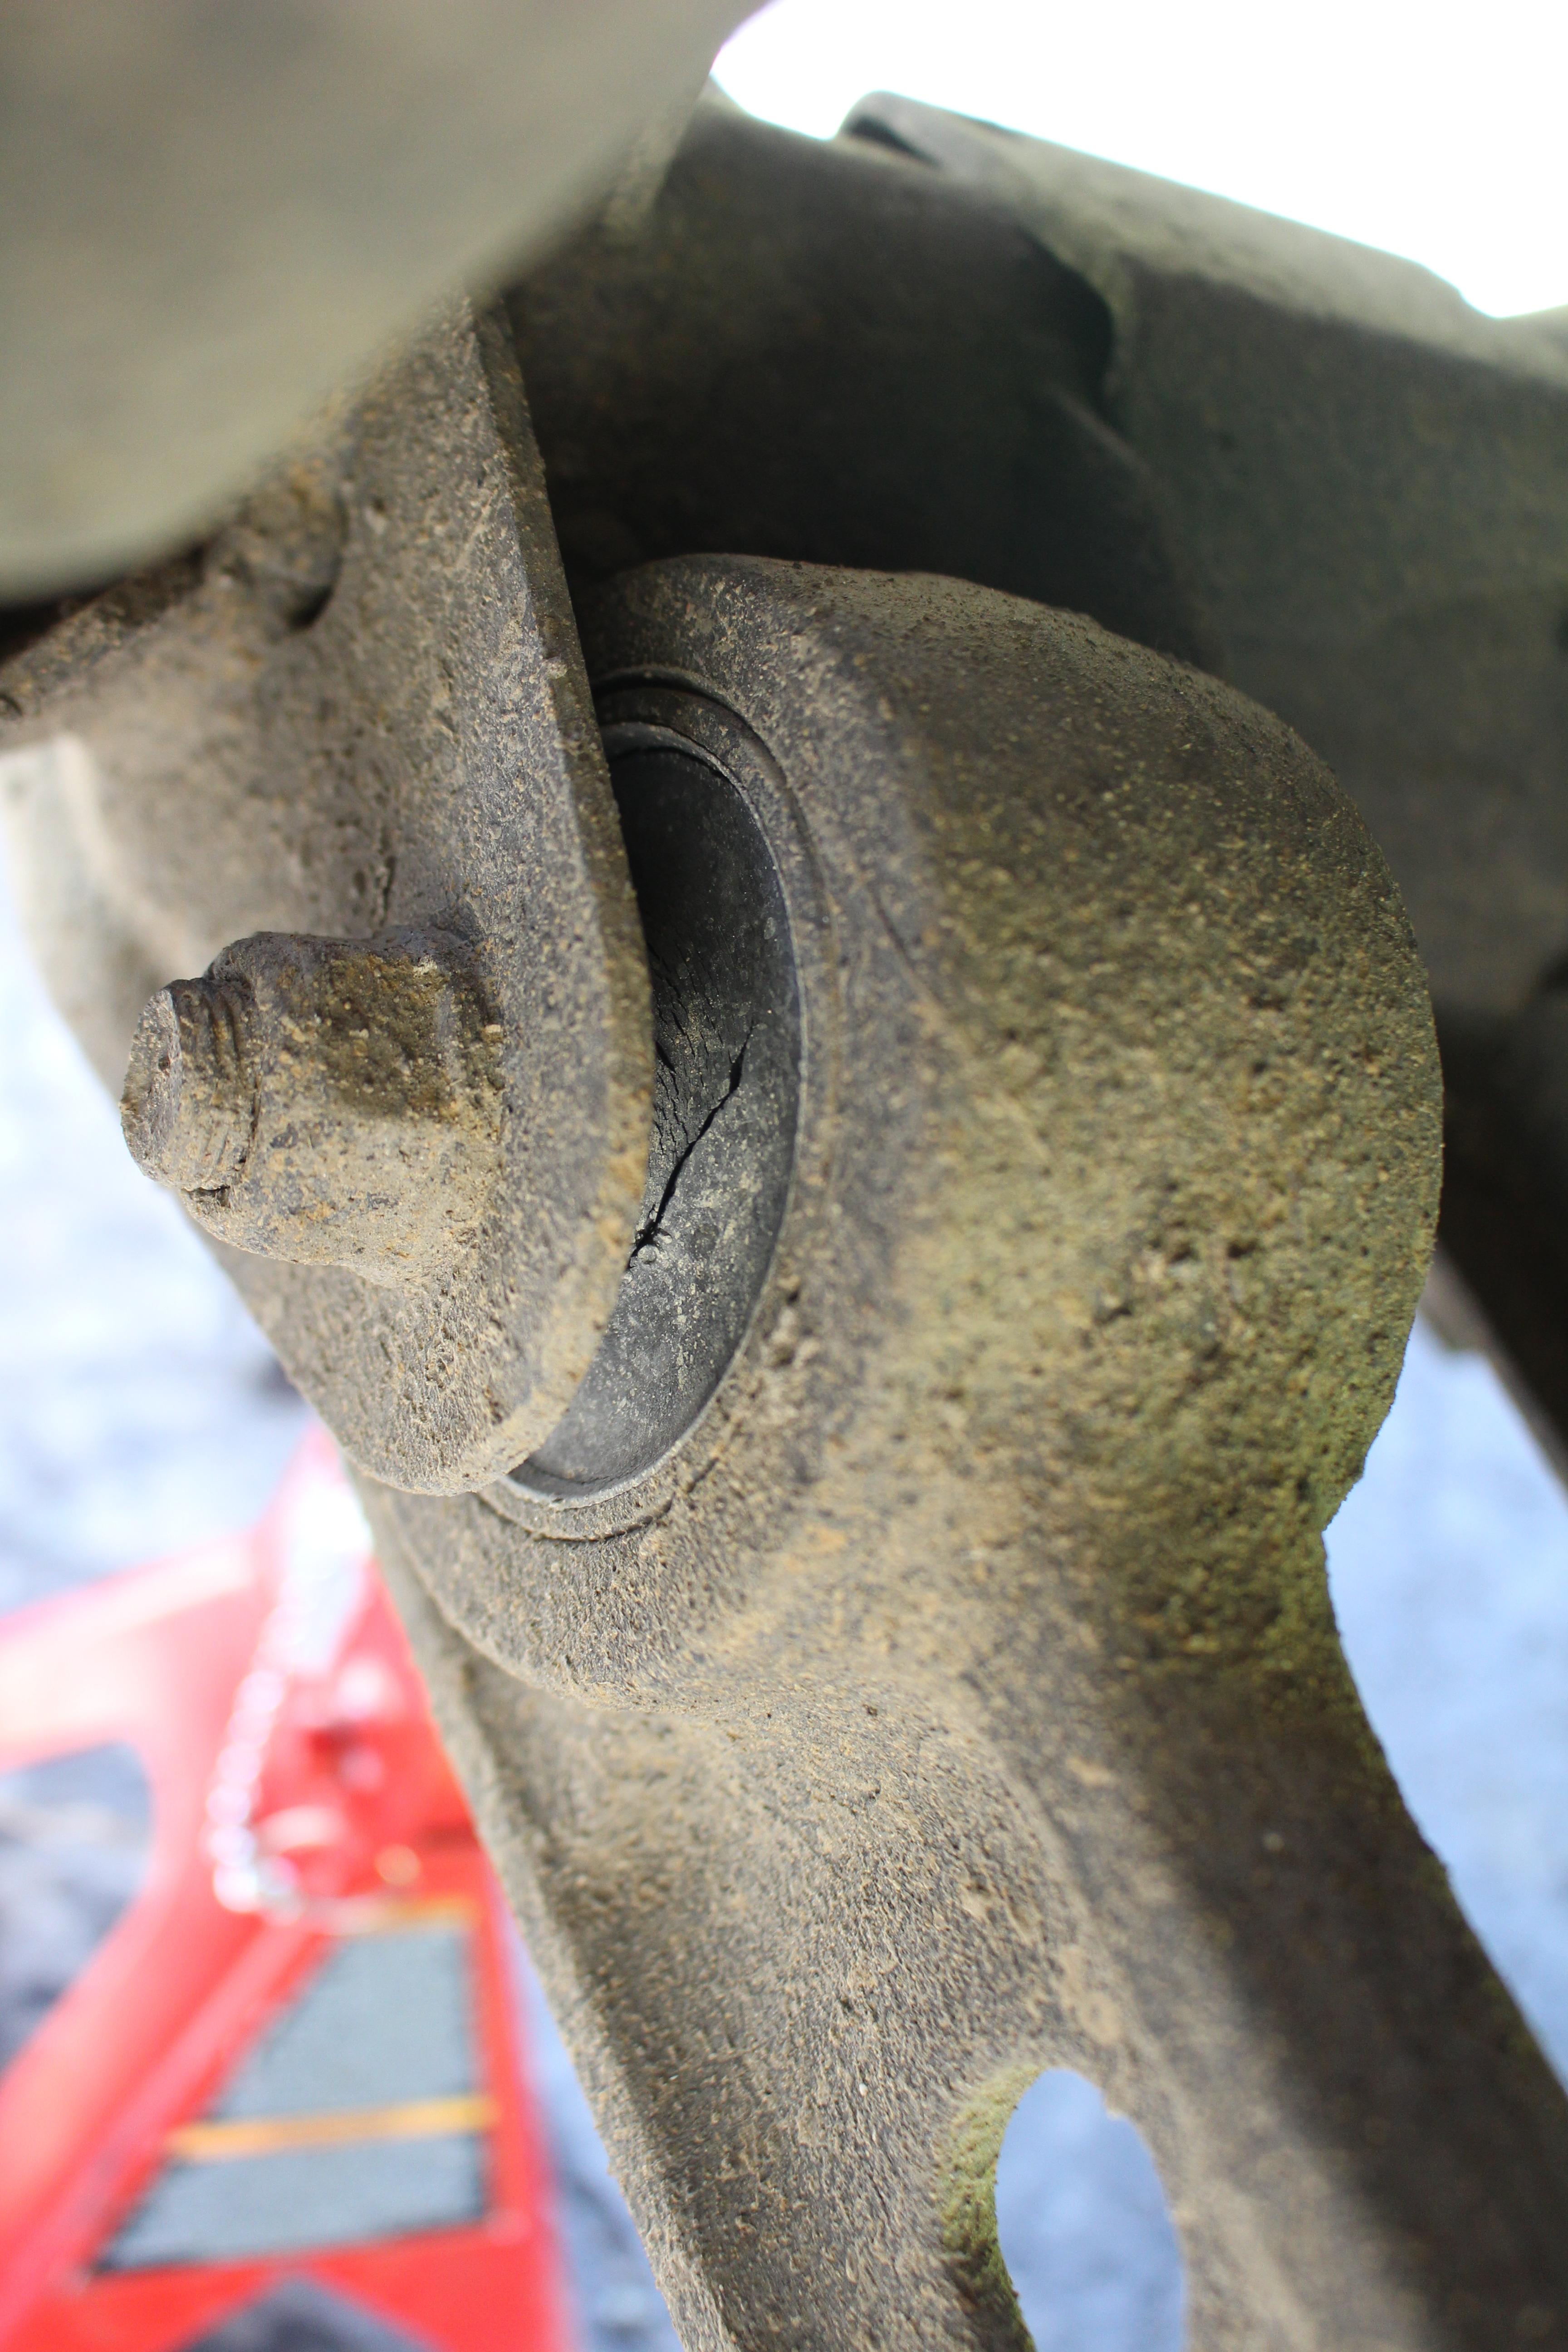
Ohh, that's bad looking. Actually, it was worse than the picture looks. We'll have to do something about that some time. (Radius arm bushing)
First, you need some supplies. Two jack stands, one jack, black RTV, an oil drain pan, and the pictured tools. Of course, you'll also need oil. The weight depends on application and driving style. I off road, have oversize tires, tow trailers, and drive hard. With that in mind I chose an 85w140 oil.
Now to start. Begin by chocking your front wheels then jacking up one side, placing the axle on a jack stand, and removing your wheel. If you don't know how to do that then you should not be doing this job yourself. You will be greeted by the sight of your hub and brakes.
Now to begin disassembly. Start by removing the three bolts holding the gravel shield on. If you like you can dispose of these. I ended up not reinstalling the gravel shields, but it's up to you. The bolts are 8mm.
Now remove your brake caliper. That a 12mm and there are two bolts. Once both are removed it should rotate off without too much resistance.
Now for the caliper bracket which is held on by two pretty stout 13mm 12 point bolts.
As I said, these are pretty stout. I ended up taking a box wrench and hitting it with a hammer to break them loose. Remember, these are inside out, so right is loose and left is tight instead of righty tighty lefty loosy.
Your caliper should fall right off once the second bolt is out. I recommend taking all four bolts that came out of it and lightly threading them in so you don't loose them.
If you have the rotor retainer screw still installed, remove it and go ahead and toss it with the gravel shields. They're useless and always got in my way. I have never reinstalled one.
Now, if you're like me, your rotors are on there pretty d*mn tight but you don't want to scar it up with a hammer. Here is your solution. Take a box wrench and hammer. Use the box wrench as a lever and just work your way around the rotor slowly working it off as shown.
The happy medium between speed and ease seems to be using three separate lever points. You can probably get 2-3 solid hits on each before you move on to the next.
Now for the hub bolts; there are four and they are 15 mm. Again, take a hammer and a closed box wrench and just break them loose.
Once they're broken loose they will still be pretty stout, so you won't be able to thread them out by hand. Just use your ratchet and socket combo.
Once all four of those are out, you need to remove your hub and axle. DO NOT REMOVE THE AXLE NUT unless you also have to replace a hub. If that is the case, you should have broken the nut loose before you removed everything. Take your hammer and just work your way around the back of the hub.
Slowly but surely it will start to work its way out. Be sure to have something laying under it to catch the majority of the oil that comes out.
Now, before you pull your axle and hub out all the way, be sure to undo the ABS sensor from it's plug and from all of the clips holding it to the brake line.
Now slide the axle the rest of the way out, sit it to the side where it won't get (too) dirty, and it's time to move to the other side to repeat the same process.
Ohh, that's bad looking. Actually, it was worse than the picture looks. We'll have to do something about that some time. (Radius arm bushing)
Thread Starter
|
Camel Trophy
Joined: Aug 2014
Posts: 4,743
Likes: 985
From: Southwestern Virginia
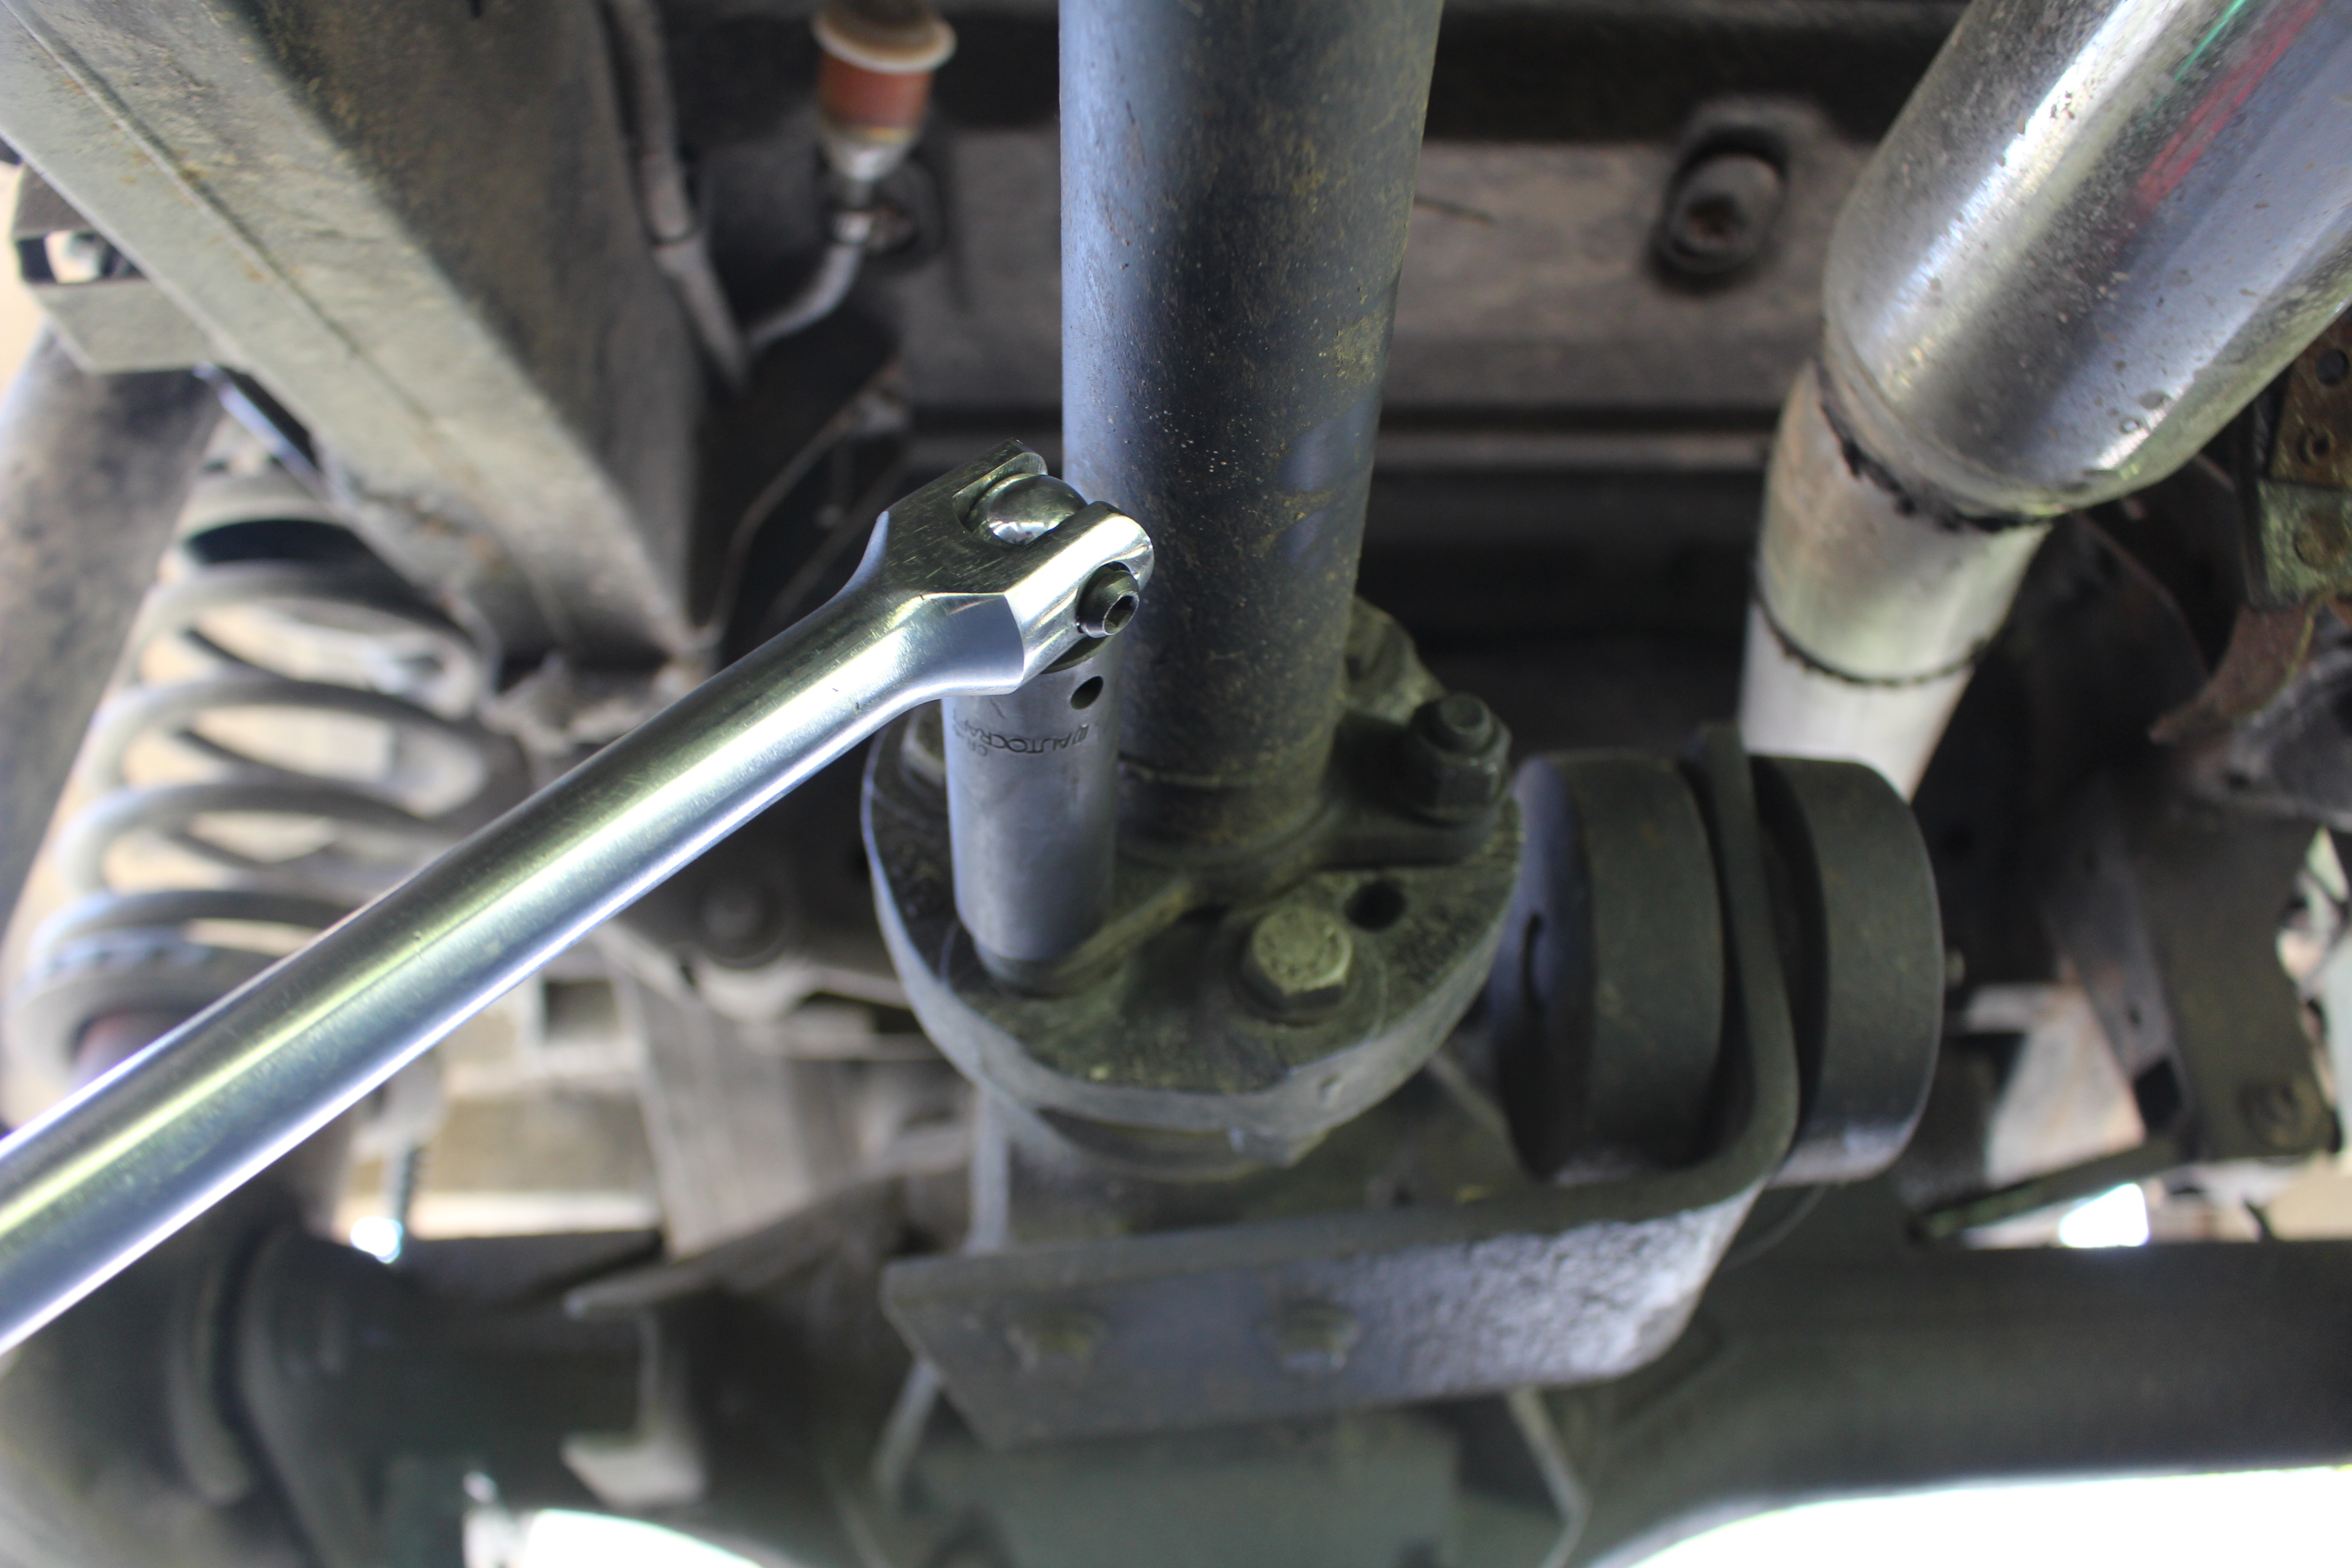
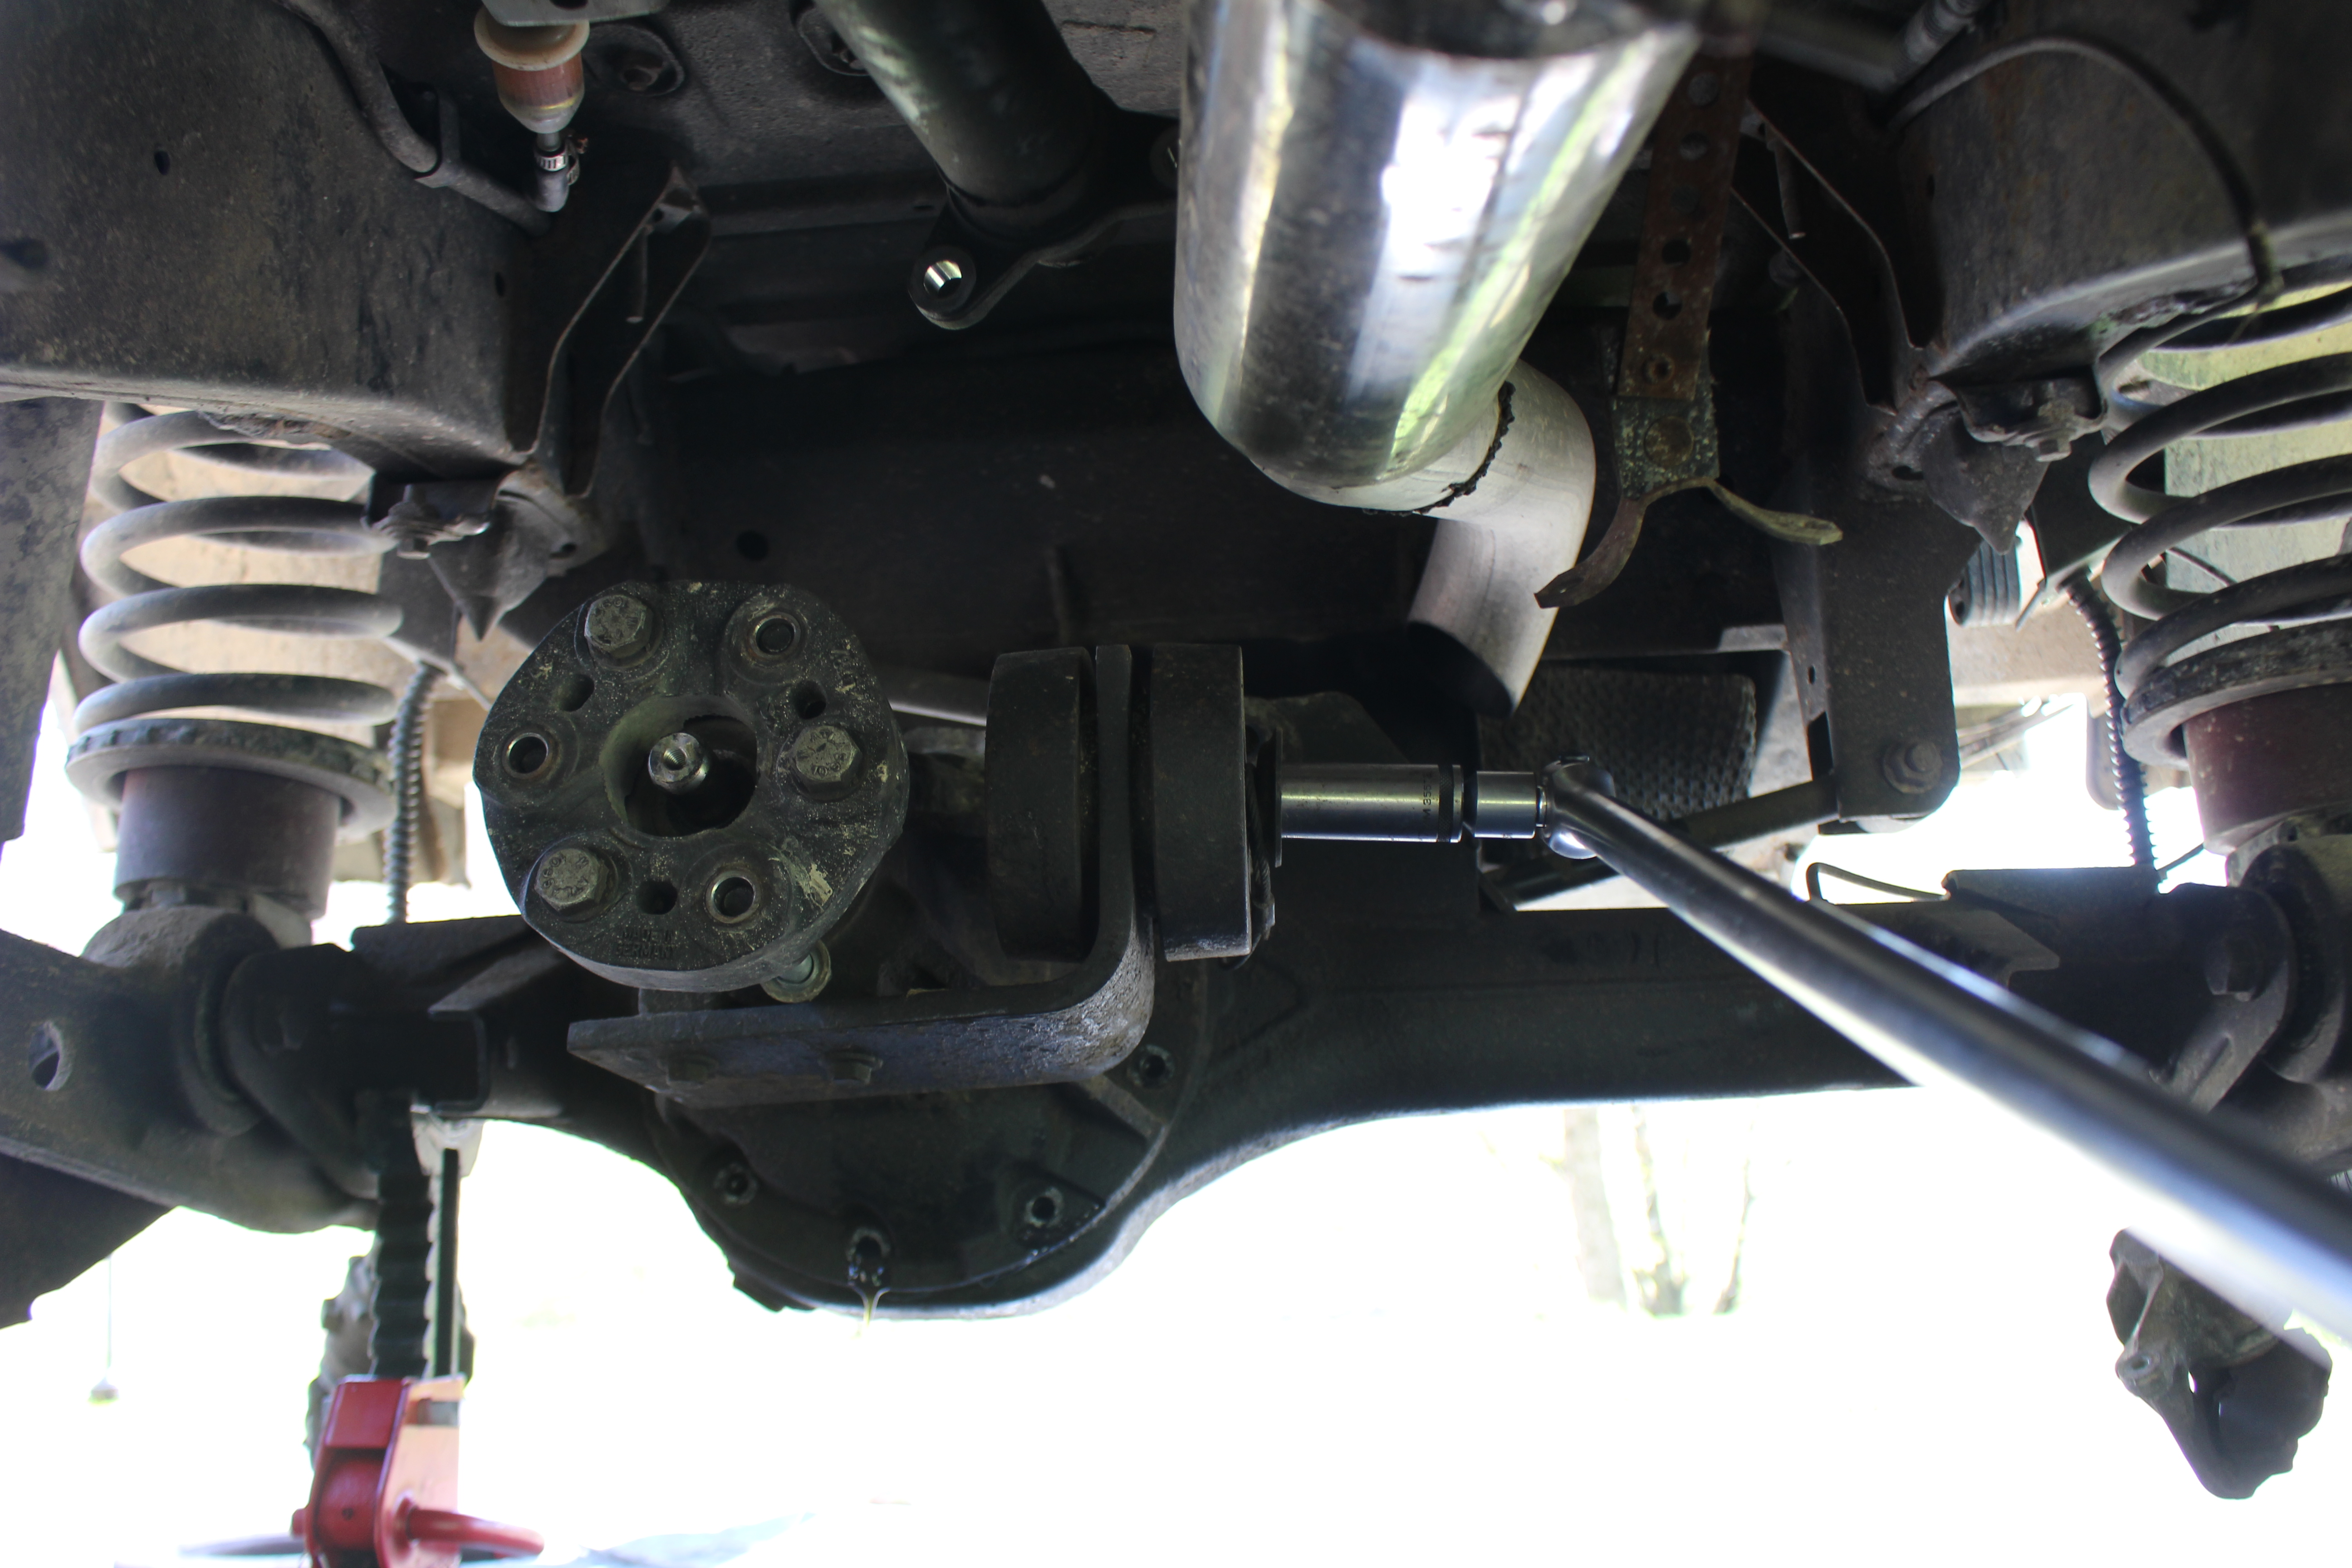
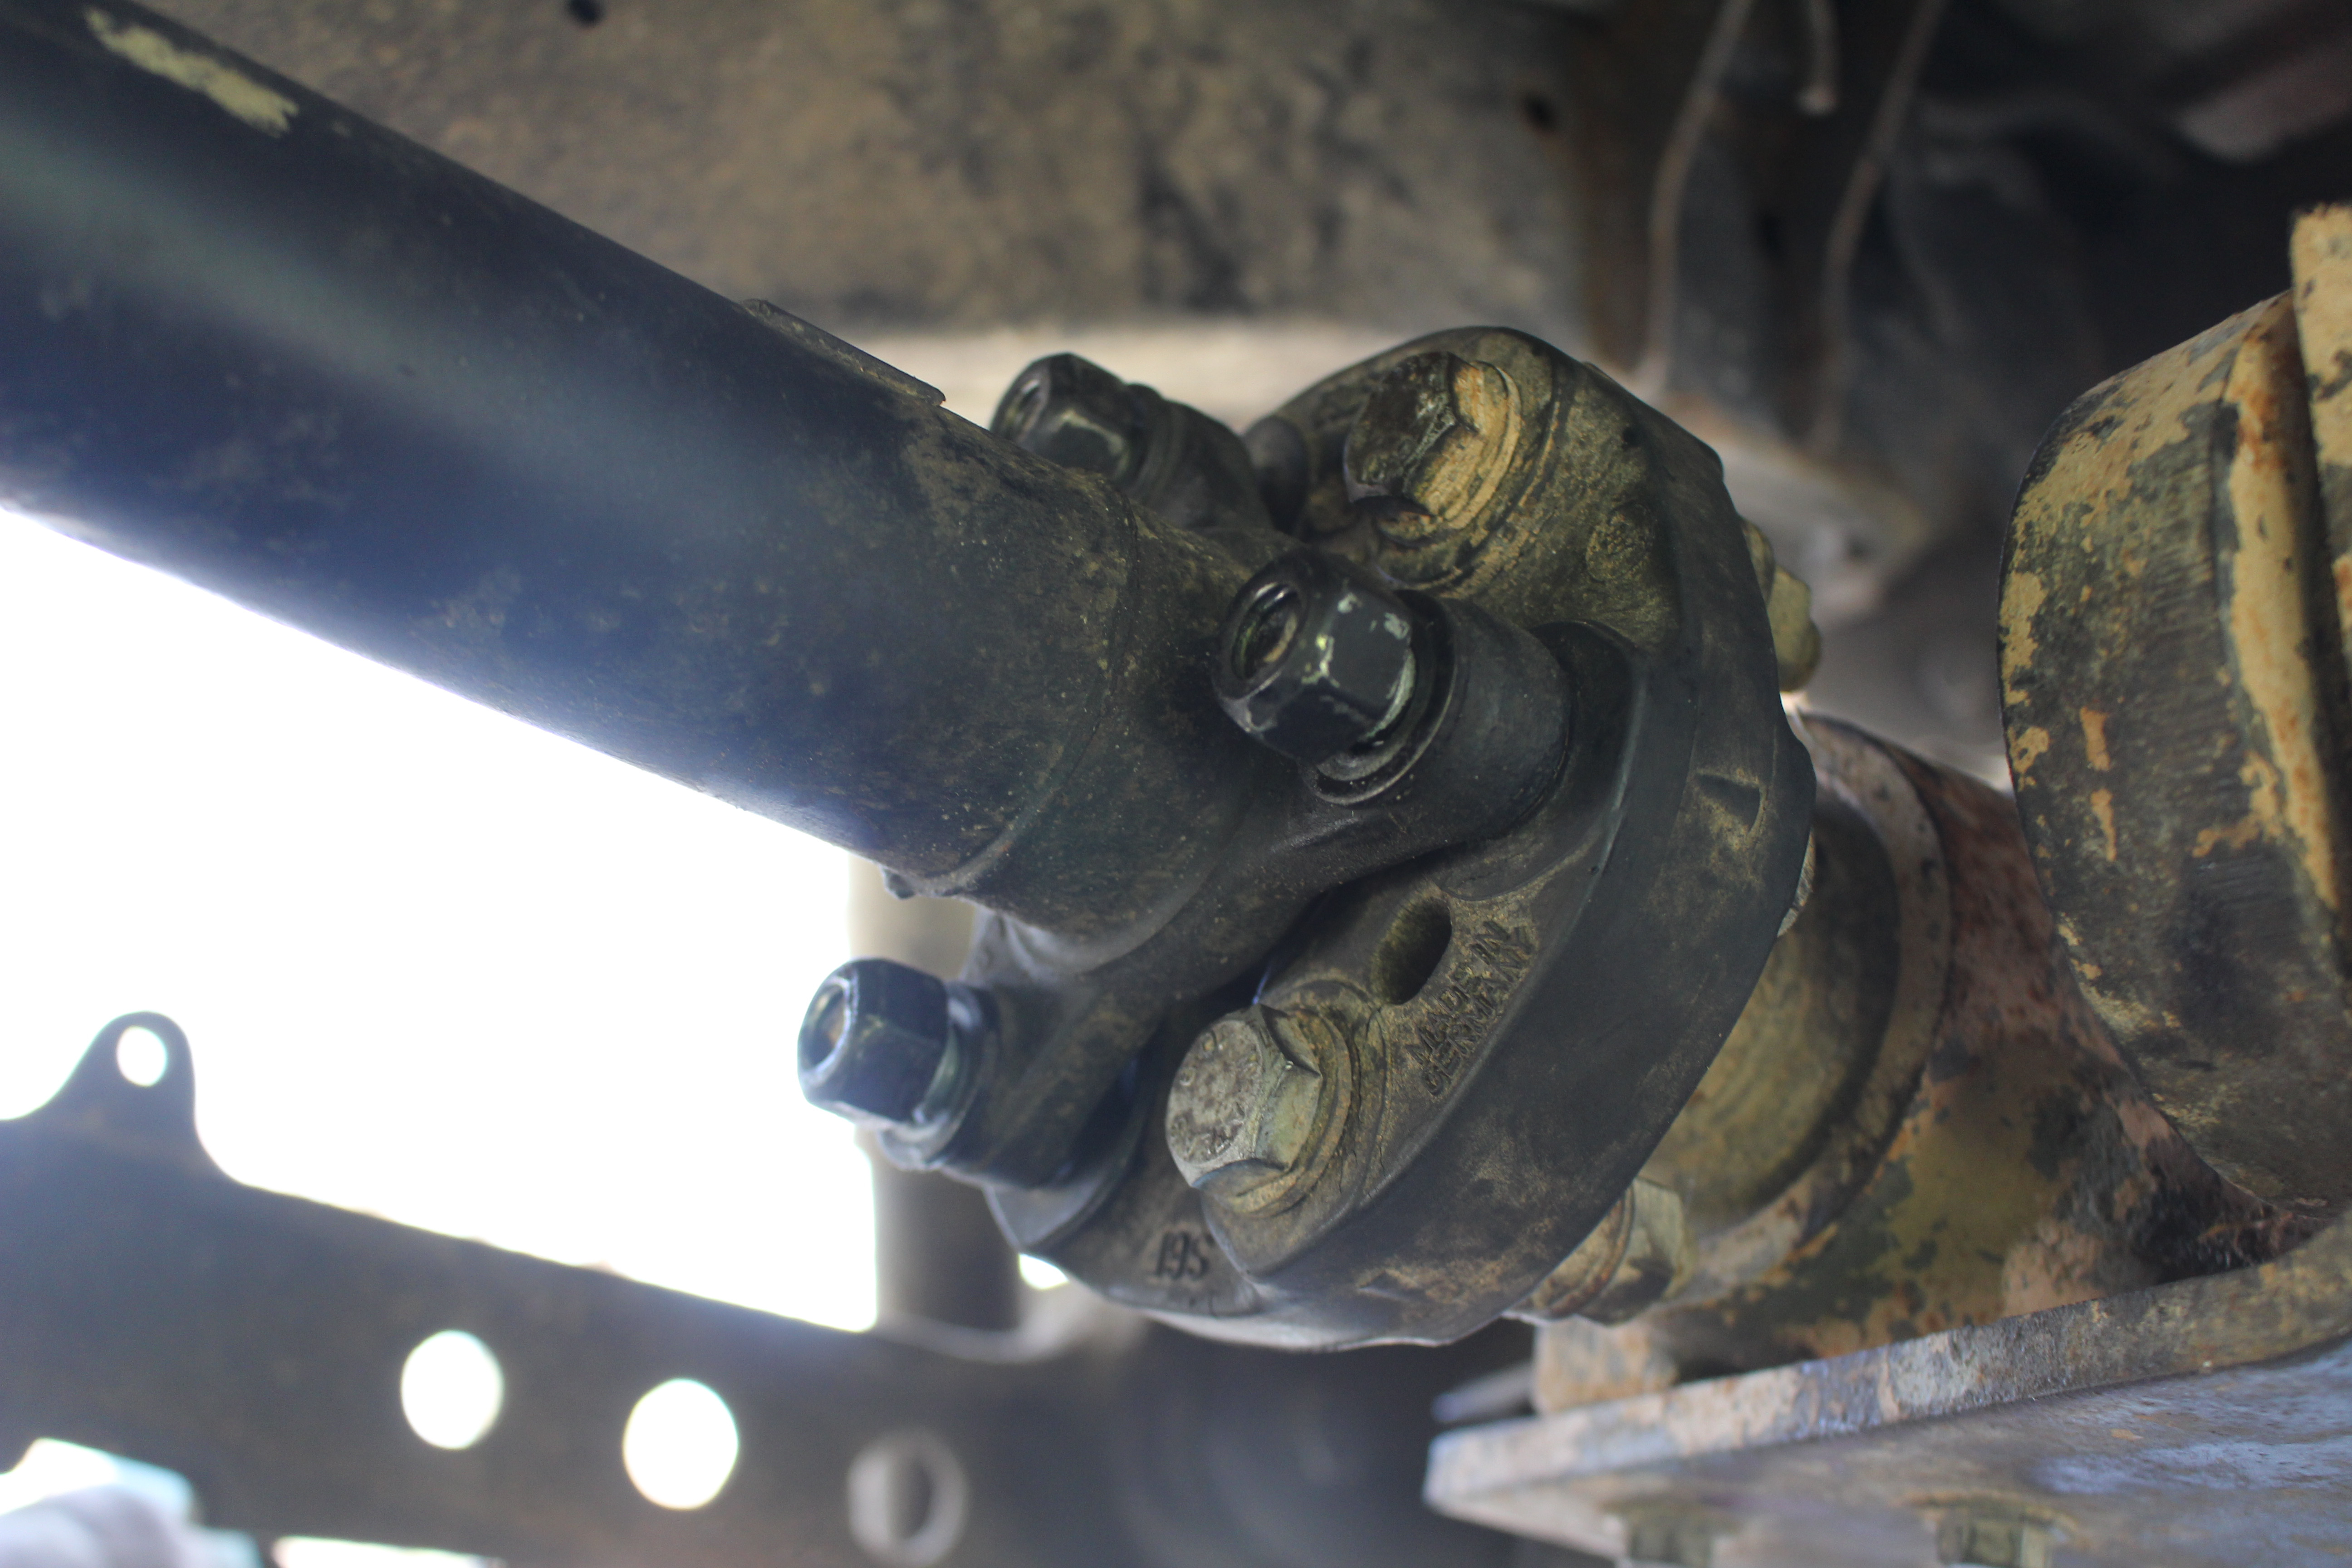
Now it's time to remove the rotoflex end of the rear driveshaft. You only need to undo the three nuts holding the driveshaft side. Then the driveshaft will slip out. You can break them loose this way, but once they are broken loose you will have to use a ratchet and your crescent wrench. They are 3/4".
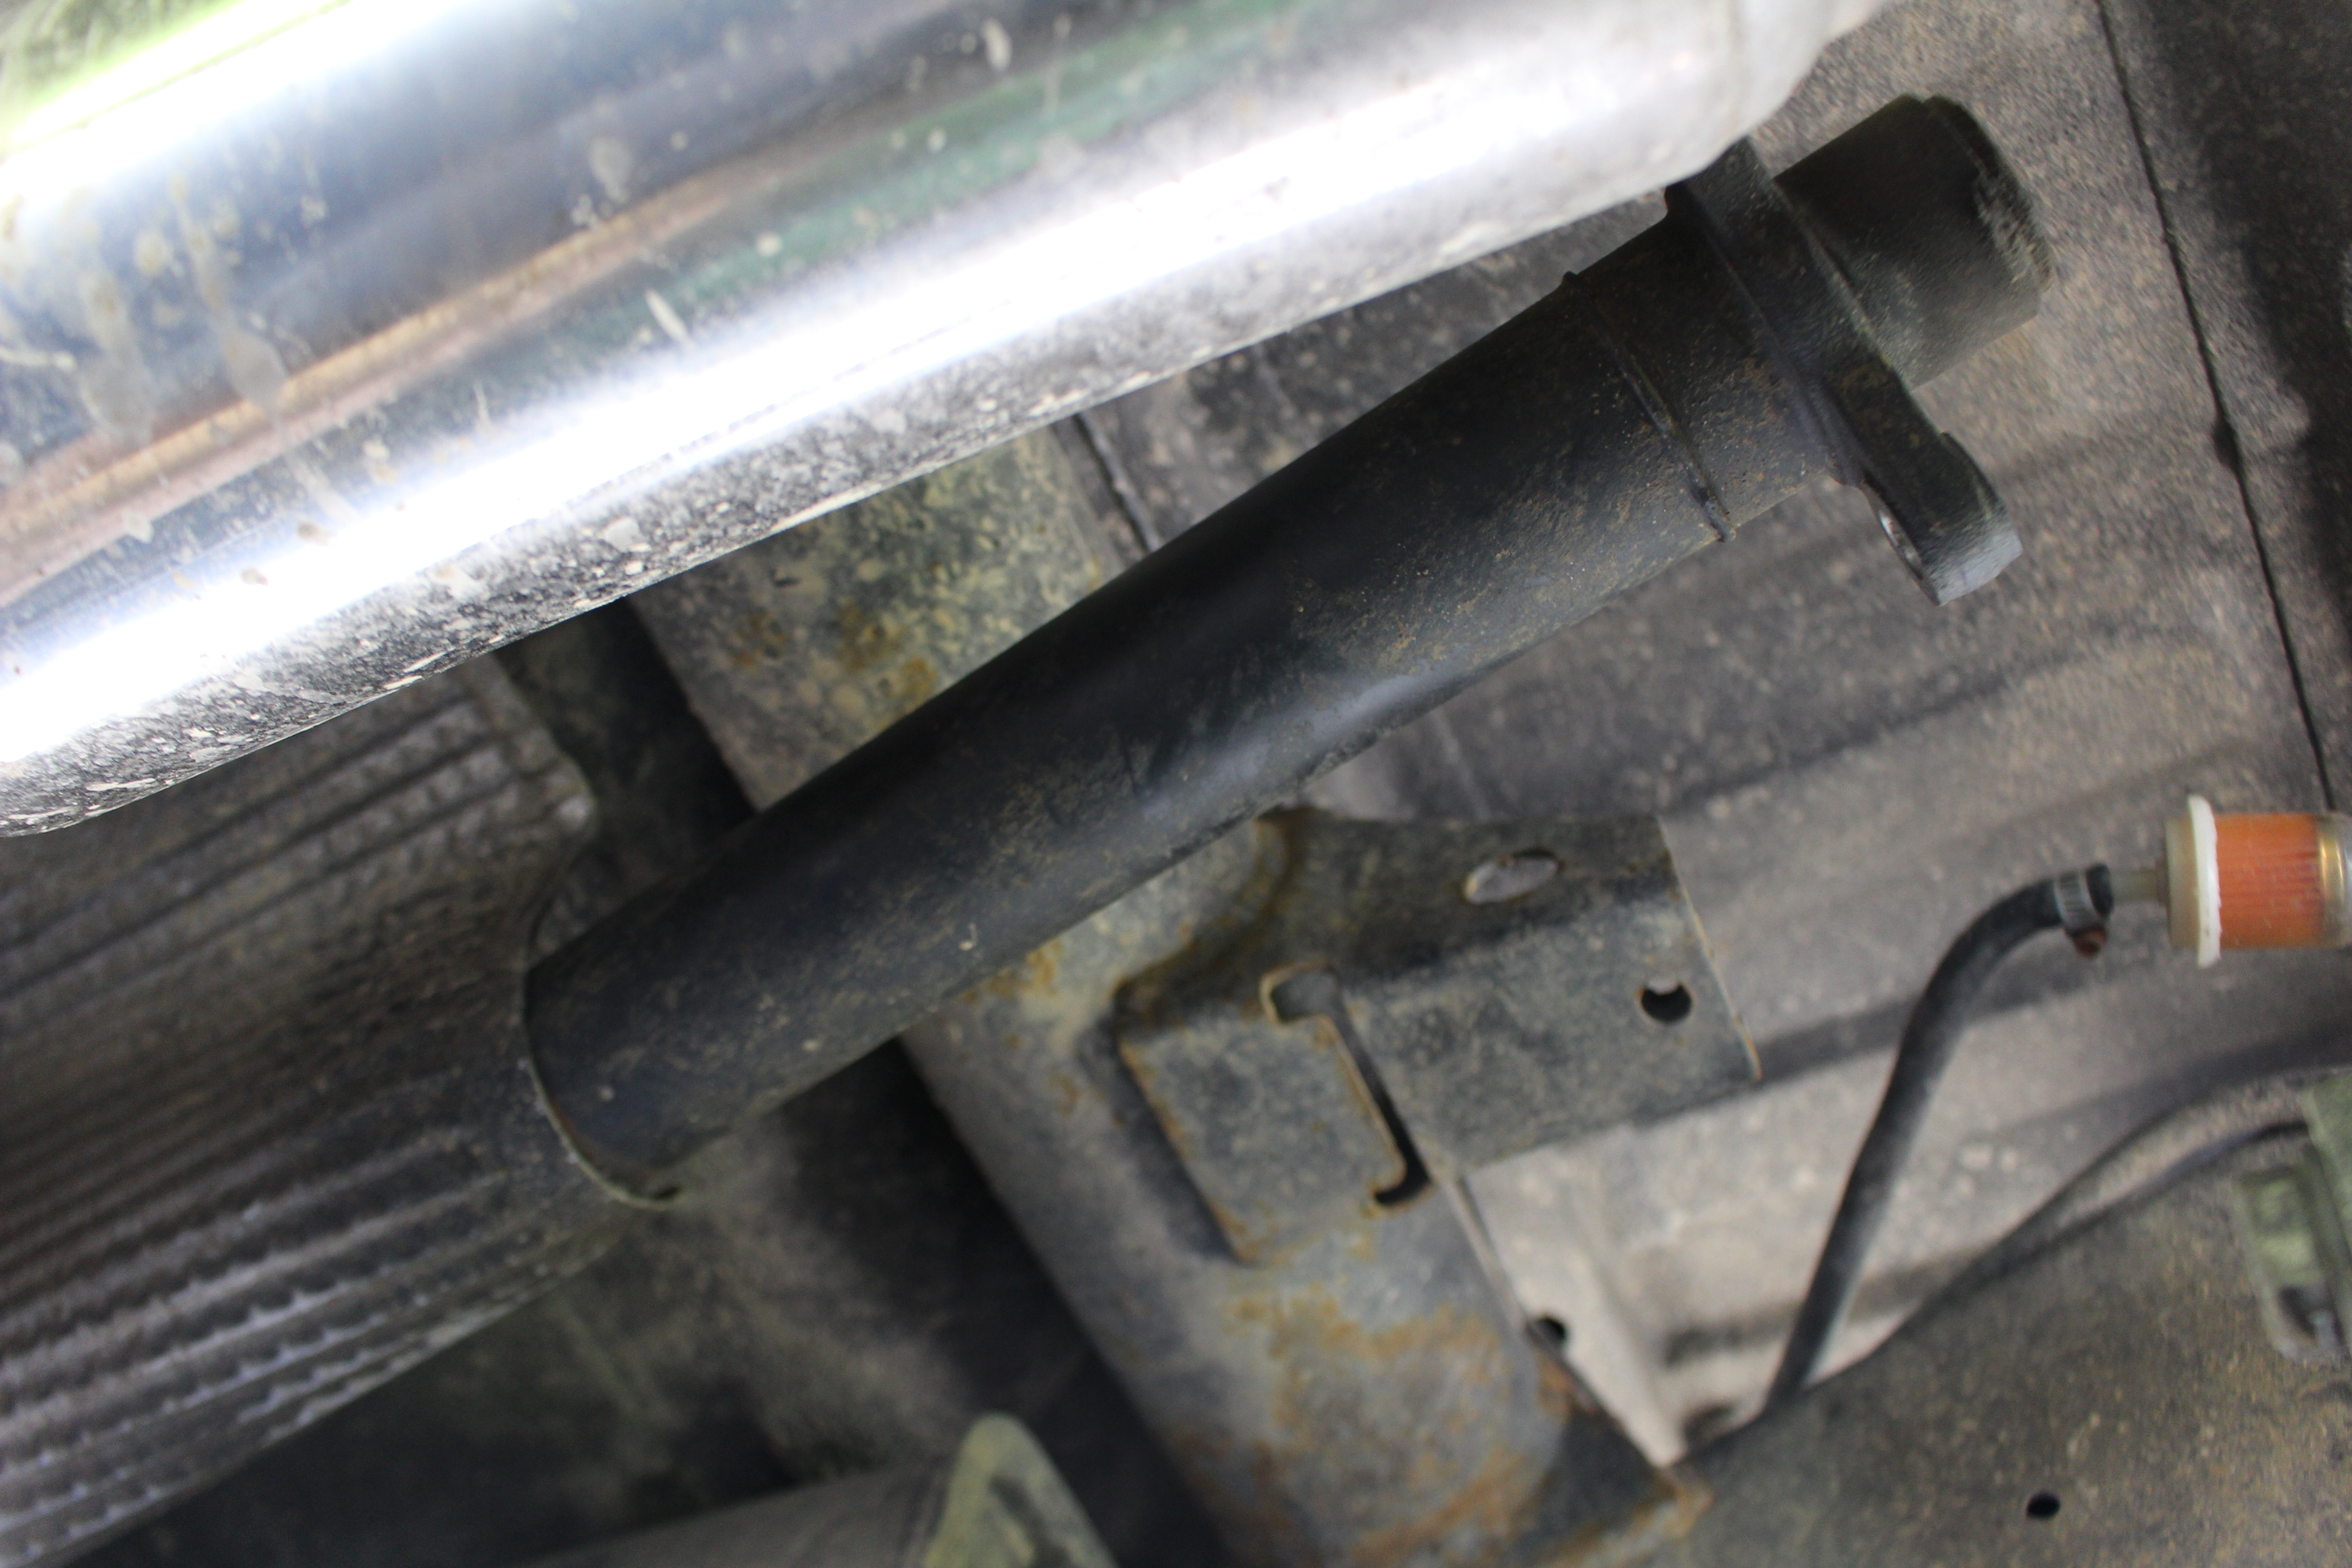
Once you get them all undone, slide your driveshaft shorter, raise it up, and use your muffler heat shield to hold it up out of your way.
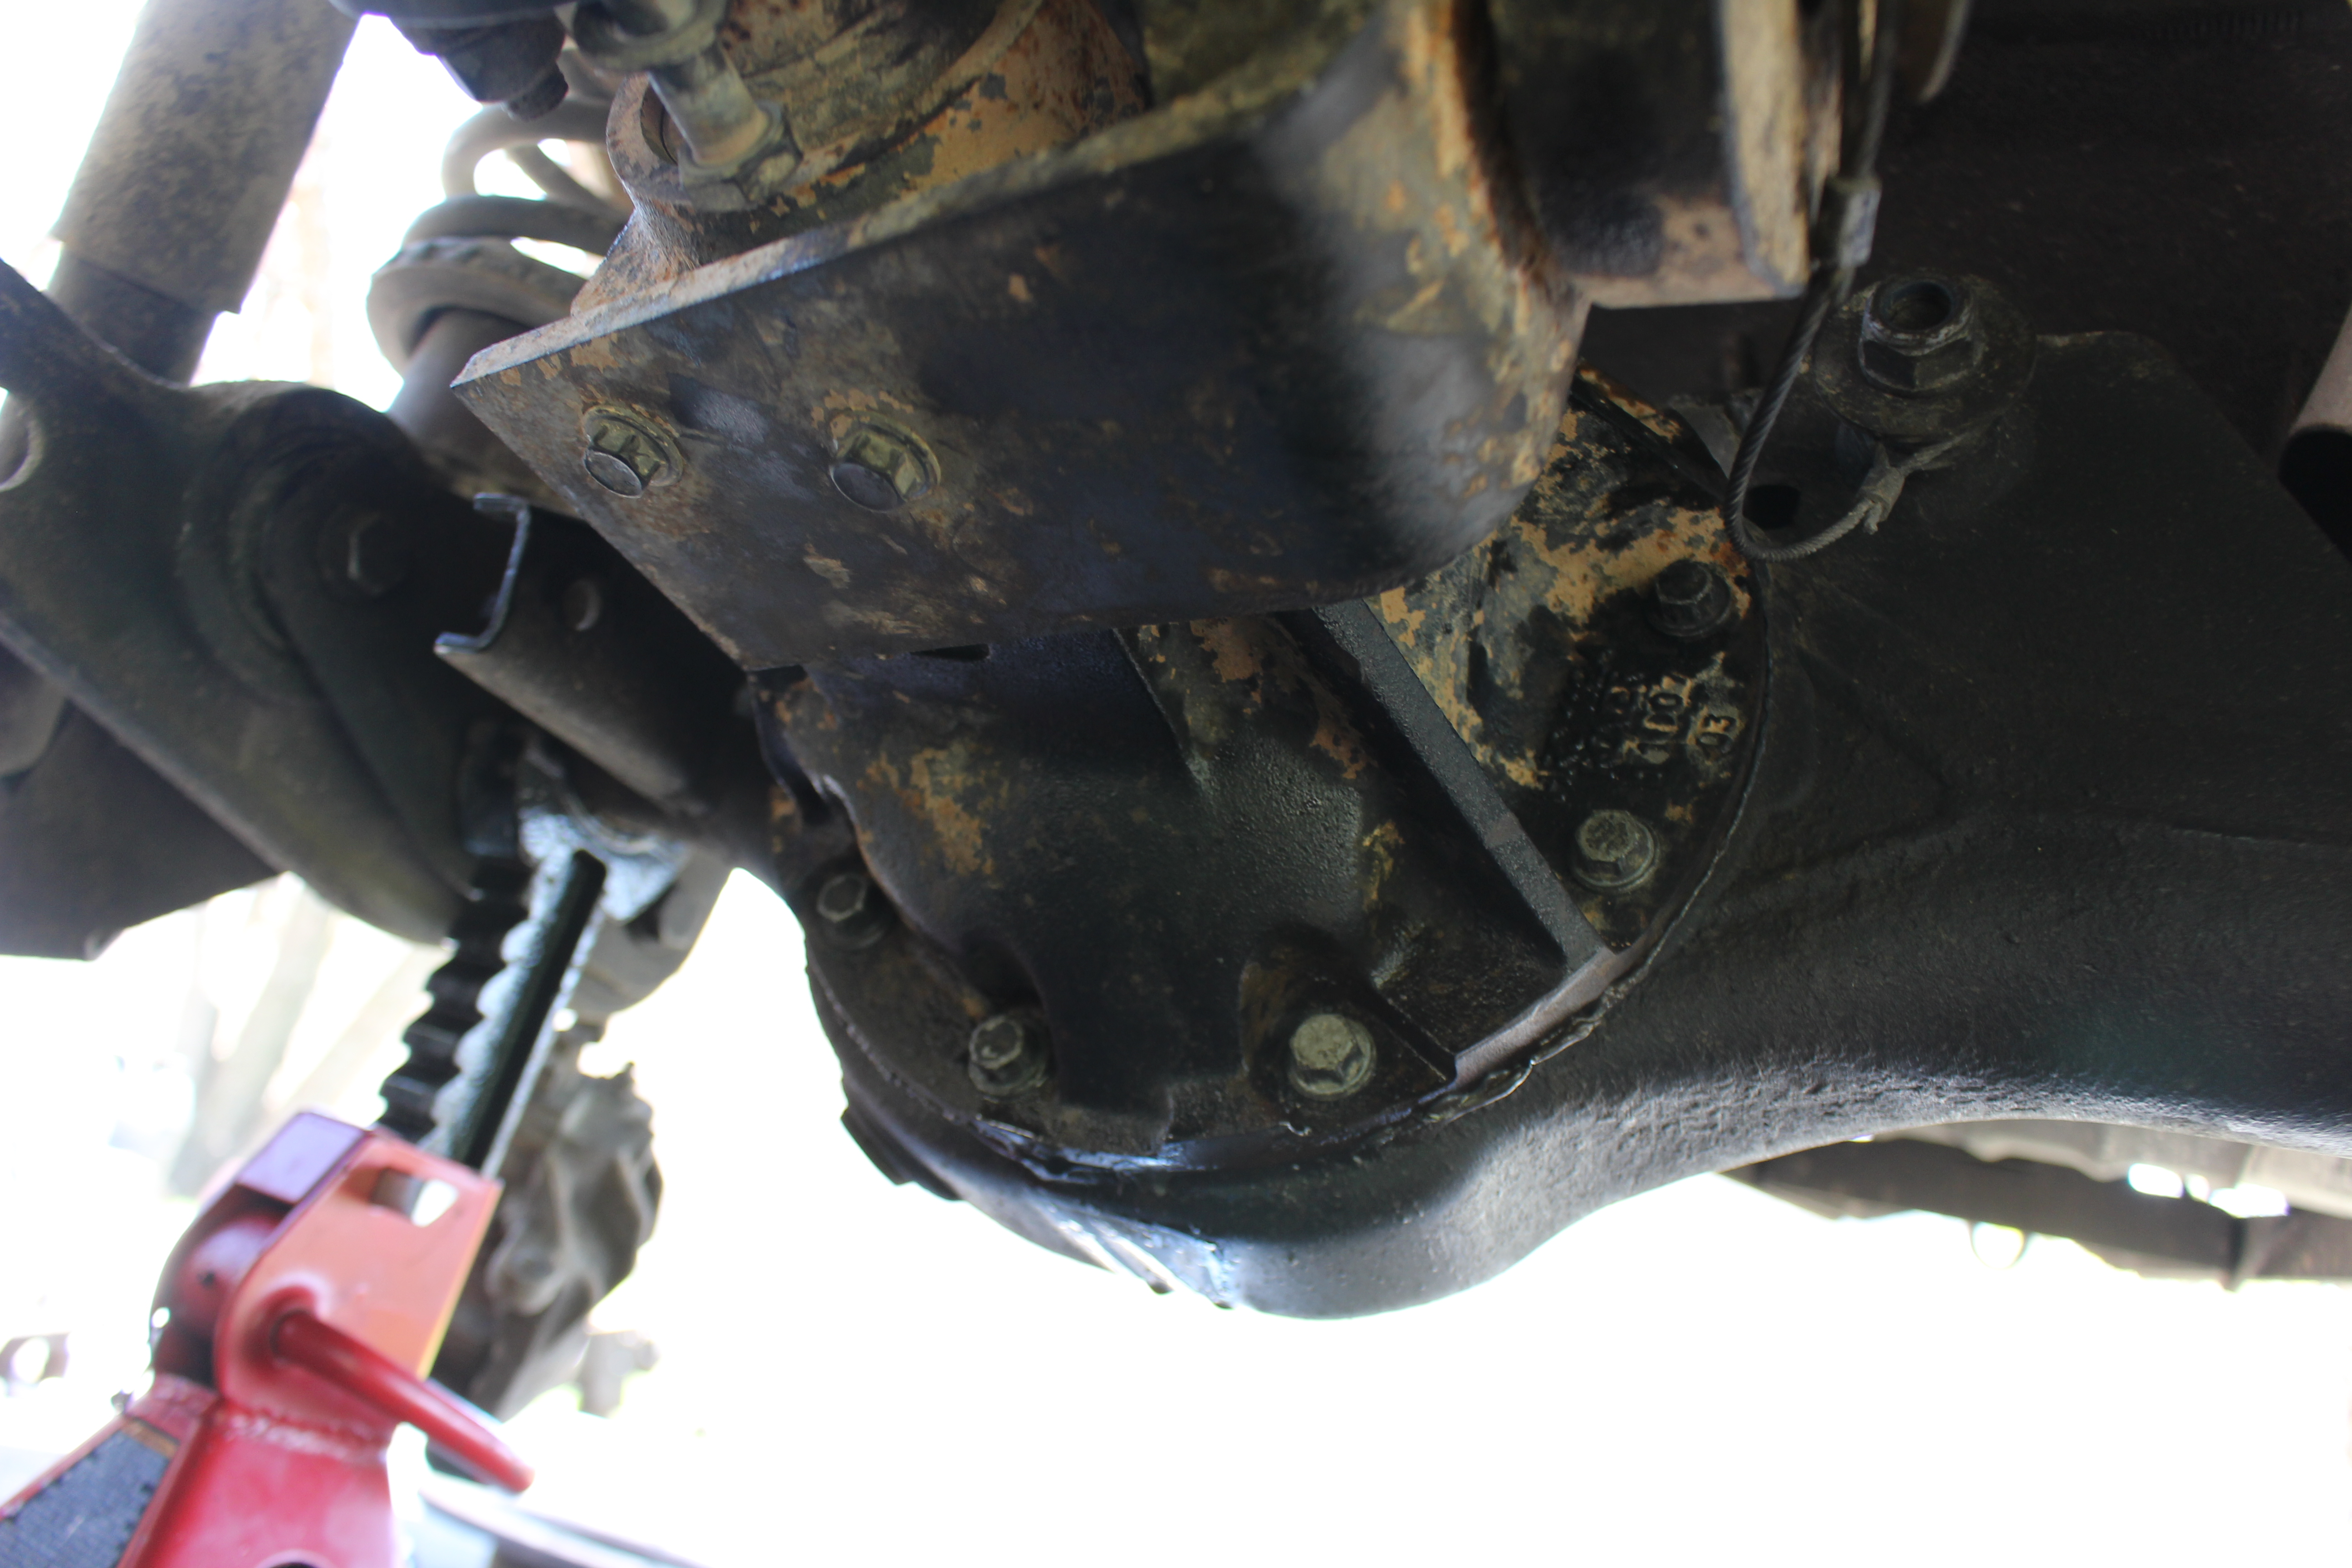
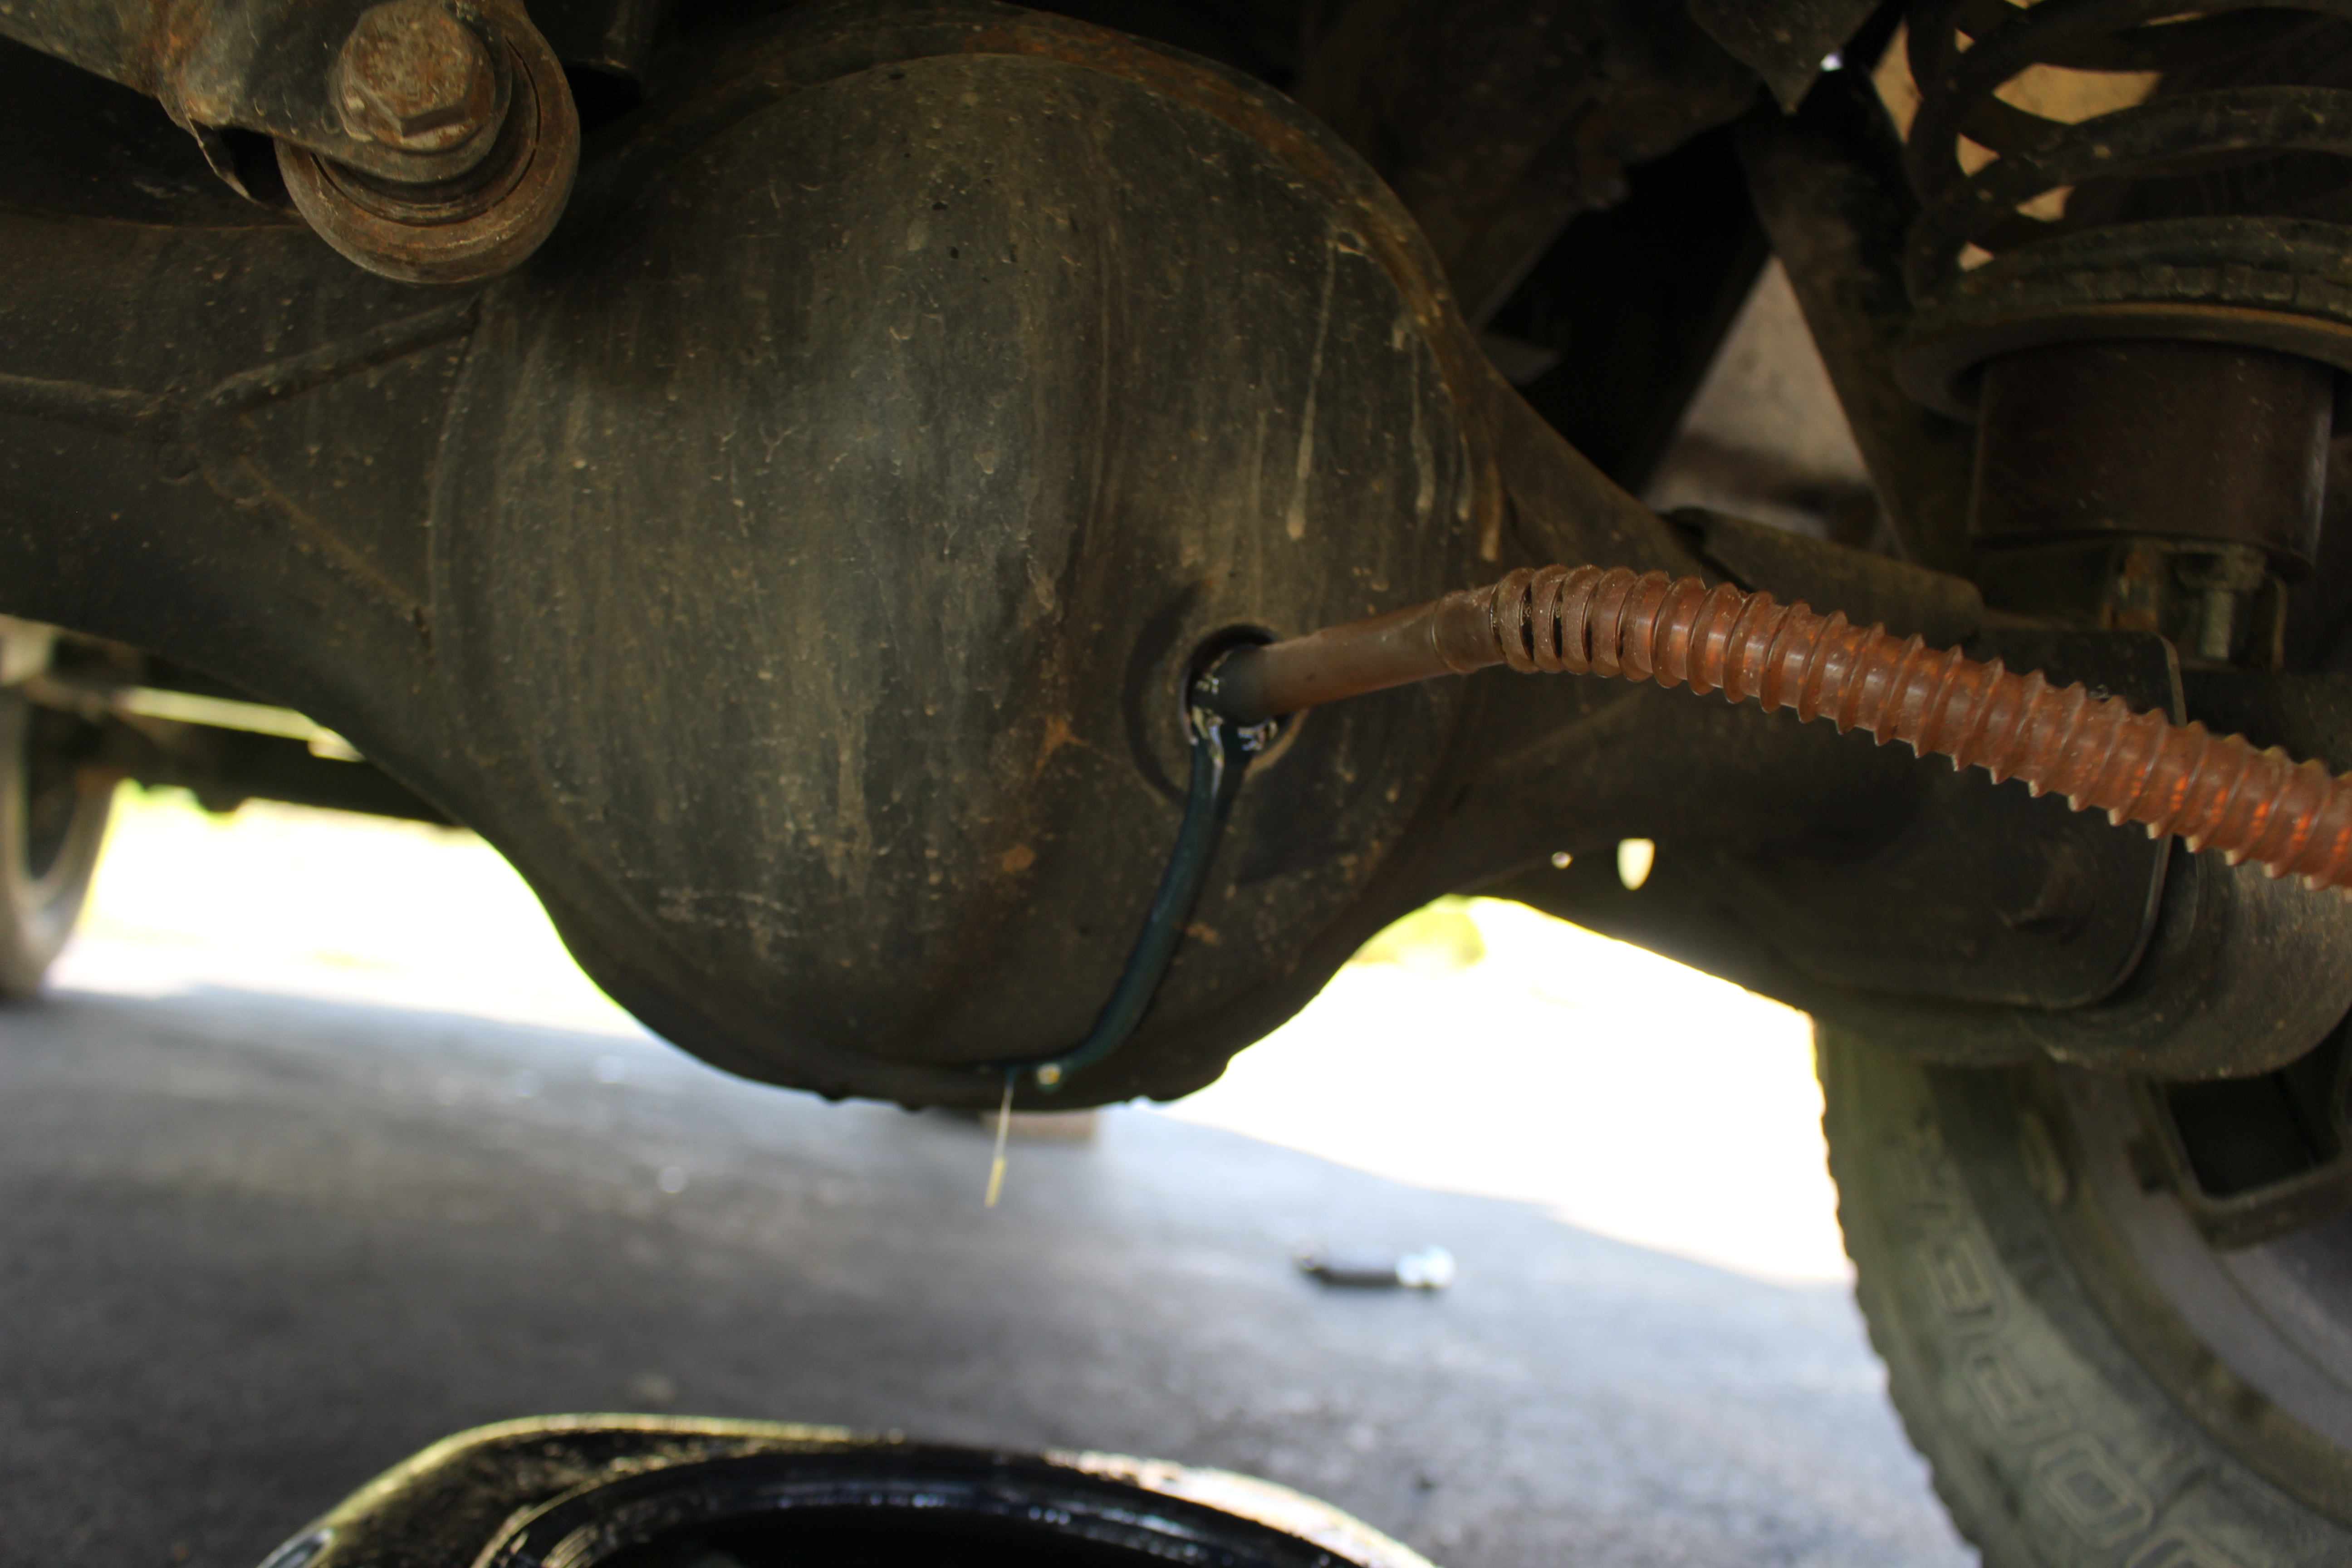
Now it's time to start with the actual diff bolts. Start at the bottom so it can start draining. Remove all but one. You will either need a deep socket or a short socket with an extension. They are all 13mm.
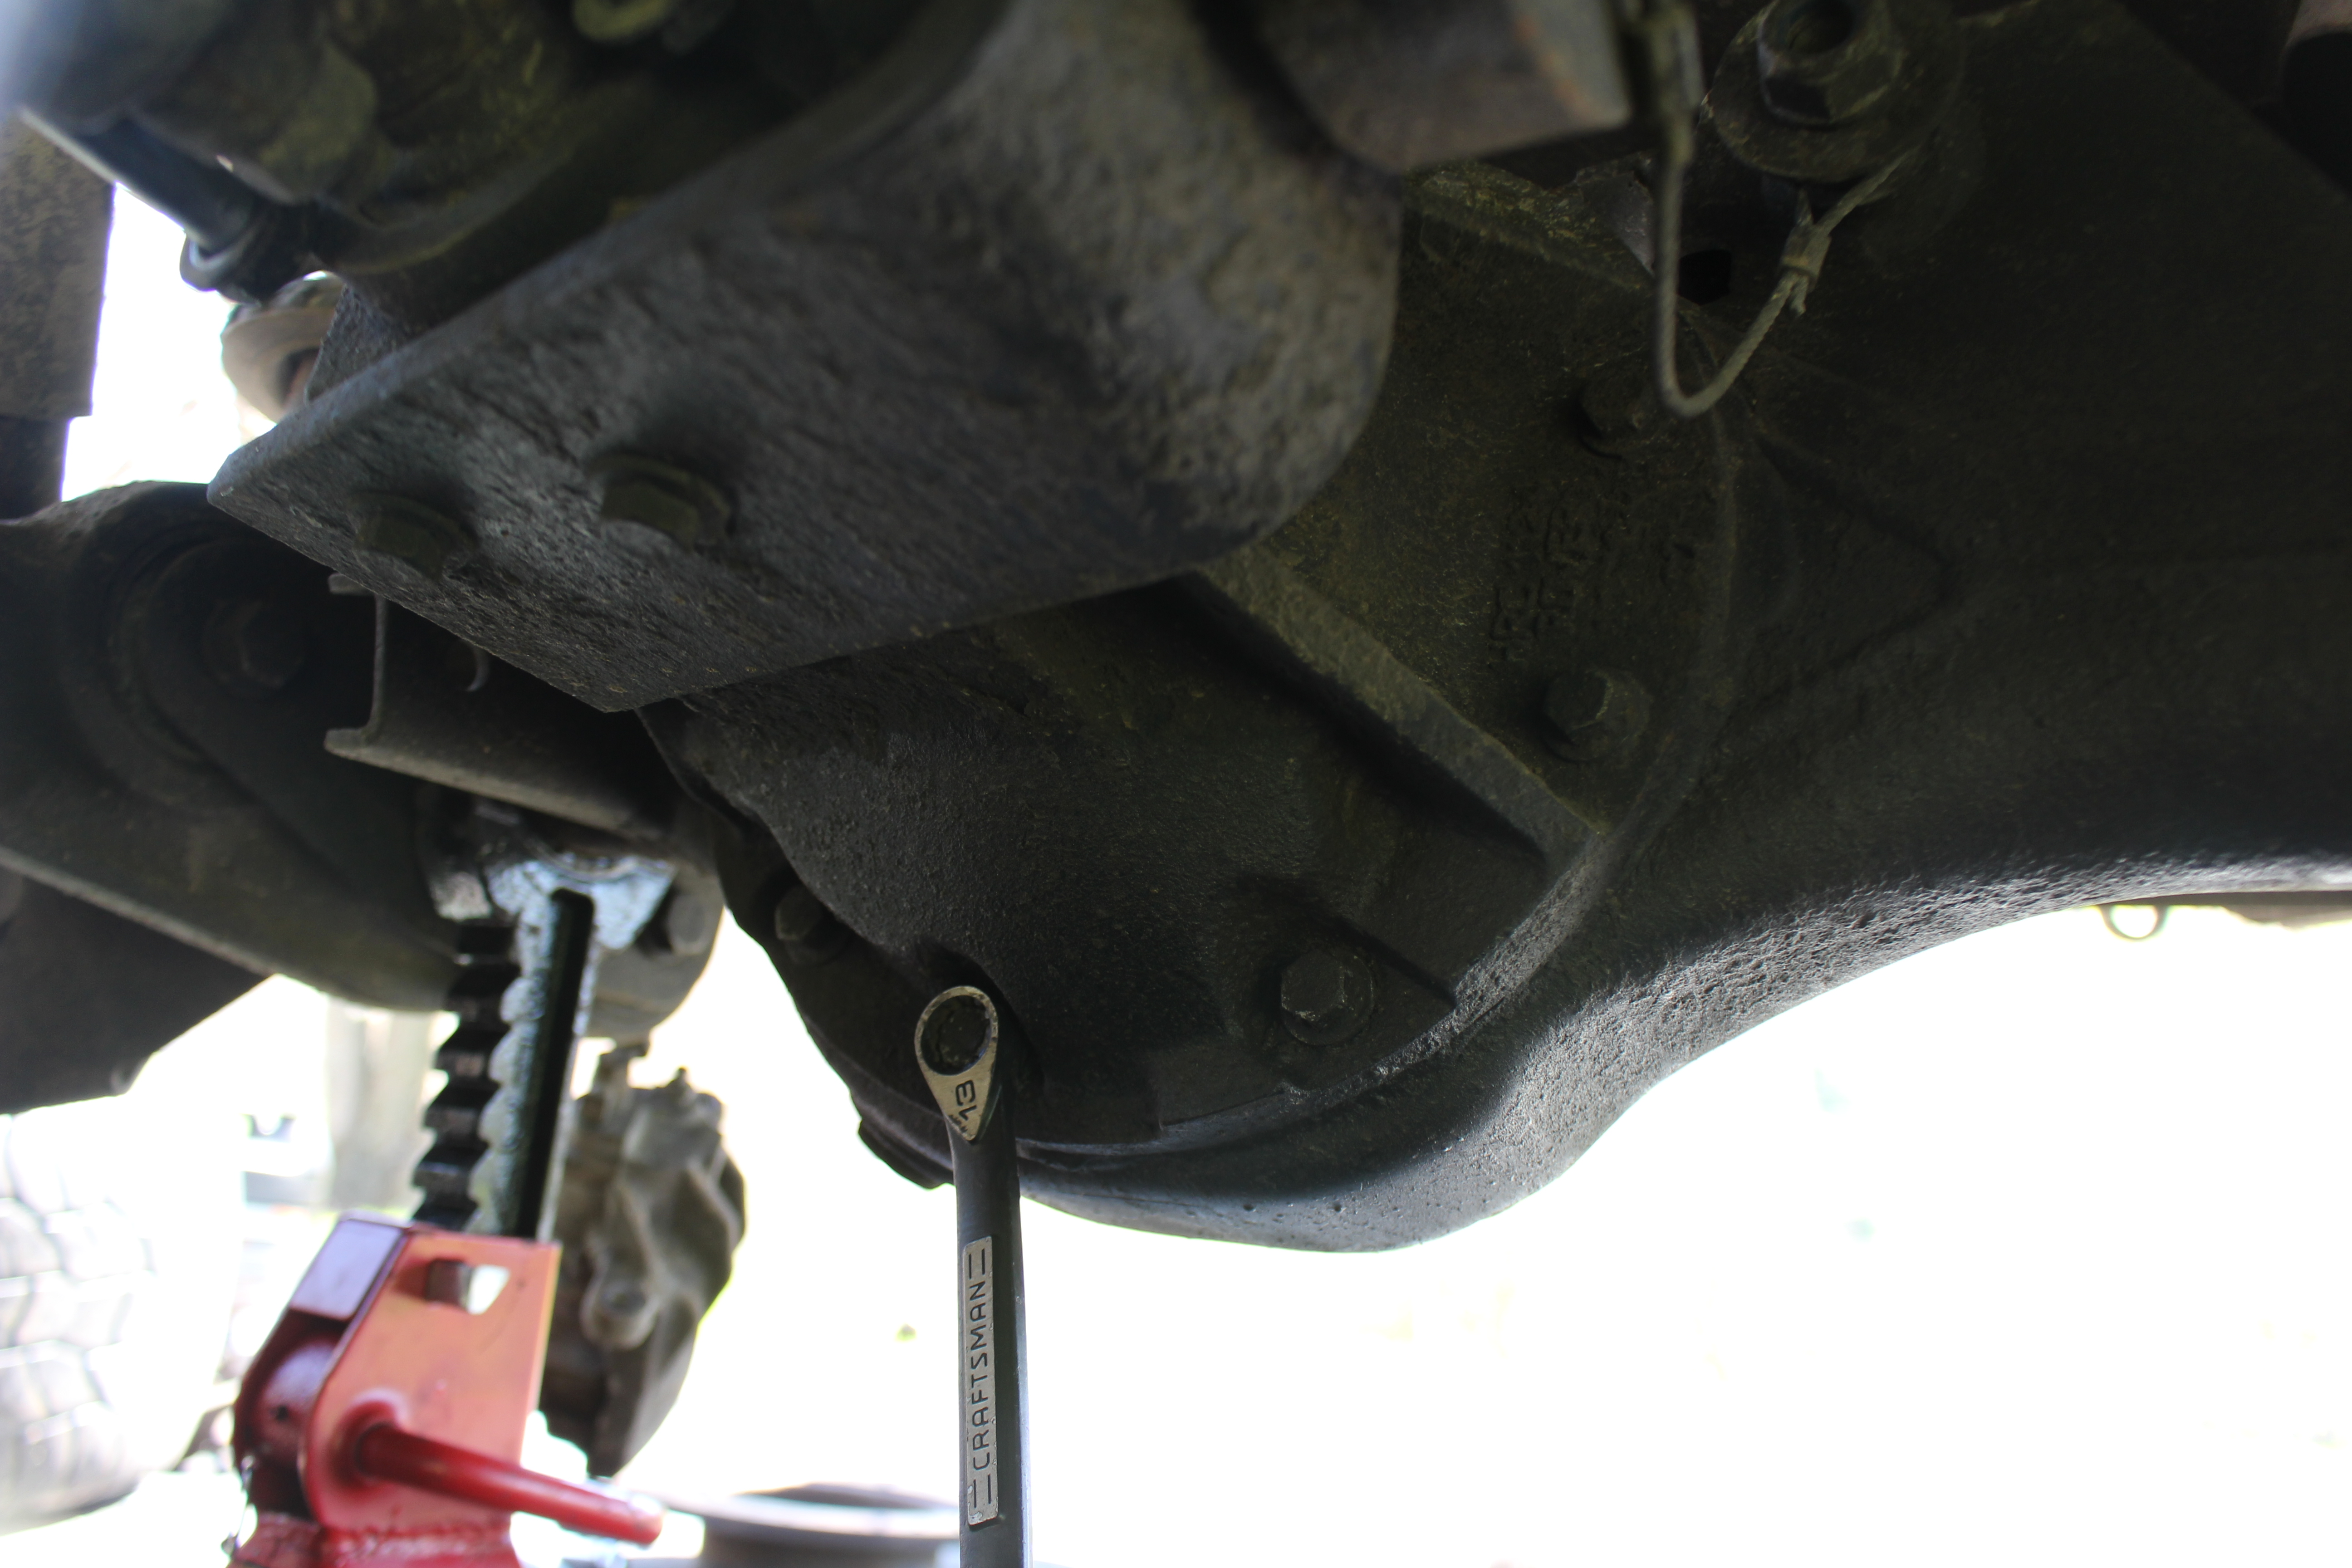
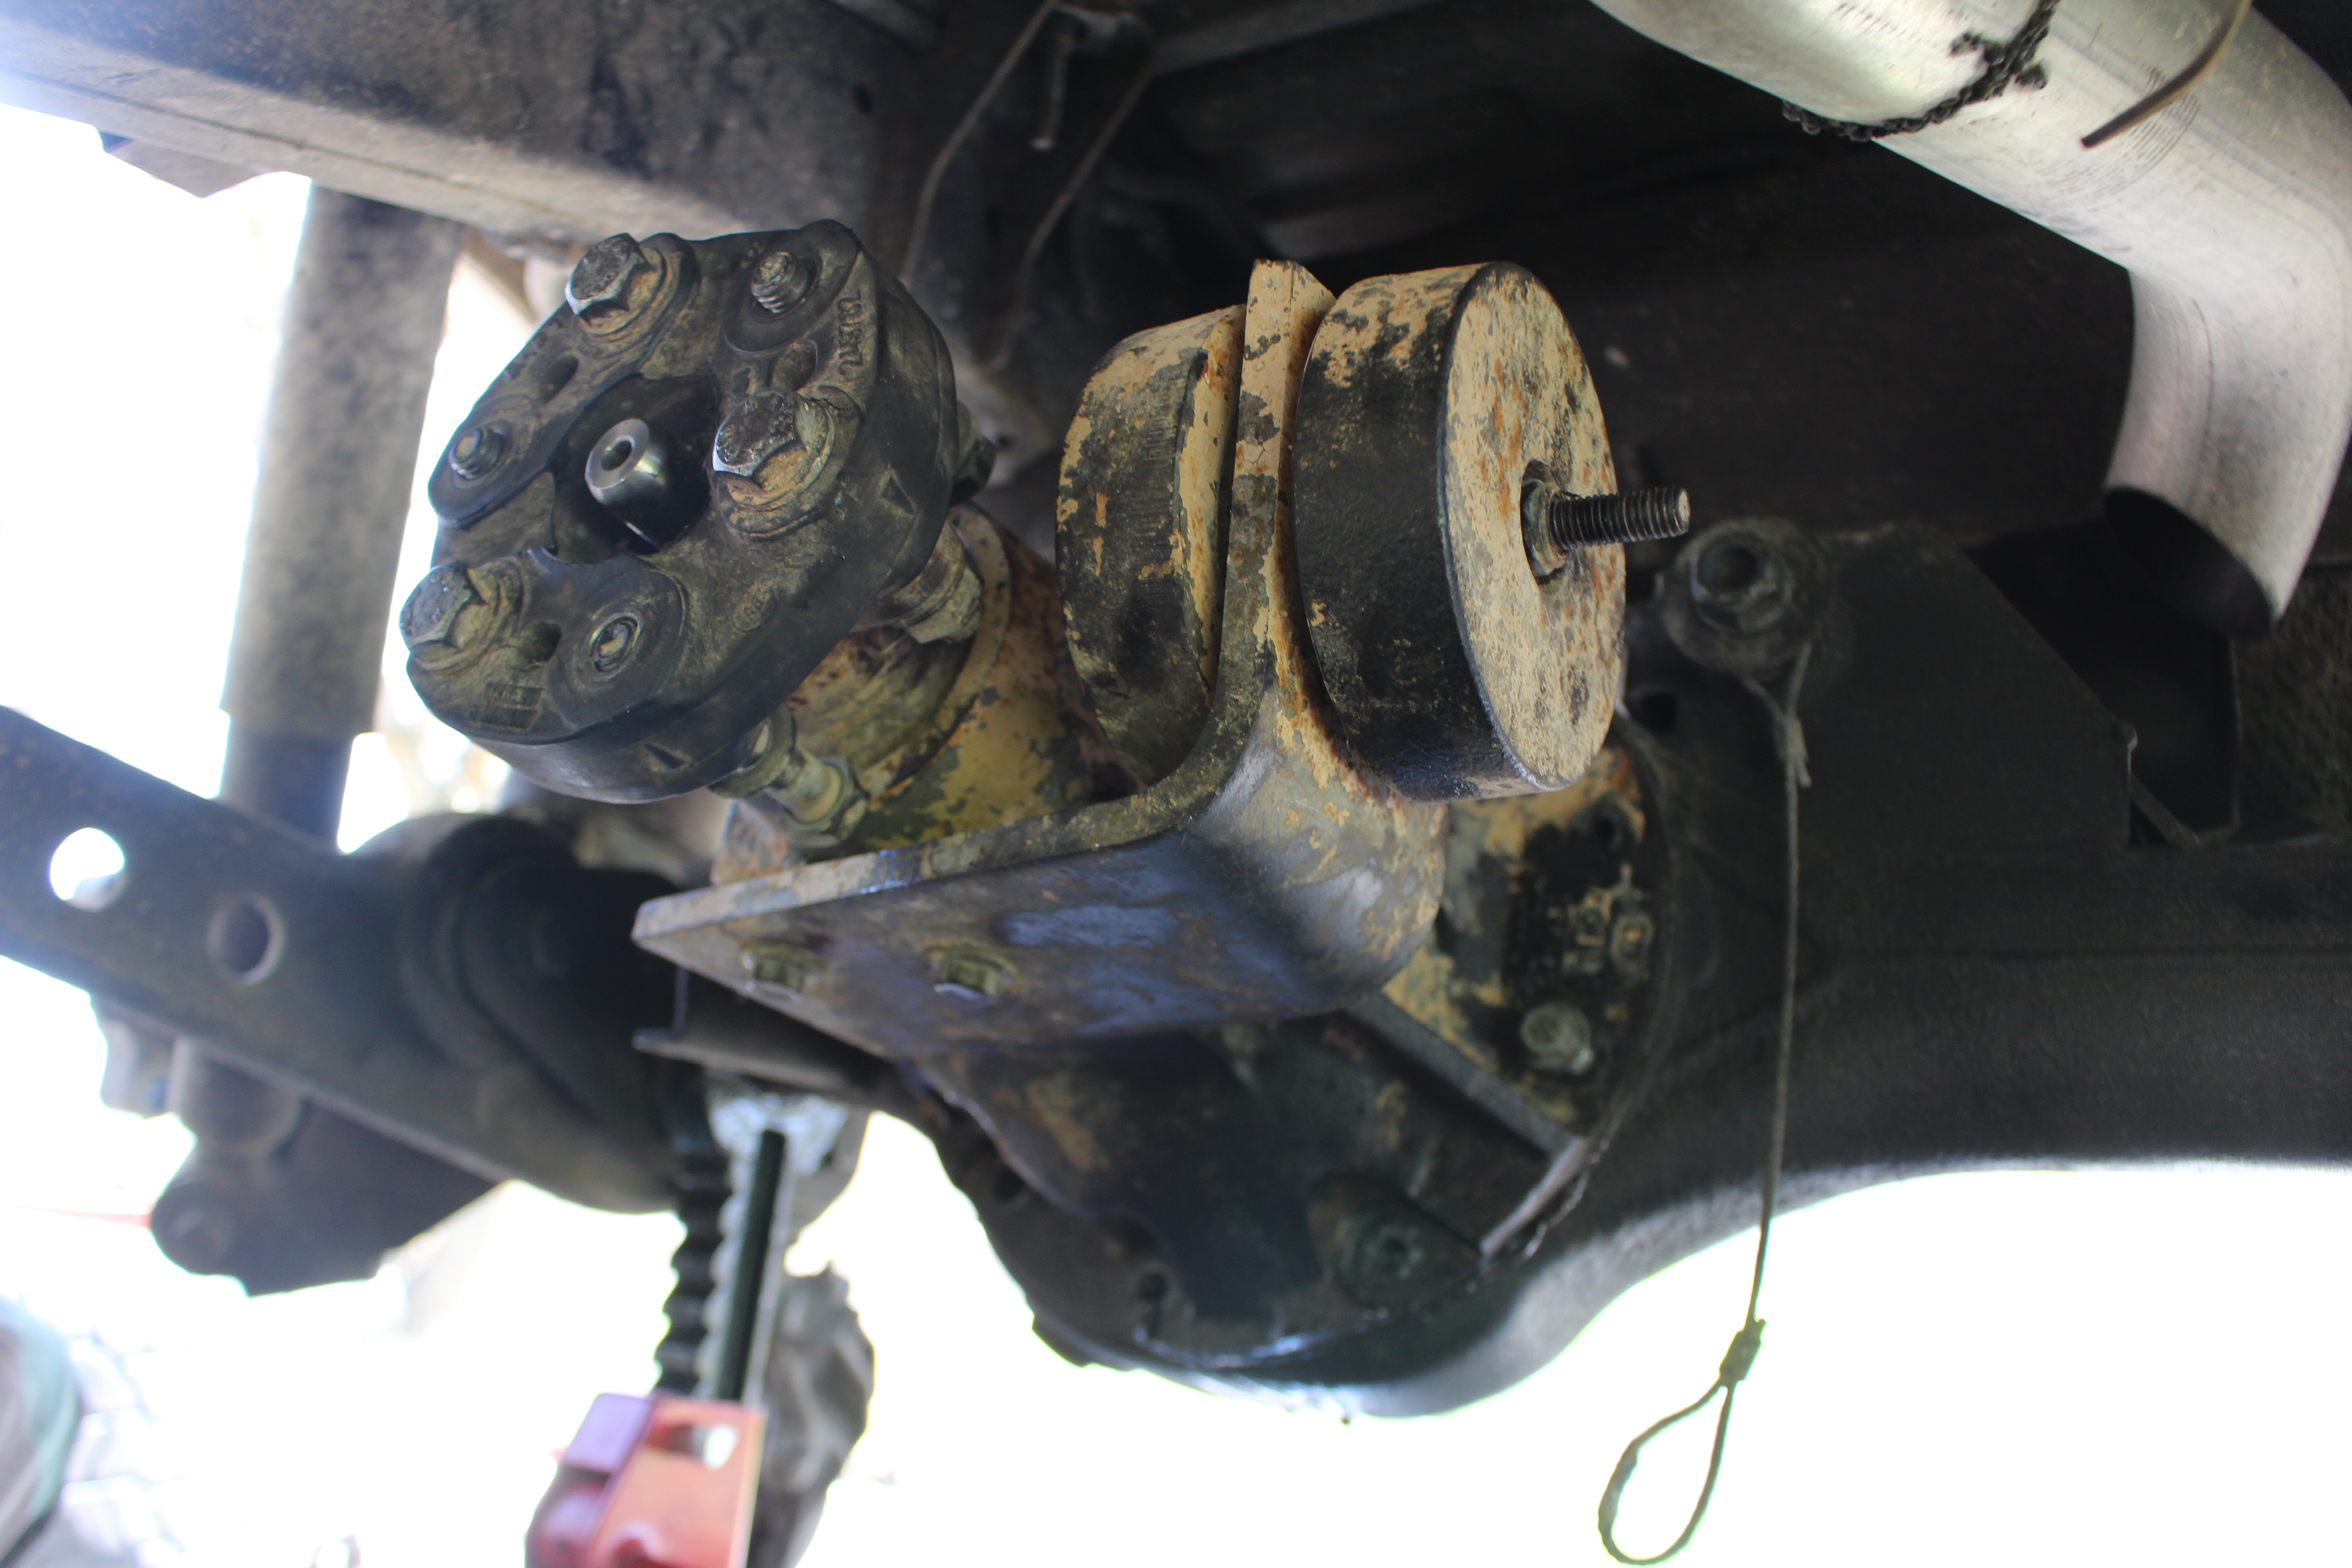
Now, before you remove the last bolt go ahead and undo the 17mm nut holding the cable which holds the weight if it falls. Once that's done you can remove the last bolt and lift the diff out. Be careful, it is VERY heavy. I estimate somewhere around 70-75 lbs. A floor jack would make the job much easier if that is an option for you.
Once you get them all undone, slide your driveshaft shorter, raise it up, and use your muffler heat shield to hold it up out of your way.
Now it's time to start with the actual diff bolts. Start at the bottom so it can start draining. Remove all but one. You will either need a deep socket or a short socket with an extension. They are all 13mm.
Now, before you remove the last bolt go ahead and undo the 17mm nut holding the cable which holds the weight if it falls. Once that's done you can remove the last bolt and lift the diff out. Be careful, it is VERY heavy. I estimate somewhere around 70-75 lbs. A floor jack would make the job much easier if that is an option for you.
Thread Starter
|
Camel Trophy
Joined: Aug 2014
Posts: 4,743
Likes: 985
From: Southwestern Virginia
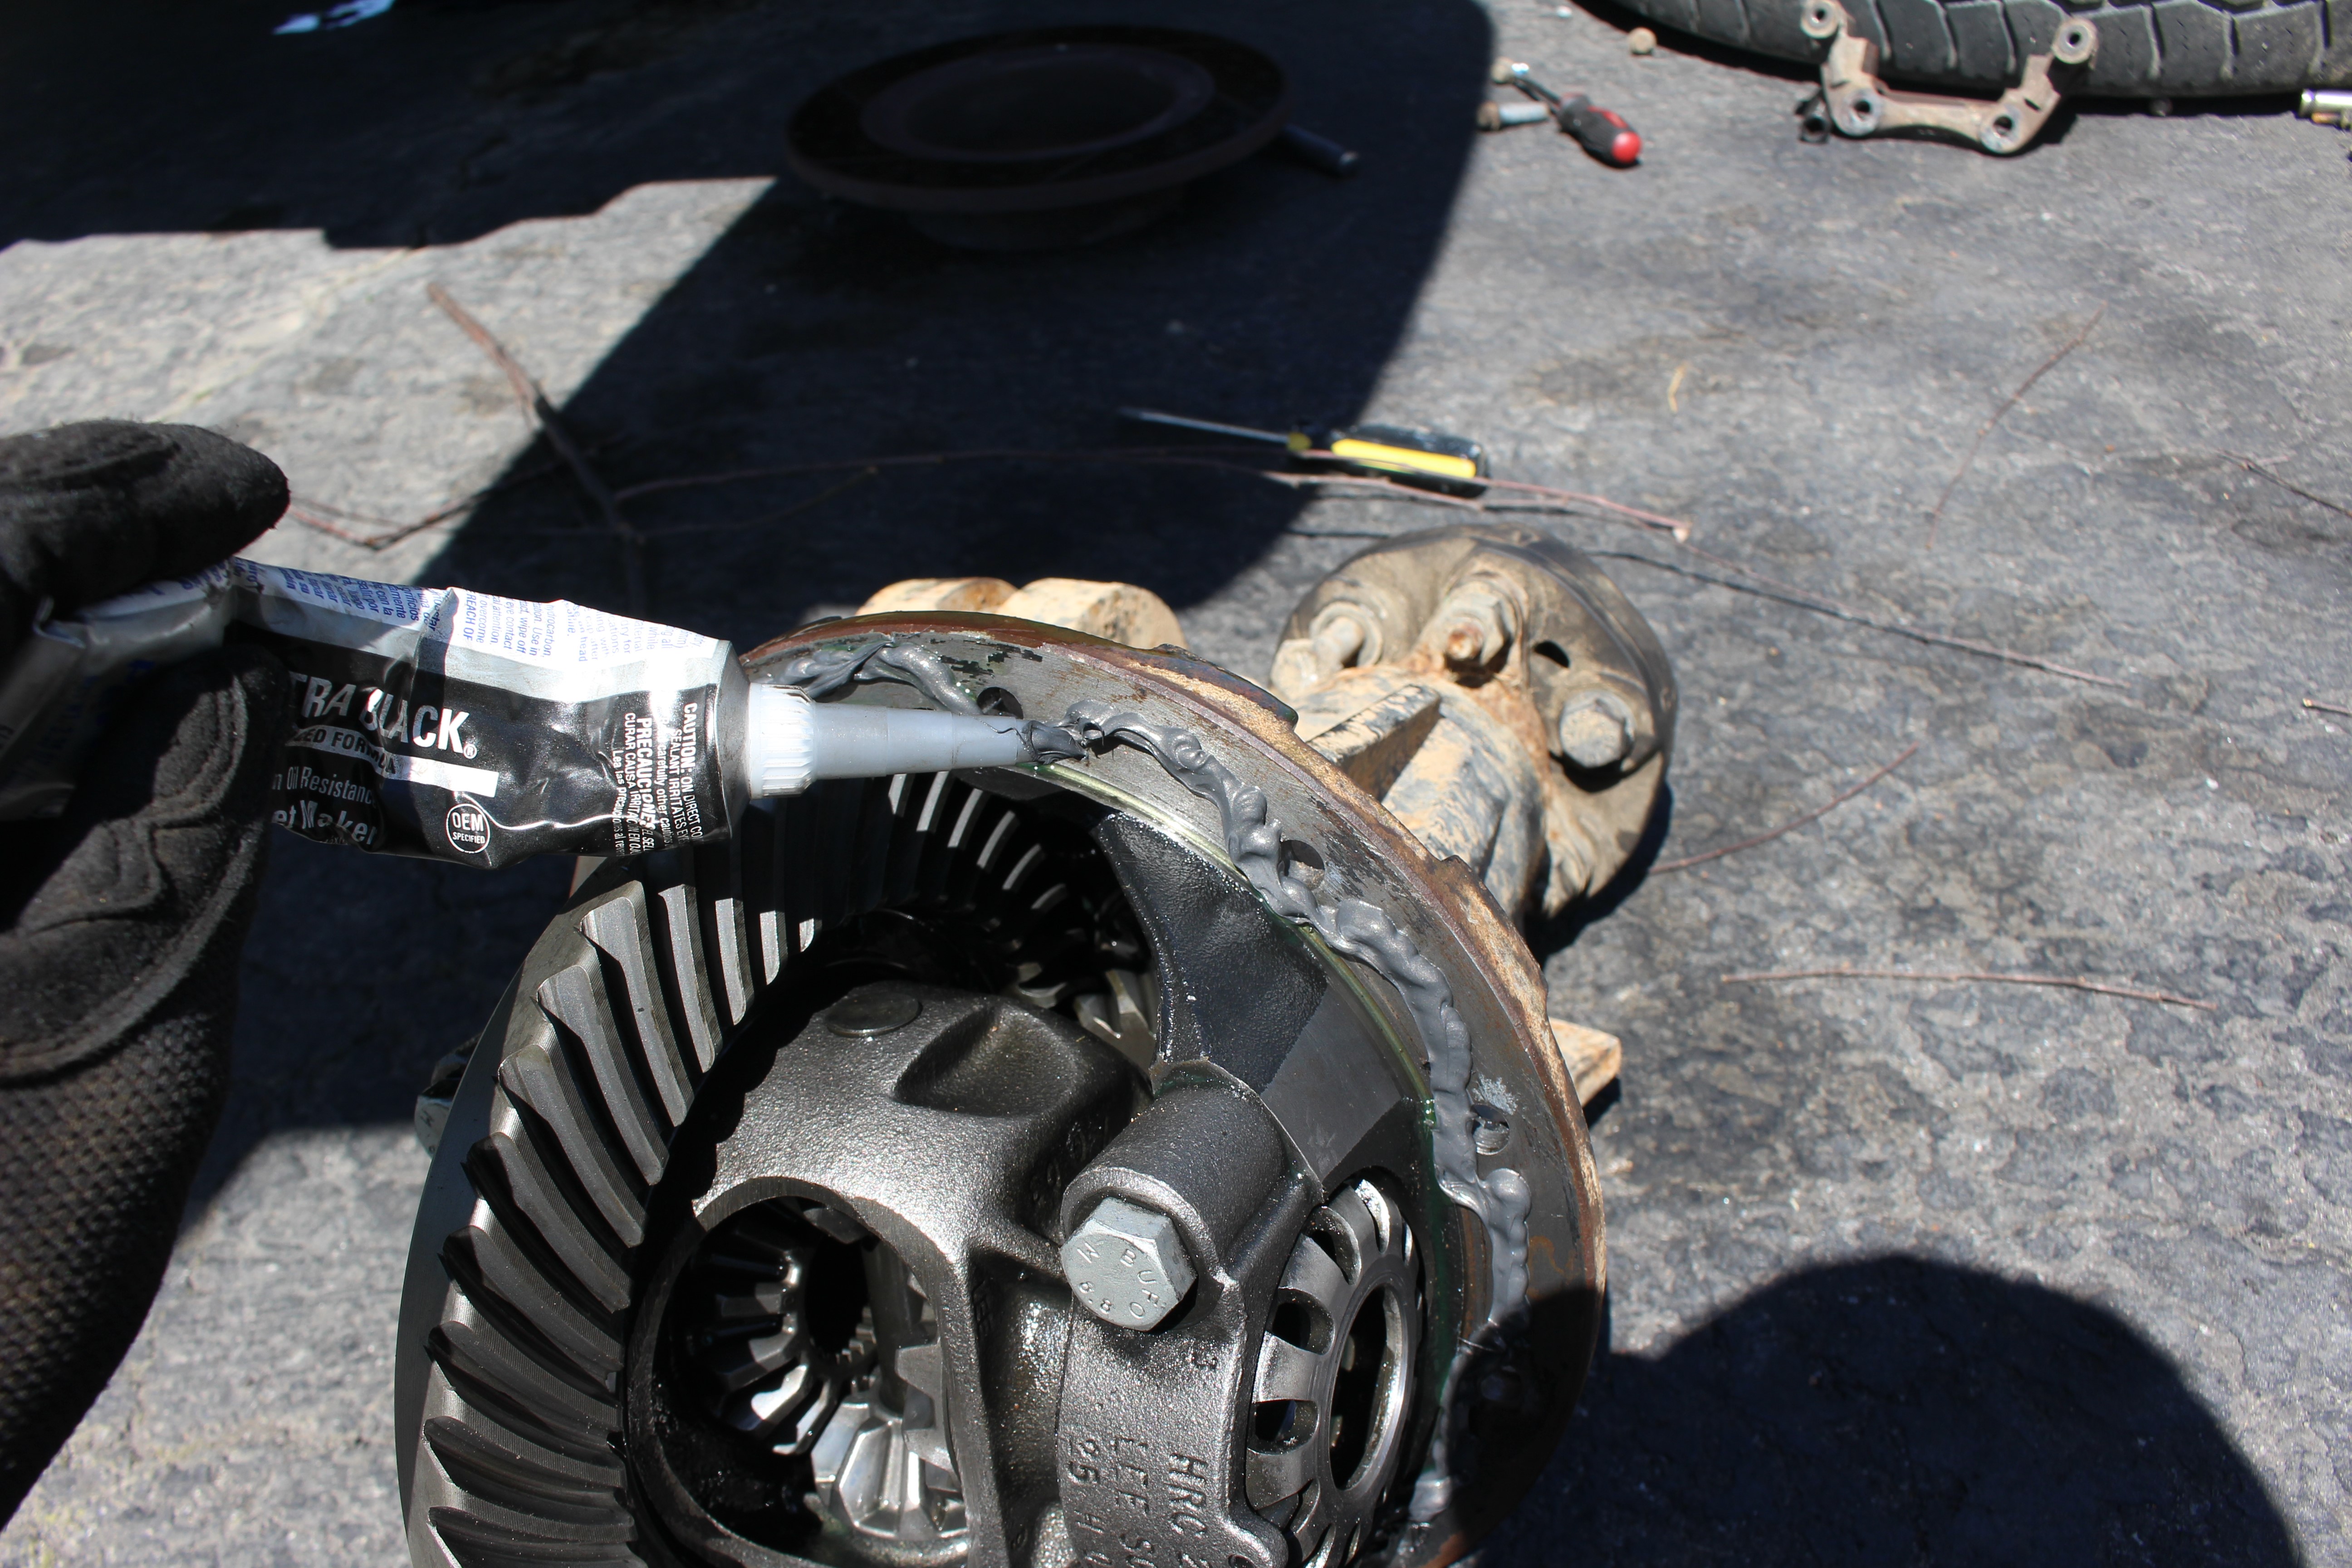
Evidently I forgot to take pictures of this part of the process, but you will want to clean up your new diff. I used seafoam and a microfiber cloth because that's what I had. A spray solvent such as wd40 would be much easier, then a light wipe with a microfiber.
Once you get it all cleaned up and there is no debris in the new diff, you will want to run a bead of your RTV all the way around the edges as shown.
Now for reinstallation. You'll also want to wipe the mating surface to clear it of oil so it does not effect the RTV. I also recommend following your specific brand's torquing and drying instructions. Typically that is one our finger tight, then full torque and wait till the next day to fill with fluids. I was in a rush to drive back to college, already late to an event, so I just torqued it down and filled it up after I got the rest back together.
The two bottom side bolts are the easiest two to get back in first. I recommend either having help at this point or, again, using a floor jack.
Now you can install the rest of the bolts and torque them down, or just crank down on them really good as I did.
Now reinstall your driveshaft the opposite of how you removed it. You will be able to rotate the diff however you need it to fit the driveshaft.
Evidentally I also forgot to take a picture of this. Anyway, you'll want to reinstall the steel cable on the dampening weight so that if it gets knocked off it will not leave the underside of your truck. Once you do that, you're done under the truck.
Now you're ready to reinstall hubs and axles. Before you do, wipe away any grease and especially grime which has run out where the hub goes.
The axle may take a little work getting the teeth lined up with the inside of the diff, but once it's in it will go easy. DO NOT FORCE ANYTHING. It should slide easily. Then put the four 15mm bolts back and torque them down.
I also ended up replacing one hub with one off my parts truck, axle and all for simplicity. I had cut the parts truck ABS sensor for ease (laziness), so I had to switch them. I didn't catch the allen key size, but if you do switch sensors be sure to not get ANY debris in the hub and to clean the sensor VERY well.
Next, feed your ABS sensor plug back through and clip the connector back together.
Now slap the rotor back on.
And the caliper bracket with it's two 12 point 13mm bolts.
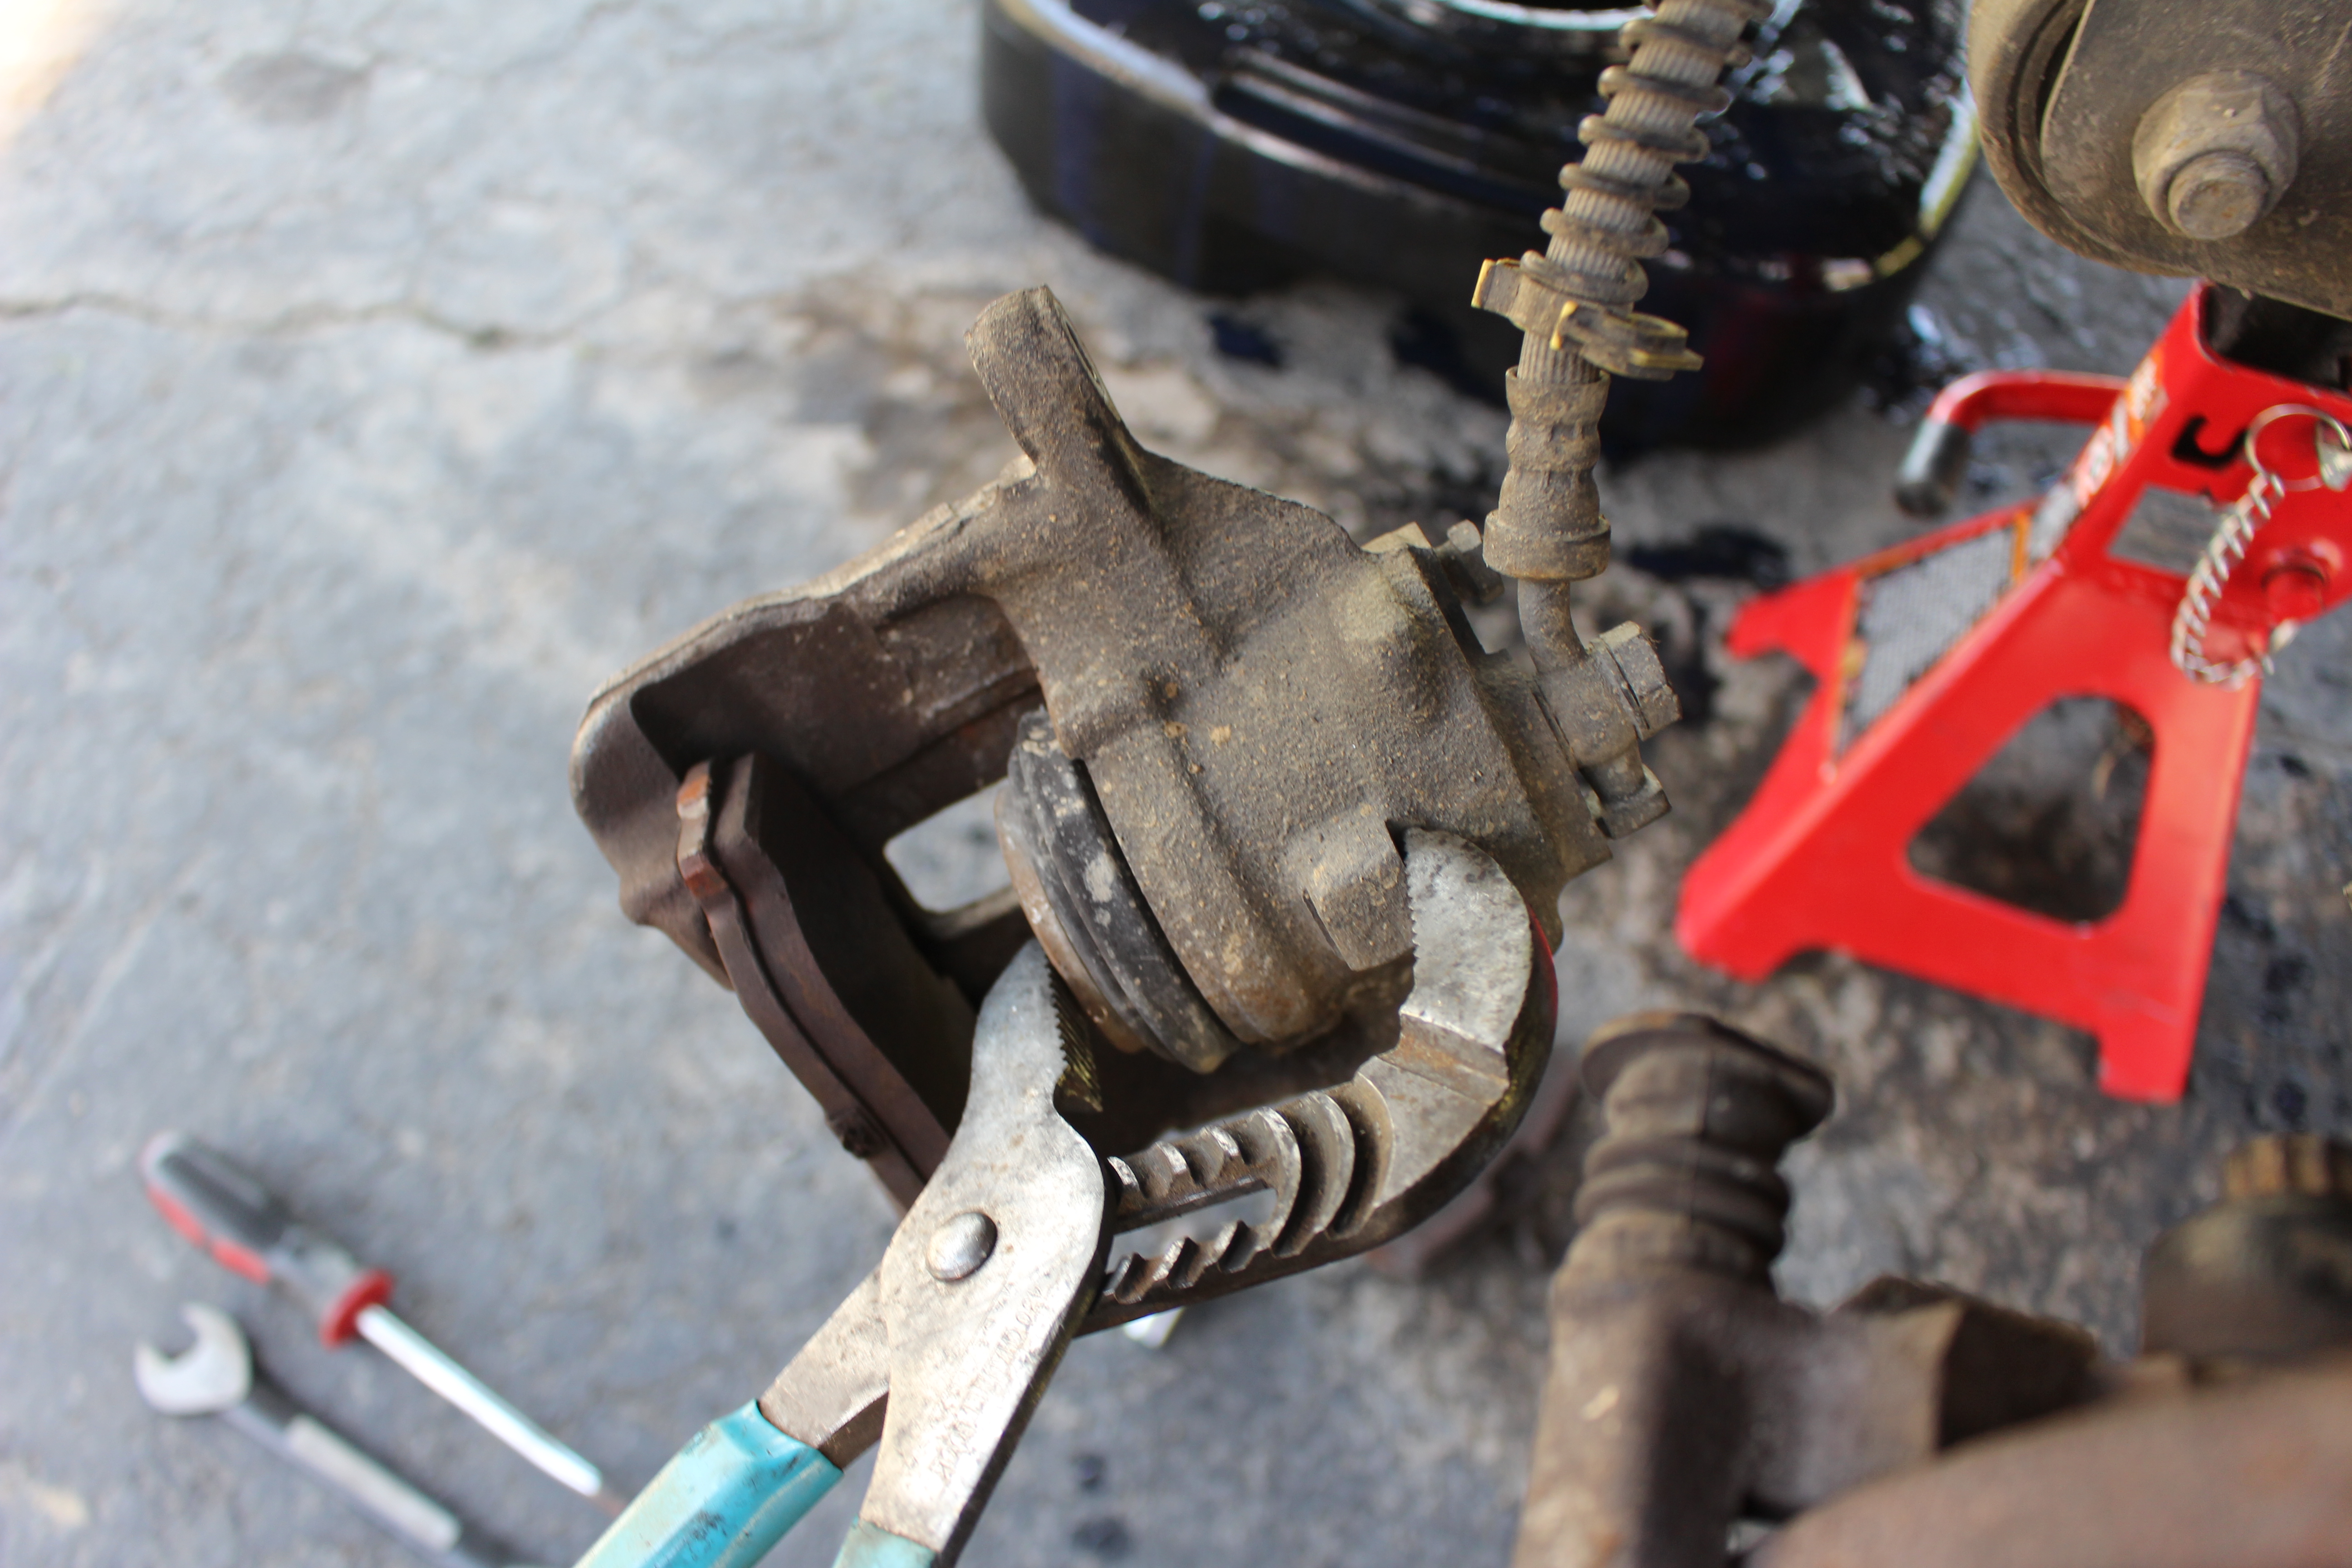
Now, for the calipers you will need to compress the piston. I use a large pair of channel locks I have and that works quite well. If you're doing the front then use two pairs of channel locks.
Then reinstall with the brake pads and reinstall the two 12mm bolts that hold it.
Now re-route the ABS sensor and plug it back in if you haven't already.
And finally put the wheels back on and pat yourself on the back. You're almost done.
Now crawl back under with your oil, a kerosene pump, and your cresent wrench. I recommend getting yourself some brass fill plugs. Lucky 8 sells them and they are a million times better than the plastic trash from the factory which gets ruined every time you remove them.

Use the pump and start pumping oil into your diff. This is by far the easiest way, but still time consuming.
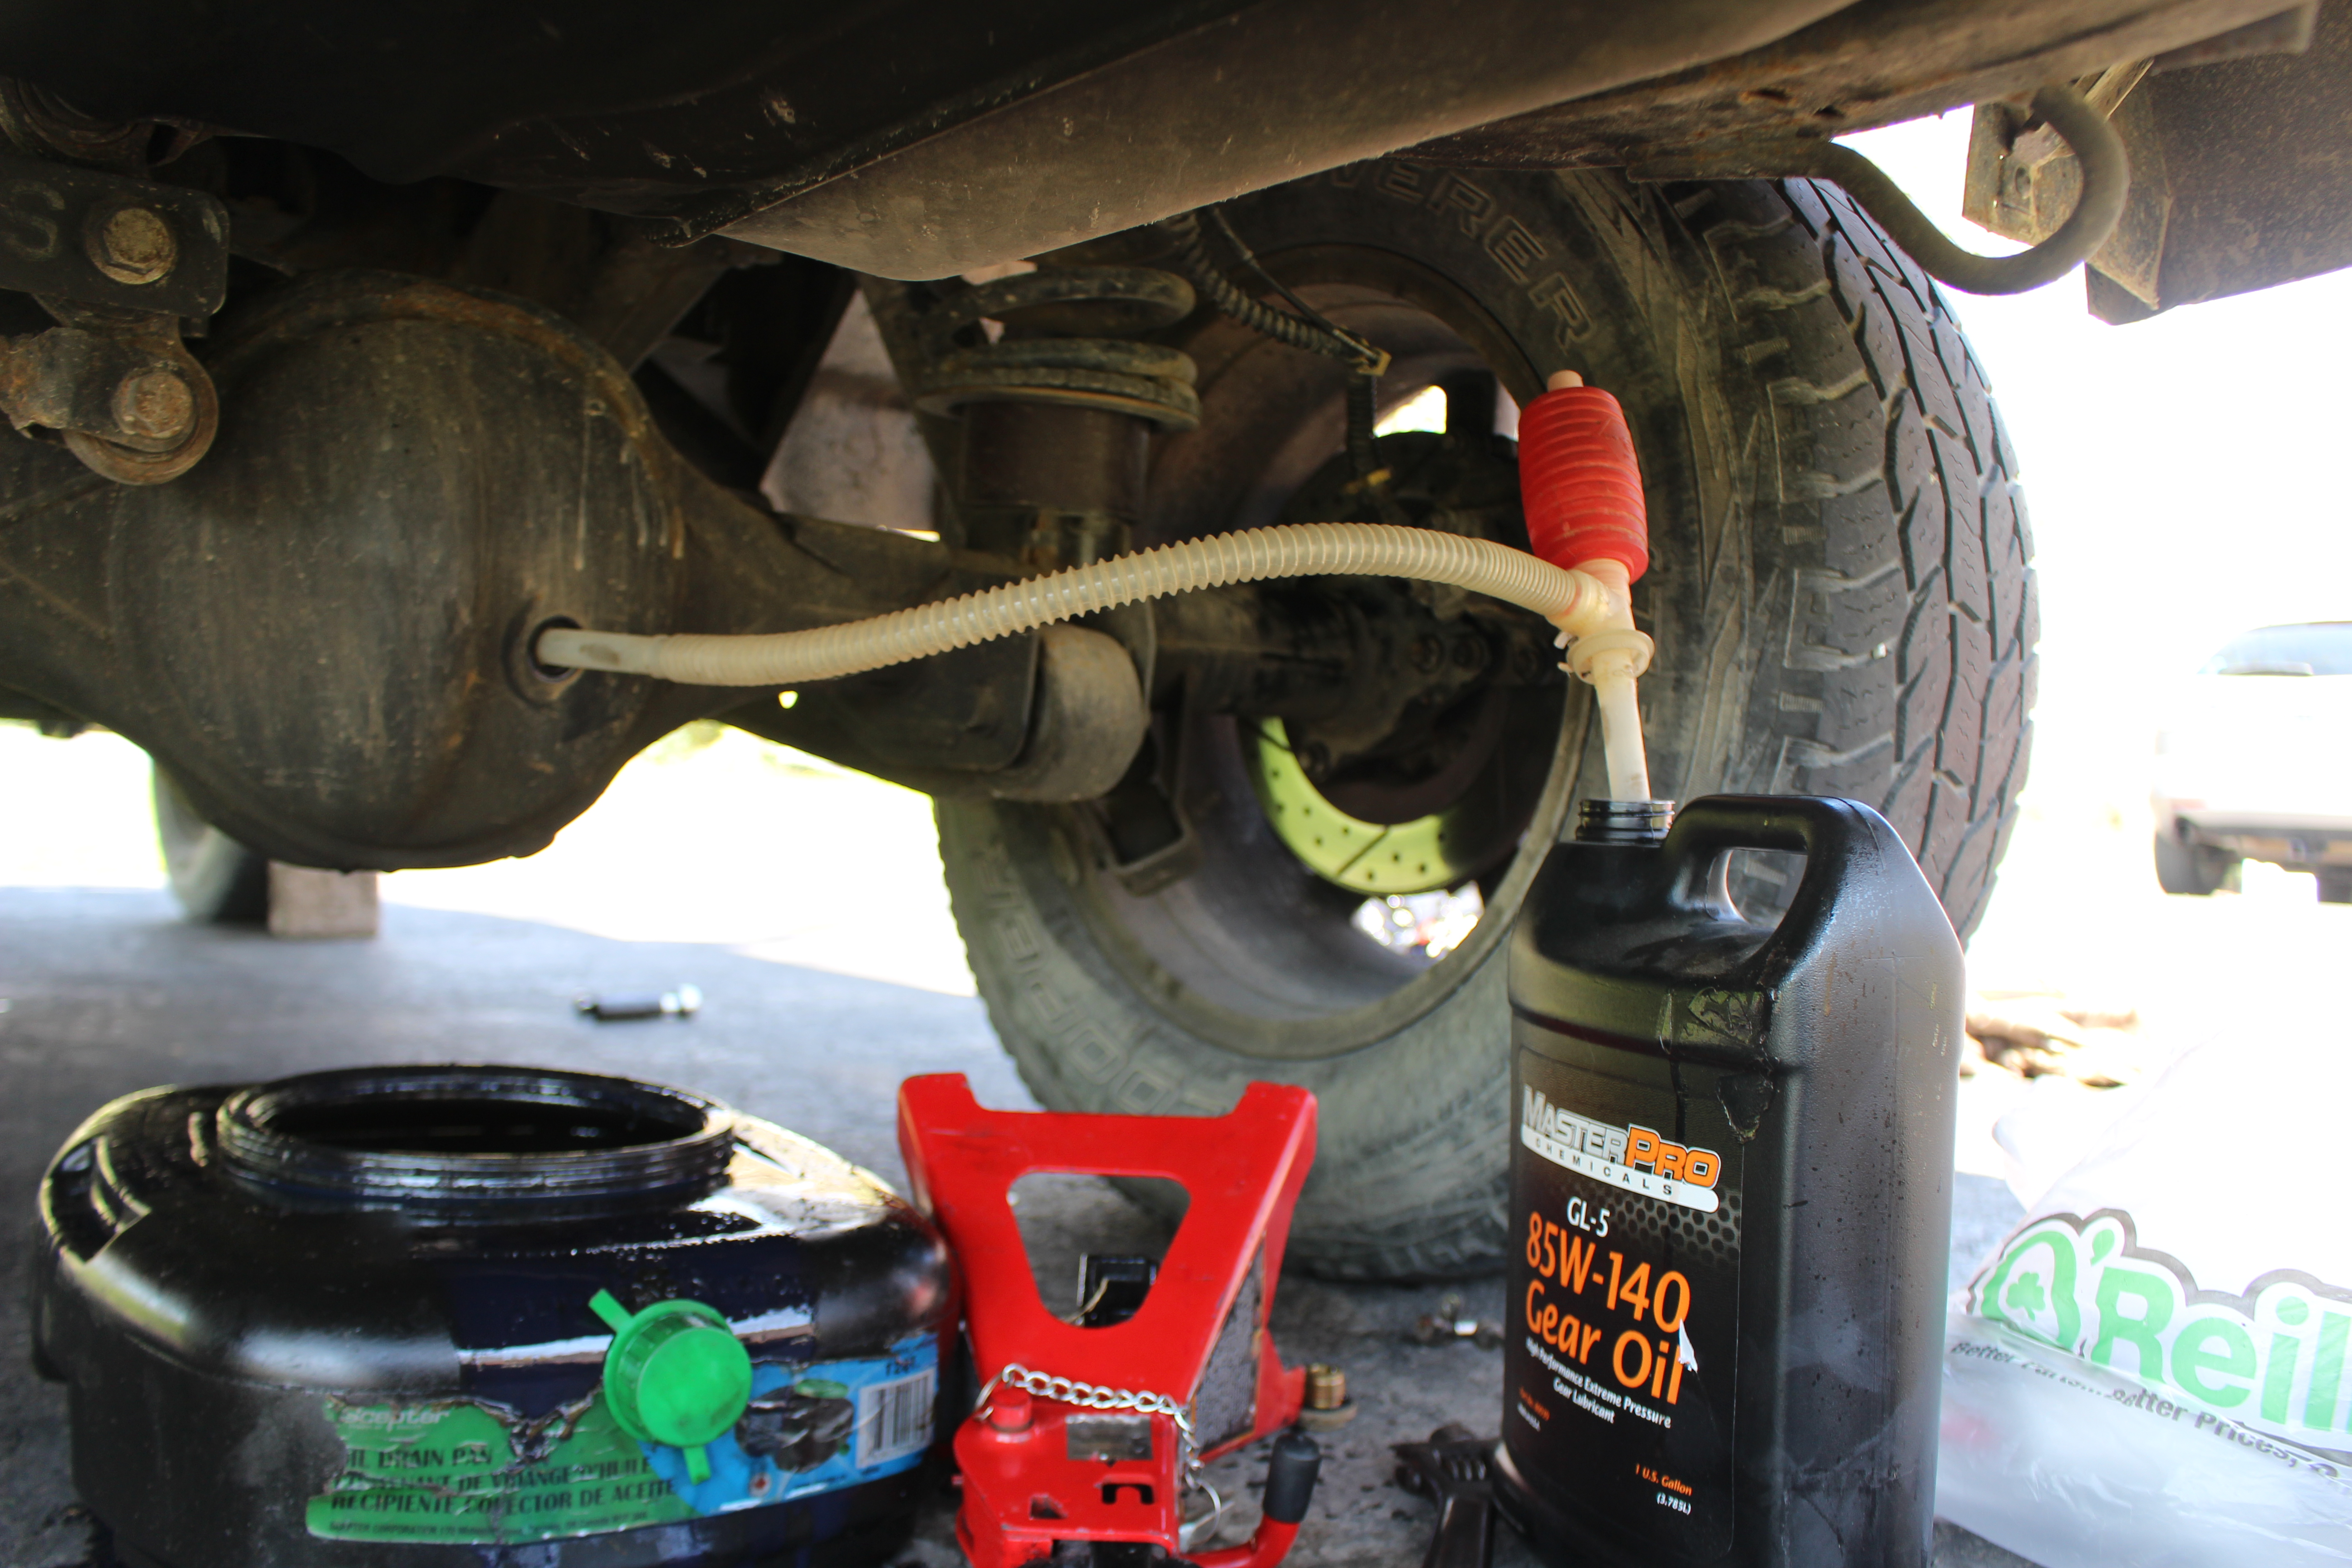
Once oil starts running out at a decent rate, your diff is full. Make sure you just don't have the pump end aimed up and it's running back down and out. You will be able to tell when you remove the pump end from the fill hole.
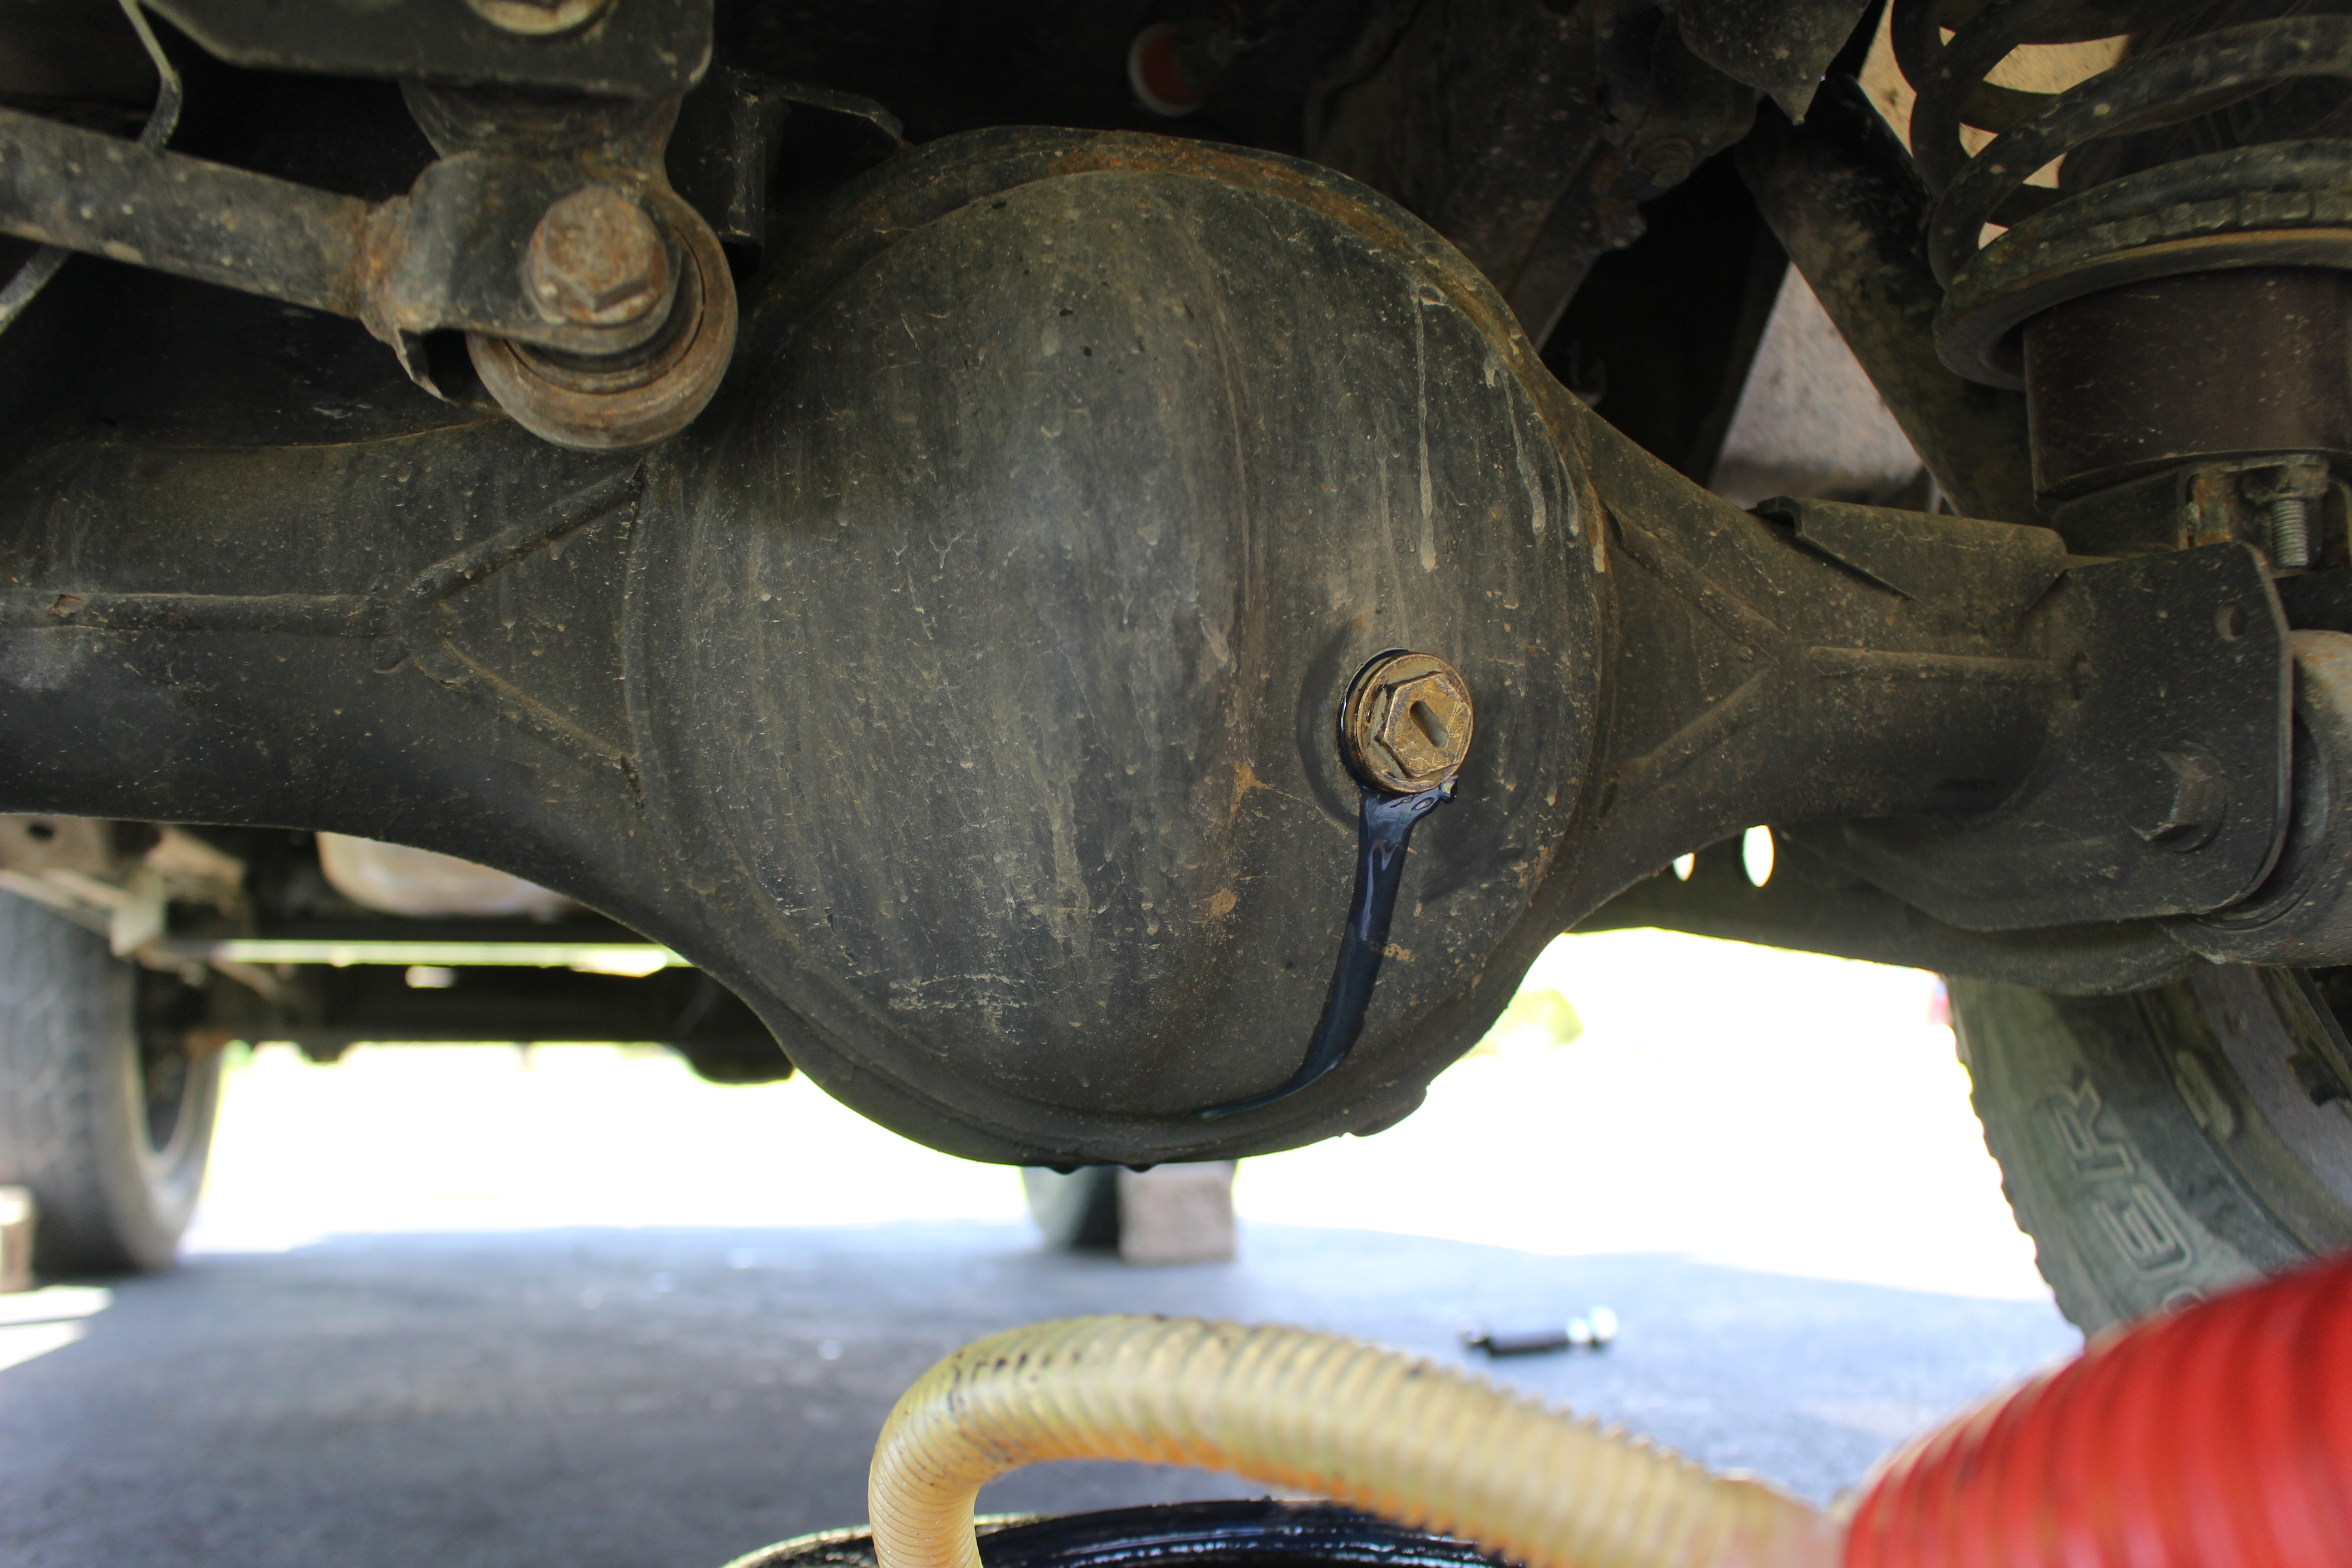
And finally, reintall the fill plug. Almost there.
Final step. Before you turn the truck back on and start moving, give your brakes a couple pumps to firm up in the rear since you had to compress the calipers. You do NOT need to bleed them, just give them a couple pumps. Now you're done! Take her for a spin to make sure everything is working correctly.
If you've got any questions or comments feel free to post them below!
Once you get it all cleaned up and there is no debris in the new diff, you will want to run a bead of your RTV all the way around the edges as shown.
Now for reinstallation. You'll also want to wipe the mating surface to clear it of oil so it does not effect the RTV. I also recommend following your specific brand's torquing and drying instructions. Typically that is one our finger tight, then full torque and wait till the next day to fill with fluids. I was in a rush to drive back to college, already late to an event, so I just torqued it down and filled it up after I got the rest back together.
The two bottom side bolts are the easiest two to get back in first. I recommend either having help at this point or, again, using a floor jack.
Now you can install the rest of the bolts and torque them down, or just crank down on them really good as I did.
Now reinstall your driveshaft the opposite of how you removed it. You will be able to rotate the diff however you need it to fit the driveshaft.
Evidentally I also forgot to take a picture of this. Anyway, you'll want to reinstall the steel cable on the dampening weight so that if it gets knocked off it will not leave the underside of your truck. Once you do that, you're done under the truck.
Now you're ready to reinstall hubs and axles. Before you do, wipe away any grease and especially grime which has run out where the hub goes.
The axle may take a little work getting the teeth lined up with the inside of the diff, but once it's in it will go easy. DO NOT FORCE ANYTHING. It should slide easily. Then put the four 15mm bolts back and torque them down.
I also ended up replacing one hub with one off my parts truck, axle and all for simplicity. I had cut the parts truck ABS sensor for ease (laziness), so I had to switch them. I didn't catch the allen key size, but if you do switch sensors be sure to not get ANY debris in the hub and to clean the sensor VERY well.
Next, feed your ABS sensor plug back through and clip the connector back together.
Now slap the rotor back on.
And the caliper bracket with it's two 12 point 13mm bolts.
Now, for the calipers you will need to compress the piston. I use a large pair of channel locks I have and that works quite well. If you're doing the front then use two pairs of channel locks.
Then reinstall with the brake pads and reinstall the two 12mm bolts that hold it.
Now re-route the ABS sensor and plug it back in if you haven't already.
And finally put the wheels back on and pat yourself on the back. You're almost done.
Now crawl back under with your oil, a kerosene pump, and your cresent wrench. I recommend getting yourself some brass fill plugs. Lucky 8 sells them and they are a million times better than the plastic trash from the factory which gets ruined every time you remove them.
Use the pump and start pumping oil into your diff. This is by far the easiest way, but still time consuming.
Once oil starts running out at a decent rate, your diff is full. Make sure you just don't have the pump end aimed up and it's running back down and out. You will be able to tell when you remove the pump end from the fill hole.
And finally, reintall the fill plug. Almost there.
Final step. Before you turn the truck back on and start moving, give your brakes a couple pumps to firm up in the rear since you had to compress the calipers. You do NOT need to bleed them, just give them a couple pumps. Now you're done! Take her for a spin to make sure everything is working correctly.
If you've got any questions or comments feel free to post them below!


Thread Starter
|
Camel Trophy
Joined: Aug 2014
Posts: 4,743
Likes: 985
From: Southwestern Virginia
Thanks, France.
Yea. After I got to looking, they're pretty much all dicked up. If I replaced them I would go poly, but honesltly its the same price for poly bushings as it is to get castor corrected arms from RTE, so I'll probably do that when I've got the money. That was the plan anyway since I wanted to move the rear axle back about 3" and they said they could make longer arms for me. This just pushes that more to the forefront.
Yea. After I got to looking, they're pretty much all dicked up. If I replaced them I would go poly, but honesltly its the same price for poly bushings as it is to get castor corrected arms from RTE, so I'll probably do that when I've got the money. That was the plan anyway since I wanted to move the rear axle back about 3" and they said they could make longer arms for me. This just pushes that more to the forefront.


Thread
Thread Starter
Forum
Replies
Last Post