
Oil Pump and Timing Chain Replacement Write Up


Thread Starter
|
Camel Trophy
Joined: Aug 2014
Posts: 4,743
Likes: 985
From: Southwestern Virginia
Alright, this is a pretty long write up. Hell, it's a pretty long job. Took me two days, fair warning. First off, lets start with the supplies you'll need.
You'll want a couple gallons of pre-mixed antifreeze, or one gallon of full strength and on gallon of distilled water. Don't use tap water because the minerals will solidify inside your cooling system. Also fetch some delicious high ZDDP oil, a box of band clamps if you haven't already switched all your coolant hoses to them, and an oil filter. I recommend either the Mobil 1 M1-301 (my personal preference) or the Wix 51515XP (a little cheaper, it was on sale, doesn't filter quite as well but pretty close). I also used some water wetter, but it's not absolutely necessary. The one thing I forgot to picture is Vaseline. Be sure to get yourself either some petroleum jelly or some assembly lube. I went with petroleum jelly because its cheap and easy. You also, absolutely, without a doubt, must have a 2 foot breaker bar OR a large torque wrench. Without one or the other you will never get past the harmonic balancer.
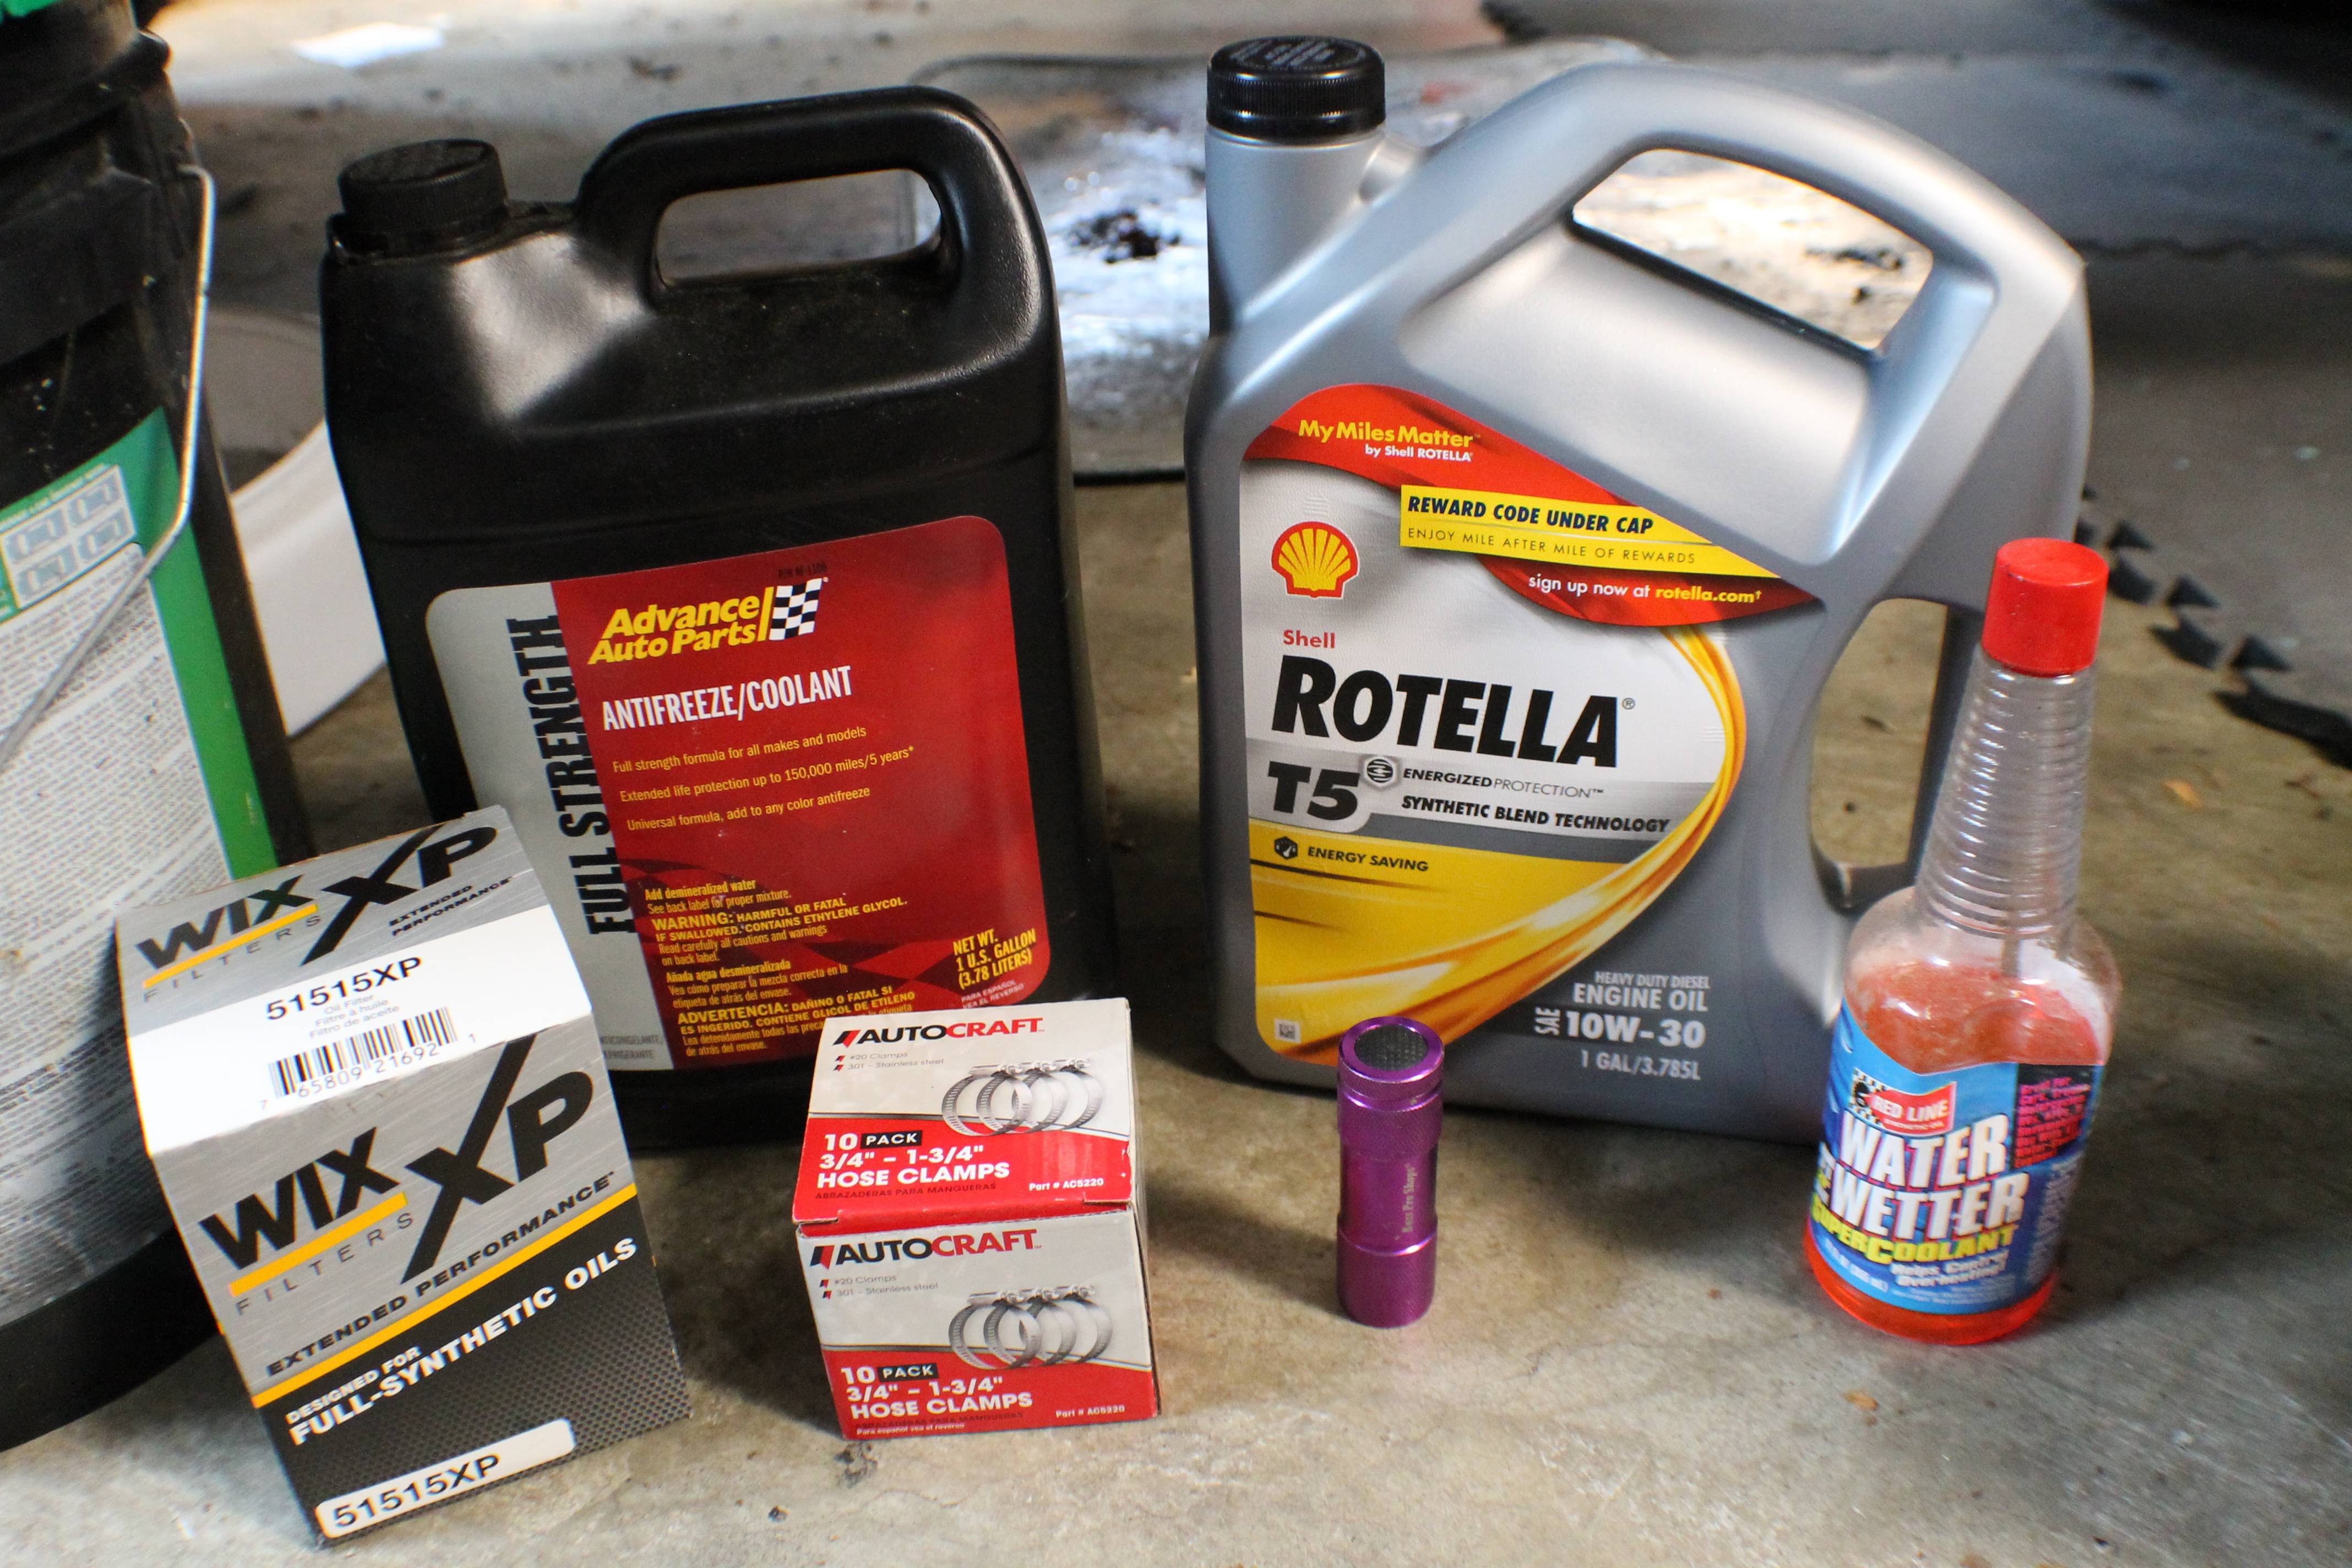
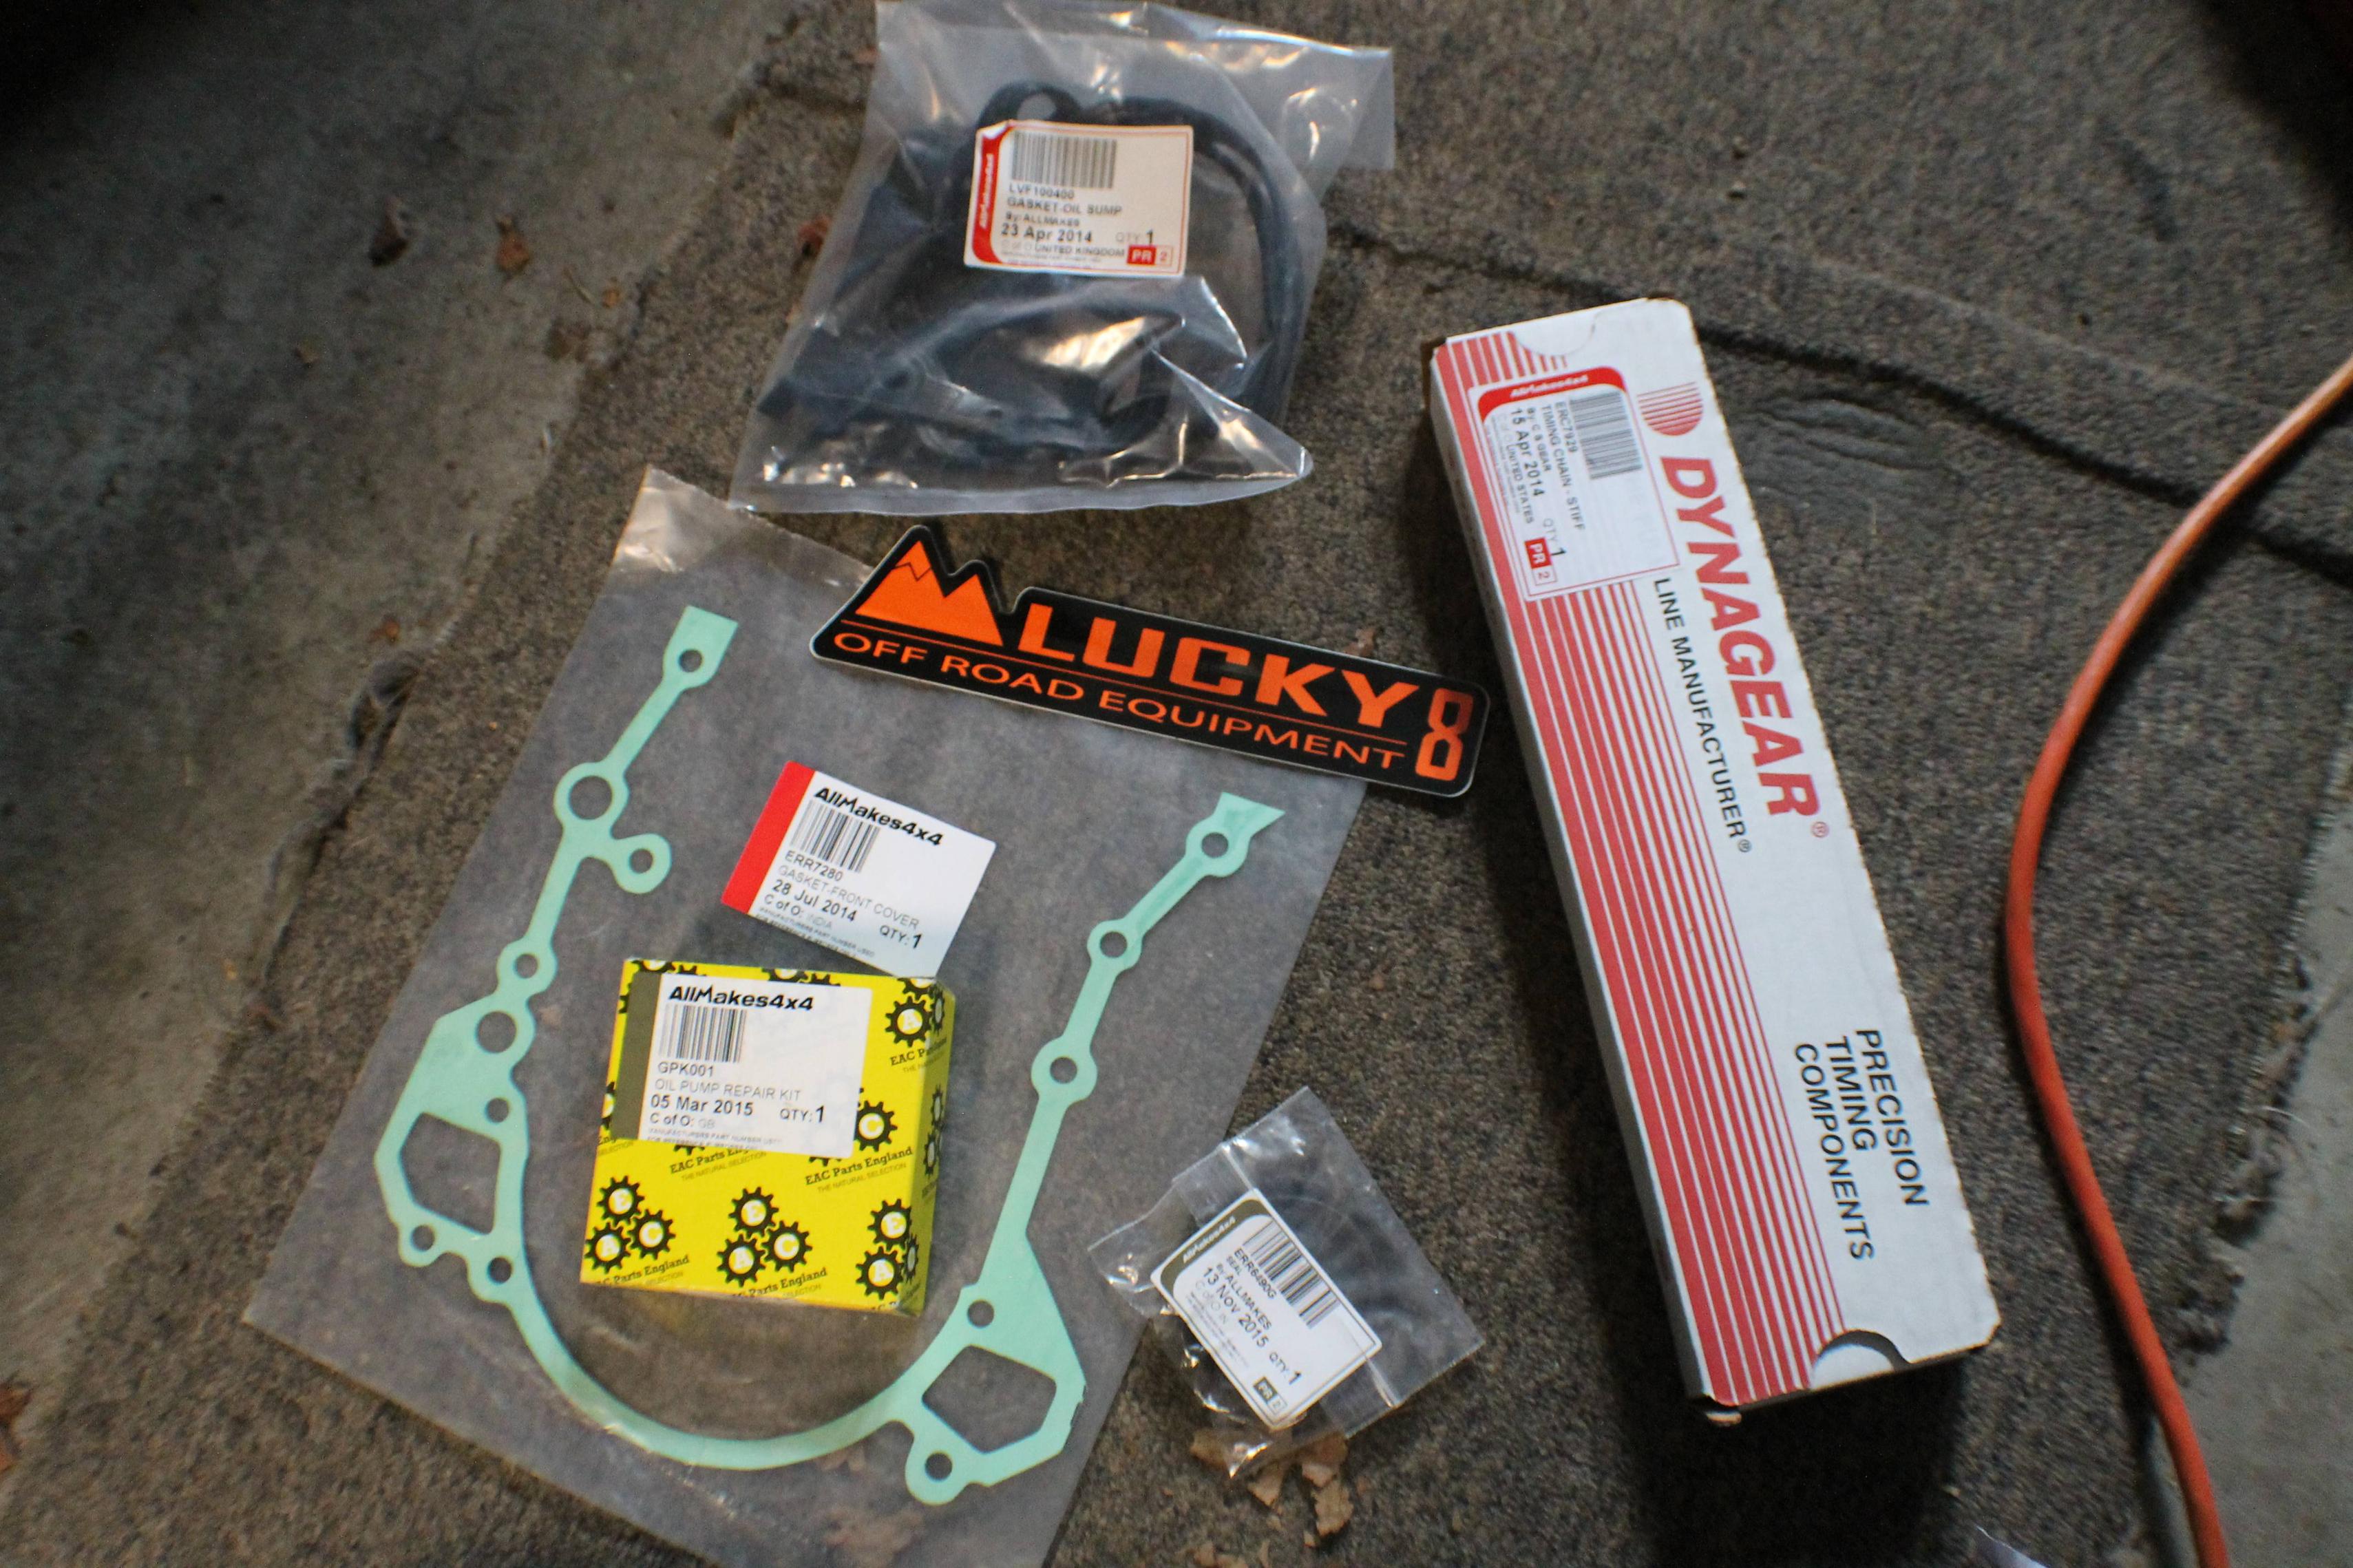
Ok, you'll also need the actual parts for the replacement. I got the whole set as a kit from Lucky 8 and Erik gave me a forum member discount. It was a steal compared to anything I could find online. Message him for more info. Land Rover Forums - Land Rover Enthusiast Forum - View Profile: WNYErikDiscoII
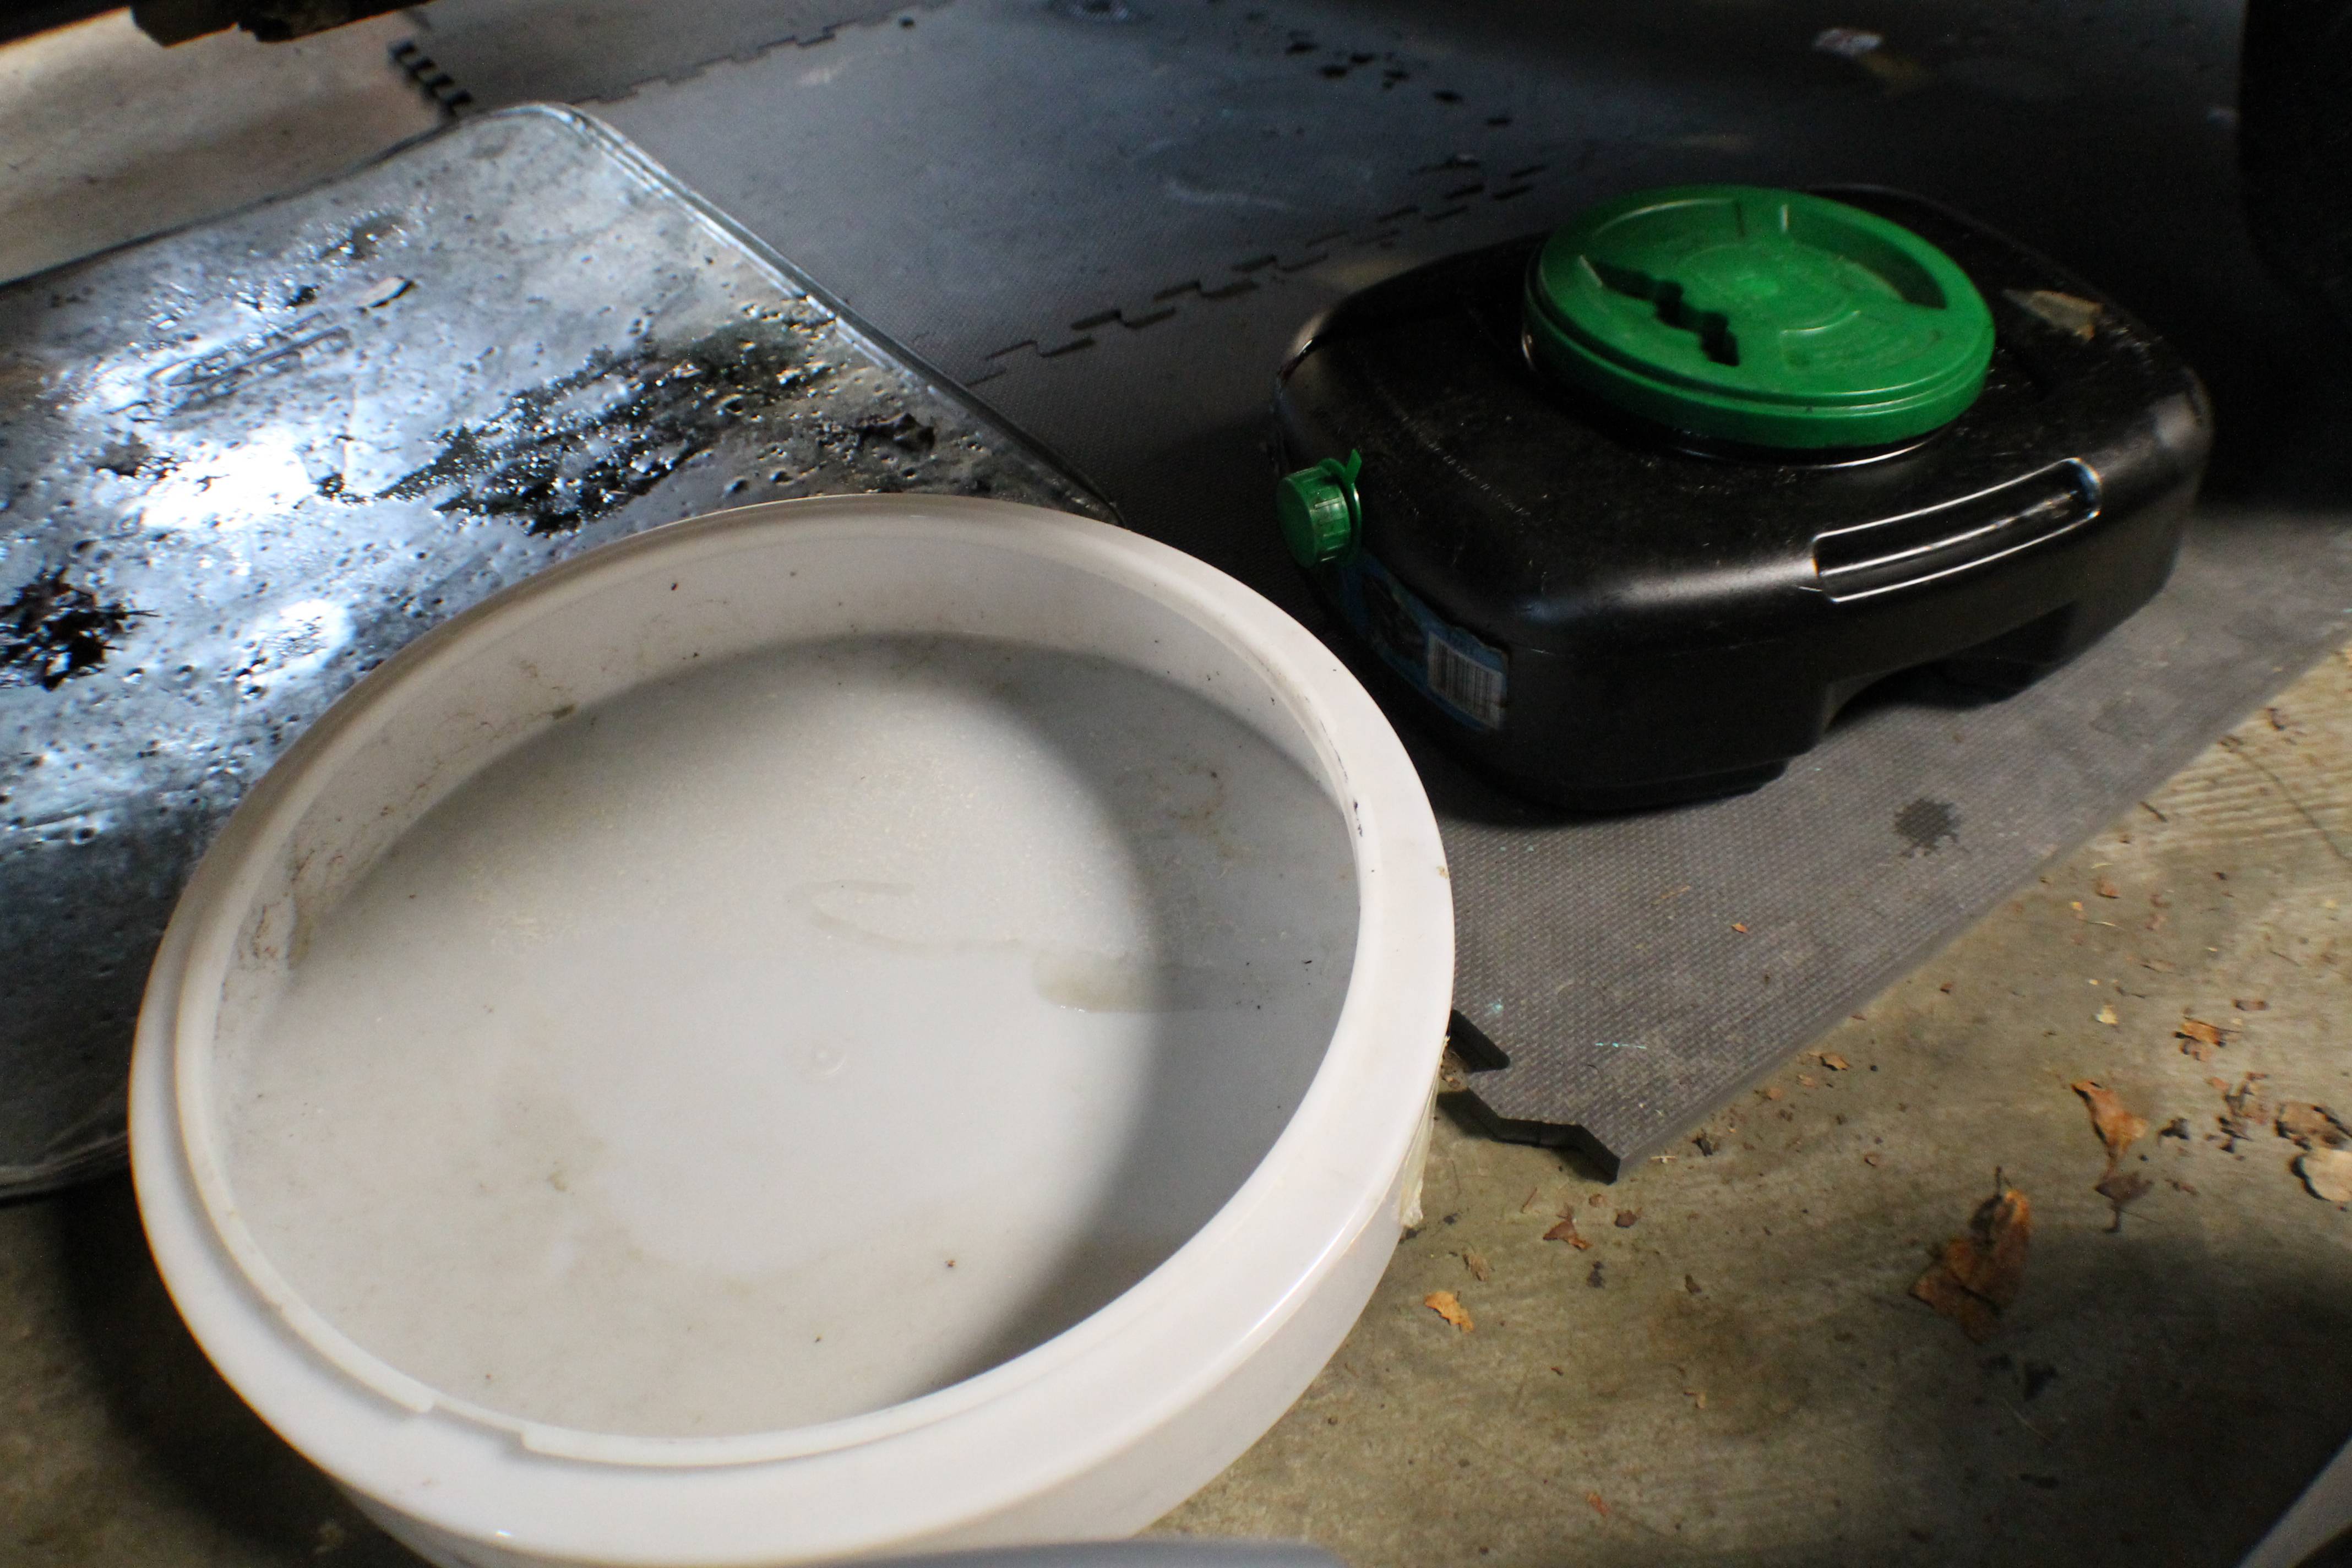
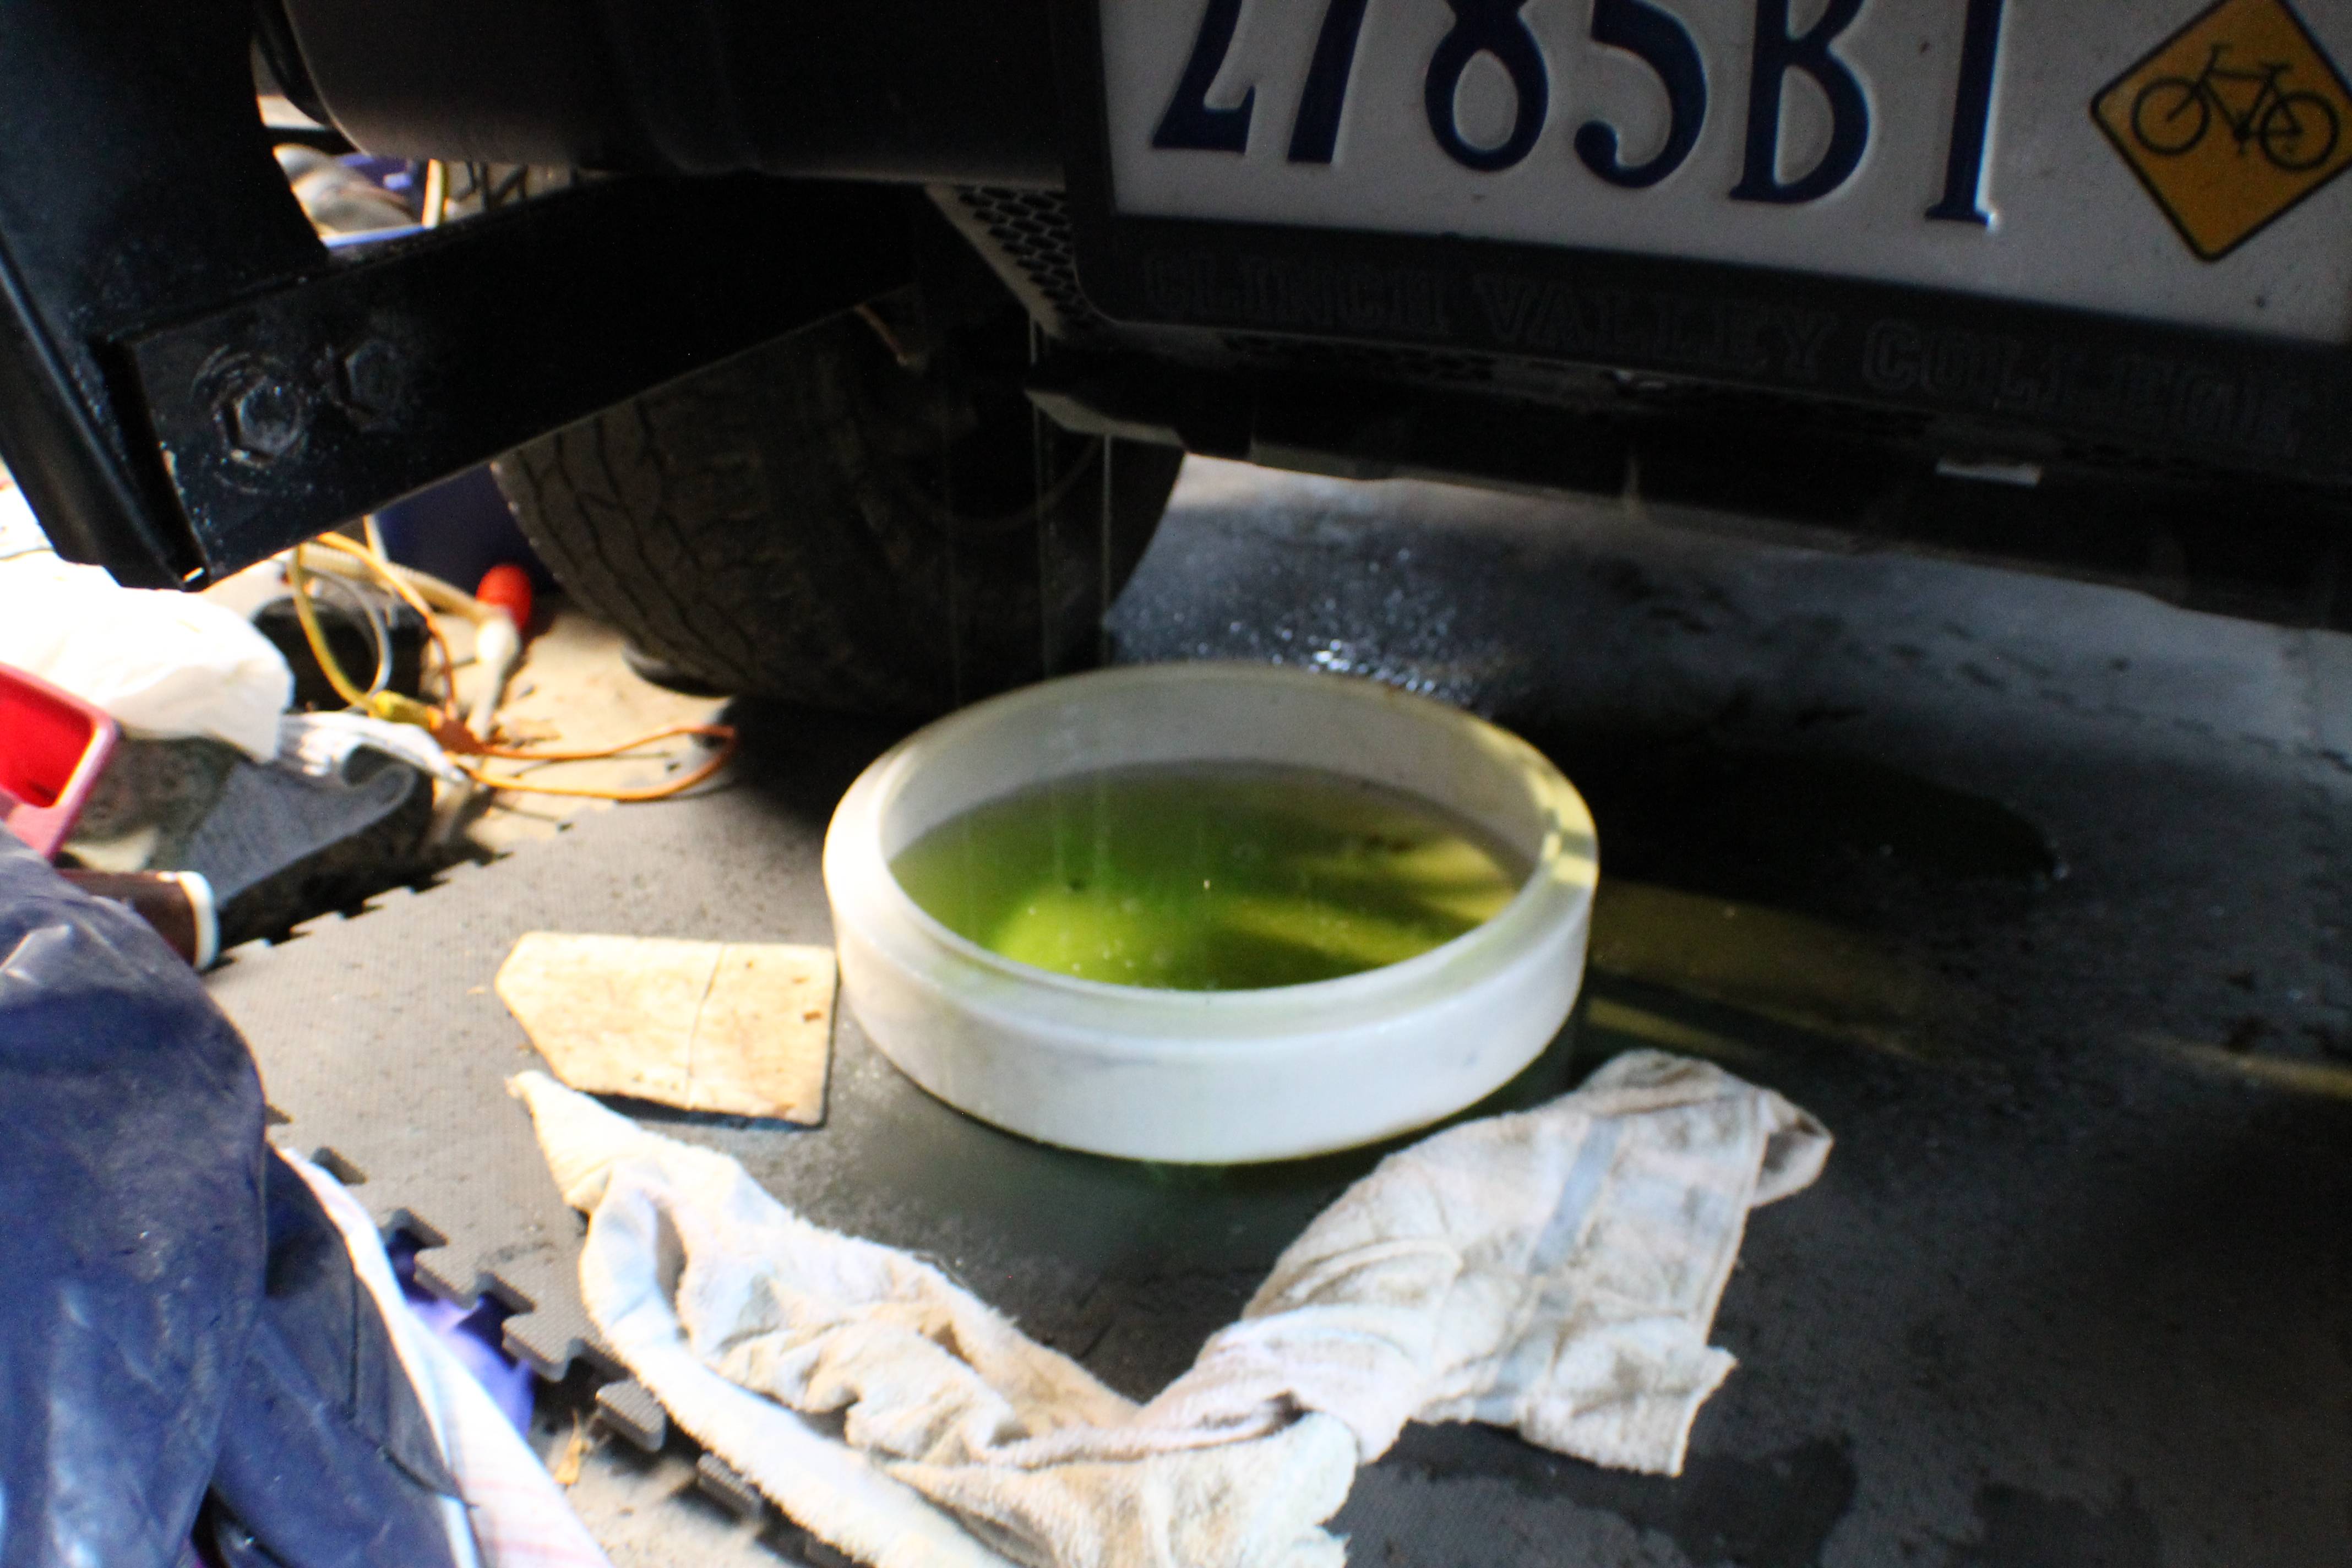
Now, if you've ever drained your cooling system you know what a d*mn mess it makes all over the place. If you've never drained your cooling system... it makes a d*mn mess all over the place. Might work on a drain valve in the future... Anywho, find yourself some sort of pan with a large mouth. I've got this old light fixture I've been using for a couple years that works great. You'll also want a separate pan to drain your oil into.
Ok, now we can jump into the write up.
-=-=-=-=-=-=-=-=-=-=-=-=-=-=-=-=-=-=-=-=-=-=-=-=-=-=-=-=-=-=-=-=-=-=-=-=-=-=-=-=-=-=-=-=-=-=-=-=-=-=-=-=-=-=-=-=-=-=-
Since this is such a large job and the write up is going to be pretty long as it is, I'm not going to picture every single little nut and bolt that needs to be removed one at a time. I will, however, picture the area and describe what needs to be done. If you can't follow the instructions in this manner, you should not attempt this job. If you're not sure if you are capable of tackling this job, read through the write up and feel free to ask questions before starting. I, as well as many others, would be more than happy to answer any and all questions you may have.
-=-=-=-=-=-=-=-=-=-=-=-=-=-=-=-=-=-=-=-=-=-=-=-=-=-=-=-=-=-=-=-=-=-=-=-=-=-=-=-=-=-=-=-=-=-=-=-=-=-=-=-=-=-=-=-=-=-=-
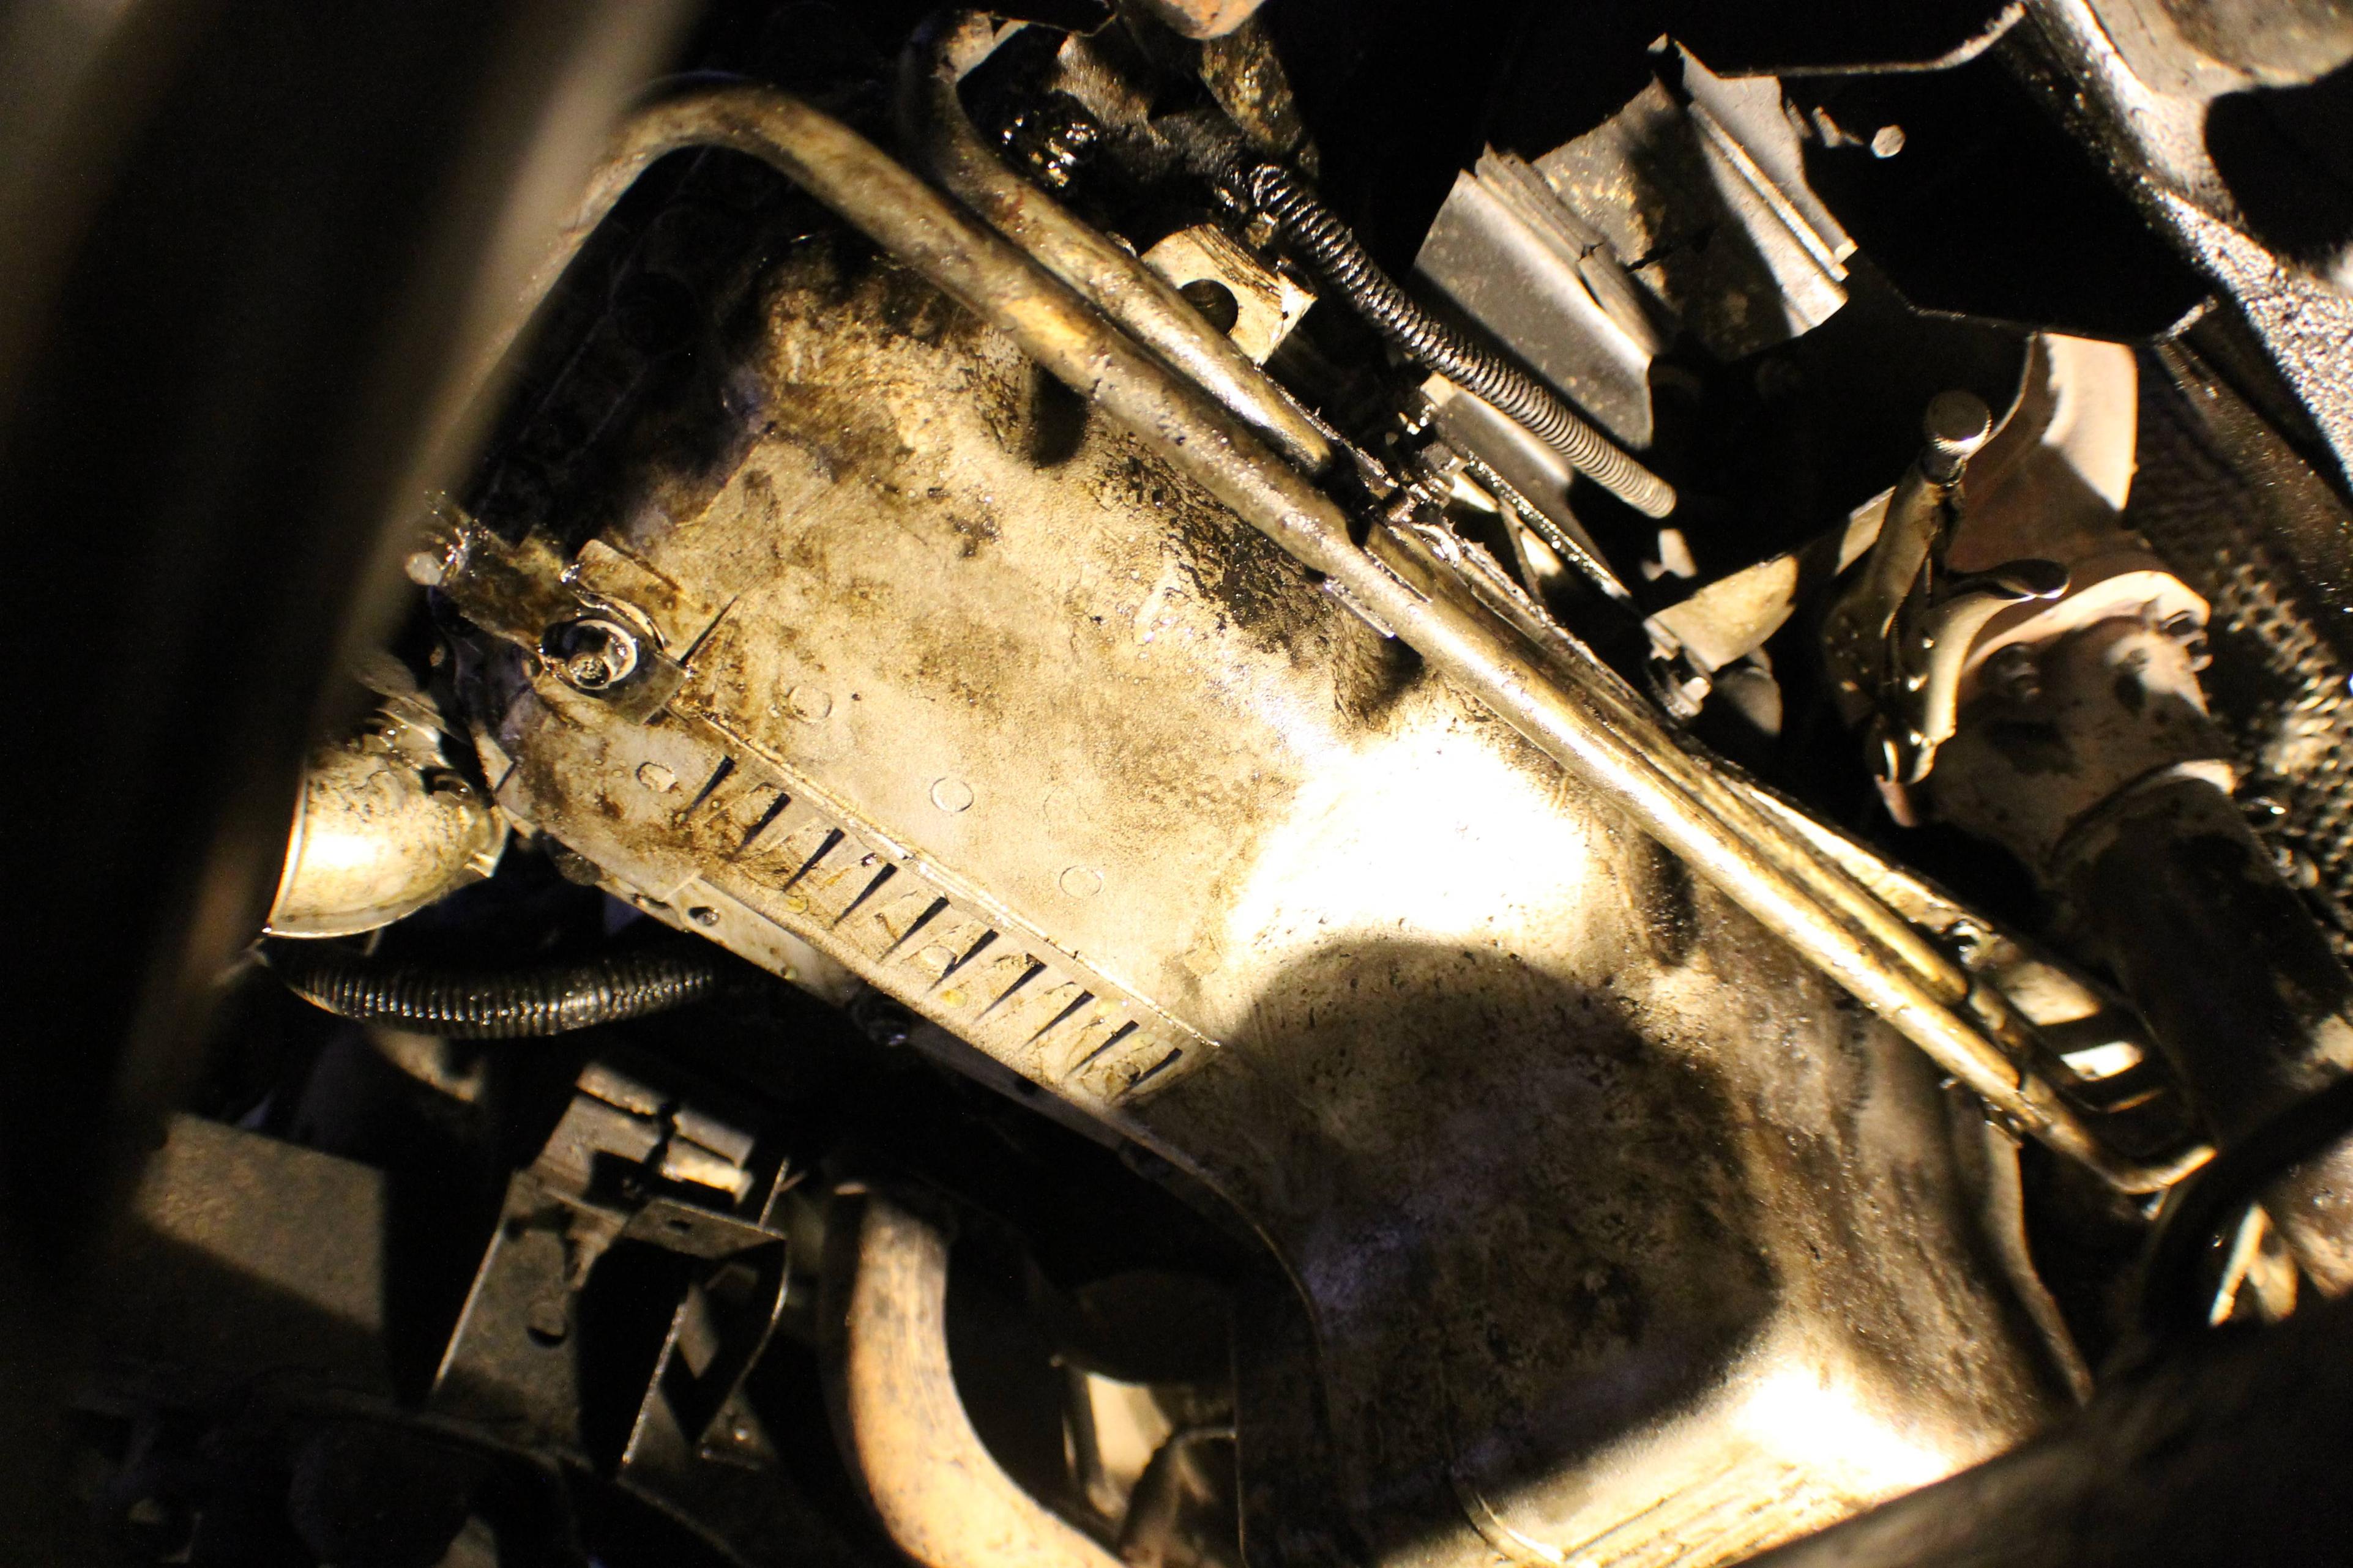
Alright, starting off with easy stuff. We are simply going to drain the oil and the coolant. Draining oil is easy. Pop off the filler cap, crawl underneath with your 15mm socket on a ratchet and your oil drain pan. It may be easier to use a breaker bar to break the drain plug loose. I usually do just for ease. I always end up punching the cross member when it breaks loose if I don't use the breaker bar. Drop the plug out and allow all the oil to drain. Now sit the plug somewhere that you won't lose it or return it to the drain hole.
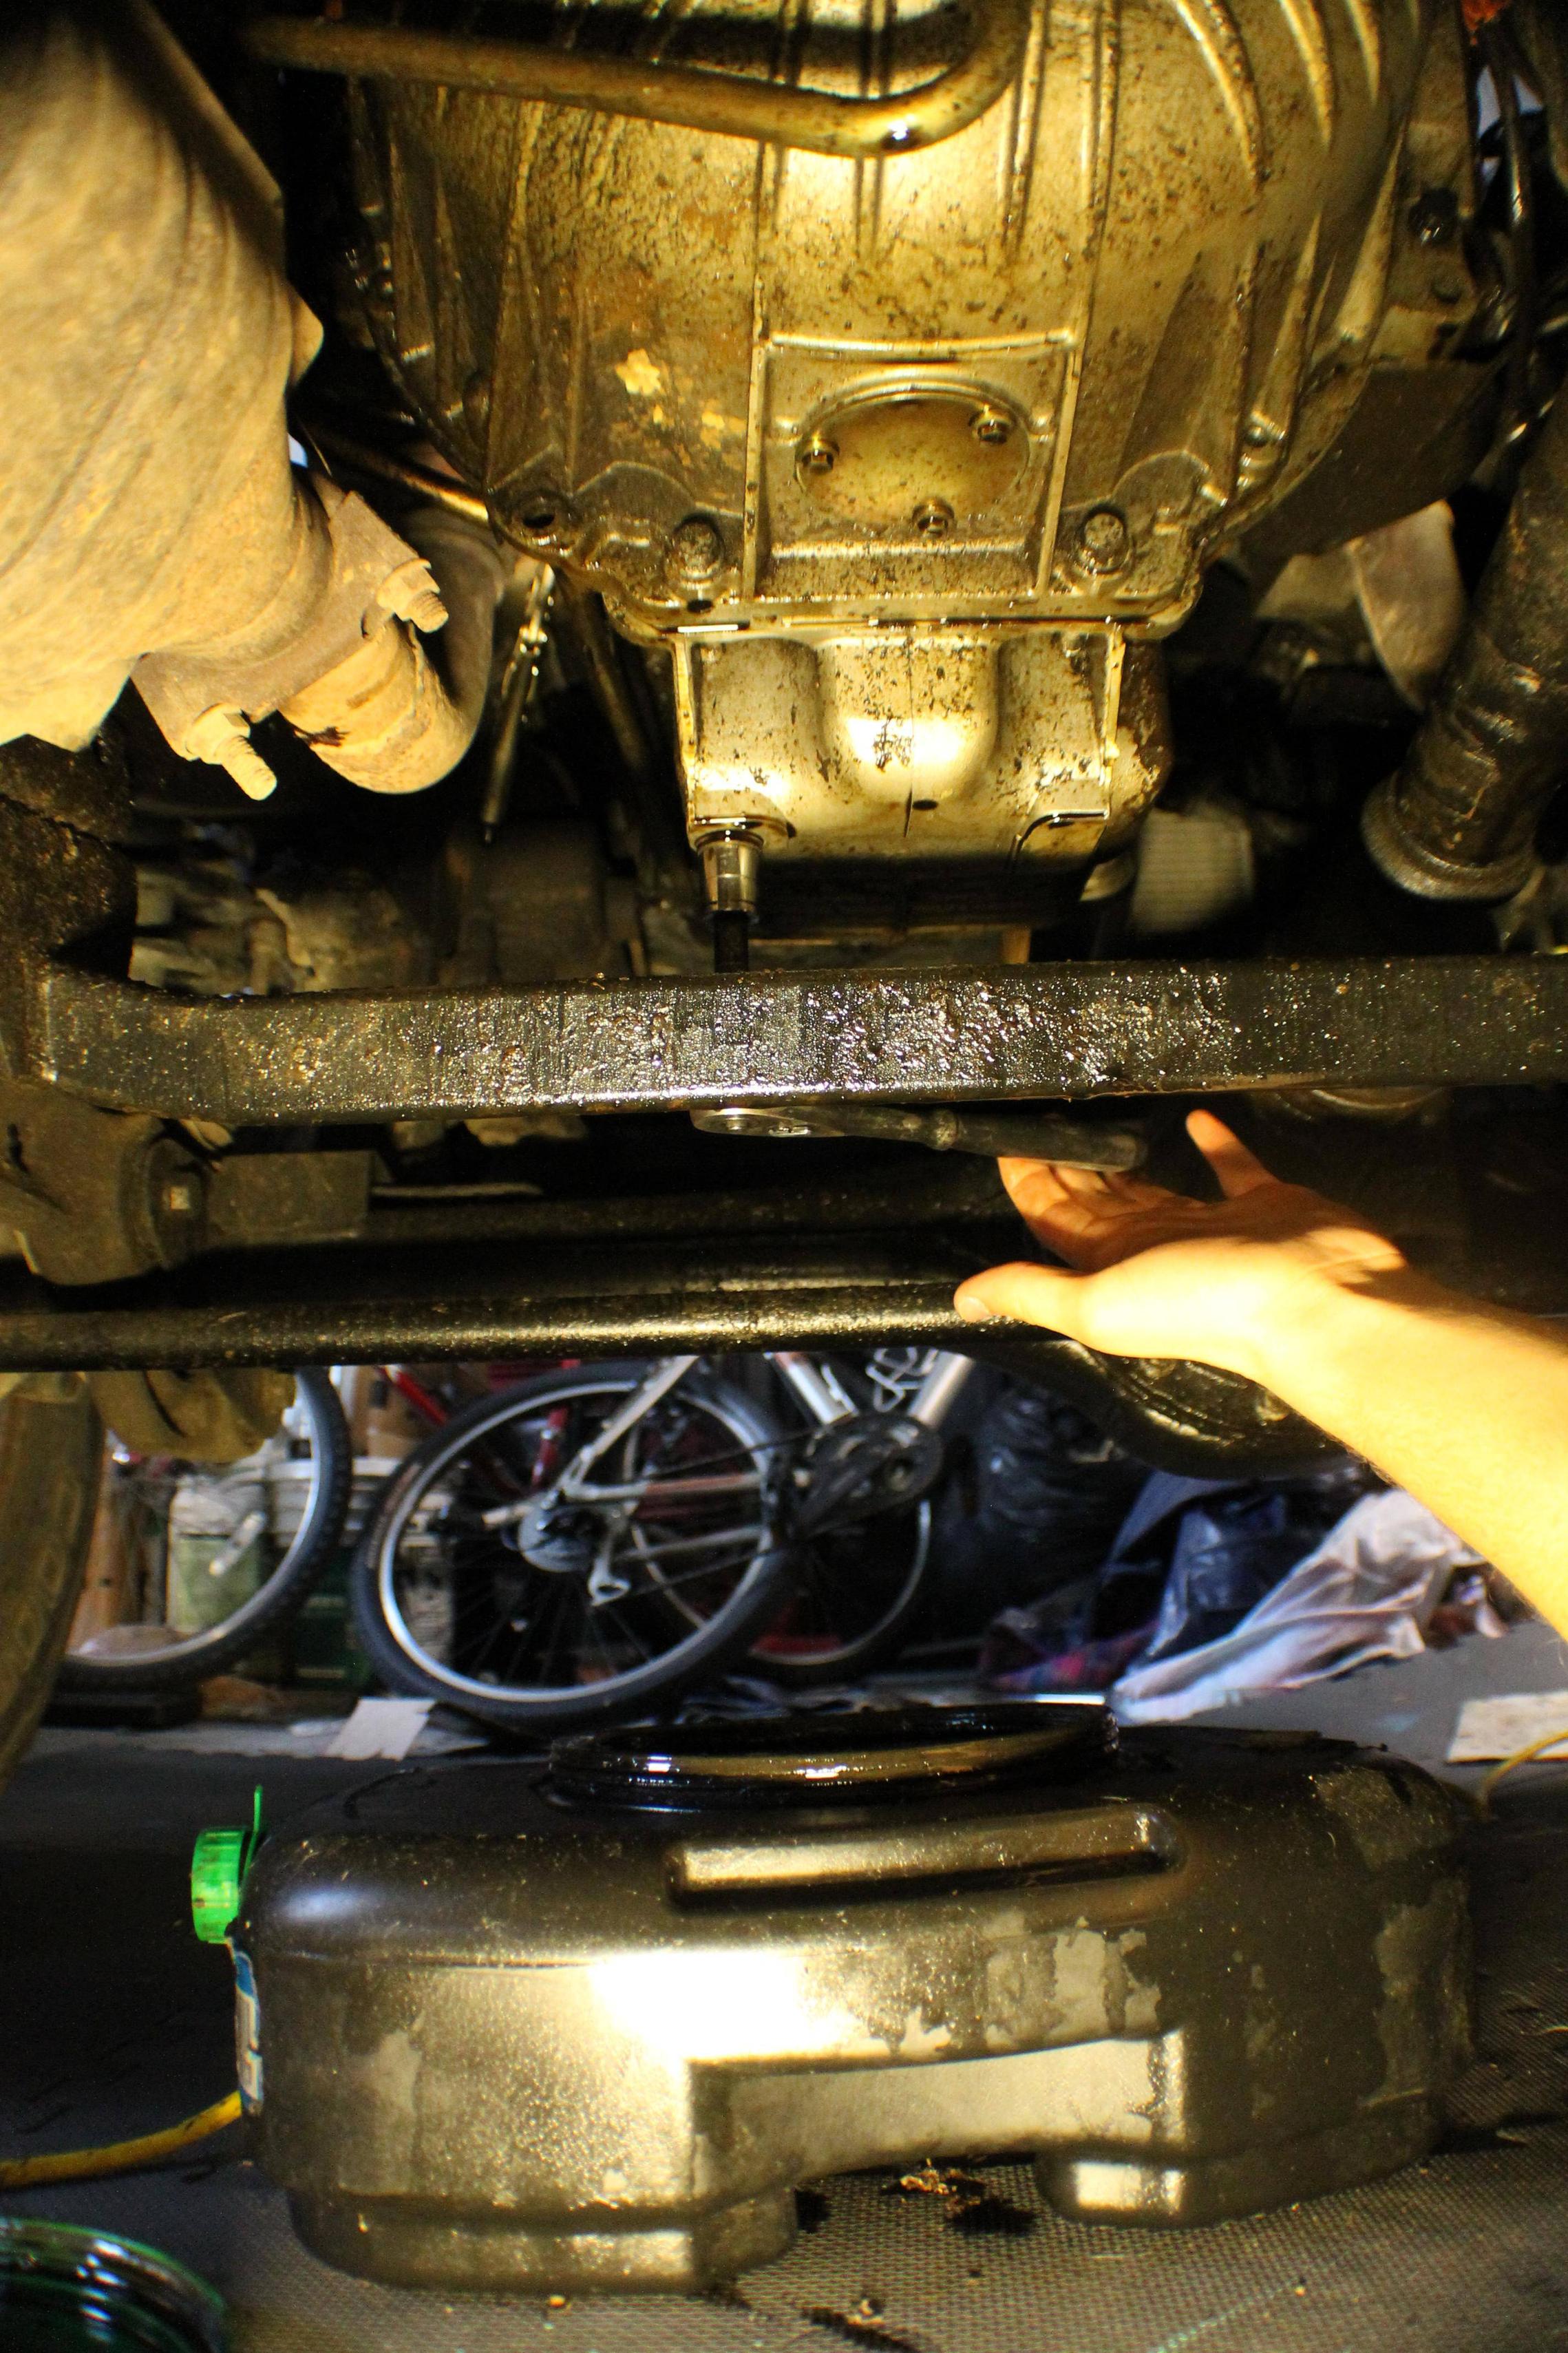
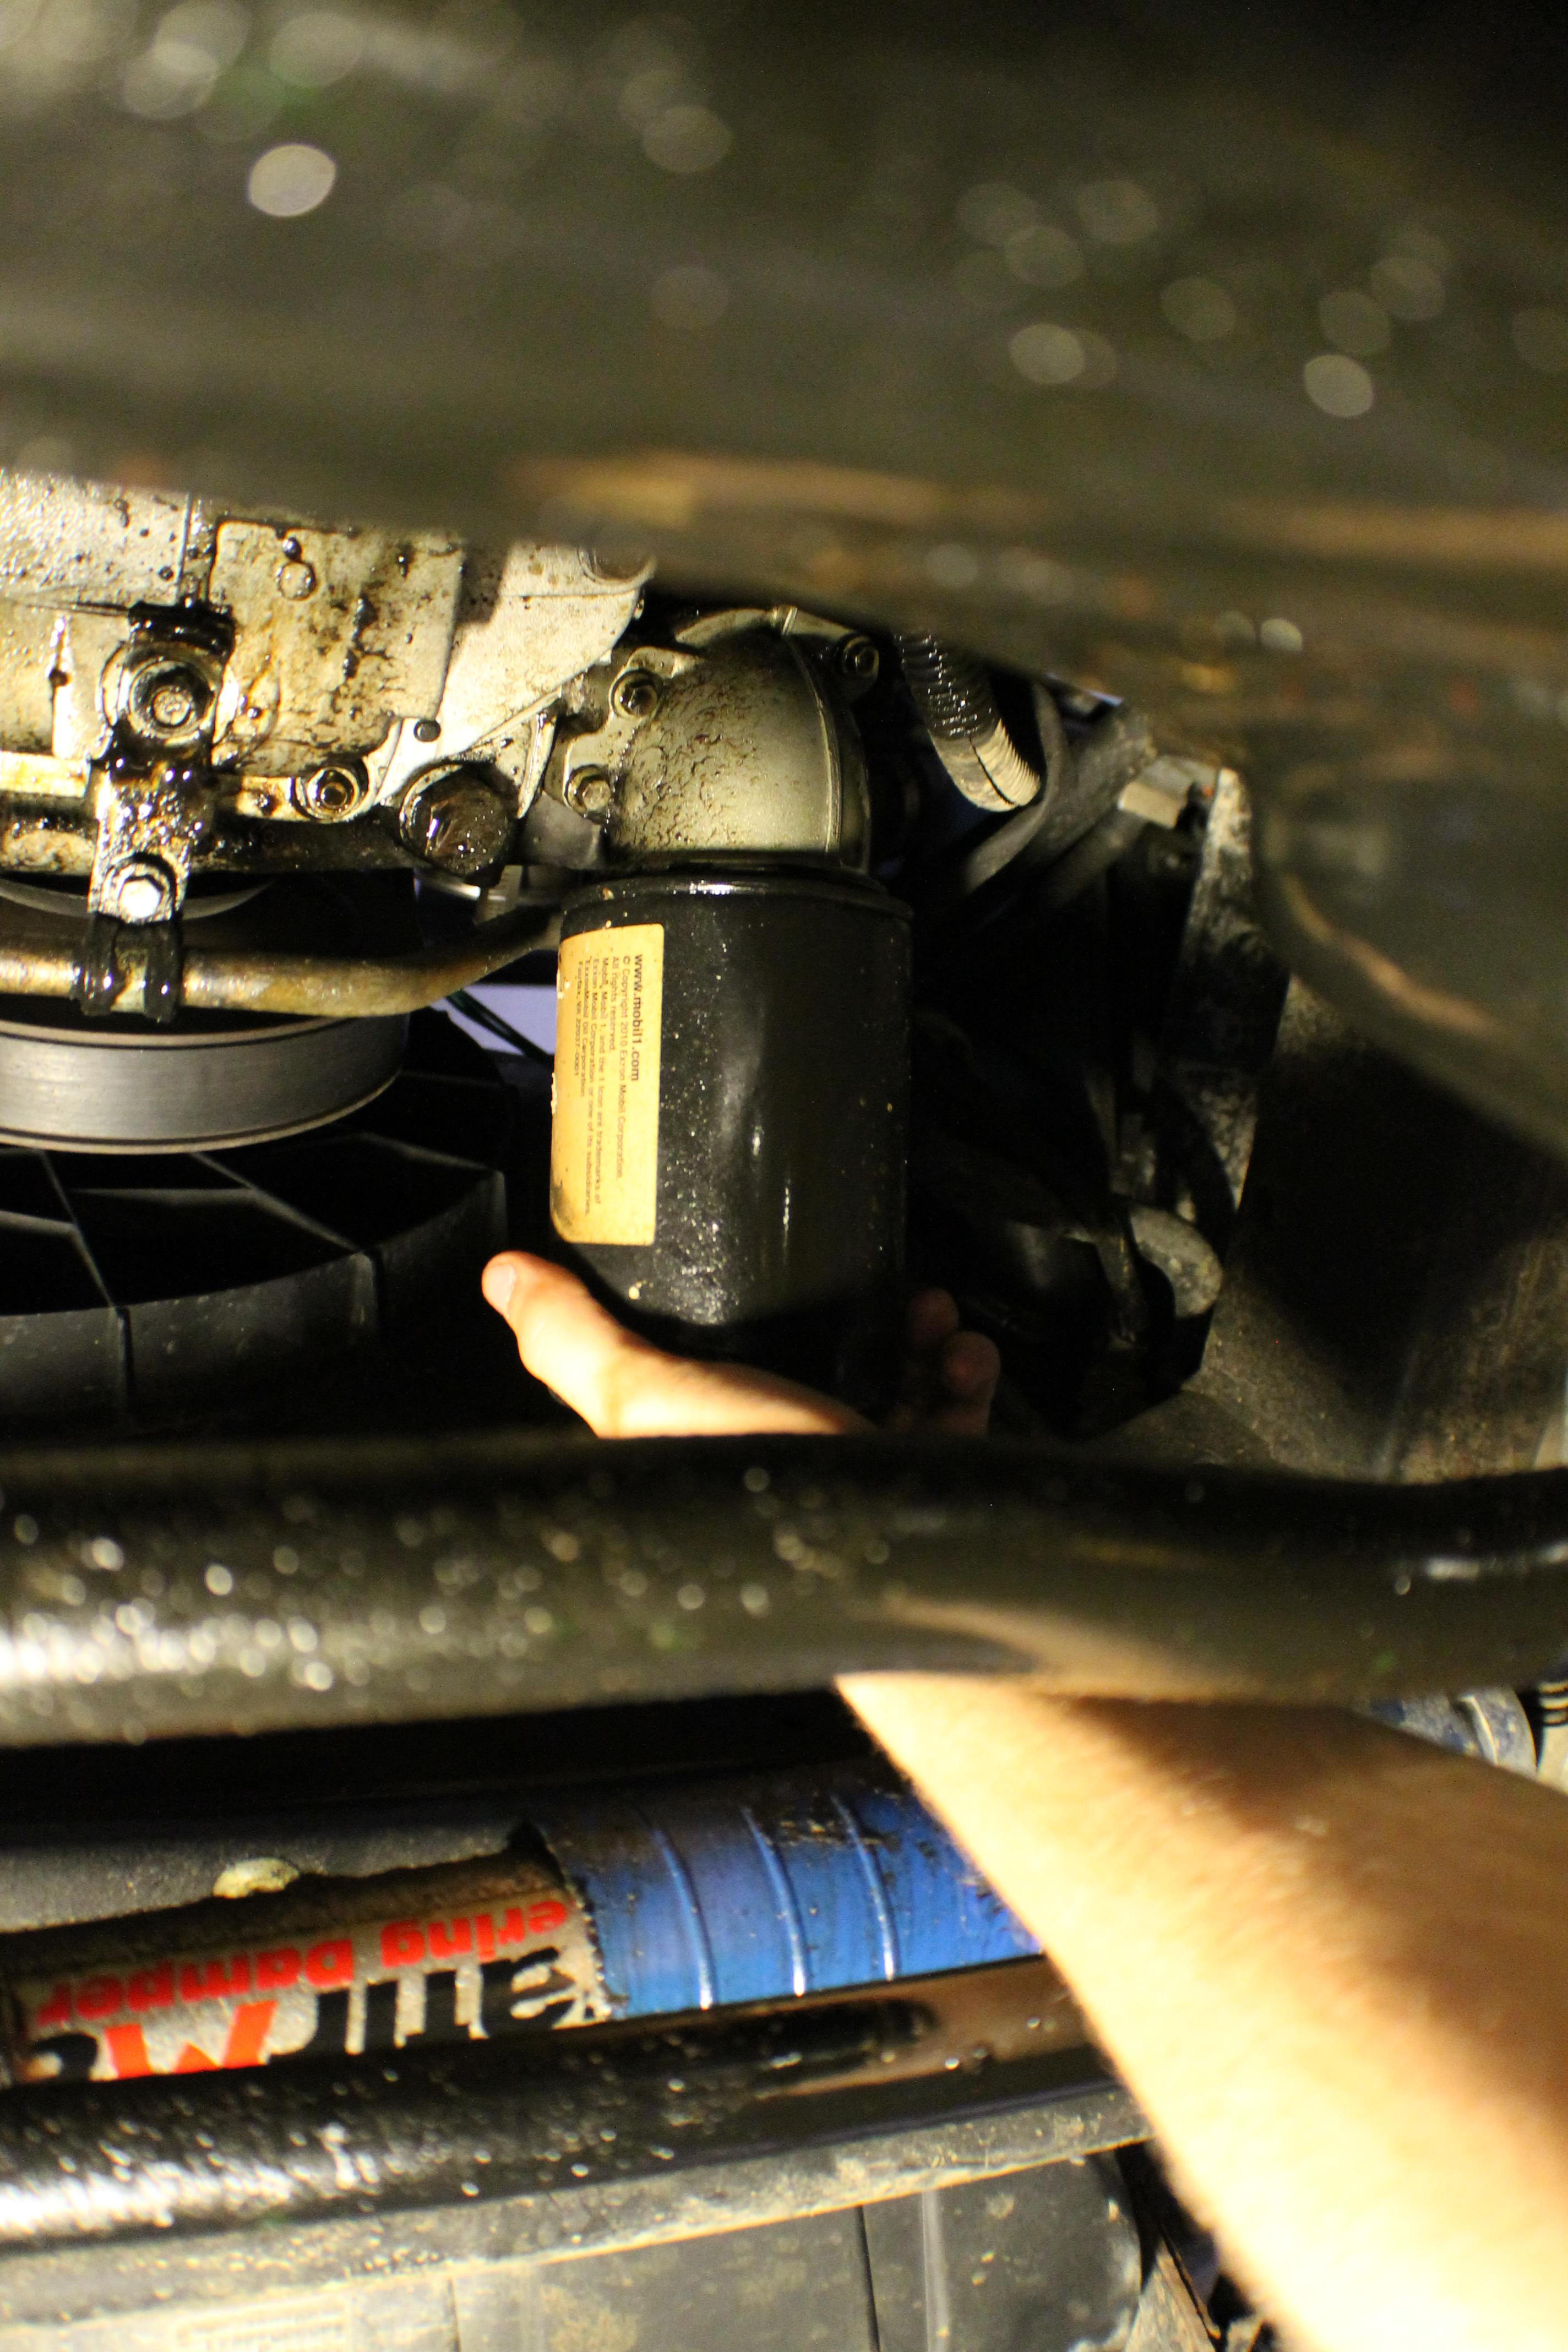
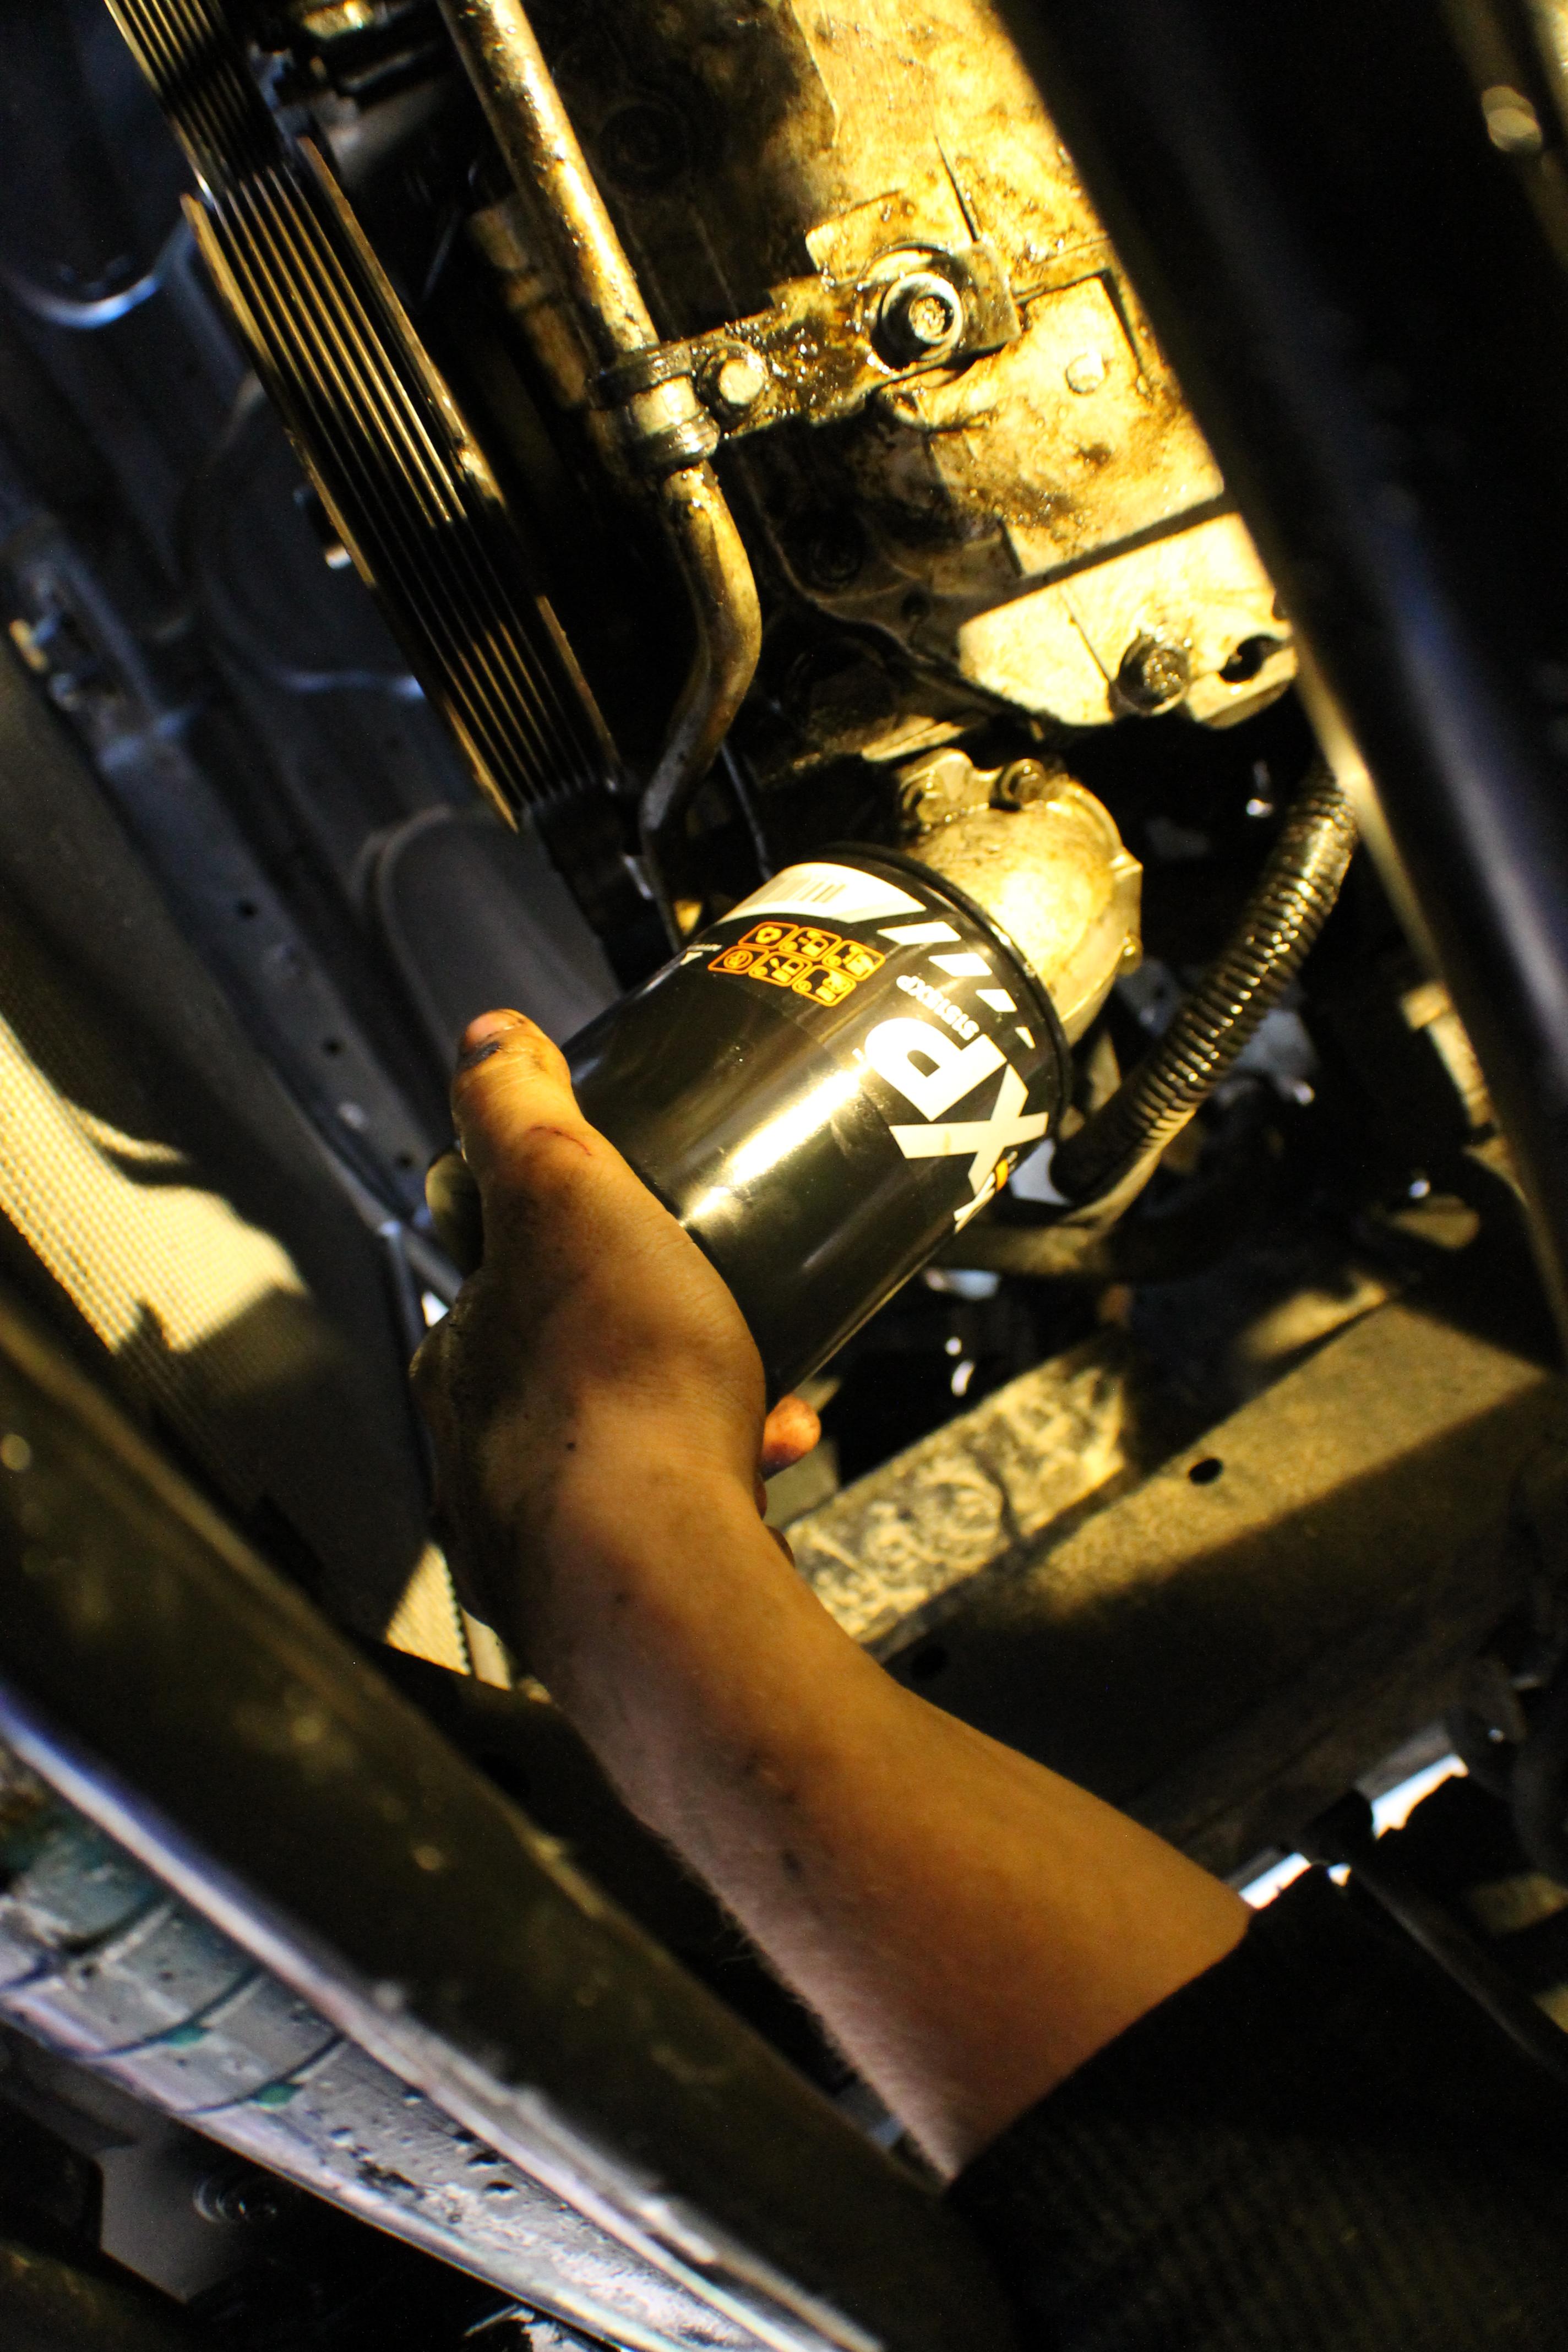
Now slide the pan up to the front underneath your oil filter. Your filter should come off by hand, but if not then just pop a philips screwdriver through it and spin it off that way. I just drop the filter into the drain pan, you can do with it whatever you please.
Once all the oil is drained, move the pan out from other the truck. Next we're draining the coolant, and if you get any coolant in the oil then you won't be able to recycle it.
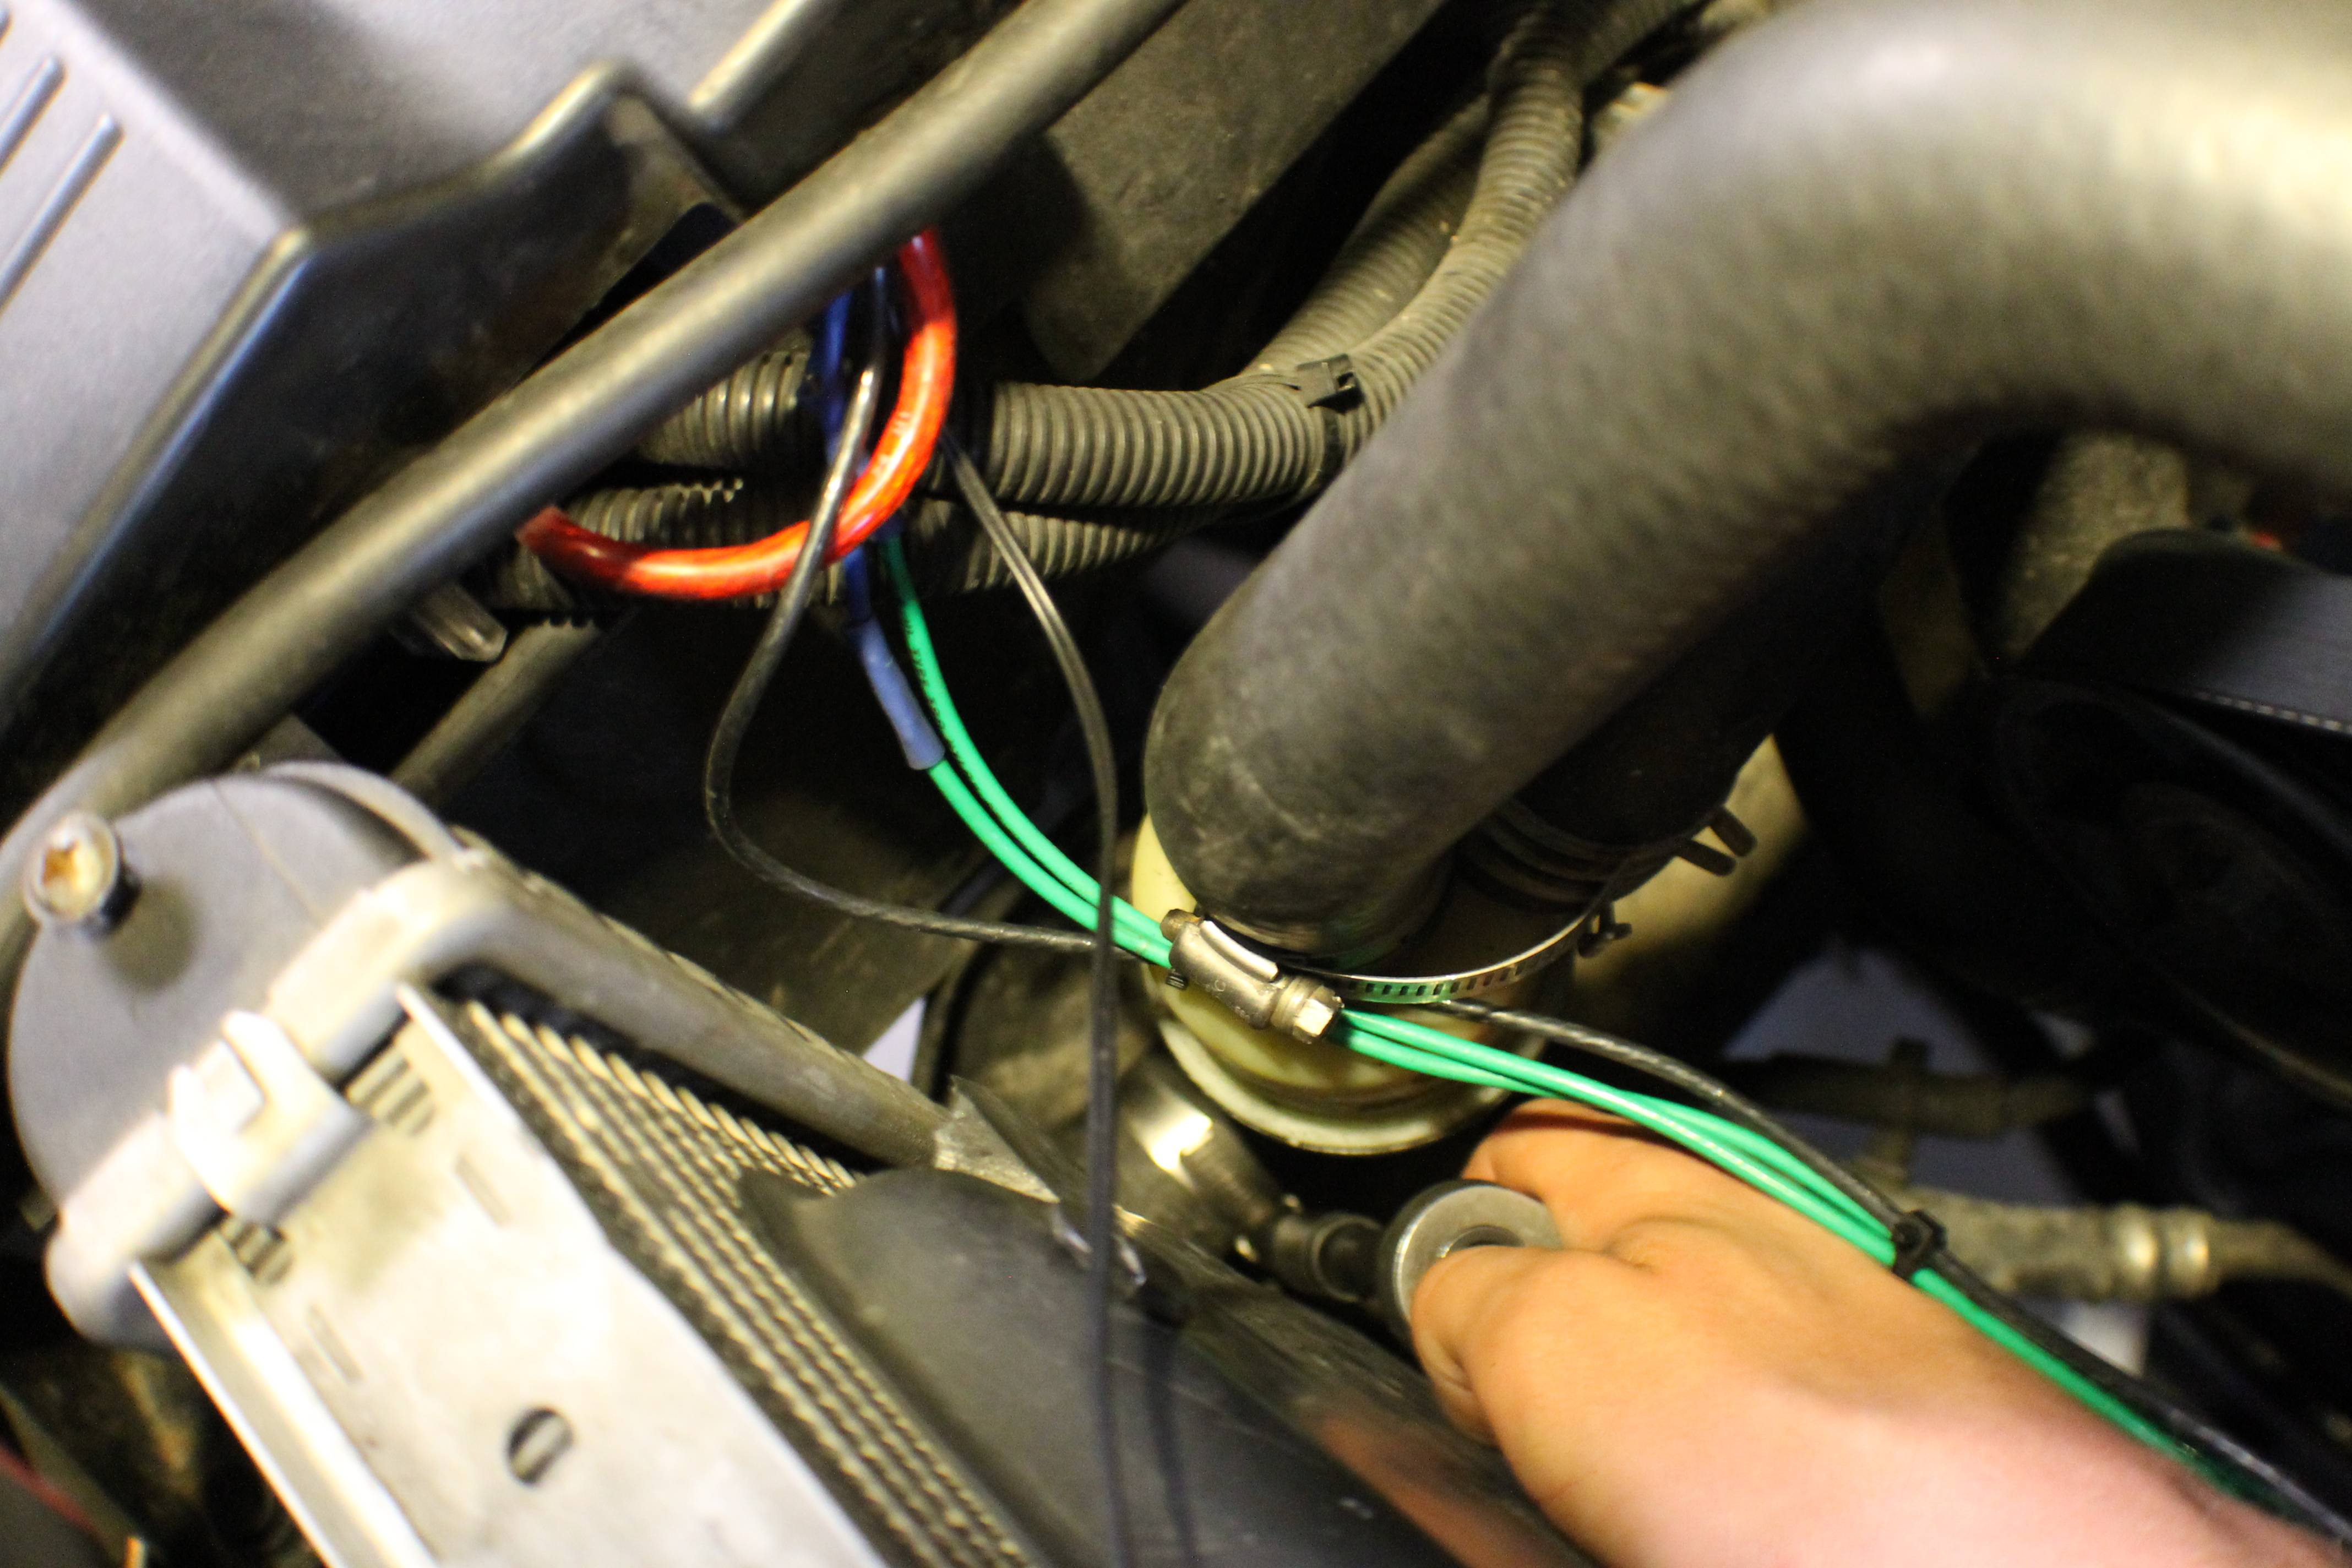
This step depends on whether or not you have the factory style hose clamps or the band style hose clamps. If you've got the factory style, pull out your channel locks. If you've got the band style as I do, use an 8mm socket on your ratchet. Slide your wide mouth pan under the truck closest to where you think most of the coolant will drain. Remove the overflow tank cap, loosen the clamp that attaches the hose to the lower side of the radiator, and slide the hose off allowing the coolant to drain.
Now, before you cover your garage/driveway in coolant and awaken the wrath of your mother/girlfriend/wife, quickly kneel down and scoot your pan around so to a position that will allow it to catch the most coolant possible. You'll still get quite a bit on the floor. Keep some towels handy that the lady of the house has forgotten existed or that have already been otherwise ruined for household use.
Once that has finished draining, remove the remaining coolant hoses and sit them out of your way. I just sat mine on top of the engine.
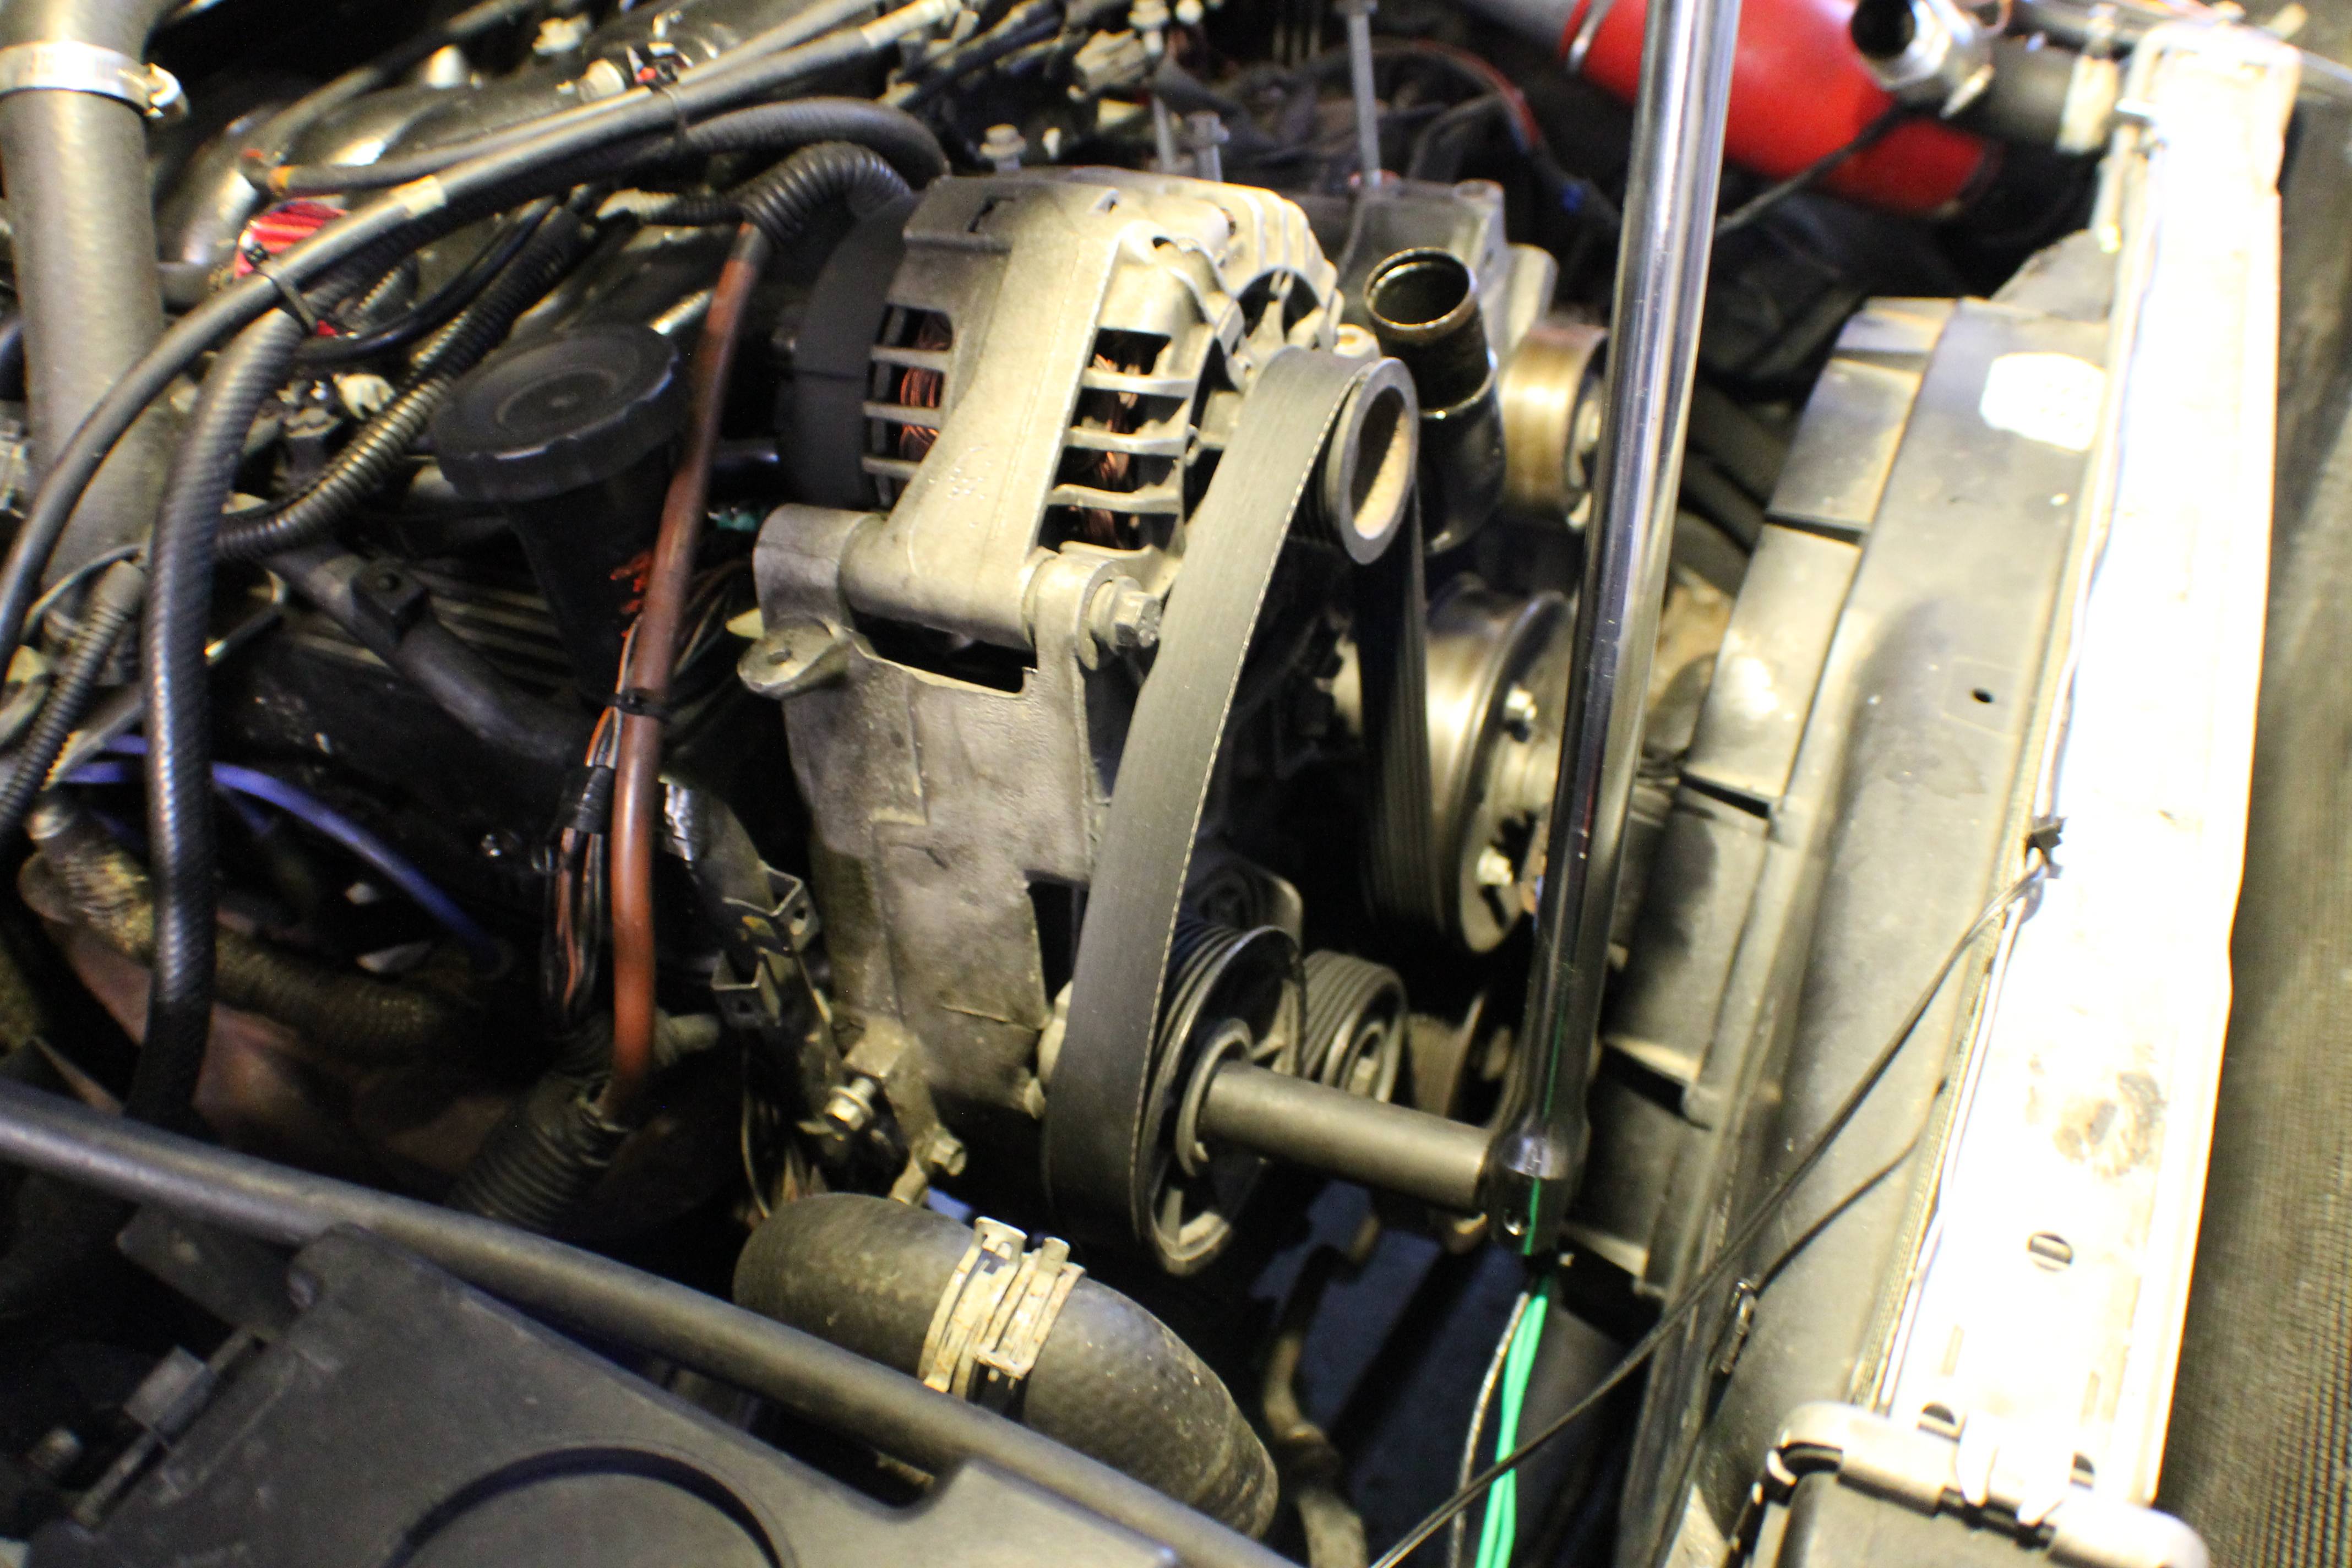
Now you will need to remove your serpentine belt. I used a 5/8" impact socket on the end of my breaker bar to raise the belt tensioner, but it can be done with a box wrench.
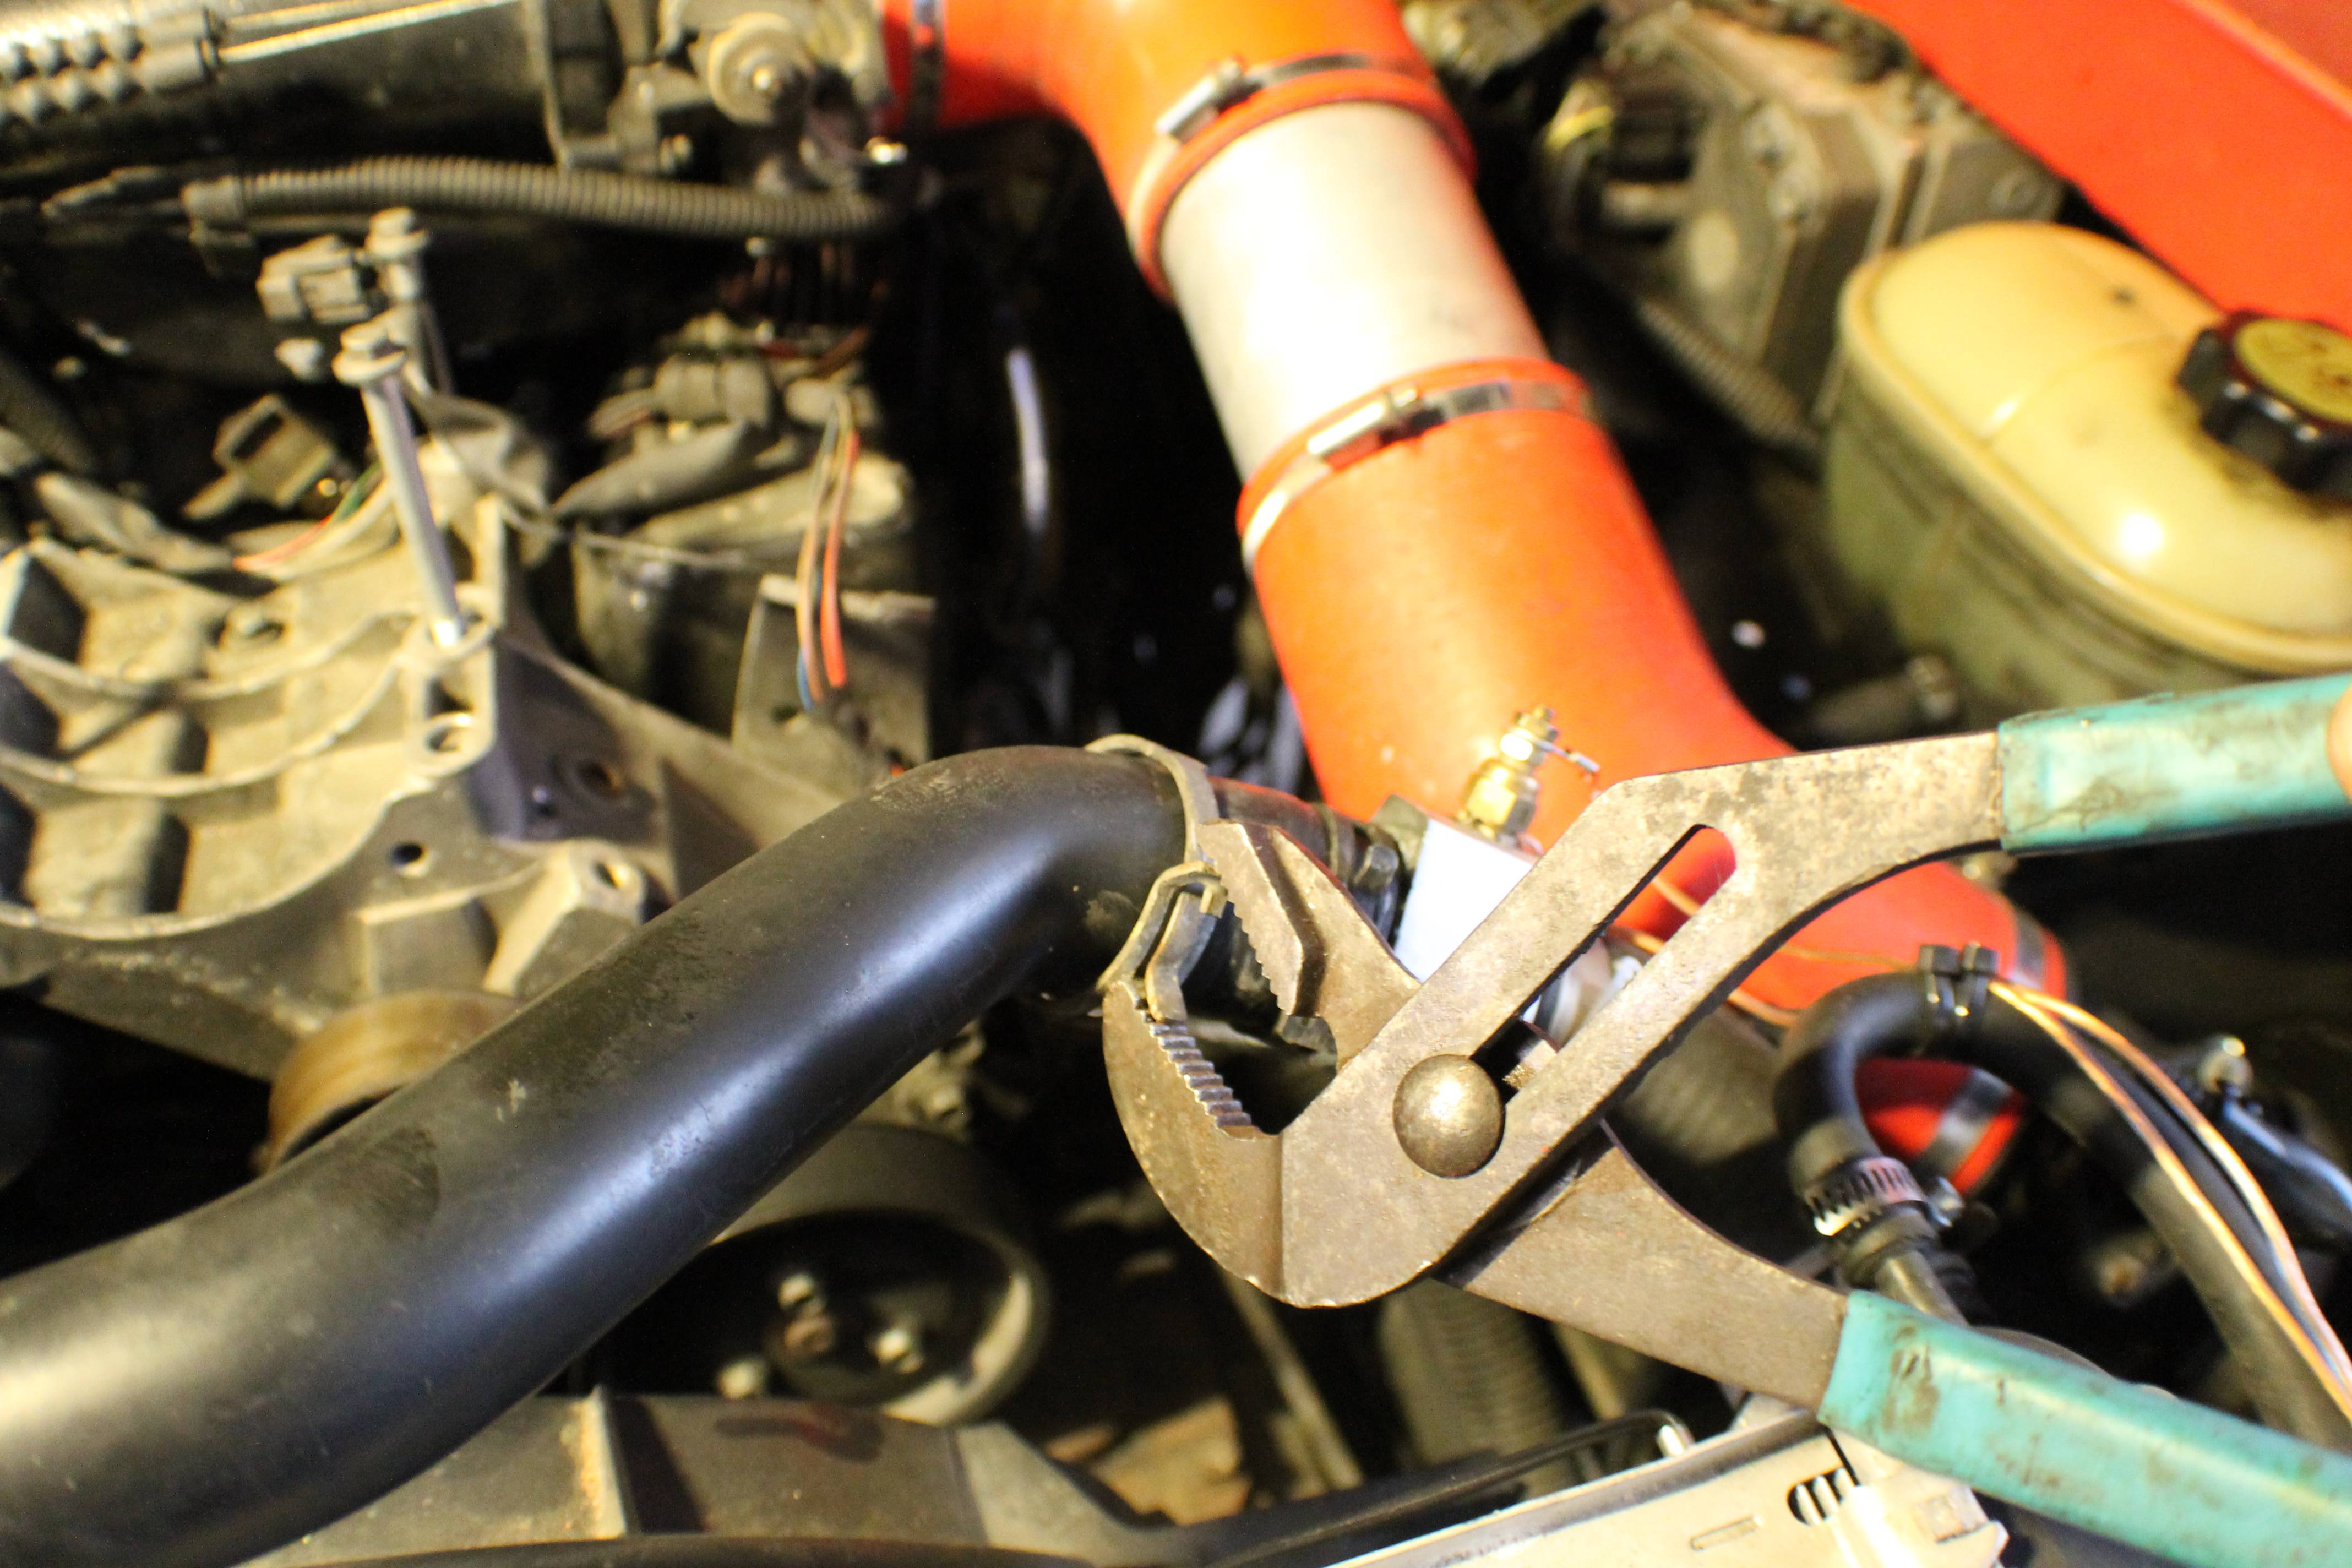
Once all of that is out of the way, remove your fan. If you have the factory mechanical fan, you will also need to remove the shroud. You may have already done this to get to the lower radiator hose. If you have the factory mechanical fan you can remove it by clamping a large set of vice grips onto the water pump pulley, as shown below when removing the water pump pulley, and then using a crescent wrench to twist the fan off.
If you have done an electric fan conversion, as I have, start by unplugging the fan. If you wired yours directly without plugs, you will be required to cut the wires and I would recommend splicing in connectors so that it can more easily be removed in the future. If you have not converted to an electric fan setup, I highly recommend doing so while the fan is out of the truck. It's quite simple, relatively cheap, and netted me an extra 1 mpg. There is a write up for that which you can find in the index linked in my description.
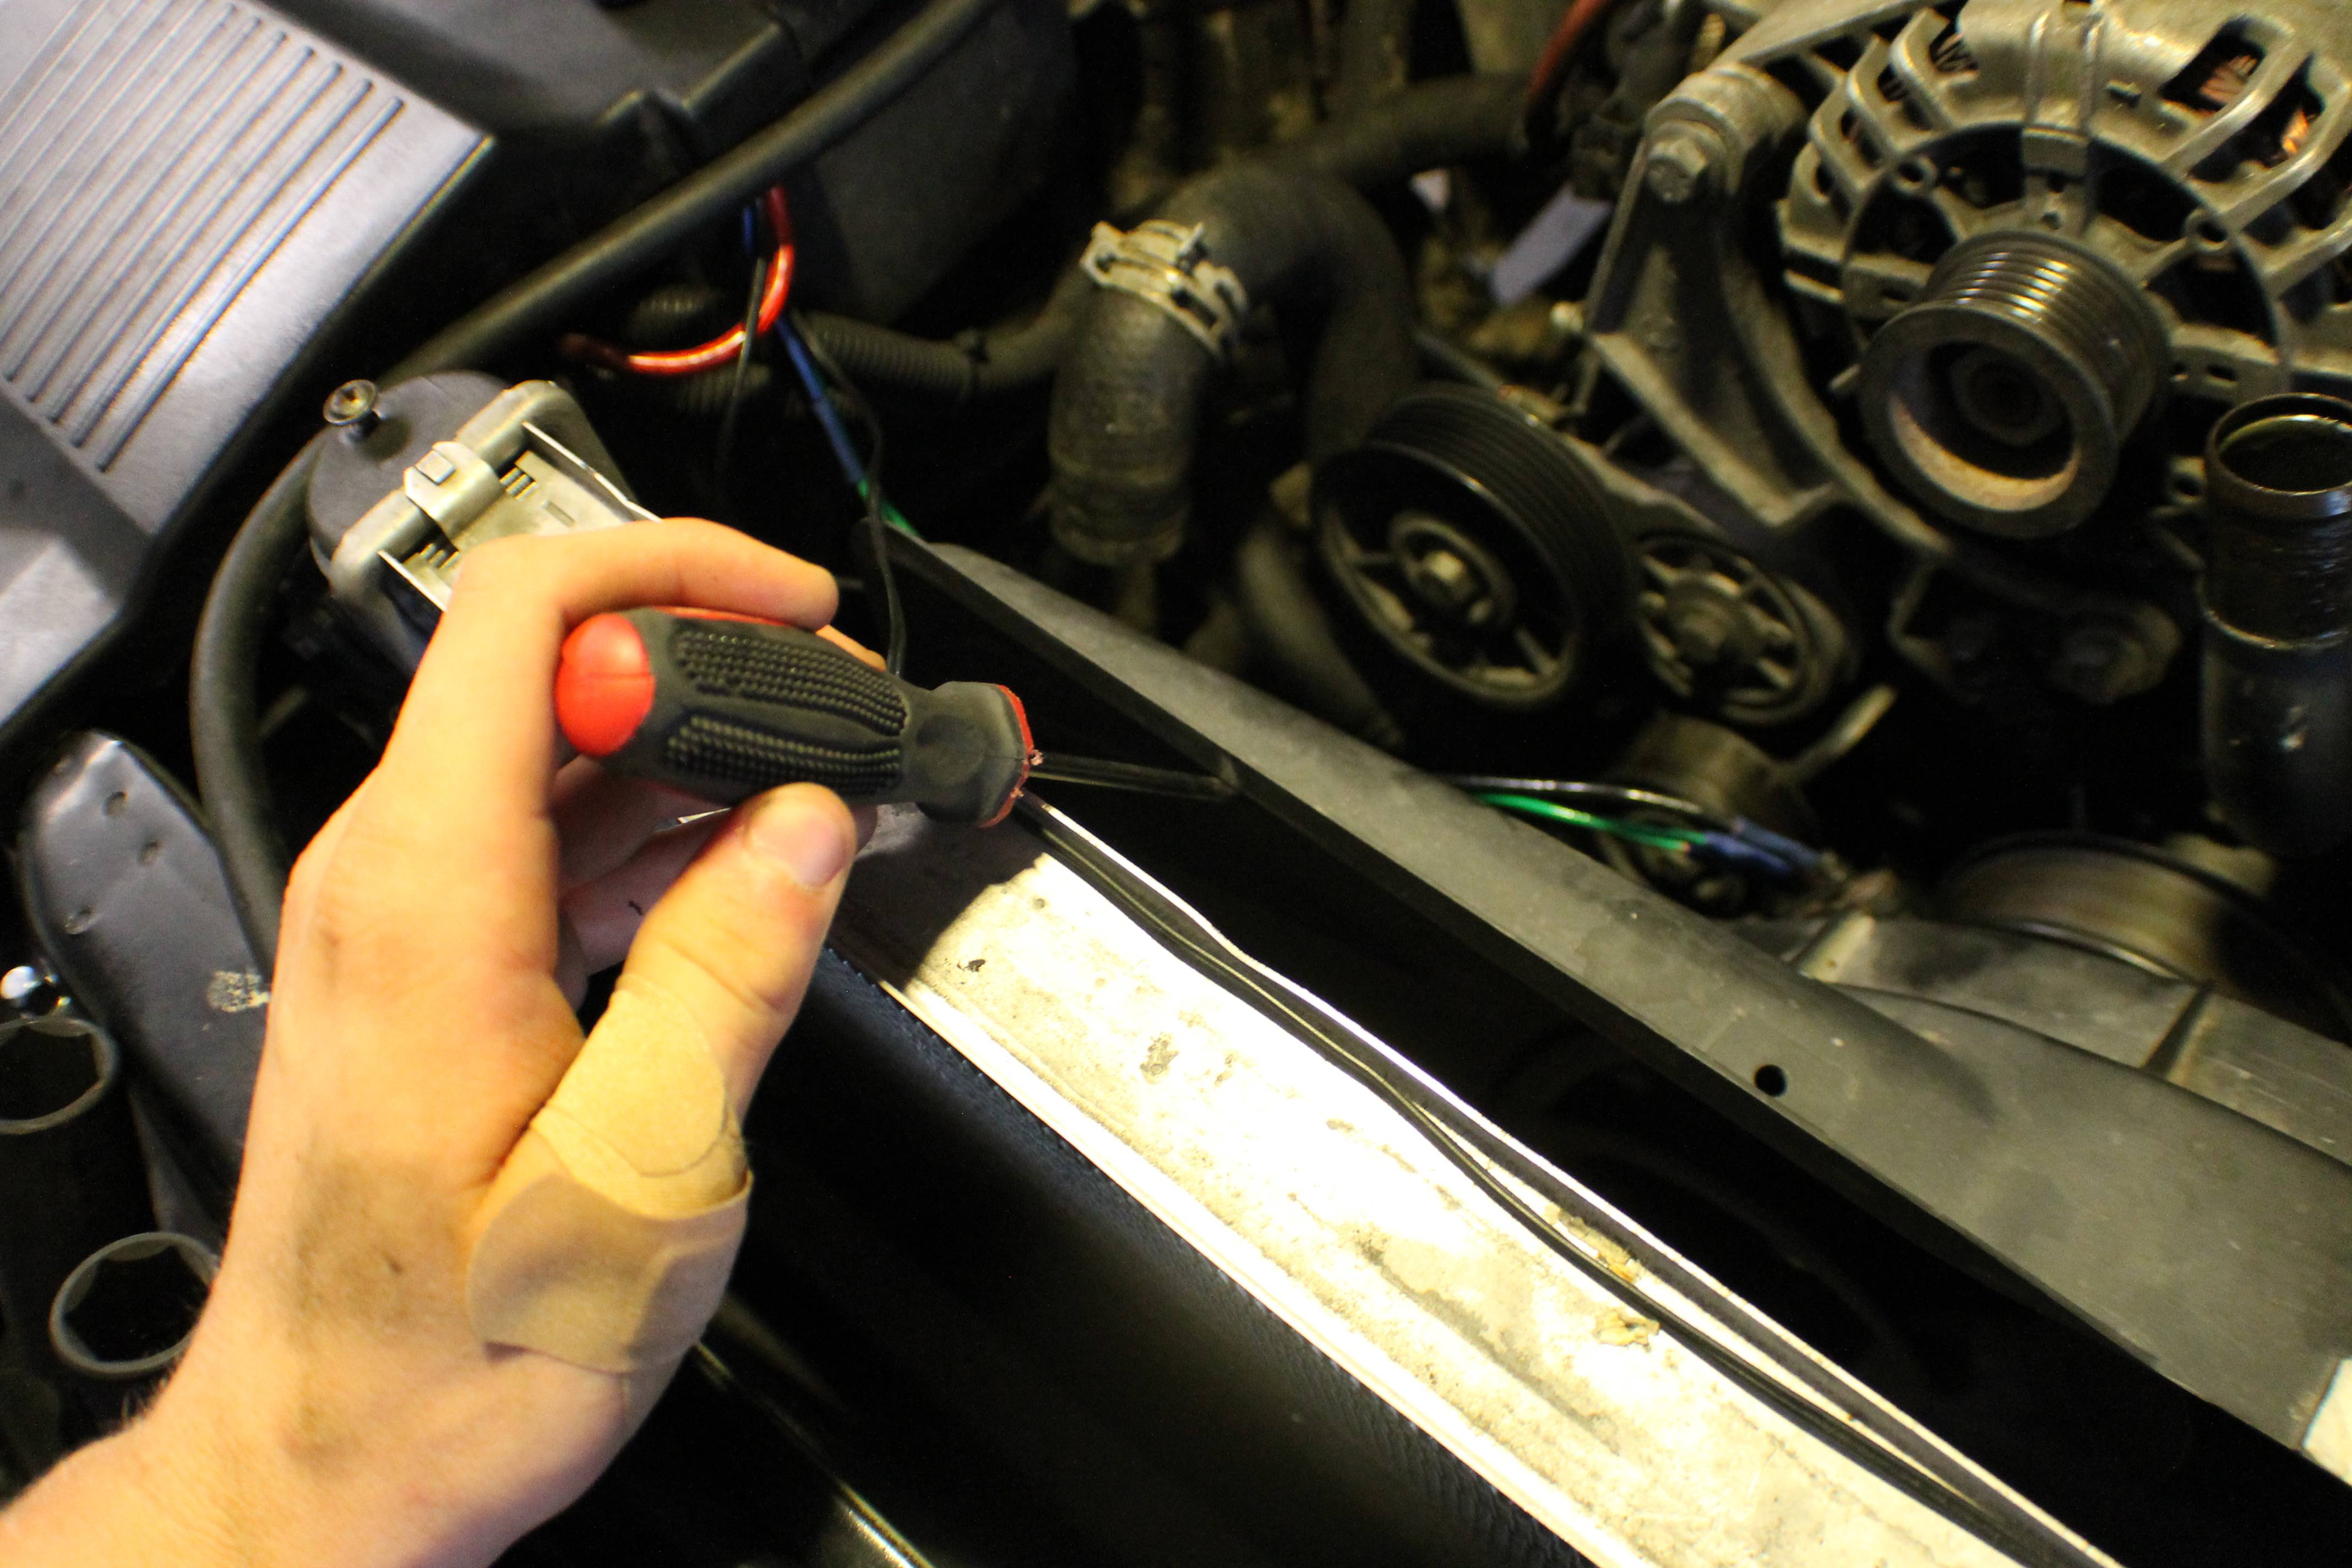
Once it's unplugged, take a flat head screwdriver and place it between the fan and the radiator. Pry with the end of the screwdriver against the fan, NOT against the radiator. If you pry the opposite direction that is shown, you will end up with a hole in your radiator. Do this on both sides to pop the top fan retainers loose and then the whole assembly will lift out. Don't lose the retainers because you will want to reuse those when you reinstall the fan.
Alright, now we start getting into the bigger stuff. This part right here is the point of no return because now you have to drop the oil pan to get it back together. If you have been having trouble following along up to this point, put it back together and pay a shop to do the work.
Get your breaker bar and pull out your large impact sockets. You will need a 15/16" socket. I placed the breaker bar between the plastic shield that is against the passengers side frame rail and the frame rail itself. Thinking back with "Righty Tighty Lefty Loosey" in mind... I did that wrong. You will want to either place the breaker bar under the passengers side frame rail or over top the drivers side frame rail. Use the breaker bar to turn the crank so that the breaker bar is making contact with the frame rail, or at least close to making contact. Once it's on you will want to go bump the starter 2-3 times. DO NOT START THE ENGINE. Simply bumping the starter won't hurt anything, but if you start the engine then you will be putting considerable stress on your dry bearings since there is no oil in the sump to be picked up. Once you've bumped the starter two or three times the bolt will have probably broken loose. If it hasn't then bump it two or three more times or until it does break loose, though it shouldn't take many bumps.
At this point the crank bold should twist out with the socket by hand, but if it doesn't then you'll want to stick a ratchet on it. Once it's loosened it should slide right off of the crank and lift out.

Alright, now we move under the truck. This will not be fun because you will be spending a bit of time laying on your back working over your head while greasy blobs of dirt try and occasionally succeed to fall in your eyes. Safety glasses are recommended. Don't breathe with your mouth open. I'll tell you now so you don't have to keep crawling under and out from under your truck, you'll need the following tools. Two short or one long ratchet extension(s), a 13mm deep socket, a 10mm deep socket, an 8mm shallow socket, a 13mm box wrench, your breaker bar, and an adapter to adapt the 3/8" drive sockets and extensions to your breaker bar. If you're using all shallow sockets, add another short extension to your list of tools.
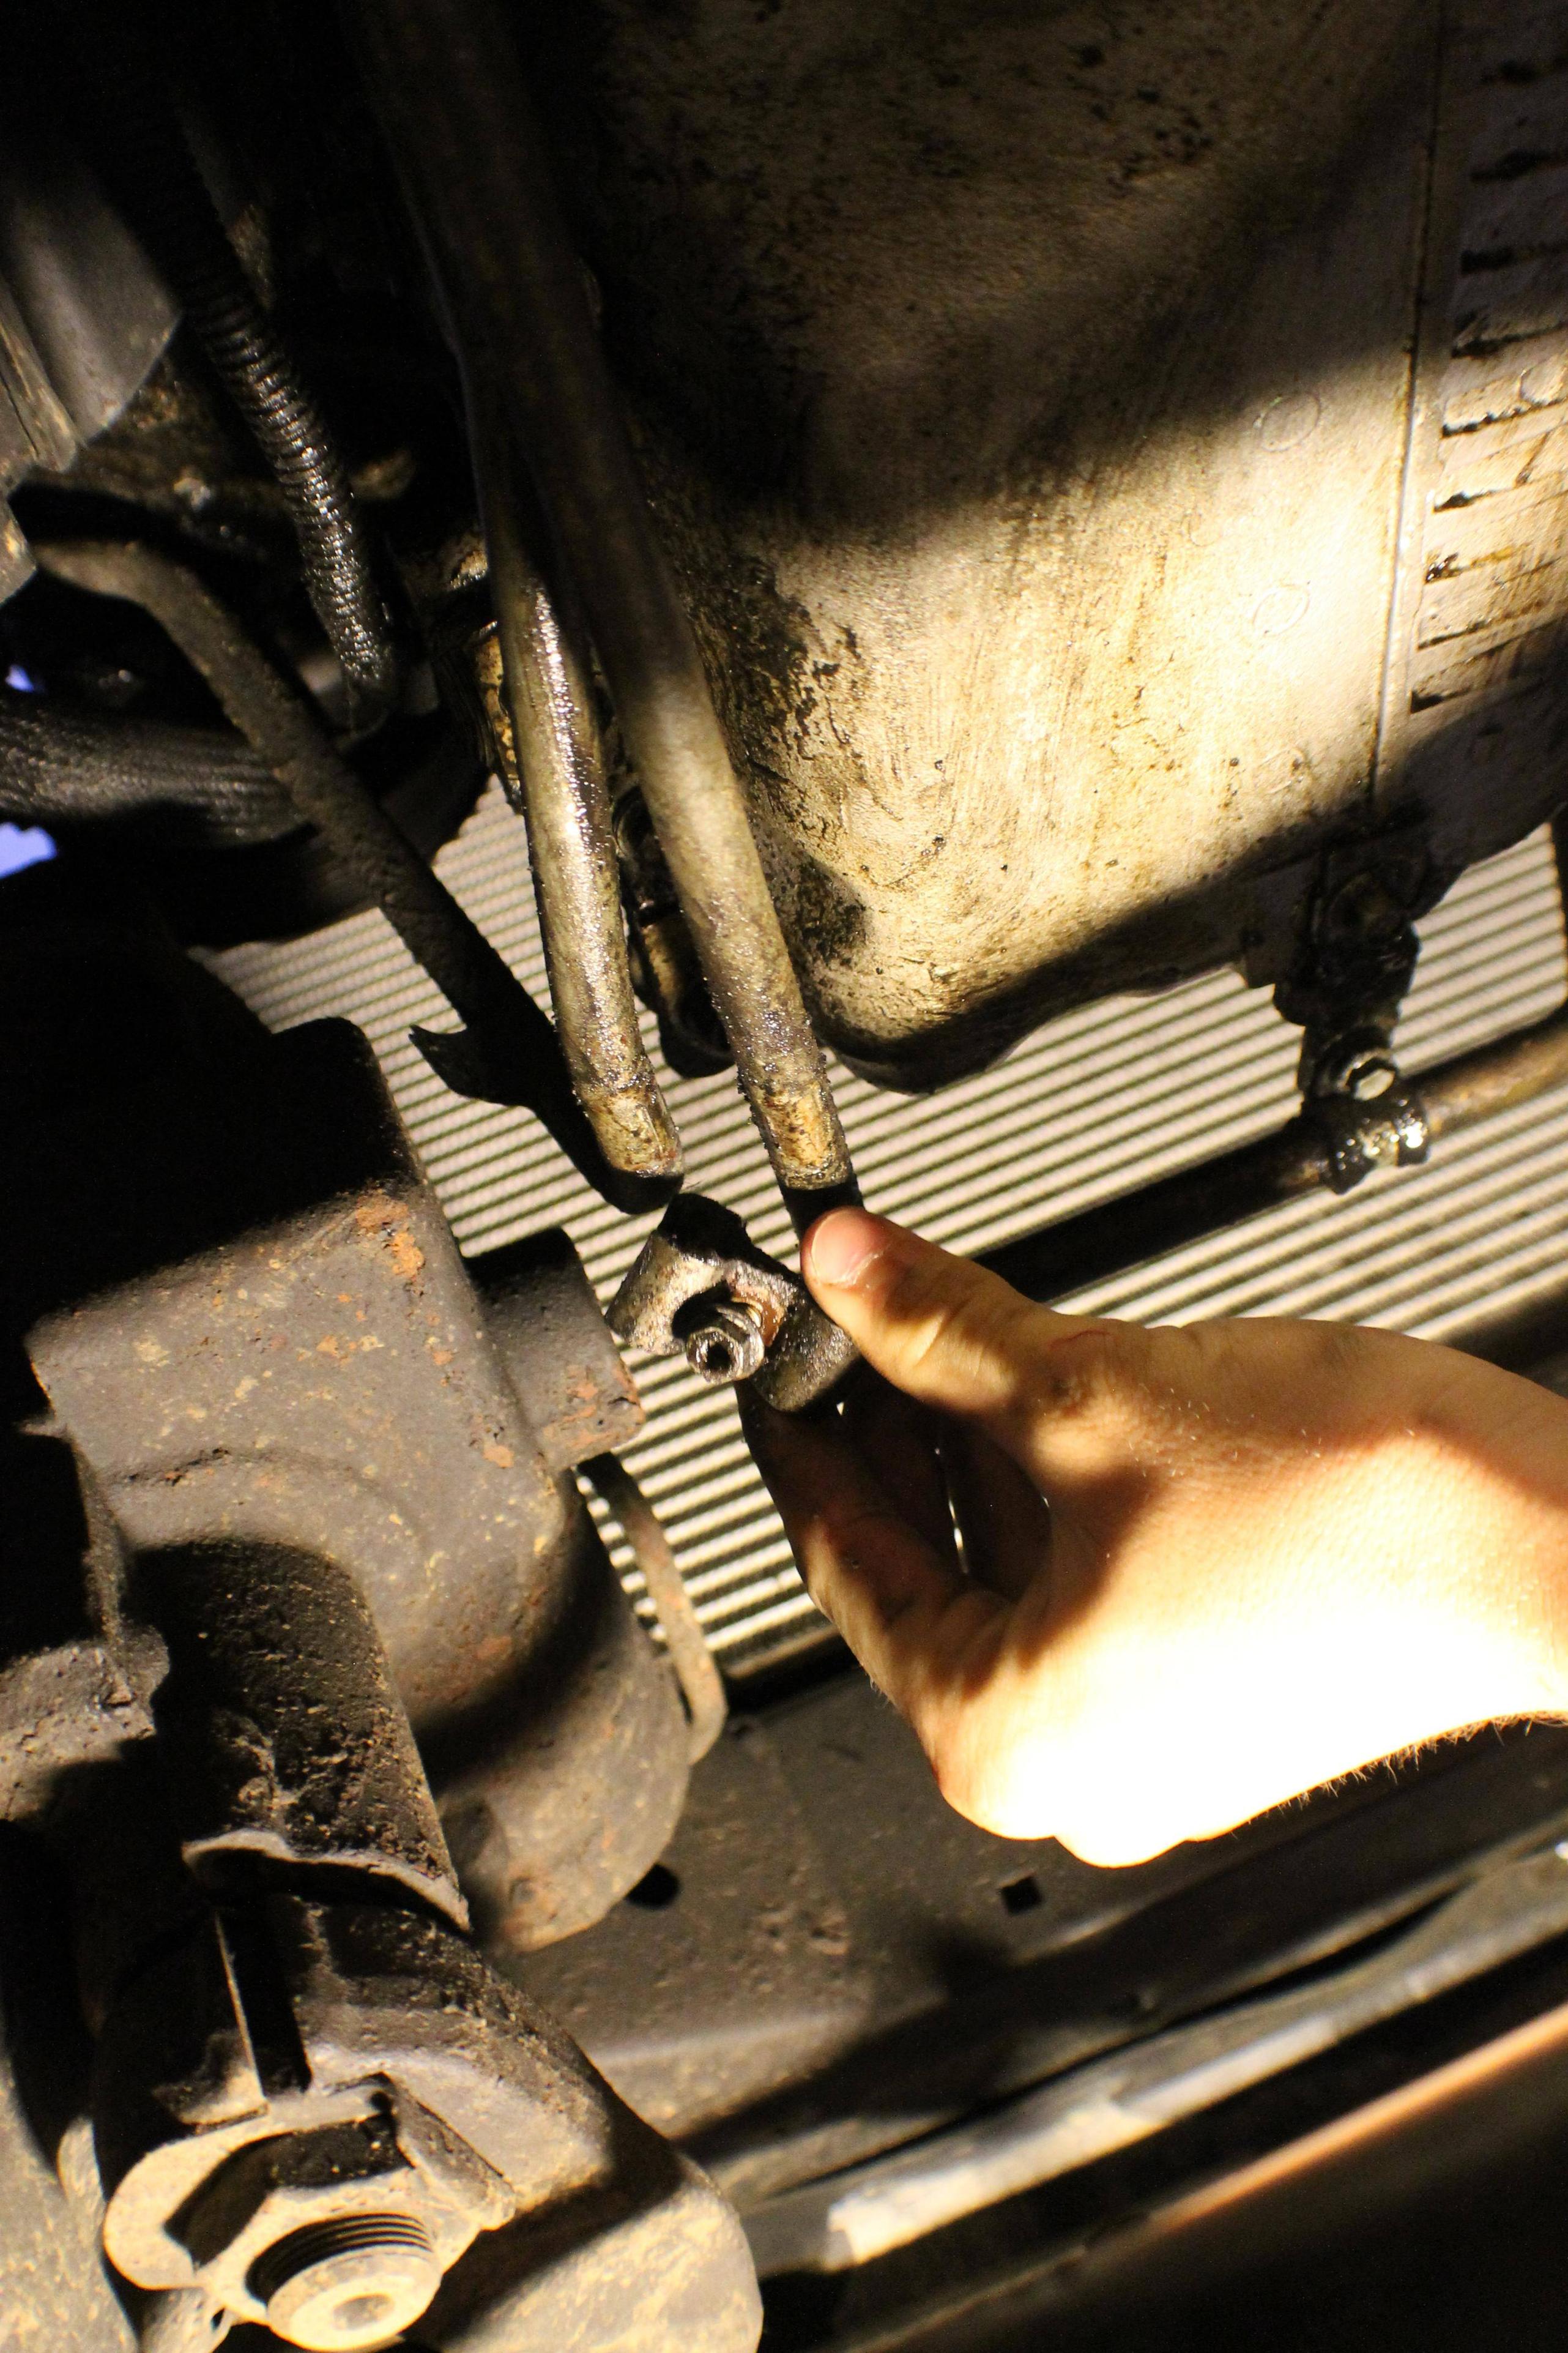
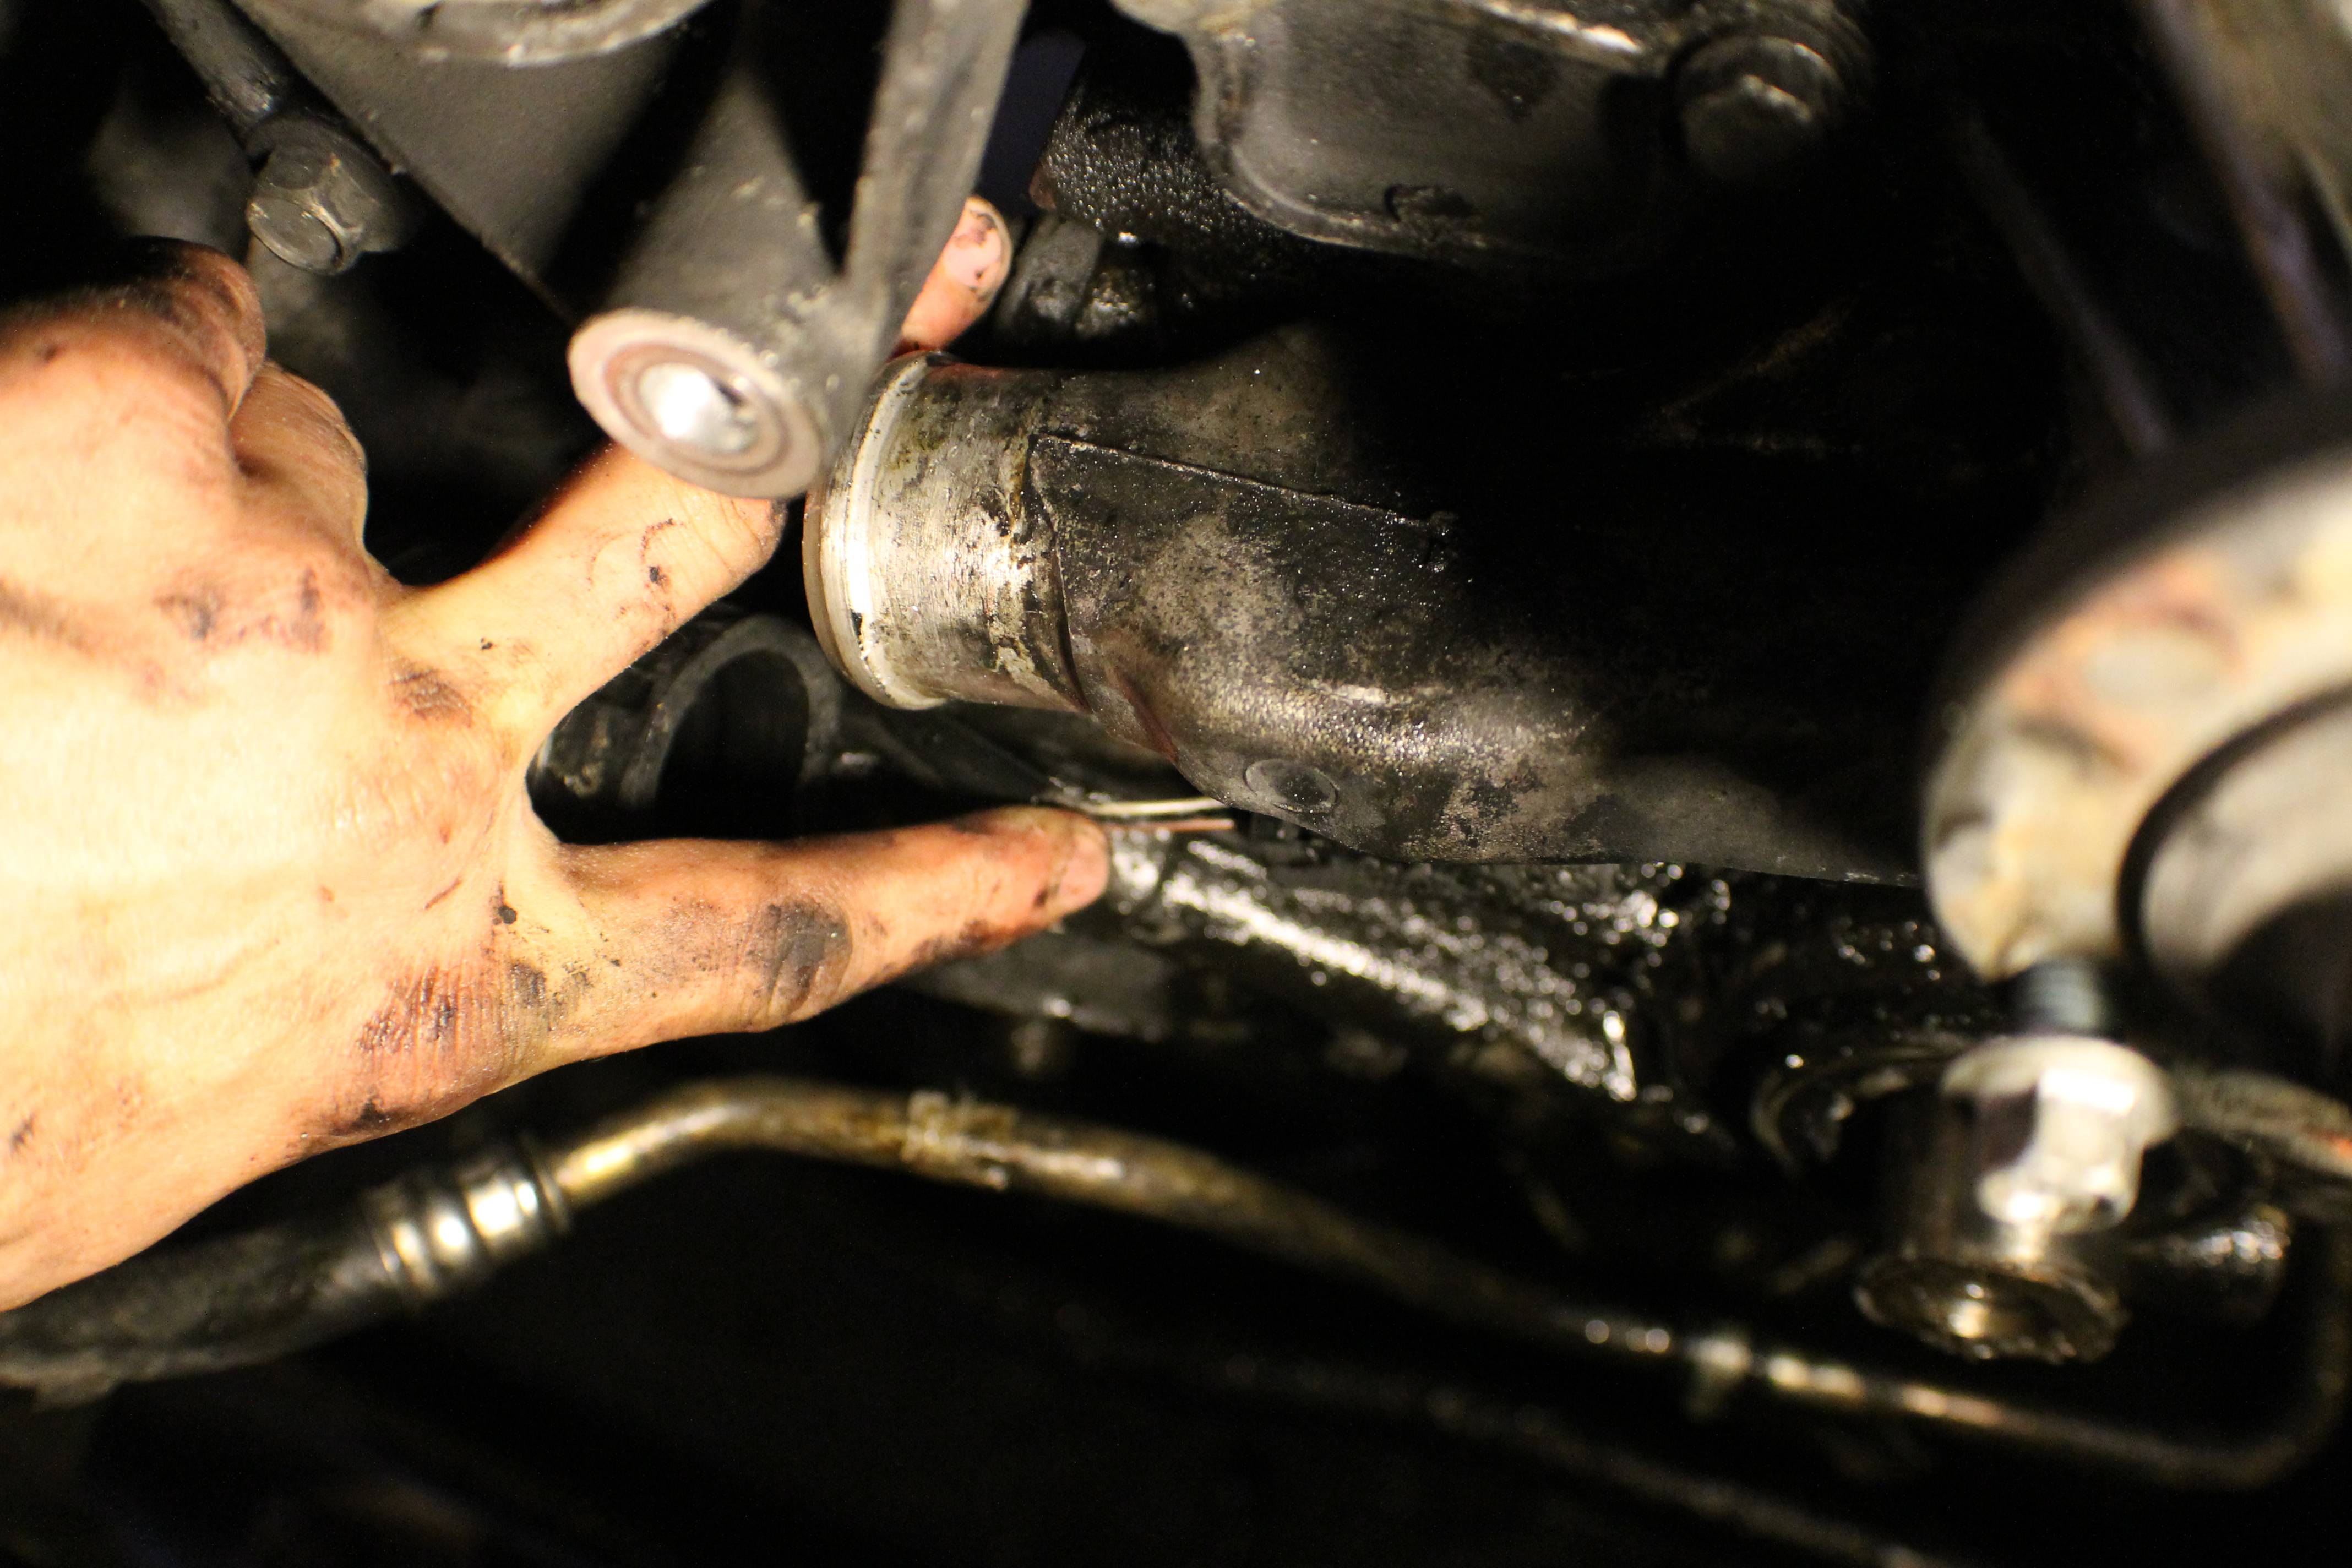
Now, start with your 8mm and 10mm sockets. remove all the pictured little doo-hickeys holding onto the transmission cooler lines. The first pictured clamp takes a 10mm, second pictured takes an 8mm, and third pictured will want to be loosened with an 8mm on the line side then removed with a 10mm on the oil pan side. Once the oil pan side is removed, place the bolt back in the pan so you don't lose it.
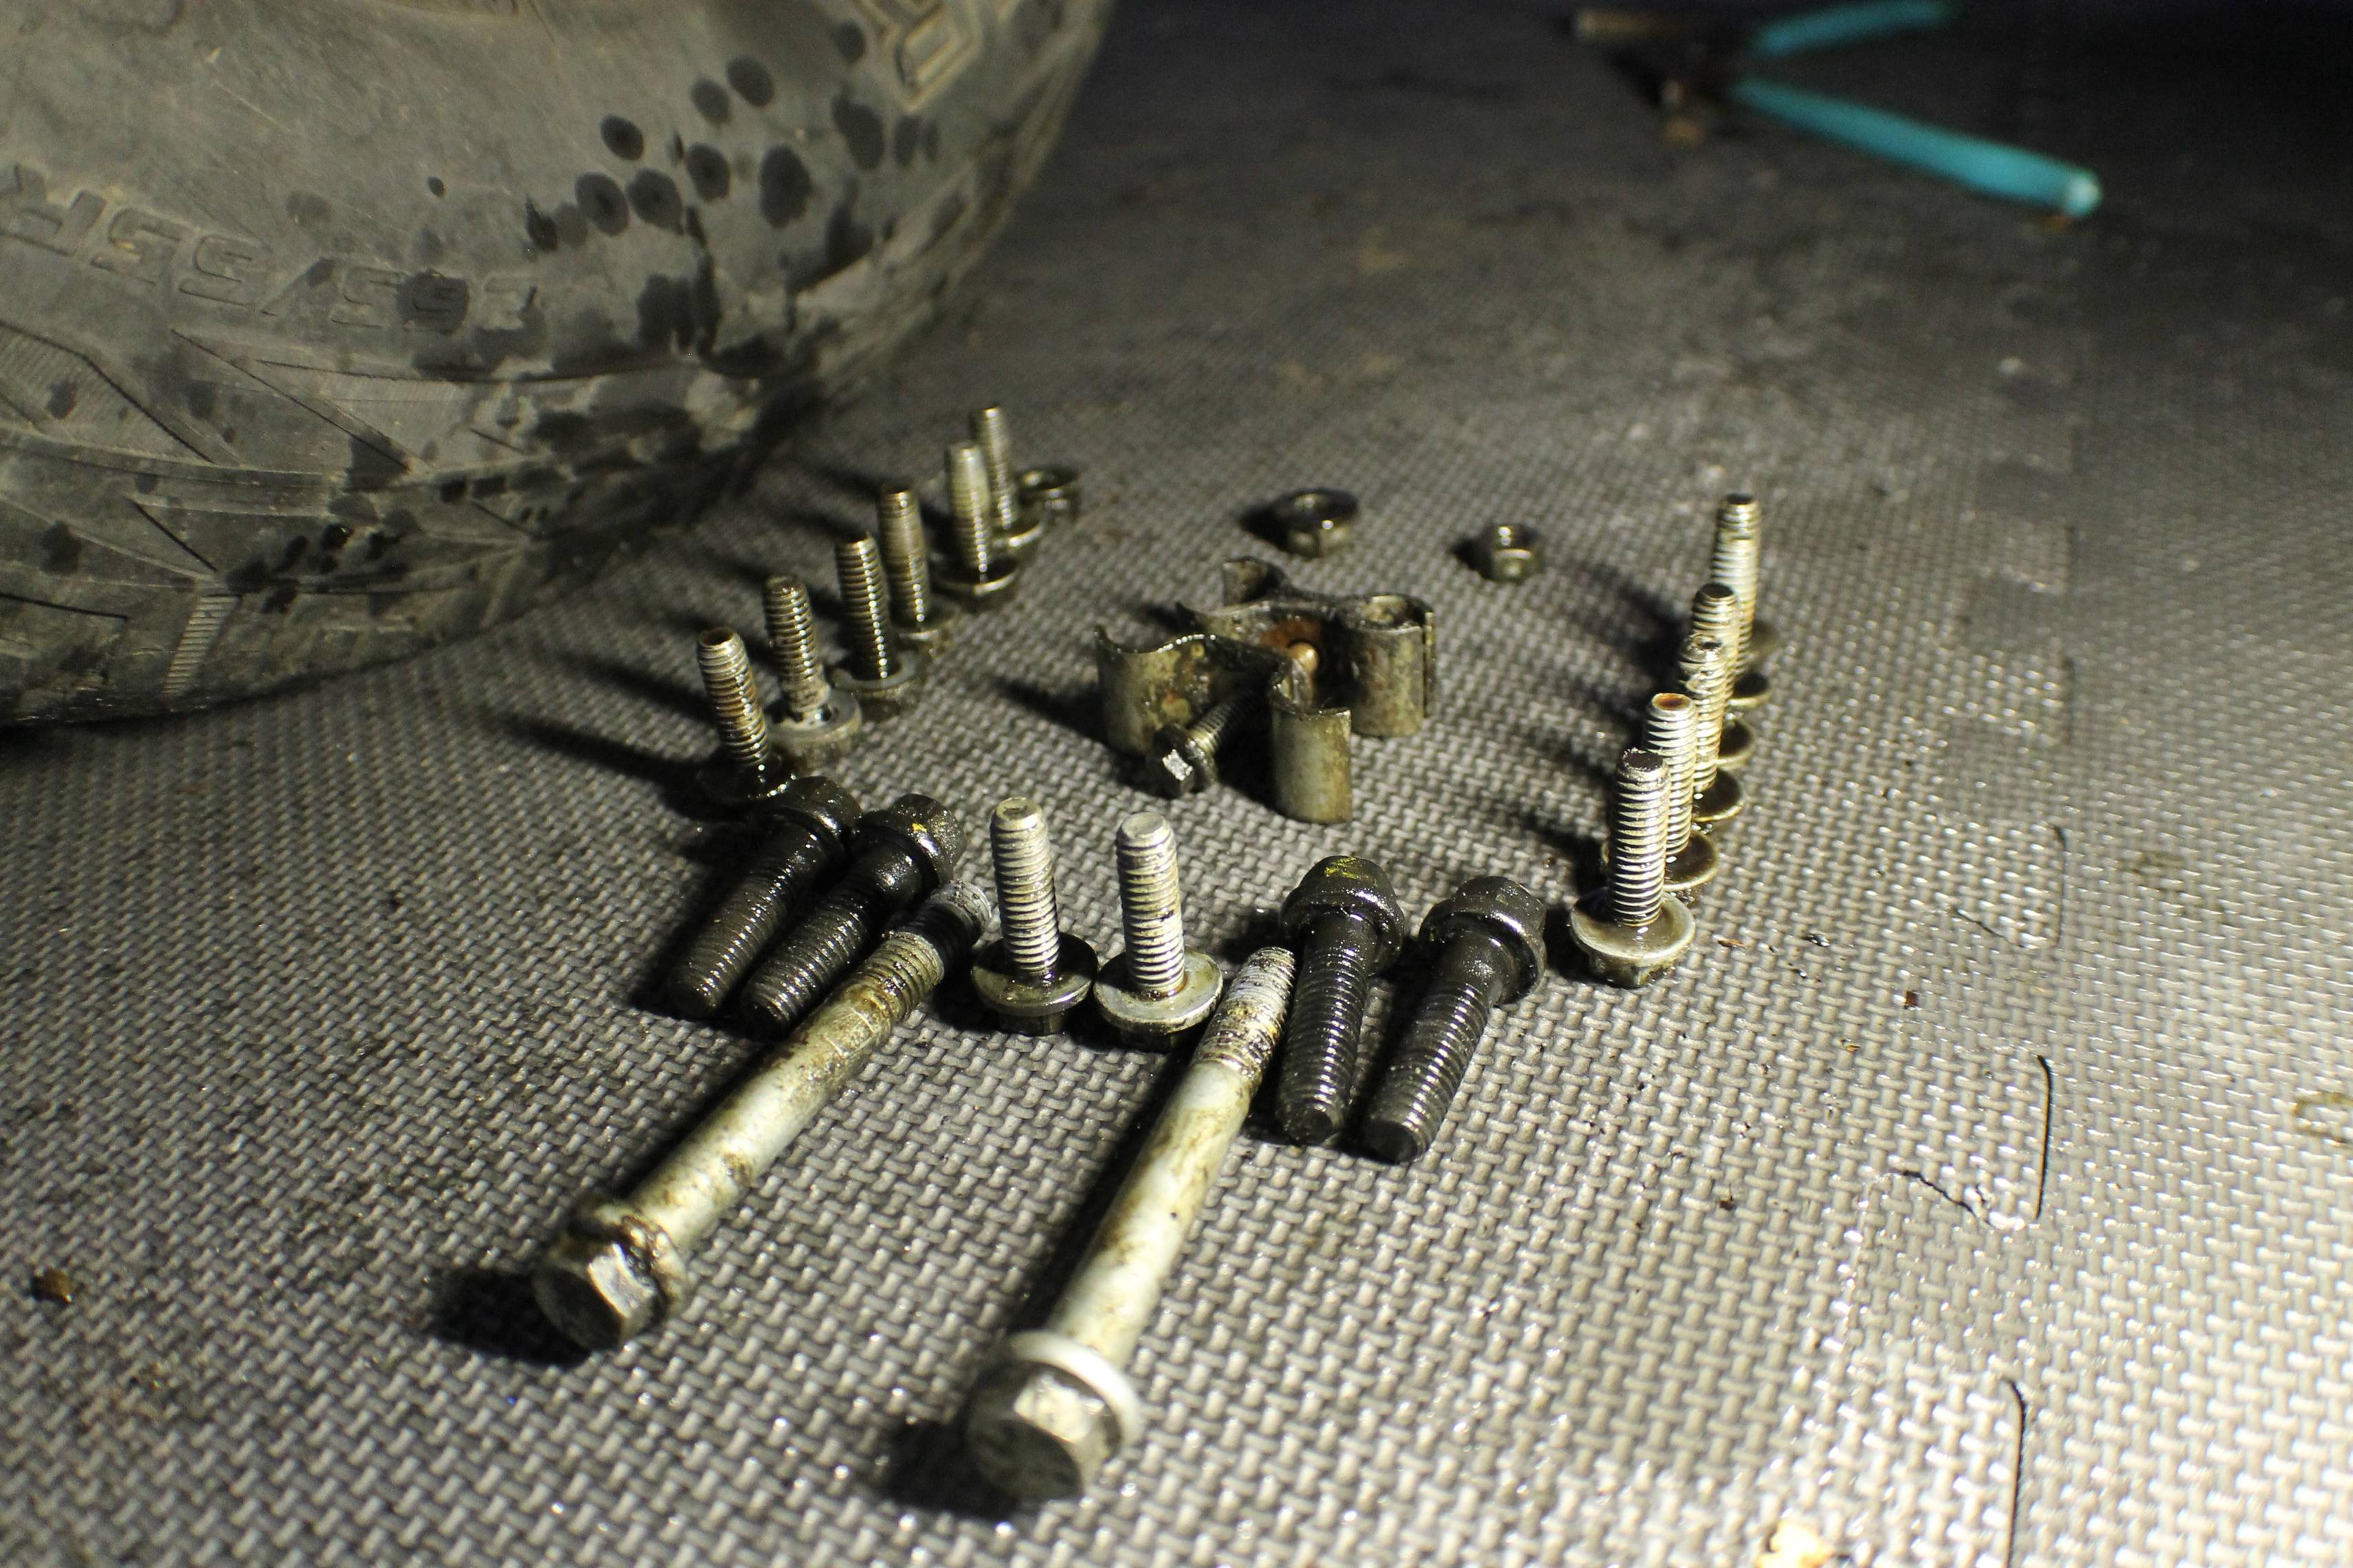
Alright, not that that's done you will be able to get to all of the oil pan nuts and bolts. There are three nuts with washers on the very front that connect the oil pan to the front cover, six bolts on both the drivers side and the passengers side of the pan going up into the block. Those should all be fairly straight forward. This is a picture of all of the bolts (sans 1) that hold the pan in, which will give you a better idea of where the bolts are located and how I sat mine in order to not get them mixed up. I recommend sitting all your bolts out in the pattern that they should go back in like this, and be careful not to knock them. This will make your job easier when the time comes to reinstall the pan.
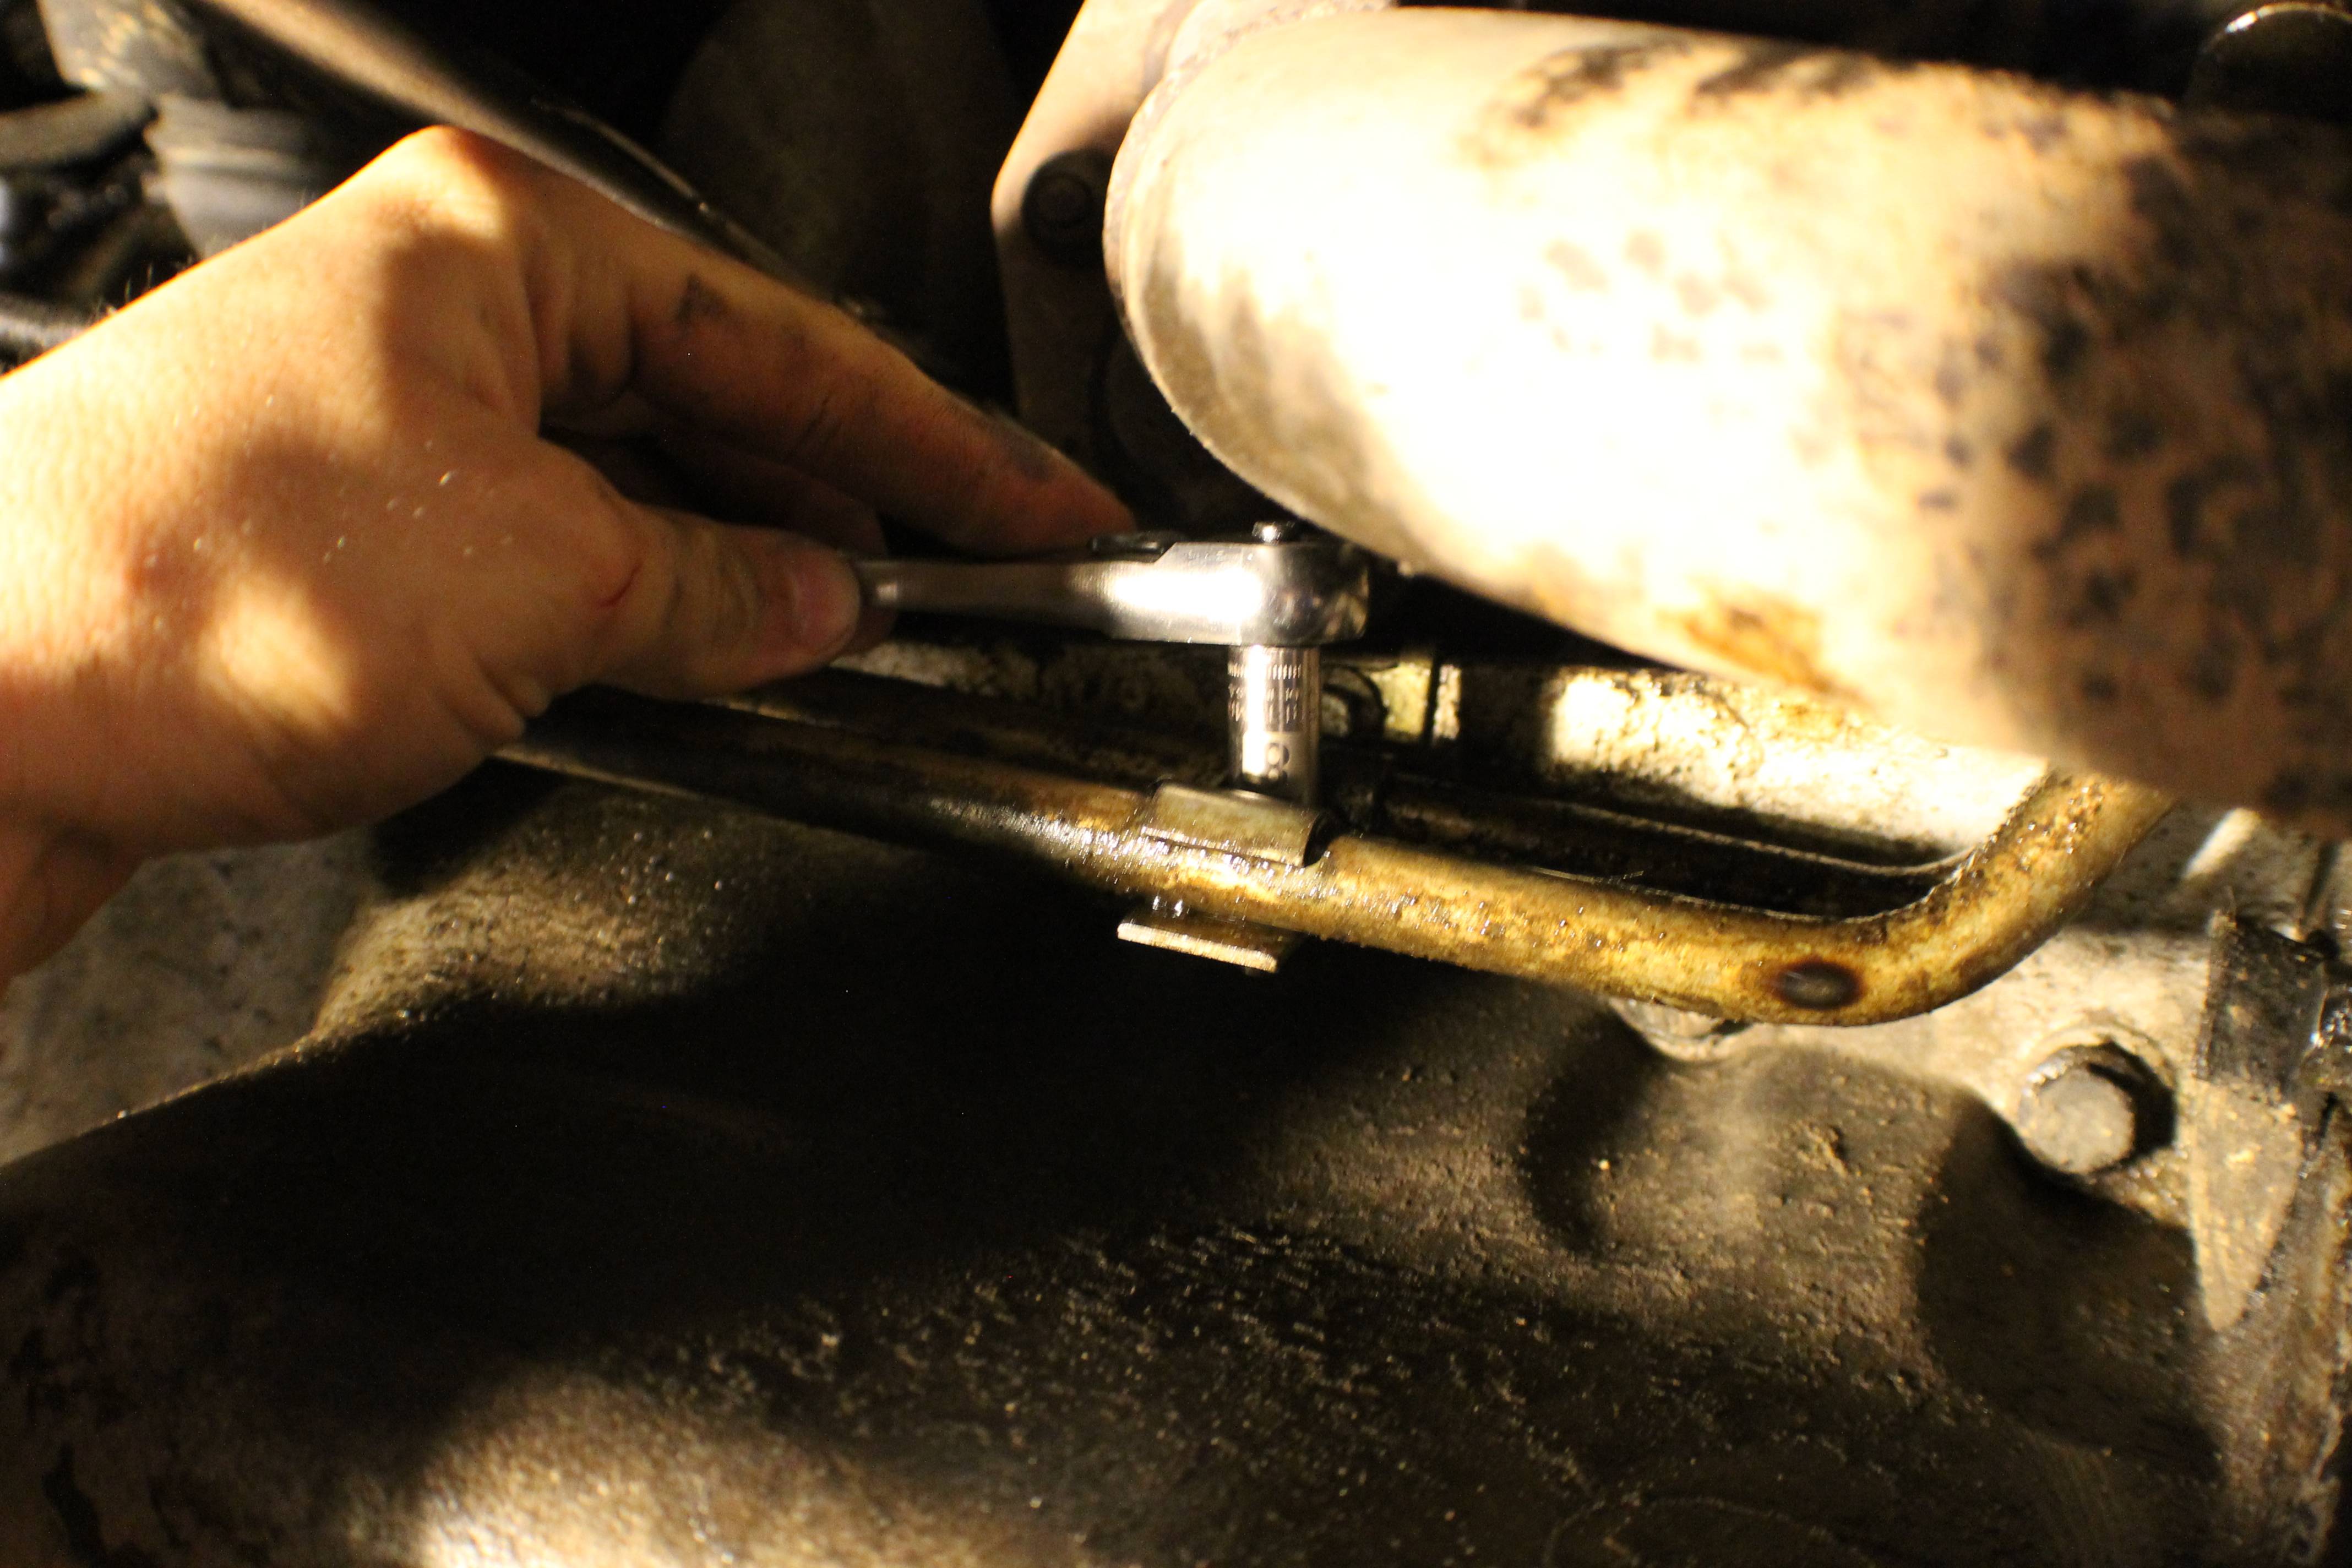
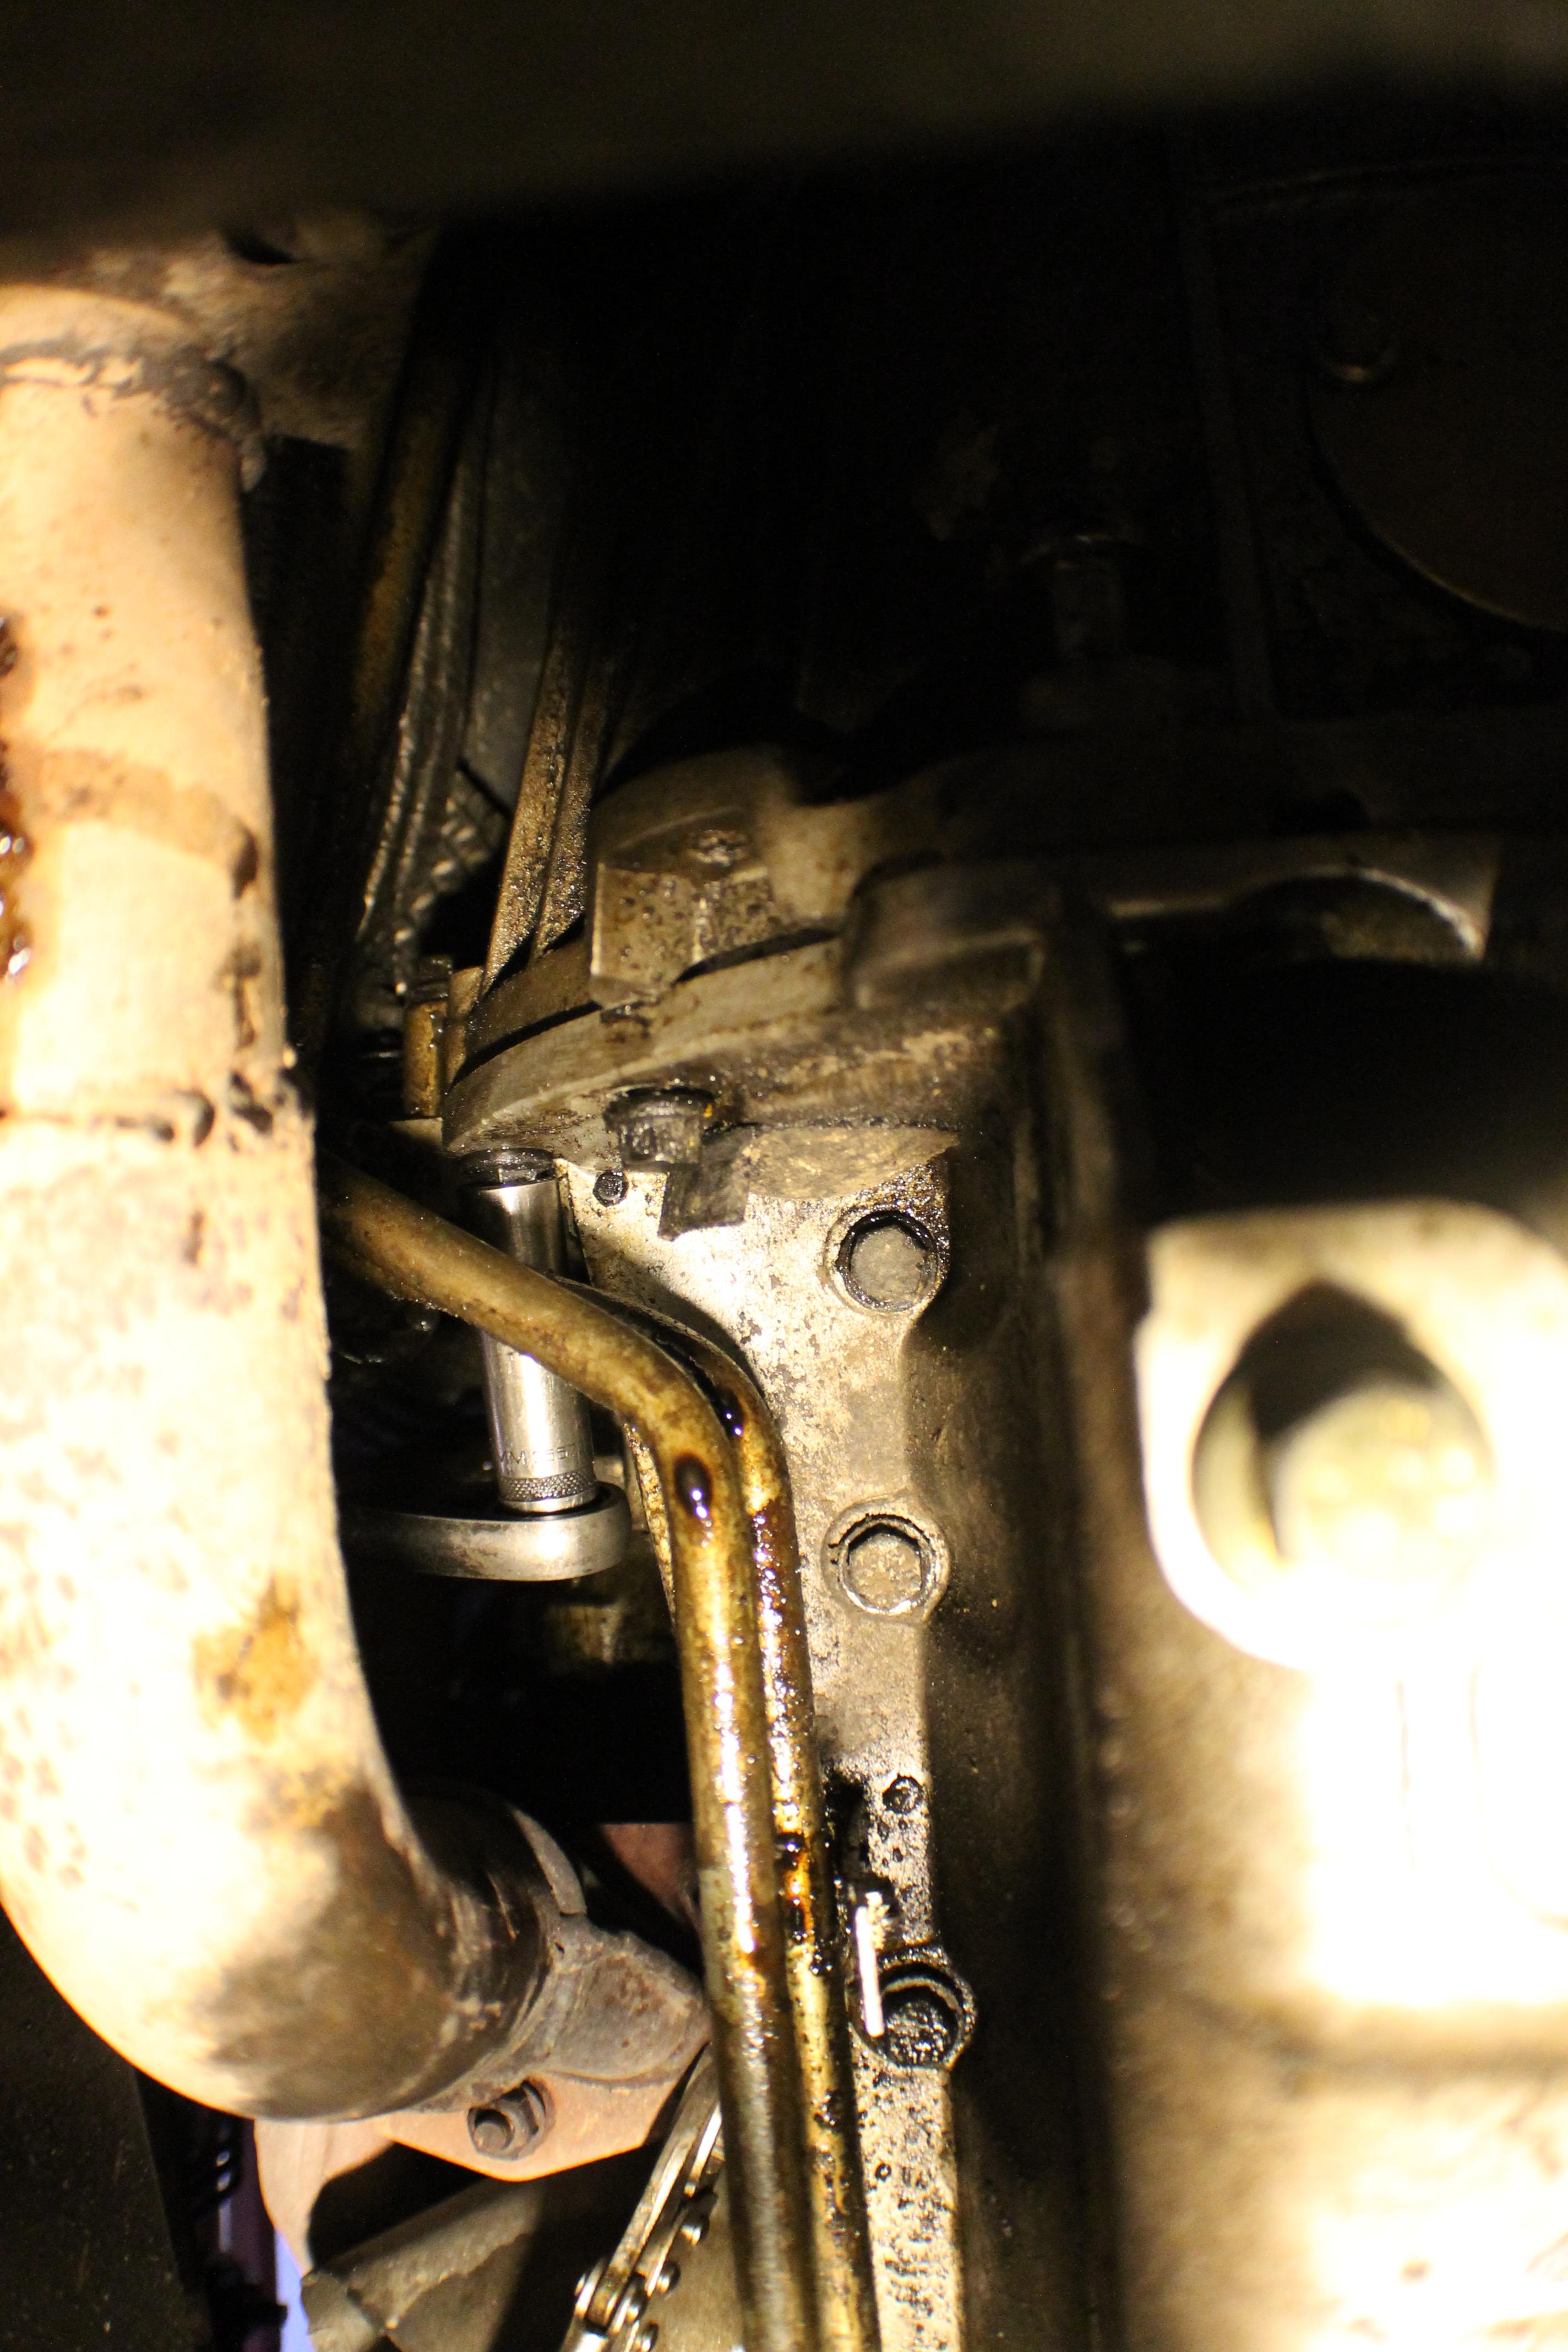
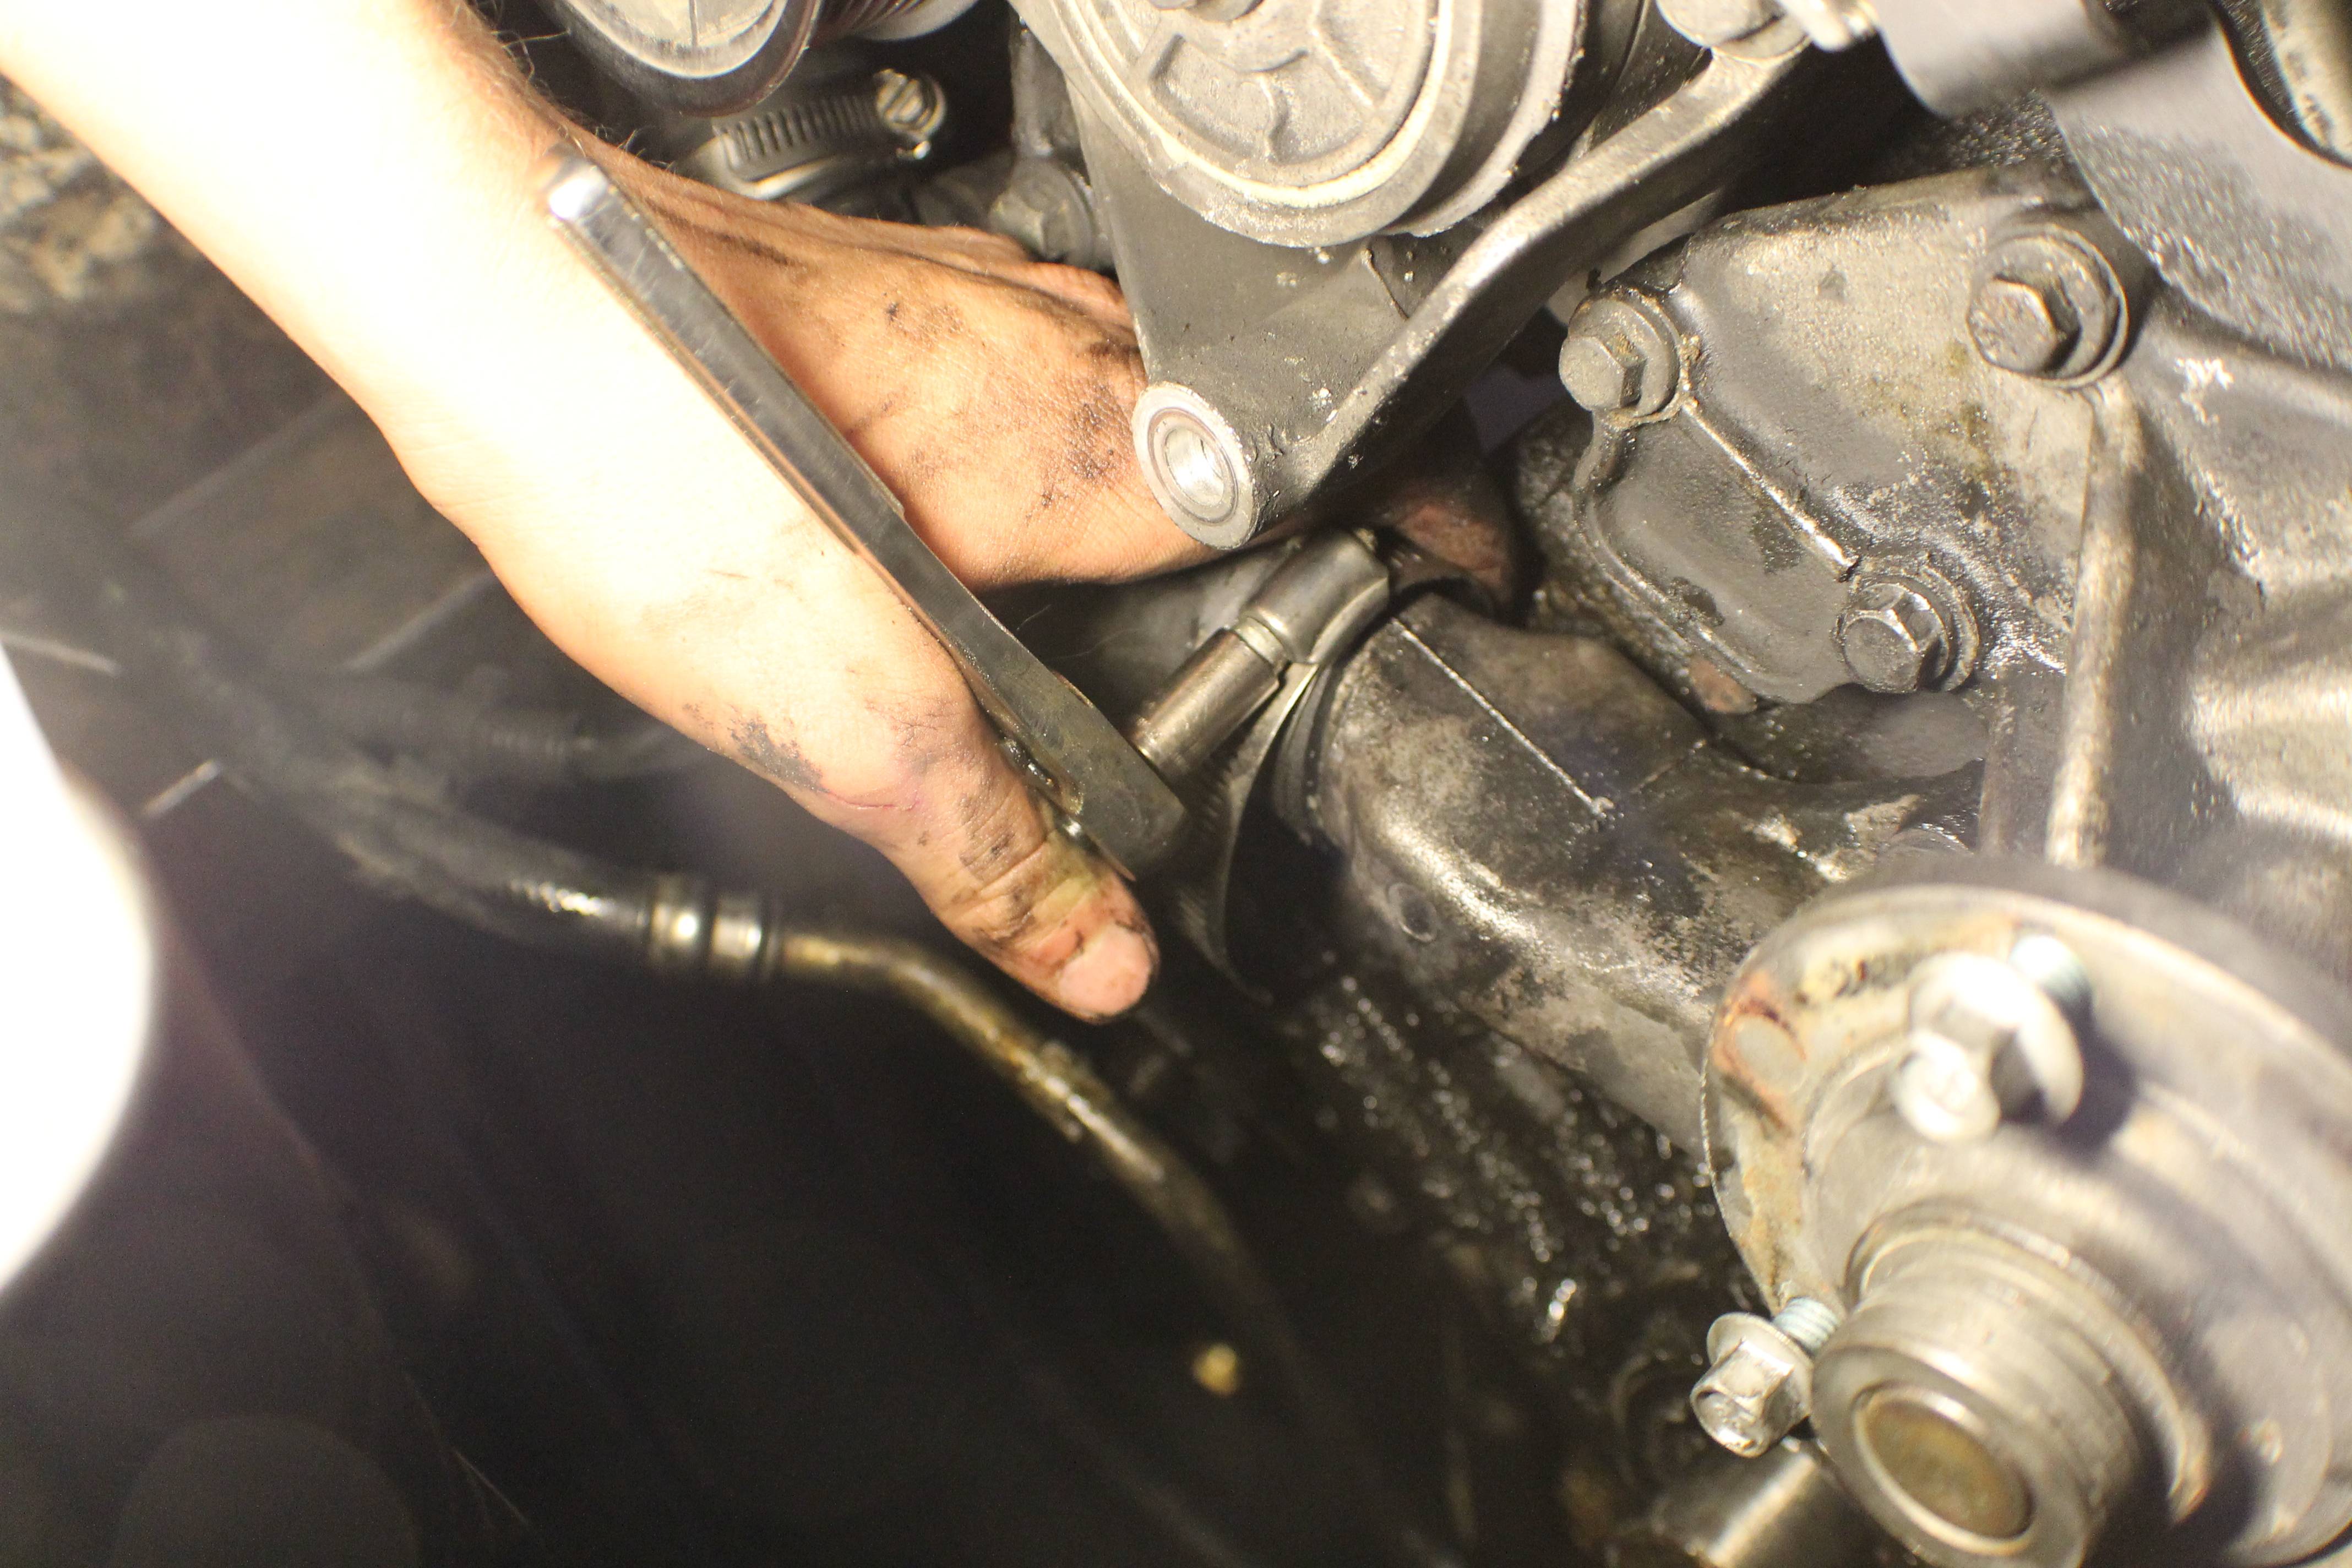
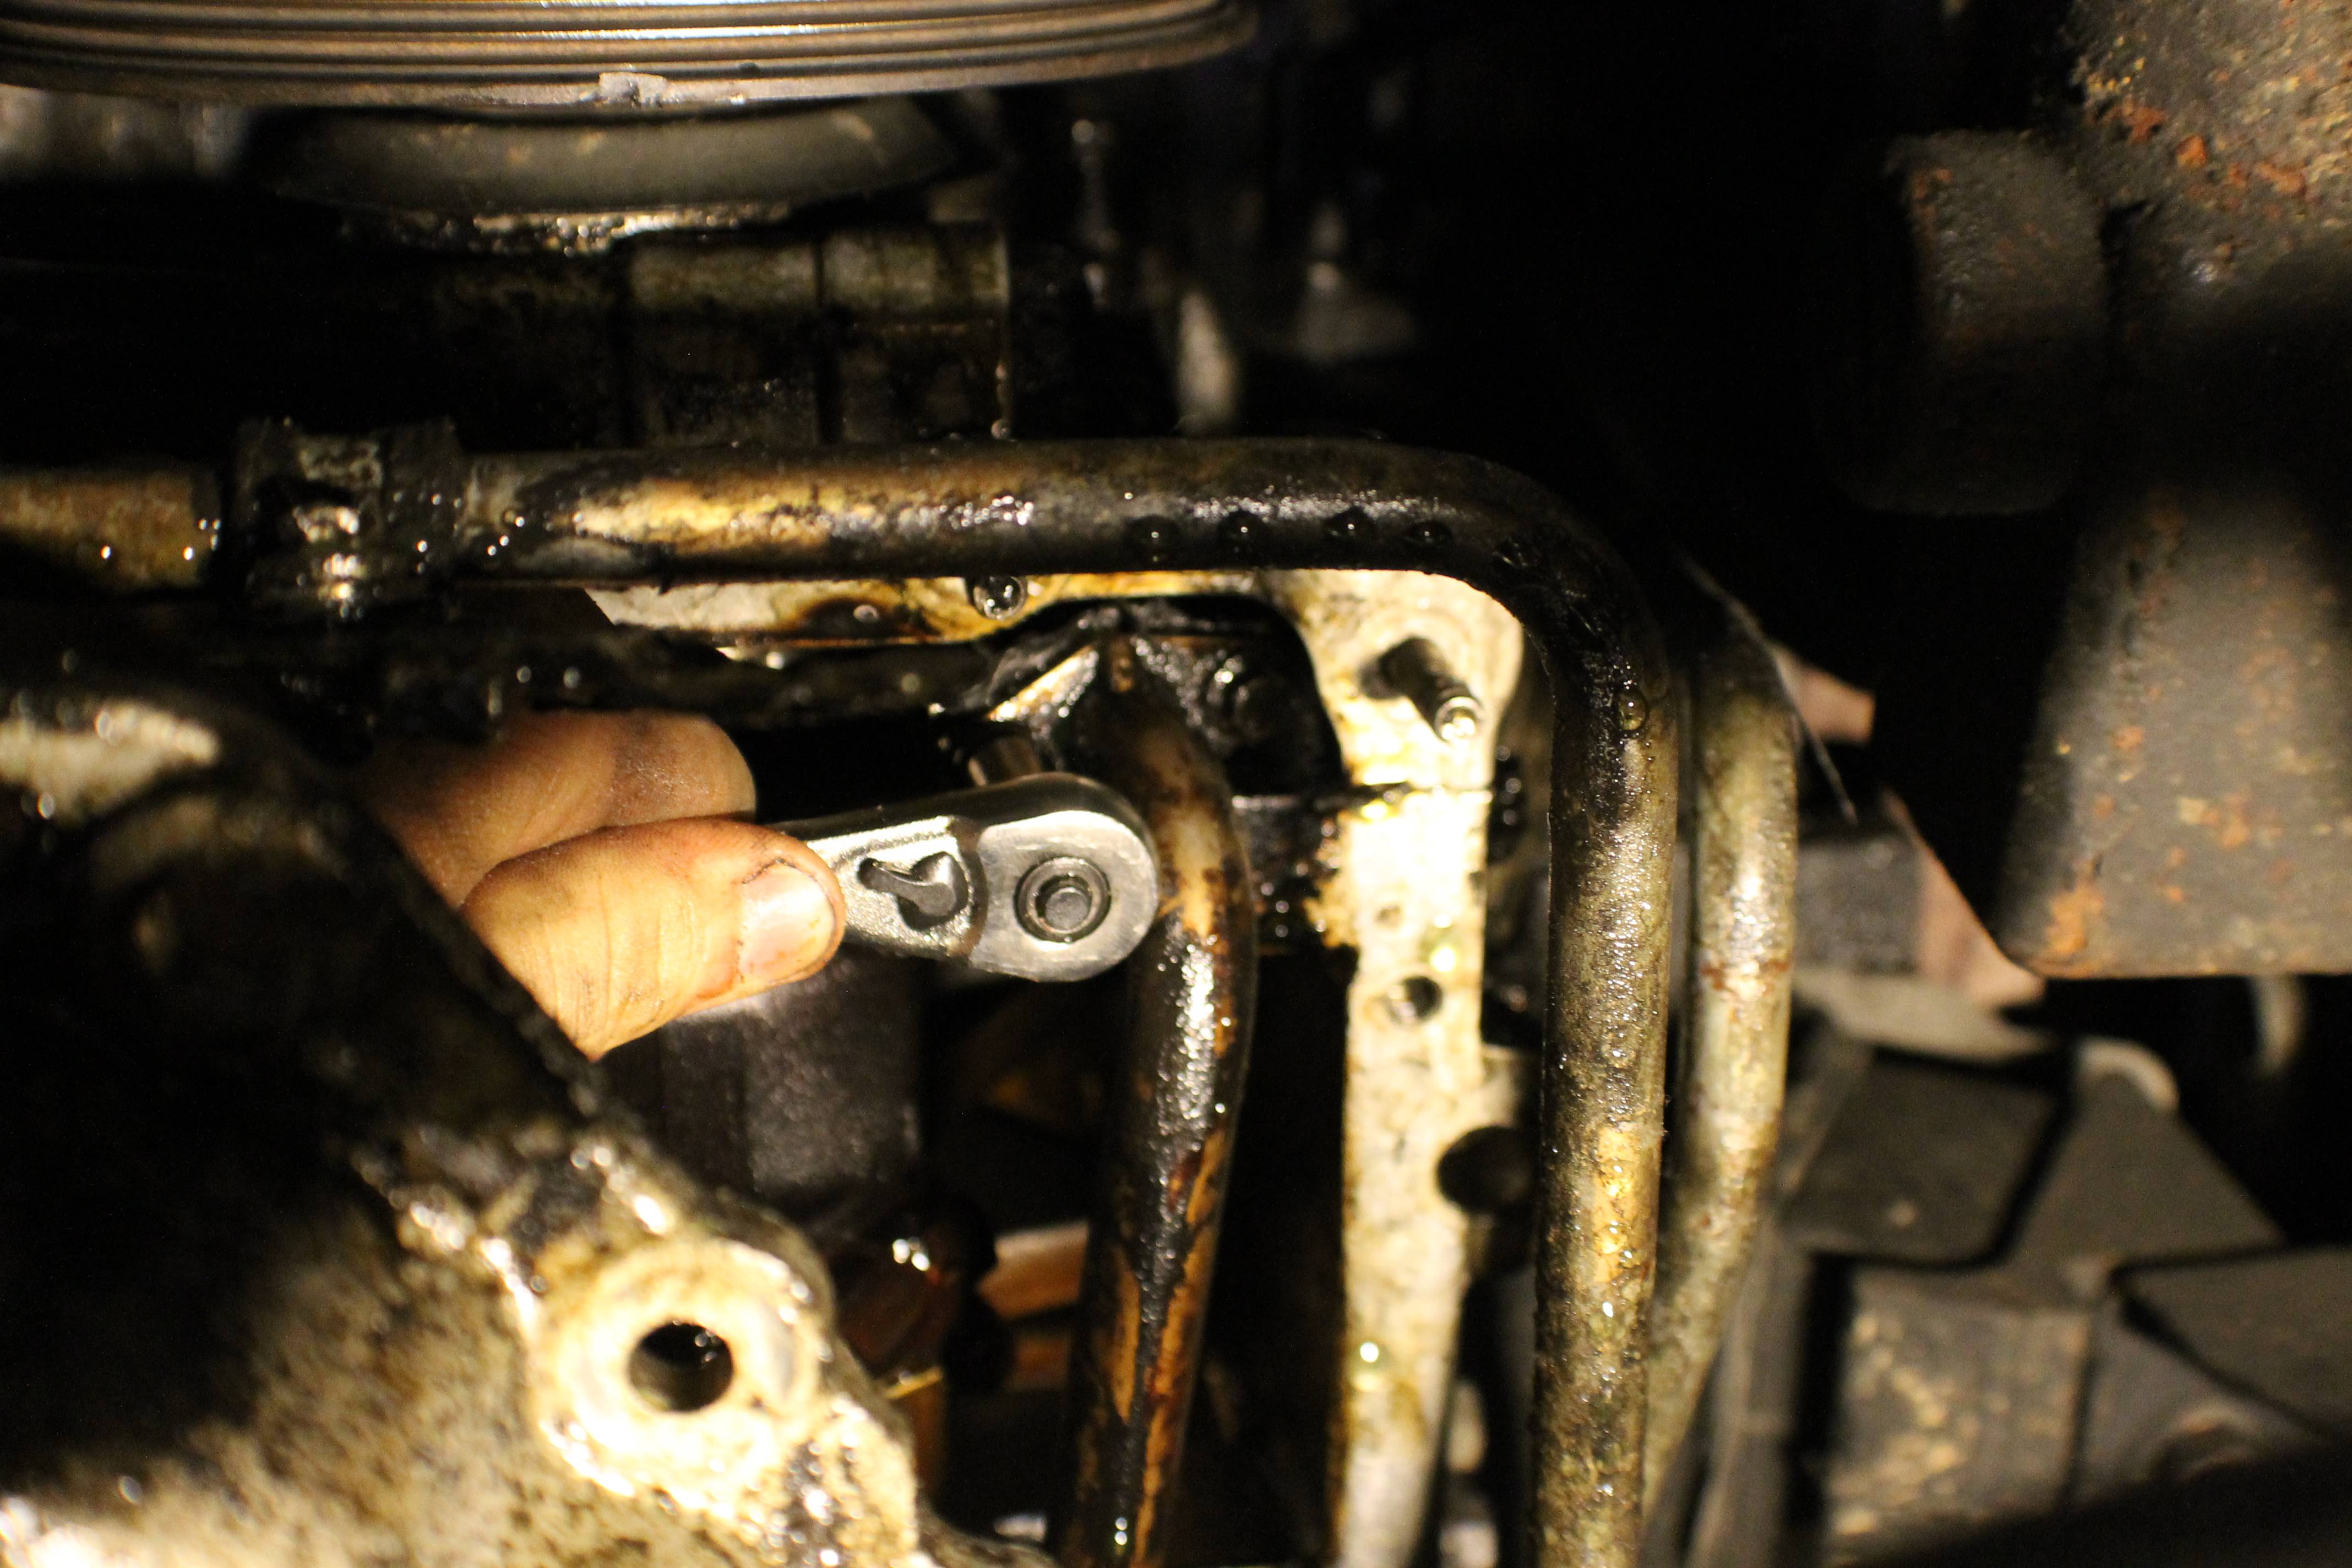
Now, there will be two more bolts on either side pointing backwards that go from the pan and thread back into the bell housing. These had the larger 13mm head. You know, I keep telling you 13mm, but the truth is I'm not positive because I'm writing most of this from memory as I go through the pictures. I think it was a 13mm, but it might not be. Someone correct me if I'm wrong and I'll correct it. These will be kinda tough to get to, but I believe every single one was possible with the socket and ratchet after I loosened the trans cooler lines. The hardest one was the one pictured which was at a weird angle and I had to reach around the exhaust and the trans cooler lines.
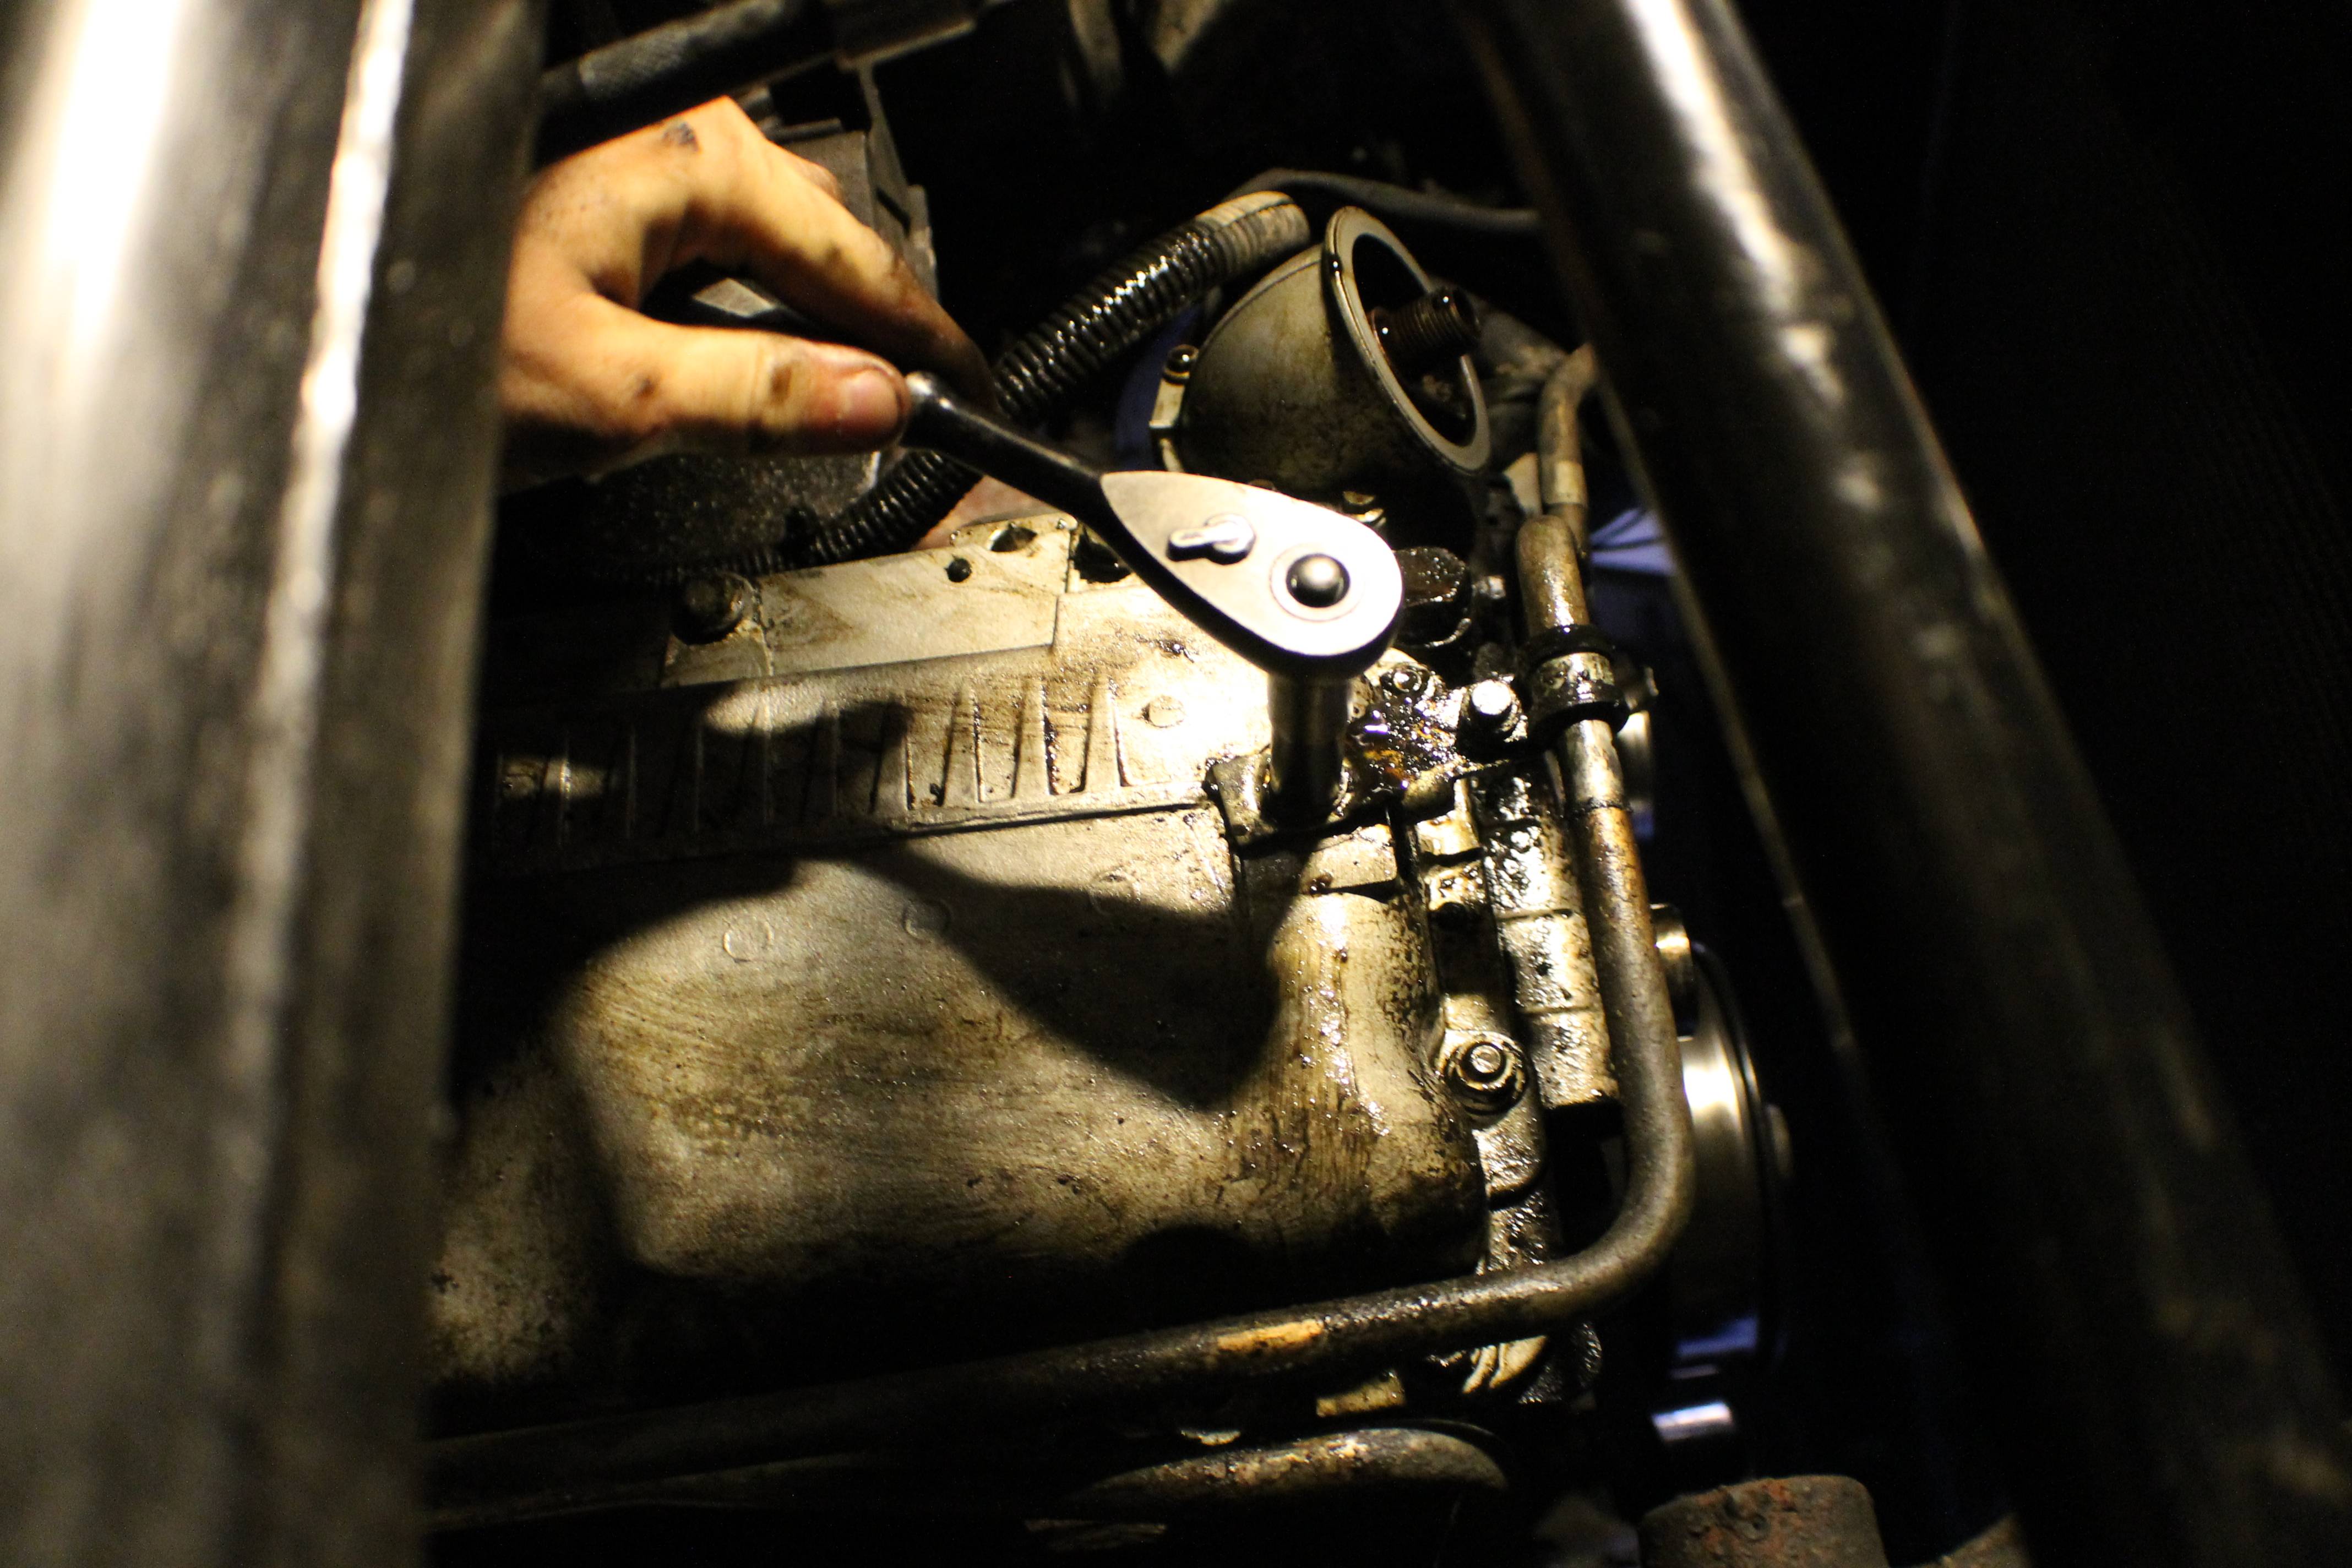
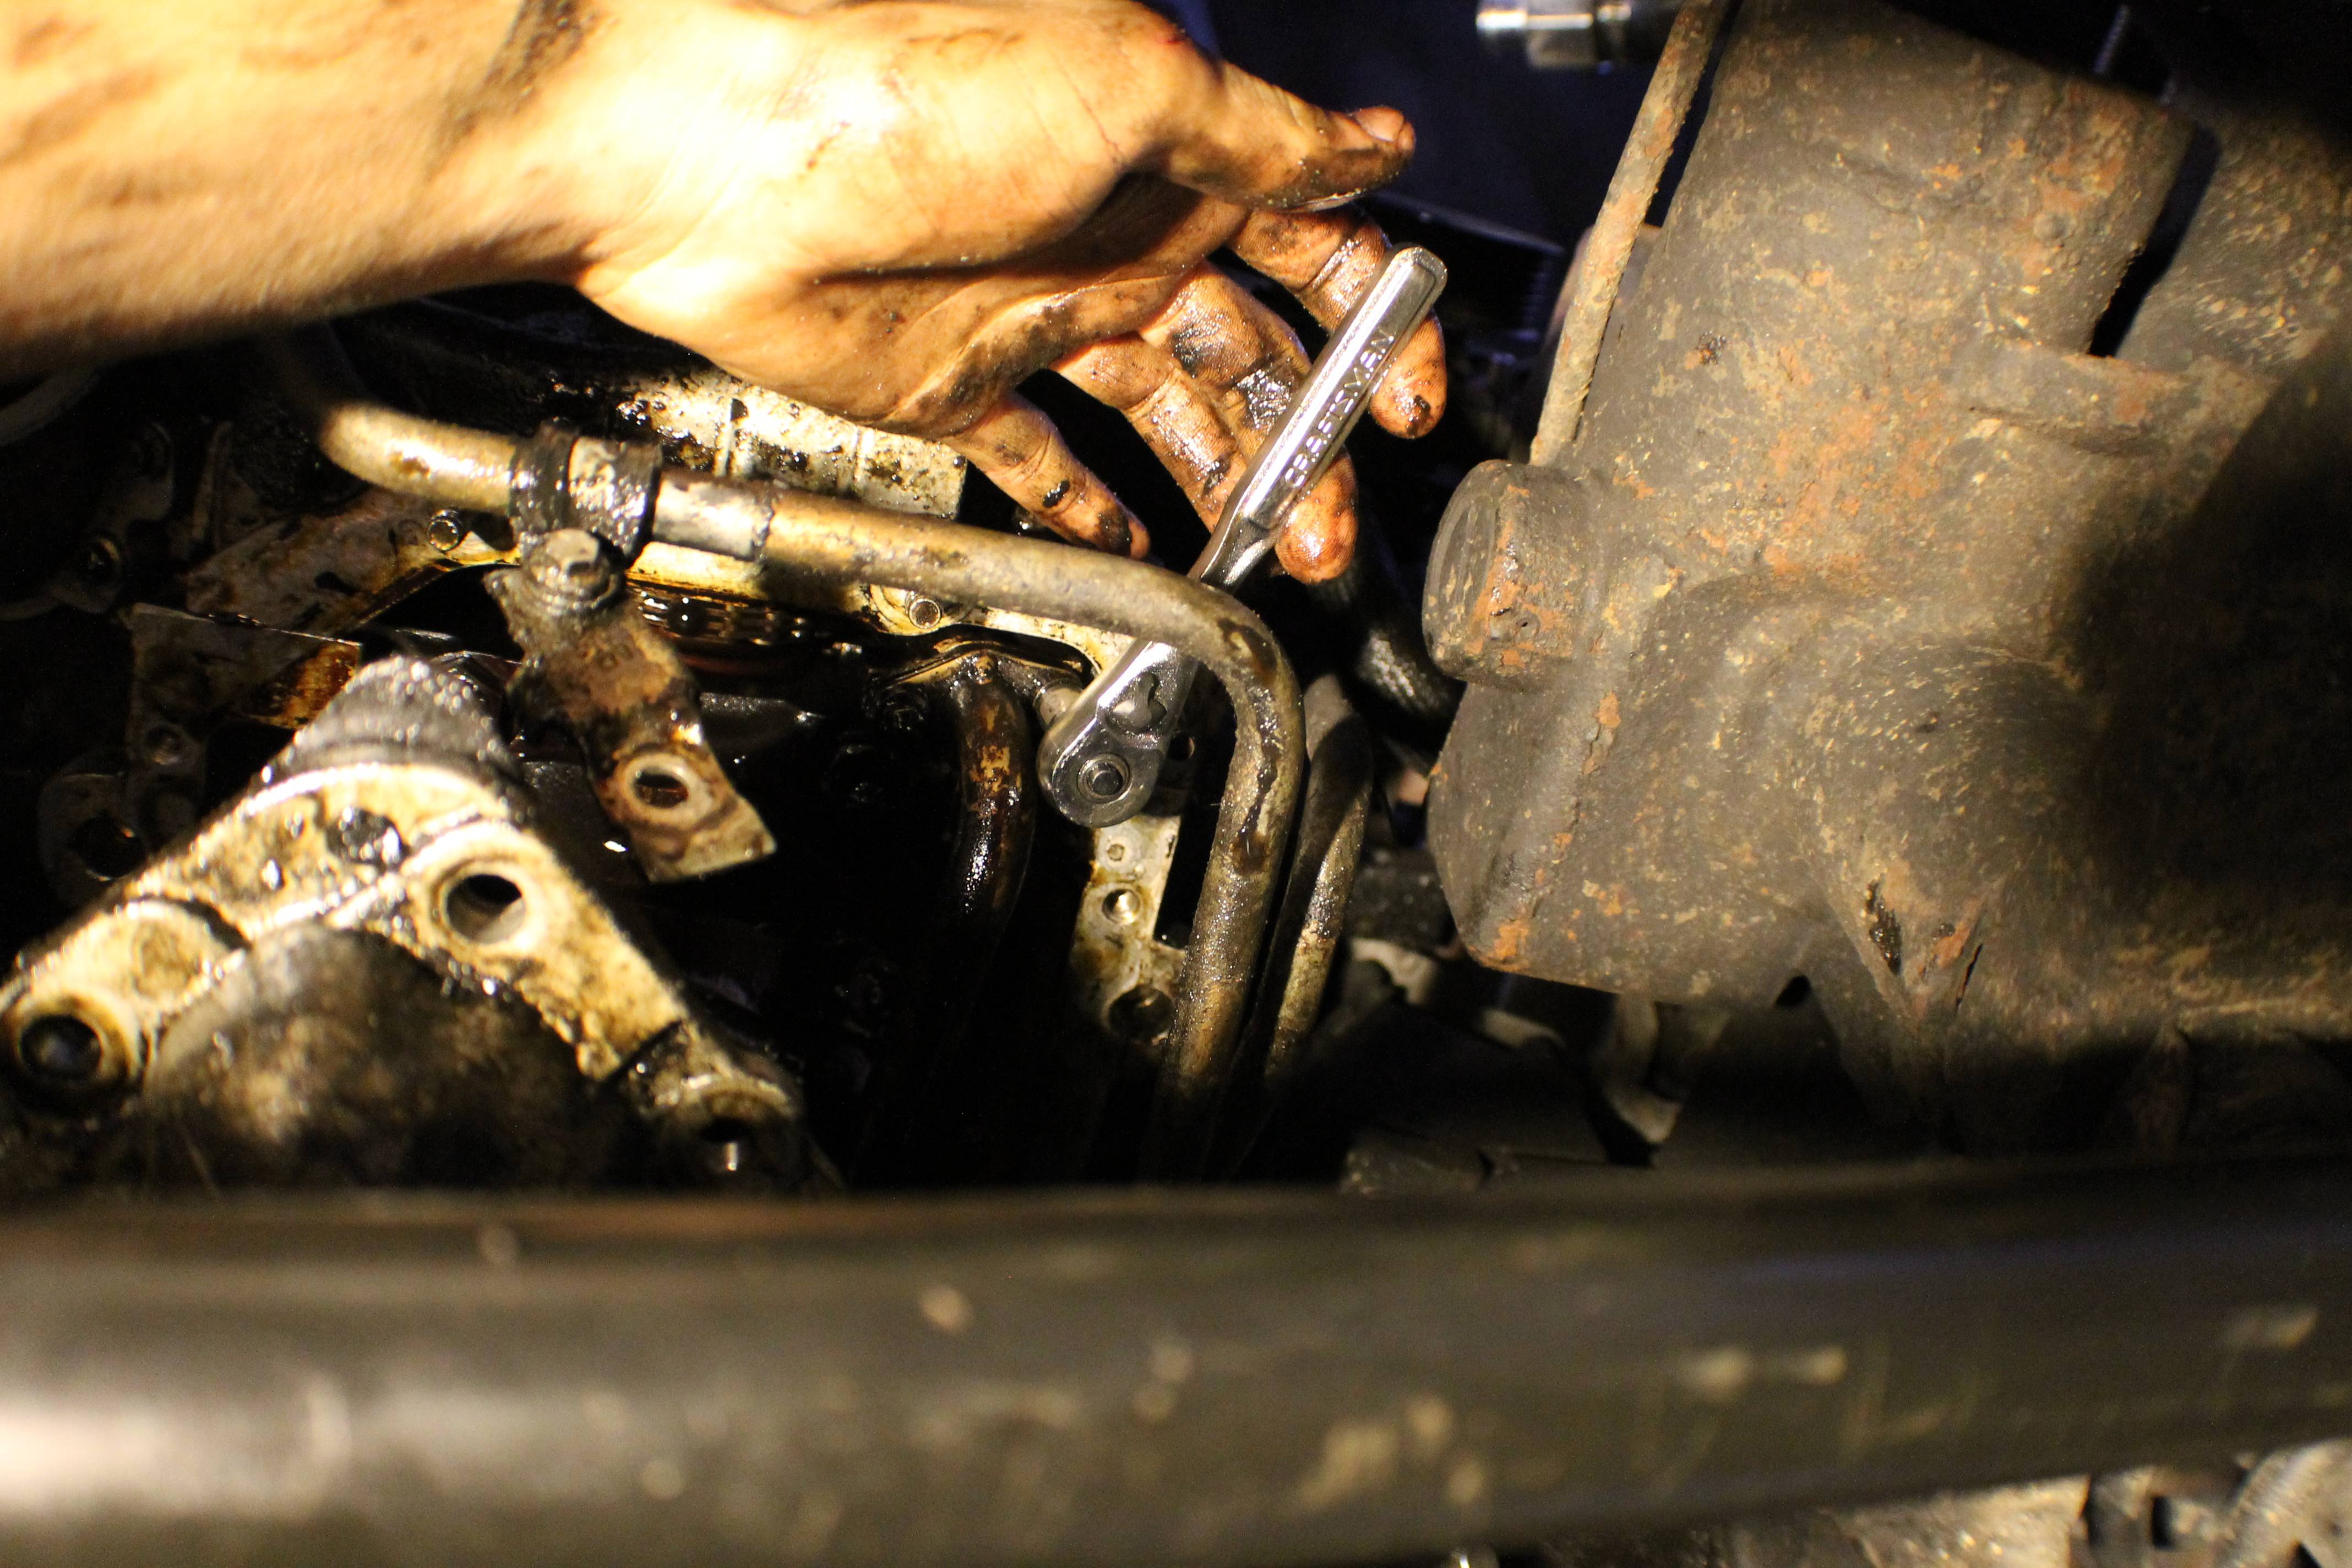
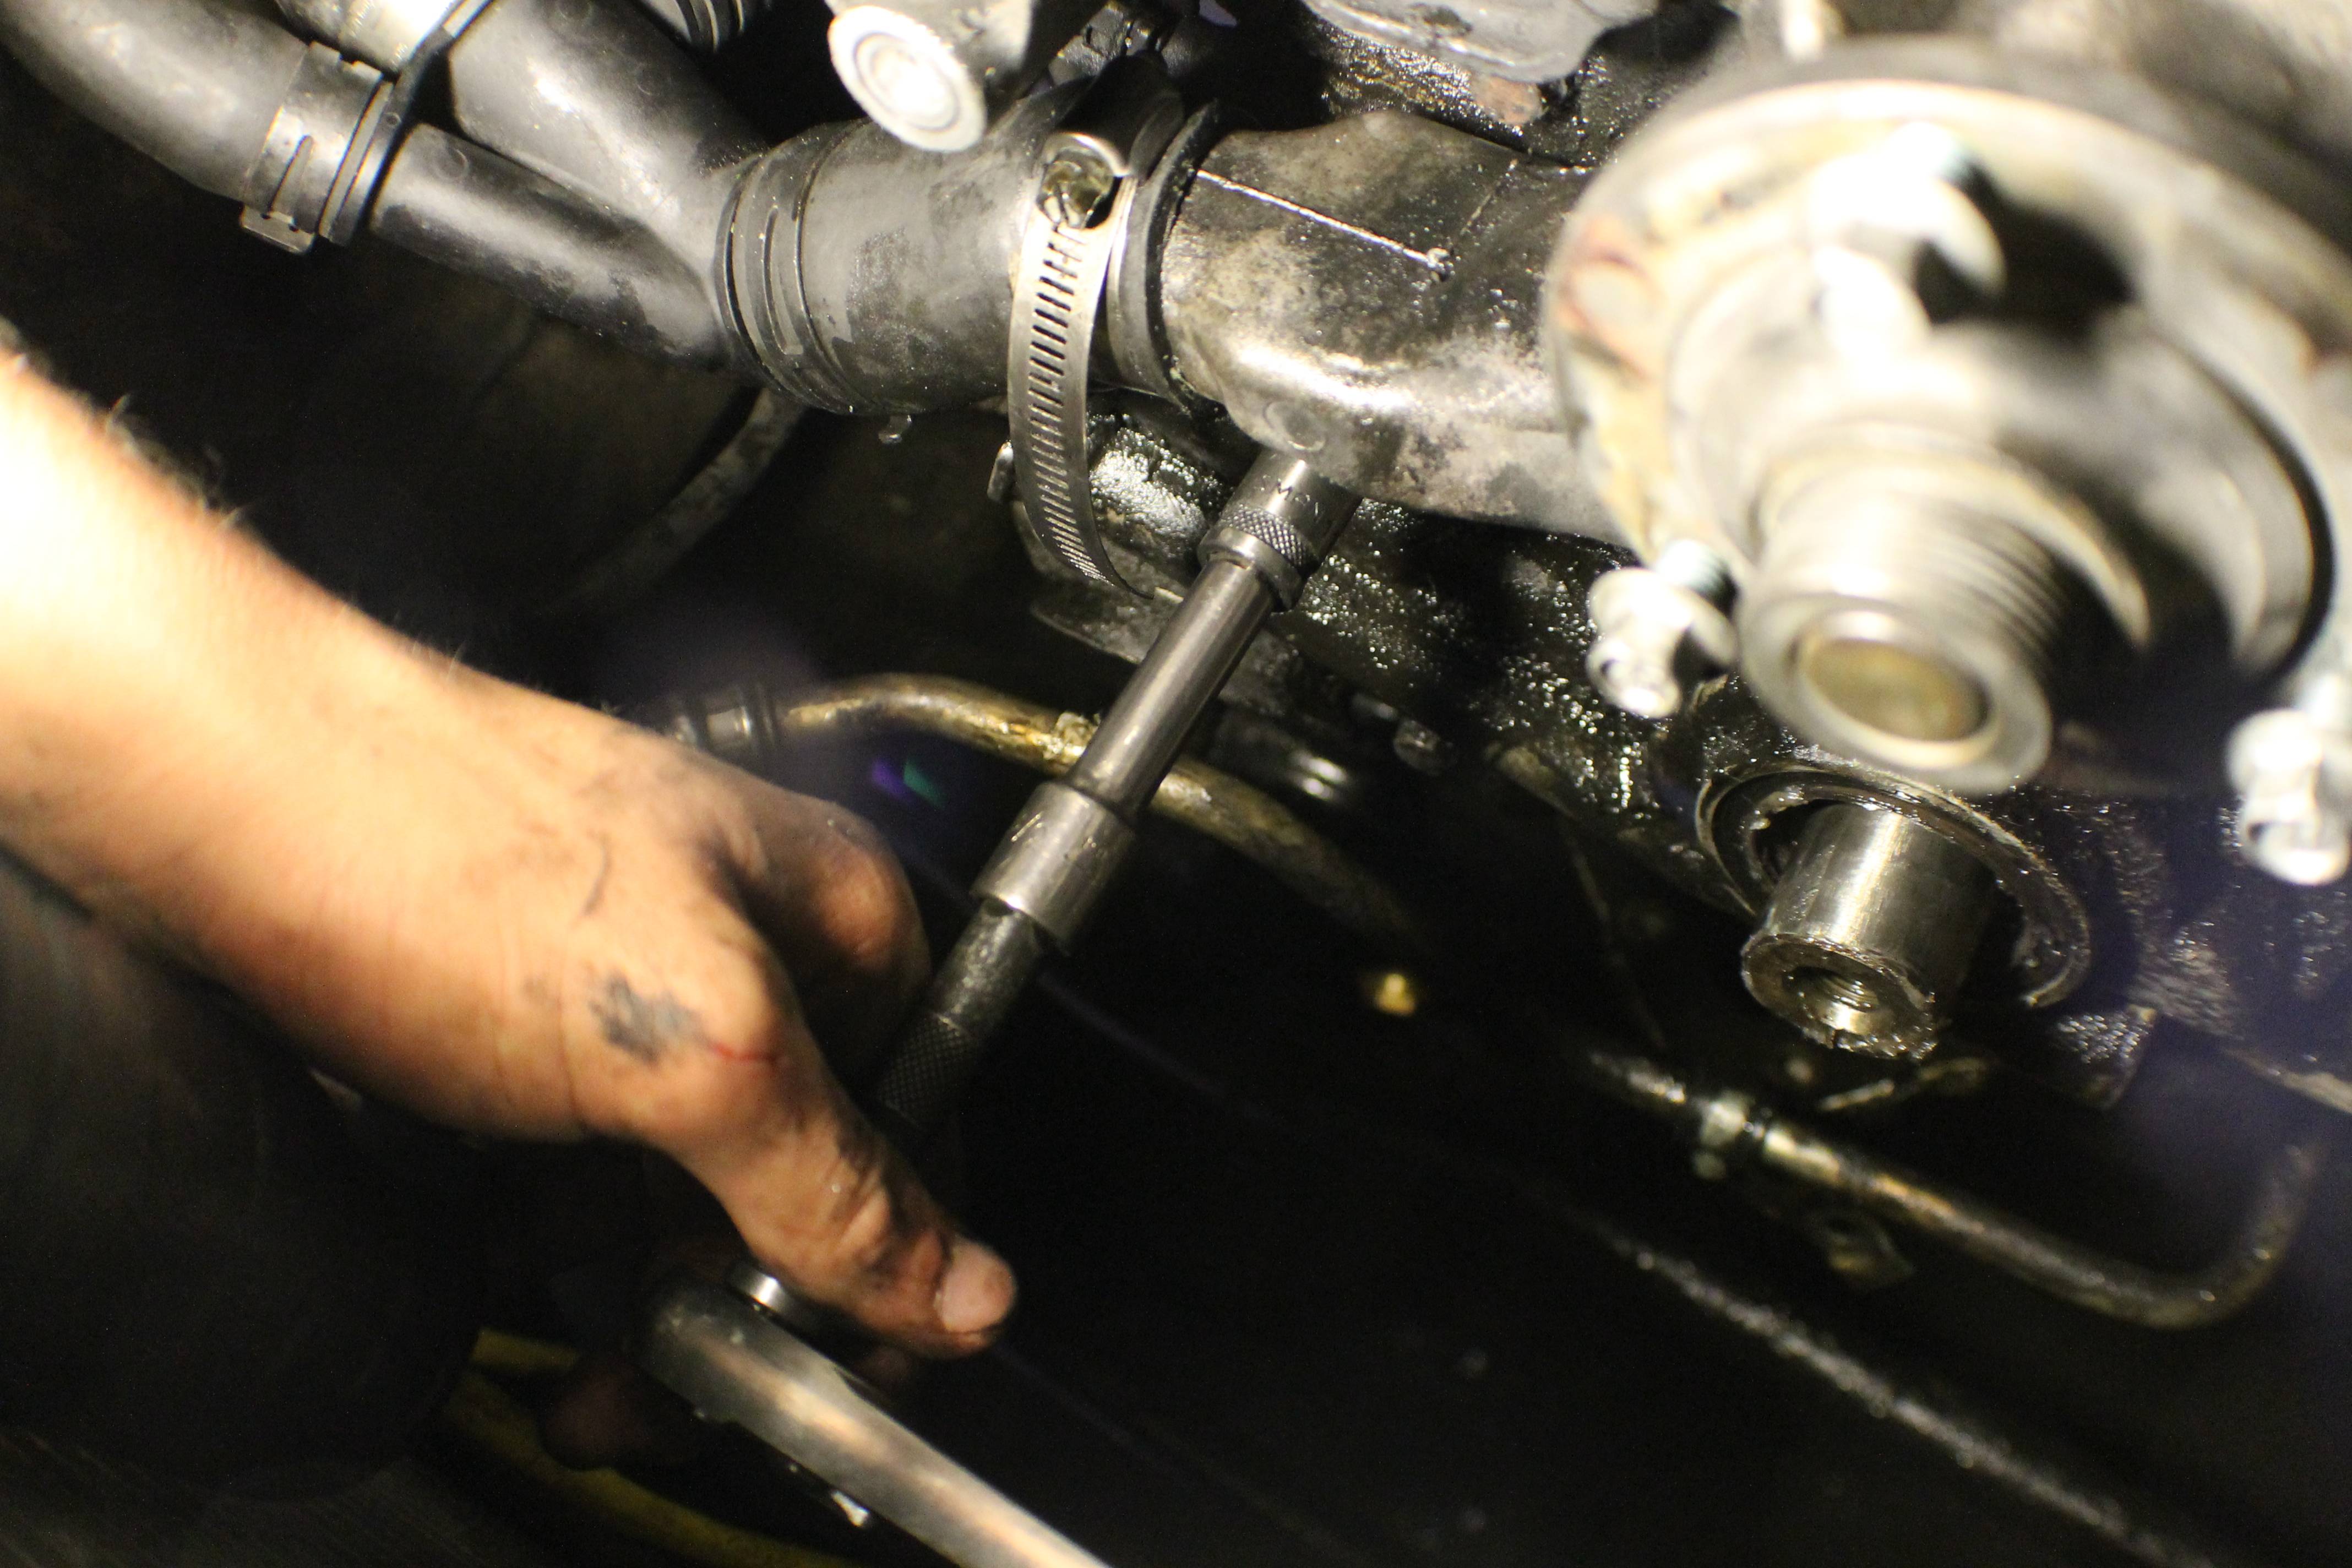
Now, here are the last four bolts. There are two going from the bell housing that thread into the oil pan which you can see in this picture hanging out, and then there will be two up in the holes which you can see my socket up in. Once all of these are out, you will still not be able to remove the oil pan because, like me, you will have forgotten one bolt that will attempt to give you hell. Please, if the pan does not come out with relative ease, don't yank on it because you will crack it. Do another inspection and find the one you missed and the pan should come out relatively easily. You may have to pry some with a screwdriver to get it past the studs that attach it to the front cover, but once past those it will attempt to come crashing down into you. Don't worry, it won't make it past the axle/track bar/crossmember/etc.

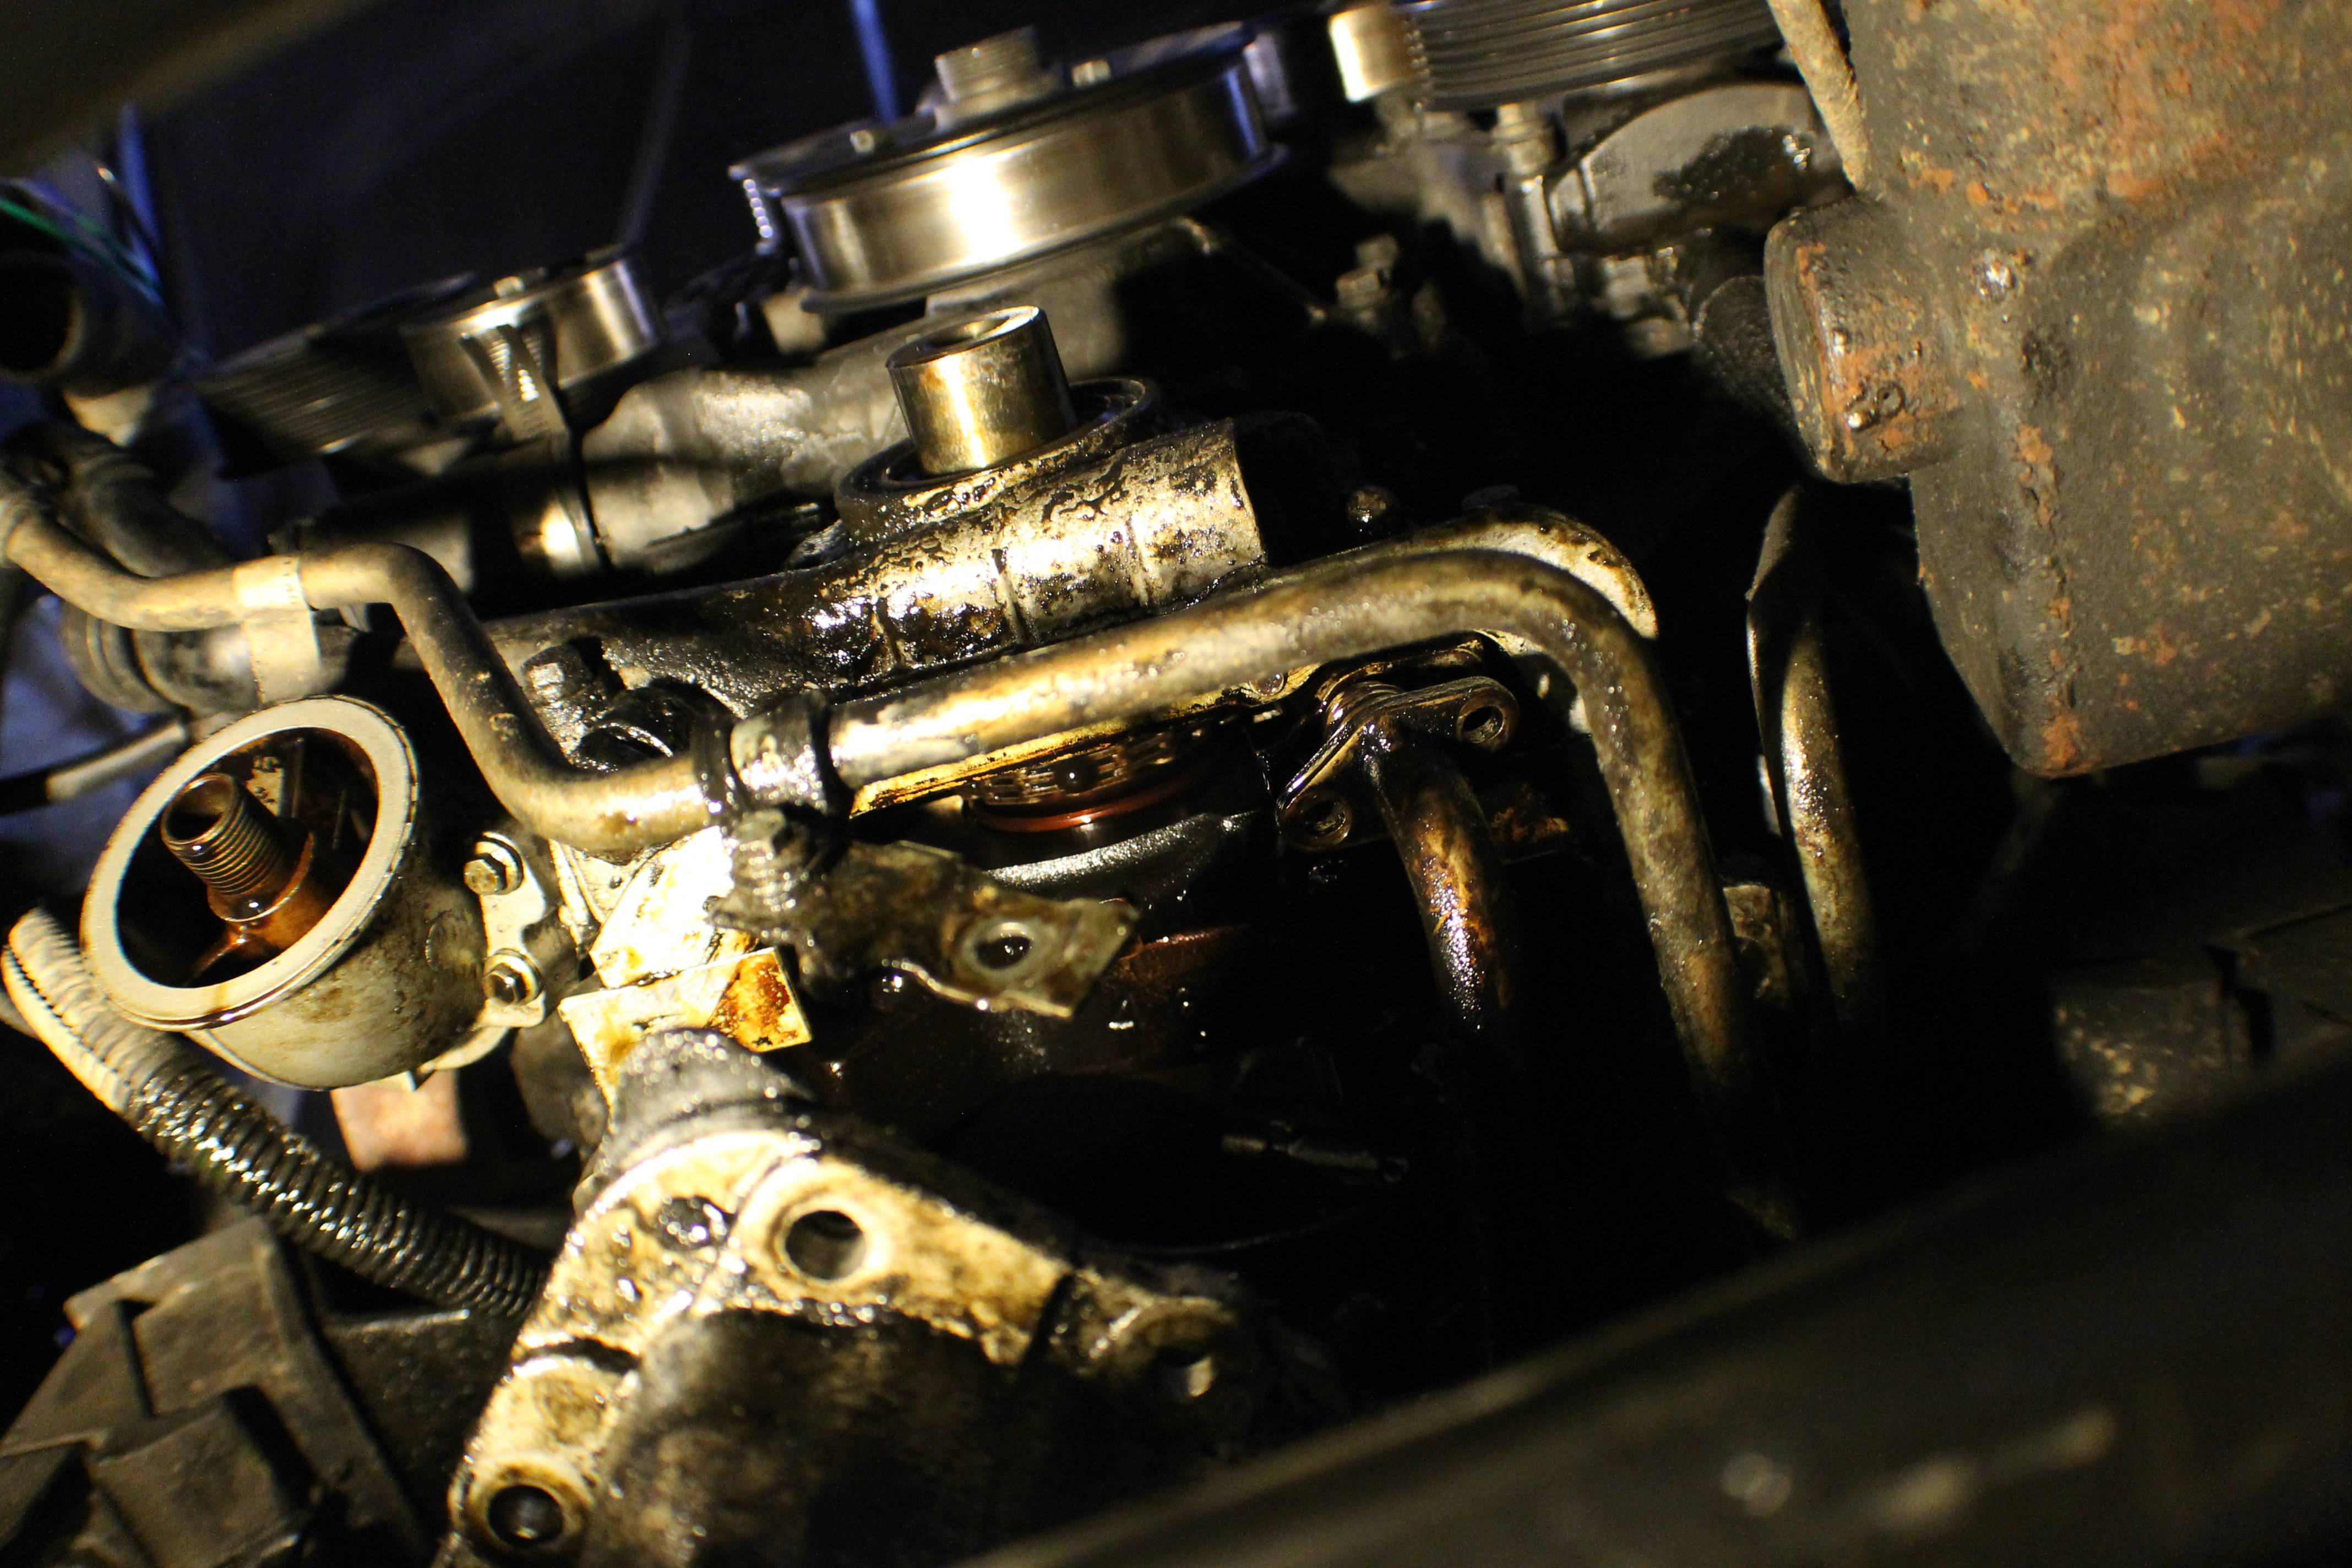
Now, slide the pan out of your way as well as you can and then take your 8mm socket. You will want to remove the two bolts that hold the oil pickup to the front cover and then simply pull it out. This might take a little tugging because the way the pickup is mounted keeps it pretty tight, but it'll come.
You'll want a couple gallons of pre-mixed antifreeze, or one gallon of full strength and on gallon of distilled water. Don't use tap water because the minerals will solidify inside your cooling system. Also fetch some delicious high ZDDP oil, a box of band clamps if you haven't already switched all your coolant hoses to them, and an oil filter. I recommend either the Mobil 1 M1-301 (my personal preference) or the Wix 51515XP (a little cheaper, it was on sale, doesn't filter quite as well but pretty close). I also used some water wetter, but it's not absolutely necessary. The one thing I forgot to picture is Vaseline. Be sure to get yourself either some petroleum jelly or some assembly lube. I went with petroleum jelly because its cheap and easy. You also, absolutely, without a doubt, must have a 2 foot breaker bar OR a large torque wrench. Without one or the other you will never get past the harmonic balancer.
Ok, you'll also need the actual parts for the replacement. I got the whole set as a kit from Lucky 8 and Erik gave me a forum member discount. It was a steal compared to anything I could find online. Message him for more info. Land Rover Forums - Land Rover Enthusiast Forum - View Profile: WNYErikDiscoII
Now, if you've ever drained your cooling system you know what a d*mn mess it makes all over the place. If you've never drained your cooling system... it makes a d*mn mess all over the place. Might work on a drain valve in the future... Anywho, find yourself some sort of pan with a large mouth. I've got this old light fixture I've been using for a couple years that works great. You'll also want a separate pan to drain your oil into.
Ok, now we can jump into the write up.
-=-=-=-=-=-=-=-=-=-=-=-=-=-=-=-=-=-=-=-=-=-=-=-=-=-=-=-=-=-=-=-=-=-=-=-=-=-=-=-=-=-=-=-=-=-=-=-=-=-=-=-=-=-=-=-=-=-=-
Since this is such a large job and the write up is going to be pretty long as it is, I'm not going to picture every single little nut and bolt that needs to be removed one at a time. I will, however, picture the area and describe what needs to be done. If you can't follow the instructions in this manner, you should not attempt this job. If you're not sure if you are capable of tackling this job, read through the write up and feel free to ask questions before starting. I, as well as many others, would be more than happy to answer any and all questions you may have.
-=-=-=-=-=-=-=-=-=-=-=-=-=-=-=-=-=-=-=-=-=-=-=-=-=-=-=-=-=-=-=-=-=-=-=-=-=-=-=-=-=-=-=-=-=-=-=-=-=-=-=-=-=-=-=-=-=-=-
Alright, starting off with easy stuff. We are simply going to drain the oil and the coolant. Draining oil is easy. Pop off the filler cap, crawl underneath with your 15mm socket on a ratchet and your oil drain pan. It may be easier to use a breaker bar to break the drain plug loose. I usually do just for ease. I always end up punching the cross member when it breaks loose if I don't use the breaker bar. Drop the plug out and allow all the oil to drain. Now sit the plug somewhere that you won't lose it or return it to the drain hole.
Now slide the pan up to the front underneath your oil filter. Your filter should come off by hand, but if not then just pop a philips screwdriver through it and spin it off that way. I just drop the filter into the drain pan, you can do with it whatever you please.
Once all the oil is drained, move the pan out from other the truck. Next we're draining the coolant, and if you get any coolant in the oil then you won't be able to recycle it.
This step depends on whether or not you have the factory style hose clamps or the band style hose clamps. If you've got the factory style, pull out your channel locks. If you've got the band style as I do, use an 8mm socket on your ratchet. Slide your wide mouth pan under the truck closest to where you think most of the coolant will drain. Remove the overflow tank cap, loosen the clamp that attaches the hose to the lower side of the radiator, and slide the hose off allowing the coolant to drain.
Now, before you cover your garage/driveway in coolant and awaken the wrath of your mother/girlfriend/wife, quickly kneel down and scoot your pan around so to a position that will allow it to catch the most coolant possible. You'll still get quite a bit on the floor. Keep some towels handy that the lady of the house has forgotten existed or that have already been otherwise ruined for household use.
Once that has finished draining, remove the remaining coolant hoses and sit them out of your way. I just sat mine on top of the engine.
Now you will need to remove your serpentine belt. I used a 5/8" impact socket on the end of my breaker bar to raise the belt tensioner, but it can be done with a box wrench.
Once all of that is out of the way, remove your fan. If you have the factory mechanical fan, you will also need to remove the shroud. You may have already done this to get to the lower radiator hose. If you have the factory mechanical fan you can remove it by clamping a large set of vice grips onto the water pump pulley, as shown below when removing the water pump pulley, and then using a crescent wrench to twist the fan off.
If you have done an electric fan conversion, as I have, start by unplugging the fan. If you wired yours directly without plugs, you will be required to cut the wires and I would recommend splicing in connectors so that it can more easily be removed in the future. If you have not converted to an electric fan setup, I highly recommend doing so while the fan is out of the truck. It's quite simple, relatively cheap, and netted me an extra 1 mpg. There is a write up for that which you can find in the index linked in my description.
Once it's unplugged, take a flat head screwdriver and place it between the fan and the radiator. Pry with the end of the screwdriver against the fan, NOT against the radiator. If you pry the opposite direction that is shown, you will end up with a hole in your radiator. Do this on both sides to pop the top fan retainers loose and then the whole assembly will lift out. Don't lose the retainers because you will want to reuse those when you reinstall the fan.
Alright, now we start getting into the bigger stuff. This part right here is the point of no return because now you have to drop the oil pan to get it back together. If you have been having trouble following along up to this point, put it back together and pay a shop to do the work.
Get your breaker bar and pull out your large impact sockets. You will need a 15/16" socket. I placed the breaker bar between the plastic shield that is against the passengers side frame rail and the frame rail itself. Thinking back with "Righty Tighty Lefty Loosey" in mind... I did that wrong. You will want to either place the breaker bar under the passengers side frame rail or over top the drivers side frame rail. Use the breaker bar to turn the crank so that the breaker bar is making contact with the frame rail, or at least close to making contact. Once it's on you will want to go bump the starter 2-3 times. DO NOT START THE ENGINE. Simply bumping the starter won't hurt anything, but if you start the engine then you will be putting considerable stress on your dry bearings since there is no oil in the sump to be picked up. Once you've bumped the starter two or three times the bolt will have probably broken loose. If it hasn't then bump it two or three more times or until it does break loose, though it shouldn't take many bumps.
At this point the crank bold should twist out with the socket by hand, but if it doesn't then you'll want to stick a ratchet on it. Once it's loosened it should slide right off of the crank and lift out.
Alright, now we move under the truck. This will not be fun because you will be spending a bit of time laying on your back working over your head while greasy blobs of dirt try and occasionally succeed to fall in your eyes. Safety glasses are recommended. Don't breathe with your mouth open. I'll tell you now so you don't have to keep crawling under and out from under your truck, you'll need the following tools. Two short or one long ratchet extension(s), a 13mm deep socket, a 10mm deep socket, an 8mm shallow socket, a 13mm box wrench, your breaker bar, and an adapter to adapt the 3/8" drive sockets and extensions to your breaker bar. If you're using all shallow sockets, add another short extension to your list of tools.
Now, start with your 8mm and 10mm sockets. remove all the pictured little doo-hickeys holding onto the transmission cooler lines. The first pictured clamp takes a 10mm, second pictured takes an 8mm, and third pictured will want to be loosened with an 8mm on the line side then removed with a 10mm on the oil pan side. Once the oil pan side is removed, place the bolt back in the pan so you don't lose it.
Alright, not that that's done you will be able to get to all of the oil pan nuts and bolts. There are three nuts with washers on the very front that connect the oil pan to the front cover, six bolts on both the drivers side and the passengers side of the pan going up into the block. Those should all be fairly straight forward. This is a picture of all of the bolts (sans 1) that hold the pan in, which will give you a better idea of where the bolts are located and how I sat mine in order to not get them mixed up. I recommend sitting all your bolts out in the pattern that they should go back in like this, and be careful not to knock them. This will make your job easier when the time comes to reinstall the pan.
Now, there will be two more bolts on either side pointing backwards that go from the pan and thread back into the bell housing. These had the larger 13mm head. You know, I keep telling you 13mm, but the truth is I'm not positive because I'm writing most of this from memory as I go through the pictures. I think it was a 13mm, but it might not be. Someone correct me if I'm wrong and I'll correct it. These will be kinda tough to get to, but I believe every single one was possible with the socket and ratchet after I loosened the trans cooler lines. The hardest one was the one pictured which was at a weird angle and I had to reach around the exhaust and the trans cooler lines.
Now, here are the last four bolts. There are two going from the bell housing that thread into the oil pan which you can see in this picture hanging out, and then there will be two up in the holes which you can see my socket up in. Once all of these are out, you will still not be able to remove the oil pan because, like me, you will have forgotten one bolt that will attempt to give you hell. Please, if the pan does not come out with relative ease, don't yank on it because you will crack it. Do another inspection and find the one you missed and the pan should come out relatively easily. You may have to pry some with a screwdriver to get it past the studs that attach it to the front cover, but once past those it will attempt to come crashing down into you. Don't worry, it won't make it past the axle/track bar/crossmember/etc.
Now, slide the pan out of your way as well as you can and then take your 8mm socket. You will want to remove the two bolts that hold the oil pickup to the front cover and then simply pull it out. This might take a little tugging because the way the pickup is mounted keeps it pretty tight, but it'll come.
Last edited by Alex_M; Jan 4, 2016 at 08:38 AM.
Thread Starter
|
Camel Trophy
Joined: Aug 2014
Posts: 4,743
Likes: 985
From: Southwestern Virginia
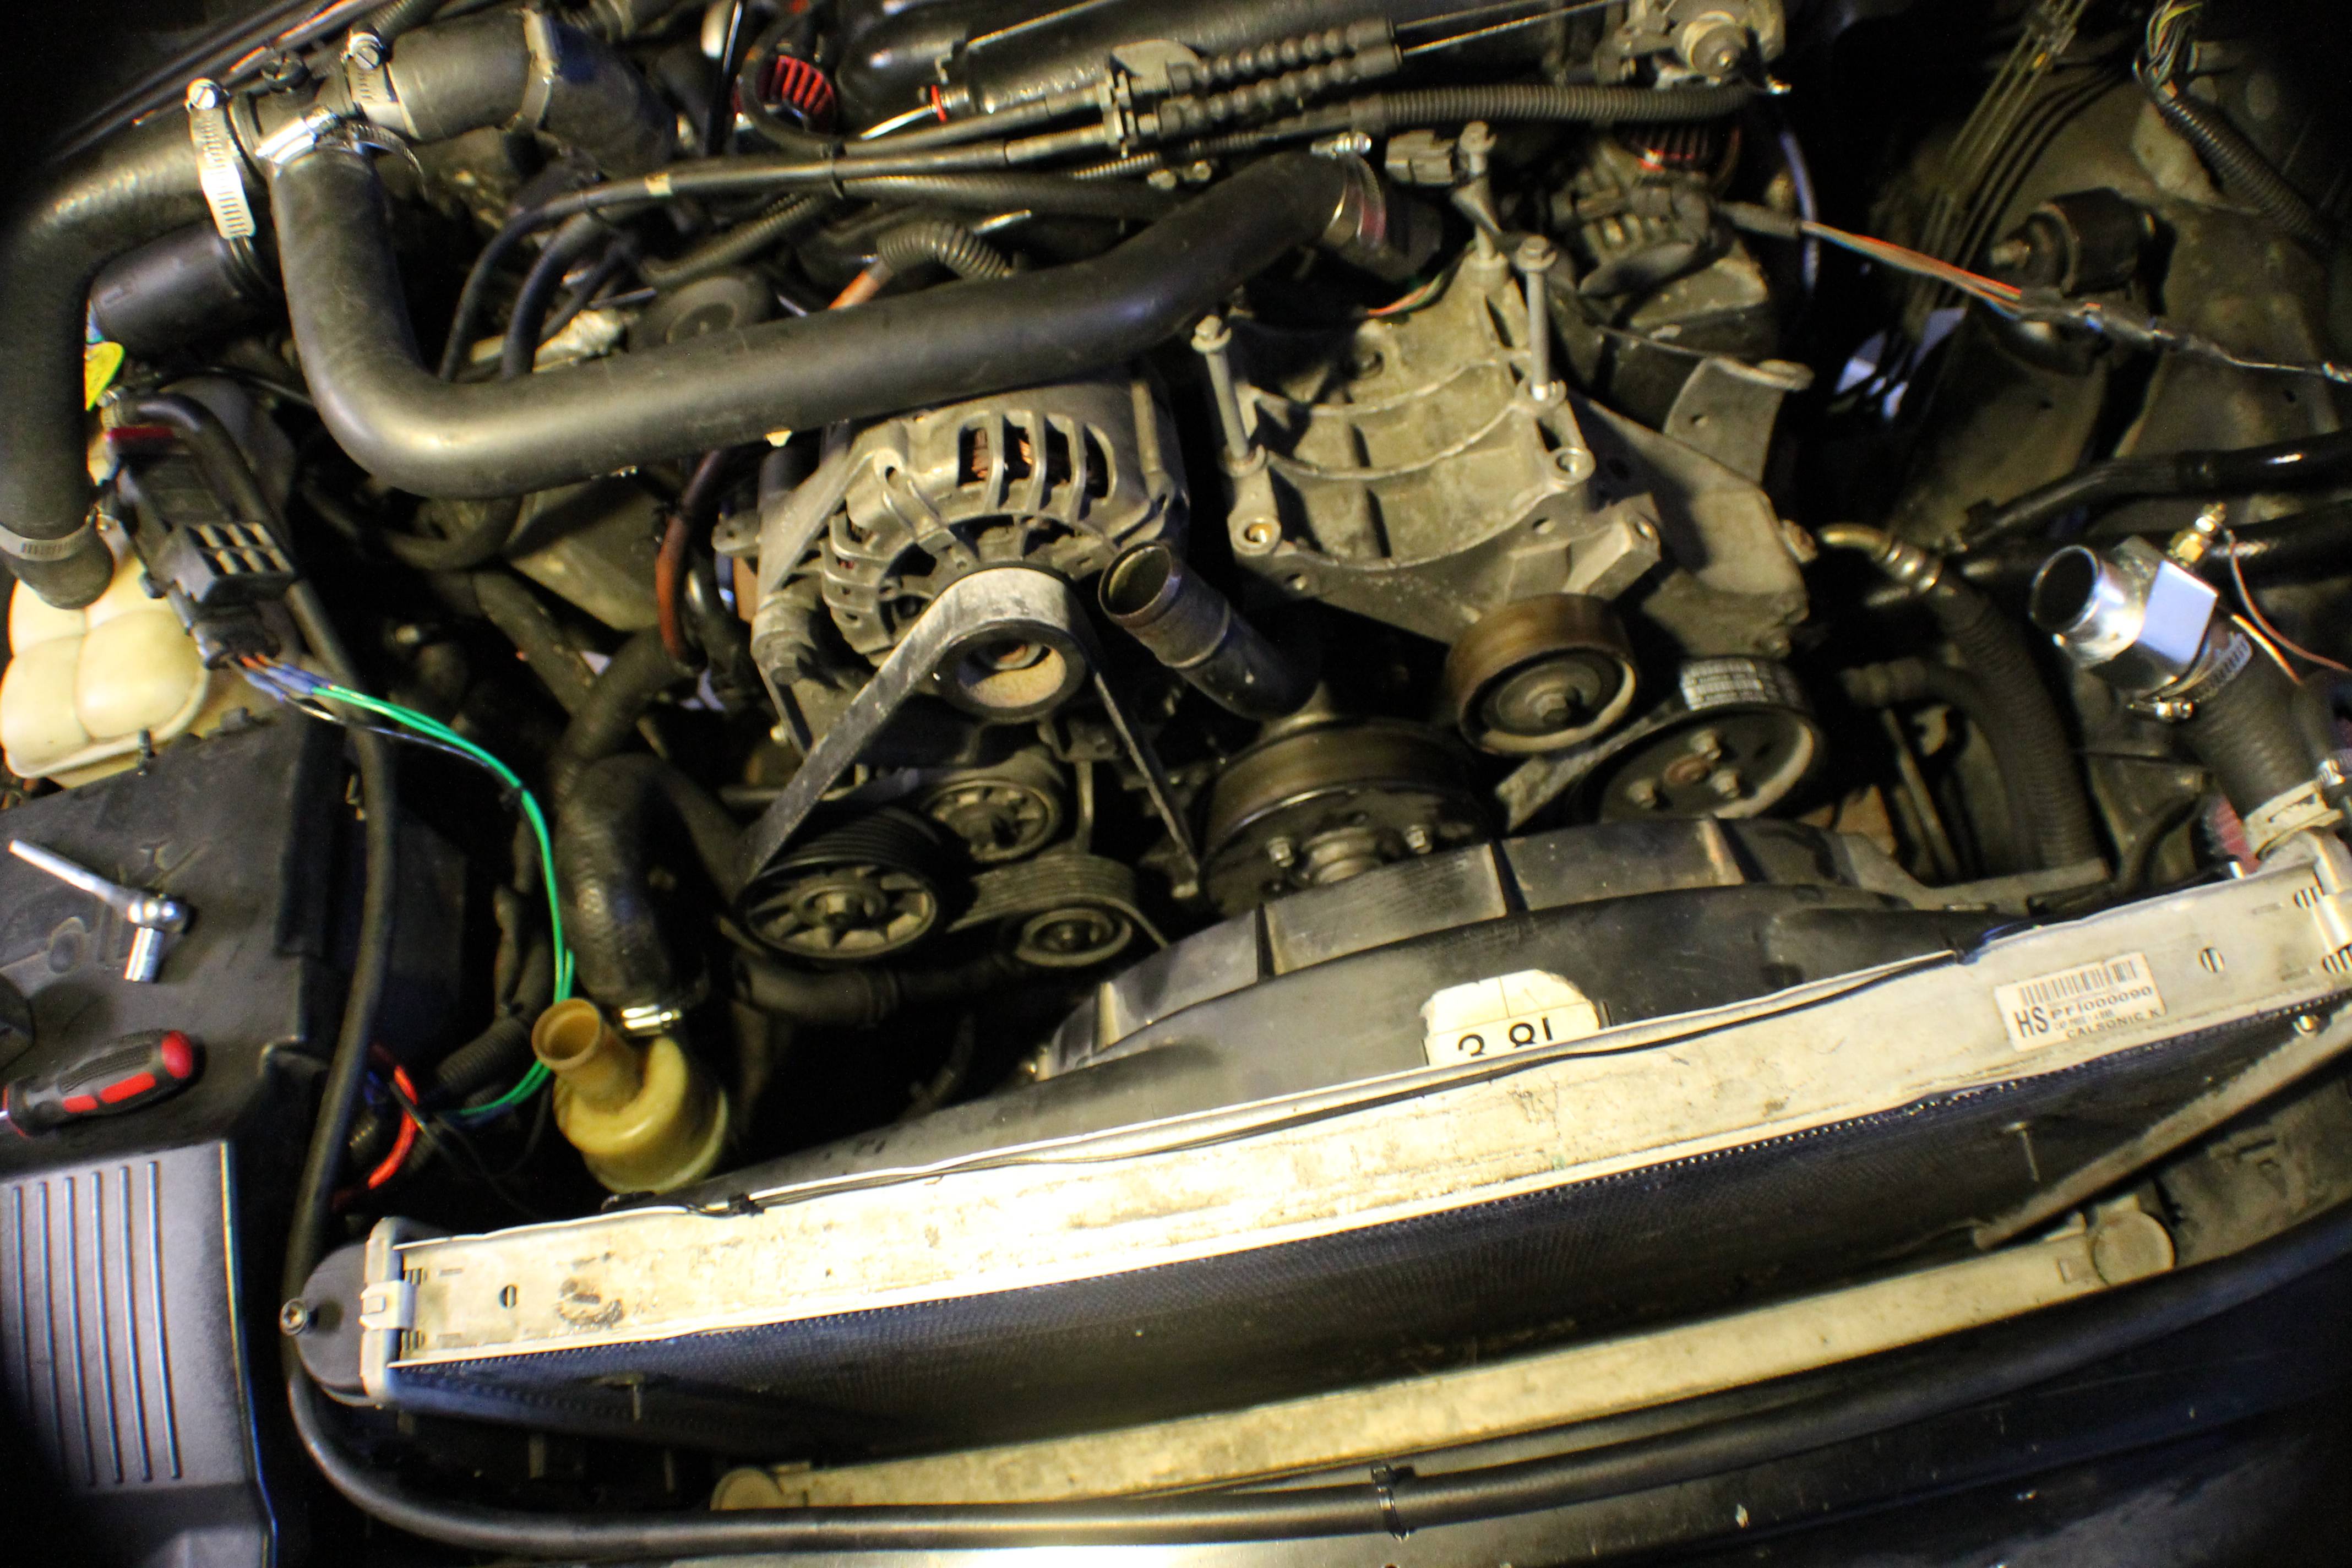
Now it's time to rejoice; you're now done laying on your back! For a while, anyway. Time to climb out and begin work under the hood again. This is the part where having a brush guard and a lifted truck sucks.
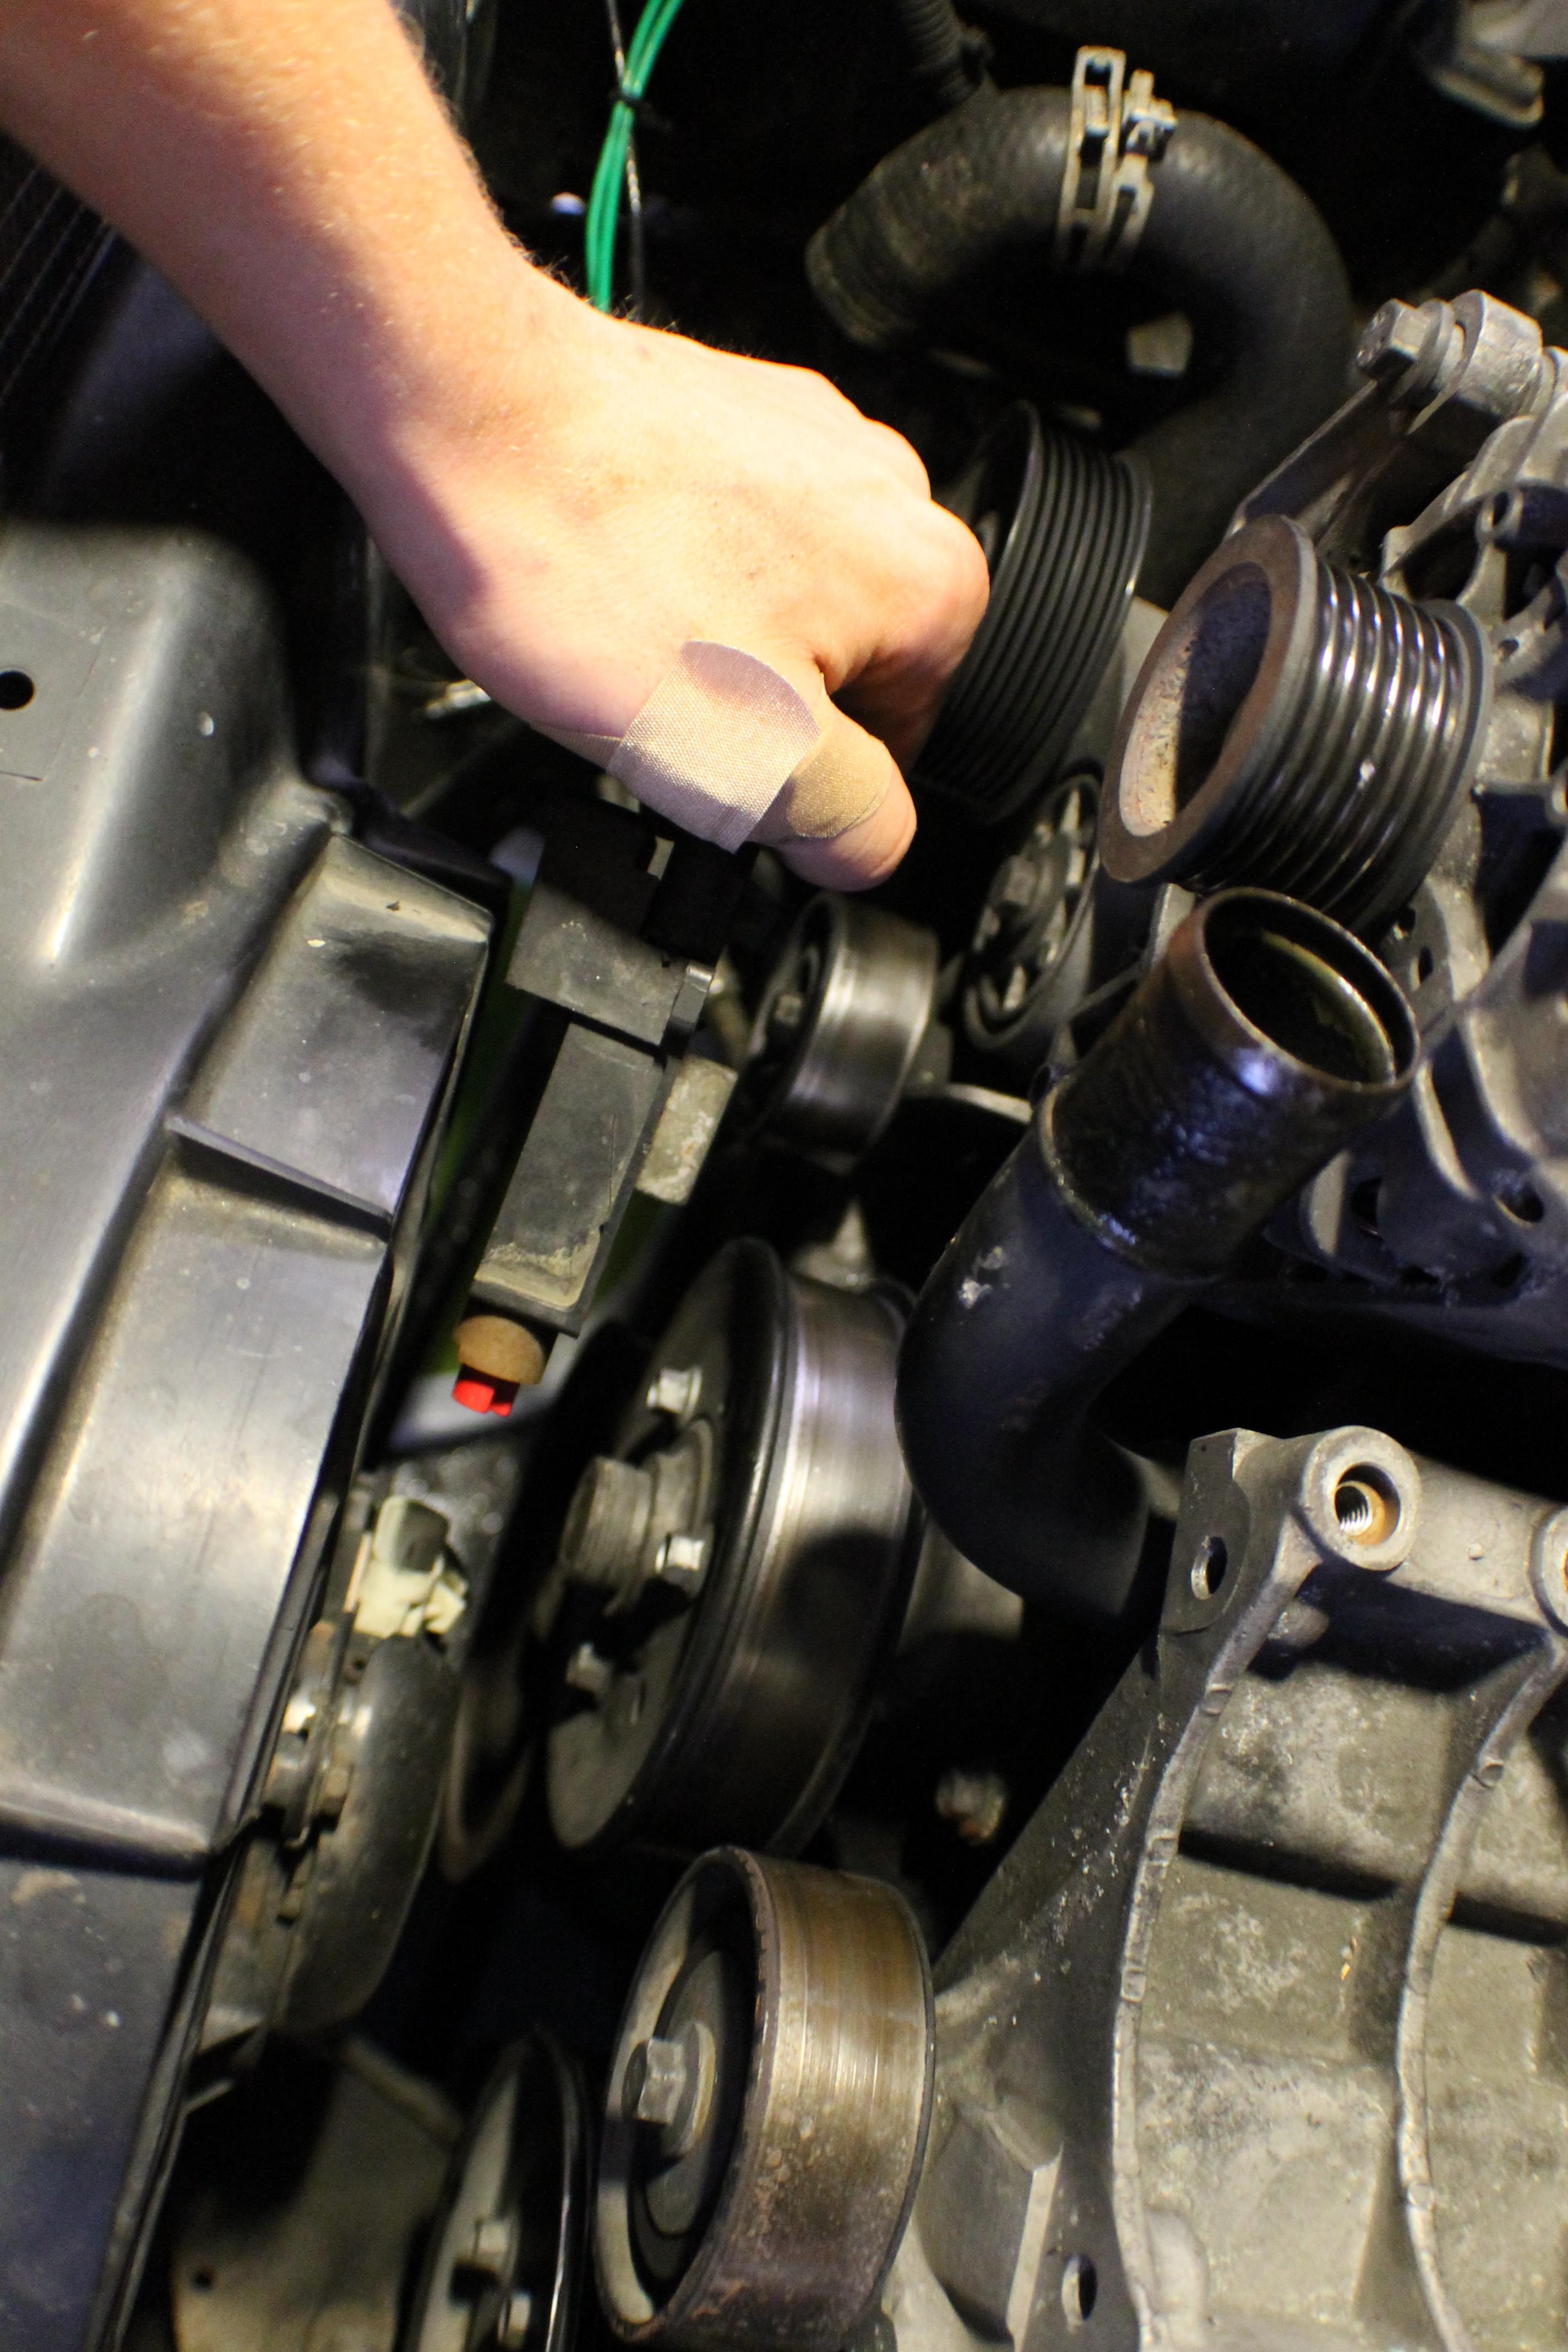
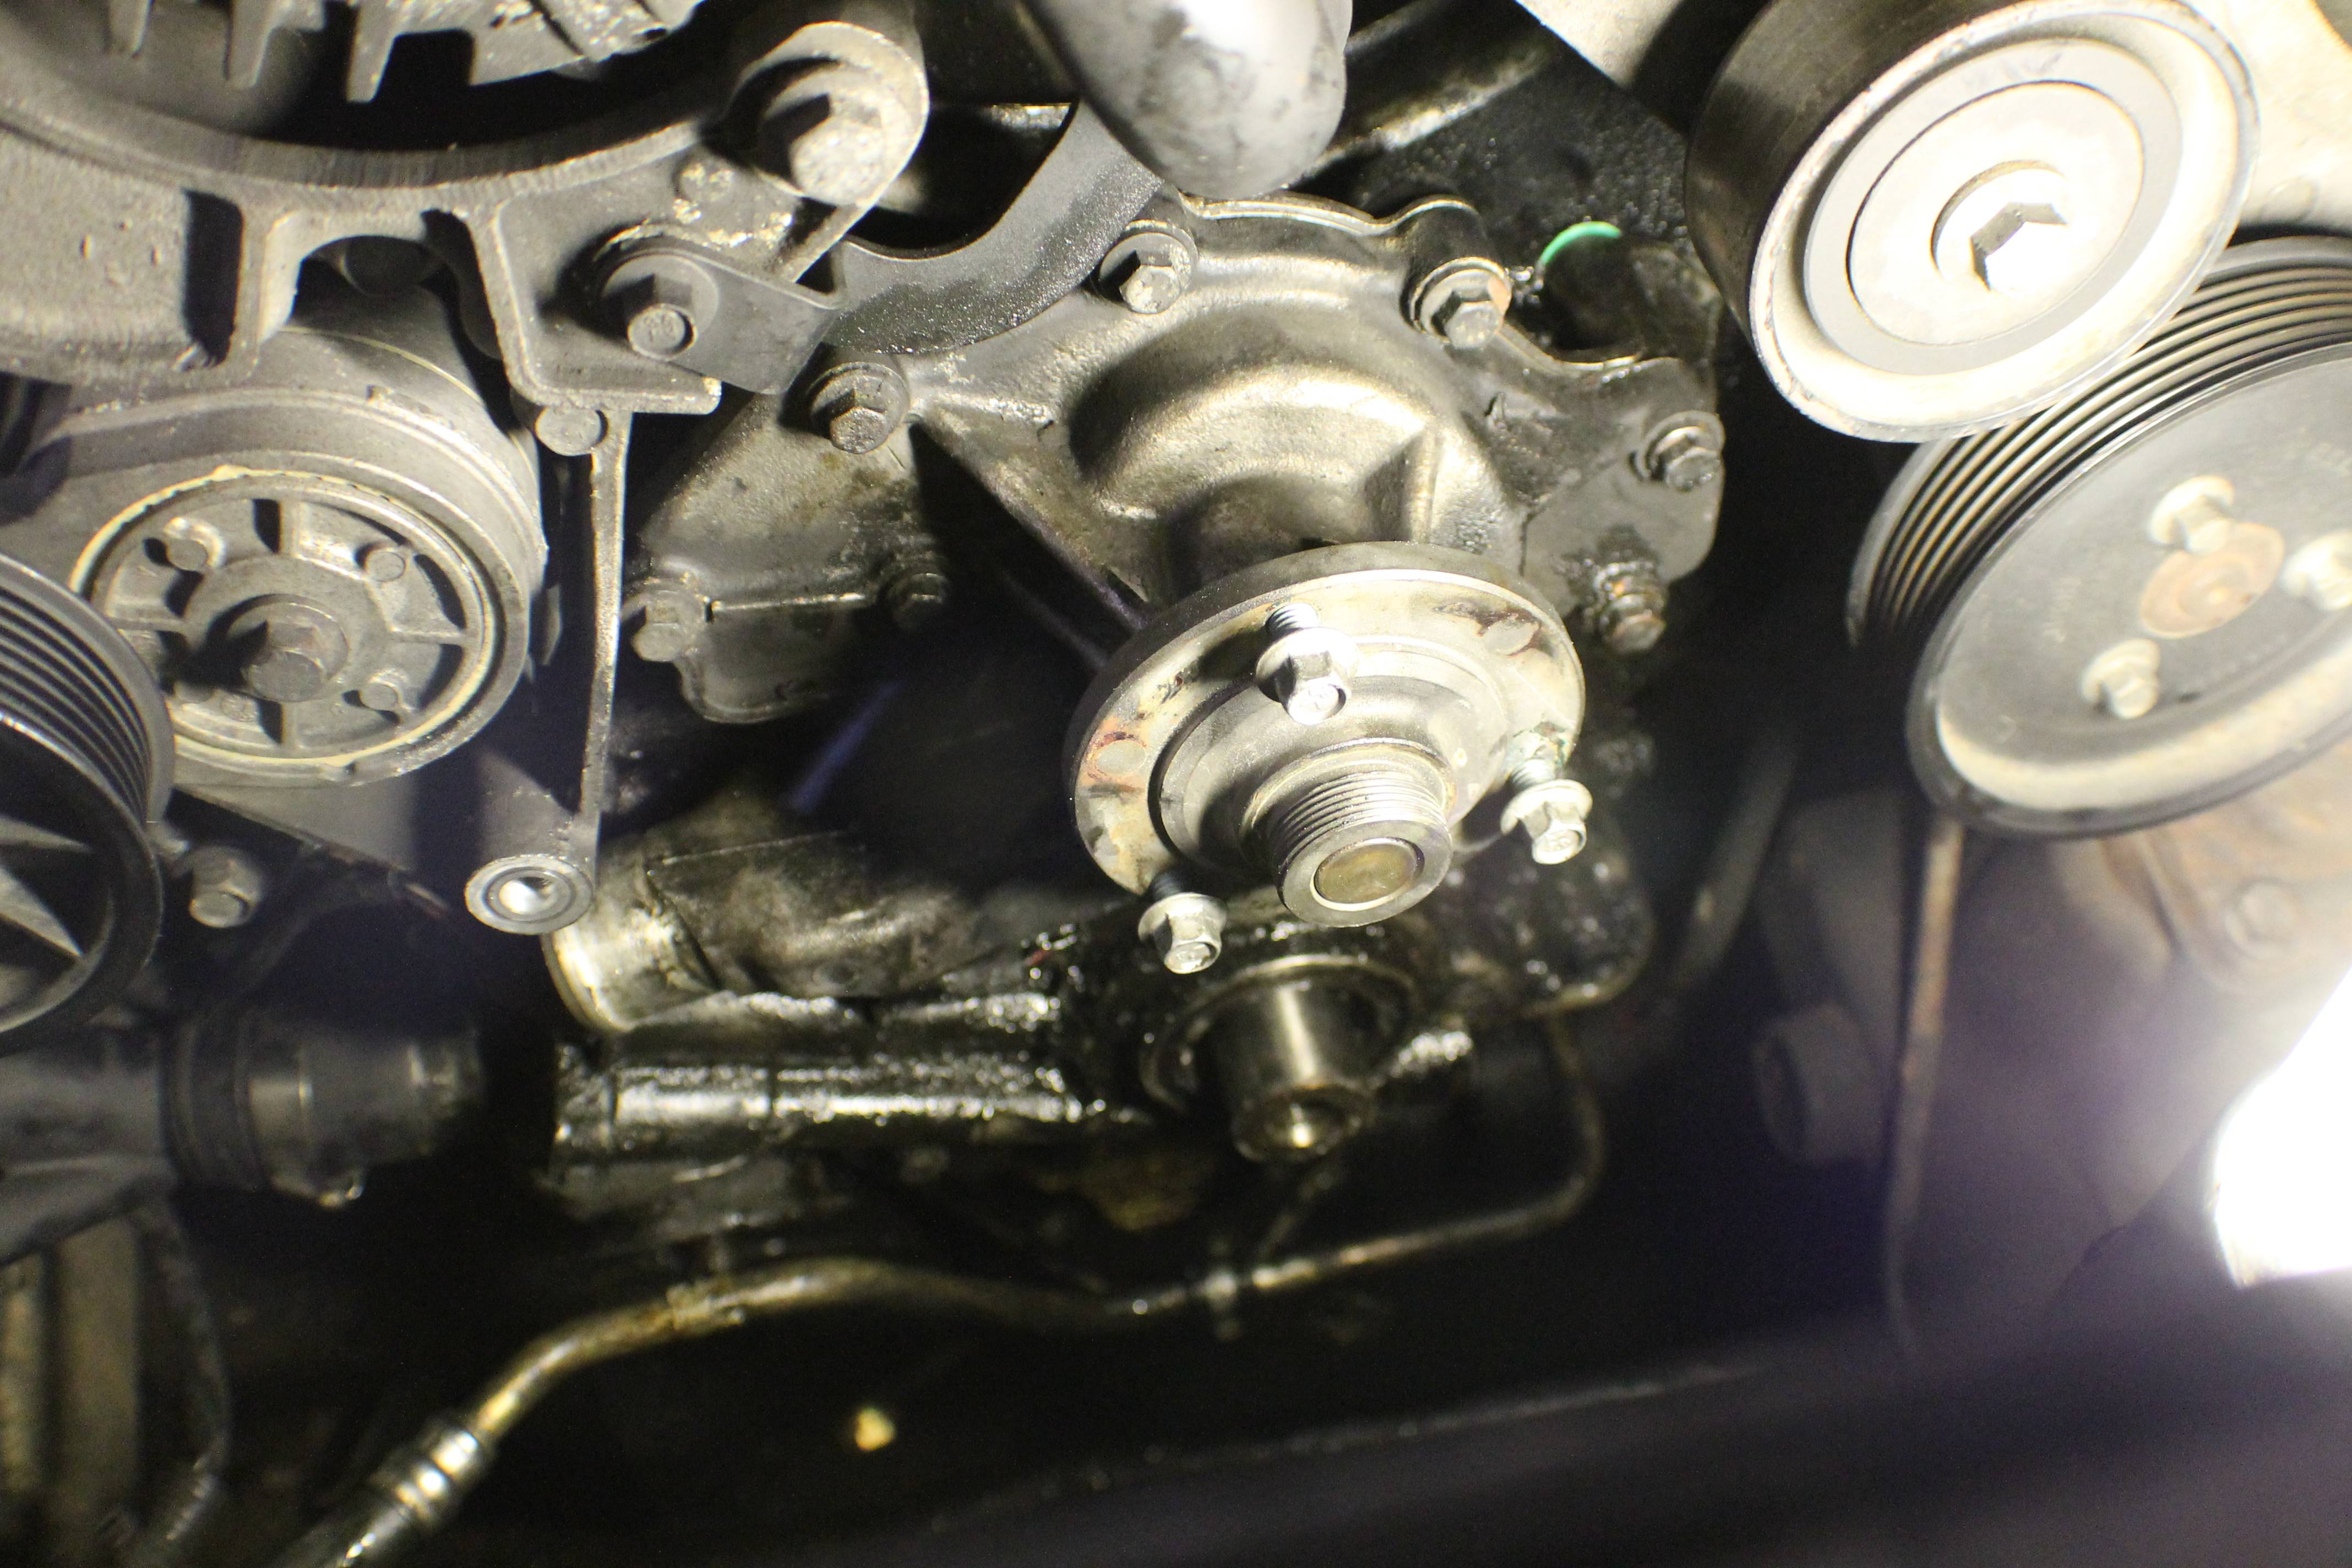
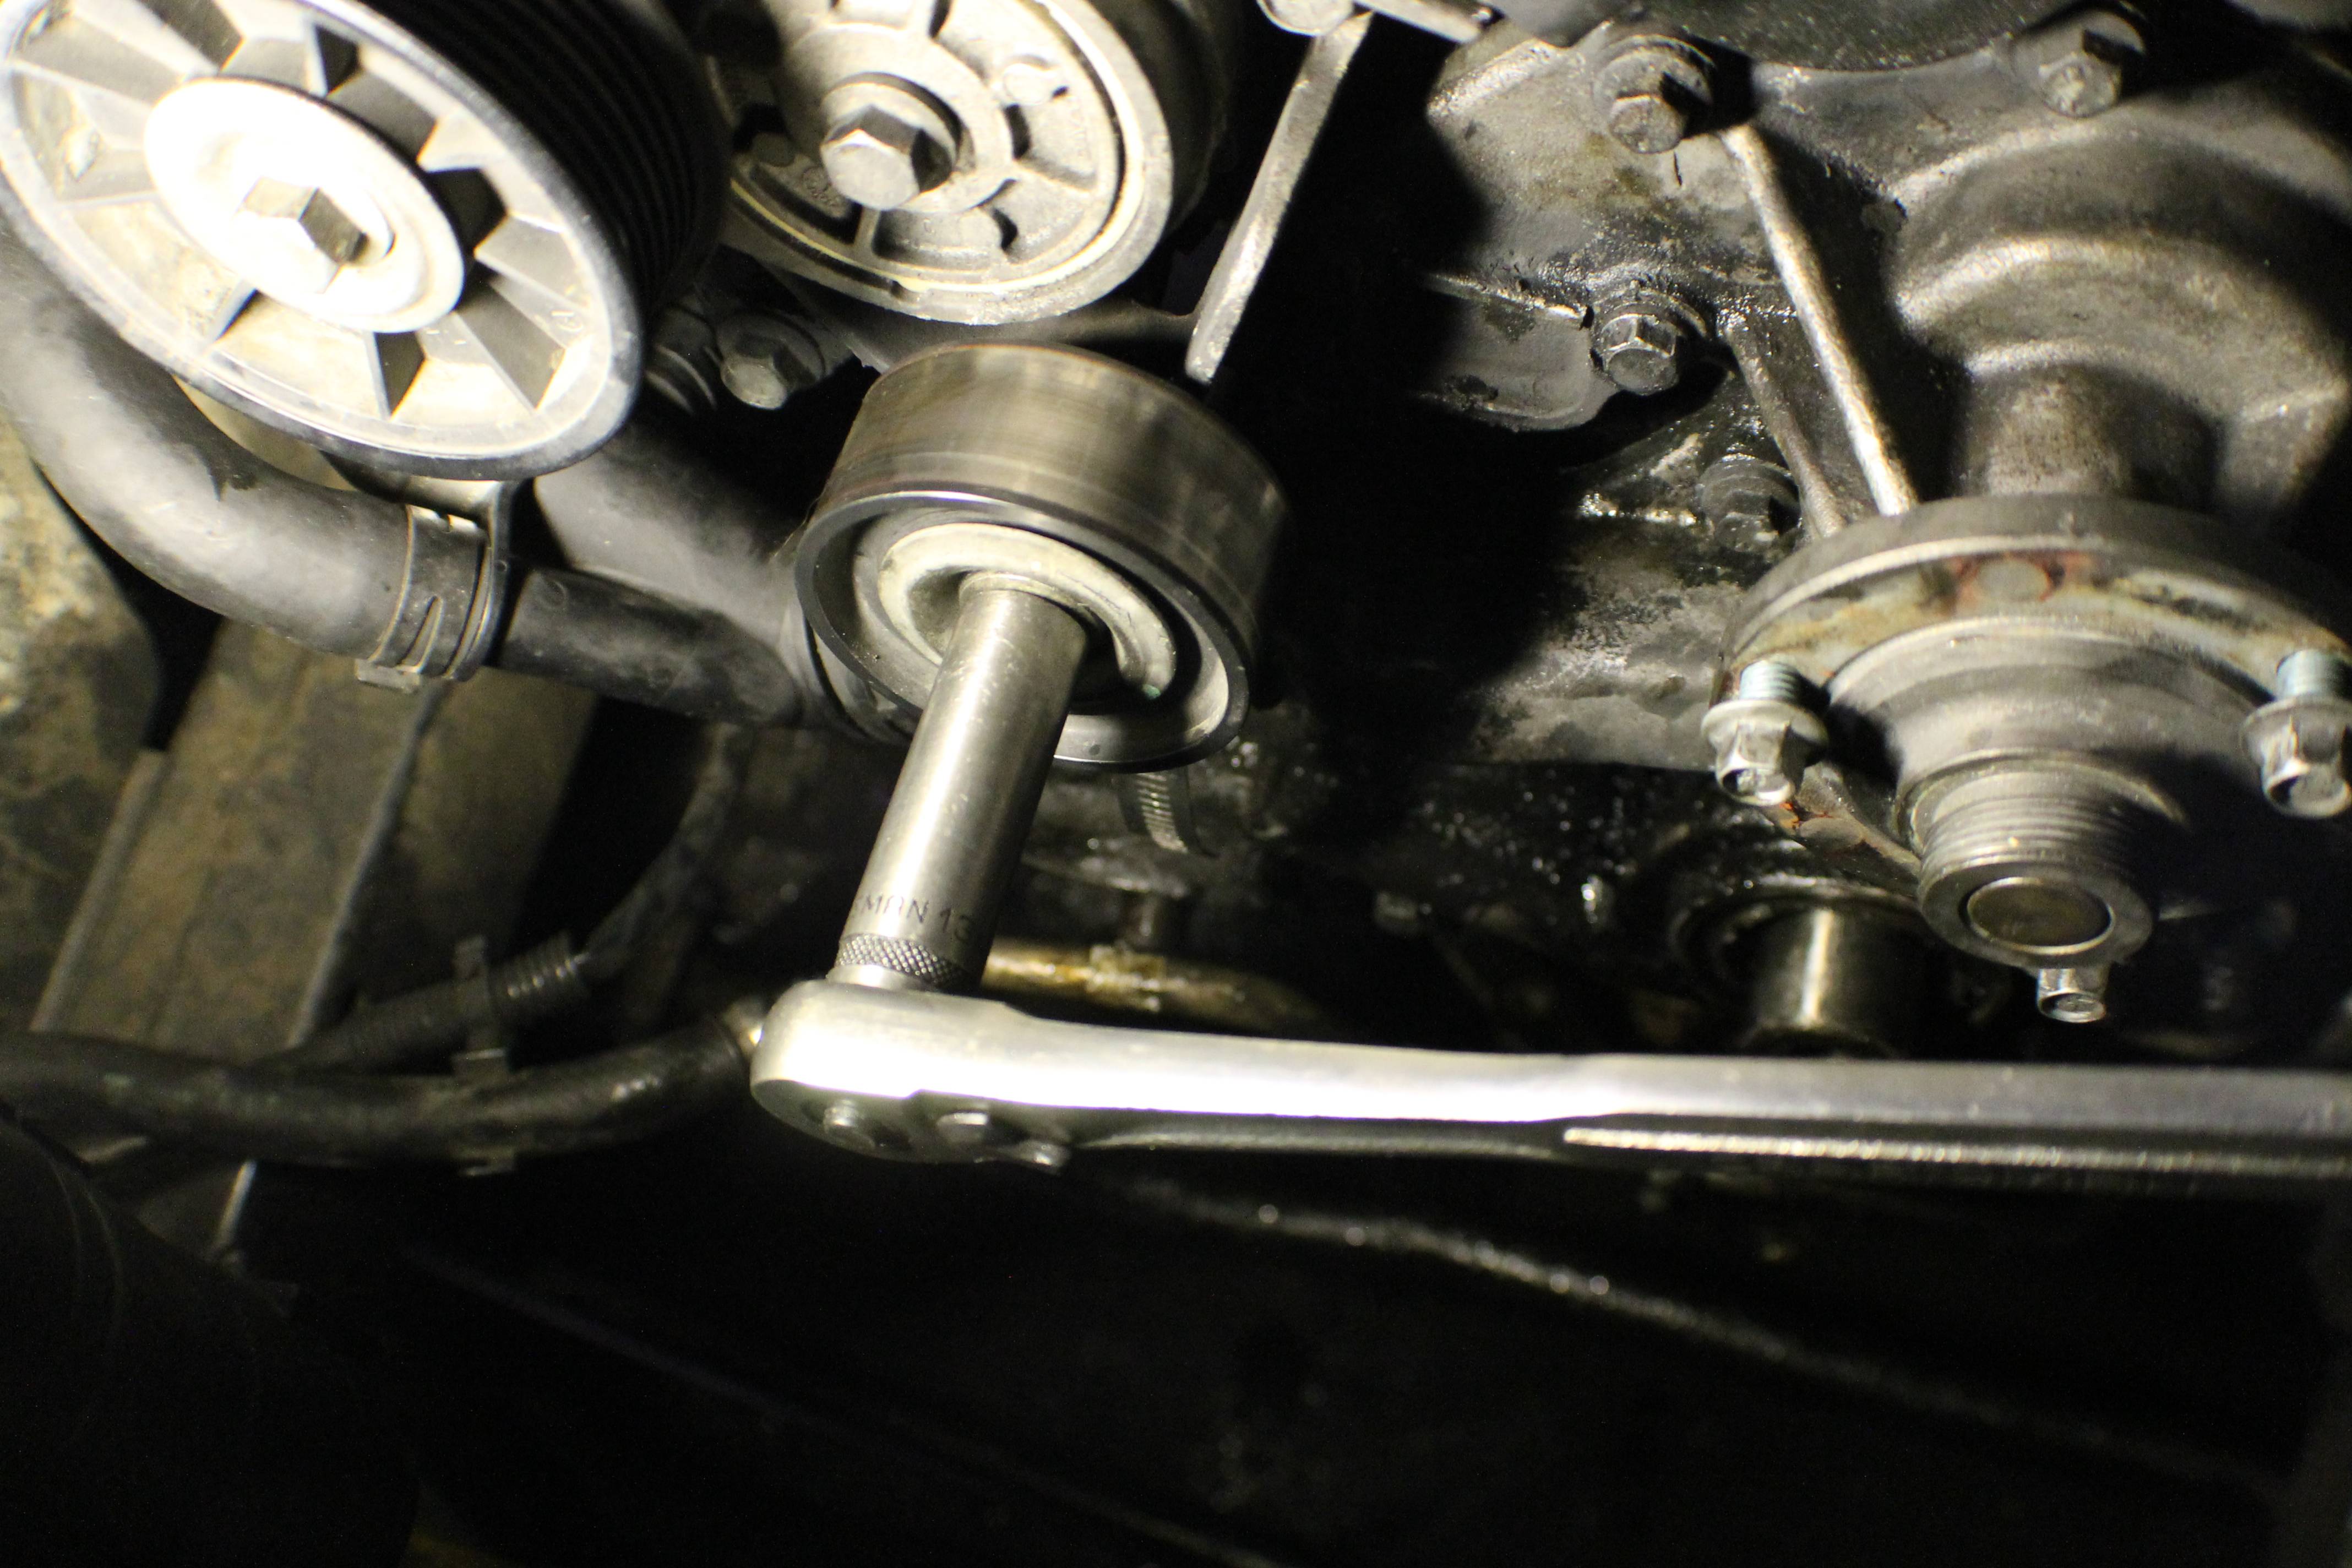
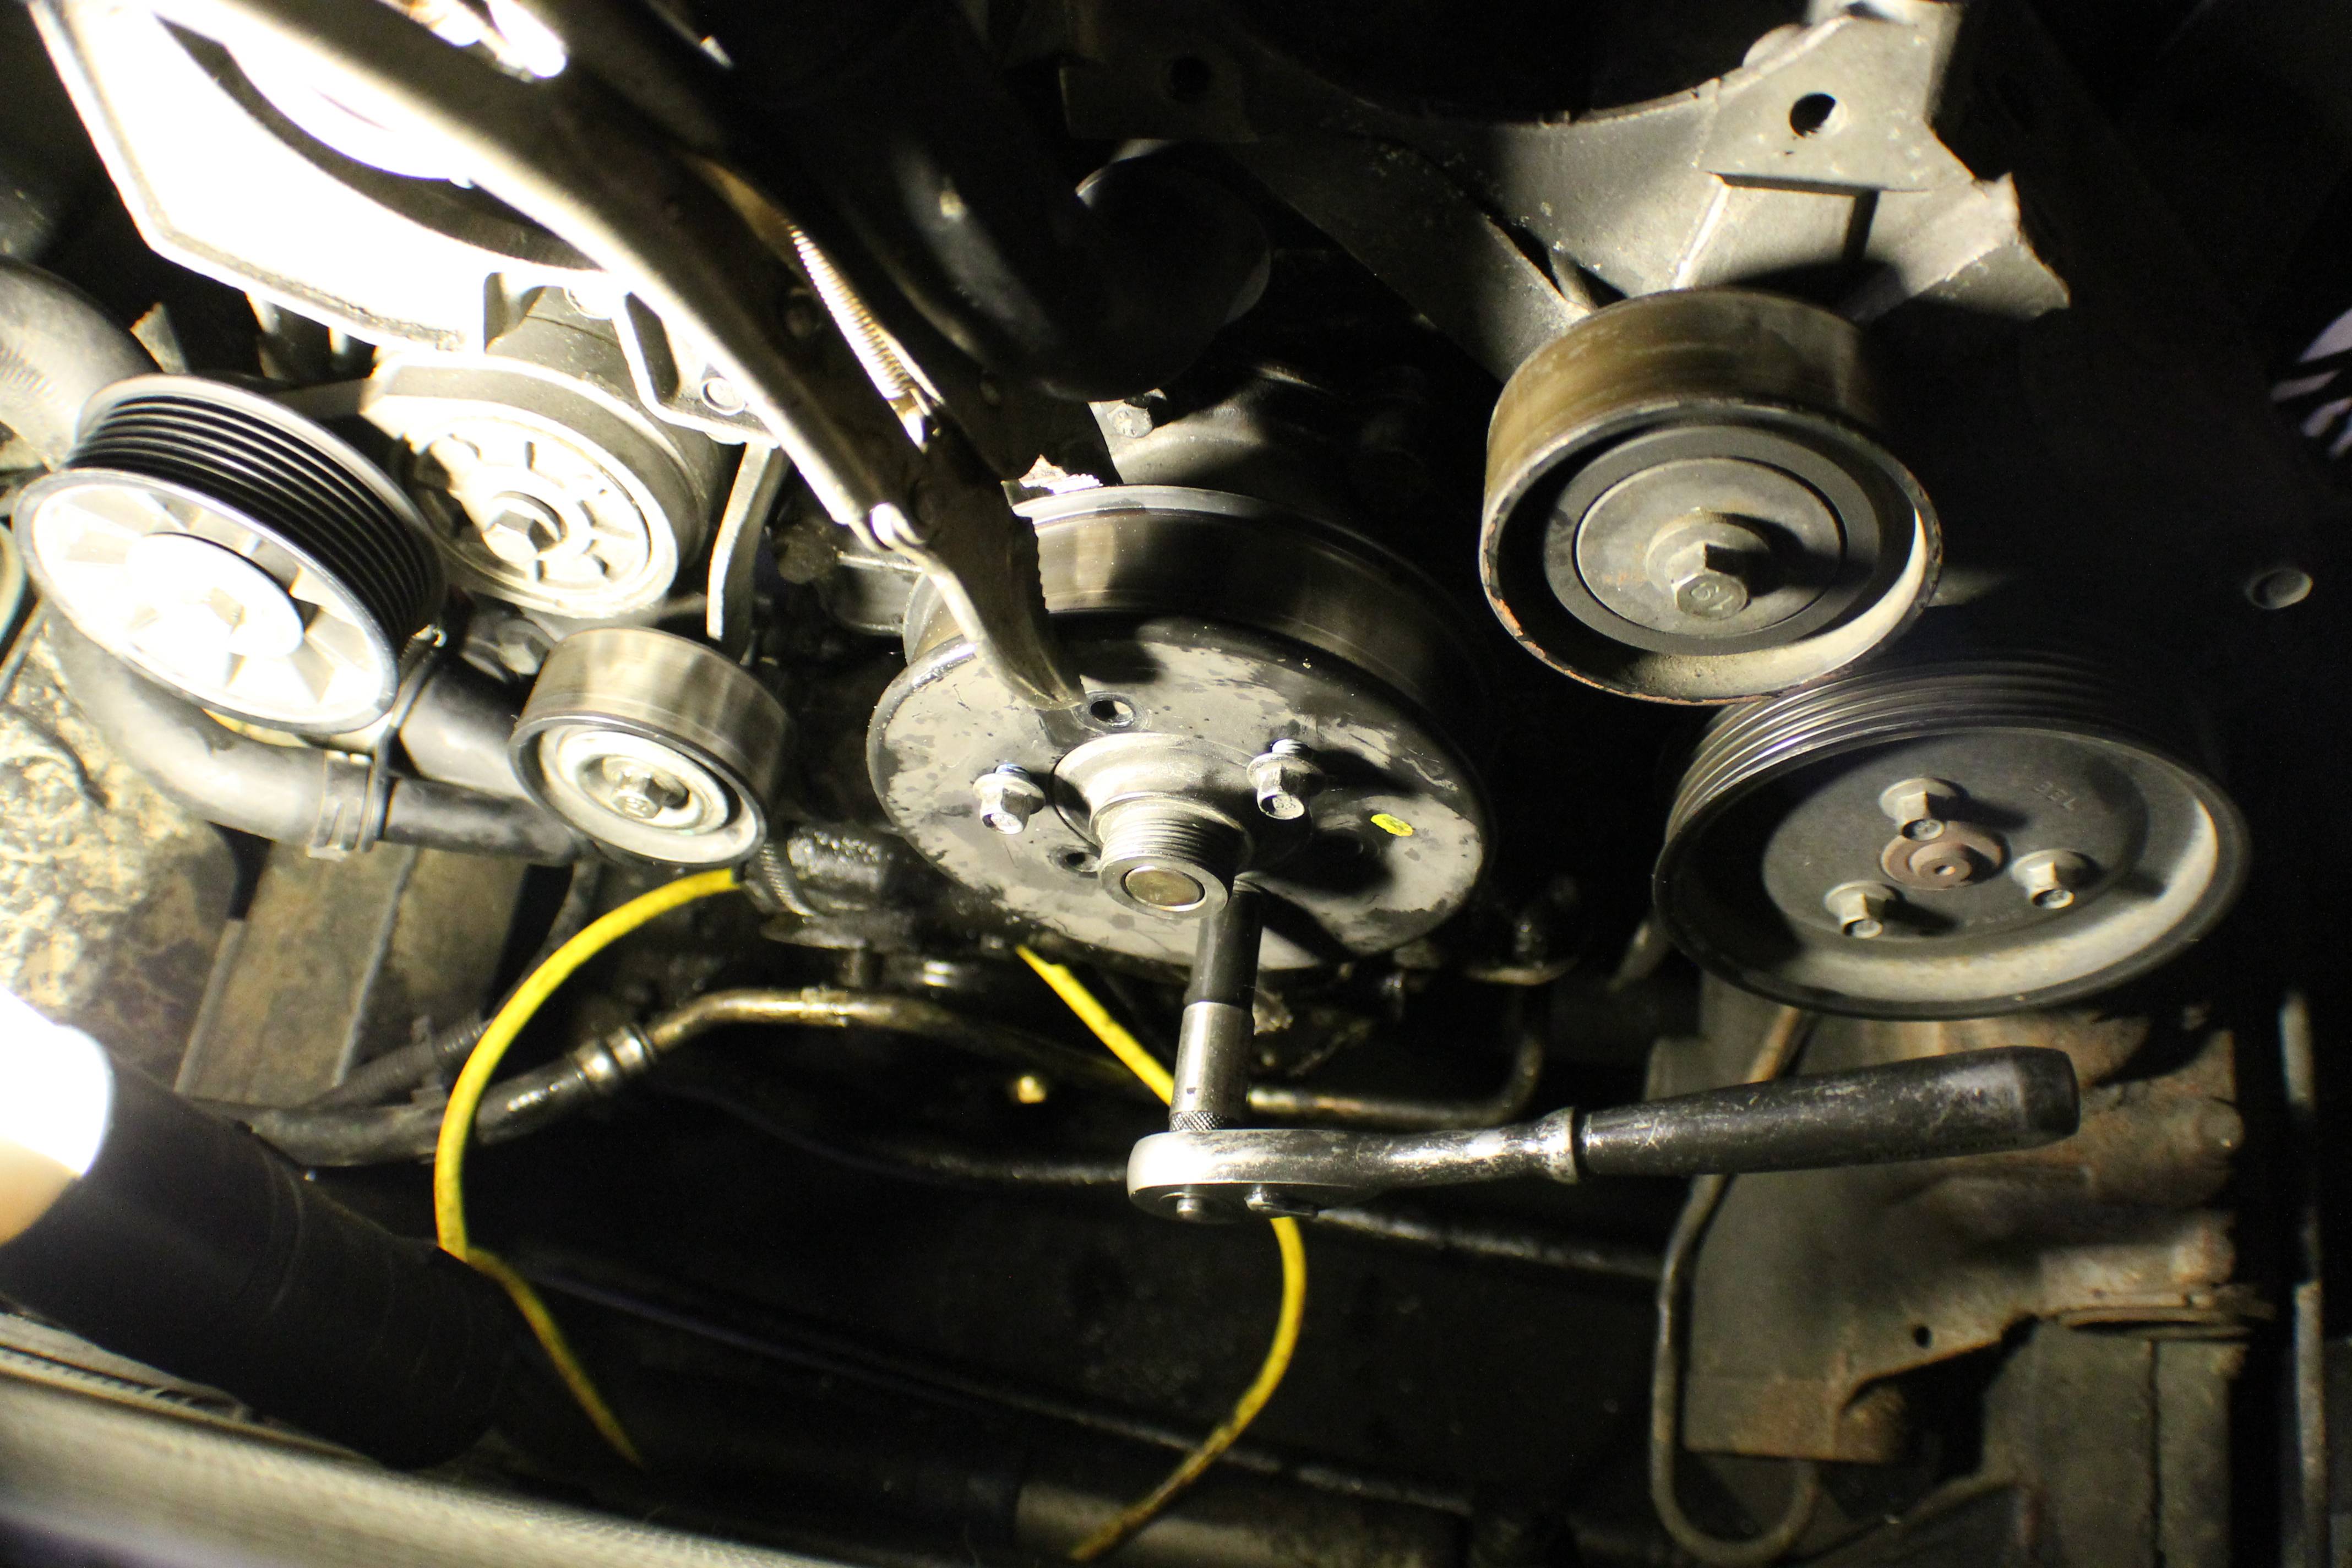
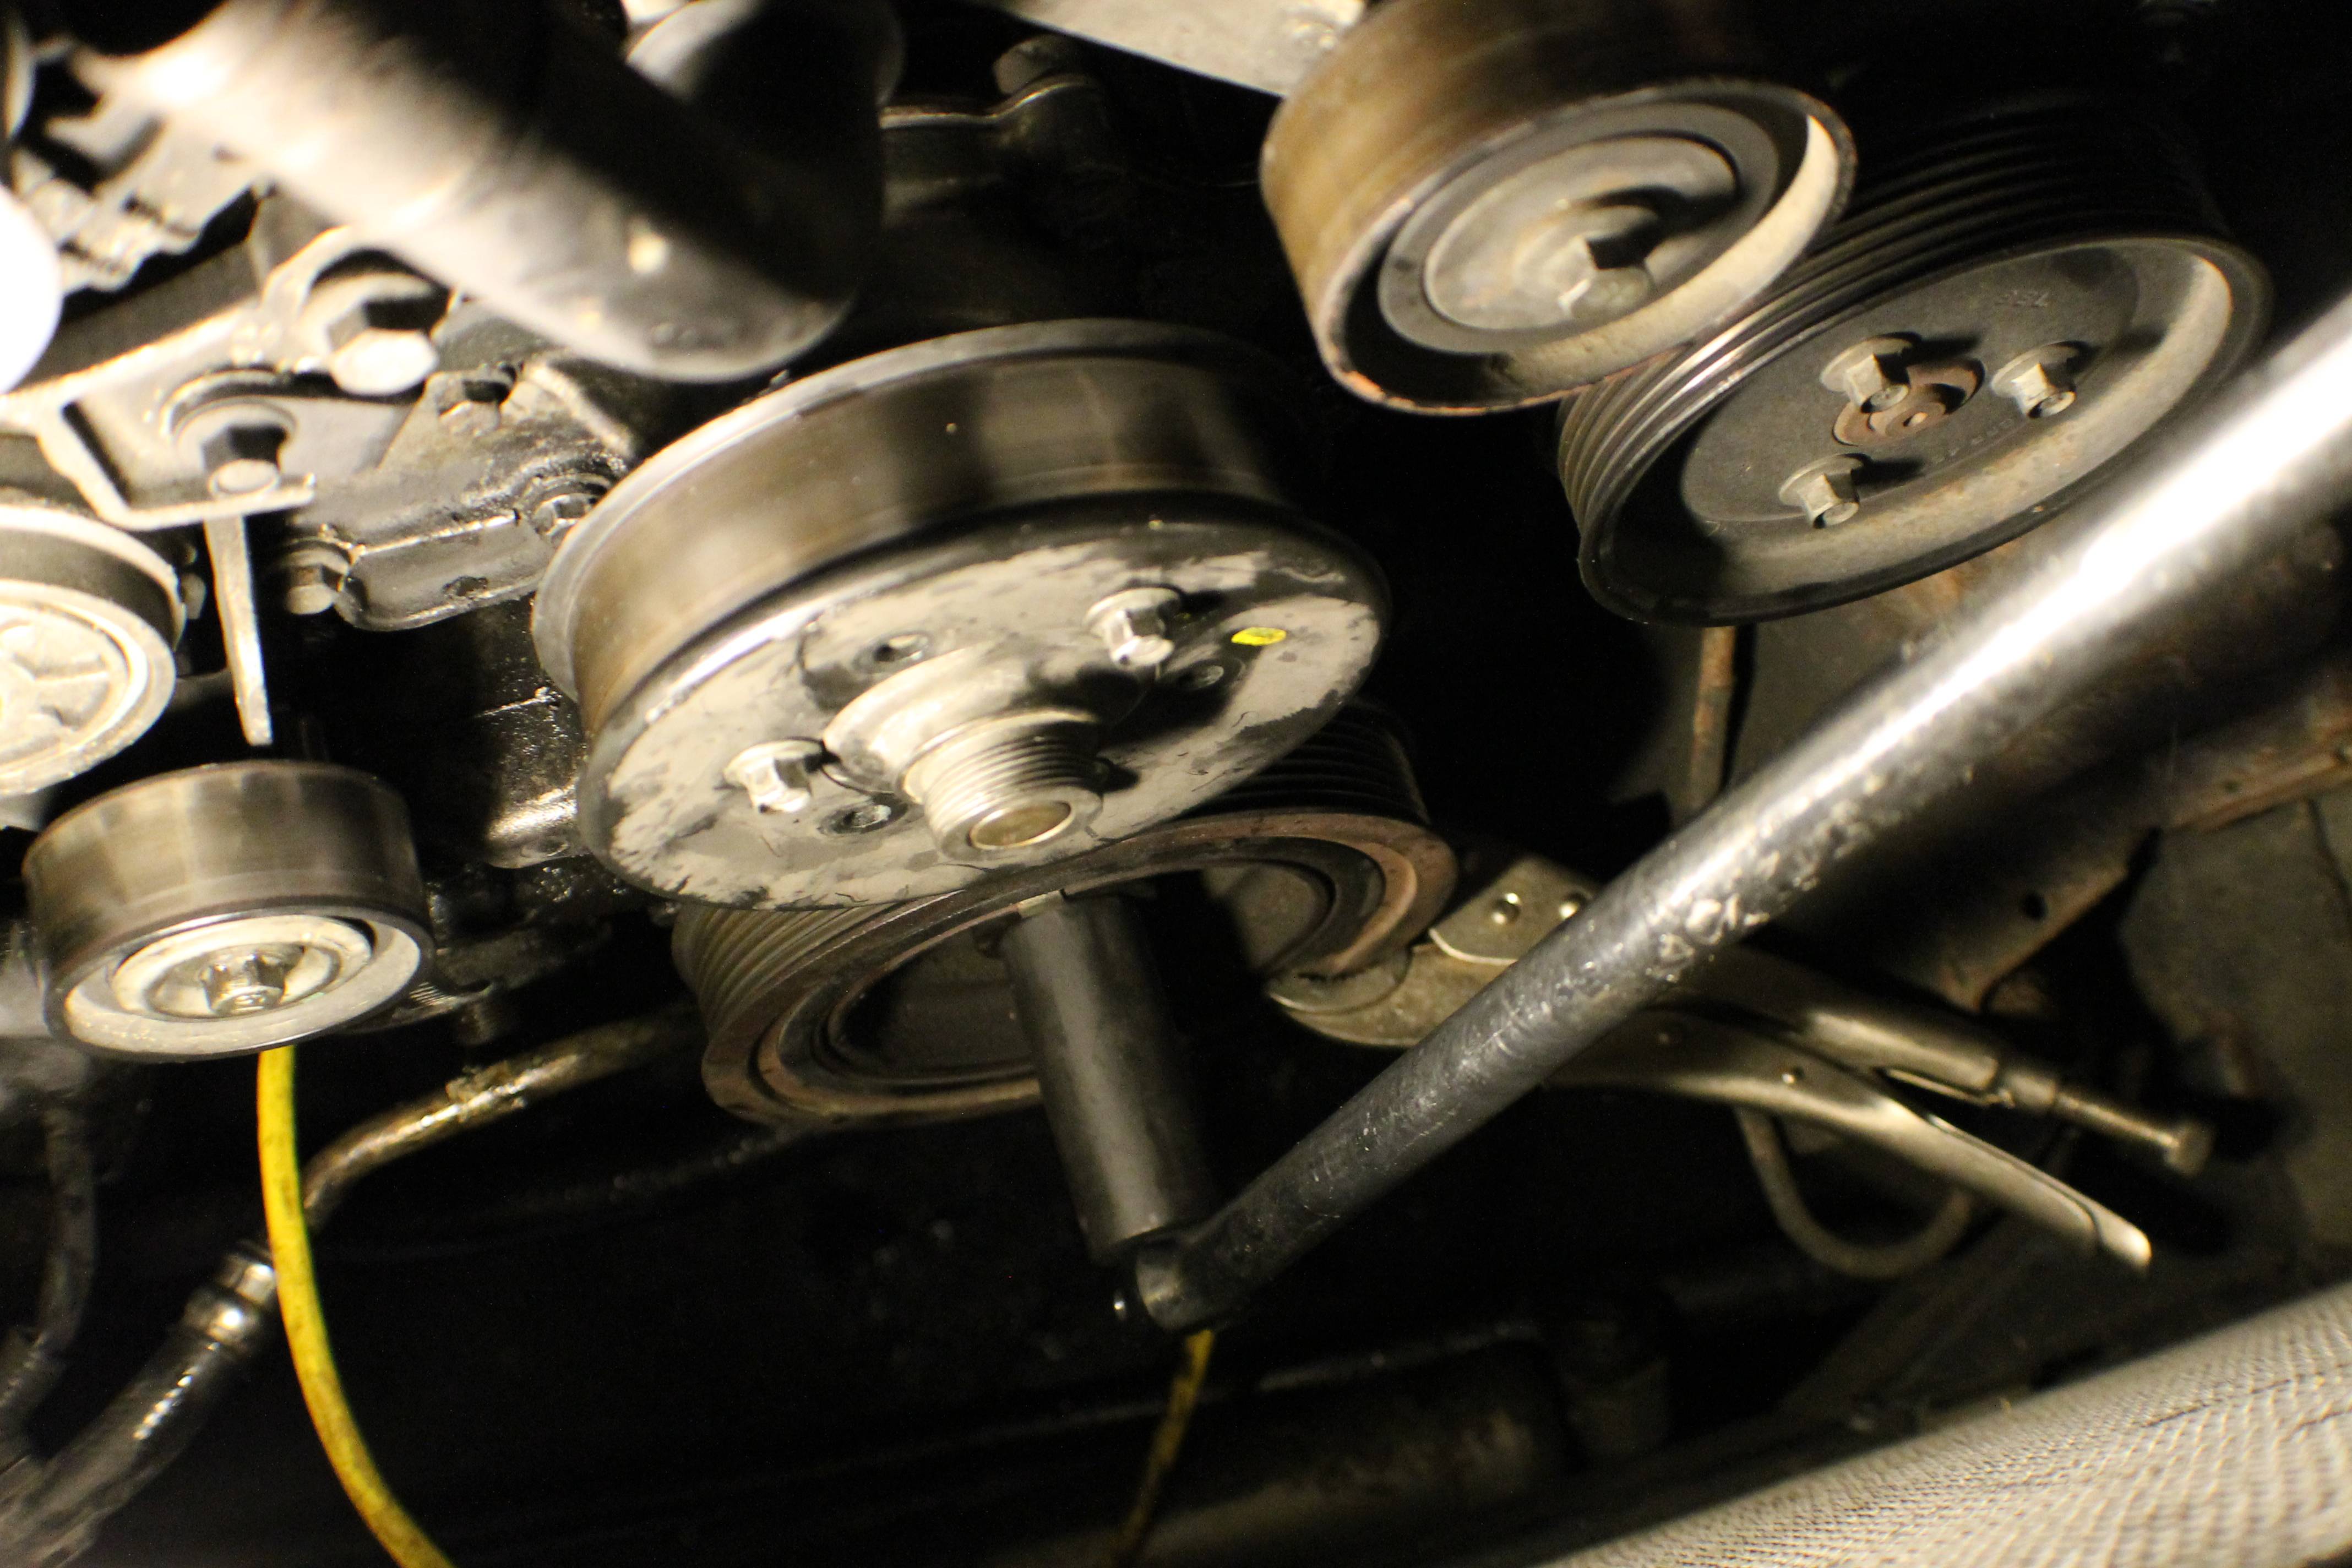
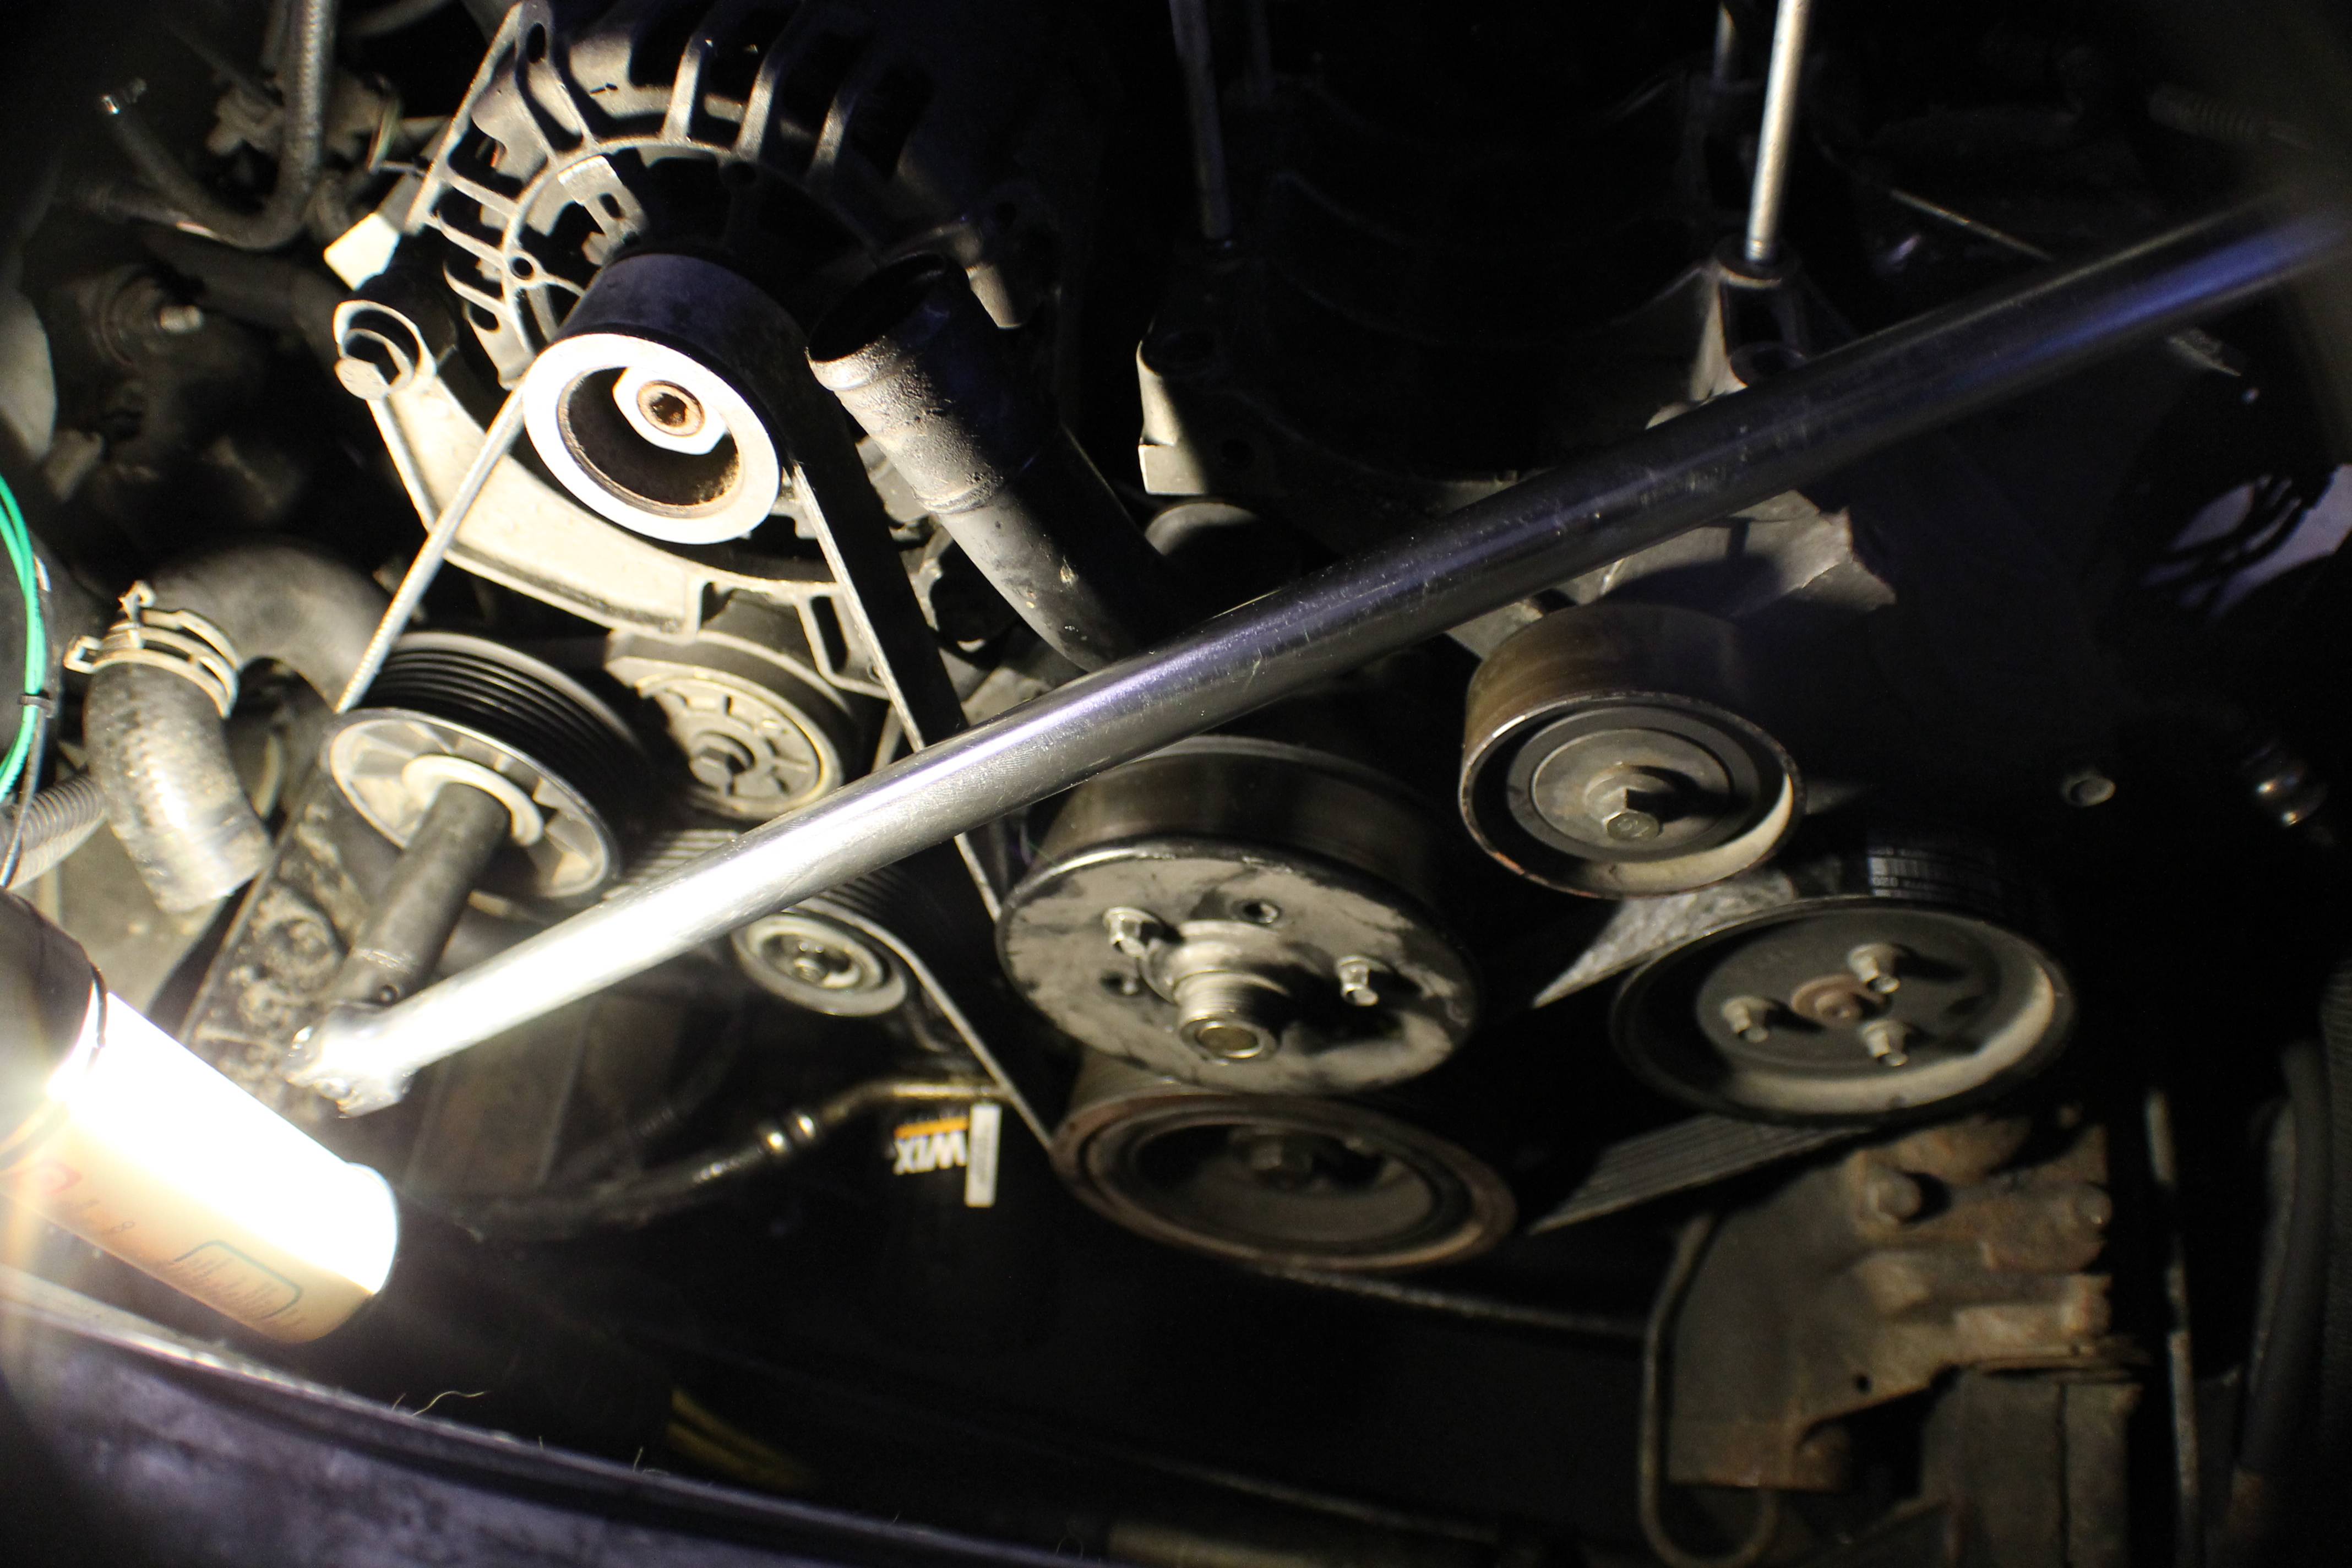
We're going to start by grabbing your big pair of vice grips. You want to place them between the alternator pulley and the coolant tube on the intake manifold. Clamp it down onto the water pump pulley so it can't turn and remove the three bolts holding it on. It will come right out. I recommend placing the bolts back in the water pump so you don't lose them.
Again, you can use this method with a large crescent wrench to remove and later replace the factory fan if that is the fan that you have and would like to keep.
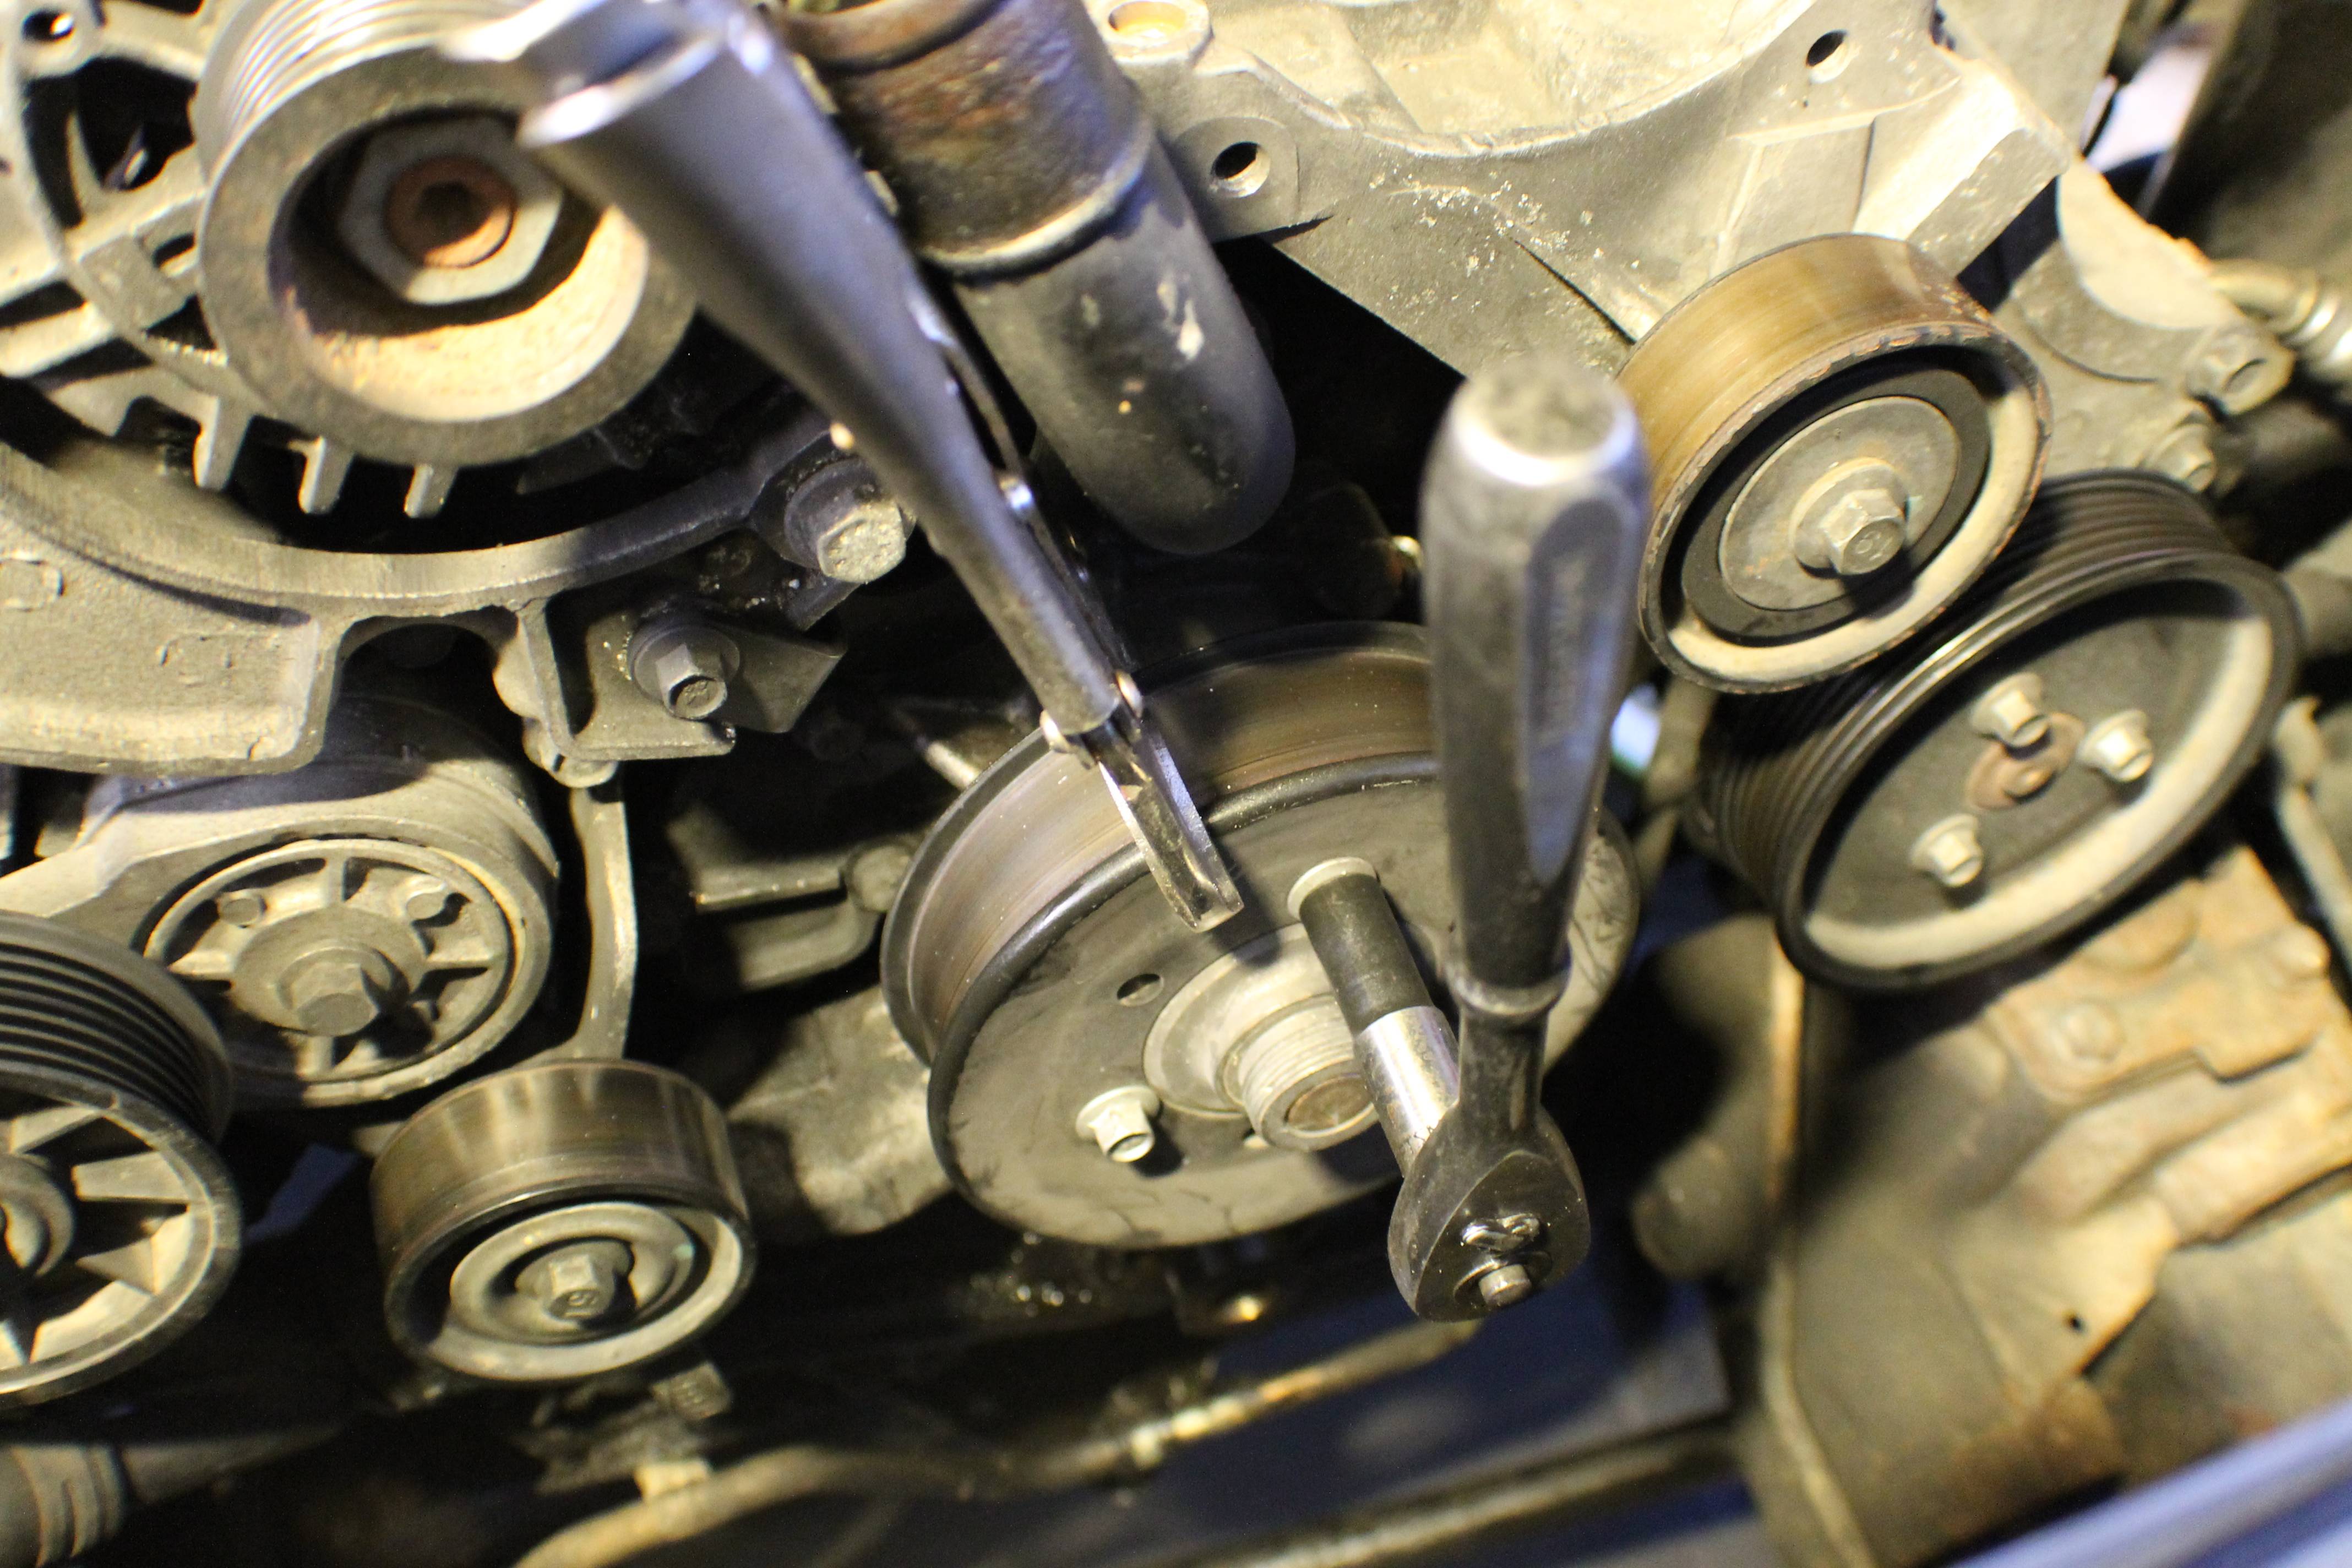
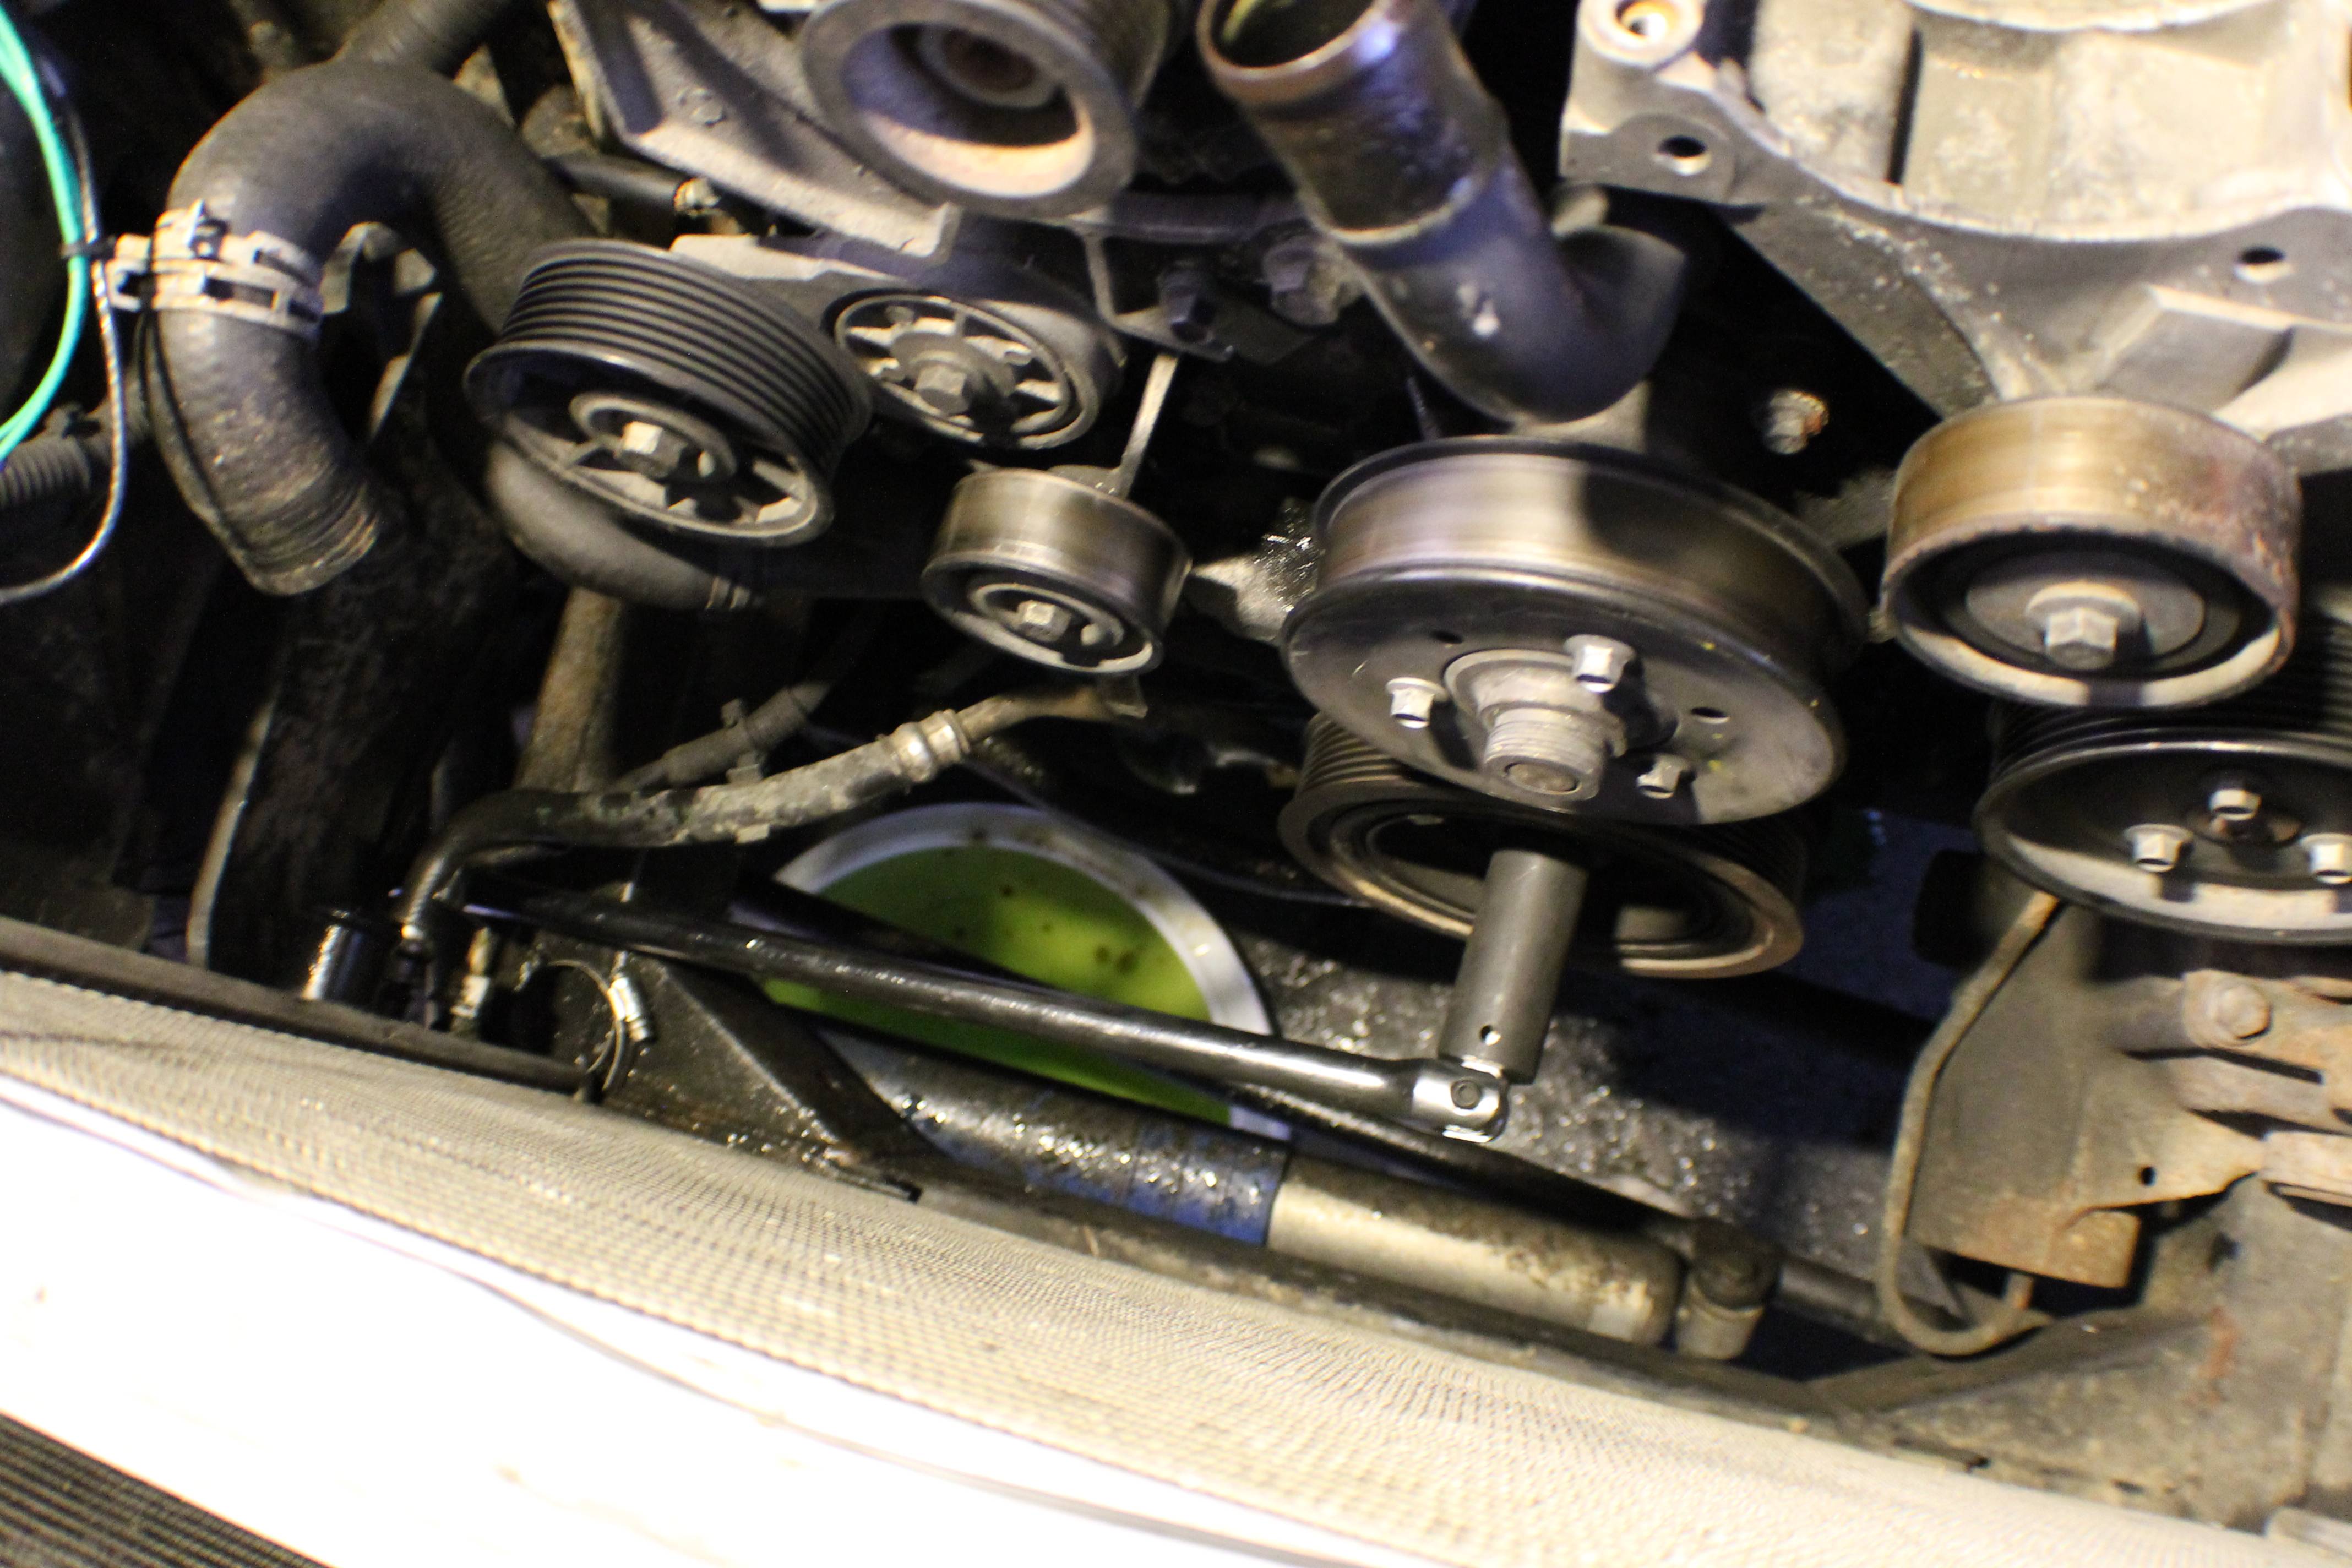
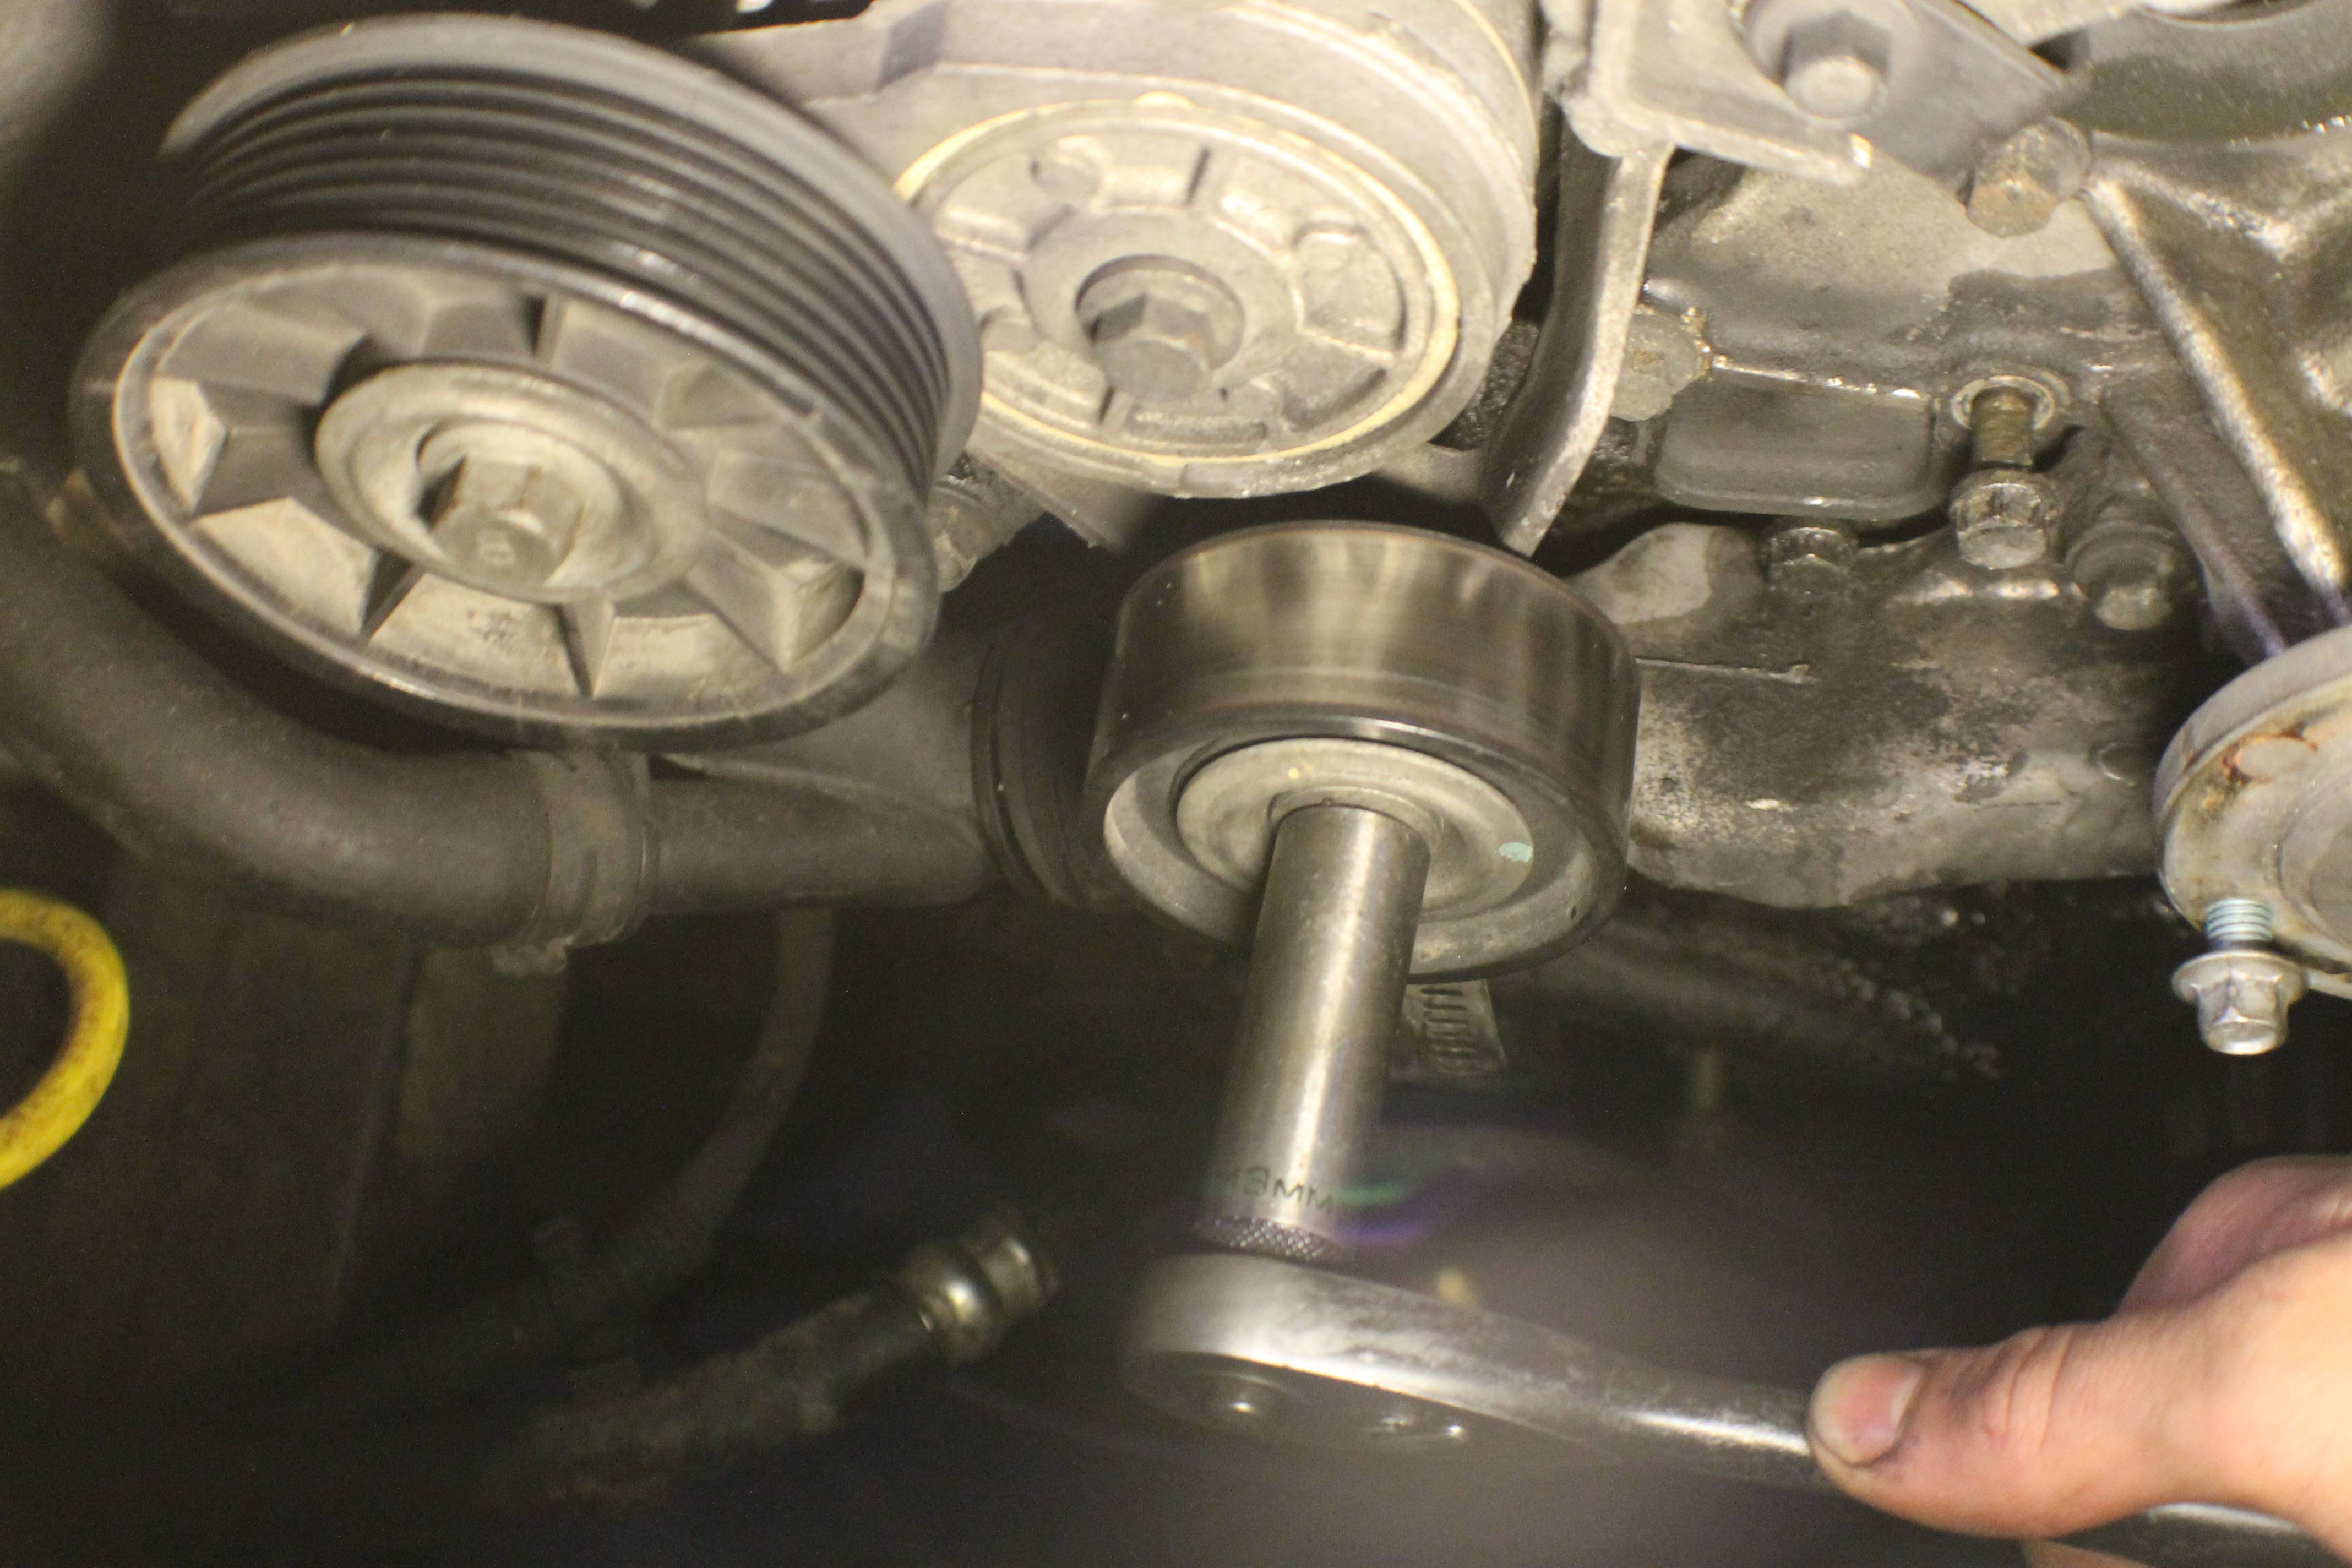
Now you also have to remove the idler pulley that's beside the belt tensioner. Sit it to the side with your harmonic balancer and water pump pulley.
Alright, now you've got access to all of the front cover bolts. I recommend you take your new front cover gasket (if you've got one) and placing it somewhere that you can look at it so you can more easily find all of the front cover bolts you need to remove.
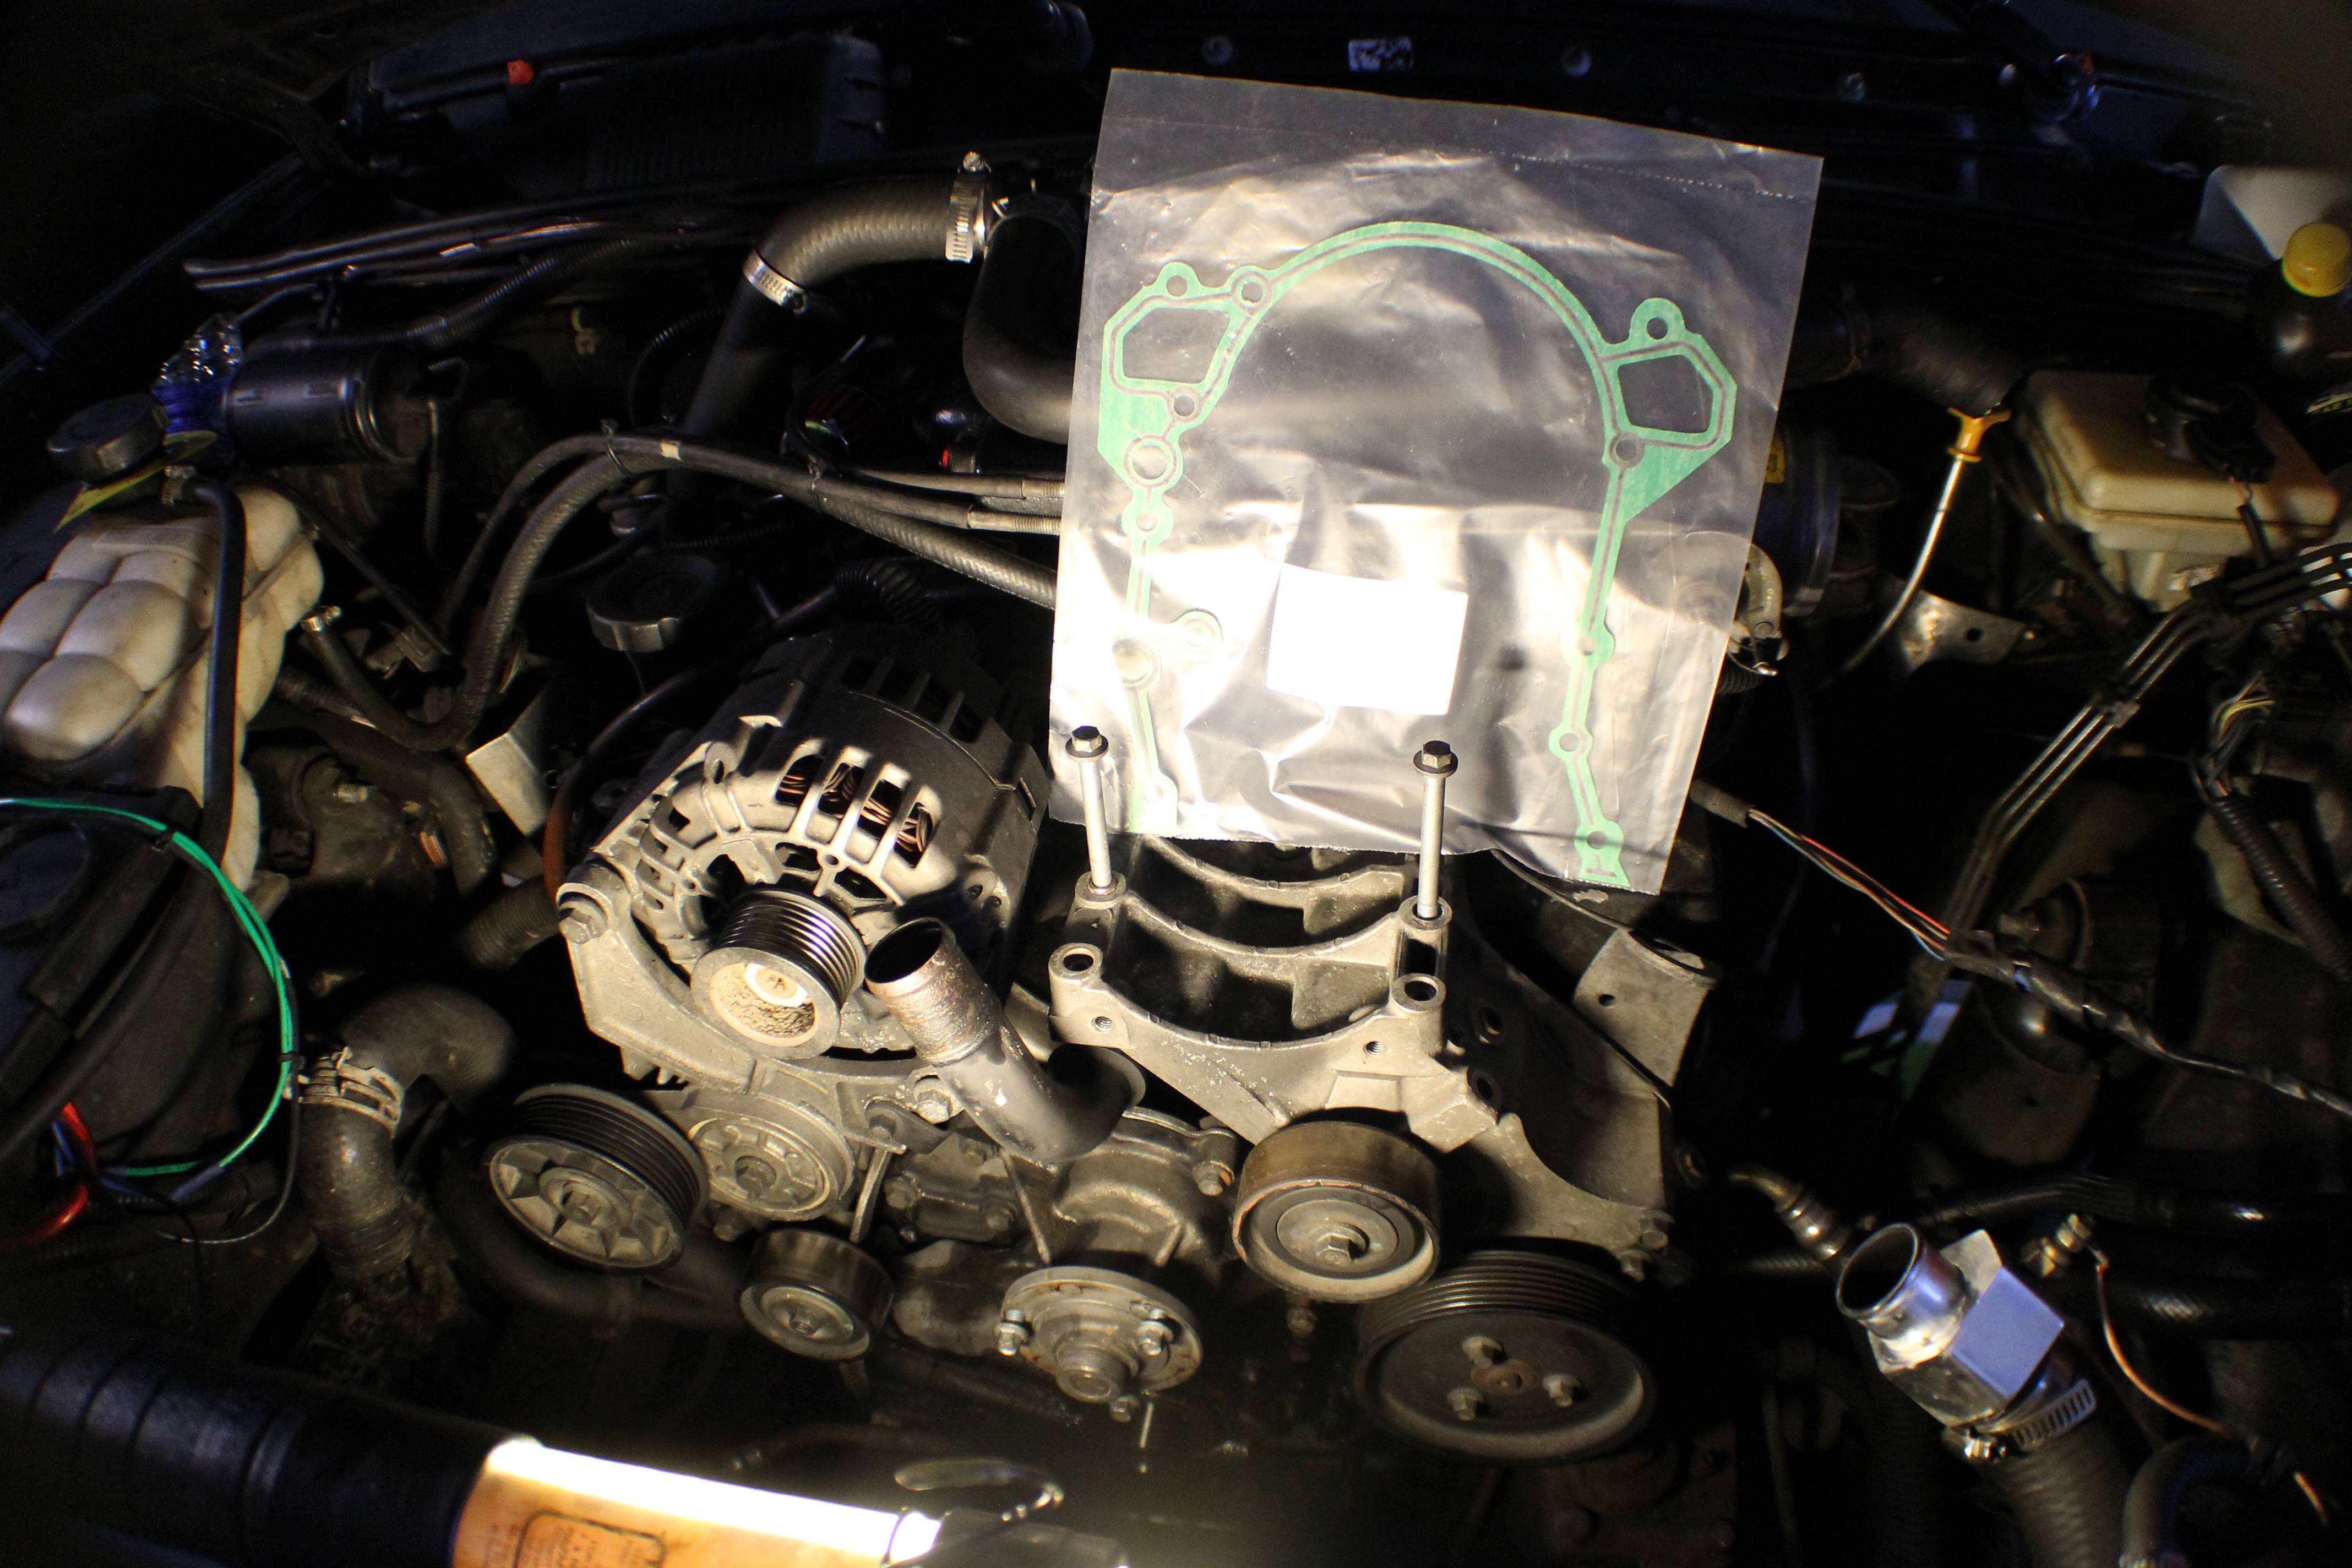
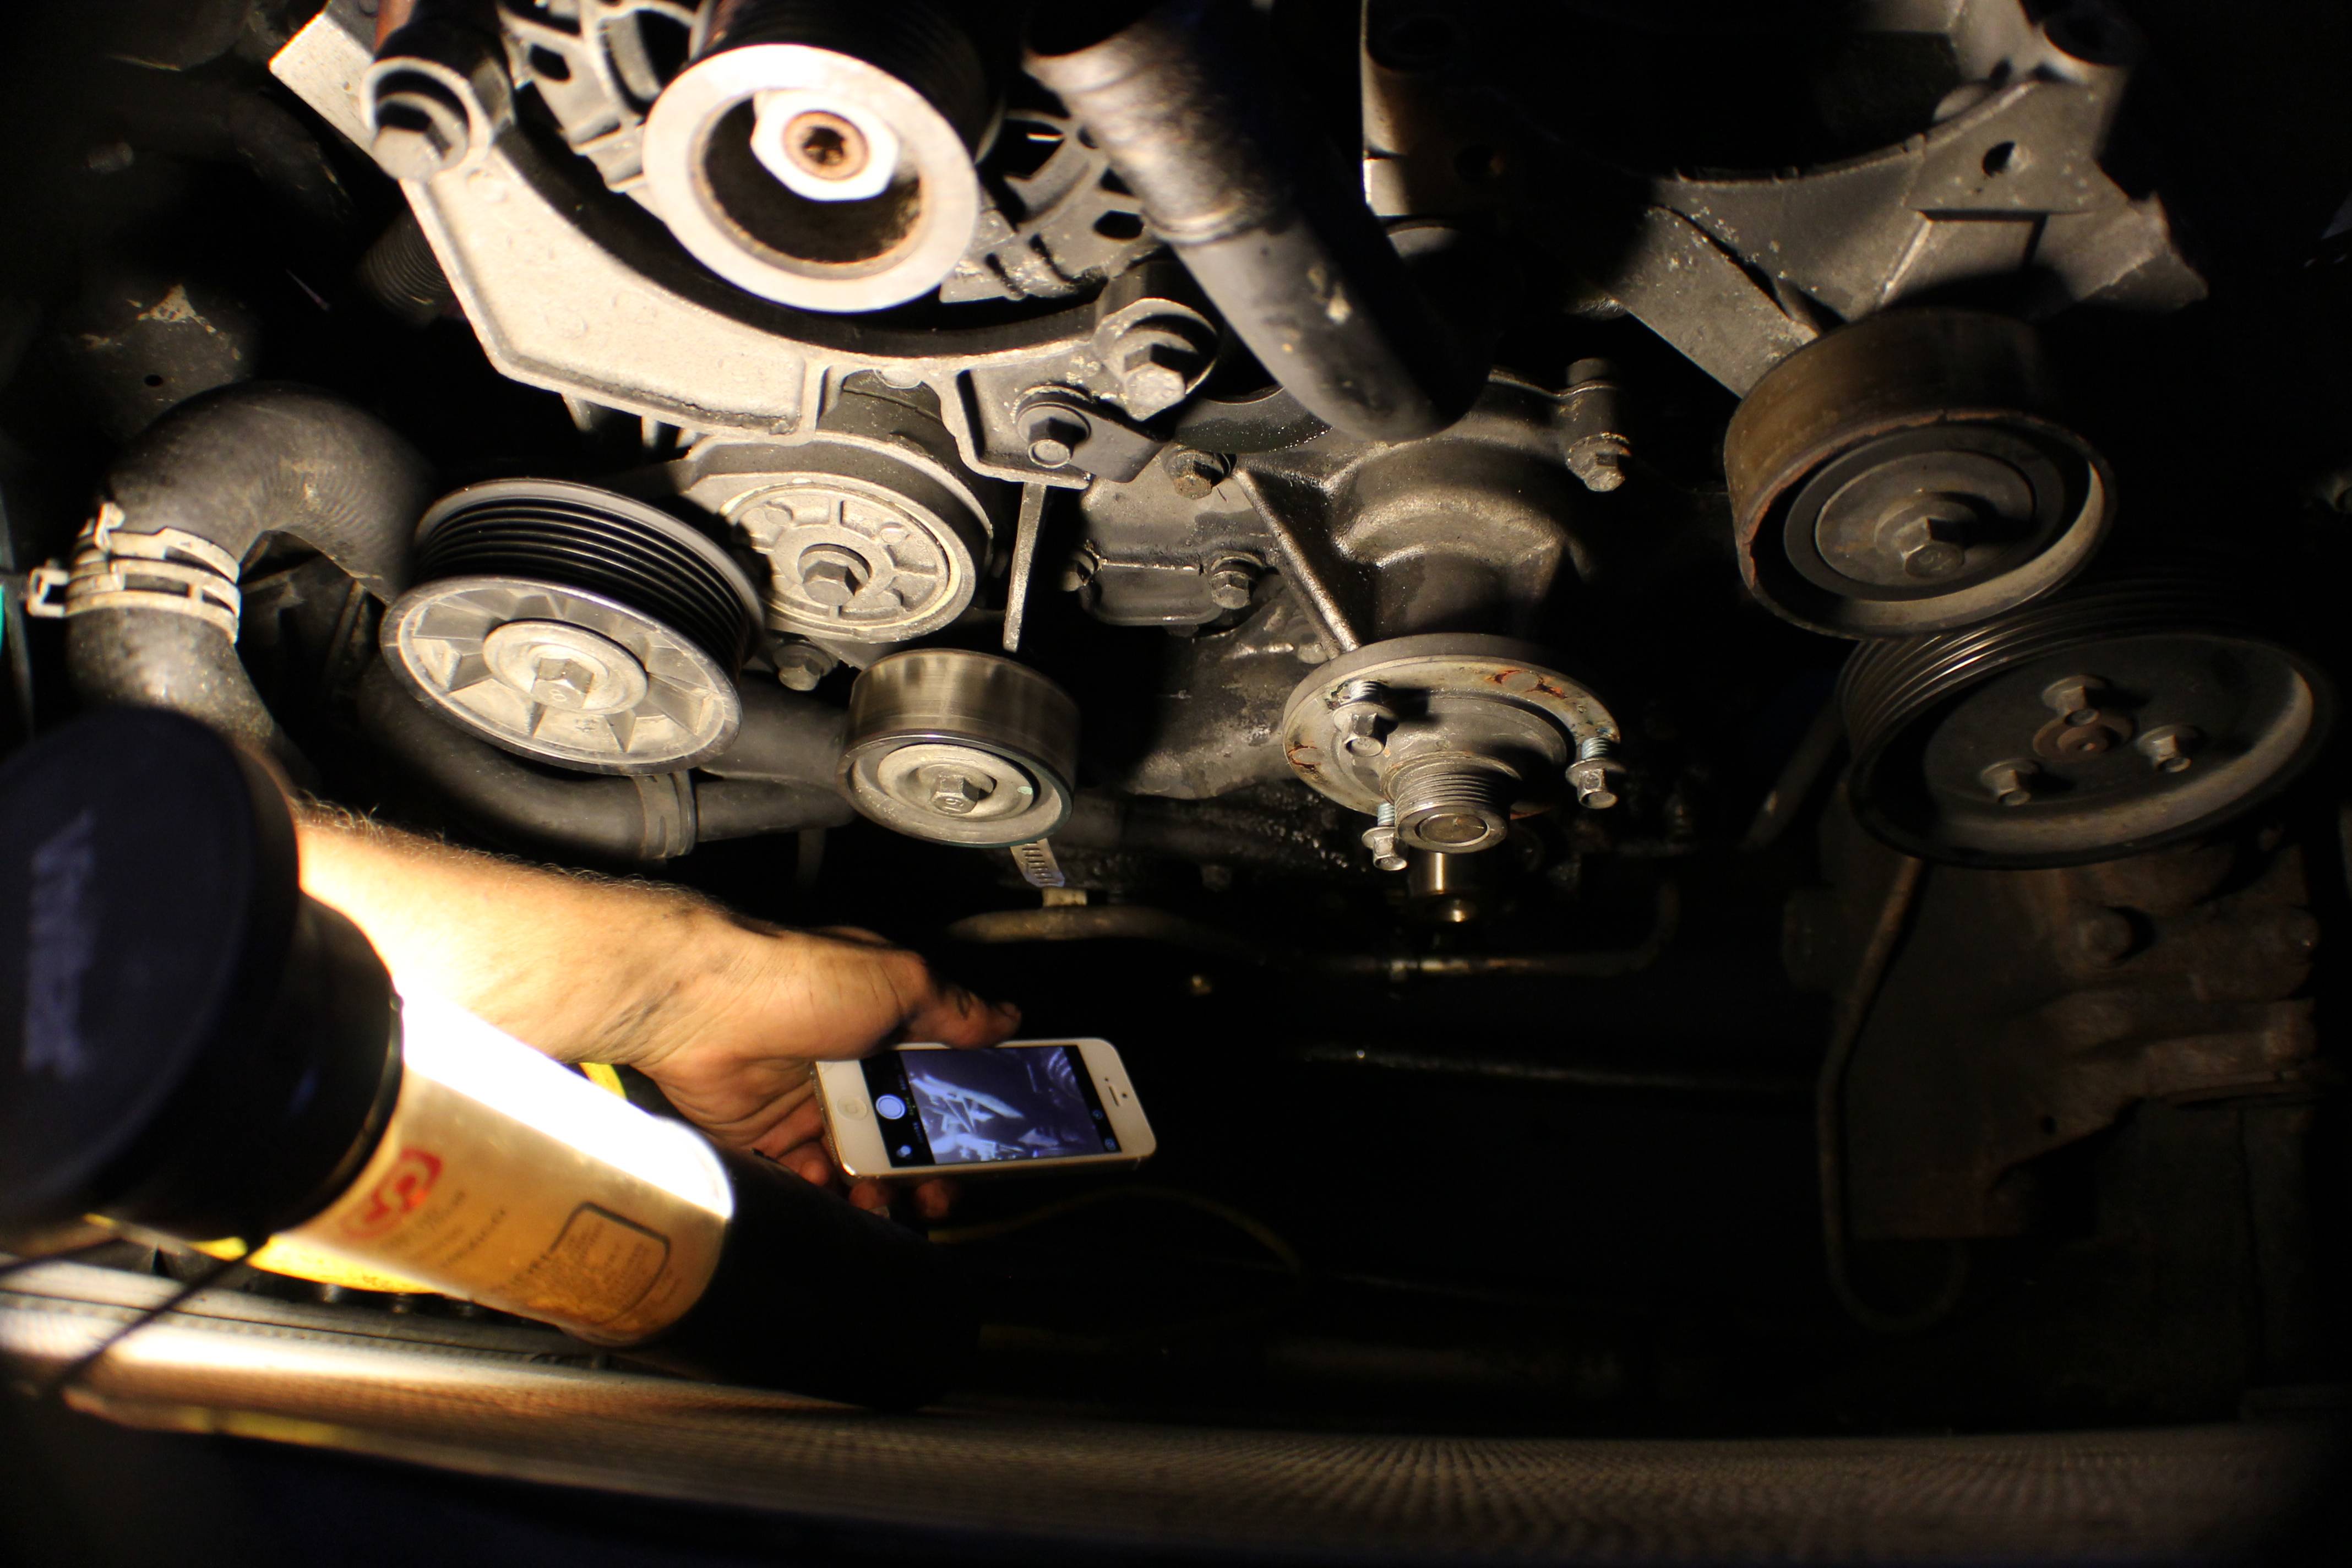
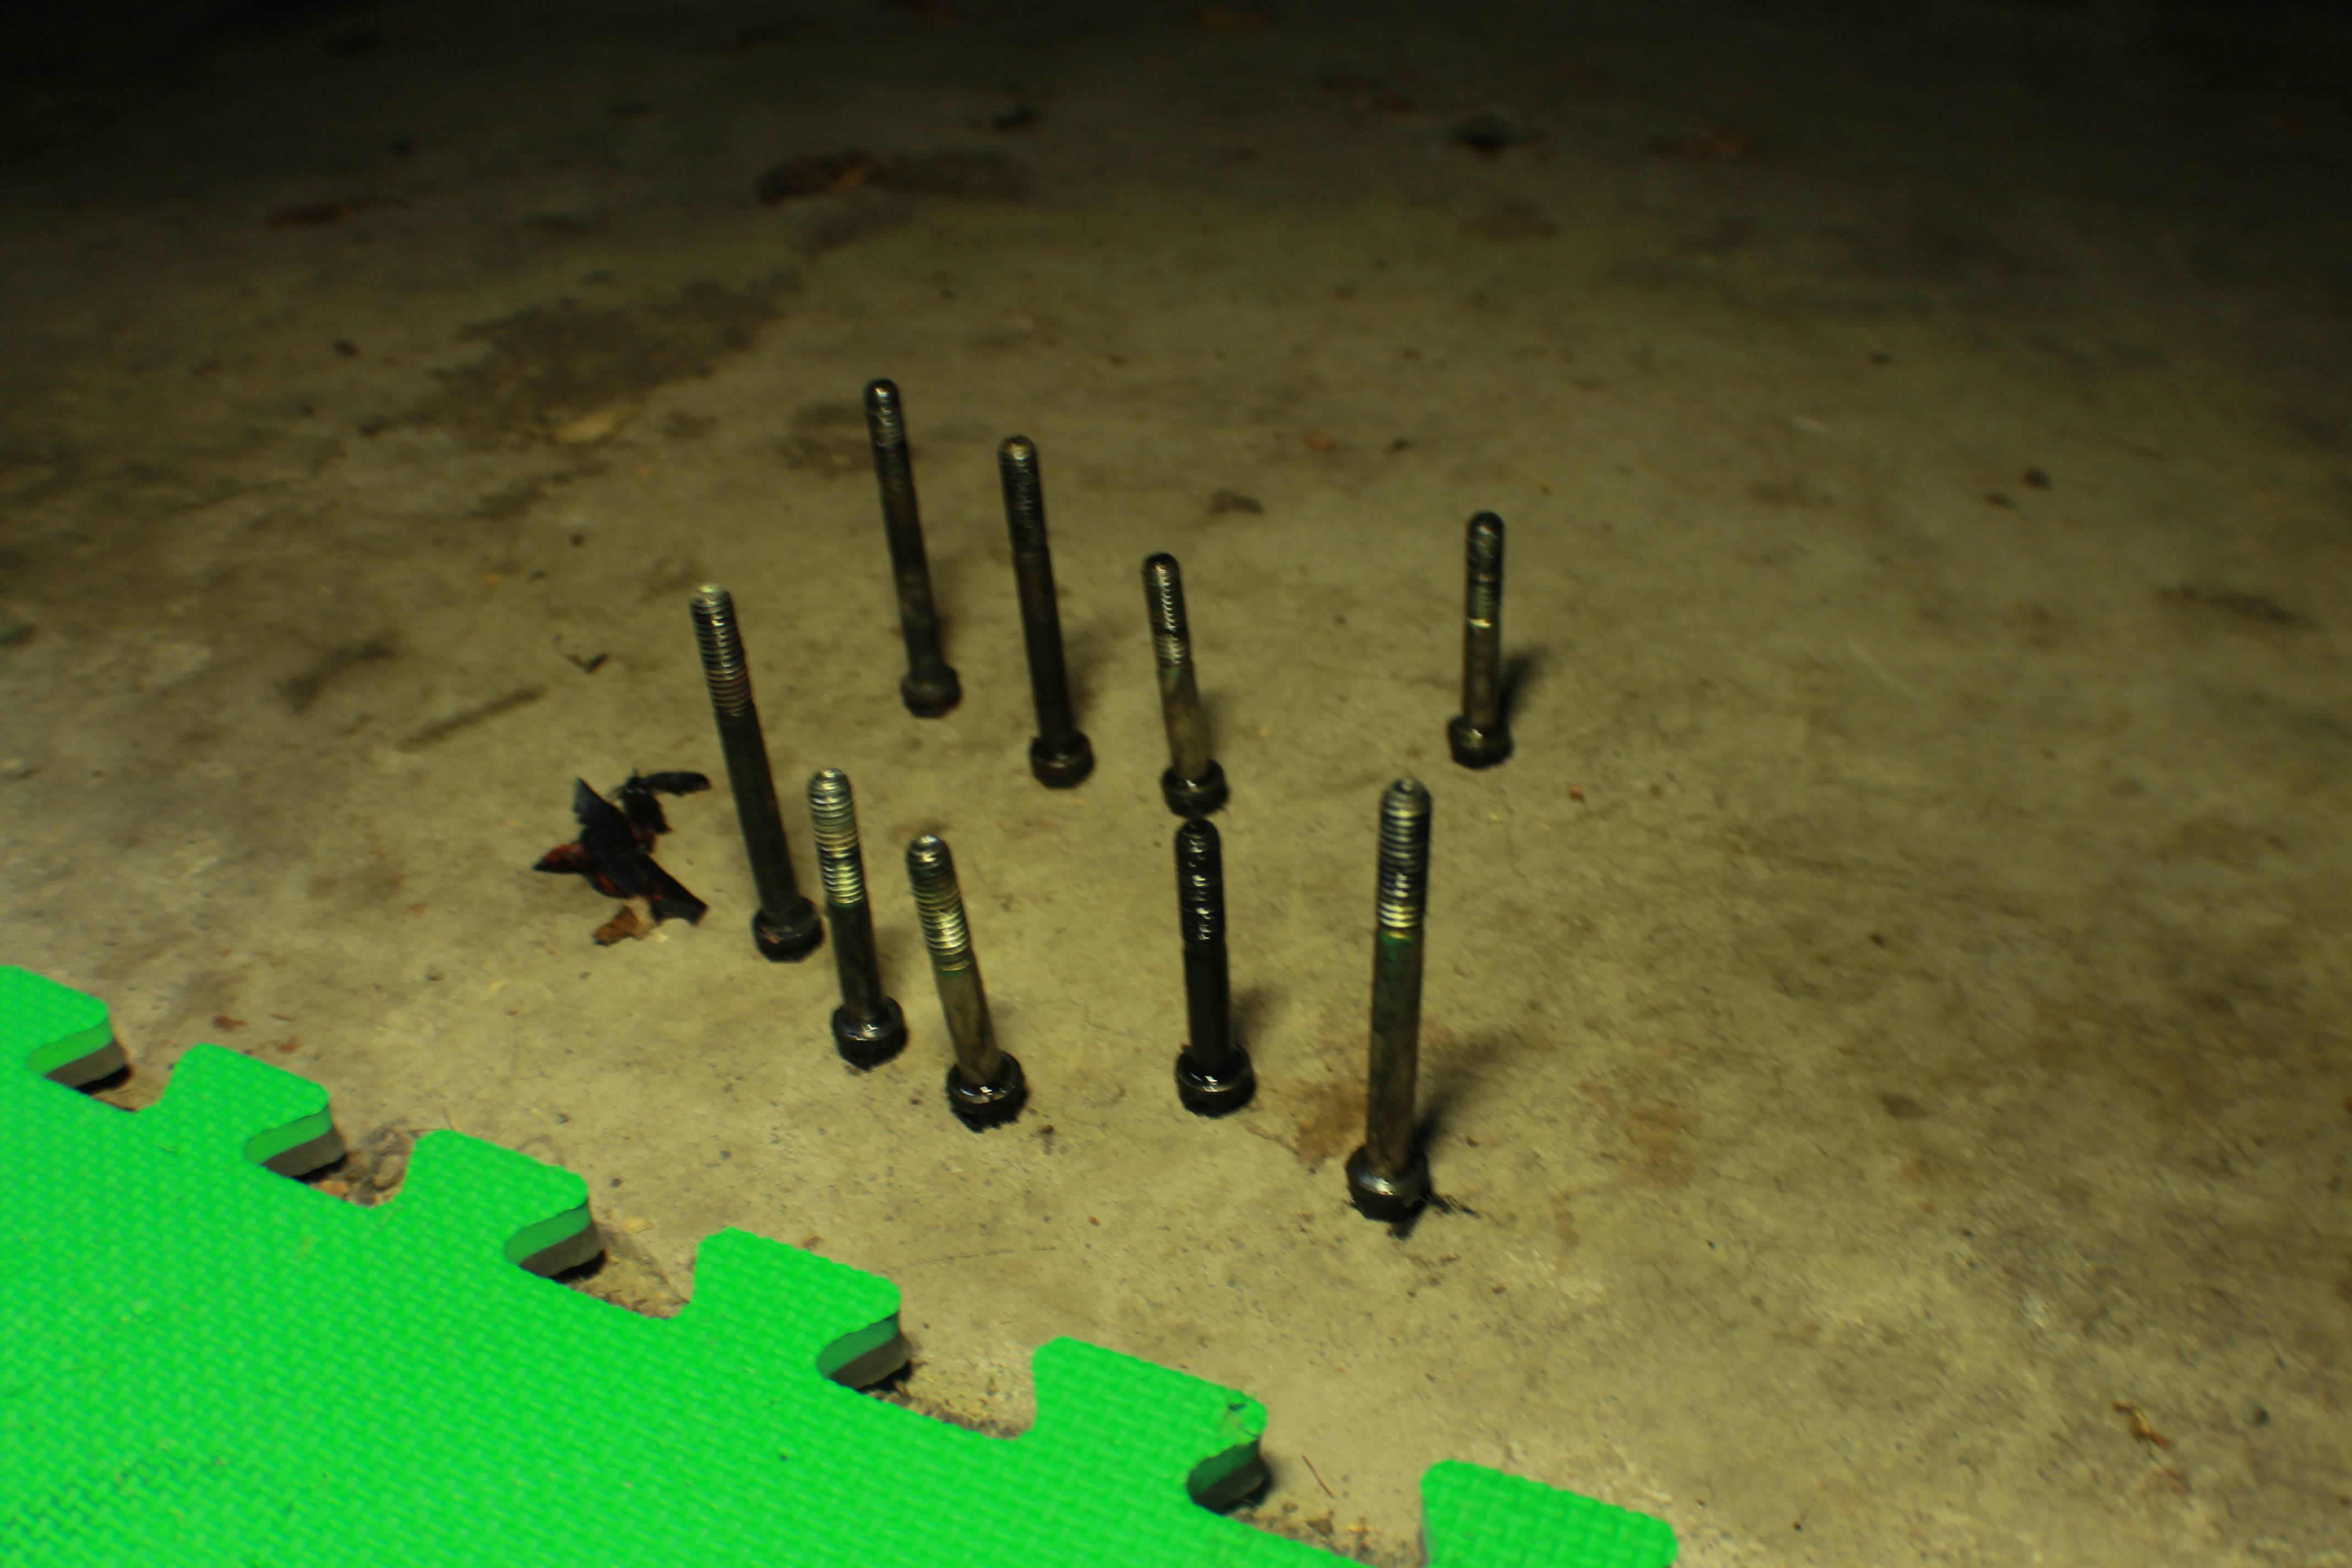
ALL of the bolts you will need to remove will be 11mm. Do not remove any of the smaller bolts unless you also want to replace the water pump gasket. A good tip from me to you; if you have a modern smartphone, use the front facing camera as a mirror to look for the couple of bolts that you can't easily find. Helped me a lot. There will be 9 bolts in total that you will have to remove. Leave them sitting in their respective holes until you get the front cover removed and attempt to not spill them once you do remove it so that you can remember which bolts go in which holes. This is important because they are different lengths. Also, do not forget (as I did) to unplug the two sensors attached to the front cover before you remove it.
Once you get the front cover out, lay it face up and remove the bolts. Lay them in a pattern that you will remember where they go back.
Now, find a large phillips bit like this one. One of the smaller ones WILL NOT work, it will simply round off the screws and you will have to drill them out, which will suck. Ask me how I know.
Edit: The bit is a #3 posidrive. Thanks drowssap!
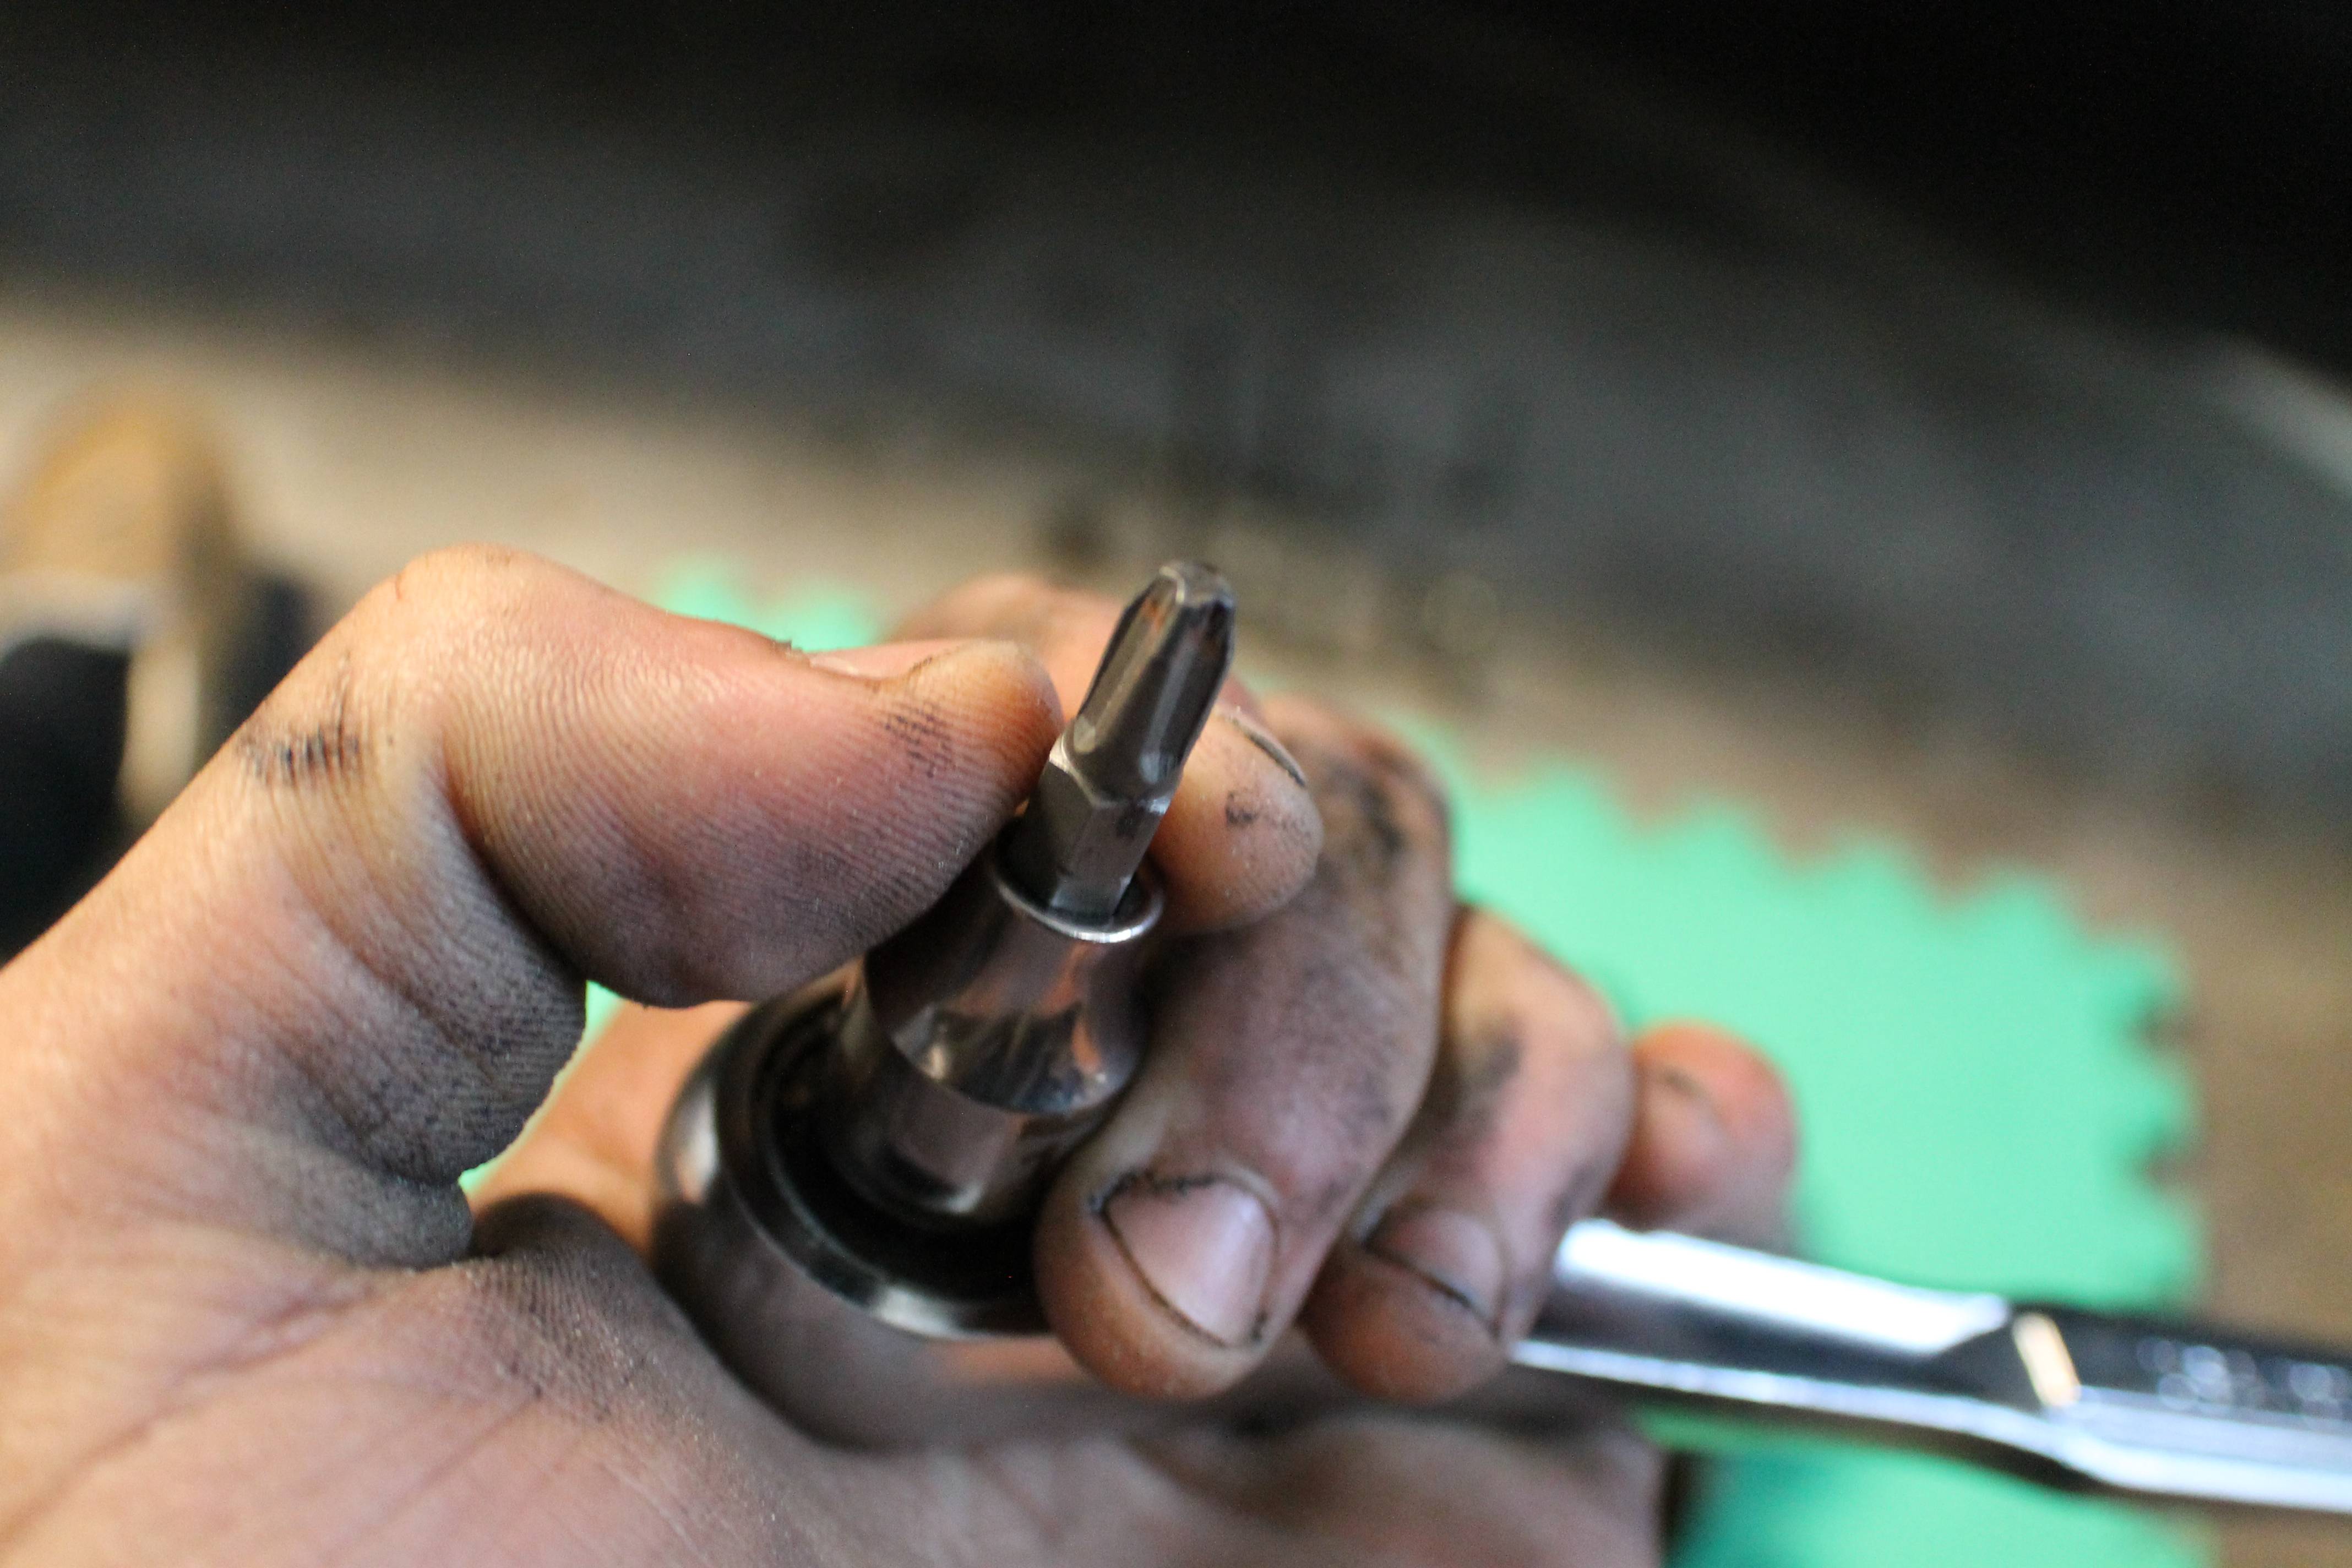
You will want to apply a lot of downward pressure while cranking on these. Really work the bit down into the screw and then really put your weight into keeping it down. If you do that, they all should come out without stripping. There's also that one odd little bolt by the oil pickup that will need to be removed.
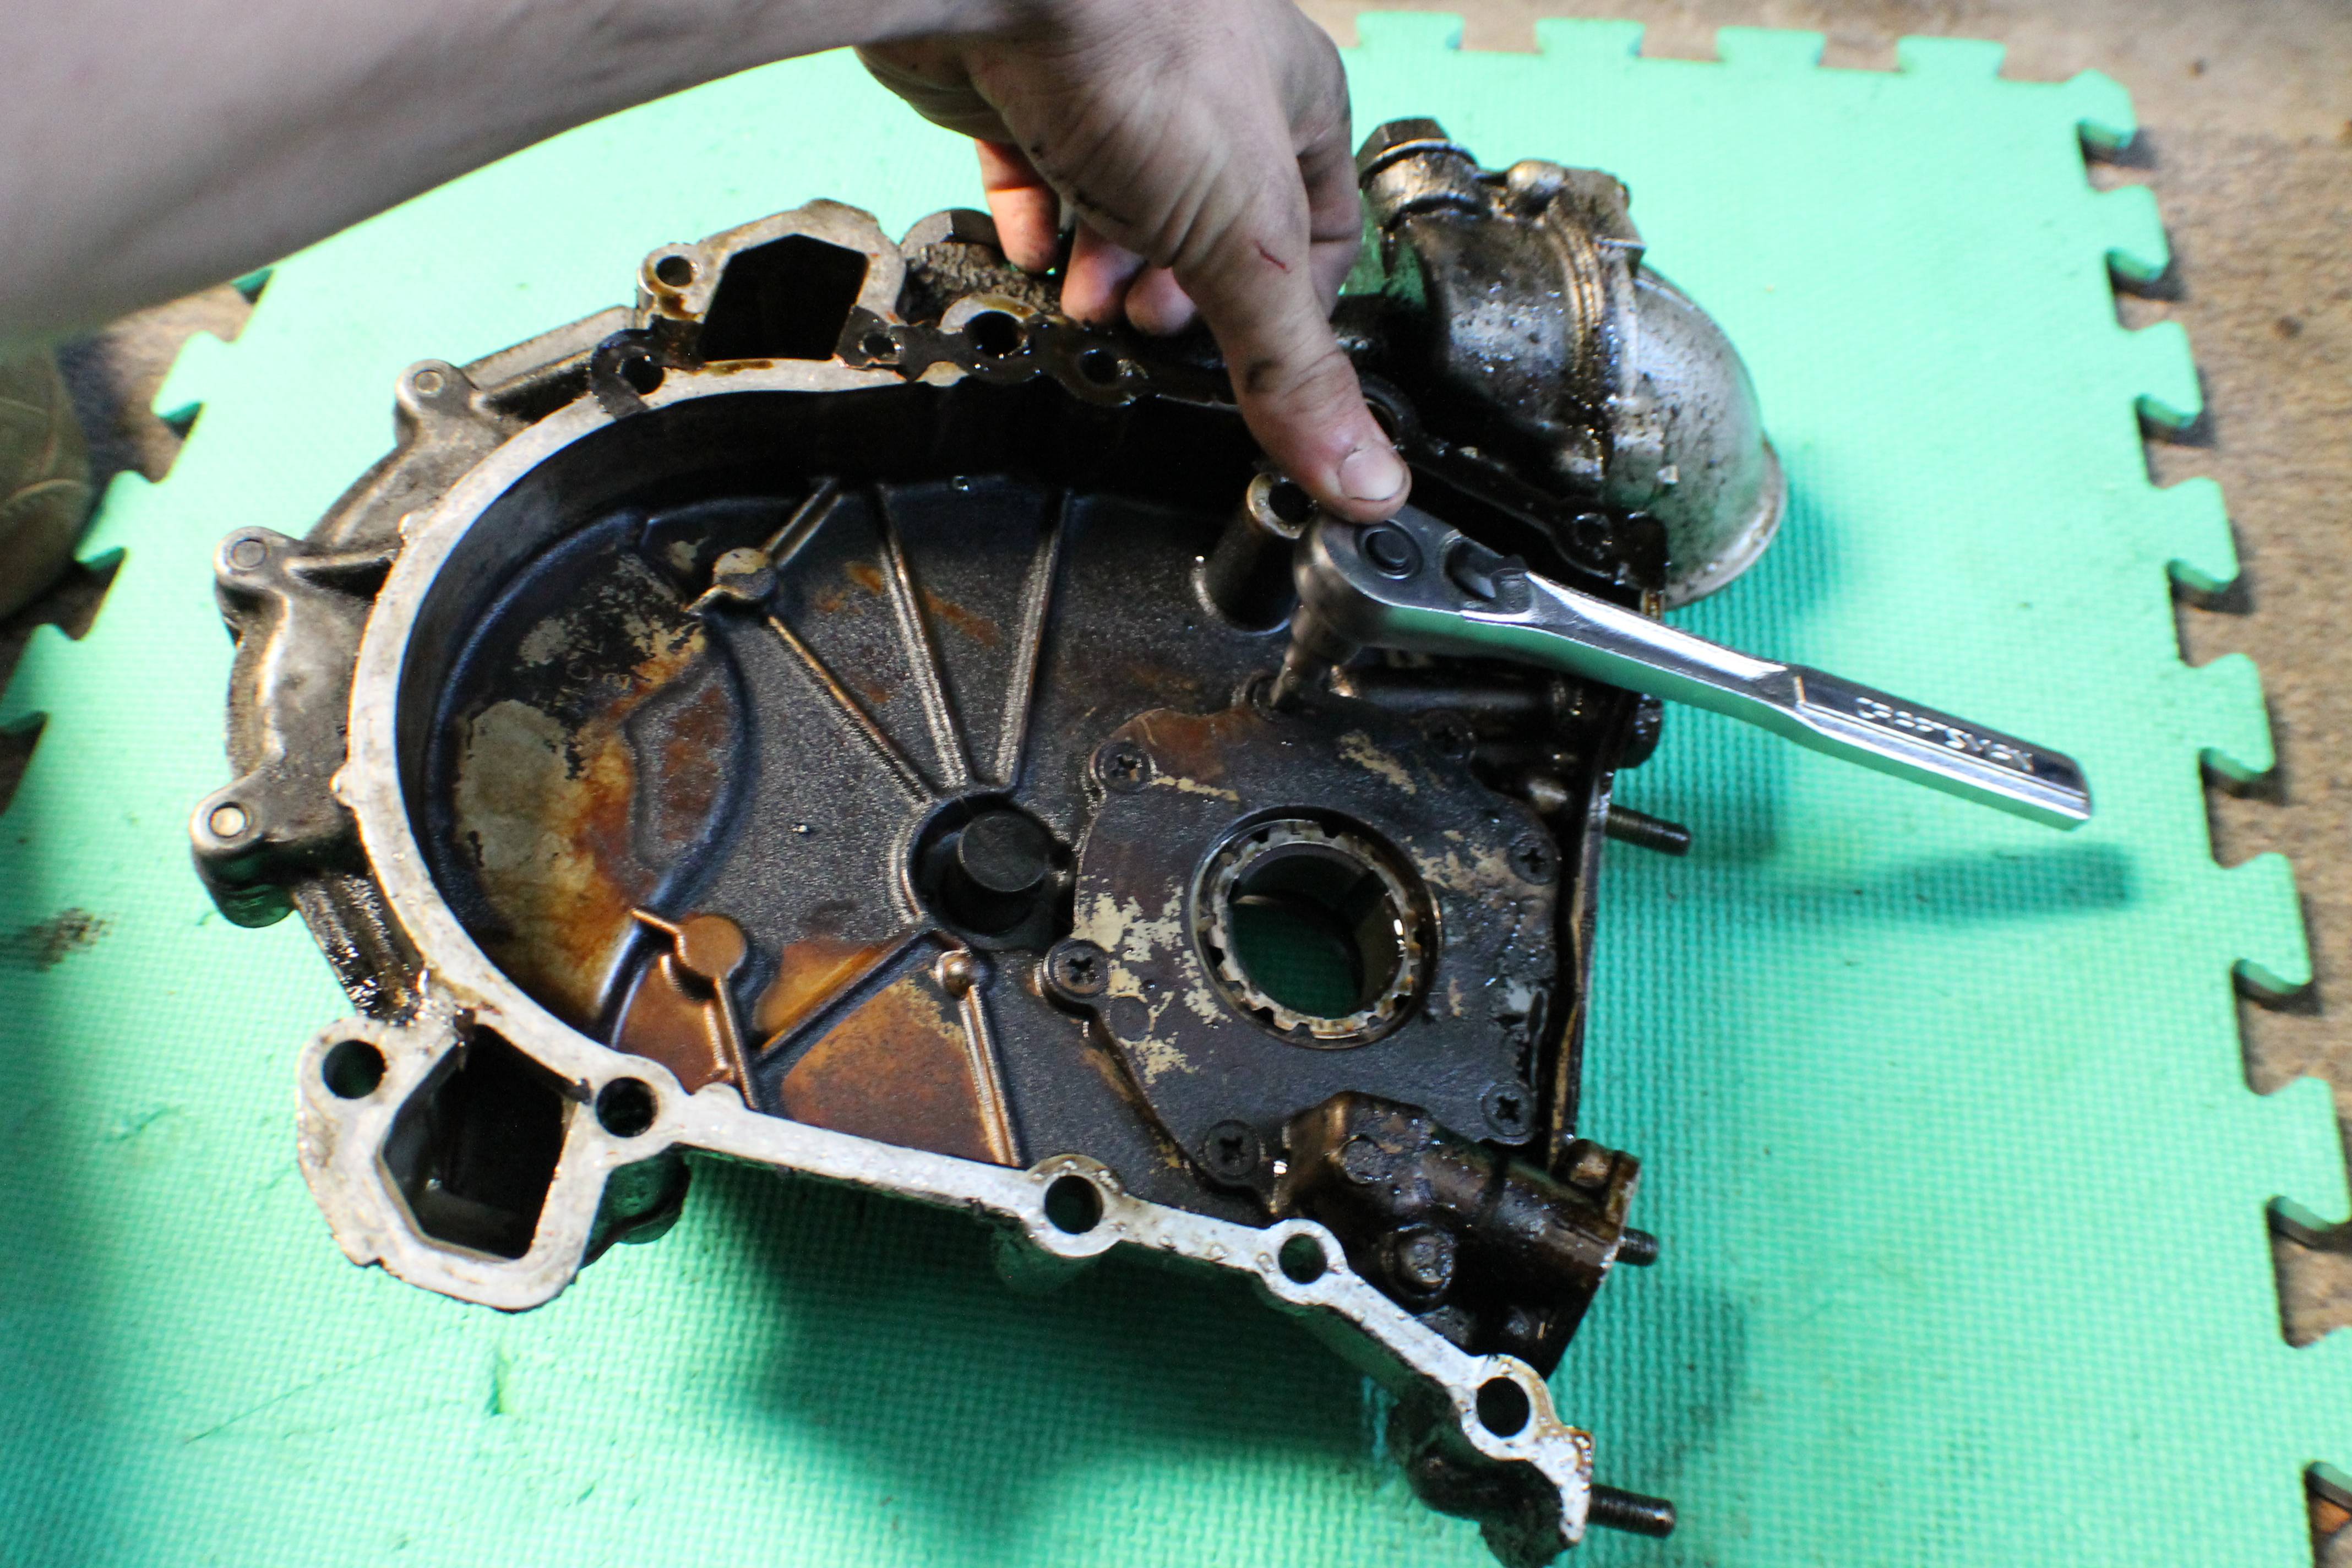
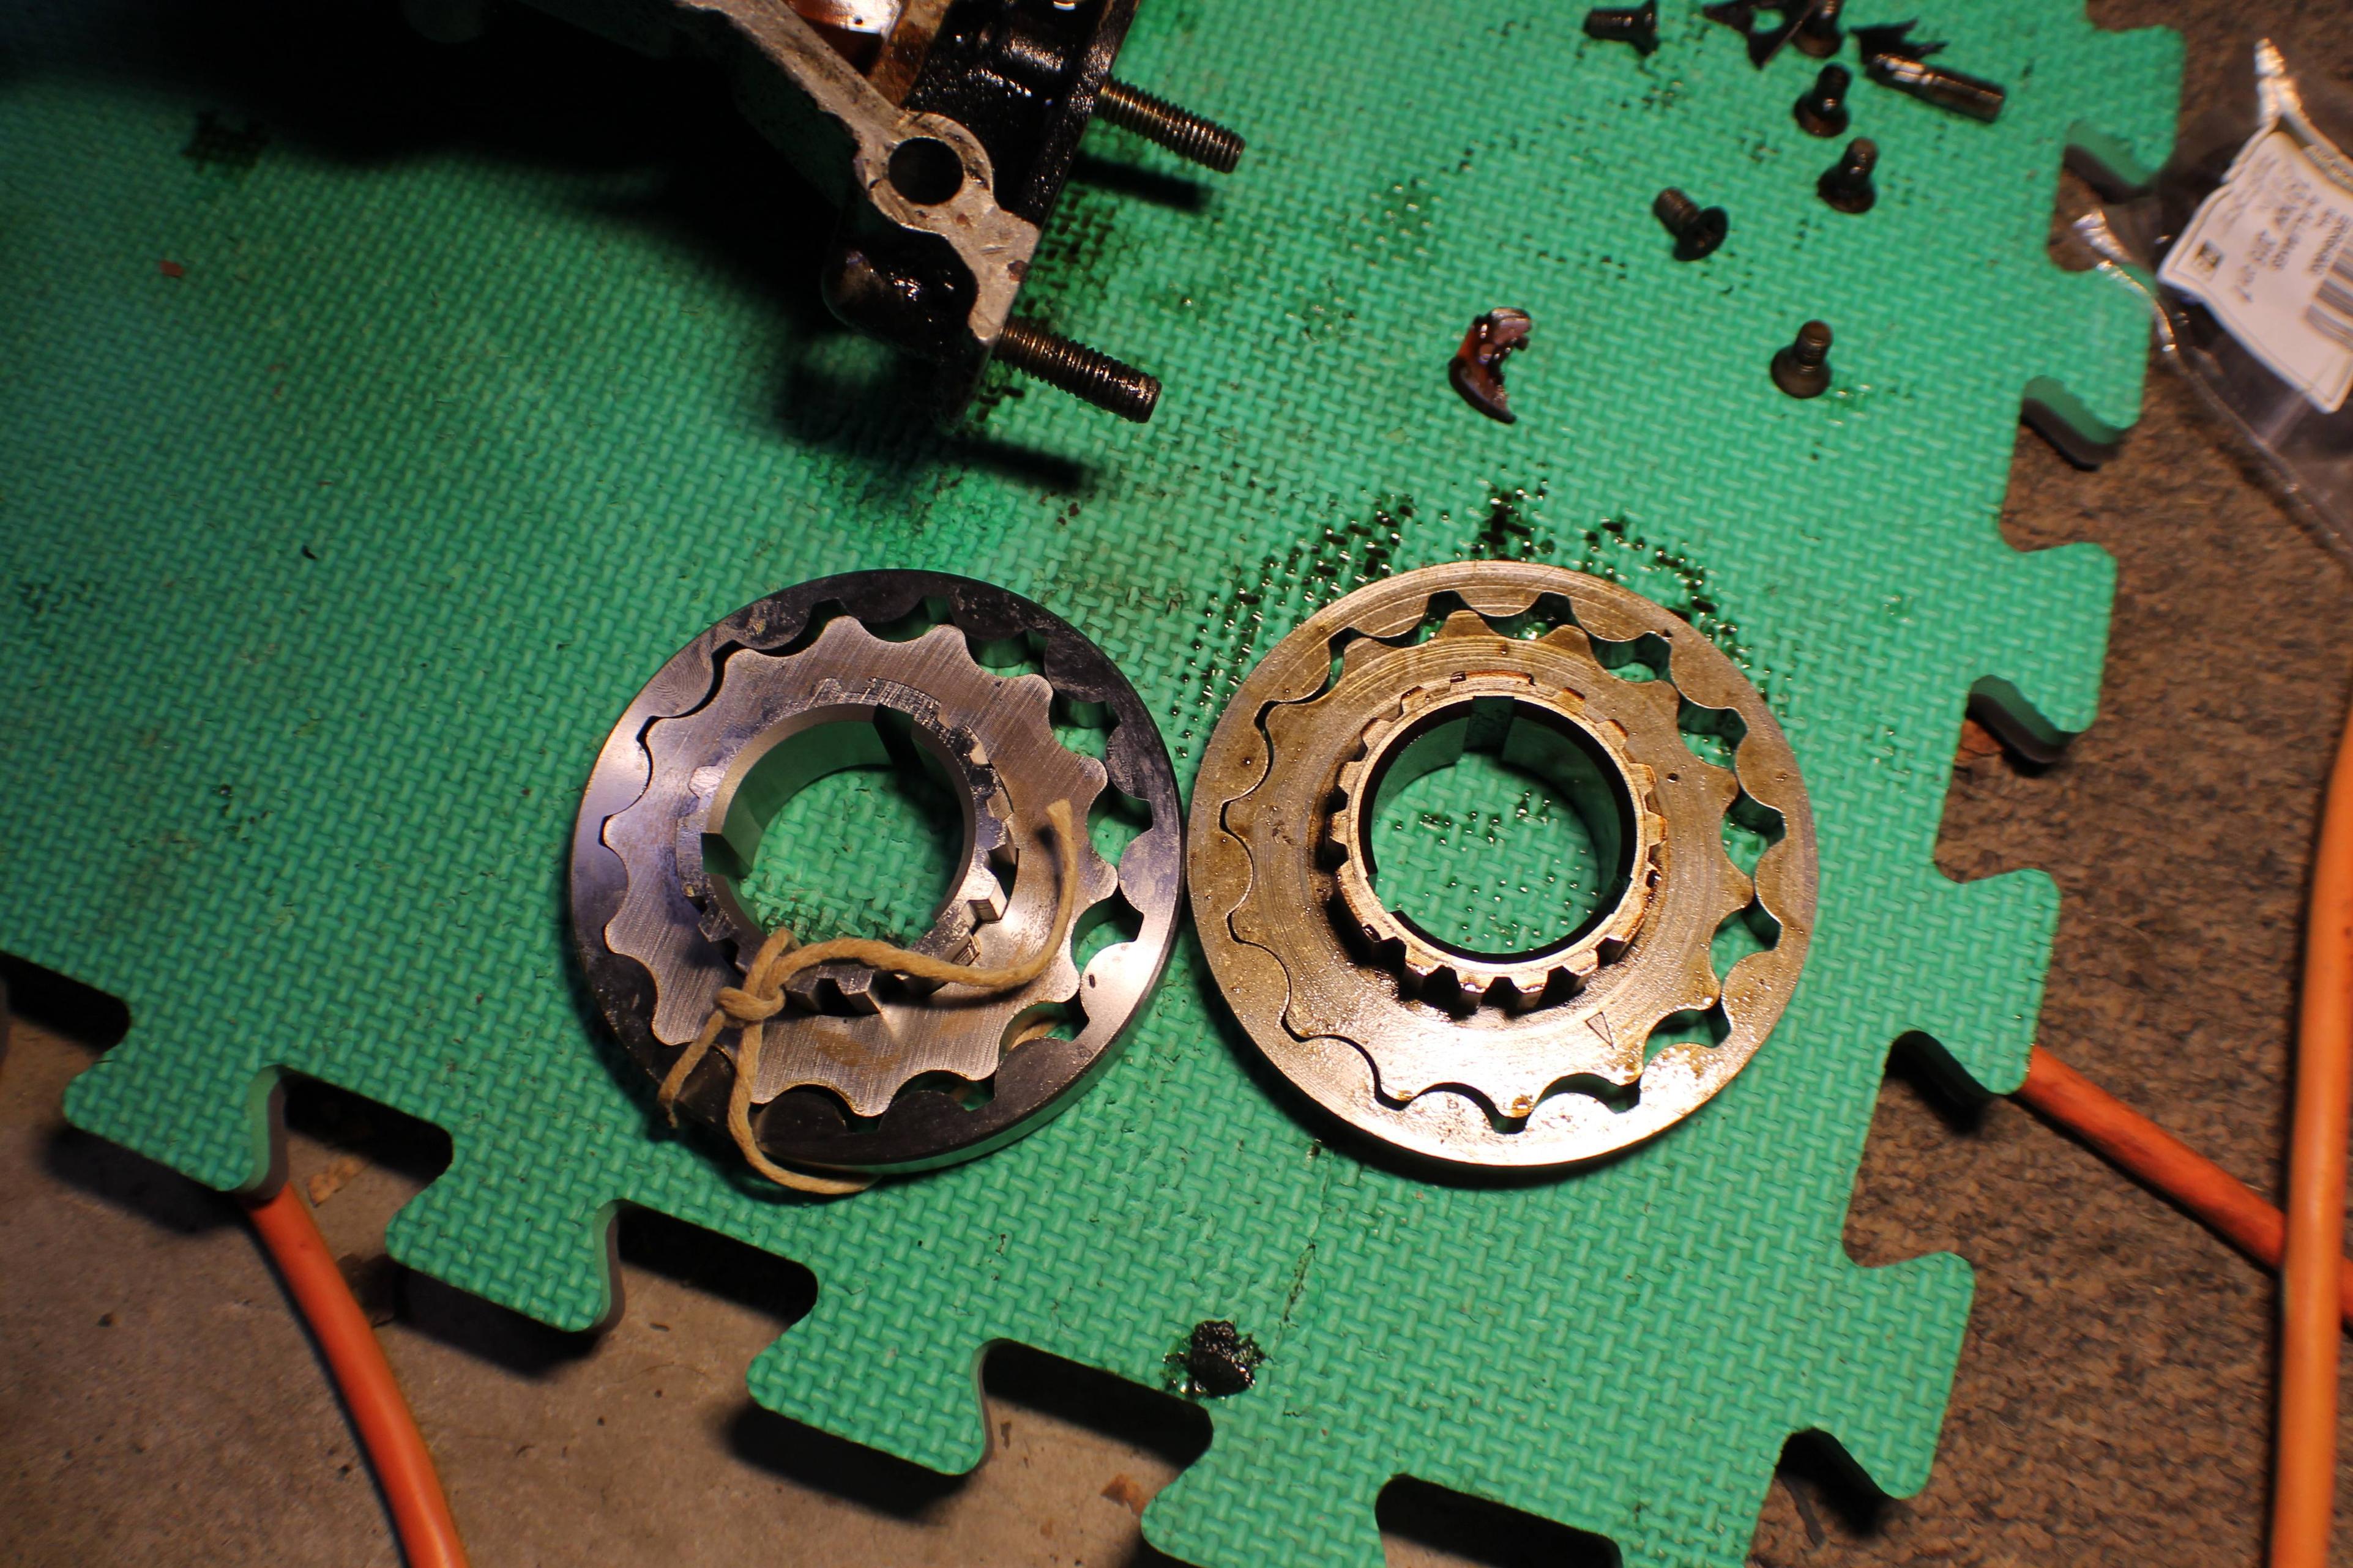
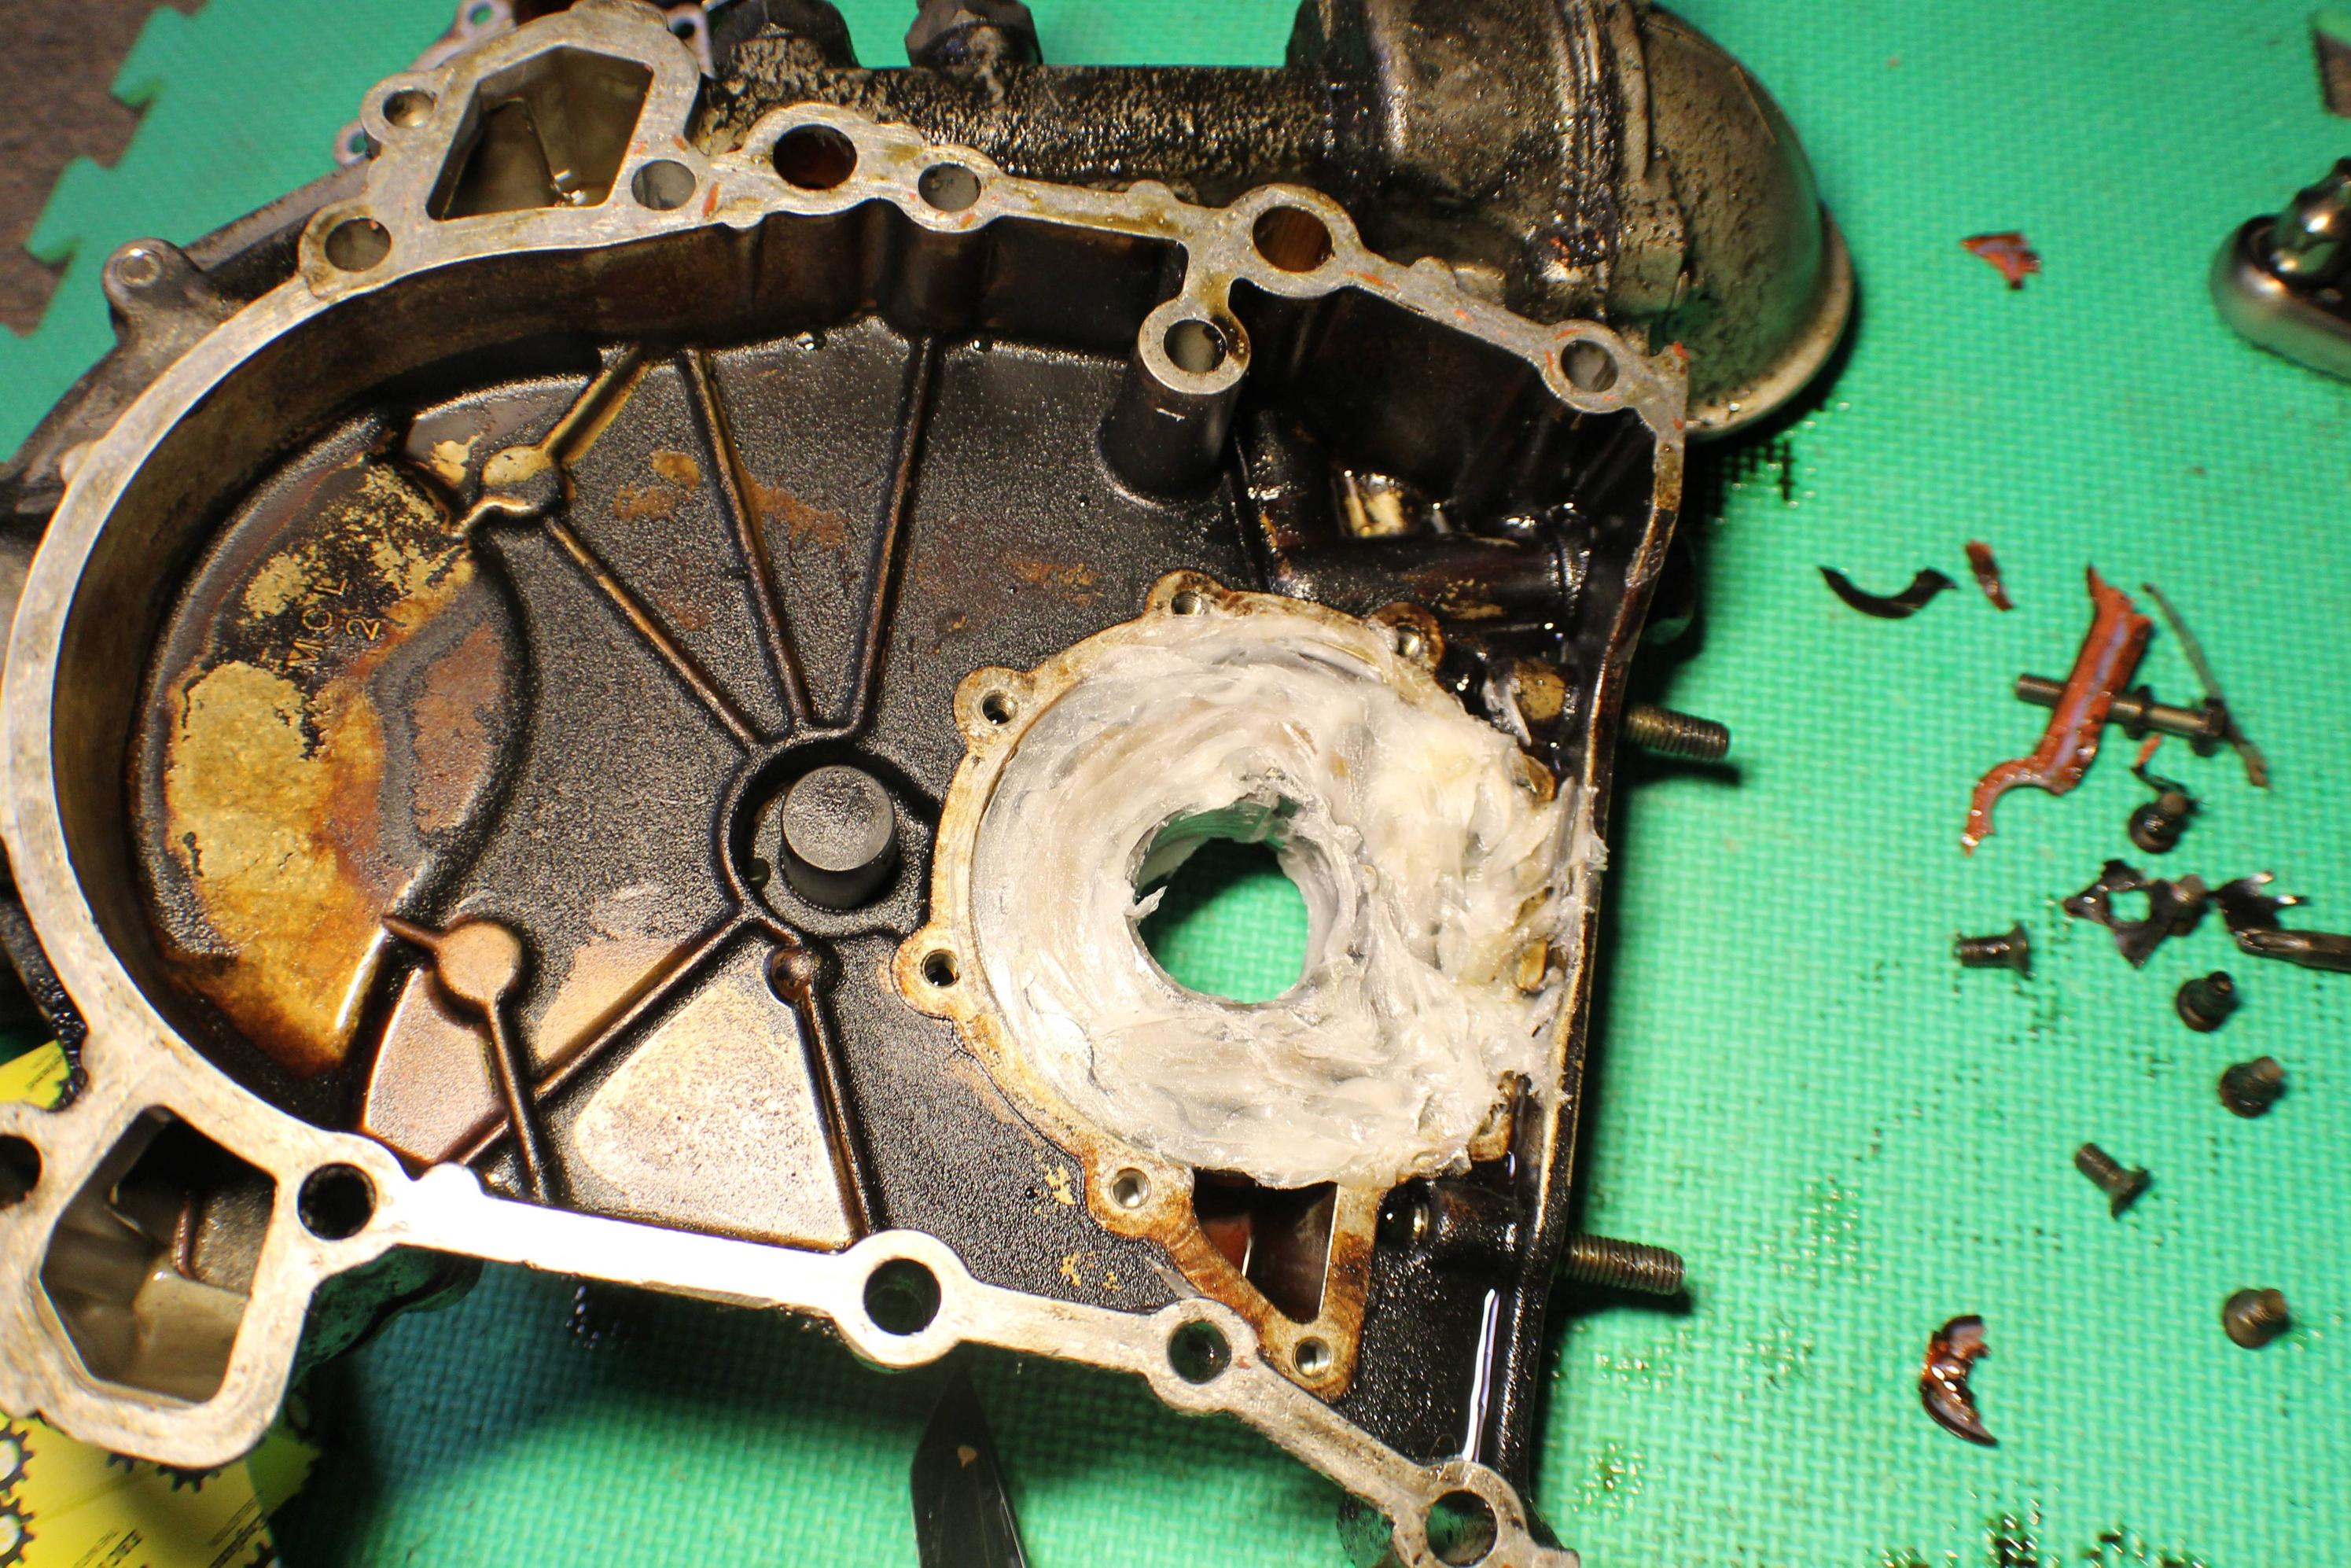
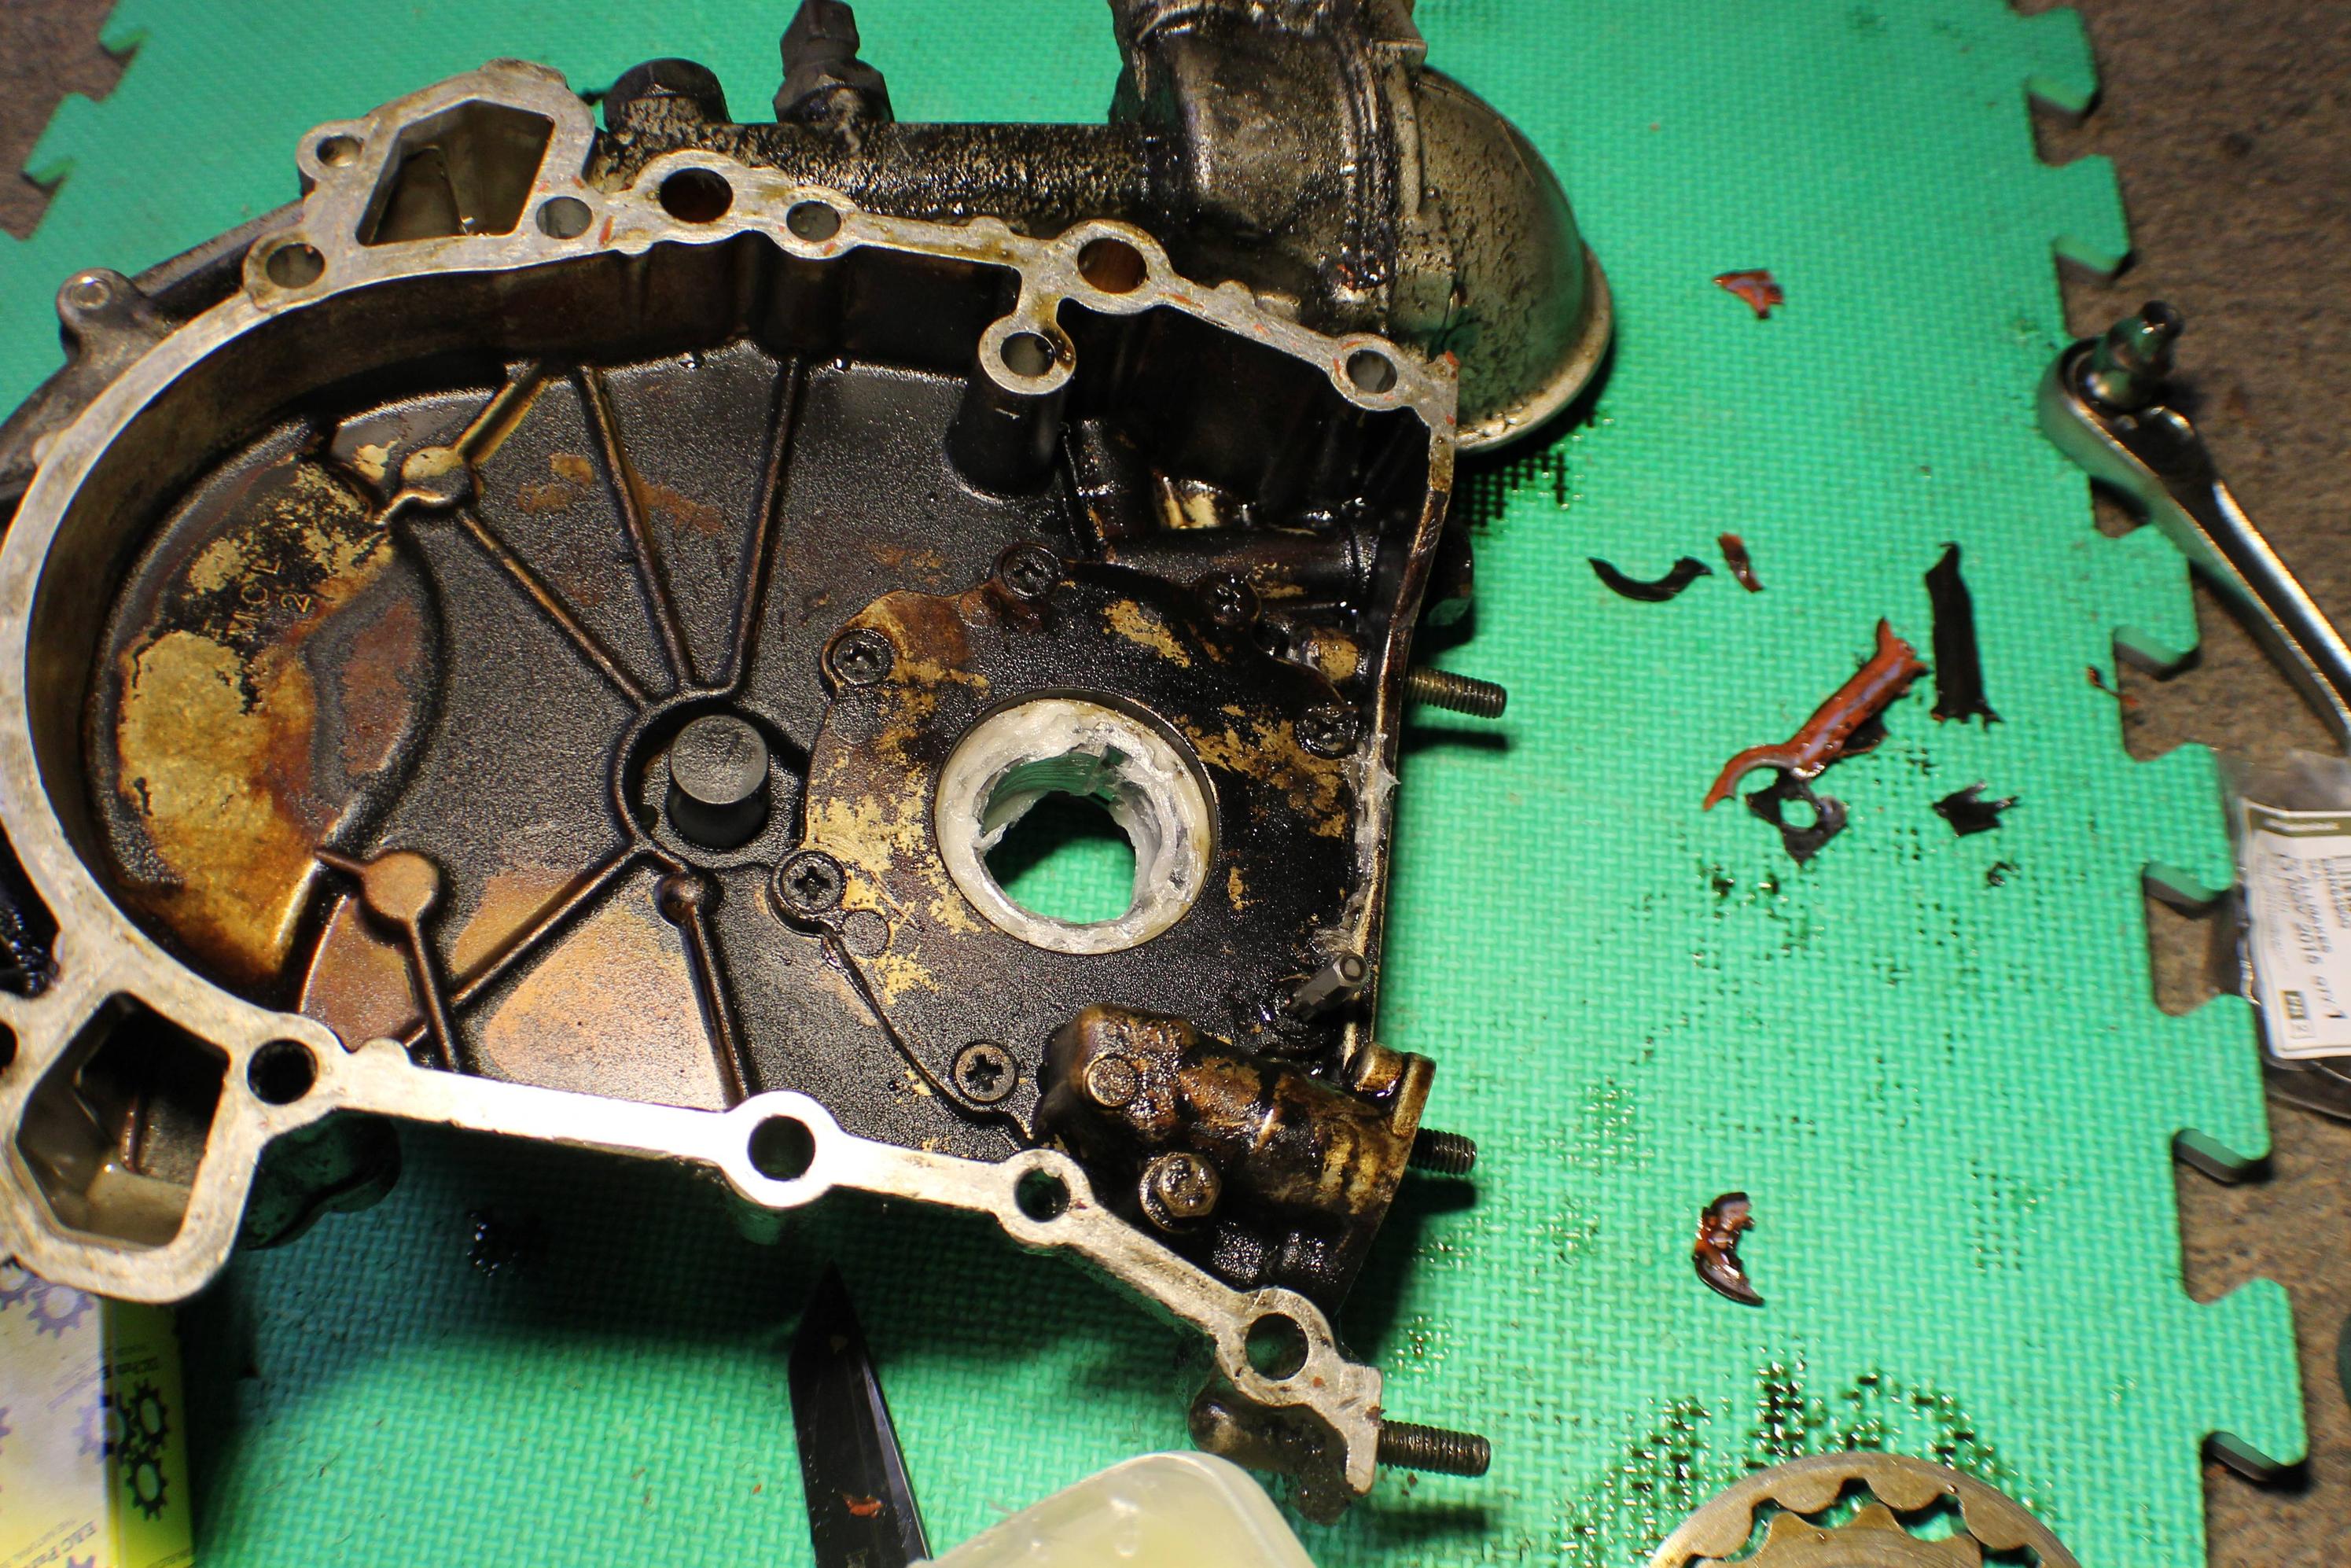
Now you can lift off the retaining plate and the oil pump will lift right out easily. If your outer ring gear is cracked, check for gouging in the front cover. If it has been gouged... I'm sorry. You'll have to replace the whole front cover which is rather costly. If you don't, you won't have enough oil pressure. Mine actually looked really good despite being at 143k on the factory pump inside the vin range for oil pump failure, and I don't believe the engine was replaced by the dealer because there is no recall service sticker under the hood. Here is a look at the old pump vs new, virtually identical other than the minor wear you would expect to find at 143k.
Now, you'll want to seperate your oil pump's outer gear from the inner gear. Place the outer gear inside the front cover and fill the inside of it with your petroleum jelly. This is to make sure the oil pump gets primed quickly upon first start up.
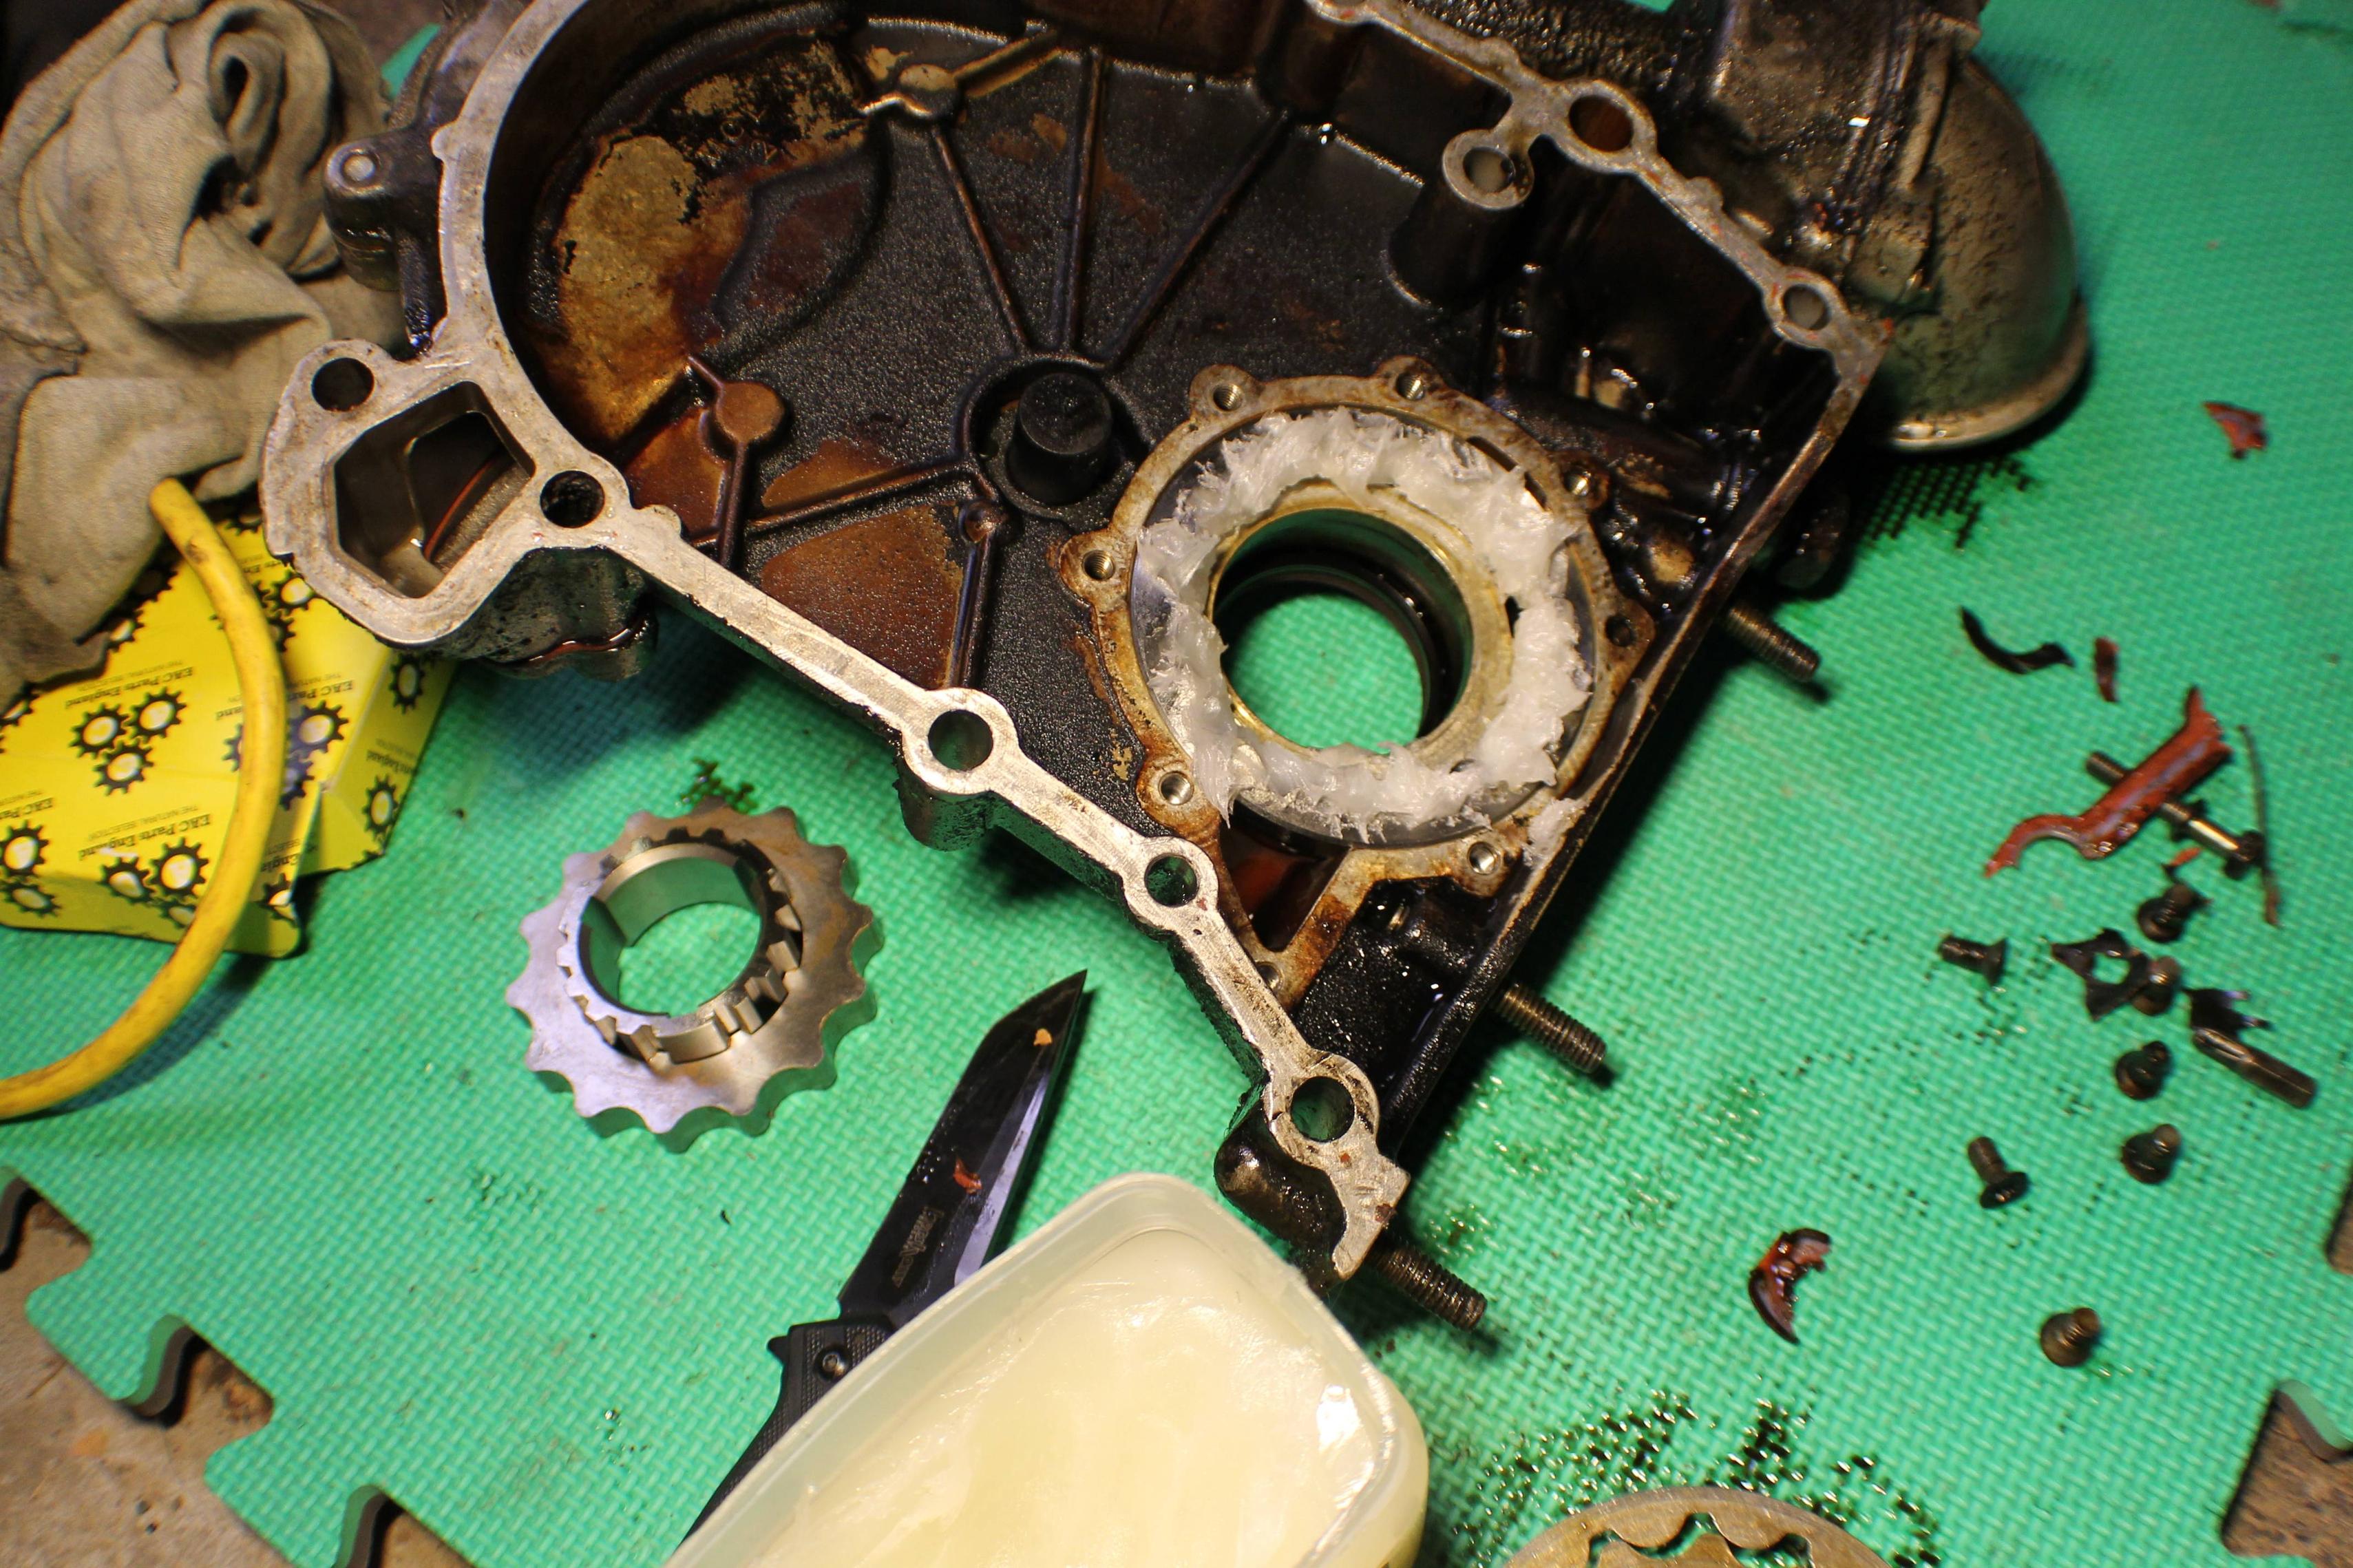
Once you've packed the outer ring, place the remainder of the oil pump inside the outer ring. Pack it with some more petroleum jelly and really work it down in between the two.
Now place the pump retainer back on and tighten it back down the same way you removed it.
At this point, I recommend flipping the front cover back over so it is laying face up and replacing the bolts back in their appropriate holes.
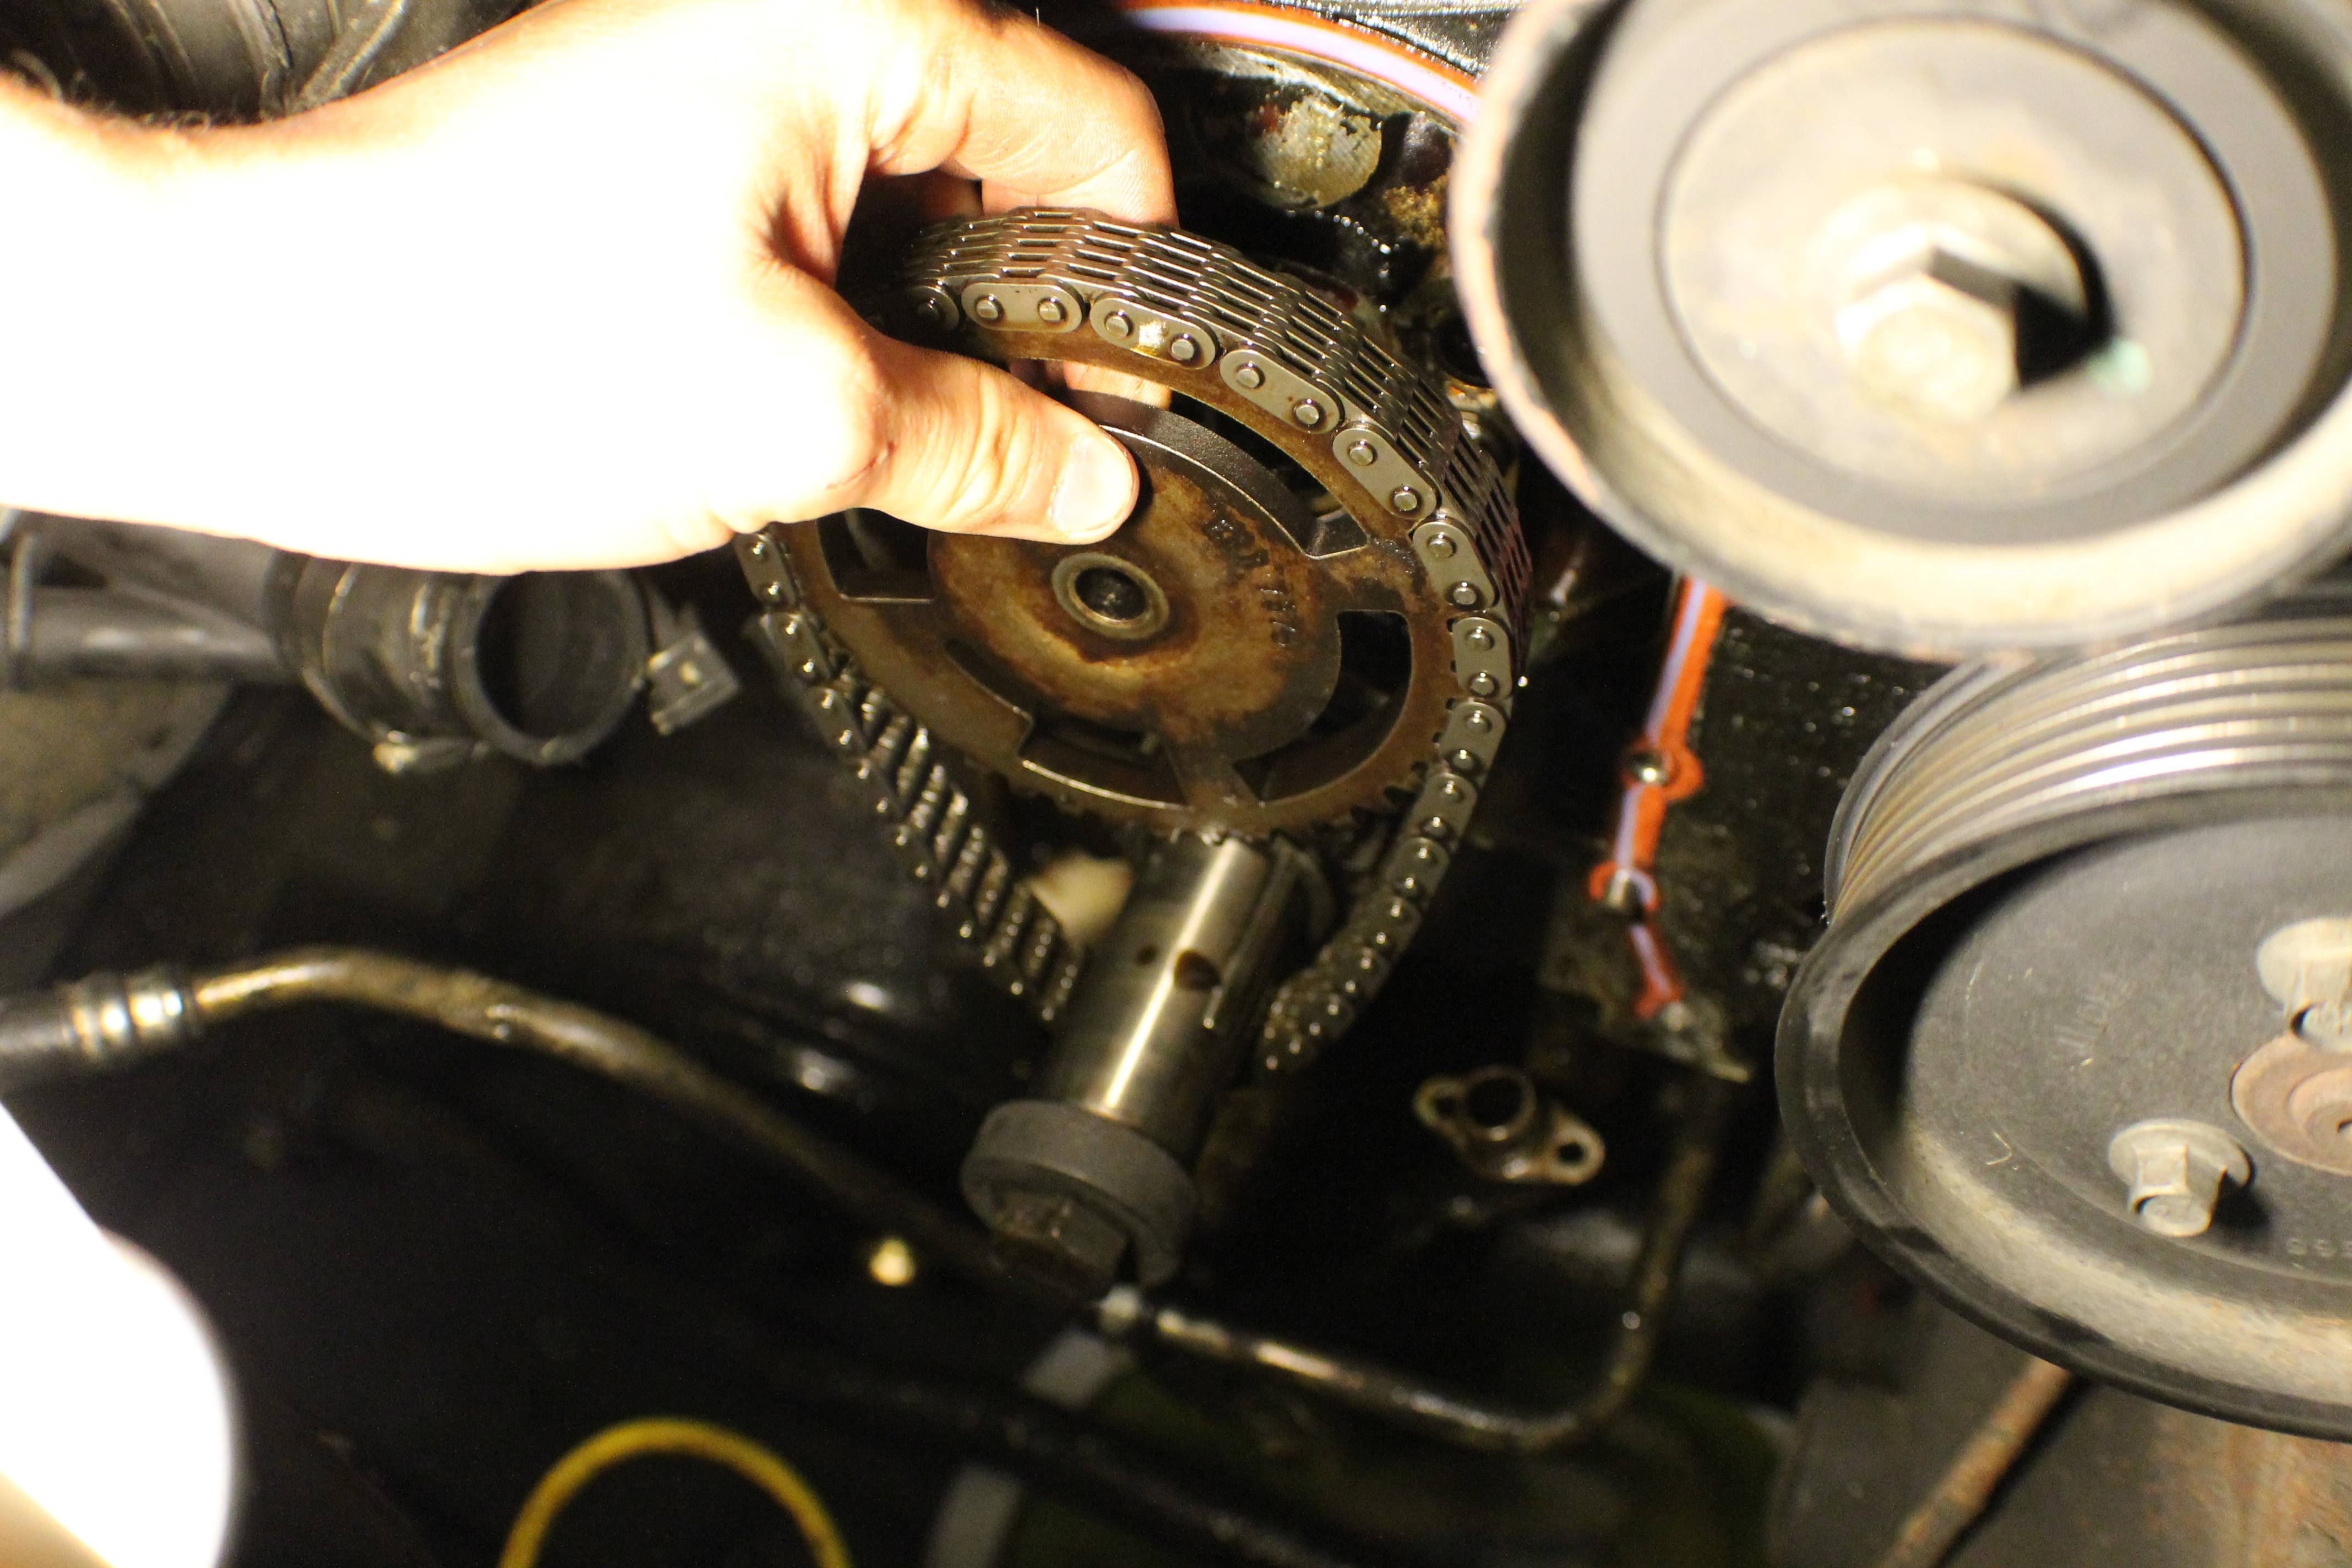
Alright, now we move back into the engine bay. First and foremost, place the crank bolt (with spacer) back into the crank. Take your 15/16" socket and your breaker bar and rotate the crank clockwise until the mark on the cam gear is at the 6 o'clock position and the crank gear is at the 12 o'clock position.
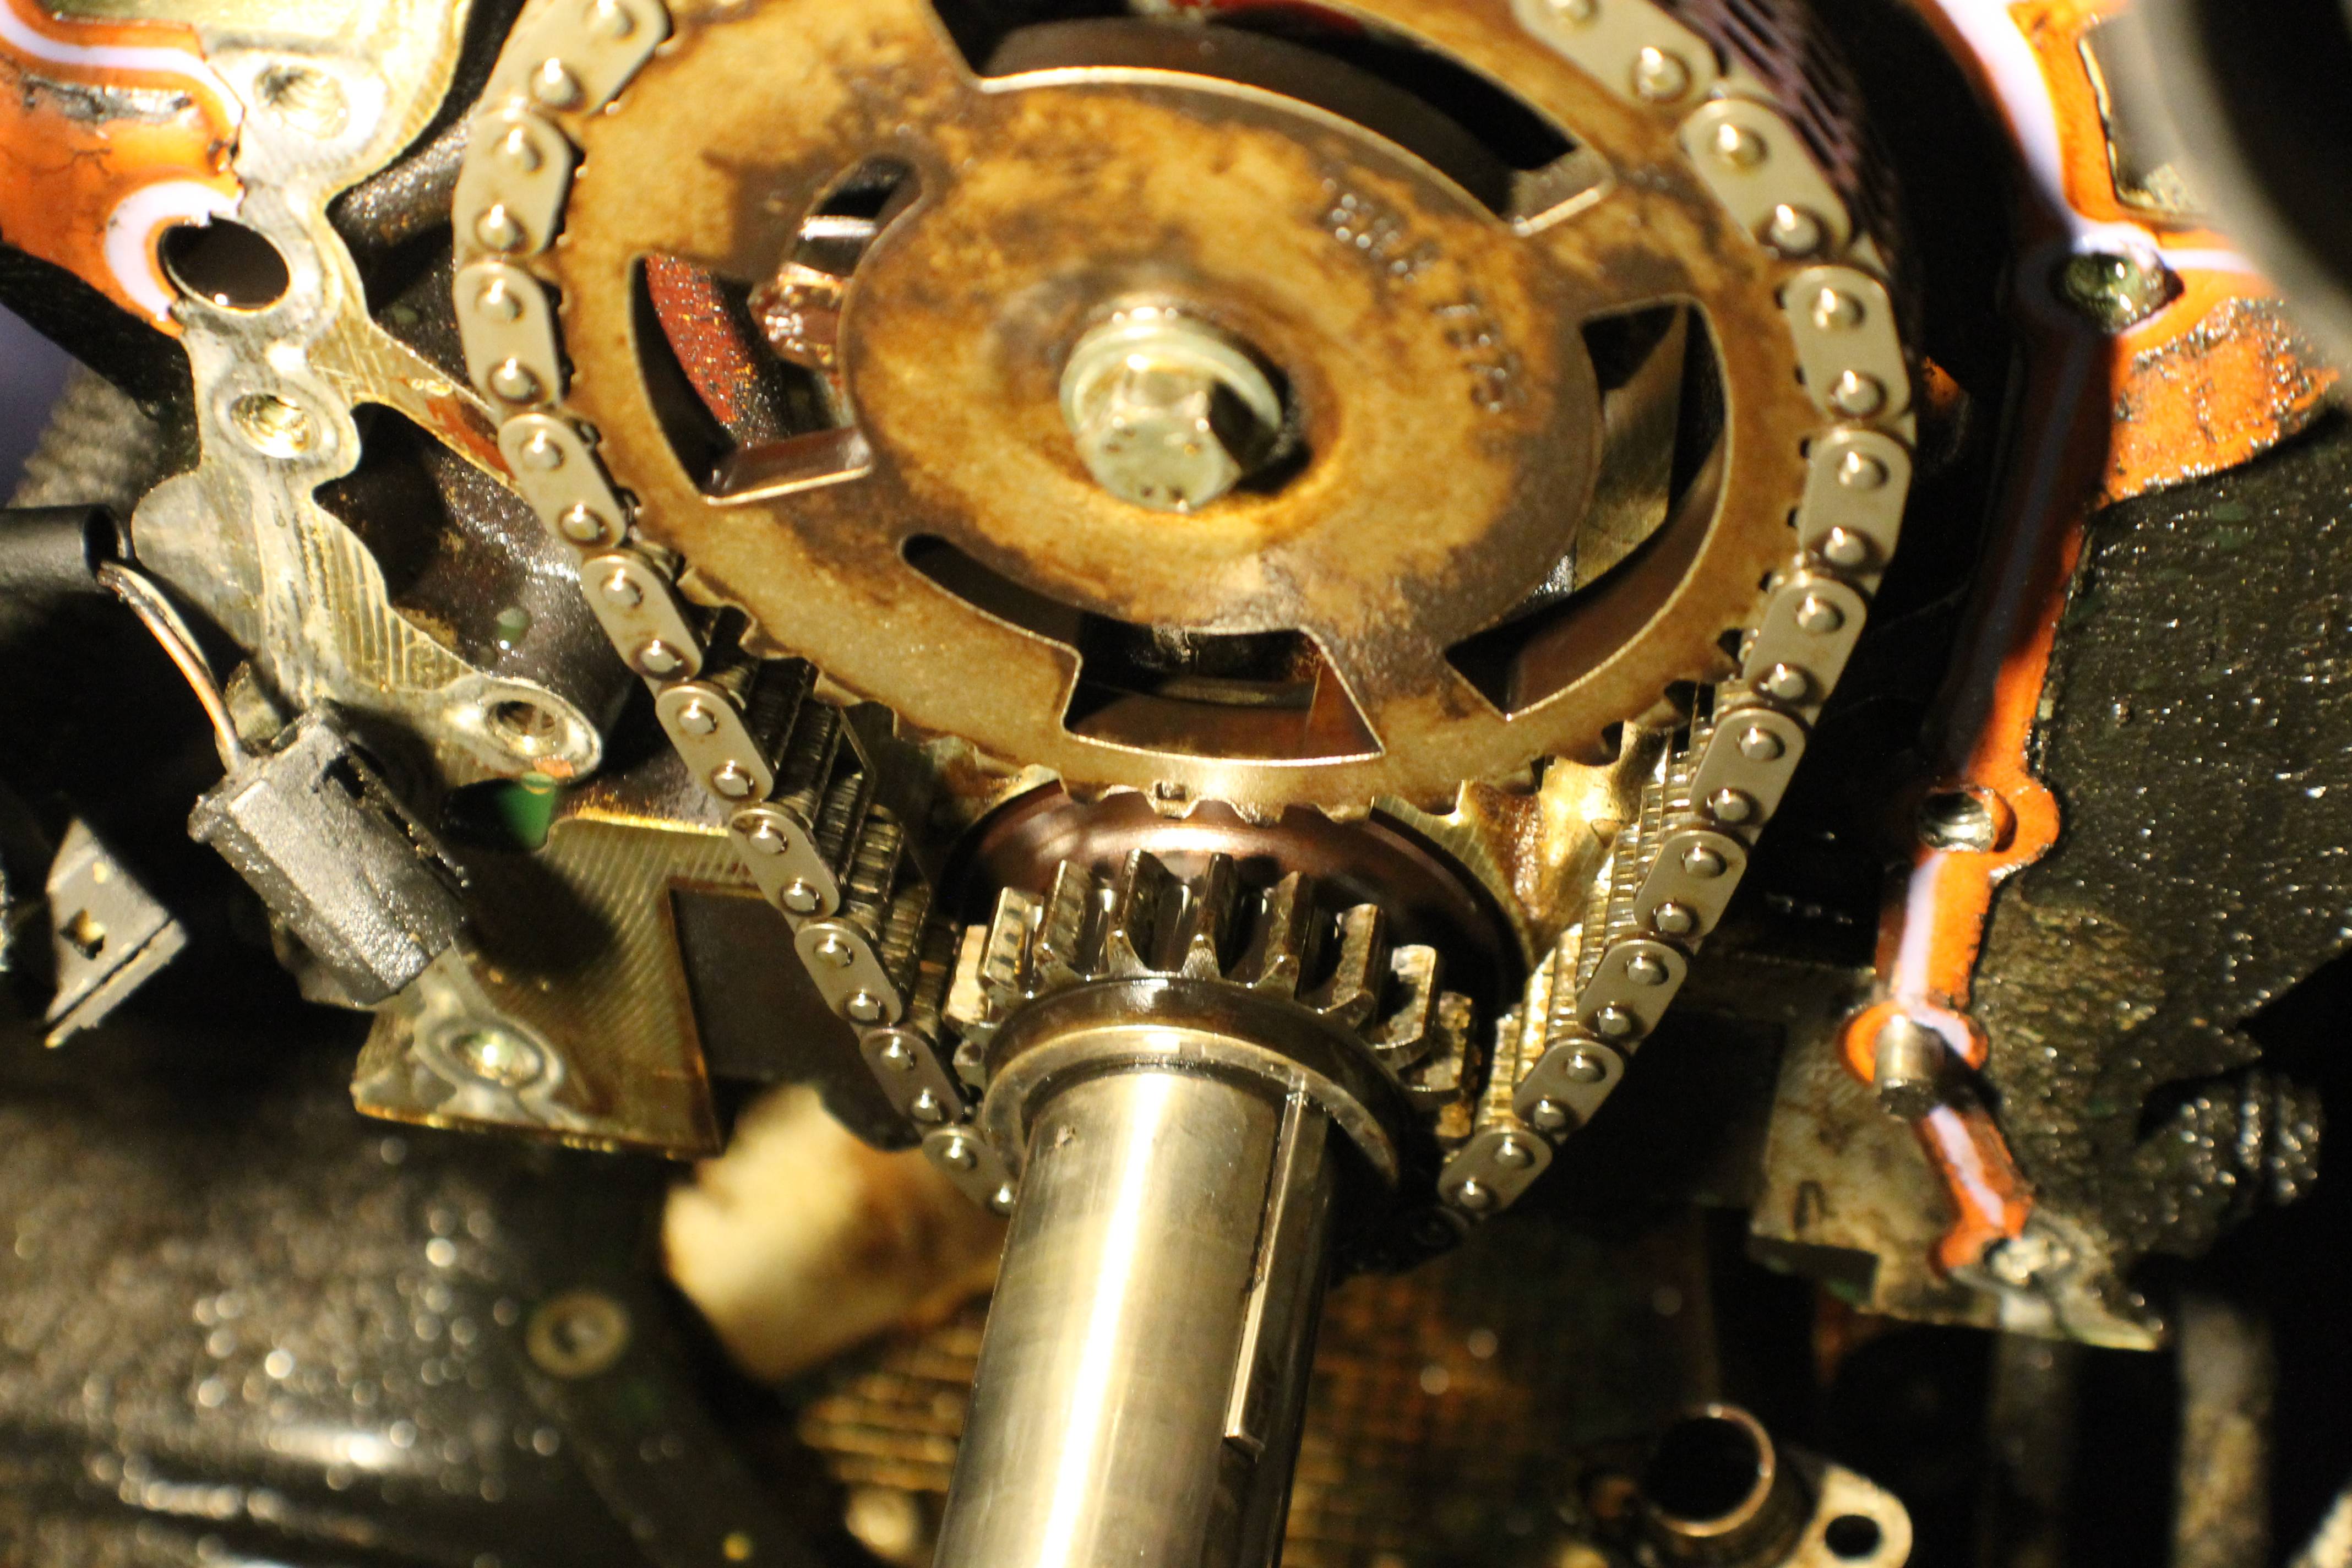
Once you've done that, I recommend taking a large crescent wrench and placing it on the crank bolt, laying between the power steering pump pulley and the power steering box, making sure that the crank and cam do not rotate while the cam bolt is being loosened. You will need a 1/2" impact socket for your breaker bar or a similarly sized metric socket in order to remove the cam bolt.
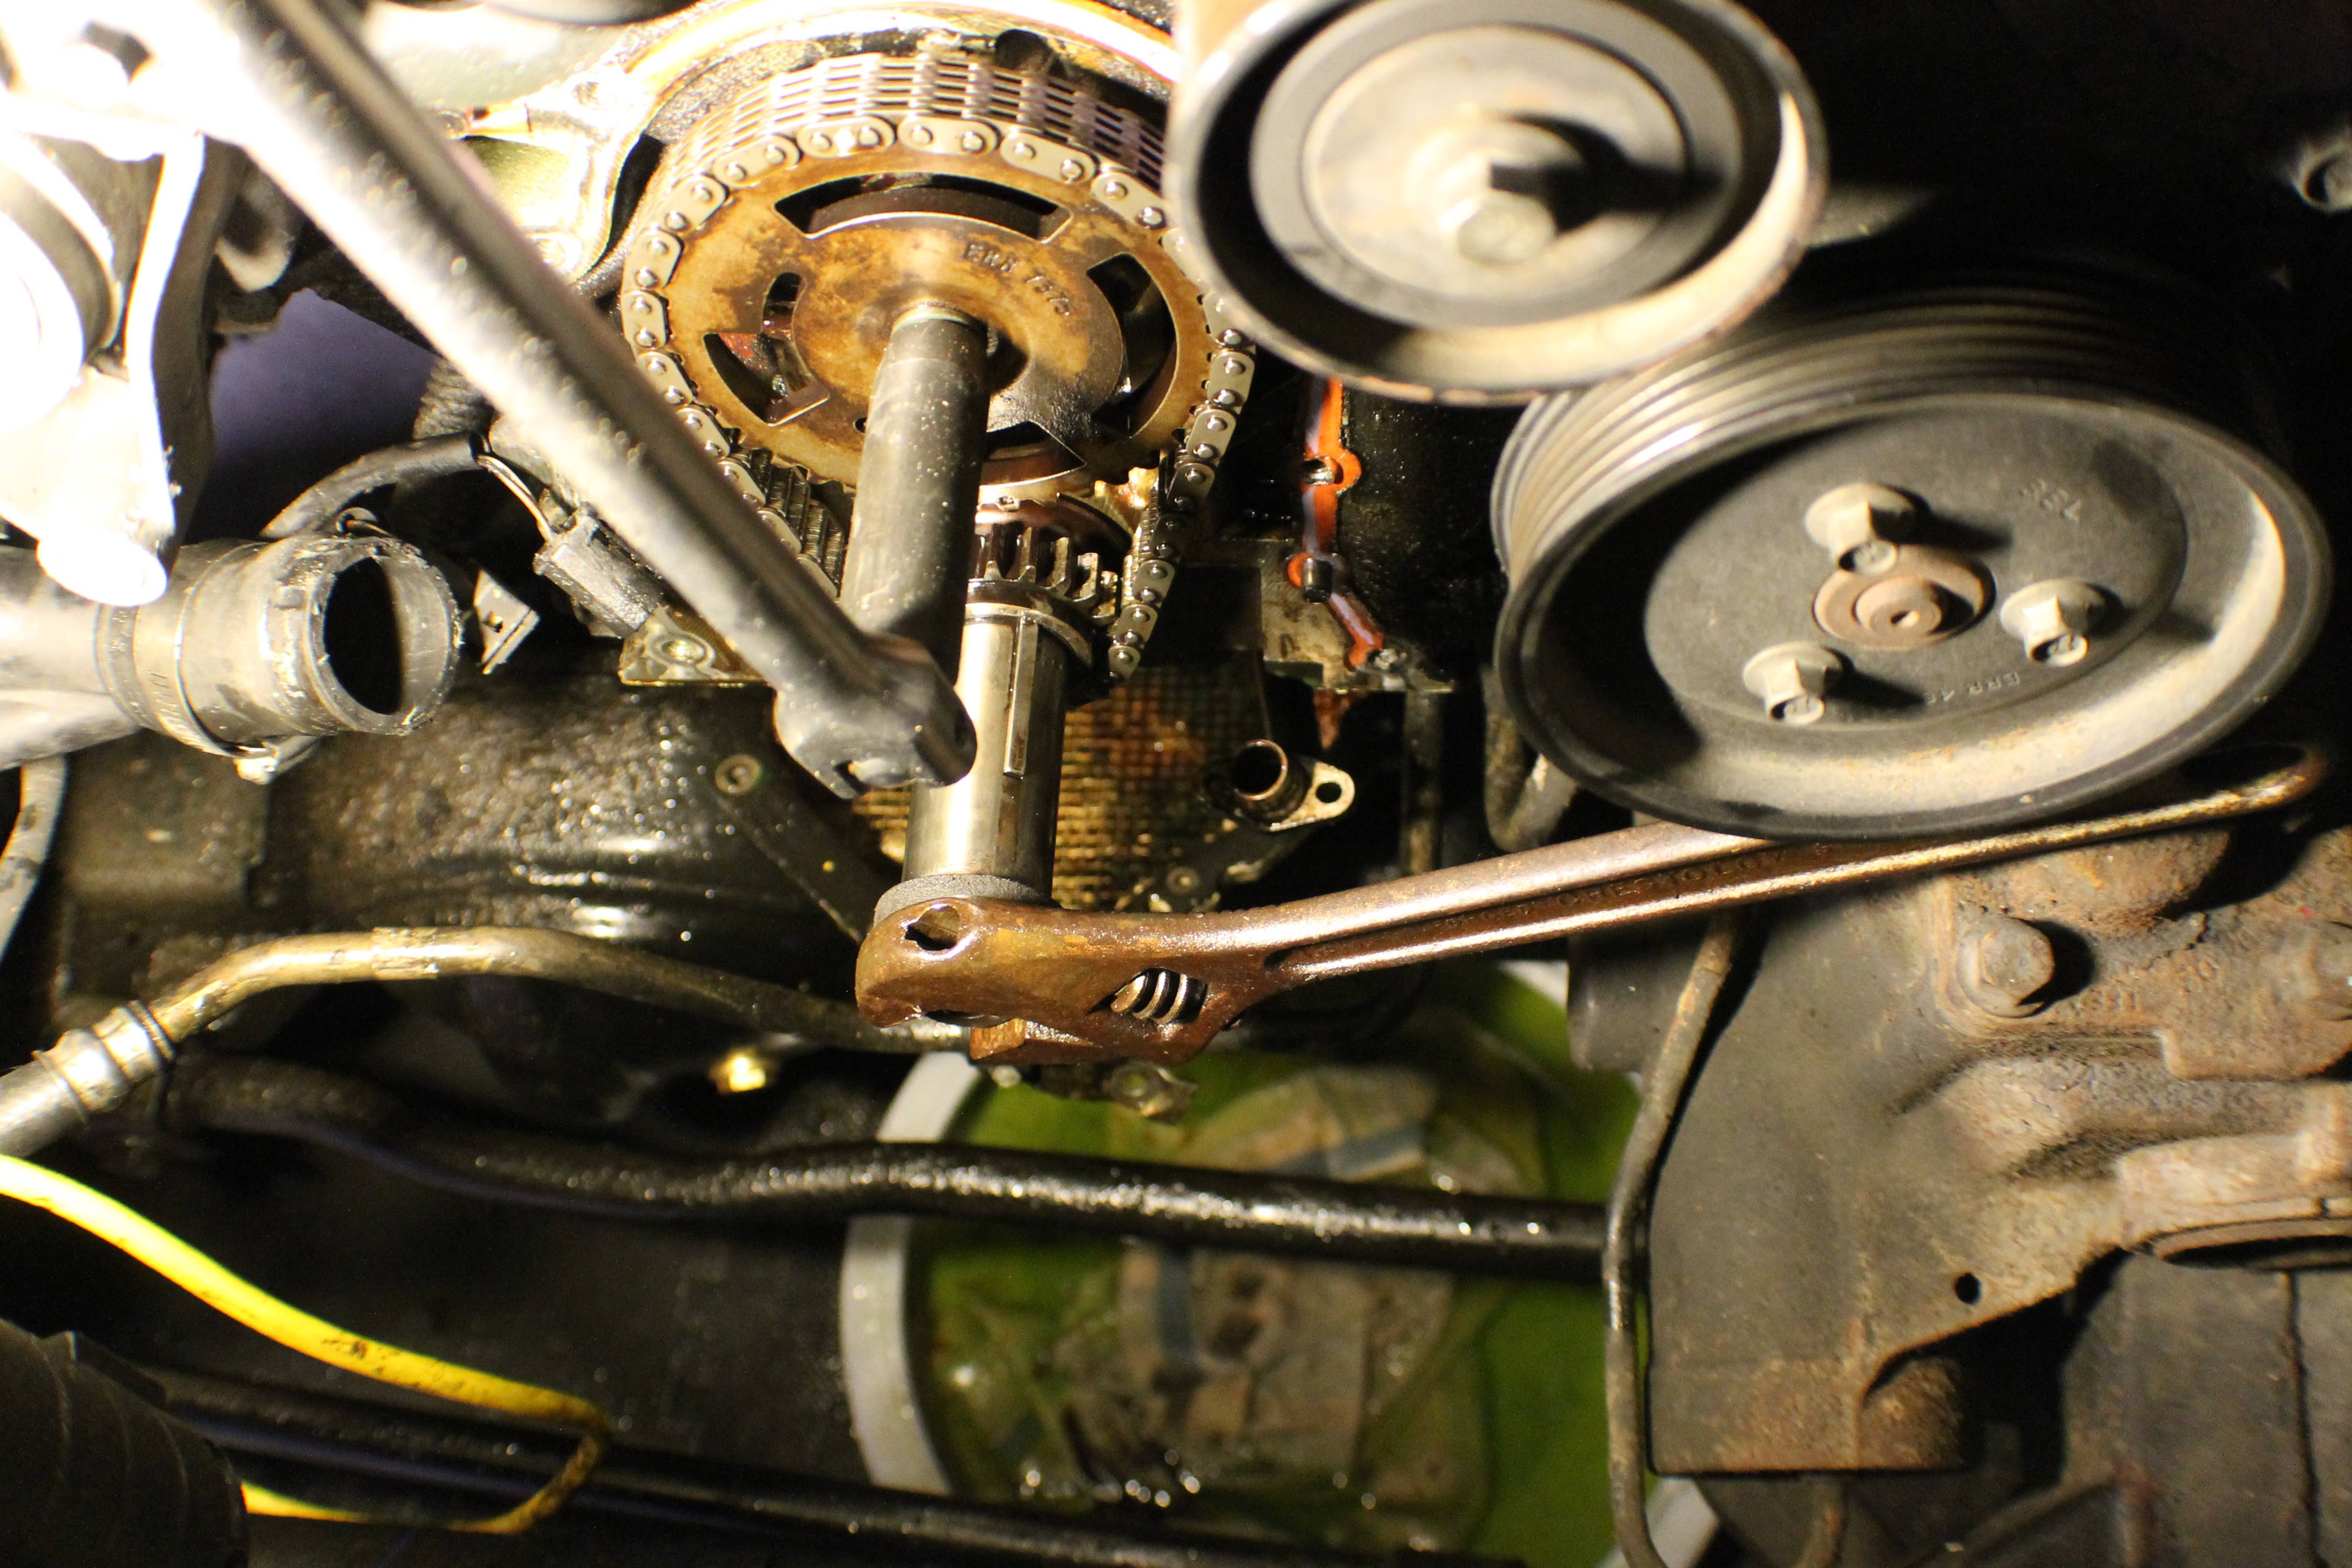
Once the bolt is removed, the top gear will slide off of the cam easily and the chain will lower right off of the crank gear, allowing the cam gear and chain to be removed.
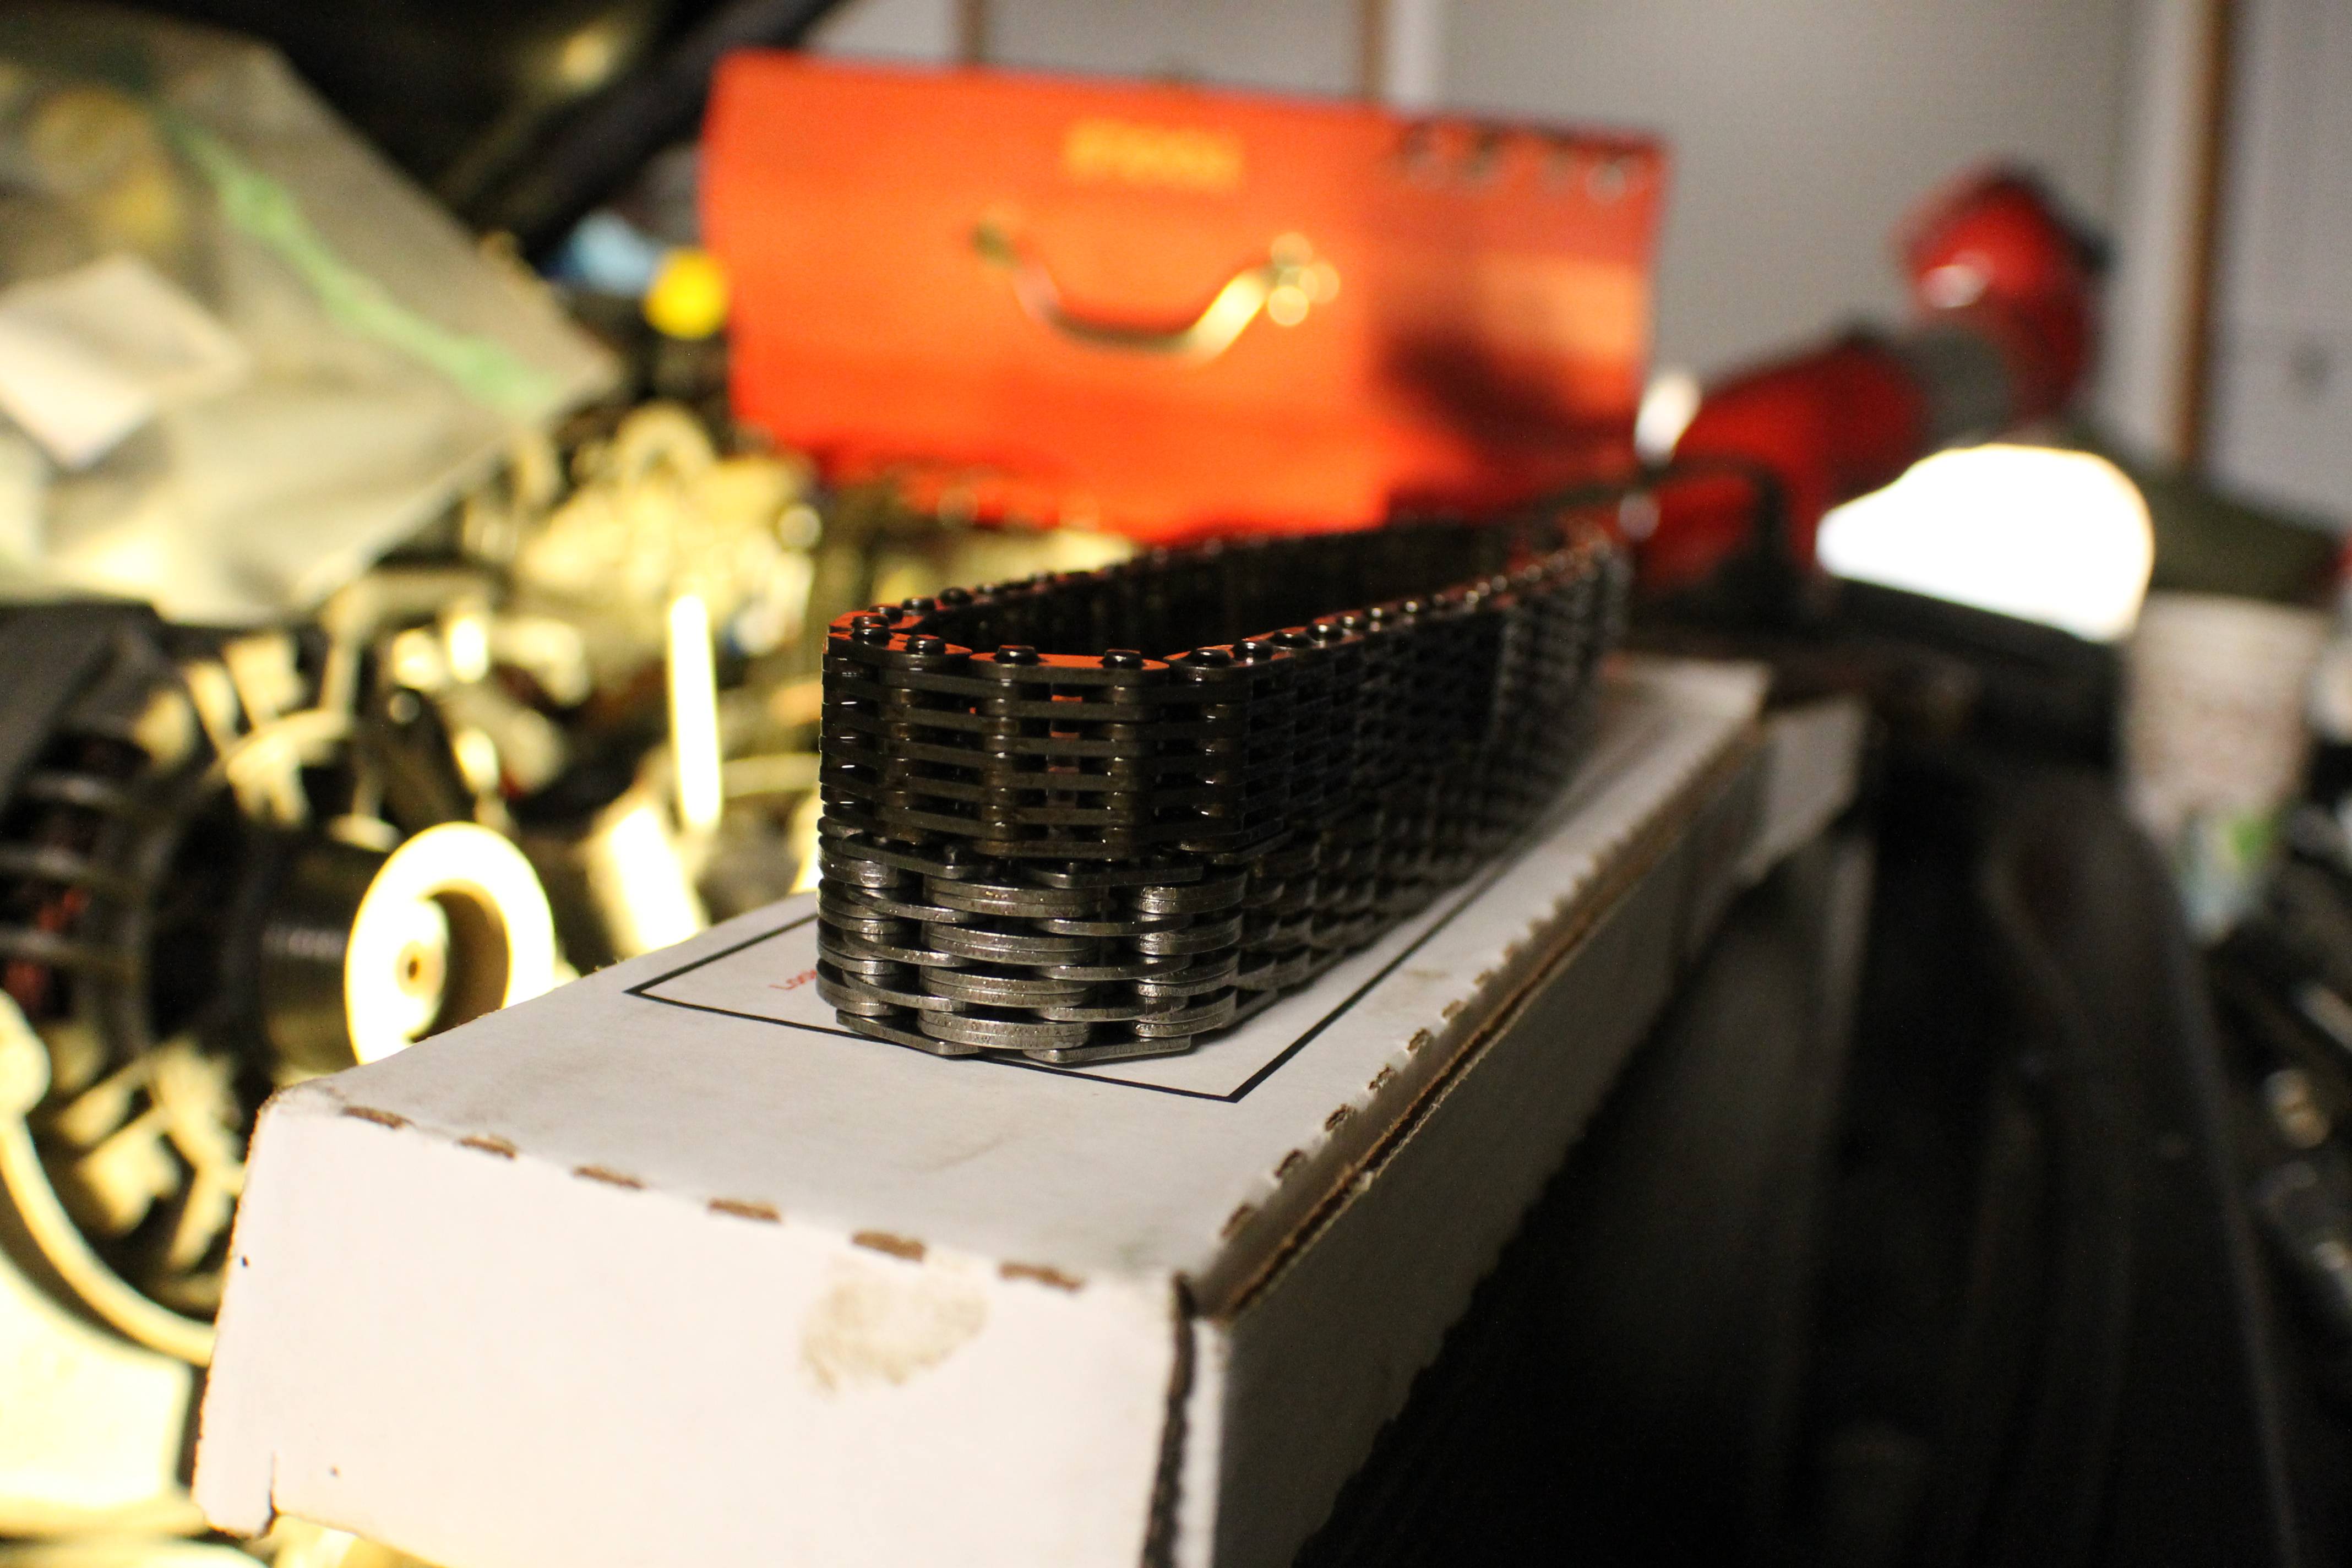
And here is a comparison between the new chain (bottom, in case you couldn't tell) and the old chain (top).
While you've got everything apart and removed, be sure to remove any remains from the front cover gasket.
The next step is to take the new front cover gasket and slather it with some black RTV on both the front and the back. This will help to make sure you don't get any future oil leaks.
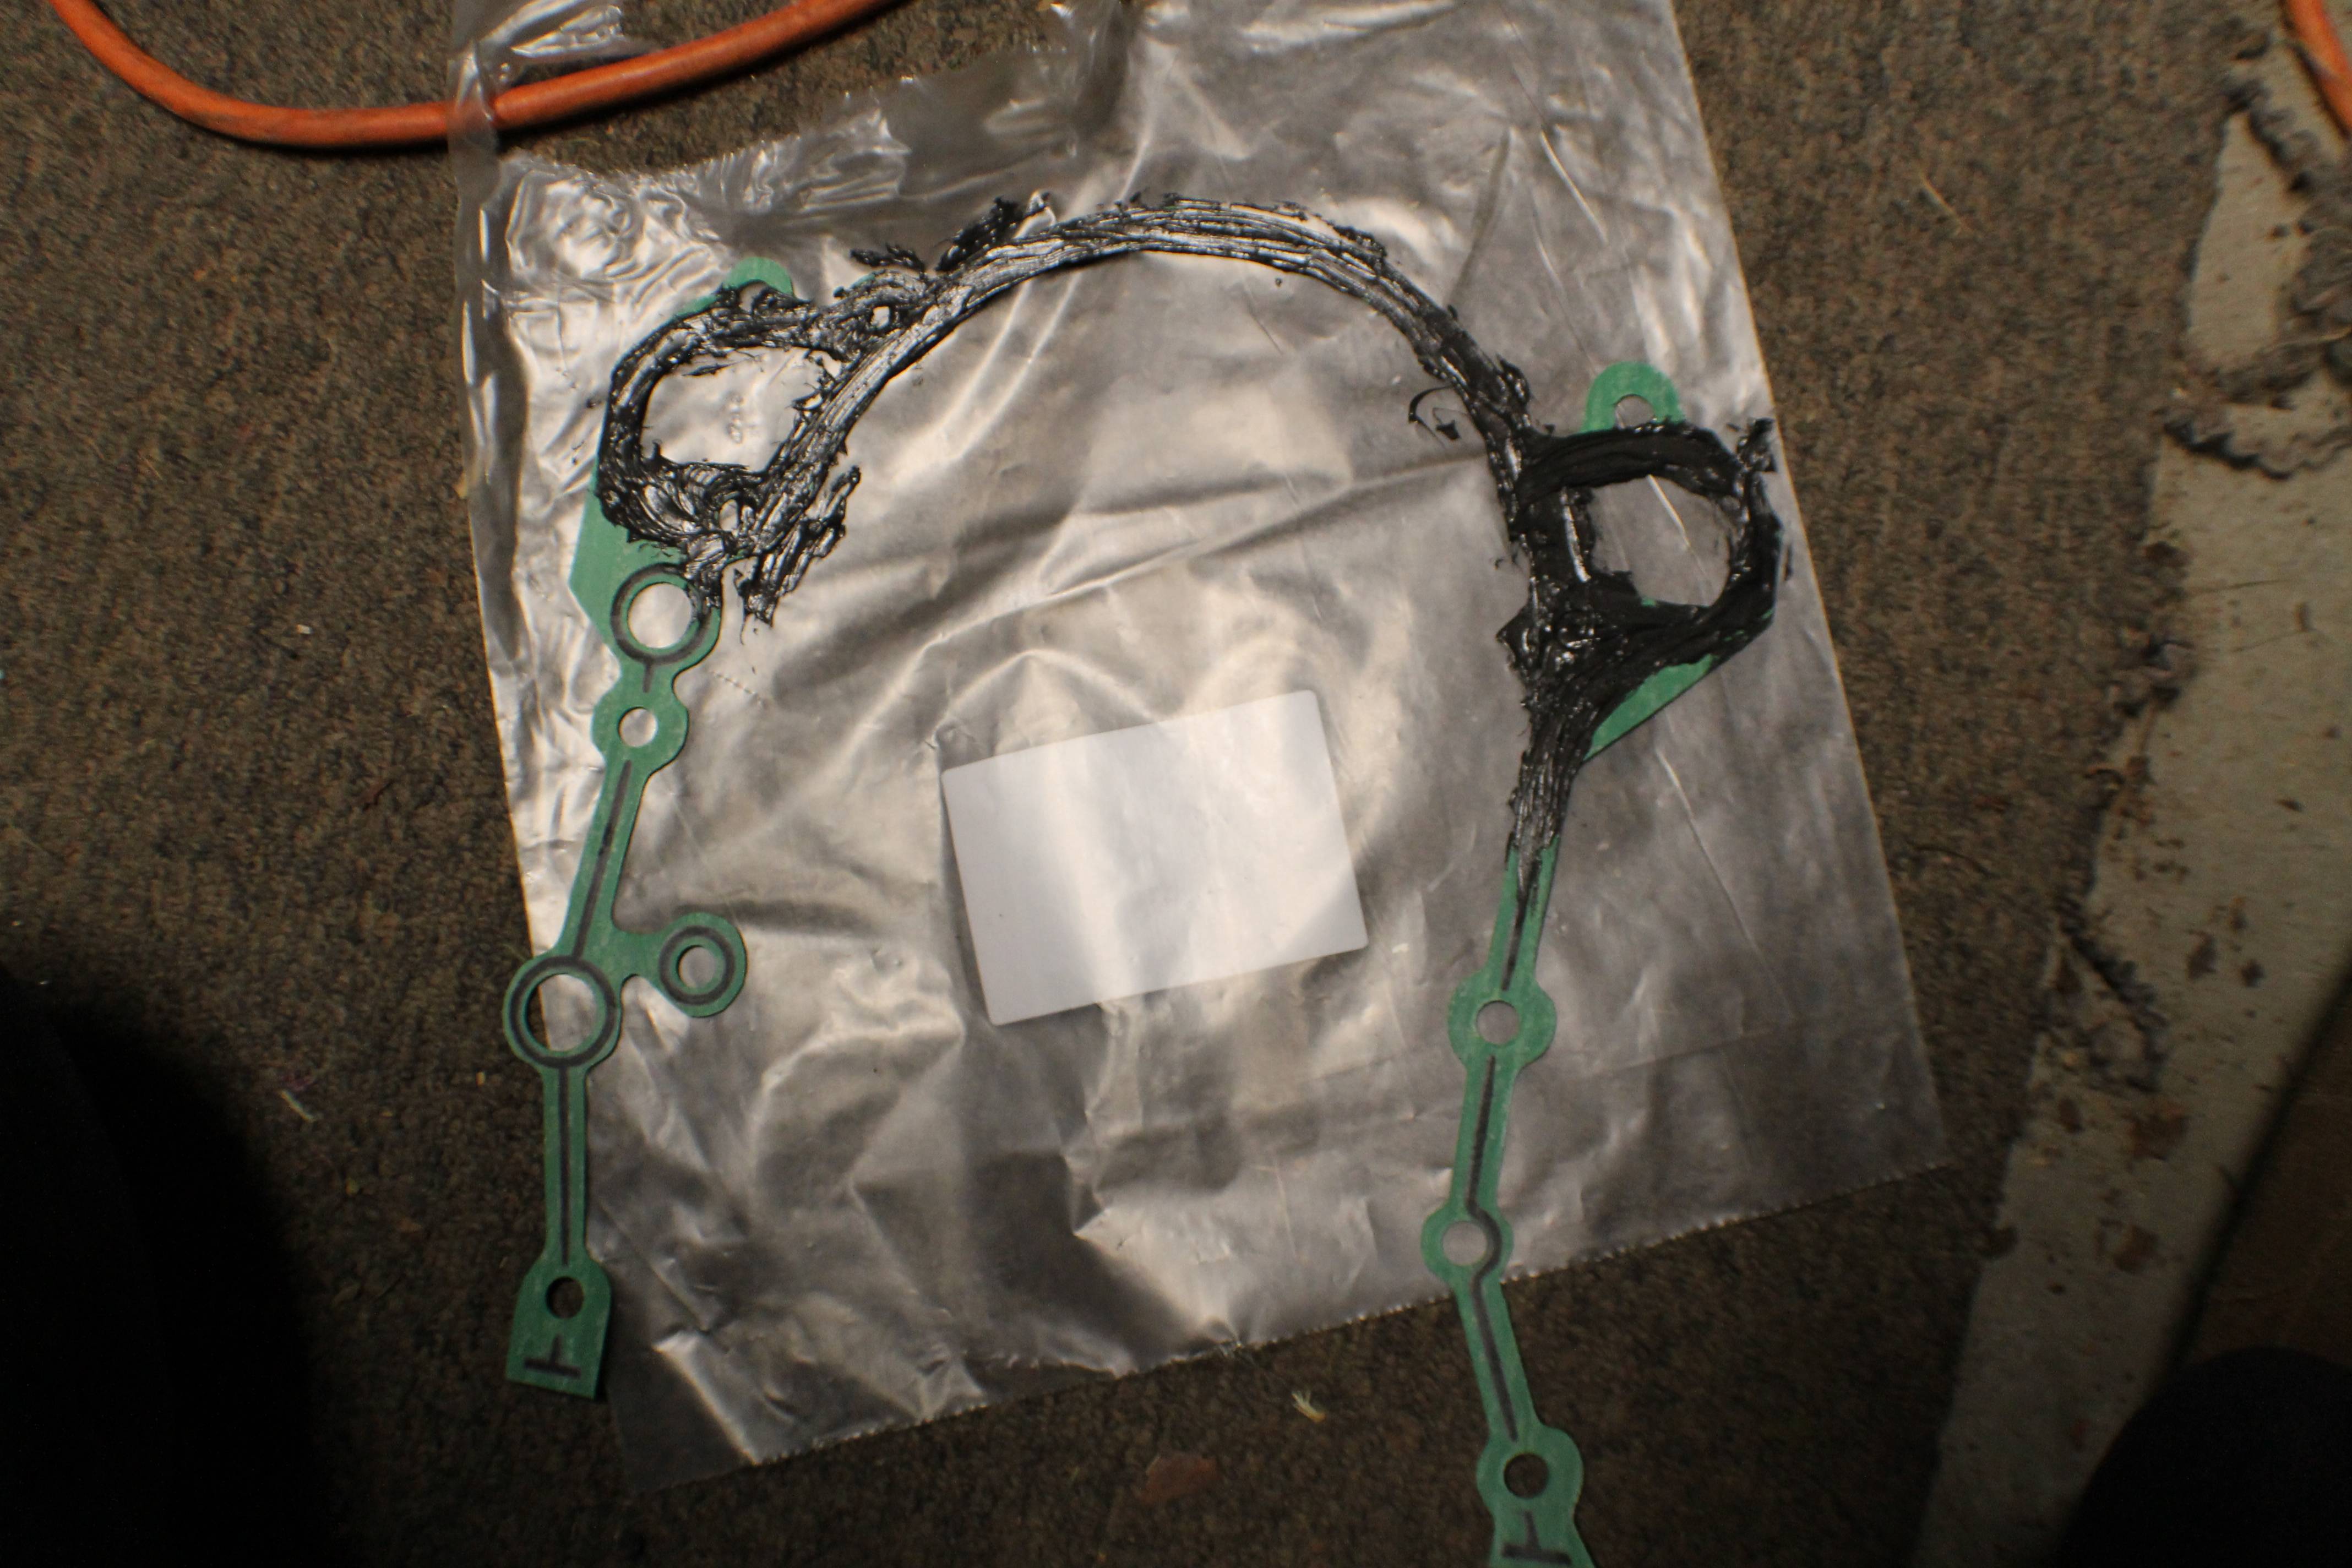
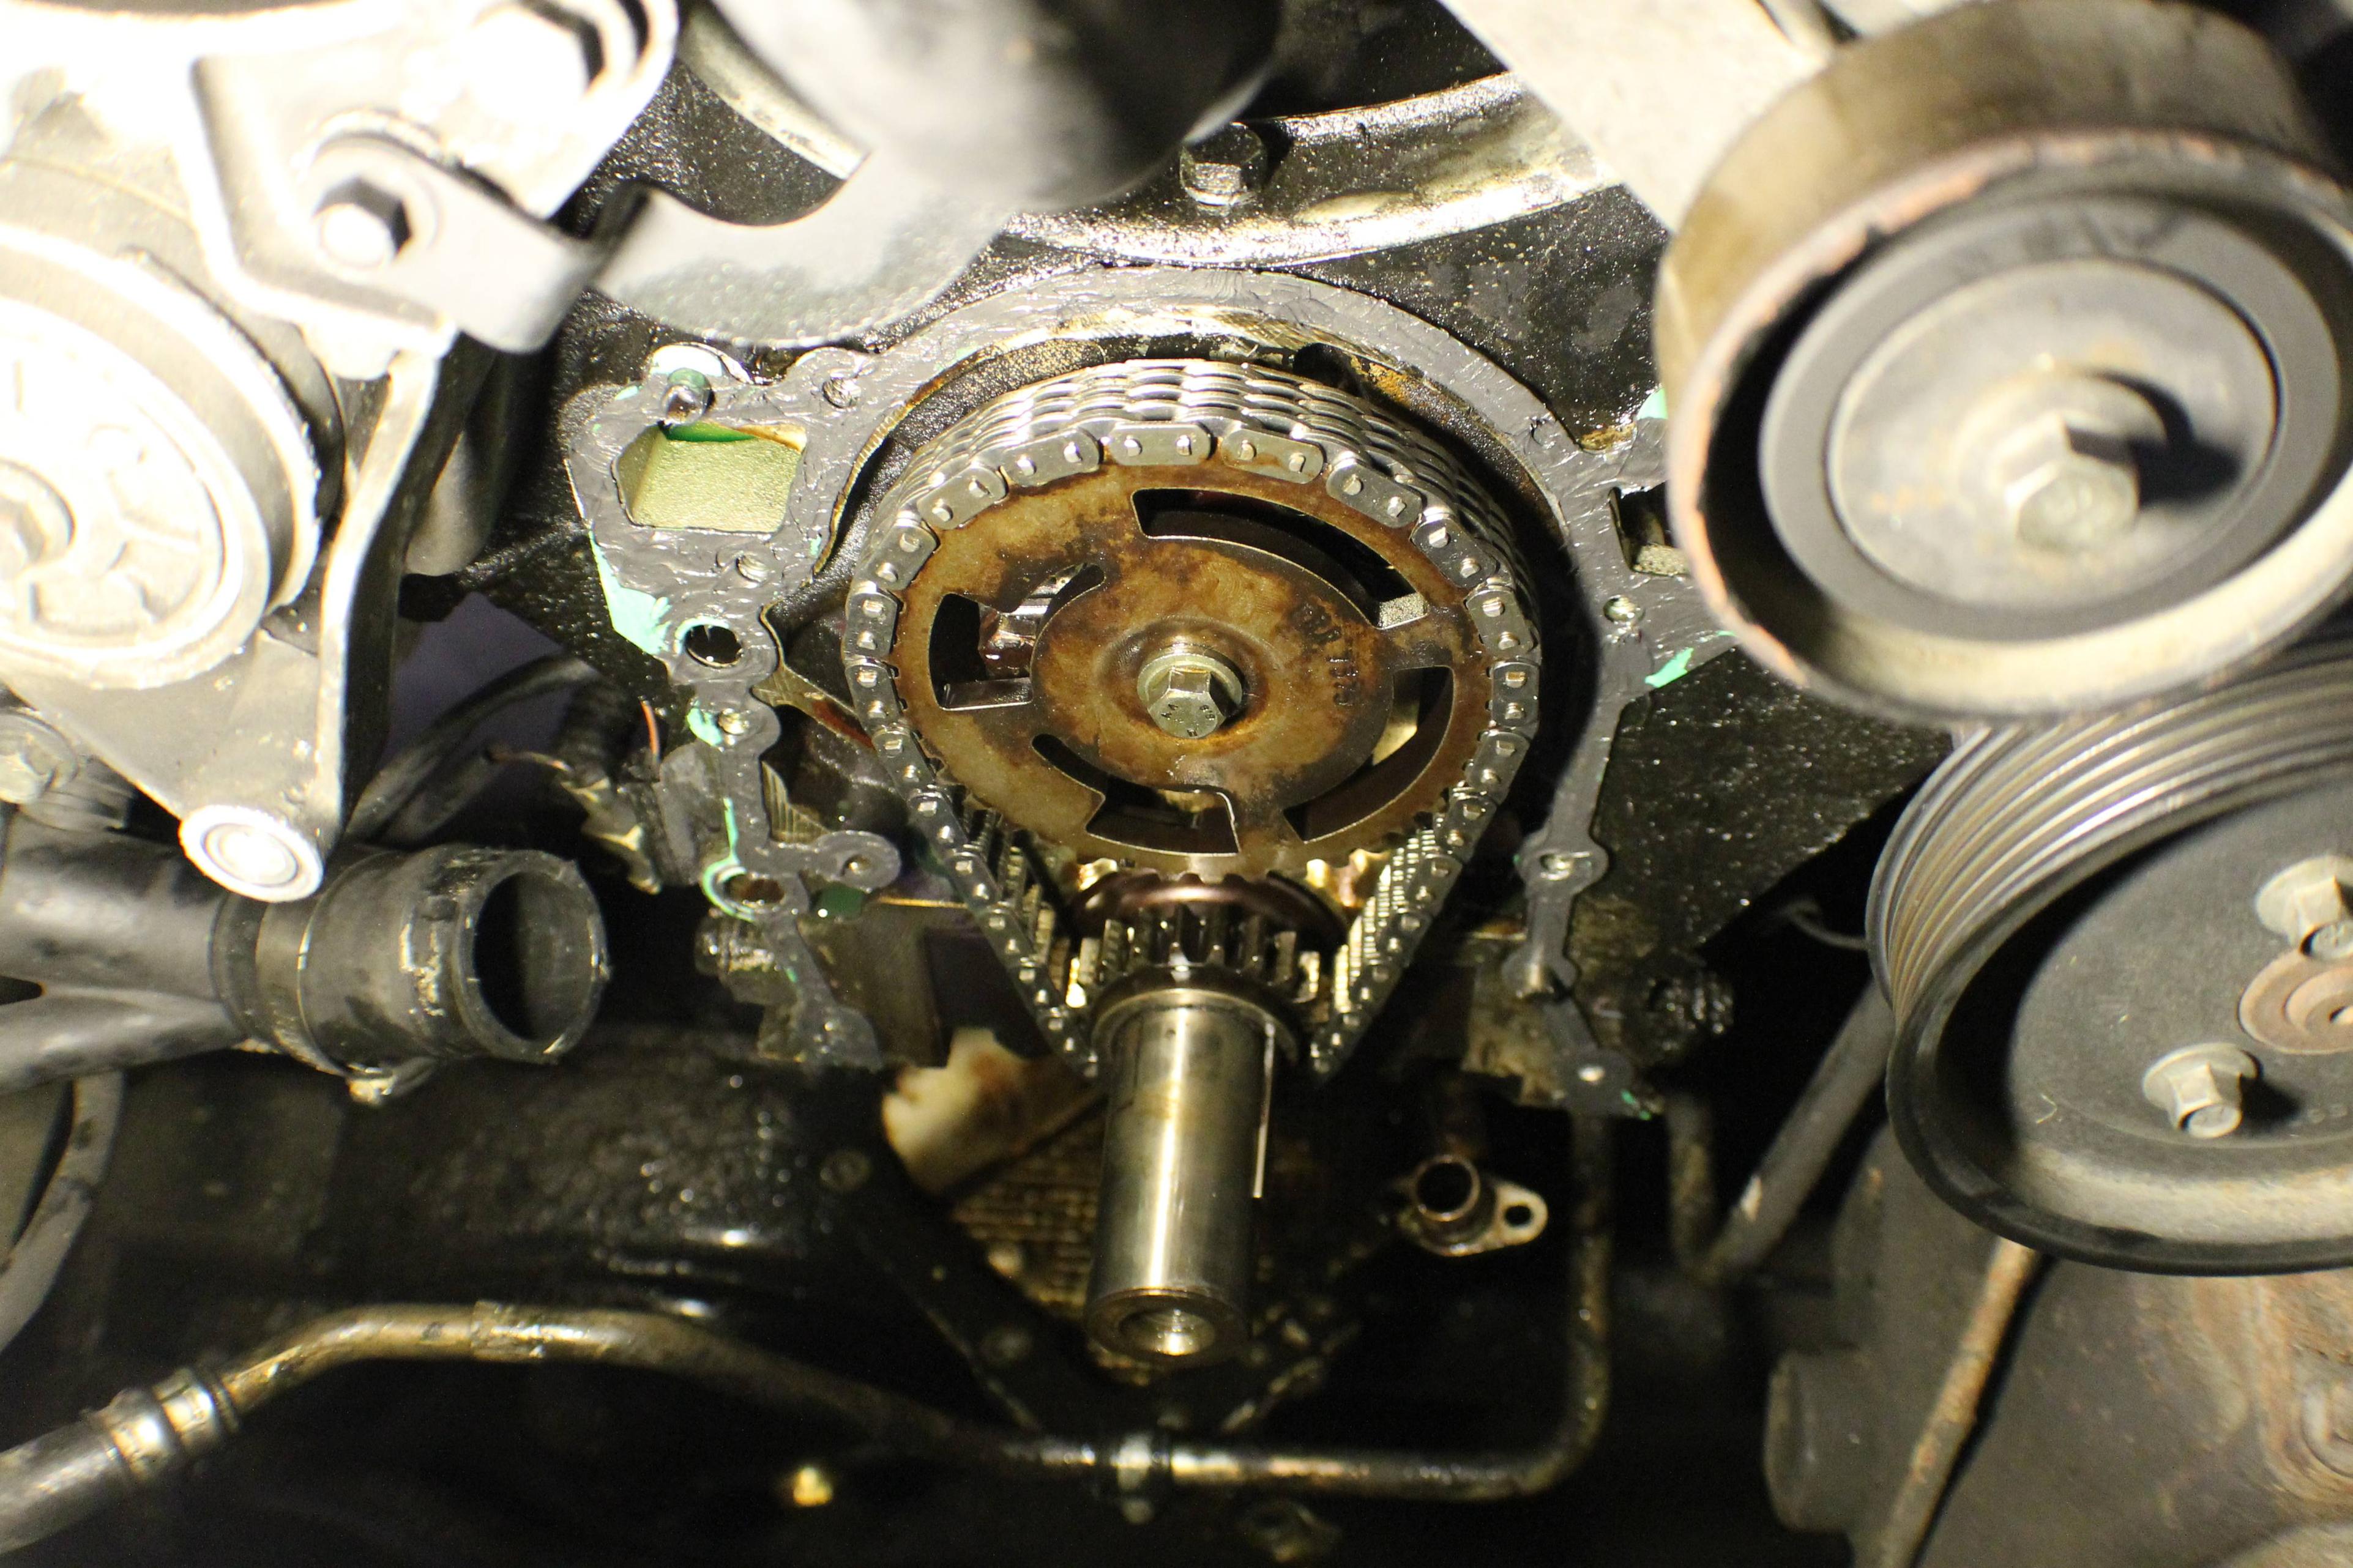
Once you've got the whole thing coated and all the remnants of the old gasket scraped off, go ahead and slide the new gasket onto the dowels where it's supposed to go. Also go ahead and reinstall the cam gear with the new timing chain, making completely sure that you keep the dots aligned how they should be. The gear may only want to slide part of the way onto the cam. That's fine, just hold it in place and put the cam bolt back in and then tighten it to slide the gear the rest of the way on. It should slide easily. If it does not and you face resistance, make sure you have the gear aligned correctly with the cam. If you don't you will damage it. Now add loctite (I forgot this step and had to disassemble and reassemble again) you can torque the cam bolt down to 36 lb/ft. I didn't have a torque wrench, so I used my breaker bar and did the math. On a 2 foot breaker bar, 18 lbs of pressure on the end of the bar would torque the bolt to the required 36 lb/ft. Not the best way to do it, but it works well enough.
Now go and get your front cover. By hand, rotate the oil pump so it will slide onto the woodruff key on the crank. Gently slide the oil pump over the crank, once it is as far back as it will go, rotate it slightly back and forth until the pump slides over the woodruff key. If it will not, then remove the cover and rotate the pump closer to where it needs to be and try again.
Now, reconnect the two sensors that you disconnected when you removed the front cover. Don't forget that the oil pressure sensor has a retaining pin that will slide in to make sure the harness does not slide off of the sensor.
Last edited by Alex_M; Dec 14, 2016 at 03:41 PM.
Thread Starter
|
Camel Trophy
Joined: Aug 2014
Posts: 4,743
Likes: 985
From: Southwestern Virginia
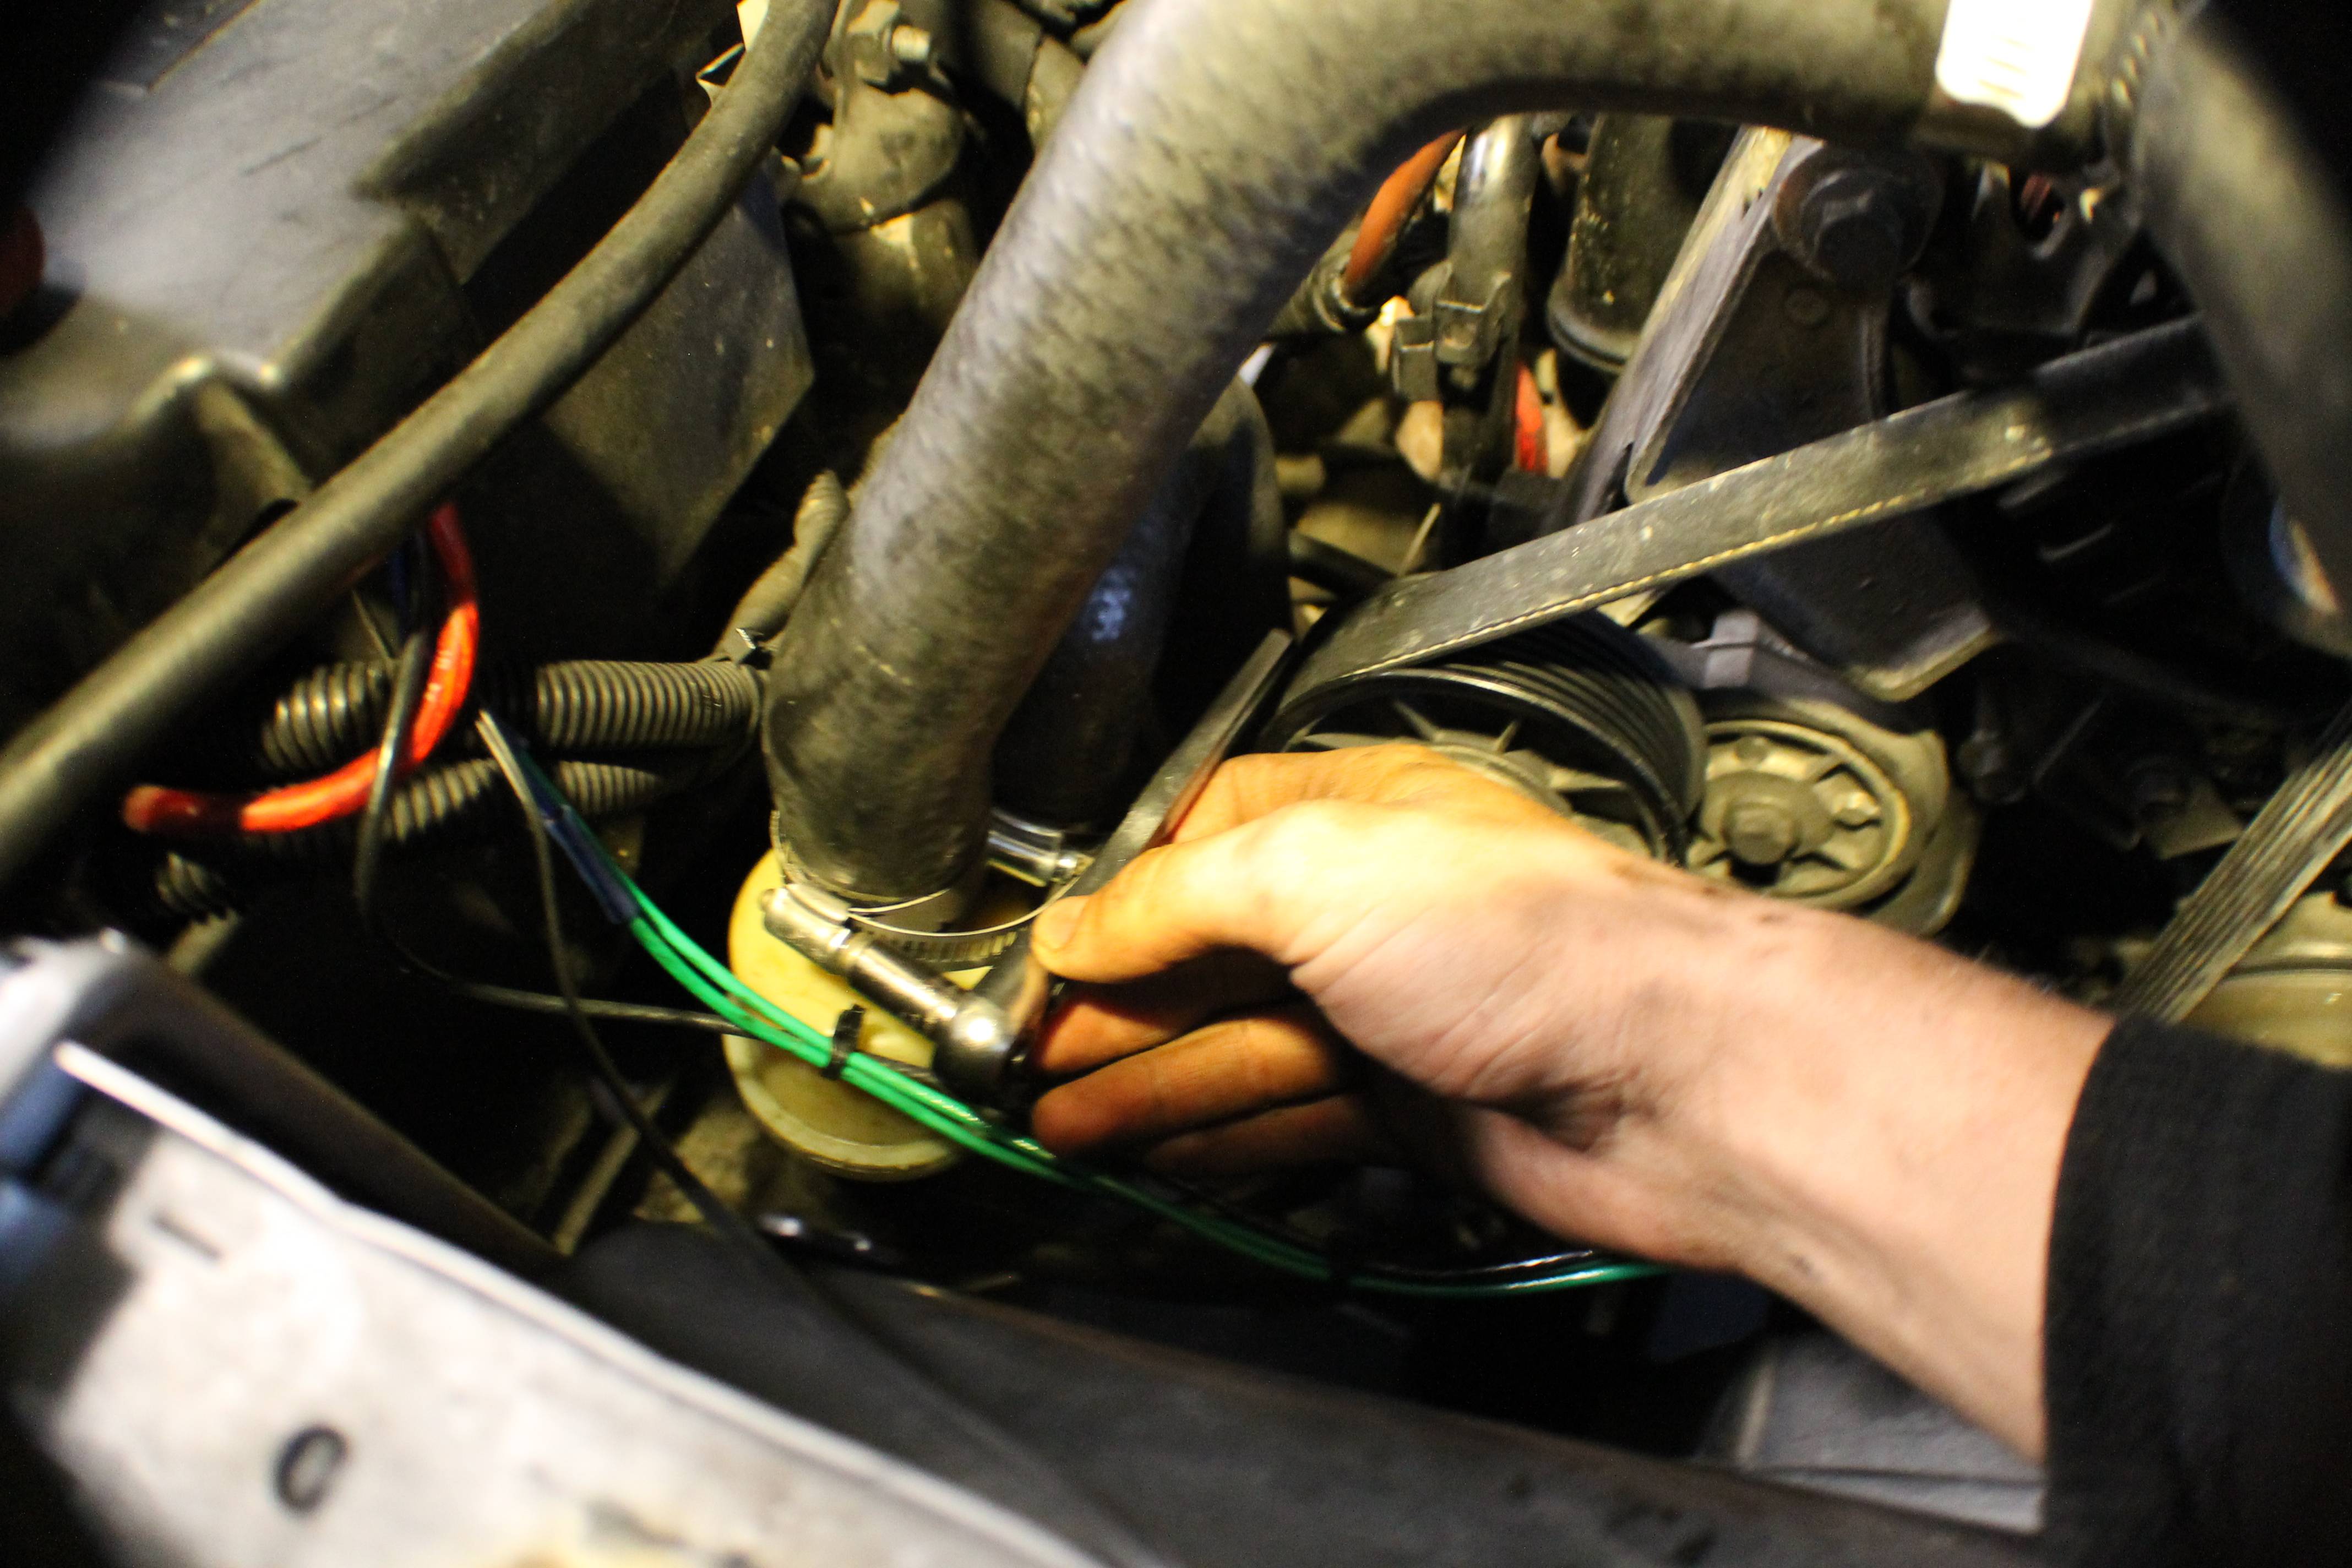
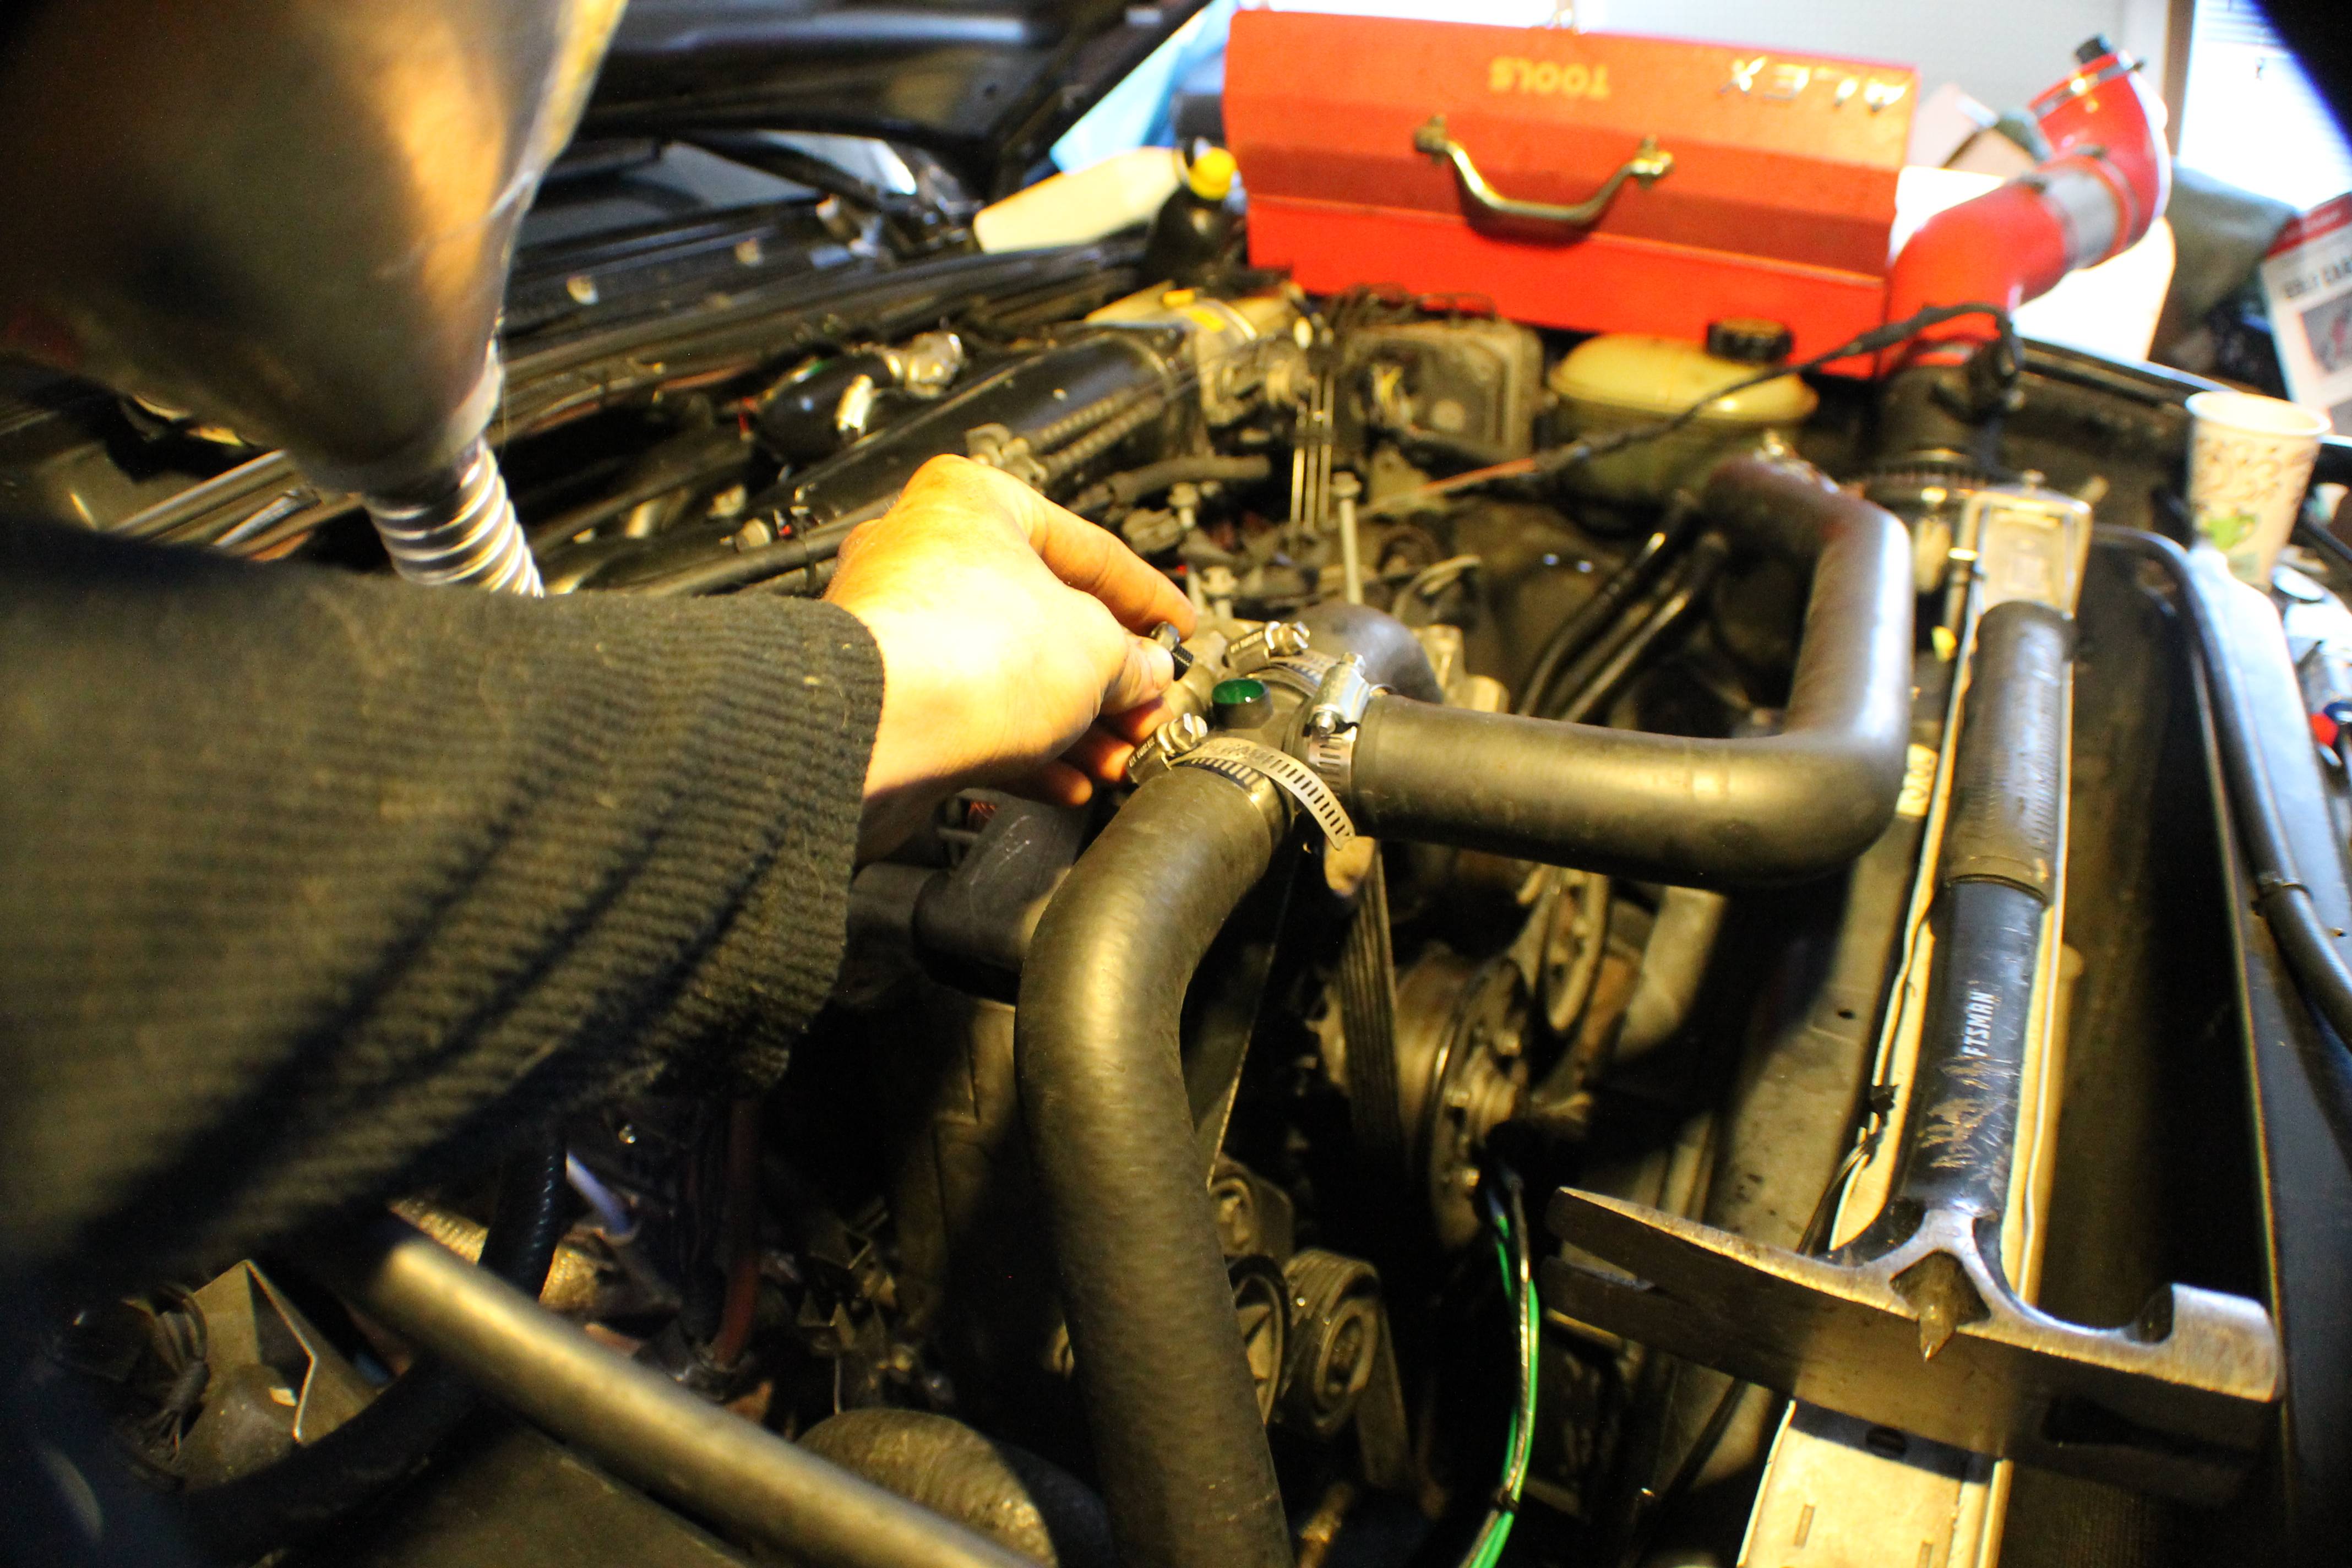
Now, once you've got those reconnected you need to reattach the coolant hose to your water pump and tighten it down using one of your nifty new band clamps.
Once that's done, you can begin tightening down all 9 of your front cover bolts. These are really supposed to be torqued to 16 lb/ft according to the RAVE, but since it's not a major mechanical moving part I just guestimated it. That's not exactly the "right" way to go about it, but it's never caused me any trouble before. If you do the same, just be sure not to overtighten them and strip the holes.
Then you can reinstall your idler pulley.
Now you can reinstall your water pump pulley the same way you originally removed it. Some blue loctite would be a good idea here since it had loctite from the factory.
Now it's time to reinstall your harmonic balancer. Carefully slide it onto the crank and then spin it until you find where it can slide back onto the woodruff key. When that's done thread the bolt into the crank by hand as far as you can. Now, the best course of action here is to take a 2x4 and wedge it between the engine block and one of the crank counterweights underneath the engine. This will prevent the crank from turning when you tighten down the bolt. I also, as you can see, placed a pair of vice grips tightly on the harmonic balancer. I do not recommend doing that because I slightly damaged my harmonic balancer. Now, again, I don't have a torque wrench. Well, not one that works. I did the math again and found that you need to place 100 lbs of pressure on the end of your 2 foot breaker bar in order for it to be torqued to it's spec of 200 lb/ft. I really cranked the hell out of it, gave it my all. A torque wrench is recommended, but if you can't get your hands on one then I don't believe one is absolutely required if you can get it close enough using this method. That said, you do so at your own risk and I take no responsibility if you use this method.
Once you've done that, go ahead and replace your serpentine belt. This is probably the easiest time to do that. Do not follow my belt routing pattern unless you have deleted your AC system as I have.
Now reinstall your thermostat and the hose connecting it to the bottom of the radiator.
Once you get that put back you'll want to sit your fan back in. If you've done/are doing the electric fan mod then the fan should sit right down into the factory fan shroud retainers on the bottom. You'll then want to slide the top retainers back in through the fins and slide their ends back on the front just how they were before. Then hook the electrical plug back into it.
Once you do that you'll want to reinstall the remainder of your coolant hoses. Be sure to replace ALL of the poorly designed factory clamps while you've got it all apart.
Now, back under the truck we go armed with the same tools as before. We should start by replacing the oil pickup tube very first. Slide it back in its little hole on the front cover and tighten it down, not too tight.
I kinda forgot to take pictures of this, but it's pretty simple so you should be able to do it no problem. Go ahead and remove the oil pan gasket from the pan. This shouldn't be too hard at all. Take your new gasket and, just like the front cover gasket, cover the whole thing with black RTV. Place the new gasket on the pan, hold the pan up in place, and bolt it back in. It may require some maneuvering with the front cover studs, but I have faith in you. I've found that the easiest way to do this is to hold it up with your left hand while you put a nut on one of the studs and start to thread in one of the bolts that go into the bell housing. I then recommend doing the two main rear upward pointing bolts first so that when it is tightened in place, it is not placed so that you have a hard time getting a socket on those two bolt heads which is how mine was. The rest of the bolts you can do in pretty much any order you want. Then, once you've got the pan bolted all the way in, replace all three oil cooler line holders.
Once the pan is back on, all of the hard stuff is done. Put your new oil filter on while you're under there. Do not do your oil filter more than hand tight. I use both hands, but do not tighten it as tight as I can. Just tighten it tight enough for it to stay on.

Thread Starter
|
Camel Trophy
Joined: Aug 2014
Posts: 4,743
Likes: 985
From: Southwestern Virginia
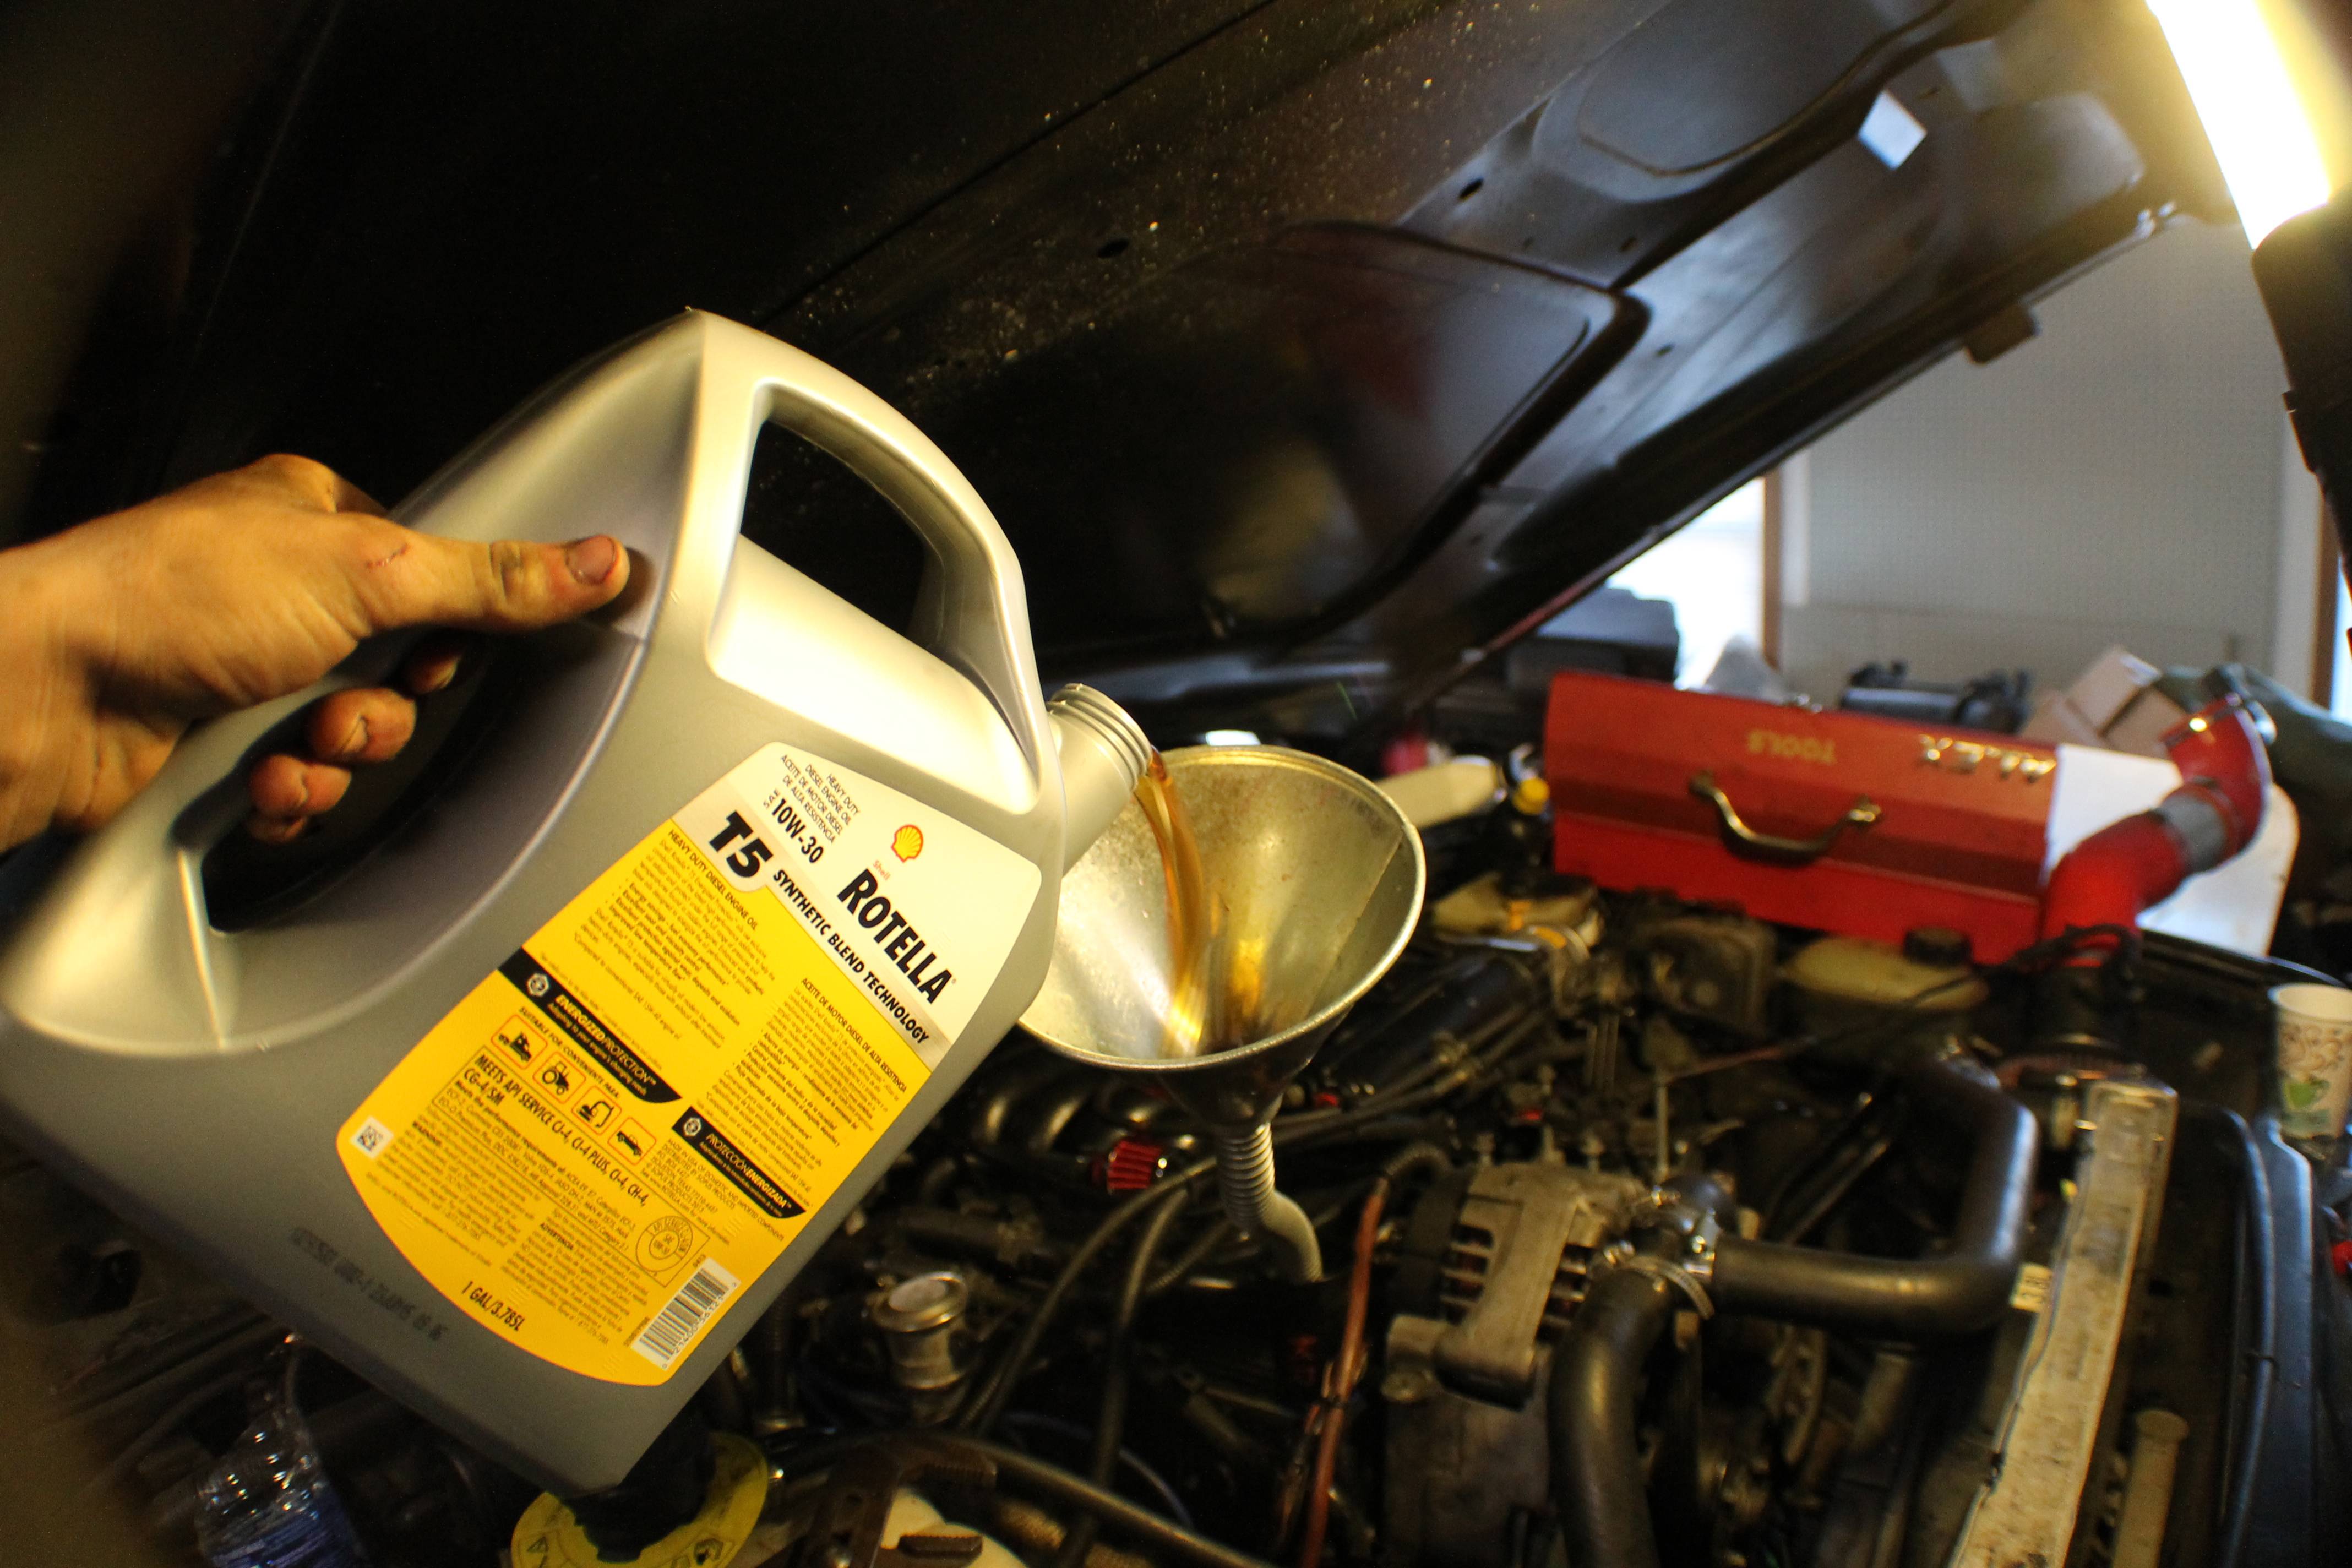
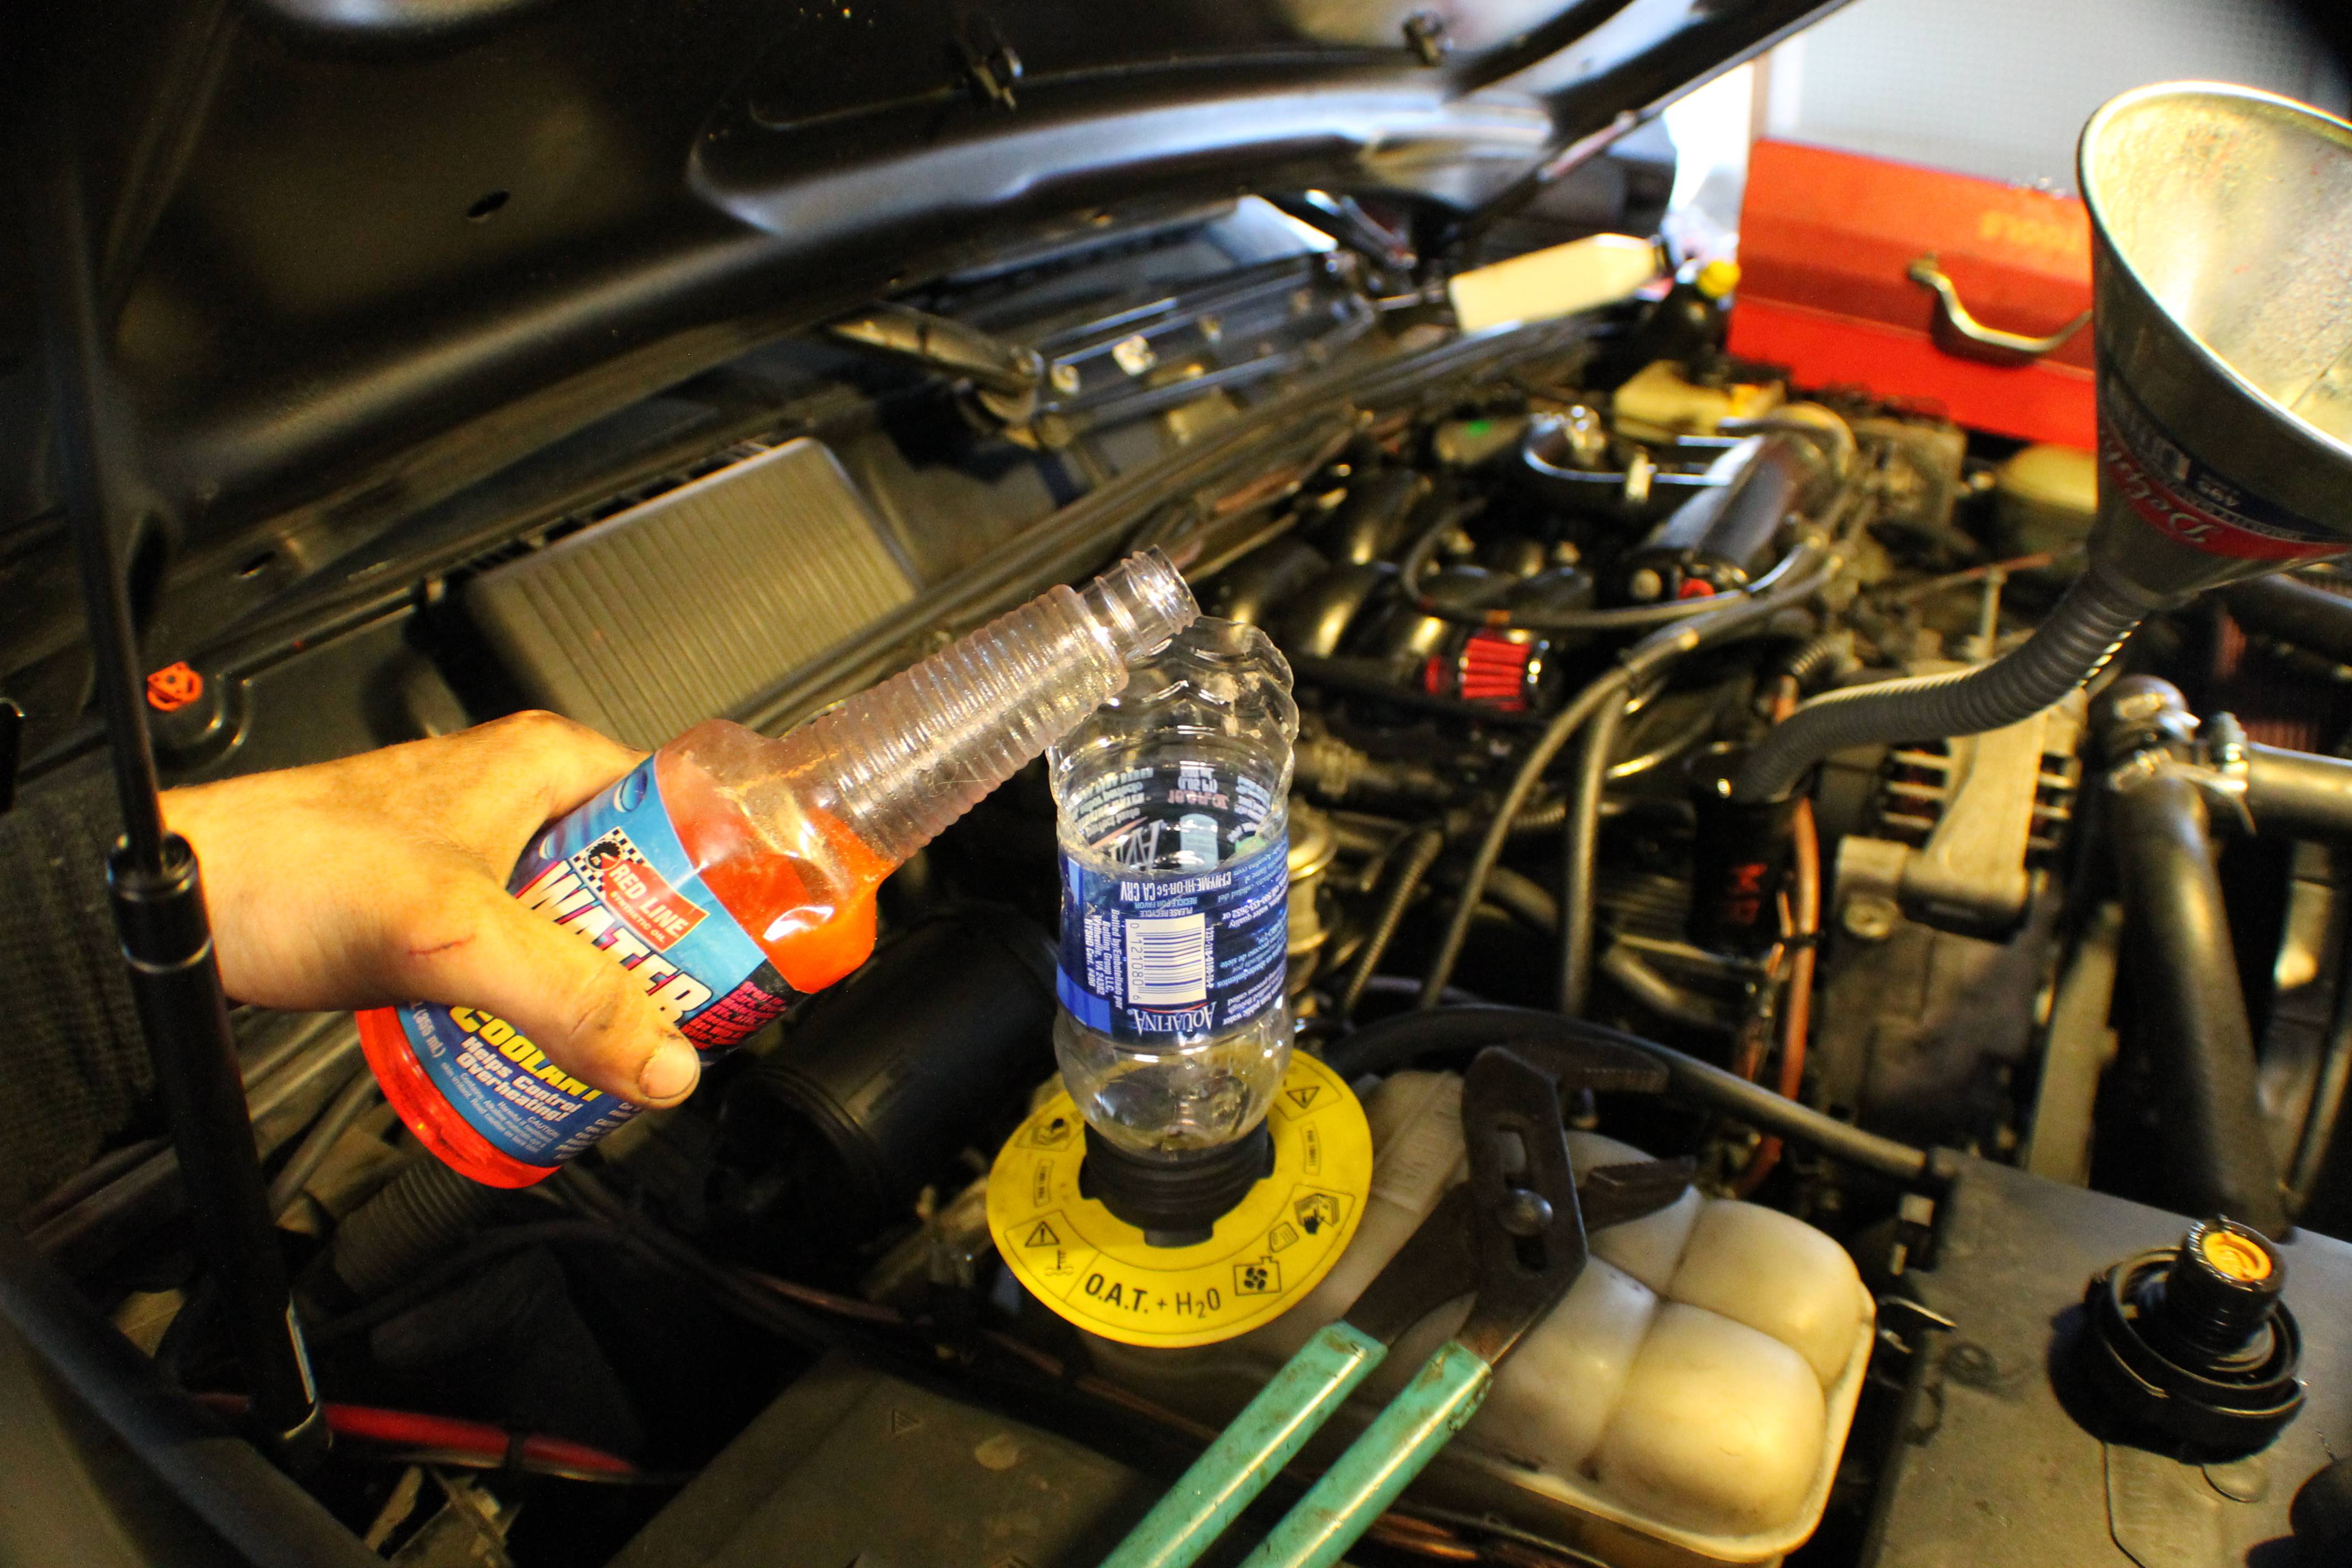
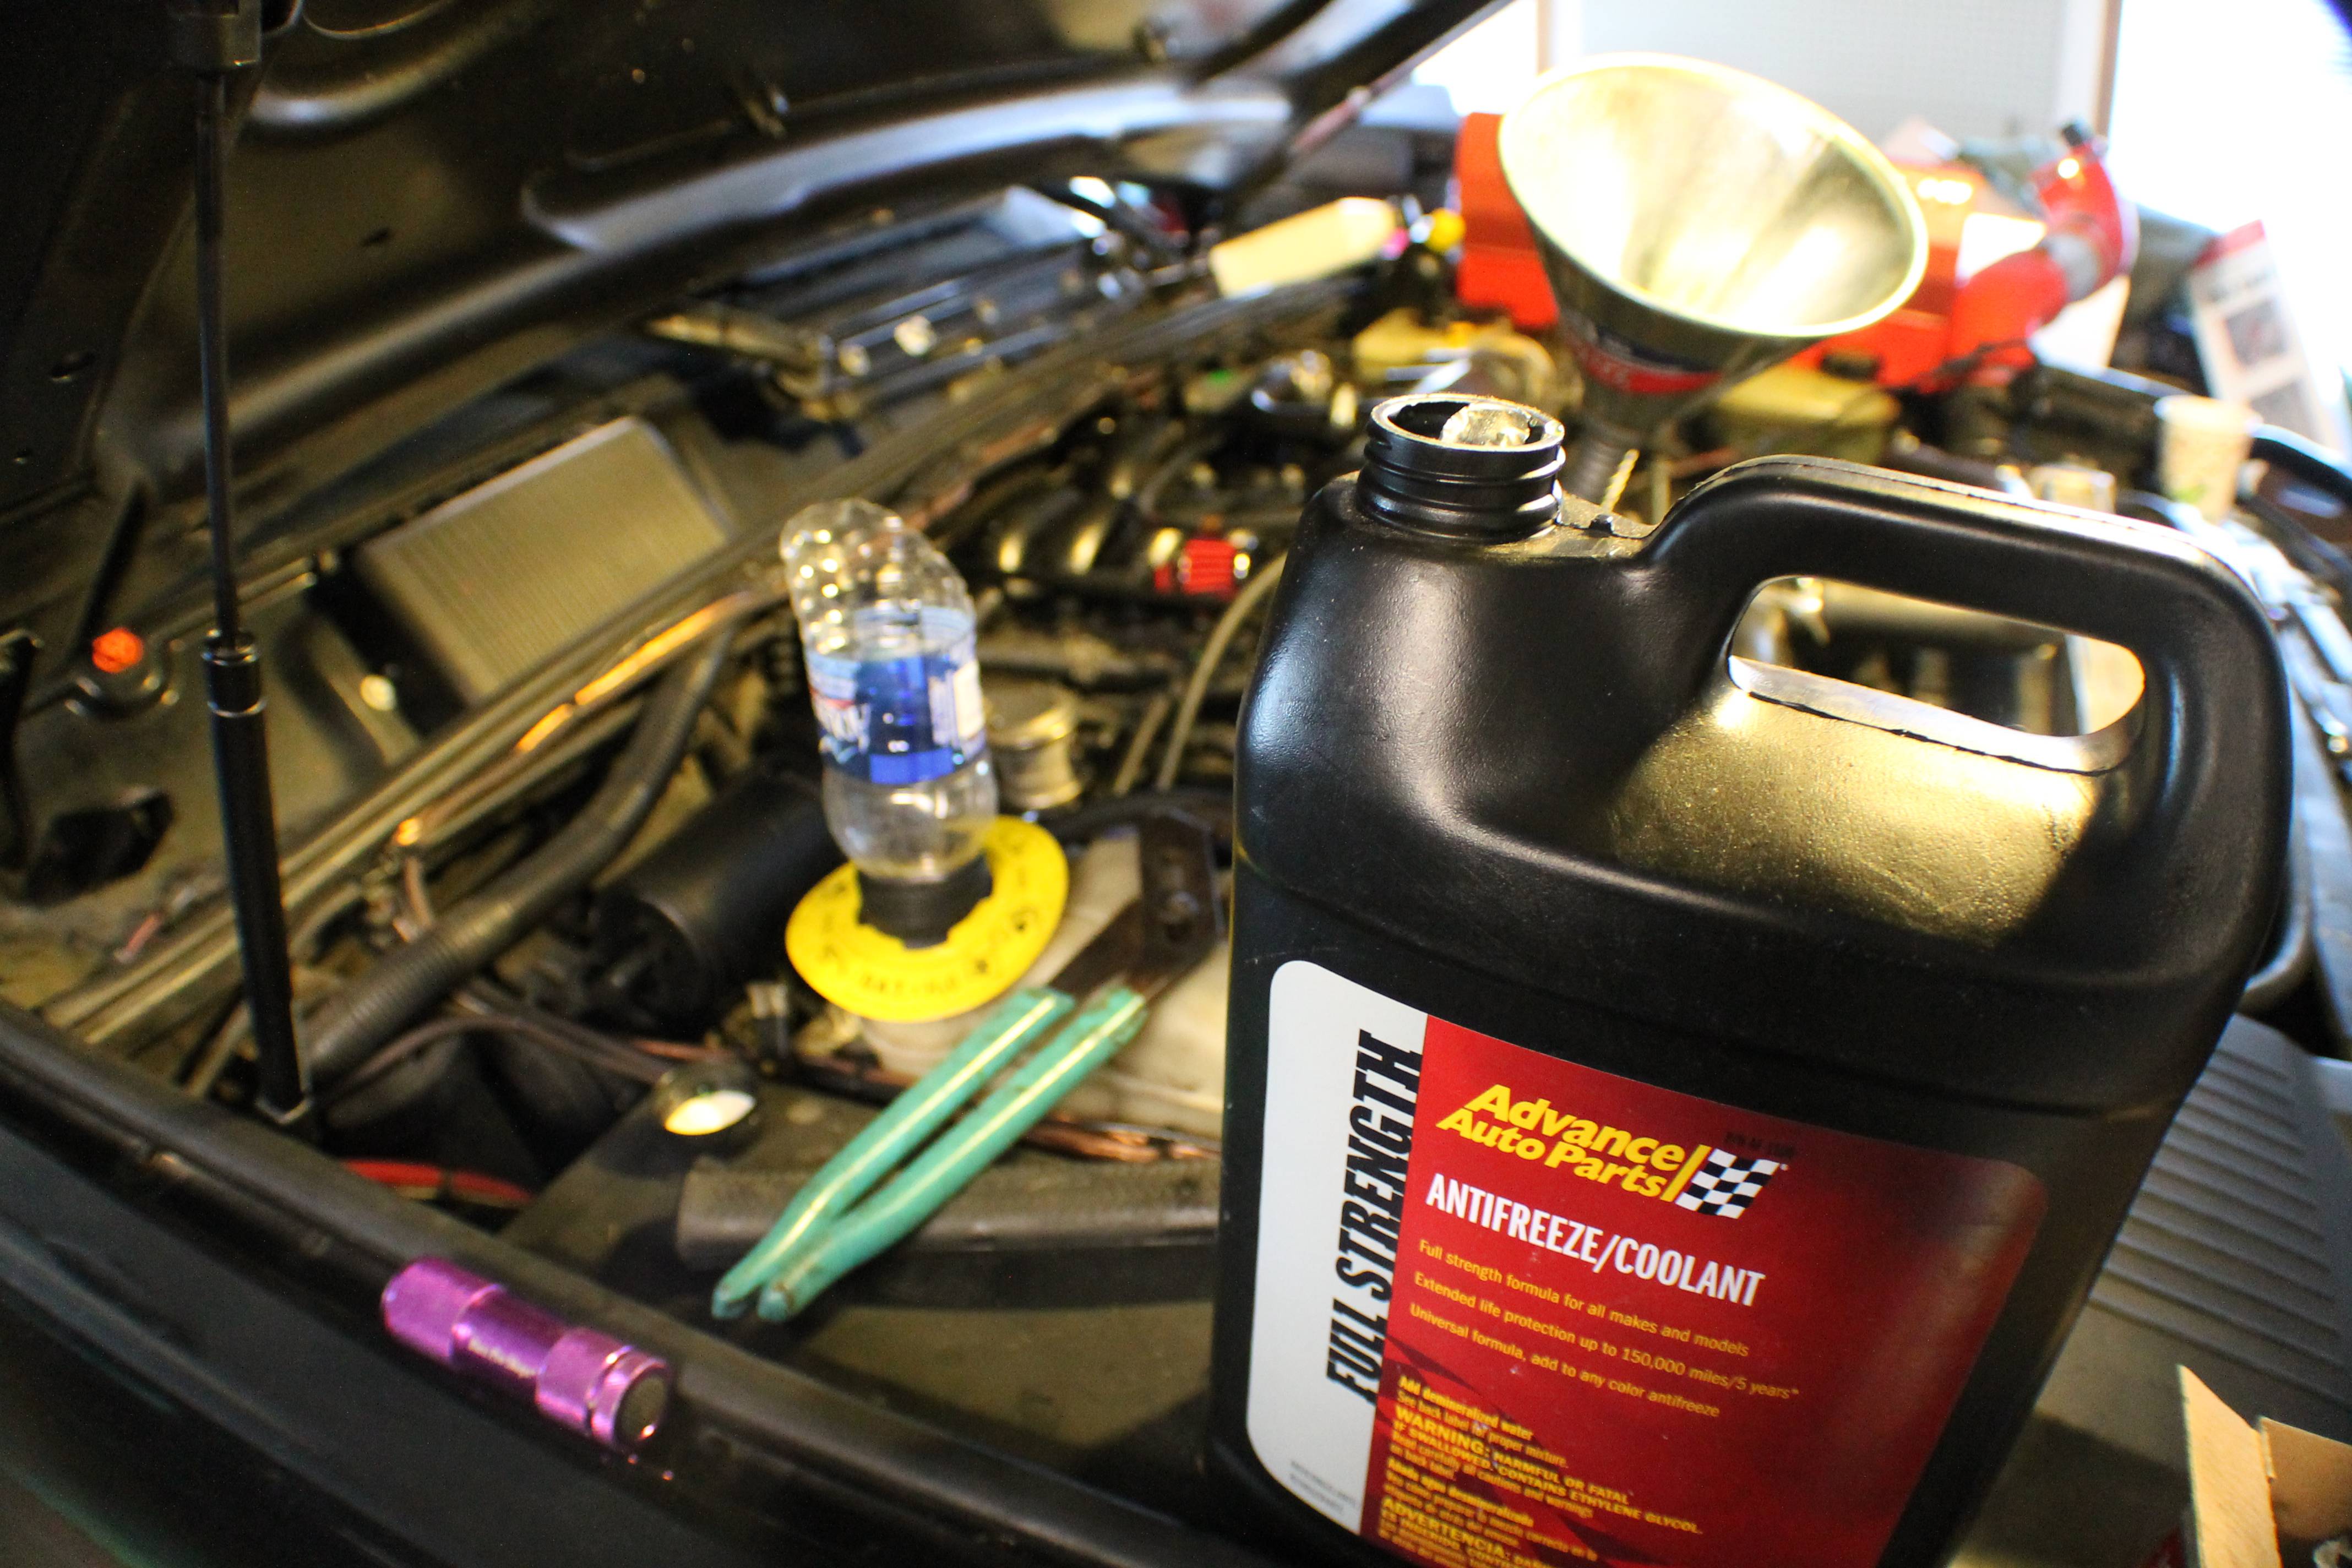
Now, move back to your engine bay and begin adding fluids. Start by adding your oil, which will take approximately 1.5 gallons.
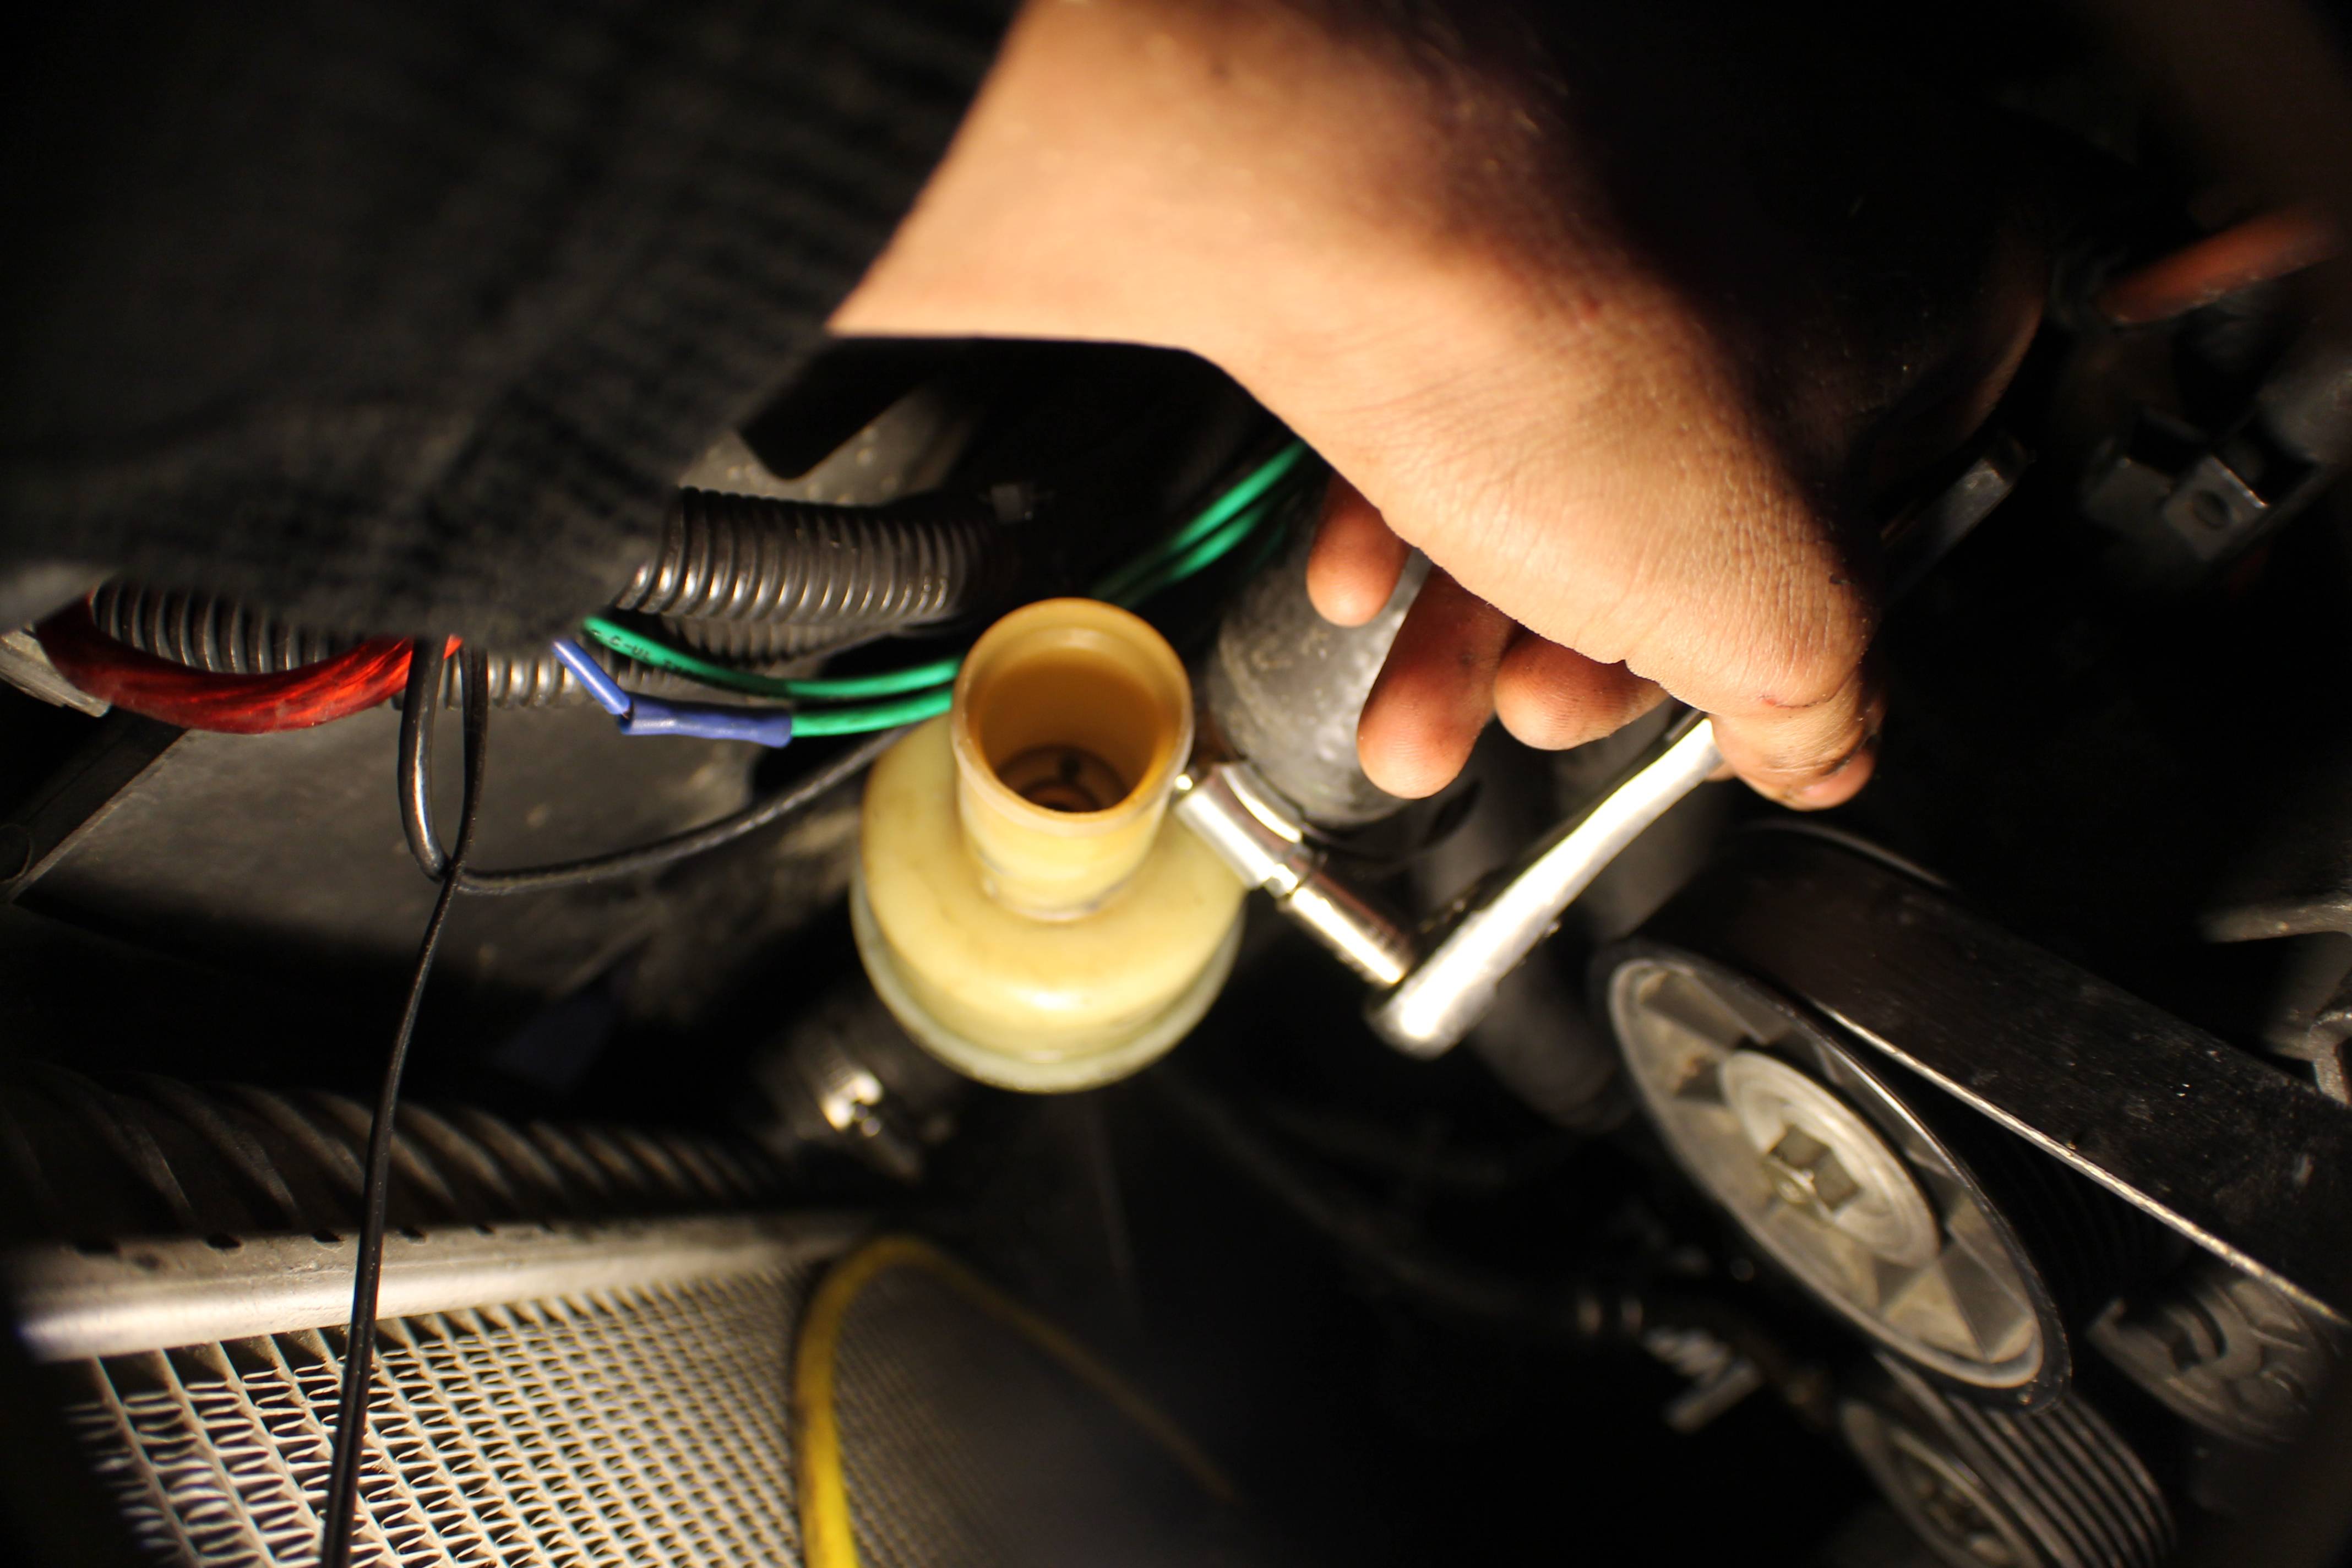
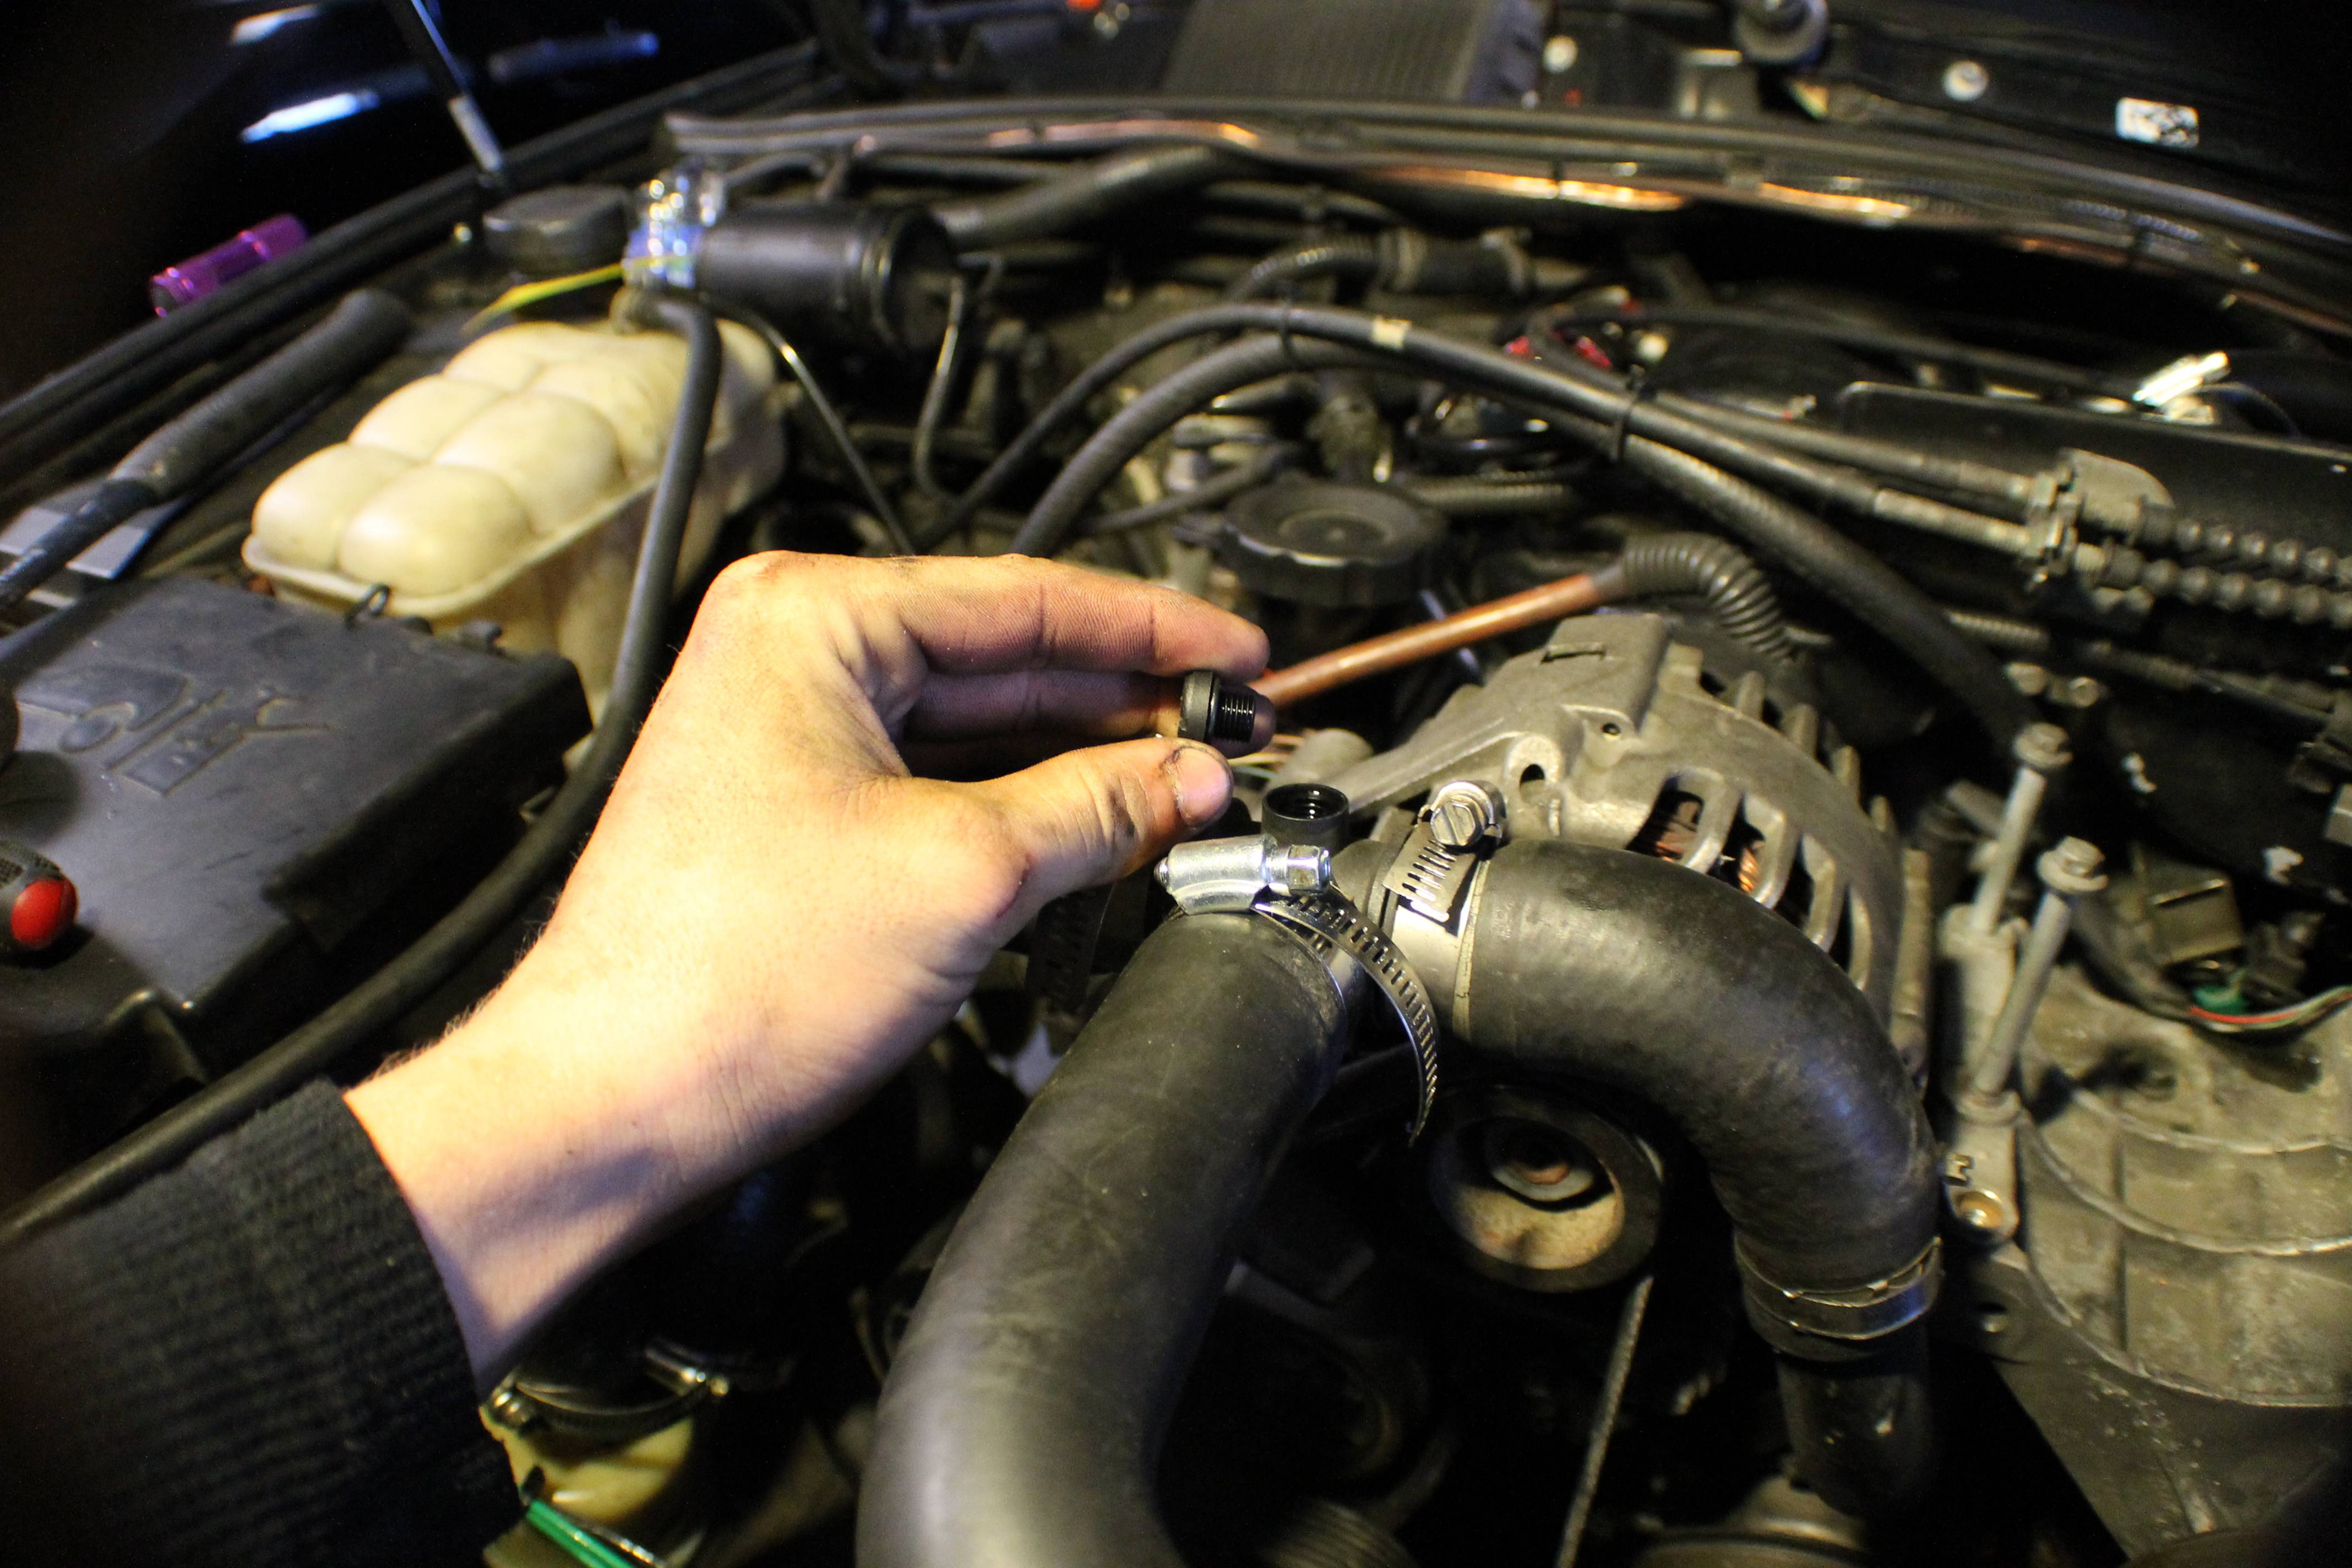
Now move to your coolant. Start by removing the bleeder valve from your t-coupling so the air can escape as you fill.
I added some water wetter first so that it would get mixed in with the coolant better. Then I added my gallon of coolant and then carried the jug around the house collecting half full bottles of water that the family had left laying around until I accumulated a whole gallon. I took that back and then poured it into the reservoir until it started overflowing.
Once the tank starts to overflow, it's time to bleed the system. First, place your coolant pan back under the truck, this time under the t-coupling/bleeder valve. Super simple. Pop the tank up from the back and remove it from its mount, then take it and sit it on top of the battery cover. Watch the bleeder valve for coolant to start gushing out. Let if flow for a few seconds as there will be more bubbles that come through, but after a few seconds put the valve cap back in place.
Now check your oil level and top it off if you need to. For this next part, I recommend unhooking all of your spark plug wires so that you can prime the system. Once you've unhooked the wires, hop inside your truck and let it crank over for a few seconds to get the oil system primed. Once you've done that then hook your plug wires back up and fire her up. Let it just idle until the RPMS drop, then let it idle a while longer. Watch and make sure that you don't have any oil pressure lights coming on, and if you do then shut your engine off immediately. I'd let her idle until she got warm, watching your coolant temps on an ultragauge or similar. Once she reached around 190, check to see if your coolant lines are getting firm. Crack open the bleeder valve a turn or so to let any air escape and close it back when you start seeing coolant come out. Once the system is bled and you have confirmed you're getting good oil pressure, pop the coolant reservoir back down in place and take her for a spin. You're done! Now, on the off chance that you're not getting oil pressure upon start up, I'd recommend trying RoverMasterTech's priming method that he outlined in this post. If you're not getting oil pressure after this then you've got a bigger problem that you will have to look into.

I hope this write up helped! If you need any help, have questions, concerns, thoughts, ideas, recommendations, commendations, presidential campaigns, boxes of campaign, or lions to be tamed, go ahead and leave them below and I'll get back to you as soon as possible.
Now move to your coolant. Start by removing the bleeder valve from your t-coupling so the air can escape as you fill.
I added some water wetter first so that it would get mixed in with the coolant better. Then I added my gallon of coolant and then carried the jug around the house collecting half full bottles of water that the family had left laying around until I accumulated a whole gallon. I took that back and then poured it into the reservoir until it started overflowing.
Once the tank starts to overflow, it's time to bleed the system. First, place your coolant pan back under the truck, this time under the t-coupling/bleeder valve. Super simple. Pop the tank up from the back and remove it from its mount, then take it and sit it on top of the battery cover. Watch the bleeder valve for coolant to start gushing out. Let if flow for a few seconds as there will be more bubbles that come through, but after a few seconds put the valve cap back in place.
Now check your oil level and top it off if you need to. For this next part, I recommend unhooking all of your spark plug wires so that you can prime the system. Once you've unhooked the wires, hop inside your truck and let it crank over for a few seconds to get the oil system primed. Once you've done that then hook your plug wires back up and fire her up. Let it just idle until the RPMS drop, then let it idle a while longer. Watch and make sure that you don't have any oil pressure lights coming on, and if you do then shut your engine off immediately. I'd let her idle until she got warm, watching your coolant temps on an ultragauge or similar. Once she reached around 190, check to see if your coolant lines are getting firm. Crack open the bleeder valve a turn or so to let any air escape and close it back when you start seeing coolant come out. Once the system is bled and you have confirmed you're getting good oil pressure, pop the coolant reservoir back down in place and take her for a spin. You're done! Now, on the off chance that you're not getting oil pressure upon start up, I'd recommend trying RoverMasterTech's priming method that he outlined in this post. If you're not getting oil pressure after this then you've got a bigger problem that you will have to look into.
I hope this write up helped! If you need any help, have questions, concerns, thoughts, ideas, recommendations, commendations, presidential campaigns, boxes of campaign, or lions to be tamed, go ahead and leave them below and I'll get back to you as soon as possible.
Last edited by Alex_M; Jan 3, 2016 at 11:36 PM.

Pro Wrench
Joined: Nov 2015
Posts: 1,935
Likes: 189
From: Coastal Georgia
Thanks. Much more informative than the videos out there and you make procedure very easy to understand.
......
......
Last edited by number9; Jan 4, 2016 at 12:36 AM. Reason: chanfe a word

Thread Starter
|
Camel Trophy
Joined: Aug 2014
Posts: 4,743
Likes: 985
From: Southwestern Virginia
I've actually already got a 180 stat. It's a Motorad unit. Before you say anything, I put it in before I knew that they were hit and miss. This one performs perfectly, so I must've gotten lucky, but I'll be doing the inline mod in the future along with a more detailed write up than the one already given. With full credit, of course.
Yea, surprised me too drow! The front cover and the oil pump were both in perfectly pristine shape.
Yea, surprised me too drow! The front cover and the oil pump were both in perfectly pristine shape.