DIY Roof Rack


Pro Wrench
Joined: Jan 2011
Posts: 1,869
Likes: 44
From: Philly
Oh sweet! Thanks!


Overlanding
Joined: Feb 2014
Posts: 22
Likes: 0
From: Meridian, Idaho
looking forward to seeing the plans, i have been looking to do something like this myself, i am a steel worker by trade so this would be simple enough to do  it looks legit for sure, also, what did you do for mounting, I'm sure you mounted to the rain guards correct?
it looks legit for sure, also, what did you do for mounting, I'm sure you mounted to the rain guards correct?

Yes, it's supported exclusively by the gutters. My sunroof can also open all the way in the front. The sun roof in the back will remain closed when the racks are on. If you want that one to open too, just add a bit more to its vertical height on my plans. Add 2 inches and it'll easily clear.
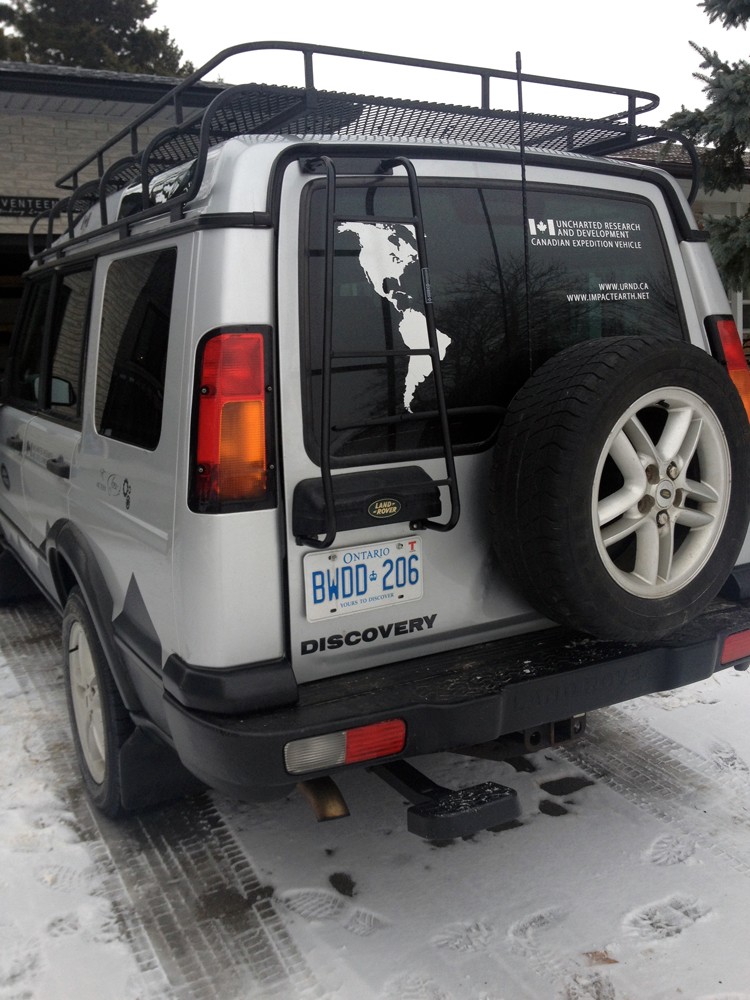
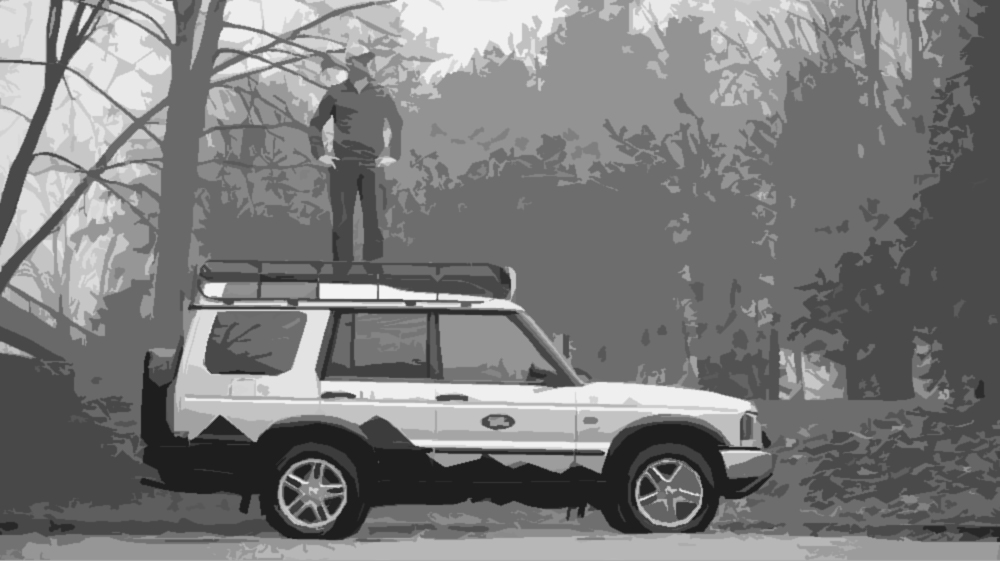
Here's an isometric view of the back. Today I bought an angle grinder and cut the grate that will be laid as a steel bed inside. Just waiting for the paint to dry, it's literally killing me as I can't wait to stand on my Land Rover for the very first time today.
Recall that the weight will be going in a downward direction. There will only be upward forces when you hit a bump. As a result, I've opted not to install L bracing on the gutter supports yet. I've tied it to the existing roof racks instead (using 100lb black paracord).
I will mount L brackets in the future to complete the project, it's designed to support it - I just haven't had enough time yet.
Last edited by Jean Filion; Dec 15, 2014 at 11:57 AM.

Three Wheeling
Joined: Nov 2013
Posts: 64
Likes: 3
From: New York State
This is super! I feel like an idiot, but I'm assuming that the rack was MIG welded?
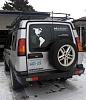
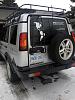
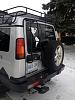
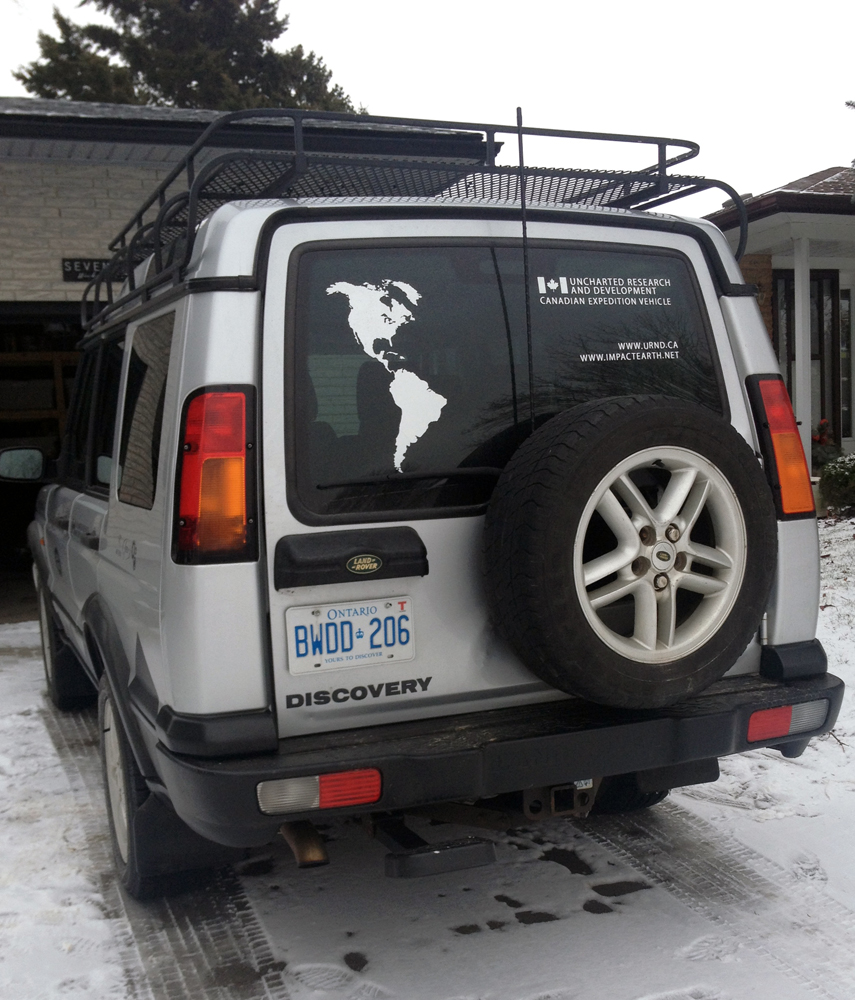
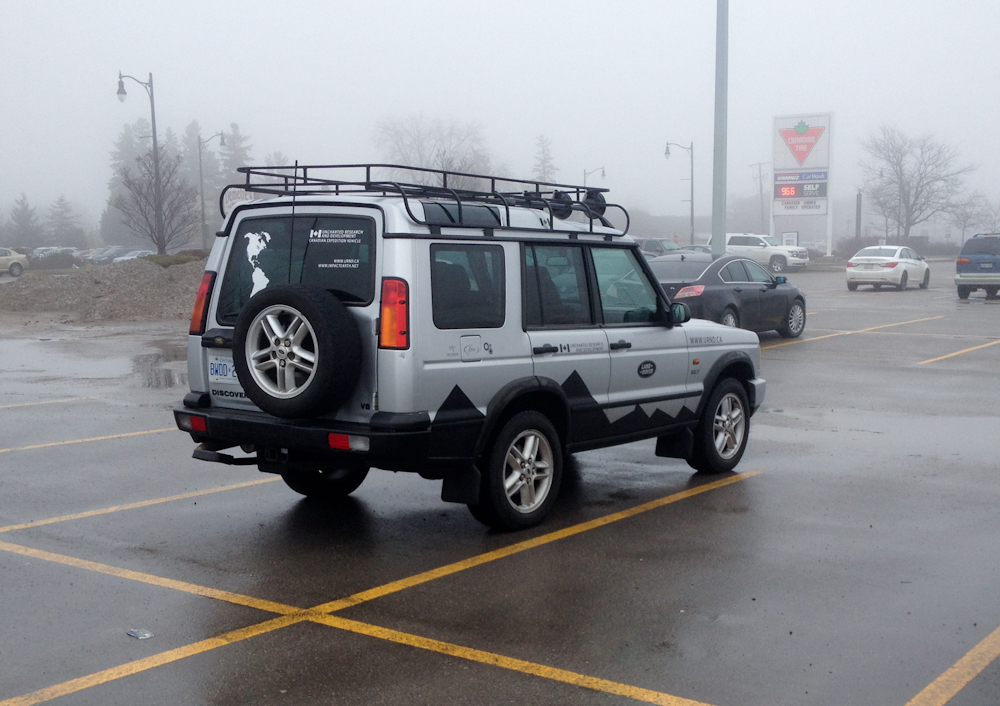
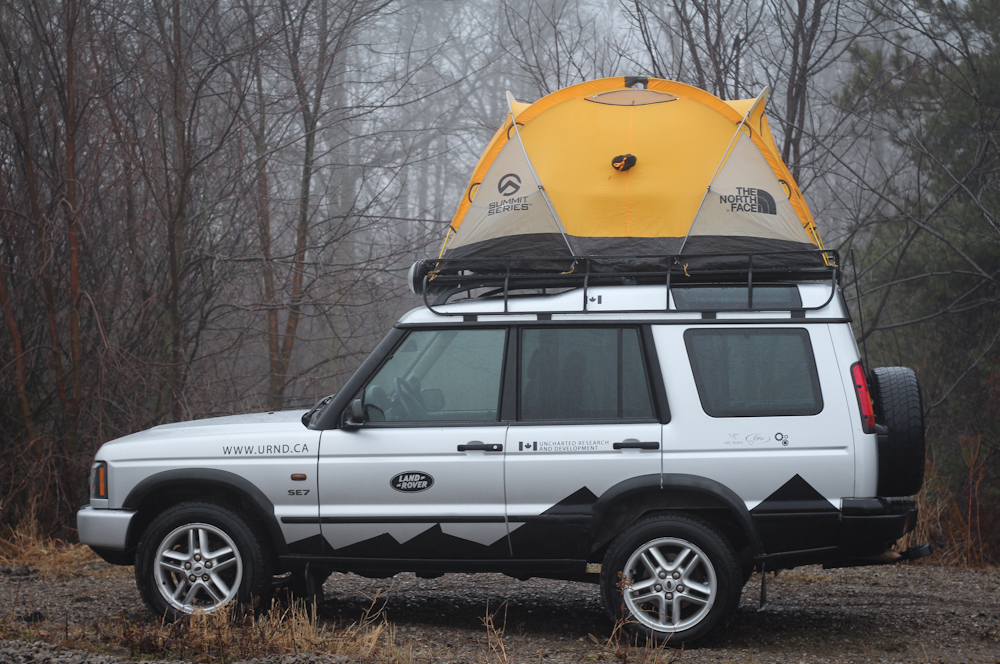
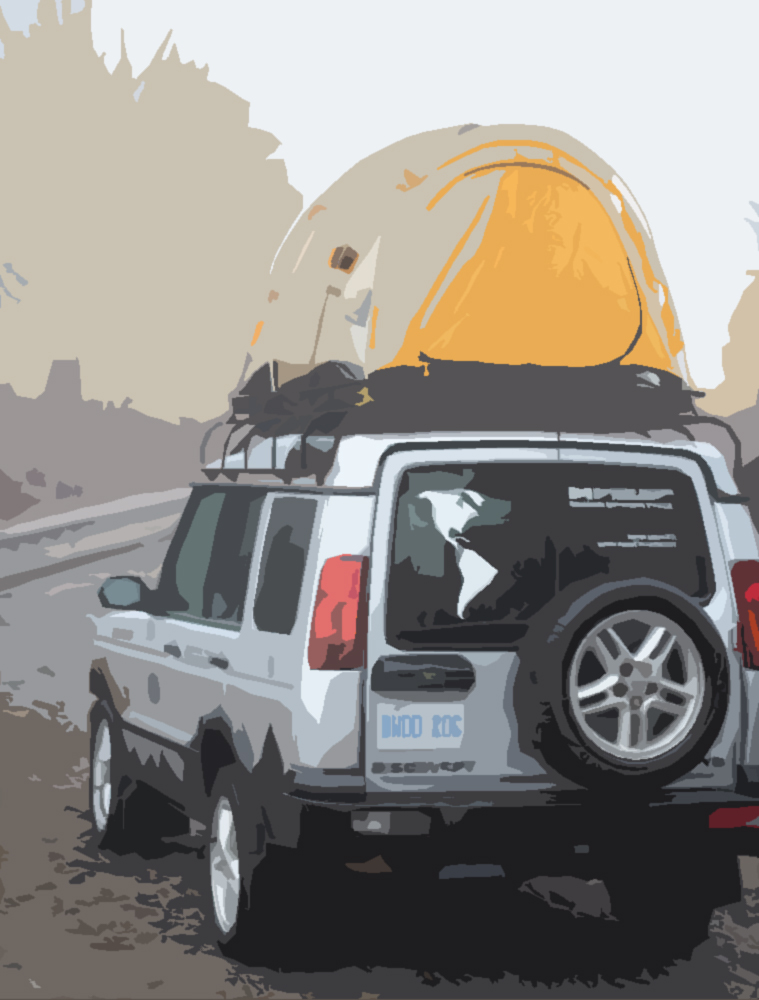
I am very pleased to announce that I was successful in painting and mounting the roof rack steel grate this morning. This completes my project. Lucky me, my North Face Mountain 25 tent fits perfectly.
I plan on taking this rover from Canada to South America and back this spring.
Attached are some victory pics:


Ok, as per your questions:
1. The mountains on the side are inspired from the modern Expedition model of the Land Rover Discovery. They were made by myself using a Carbon Fibre sticker that I bought at Canadian Tire for $14.
2. Yes, I MIG welded it. Since it's square steel tubing, it is extremely easy to weld. Any cheap-o welder will do a beautiful job. I weigh 220 lbs and I walk on my platform without any sag.
I plan on taking this rover from Canada to South America and back this spring.
Attached are some victory pics:
Ok, as per your questions:
1. The mountains on the side are inspired from the modern Expedition model of the Land Rover Discovery. They were made by myself using a Carbon Fibre sticker that I bought at Canadian Tire for $14.
2. Yes, I MIG welded it. Since it's square steel tubing, it is extremely easy to weld. Any cheap-o welder will do a beautiful job. I weigh 220 lbs and I walk on my platform without any sag.
Last edited by Jean Filion; Dec 16, 2014 at 08:18 PM.
Pro Wrench
Joined: Jan 2011
Posts: 1,869
Likes: 44
From: Philly
I am very pleased to announce that I was successful in painting and mounting the roof rack steel grate this morning. This completes my project. Lucky me, my North Face Mountain 25 tent fits perfectly.
I plan on taking this rover from Canada to South America and back this spring.
Attached are some victory pics:
Attachment 23781
Attachment 23782
Attachment 23783
Ok, as per your questions:
1. The mountains on the side are inspired from the modern Expedition model of the Land Rover Discovery. They were made by myself using a Carbon Fibre sticker that I bought at Canadian Tire for $14.
2. Yes, I MIG welded it. Since it's square steel tubing, it is extremely easy to weld. Any cheap-o welder will do a beautiful job. I weigh 220 lbs and I walk on my platform without any sag.
Did your plans initially include provisions for the tent? It fits perfectly? You planned that, right

I was always hopeful that it would fit but I was constrained by the standard size of a floor grate being 4ft wide. The tent bends making a snug fit. It's technically 6in too wide. No big deal
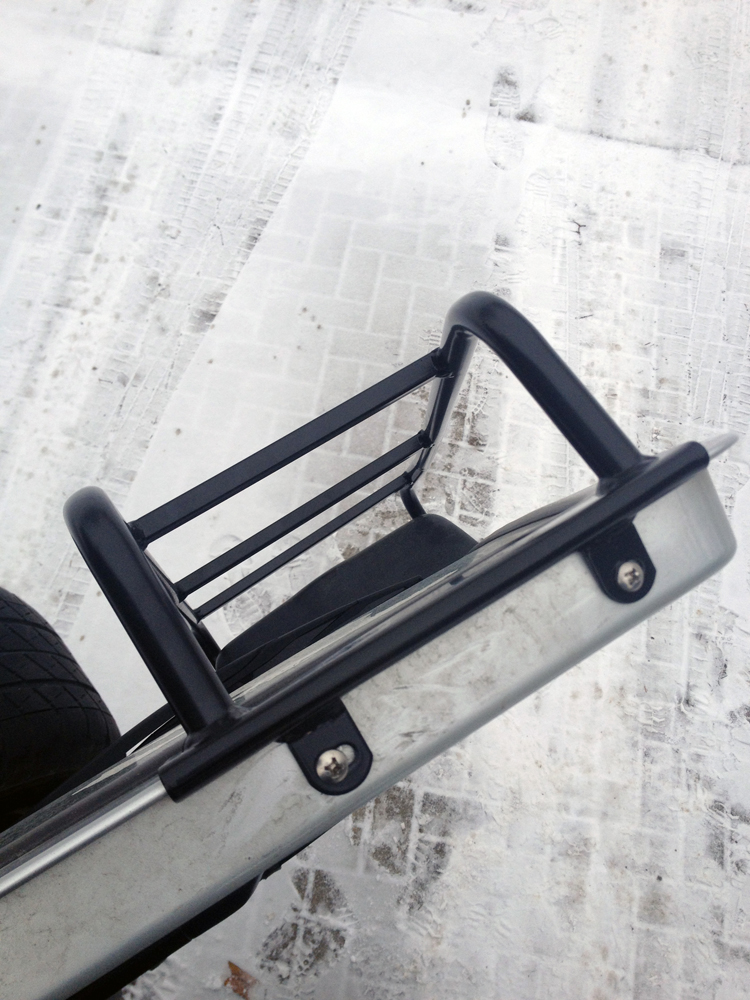
Cap stone installed (Ladder). Ok, moving my efforts to making a construction manual for these DIY roof racks. Please post photos on this thread if you build some. That would really make my day.