
Lift coil install question
#11
 10-15-2021 | 09:34 AM

Rock Crawling
Joined: Jul 2021
Posts: 268
Likes: 68
From: Top secret government location
I used a spring compressor to install one spring, sucked so I re thought the situation. Then I got smart and put a 2x4 turned side ways between the frame and axle, pushed the axle plenty far enough down to install 3 inch tf springs with little to no assistant with a pry bar.
To get enough ground clearance I used a 10 ton train jack to get the frame plenty high off the ground. I took the tires off for more clearance. Like you guys my little ton jack stands are only good for supporting the axles.
I did each spring with abs lines pulled loose on the front and disconnected from the back. stock brake lines were pulled loose. I didn't install my new extended hoses until I was done to prevent me doing something dumb and damaging them.
much easier and less effort than a leaf spring lift swap on my excursion. No having to use ratchet straps to pull the axle into place. The springs also didn't way nearly 100 lbs each
I set toe in to about 1/16 with straight edge 6 ft pieces of angle iron sitting on cinder blocks with a tape measure. To make it easier to adjust I used the bags the shocks/springs came to place under the tires. I jacked up each front tire one at a time and slid a 12x12, 3/4 inch thick plywood square under each tire with the thick plastic bag between the tire and wood. This allows the big 285 75 16 mud terrains to slide side to side with minimal effort. Not a perfect alignment but good enough to drive 15 miles to the alignment shop without eating the tires.
#12
10-15-2021 | 09:05 PM

Camel Trophy
Joined: Aug 2014
Posts: 4,734
Likes: 971
From: Southwestern Virginia
#14
10-15-2021 | 11:23 PM
Rock Crawling
Joined: Feb 2016
Posts: 412
Likes: 122
From: Ft Lauderdale, FL
#15
10-16-2021 | 12:02 AM
Camel Trophy
Joined: Aug 2014
Posts: 4,734
Likes: 971
From: Southwestern Virginia
Righto. Only disconnect shocks, maybe abs sensor and brake hose brake hose if necessary. Vice grip off the brake hose first so you're not allowing air back into the brake line if you've got to disconnect it. That, or remove the caliper and then throw the wheel back on to continue. That said, I feel like I didn't actually have to disconnect the brake at all. I'm thinking I only disconnected the shock and then jacked them apart.

#17
10-16-2021 | 08:07 PM

Thread Starter
|
Mudding
Joined: Aug 2019
Posts: 124
Likes: 40
From: Nevada
Finally got the rears in. Bottle jack between the axle and frame with the tires still on the ground made it easy.
Brake lines didn't need disconnected but were close to the max they would go, Abs lines would be to short but pop easily out of the spot they clip to. Mine had already been relocated.
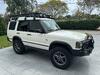
Sitting at 24" hub center to fender flare in the front.
Rear sitting at 22 1/4"
Got a ton of lift in the front and right about 3" in the rear.
HD springs so i guess its time to add a front bumper and winch bring the front down a bit maybe.
Brake lines didn't need disconnected but were close to the max they would go, Abs lines would be to short but pop easily out of the spot they clip to. Mine had already been relocated.
Sitting at 24" hub center to fender flare in the front.
Rear sitting at 22 1/4"
Got a ton of lift in the front and right about 3" in the rear.
HD springs so i guess its time to add a front bumper and winch bring the front down a bit maybe.
#18
10-17-2021 | 04:08 AM

Camel Trophy
Joined: Oct 2016
Posts: 4,705
Likes: 1,282
From: Michigan
or remove the caliper and then throw the wheel back on to continue.
Always do this (if you need extra access). But...never, ever, never, ever...just let caliper dangle by hose or drop caliper while still attached to hose. This can also damage inner portion of hose...causing drag issues and premature brake pad wear.
#20
10-18-2021 | 02:02 AM
Camel Trophy
Joined: Oct 2016
Posts: 4,705
Likes: 1,282
From: Michigan
Believe me, it happens a lot Alex. Had a new tech do it the just other day. It kind of makes me wonder what they are teaching the new guys at the vocational schools/colleges. Actually, we have three young guys, fresh out of trade schools and none of them had heard of this (brake line clamping being a no-no), so l cut the hose open, by slicing the softer outer layer horizontally, that the one tech had clamped with vise grips earlier and showed them.
Have a good day!
Have a good day!

Thread
Thread Starter
Forum
Replies
Last Post