When you click on links to various merchants on this site and make a purchase, this can result in this site earning a commission. Affiliate programs and affiliations include, but are not limited to, the eBay Partner Network.
Let me preface this post by stating I am in no way a professional. I am posting this for others who may want to do a repair on their cracked OEM bumper and have some instruction to go off of or improve upon. I had a hard time finding a step by step instruction on this forum for such a repair despite it being such a prevalent problem.
Also yes it will likely crack again, could be today or next year but hopefully it will last. And no, I don't want a steel bumper - the only one I like is First Four UK and I can't see to find them anywhere. This is a cheap and easy fix - costs under $100 and I didn't remove the bumper.
When I purchased the truck, the bumper already had numerous cracks and duct tape covering up the biggest one in the middle which is what this post will be covering. Here's a photo;
Here are the materials (minus paint) that I used for the repair - Polyvance Plastifix, Polyvance FlexFiller, Fibatape, Aluminum Tape, and sand paper.
Step 1 is to remove the grill (optional but super easy, just 3 rivets and gives more room) and then to sand out the crack. If you have a rotary tool with a teardrop bit, use that. I just used sand paper.
Step 2 is to align the two pieces as best you can and tape the backside of the crack with aluminum tape (I bet you can use duct tape if you wanted to). It is critical to align as best as possible. You'll see I could have done a better job here and it led to a small rise in a section.
Step 3 is to fill the bottom of the crack with the Plastifix powder. Do not overfill. Just get enough even coverage to cover the tape.
*Optional step - if you have a big enough crack, cut a piece of fiba tape to be slightly smaller than the crack and easily fit. Place overtop of powder. This will reinforce the repair.
Step 4 - Use the syringe to apply the liquid on the powder (and fiba tape if you used it). Keep adding powder and liquid until the crack is filled. Then let it dry for 12 hours. **Notes; this stuff is some serious chemicals, make sure you have plenty of fresh air. Also Polyvance has a good video on their site showing how to use their product.
Wet
Dry
Step 5
Sand this down until it's flush and smooth. If you have a DA sander, go for it. I just sanded by hand - wet sanded with 180 grit and then dry sanded 400.
Step 6 - Use the FlexFiller and a scraper to fill in any low spots. I couldn't find my scraper set so I used an old credit card. Not a great job, can't wait for Step 7!
Step 7 is, you guessed it, more sanding. A lot if you did a crap job like me! Whatever, builds character. Same deal as before, DA sander would be nice but I did it by hand and used 180 grit to start and progressed to 400.
And now it's time for painting. Happy to give more details on specific products if anyone requests but I used 400 grit sand paper and isopropyl alcohol on the whole bumper to prep the surface. Taped it all up. Used two coats of plastic adhesion promoter and like 5 or 6 coats of SEM trim paint. The SEM paint was fantastic - first time spray painting and it laid really well with no running.
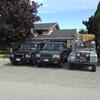
And here's the final product!
It's not perfect, specifically the small rise in the middle due to misalignment, and a few repair areas that still show a bit in direct sunlight from the right angle due to differences in plastic as well as laziness on sanding. However it looks pretty good, and a hell of a lot better than a piece of black duct tape. I doubt anyone who didn't know I repaired it could tell.
Lessons learned;
Perfect alignment of the crack and perfect sanding is necessary for a perfect look.
A filler primer on the who bumper would have helped out filling in scratches and hiding the repairs. This is why I had to do so many coats of primer. I have a can of filler primer but was concerned that it would have a problem adhering to the plastic. Thus I just used to adhesion promoter.
Overall I'm very happy with it and hope this inspires others to repair their OEM bumper as IMO it's the best look for these trucks. Good luck!
Update, bumper cracked again during installation of a reman AB engine. Not sure if it was hit or just cracked randomly but take my above guidance with a strong bourbon