
roof lights activated!!! i got questions


Thread Starter
|
Winching
Joined: Apr 2009
Posts: 561
Likes: 4
From: Port Huron, MI
sup guys...
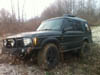
i just finished wiring my 4 hella's on my roof rack....what a PITA!! i used all the stuff that came with the lights except the ugly switches...i went to a junkyard and got a extra HDC switch and wired that to activate the roof lights...
the only thing i have to do now is blackout the hood..
anyone used roll on bed cover?
or is vinyl the way to go...anyone got a link

http://www.roversnorth.com/store/p-1...scovery-i.aspx
The DI and DII use the same kit.
http://www.lrrforums.com/showthread.php?t=4192
Where did you run the wires for the lights? Did you run them up the "A" pillar?
The DI and DII use the same kit.
http://www.lrrforums.com/showthread.php?t=4192
Where did you run the wires for the lights? Did you run them up the "A" pillar?
Recovery Vehicle
Joined: Feb 2009
Posts: 1,151
Likes: 30
From: Denver, CO
Here are some pictures. Sorry for the driveway shots. But the sun was fully blazing so you can see how the matte black dulls down the hood. I do not have any roof lights, but I really like this hood blackout. I never notice all the glare coming from the hood till it was gone. The blackout makes sunny highway driving much easier on the eyes. kinda like the black stripe under football players eye's.
Tips for install: I ordered mine from Rovers North. It take a week or more to get it because they usually do not have that many in stock. It comes with good directions. I opted to take my hood off and put it on styrofoam blocks on the kitchen table. Its aluminum so its really not heavy. You want to be able to walk around the hood. Spray Windex on the vynle hood blackout and on the hood. (Wax your hood 2x before installation). This is so you can remove it easily if damaged) Also it helps to bead up the windex when you spray the hood. Position the blackout decal so the edge is even with the raised edge of the Rover hood. There will be an extra 2 inches at teh back of the hood. Use a star pattern to sqeegee out the windex with the included squegee. I used a window washer like you see at the gas stations. Trim the excess at the back to 1" then fold under making cuts about every 6 inches to it can fit the arch contour of the hood. Let it set overnight to dry. Pick a night its not going to rain on your engine. This project can be easier with a helper to to stand back and look to see if its positioned evenly. Of course you can put your hood back on when your done. I did work some bubbles out from the decal within 24hrs. It has held up well. I have had it on for over a year. Also protects against rock chips.
Here are my pictures:
http://img.auctiva.com/imgdata/1/3/2...89165415_o.jpg
http://img.auctiva.com/imgdata/1/3/2...89165466_o.jpg
http://img.auctiva.com/imgdata/1/3/2...89165533_o.jpg
From inside:
http://img.auctiva.com/imgdata/1/3/2...89165629_o.jpg
http://img.auctiva.com/imgdata/1/3/2...89165579_o.jpg
Its a easy $60 project that makes your Rover look hard. I find it wierd that I dont see any Jeeps or Hummers with hood blackouts
Thread Starter
|
Winching
Joined: Apr 2009
Posts: 561
Likes: 4
From: Port Huron, MI
nevermind...i got the a pillar cover (outside spike) on good enough and i just hurculined my hood.....i dont like vinyl...i did stripes on my 94 trans am GT and it was a pain in the butt.....
pics ...

pics ...
Last edited by 03discoman; Jul 12, 2010 at 08:44 PM.

Thread
Thread Starter
Forum
Replies
Last Post