
Small Modification Write Ups + Index of Mods (Alex_M)


Thread Starter
|
Camel Trophy
Joined: Aug 2014
Posts: 4,743
Likes: 985
From: Southwestern Virginia
I considered a metal filter, but I actually specifically chose the plastic one because it allows you to see how much stuff has been picked up in the filter and how badly it needs to be changed. Being able to clamp it would be nice, but that can easily be achieved with a couple of hardware store pvc pipe mounts and a couple self drilling screws. It's also nice that this style of filter is available at pretty much any auto parts store where as a Range Rover filter would not be. Even if you had to run the Microgard style filter it would still work until you found the style with flanged ends.

Camel Trophy
Joined: Nov 2012
Posts: 3,717
Likes: 248
From: Longview, Texas
Today was my first day with the full cold air intake (I had to get the outlet at the 90 fixed properly, then let it dry) and the valve cover breathers and whether the difference is psychological or actual I care not... I had less hesitation off the line and a little more brake pressure. Anyway, great mods and thanks for taking the time, risk, and effort of figuring that all out. Of course I did all of that under the protection of my Alex hood strut.
Now to the next mod.
Now to the next mod.
Thread Starter
|
Camel Trophy
Joined: Aug 2014
Posts: 4,743
Likes: 985
From: Southwestern Virginia
Alright, so pretty simple get up here. I don't have the wiring diagram, but it was pretty simple from what I recall. I'll see if I can find it and add it to this post when I get home in a few days, but most of you will be able to figure it out pretty easily. The one thing I will say is to power it from a switched power source. I used my radio to turn on a relay that gives me 12v direct from the battery.
So to start, here's what you need:
Speaker wire or any other wire.
Crimps are helpful
32mm Water Temp Adapter - search for exactly that on eBay
Sunpro 2" Electrical Temp Gauge - there are a lot of styles to choose from, and you don't even have to use a Sunpro. Just be sure it's electrical.
If you want a nice mount like the one I used, just go on eBay and search up 2 inch dash pod.
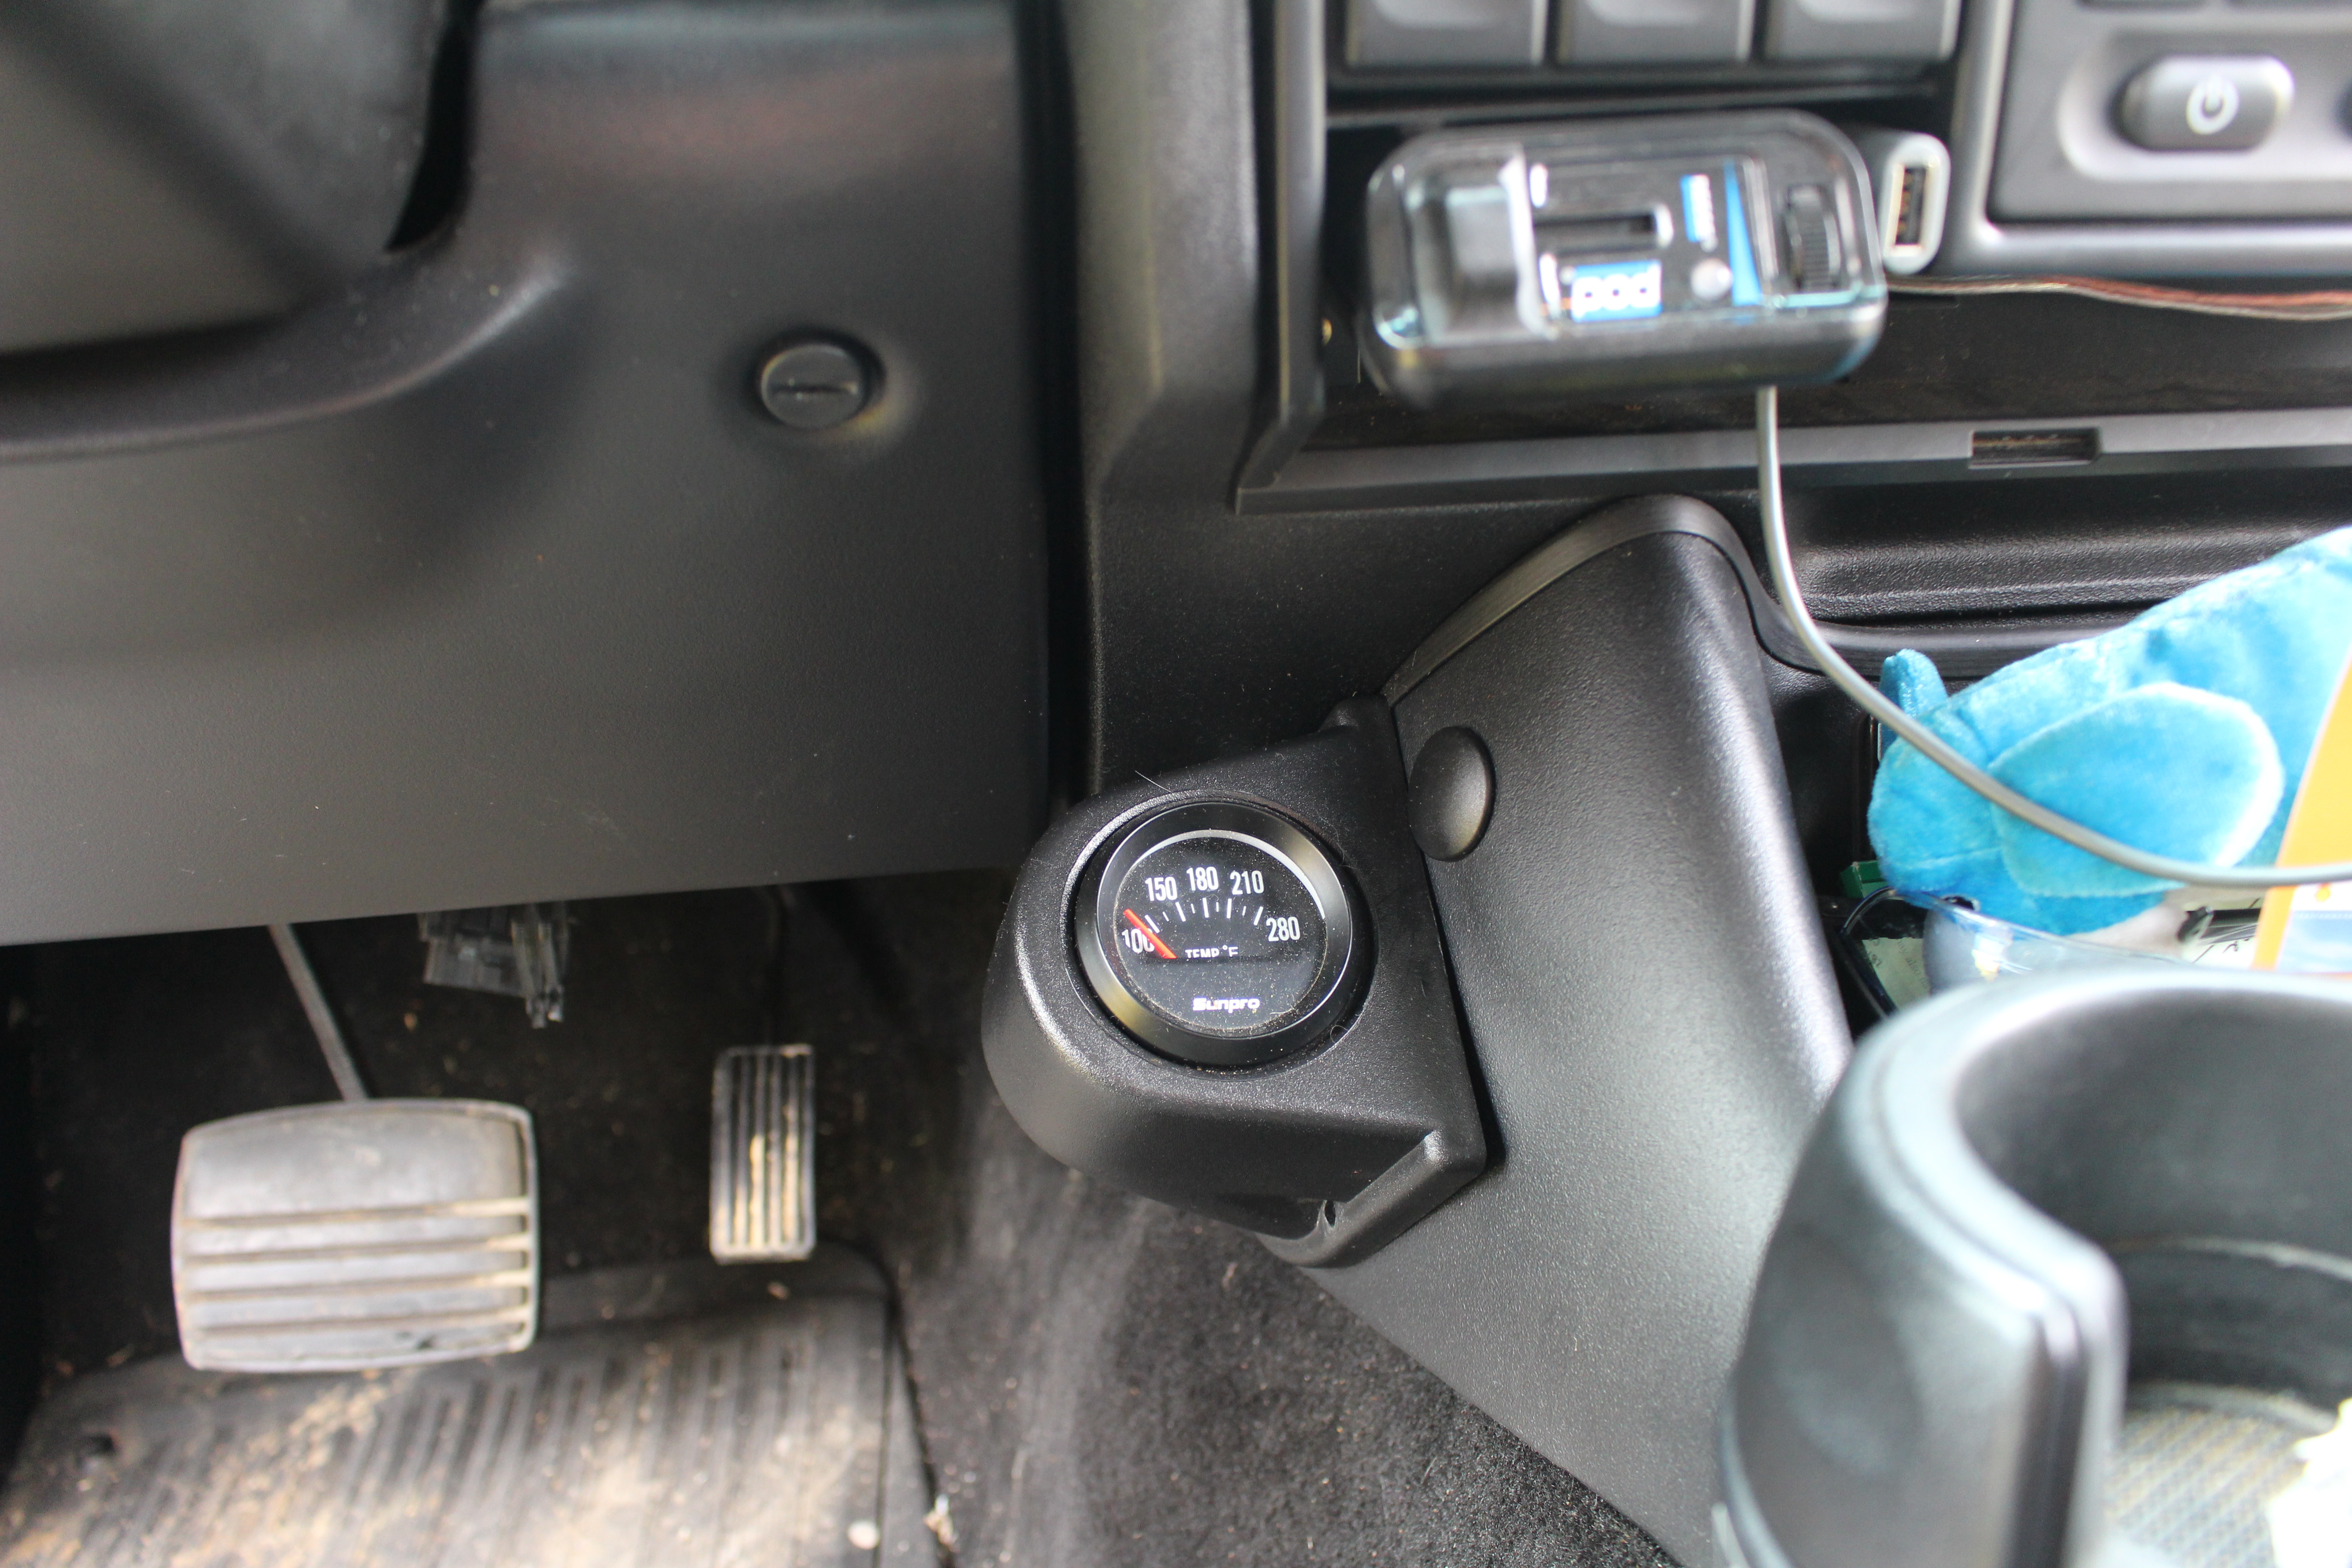
To start, I mounted my gauge essentially on the trans tunnel in the mount I made. I also drilled a hole in the plastic I mounted it on to run the wires up in the dash, then out the rubber grommet under the brake booster, and around the edge of the engine bay. It appears I forgot to get a picture of where I grounded the gauge, but I grounded it inside the flip down panel on the dash on the metal framing in there.
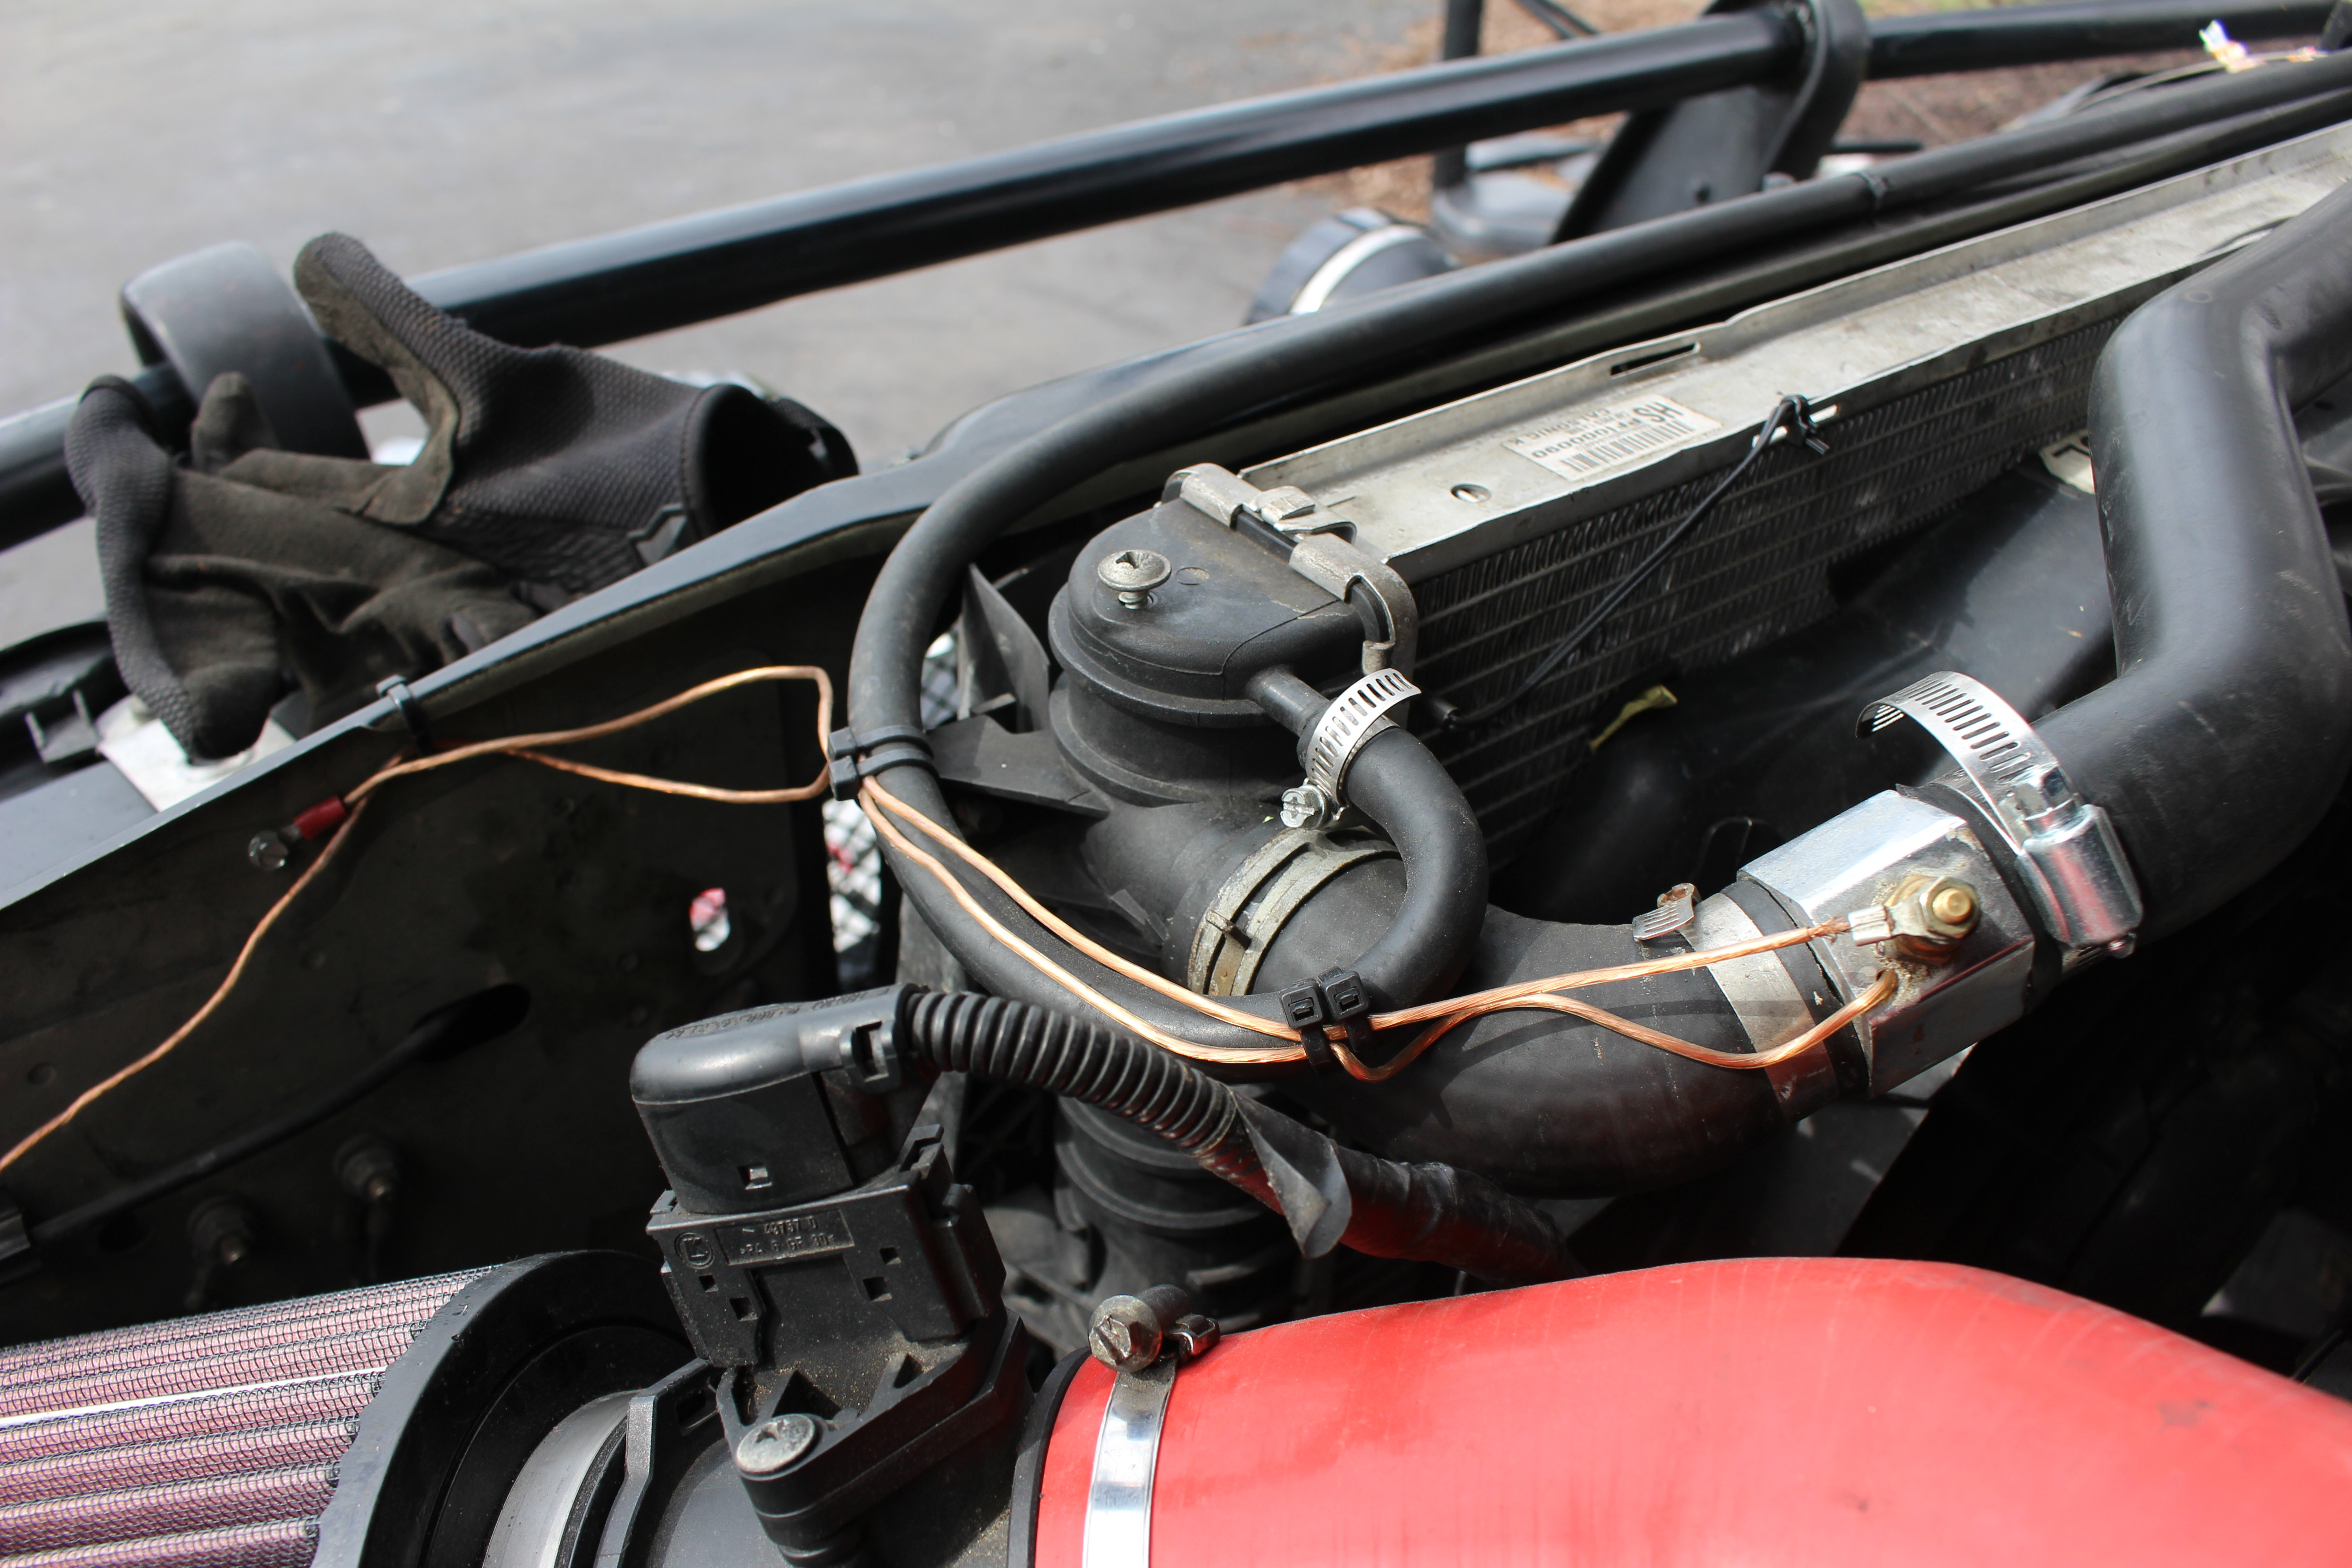
For the sender, I mounted that in the upper radiator hose. You might get a more accurate reading if you put it closer to the tee, but make sure it's in that top hose. If you've done the inline thermostat mod, put it on the engine side of the thermostat, not the radiator side. Be sure to use some Loctite 37398 thread sealant on it so it won't leak, not that it should anyway. The extra insurance is always nice though. I also recommend not using the band clamps that come with it, but instead a better set from the auto parts store.
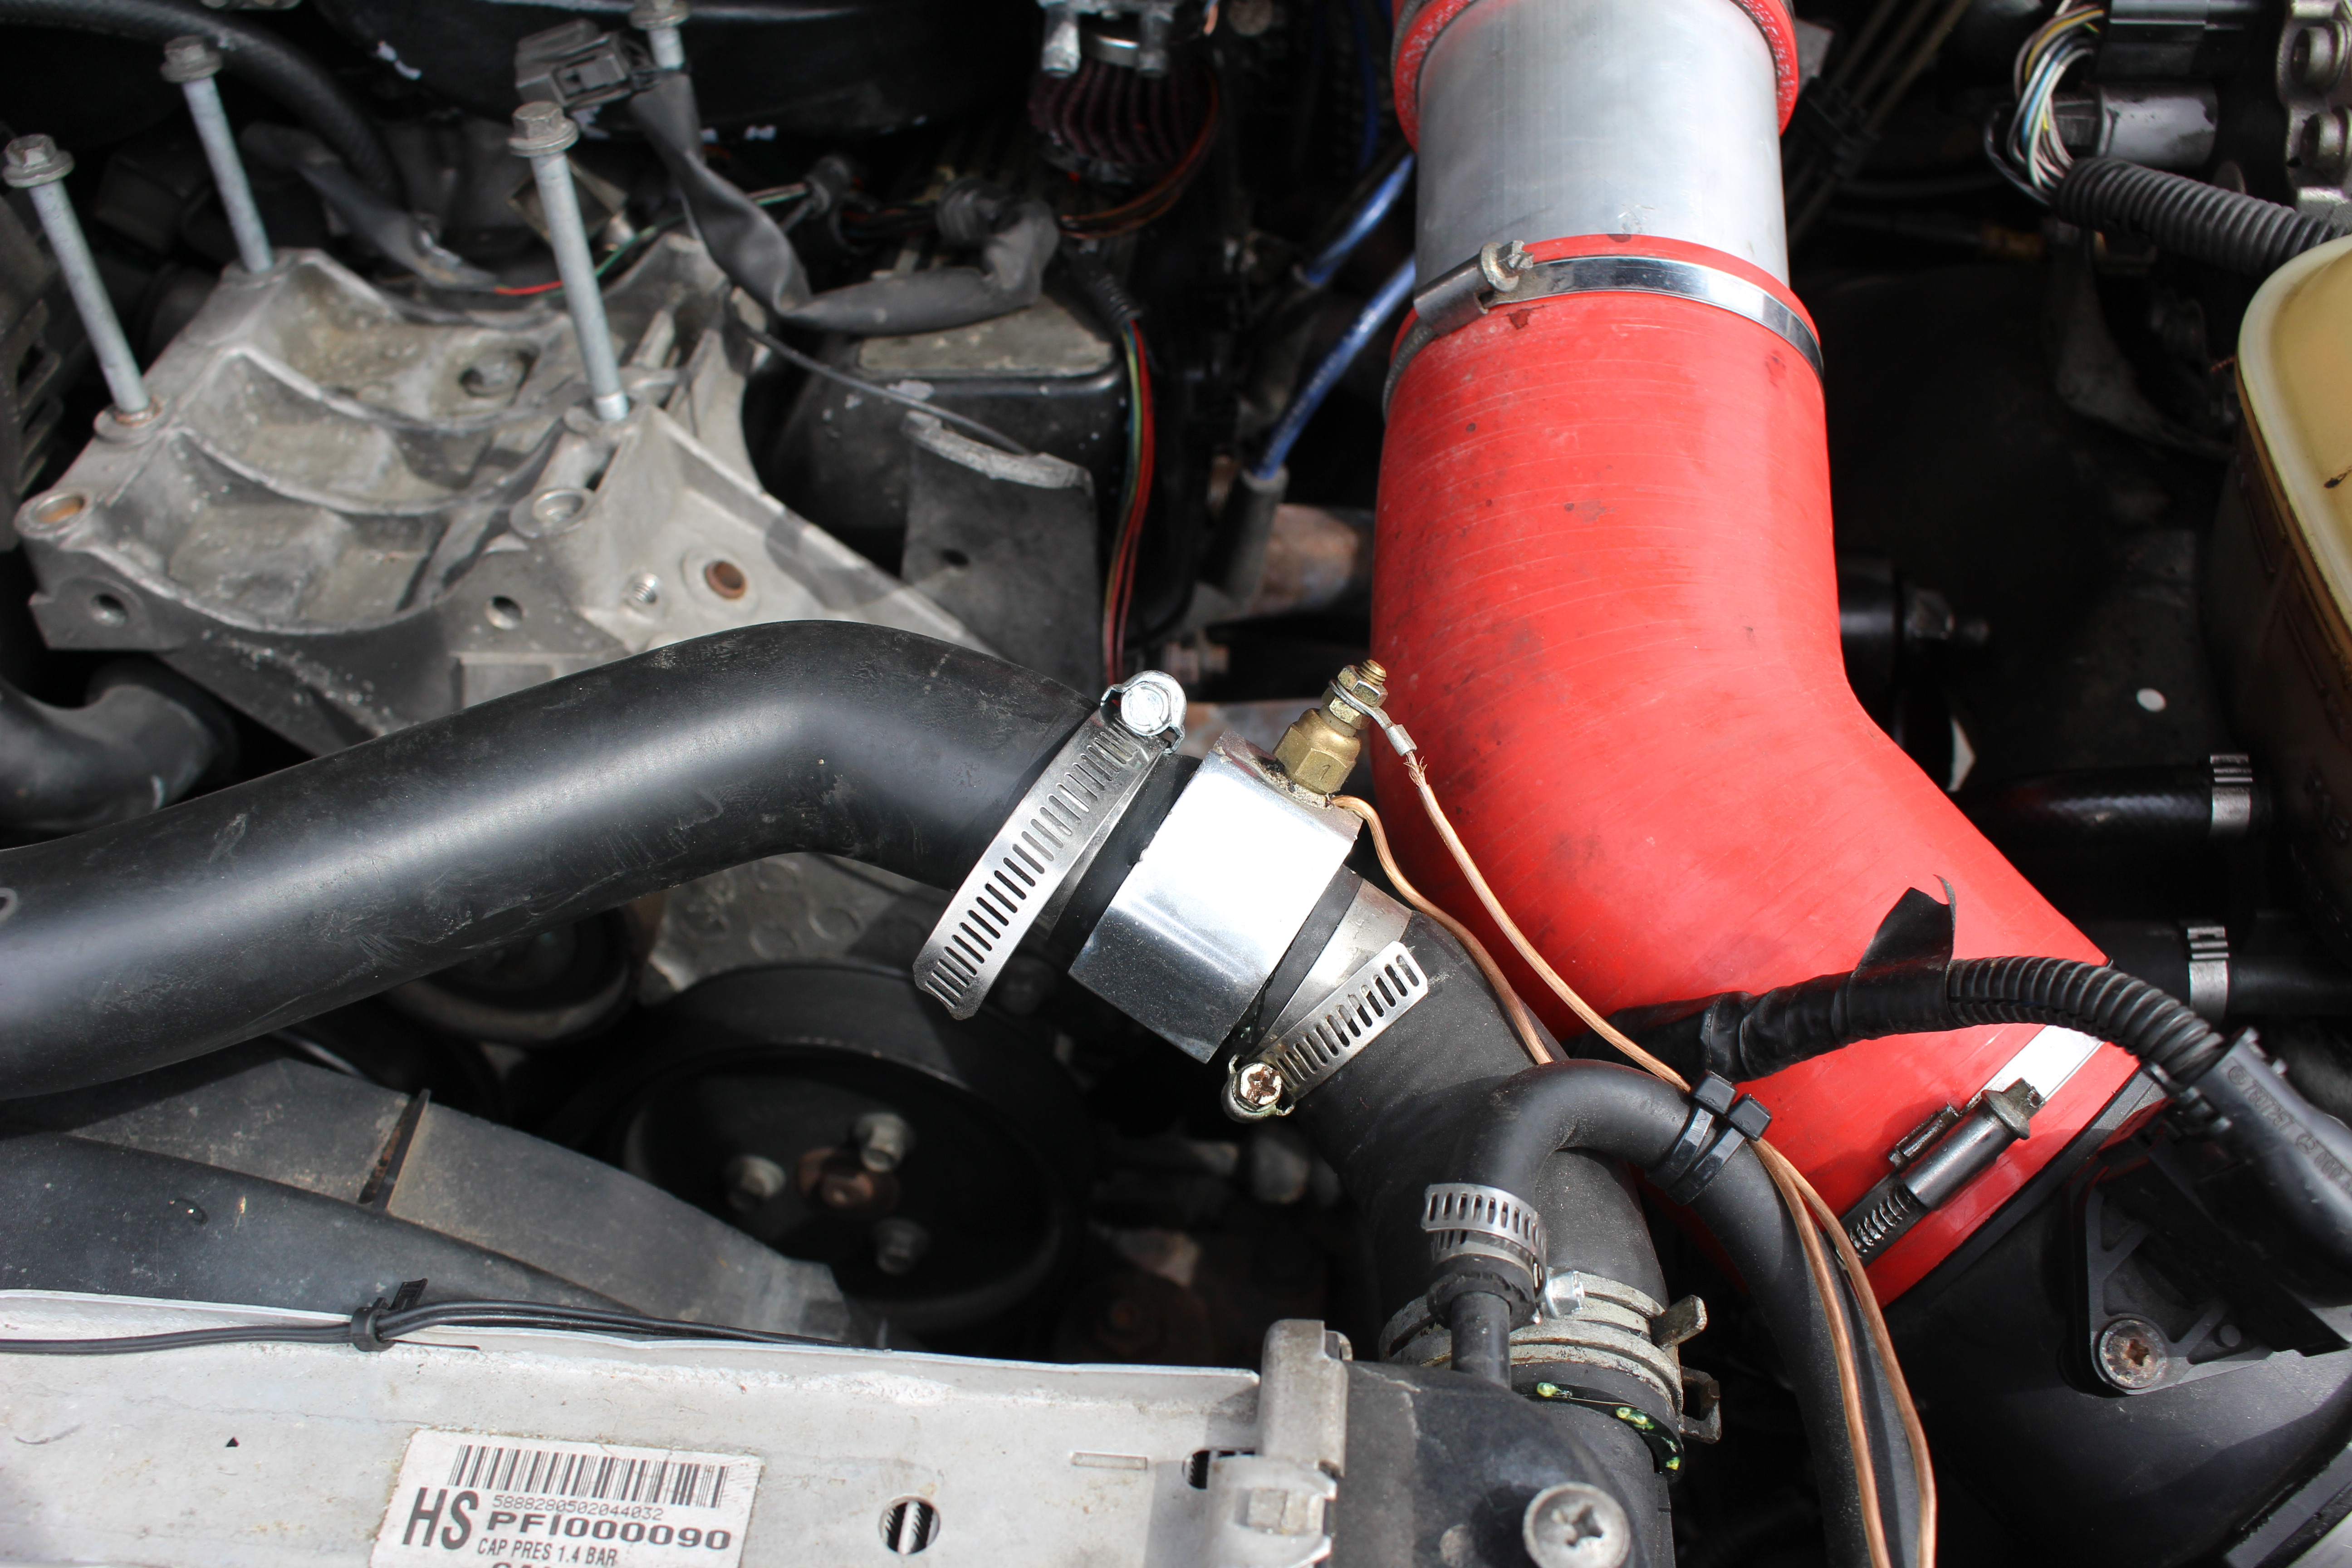
You've also got to ground the hose fitting as you can see I've done here. The sensor won't work if you don't do this. It works off of the electrical resistance of the water based on temperature. Then just run a wire over to the nearest piece of metal in the engine bay that you can ground it one. You can see where I used and I'm a fan of that position.
Hopefully this is helpful. If anyone has any questions, just ask. This seems to work great and I personally prefer it to the look of an ultragauge.
So to start, here's what you need:
Speaker wire or any other wire.
Crimps are helpful
32mm Water Temp Adapter - search for exactly that on eBay
Sunpro 2" Electrical Temp Gauge - there are a lot of styles to choose from, and you don't even have to use a Sunpro. Just be sure it's electrical.
If you want a nice mount like the one I used, just go on eBay and search up 2 inch dash pod.
To start, I mounted my gauge essentially on the trans tunnel in the mount I made. I also drilled a hole in the plastic I mounted it on to run the wires up in the dash, then out the rubber grommet under the brake booster, and around the edge of the engine bay. It appears I forgot to get a picture of where I grounded the gauge, but I grounded it inside the flip down panel on the dash on the metal framing in there.
For the sender, I mounted that in the upper radiator hose. You might get a more accurate reading if you put it closer to the tee, but make sure it's in that top hose. If you've done the inline thermostat mod, put it on the engine side of the thermostat, not the radiator side. Be sure to use some Loctite 37398 thread sealant on it so it won't leak, not that it should anyway. The extra insurance is always nice though. I also recommend not using the band clamps that come with it, but instead a better set from the auto parts store.
You've also got to ground the hose fitting as you can see I've done here. The sensor won't work if you don't do this. It works off of the electrical resistance of the water based on temperature. Then just run a wire over to the nearest piece of metal in the engine bay that you can ground it one. You can see where I used and I'm a fan of that position.
Hopefully this is helpful. If anyone has any questions, just ask. This seems to work great and I personally prefer it to the look of an ultragauge.

Pro Wrench
Joined: Nov 2015
Posts: 1,935
Likes: 189
From: Coastal Georgia
If anyone has any questions, just ask. This seems to work great...
......


Thread Starter
|
Camel Trophy
Joined: Aug 2014
Posts: 4,743
Likes: 985
From: Southwestern Virginia
Thanks for all the kind words, guys.
9, last time I checked it was dead on with what the factory gauge had, though there may be some variation when the outside temp is different. I run down the road 195-197 and idle 197-201 depending on outside temp with occasional spikes that only last seconds to around 203.
9, last time I checked it was dead on with what the factory gauge had, though there may be some variation when the outside temp is different. I run down the road 195-197 and idle 197-201 depending on outside temp with occasional spikes that only last seconds to around 203.

