When you click on links to various merchants on this site and make a purchase, this can result in this site earning a commission. Affiliate programs and affiliations include, but are not limited to, the eBay Partner Network.
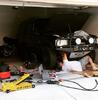
Could be. I got it because it has that bubble plastic and looks stock. Got the rebuilt heads in place. New guides and seals. Not technically difficult, but challenging because of the lift. Found the issue with the head gasket. I wonder if the composite failed and then the ring blew or vice versa.....Passenger rear. That's where I heard the 'pssst' sound a few times. Liners seem to be in place.
THX cvhyatt! I have been going slowly at 4-5 hours a day because it was 32 degrees outside and raining. Found I was missing some bolts here and there and have to wait for parts now. Hope to be done by end of this week. Saw that the BA head repair video says 90ft lbs on final torque. Thought this was high so checked ARP specs and they are at 70. So going with 70 max.
Getting there. Had to helicoil rear valley gasket clamp m8 x 1.25. At least it's a common size and kit available at autozone! Since she was running rich, I bought a new ECU coolant temp sensor. old runs about 300 ohms more resistance at about 180 degrees (690 vs 310 for the new sensor). This could be the issue with running rich. Truck thinks engine is not hot enough yet.....Also, it was an OEM unit and likely 19 yrs old.
doing some interior work. Leather seats from salvage yard. Bit dry and faded and dirty but no tears. rubbing alcohol to clean leather surfaces. dried with heat gun. 600 grit rub down. added 3 relatively light coats (not soaked, just enough to stain) of fiebings black leather dye. It is a bit glossy and looks like black ink in color. So the leather was dark compared to the vinyl. Dried with heat gun between coats. I could have dyed the vinyl with fiebings (worked fine on test area), but chose to just use lexol leather vinyl conditioner. This works fine and vinyl nearly same color as leather ! Pic does not do seat justice, poor lighting..... Original on left, refinished on right.
I saw earlier in your thread that you had a self centering steering damper - did you end up installing it? Looks like it would have required mounting bracket re-location.












 ! Pic does not do seat justice, poor lighting..... Original on left, refinished on right.