When you click on links to various merchants on this site and make a purchase, this can result in this site earning a commission. Affiliate programs and affiliations include, but are not limited to, the eBay Partner Network.
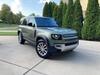
Hey All - just thought would provide a quick review of the side rails and rear step kit accessories I ordered from Powerful UK for my 110 (see links below).
Unfortunately I didn't have a good experience with the parts:
The side rails arrived damaged and missing parts. DHL was no help though Powerful UK's customer service was great and shipped out a new set of side rails this time packaged much better. The driver's side installed fine but the passenger side rail bolt holes didn't line up with the factory holes....one was off. Customer service told me basically I can file the hole larger but otherwise I'm stuck with it unless I want to pay to ship the parts back....and if I modify the part they won't accept the return. Unfortunately the bolt head is pretty small so if I widen the hole the won't be material left for the bolt to hold the rail unless I use a washer. Also the driver's side rail includes an extra hole in the rail (because the passenger side has 3 bolt holes vs. driver side only has 2). Not a big deal but know you'll see the paint color through the hole. Screws were all SS so I had to paint them black to match the rails.
The rear step was great for ~ 3 weeks and then the plastic cover fell off. Turns out they used a silicon adhesive that failed and the stud that secures the step was also rusting.
At first their customer service was not accepting a return without me paying for the shipping back to the UK but after a few heated emails they are picking up the parts and hopefully refunding me for the parts and shipping to the US. I'm really disappointed as the designs are a great idea, the pricing was reasonable (especially for Land Rover mods!) but the quality control and fitment are poor. Hopefully they'll fix the issues...if so I'll consider buying them again and updating this post!
View with the side rail installed Close up view. Notice the 3rd hole without a bolt and the rear step (while the cover stayed attached its was awesome!) Passenger side rail with the hole that didn't line up Close up on the passenger side rail with misaligned hole The broken rear step...lasted 3 weeks!
Hi We have listened to your issues and are working hard to make our products better.
We changed the rear step from steel powder coat to stainless steel - this was to make our products better - but the stainless parts were covered in some sort of oil coating that caused the adhesive not to stick - this has now been fixed with a cleaning process.
The utility rails have had a re-design and i even mention you in the video we have just posted.
We are always trying to improve - let me know if you want some of the new end caps for the utility rails etc.
I appreciate your feedback and we will try and rise to any challange !
I'm VERY late to this thread. I've had nothing but positive experiences with PowerfulUk, so very saddened by yours. To state what may be an absolute OBVIOUS comment or quite novel depending on your mechanical experience: the first thing I would confirm is that the bolts weren't secured individually. What I mean is, with almost everything there's a tolerance challenge. Always make sure you loosely attach all the fasteners/screws/bolts before tightening them all down or torquing them down. In some applications, the order even matters. Wheels, headers, etc. With something linear like that utility rail, I would start in the middle after loosely connecting them all and tighten down working out to both ends. Perhaps this wouldn't have impacted this issue but it happens a LOT. Good luck with the next mod, installation or repair!
I'm VERY late to this thread. I've had nothing but positive experiences with PowerfulUk, so very saddened by yours. To state what may be an absolute OBVIOUS comment or quite novel depending on your mechanical experience: the first thing I would confirm is that the bolts weren't secured individually. What I mean is, with almost everything there's a tolerance challenge. Always make sure you loosely attach all the fasteners/screws/bolts before tightening them all down or torquing them down. In some applications, the order even matters. Wheels, headers, etc. With something linear like that utility rail, I would start in the middle after loosely connecting them all and tighten down working out to both ends. Perhaps this wouldn't have impacted this issue but it happens a LOT. Good luck with the next mod, installation or repair!
Same.
They are great. I love how they fully admit to there being room for improvement. Simon and the crew are fantastic. I've loved all the gear I've gotten from them
Tolerances are tight on these rails. 1 minute with a hole drill or rasp and that would have been remedied to fit perfectly. I had to make some similar minor tweaks with the mounts on my rear molle plate. Great bit of kit. Has been even more useful than I imagined it would be.
I supposed we all have a bar of acceptability with products. @PowerfulUK has always reached or exceeded it in my experiences. The videos are great. I reckon I could watch Simon read the phone book and be enthralled.
I have also bought a number of accessories from Powerful UK for my Defender and my old LR4 and Discovery 5. Simon, his wife Carol and the rest of the team are excellent to deal with. Top-notch customer support on top of the informative YouTube videos, which is an extremely valuable service to us owners. I was fortunate to meet up and spend a few hours with Simon & Carol when I popped across the pond for the Goodwood Festival of Speed, and they are both wonderful people who not only are passionate about the Land Rover brand, but also strive to have the best customer support and always answer any questions you might have. I will continue to be a customer and stand by their products.
Last edited by CincyRovers; Dec 6, 2024 at 10:43 AM.
Hey - Thanks for your input. I'm a pretty experienced DIYer. The issue is definitely that the bolt holes don't line up on one side. I could drill them out but I bought this item as a bolt on and shouldn't be modifying the part to make it work. Also enlarging the holes might take away too much material and the supplied bolt heads won't have enough material to grip into. Its an easy fix with washers but that's not the kind of installation I like to do with my mods.
Hi We have listened to your issues and are working hard to make our products better.
We changed the rear step from steel powder coat to stainless steel - this was to make our products better - but the stainless parts were covered in some sort of oil coating that caused the adhesive not to stick - this has now been fixed with a cleaning process.
The utility rails have had a re-design and i even mention you in the video we have just posted.
We are always trying to improve - let me know if you want some of the new end caps for the utility rails etc.
I appreciate your feedback and we will try and rise to any challange ! https://youtu.be/VYBlo9WcC9c
Hey thanks for your input and appreciate that you guys looked into the issues and modified the parts / production to make them better! These parts are really clever ideas but they didn't hold up here in Florida. Your customer service didn't seem to care about my issues and left me with a bad overall experience which is what prompted my review of the parts on this forum. If you guys would like to send me the updated replacements I'd be more than happen to check them out and update this review depending on how they do. (I only received a partial refund for the step so I won't be purchasing these items again just to test out). While we're discussing improvements I'd suggest powder coating or painting the utility rails or using a better quality anodizing with more pigment as the rail I left installed has significantly faded over the past 6 months (see below photo). The faded color blends well with the Pangea Green but it's not black anymore (compare to the screws and bolts I painted black). faded anodizing on utility rail
Hey - Thanks for your input. I'm a pretty experienced DIYer. The issue is definitely that the bolt holes don't line up on one side. I could drill them out but I bought this item as a bolt on and shouldn't be modifying the part to make it work. Also enlarging the holes might take away too much material and the supplied bolt heads won't have enough material to grip into. Its an easy fix with washers but that's not the kind of installation I like to do with my mods.
I can understand your frustration but sometimes we as DIY’ers need to do a little ‘fudging’ to make things work. Not everything works right out of the box, and I personally would rather do what needs to be done to complete the task, as opposed to dealing with repackaging and resending a product when a few minutes of tweaking will be satisfactory. But that is up to one’s ability and patience level. Looking at the picture you provided, there is not a huge offset where the bolt needs to fit the hole, maybe a millimeter or two. Really don’t think it needs enlarging the hole or washers, just a Dremel or round file to remove a minimum of material. Oftentimes these holes are slightly oval shaped to account for machining tolerances or settling or shifting of body parts. Additionally, I note a slight difference between the rail and the trim, not quite parallel. About the same gap the hole is missing by. Everybody has a different approach, but this seems to be easily overcome with minimal effort. Results may vary.