When you click on links to various merchants on this site and make a purchase, this can result in this site earning a commission. Affiliate programs and affiliations include, but are not limited to, the eBay Partner Network.
I orxered my 23.5 when these were still scarce and clearsight wasn't an available option. What does this do? Is it just a video camera that gives a better view without the spare in the way?
To quote Land Rover:The ClearSight rearview mirror is a practical two-in-one visual field expander. This innovative mirror is connected to a roof-mounted camera. With the flip of a lever, your rearview mirror can turn into a screen for this camera view.
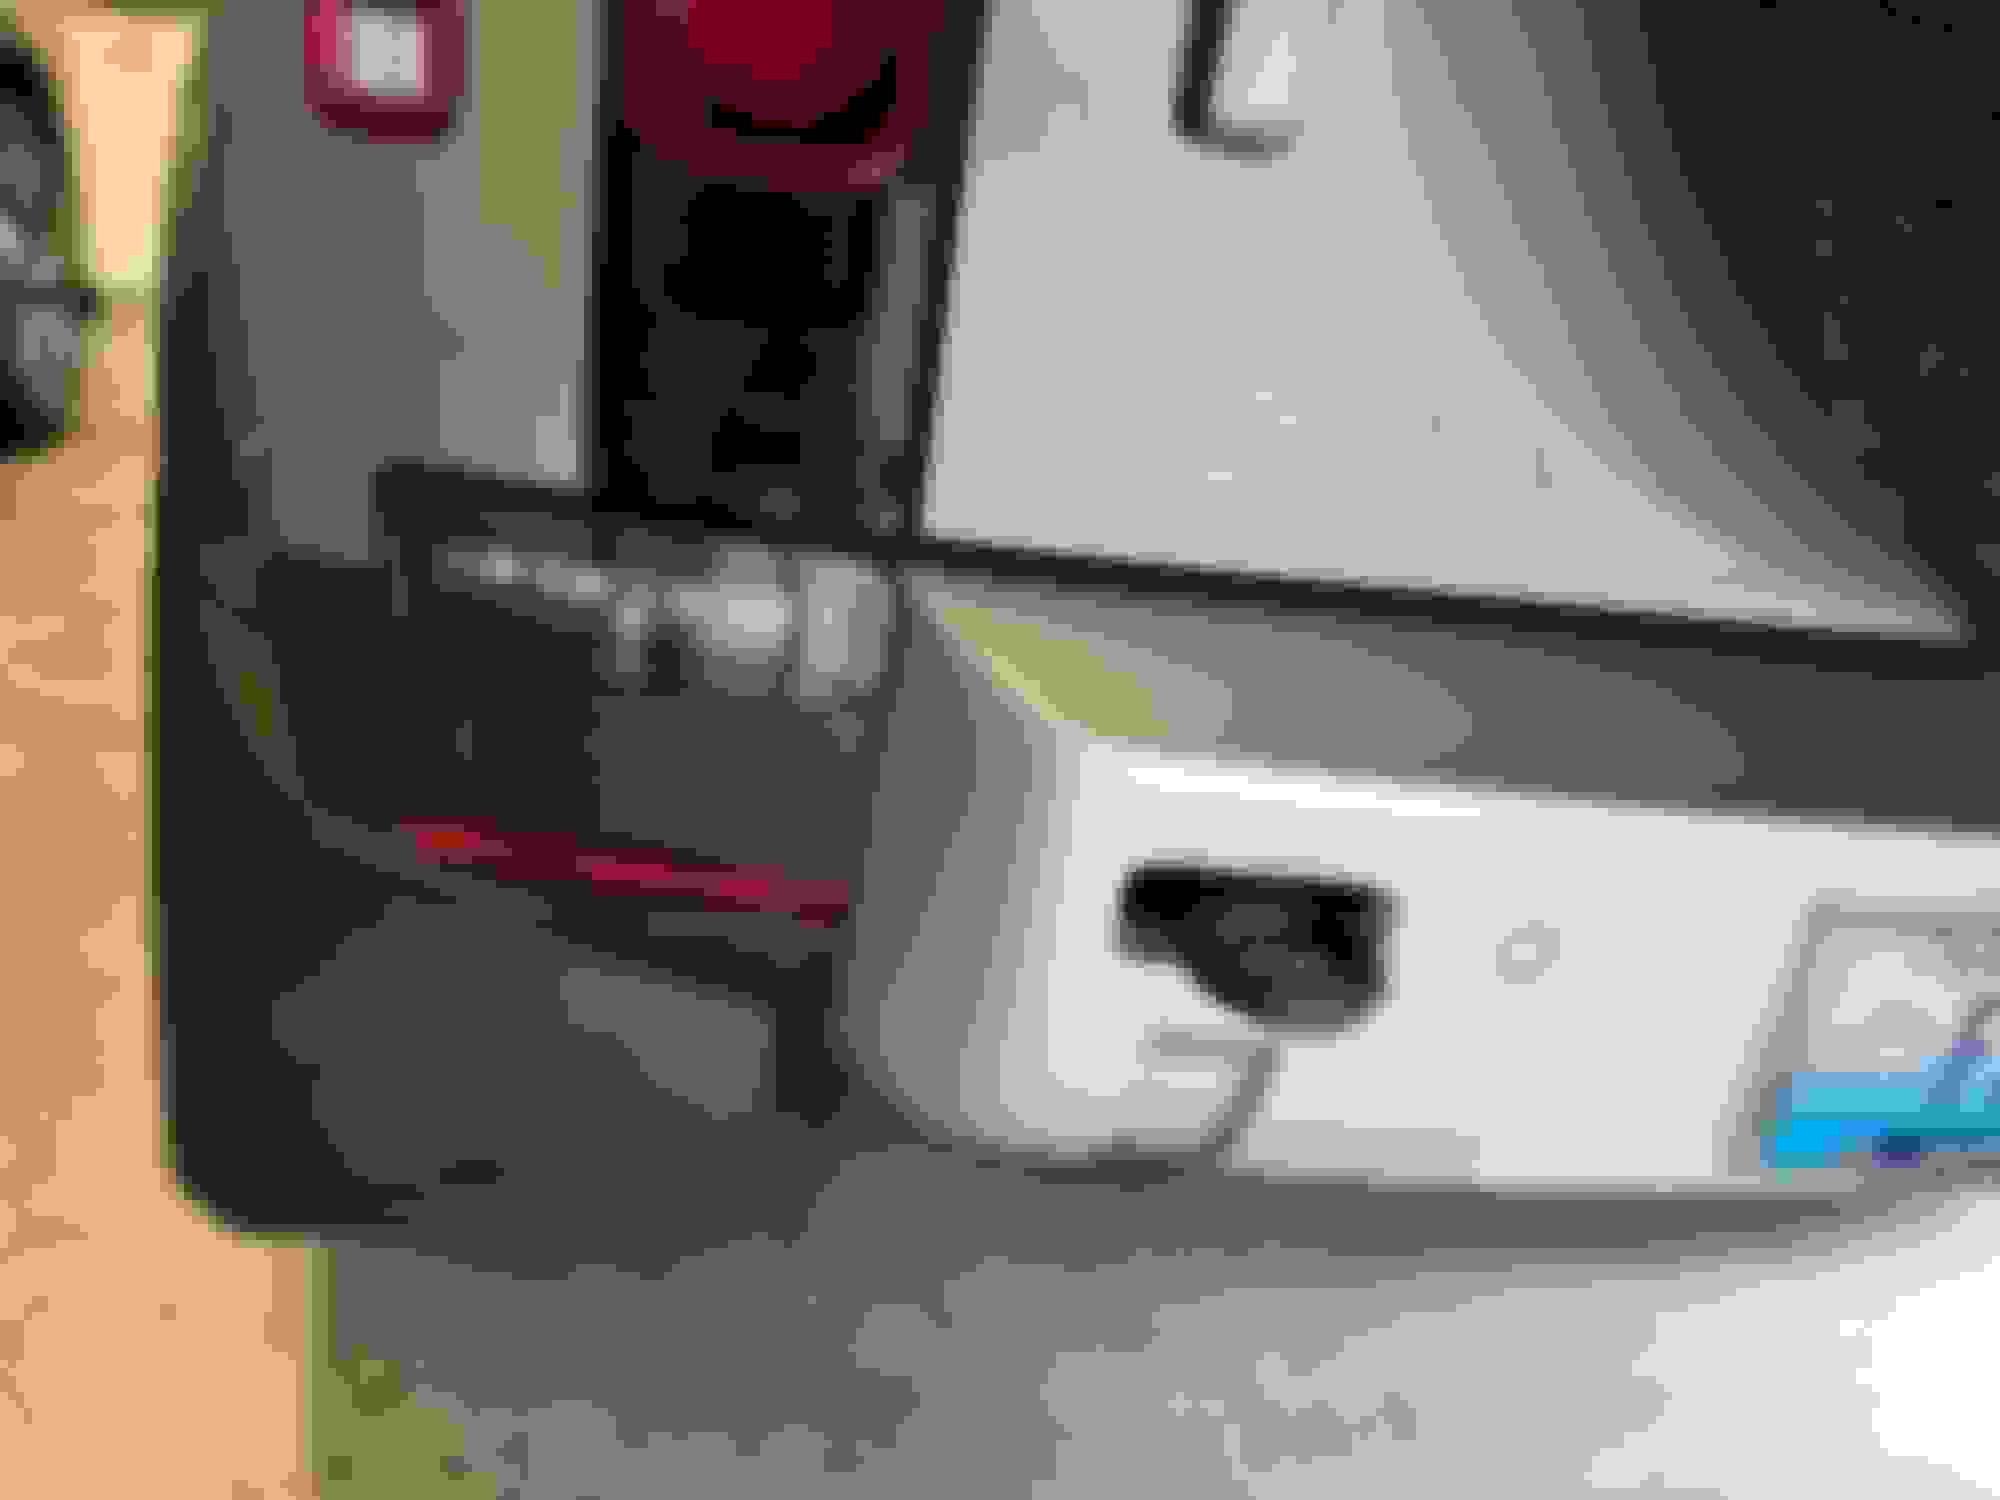
This innovative camera-linked mirror displays critical footage of the area behind the back of your vehicle. This can be useful when children are playing nearby as you're backing out of your driveway. It can also help you to see above moving boxes, sporting equipment, or other tall items stowed in front of your back window..
It really does help seeing around the headrests and spare tire,
I leave my ClearSight rear view mirror/camera on all the time. In fact given scarcity and random deletion of so many things at my time of order in 2022 it was a thrill to see it made the delivery.
It did take me some time getting used to its wide field of view but once i got used to it, I never shut it off. Visibility is measurably better in my subjective opinion. It is a bit odd when pulling a trailer, same holds true with a regular mirror, but at least I know if it fell off :-D LOL (Trailer camera view aside which I do like)
@ThunderBob Where did you get those aftermarket tail lights? I have similar ones, with the black surround, but the internal backup lens is different looking than yours... mine is a white colored lens that after 2 years old, has unfortunately yellowed. So maybe yours with what looks like 4 "lamps" in side and without the white lens on top, are revised or better?
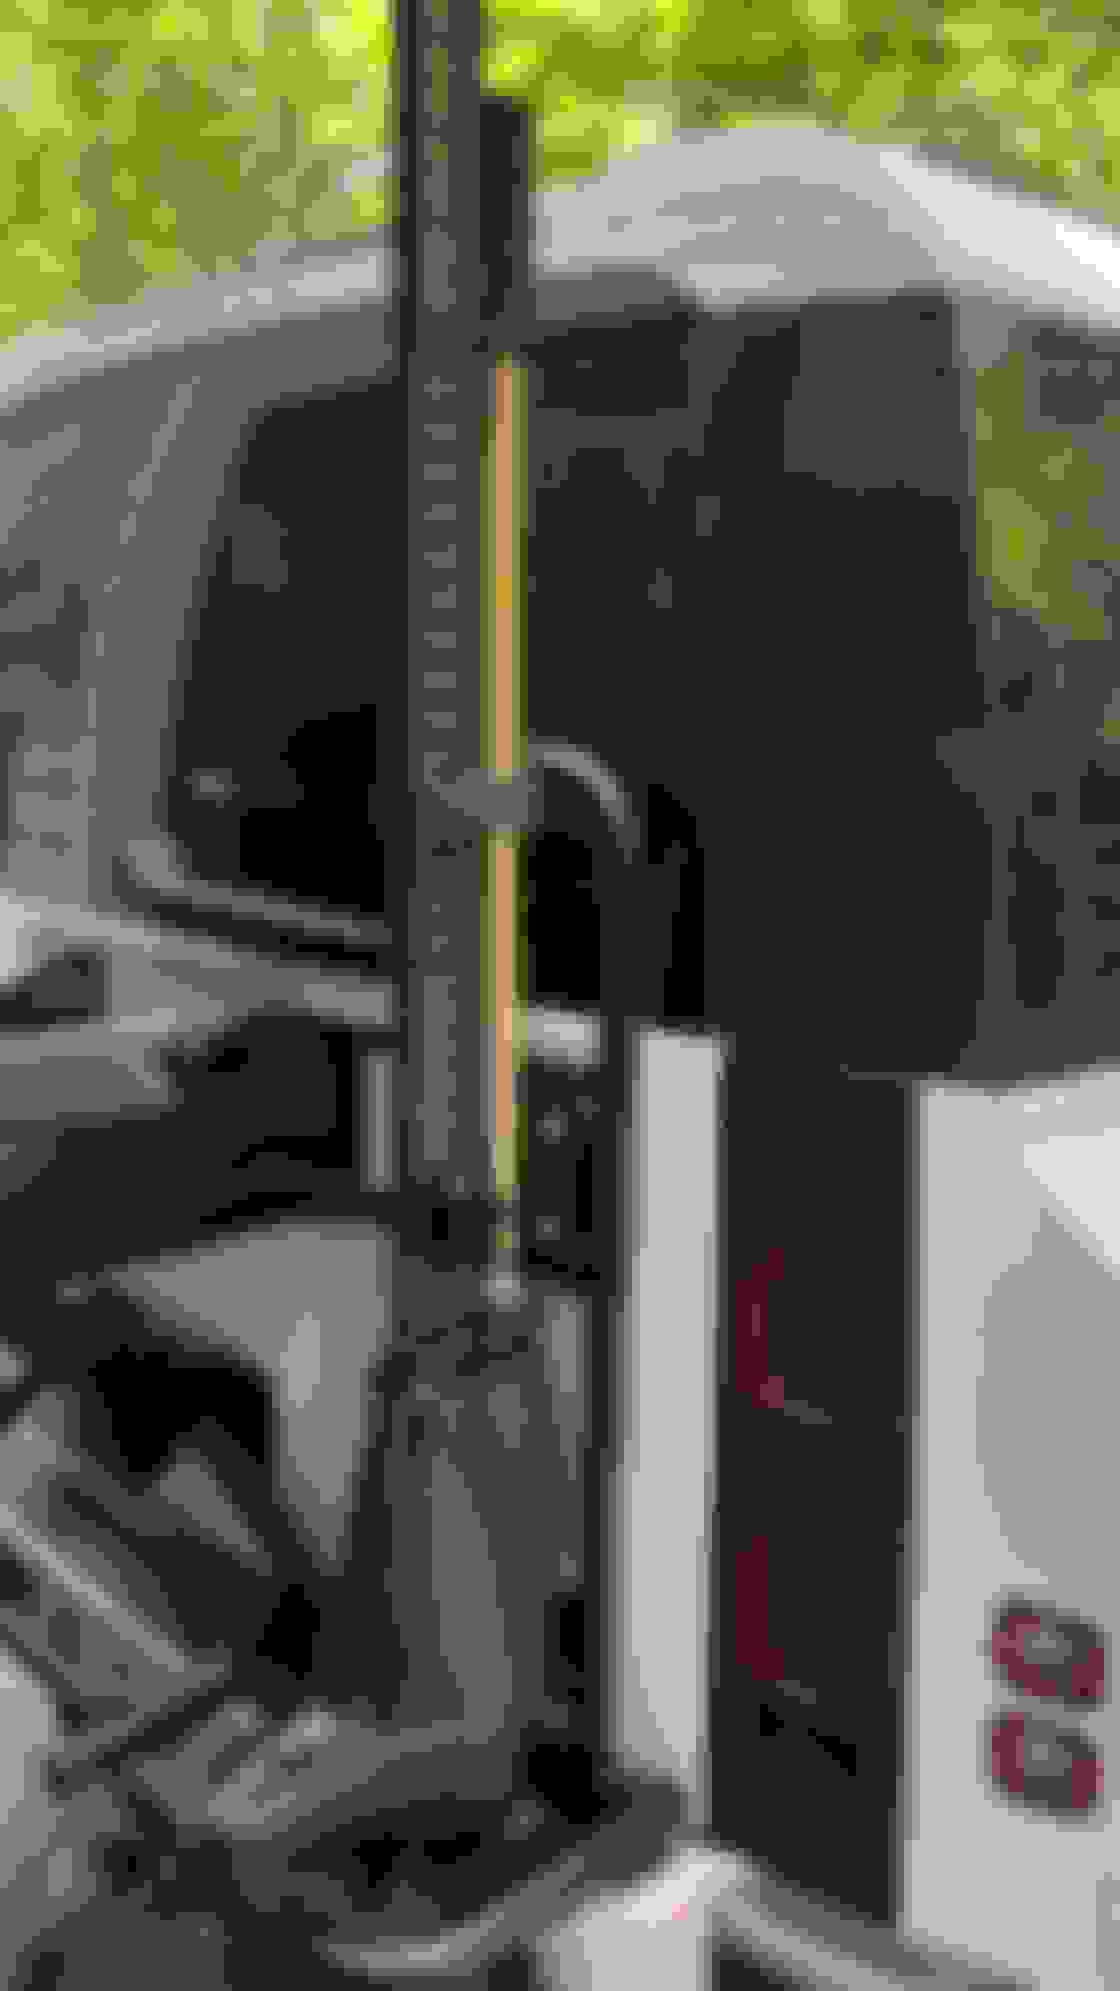
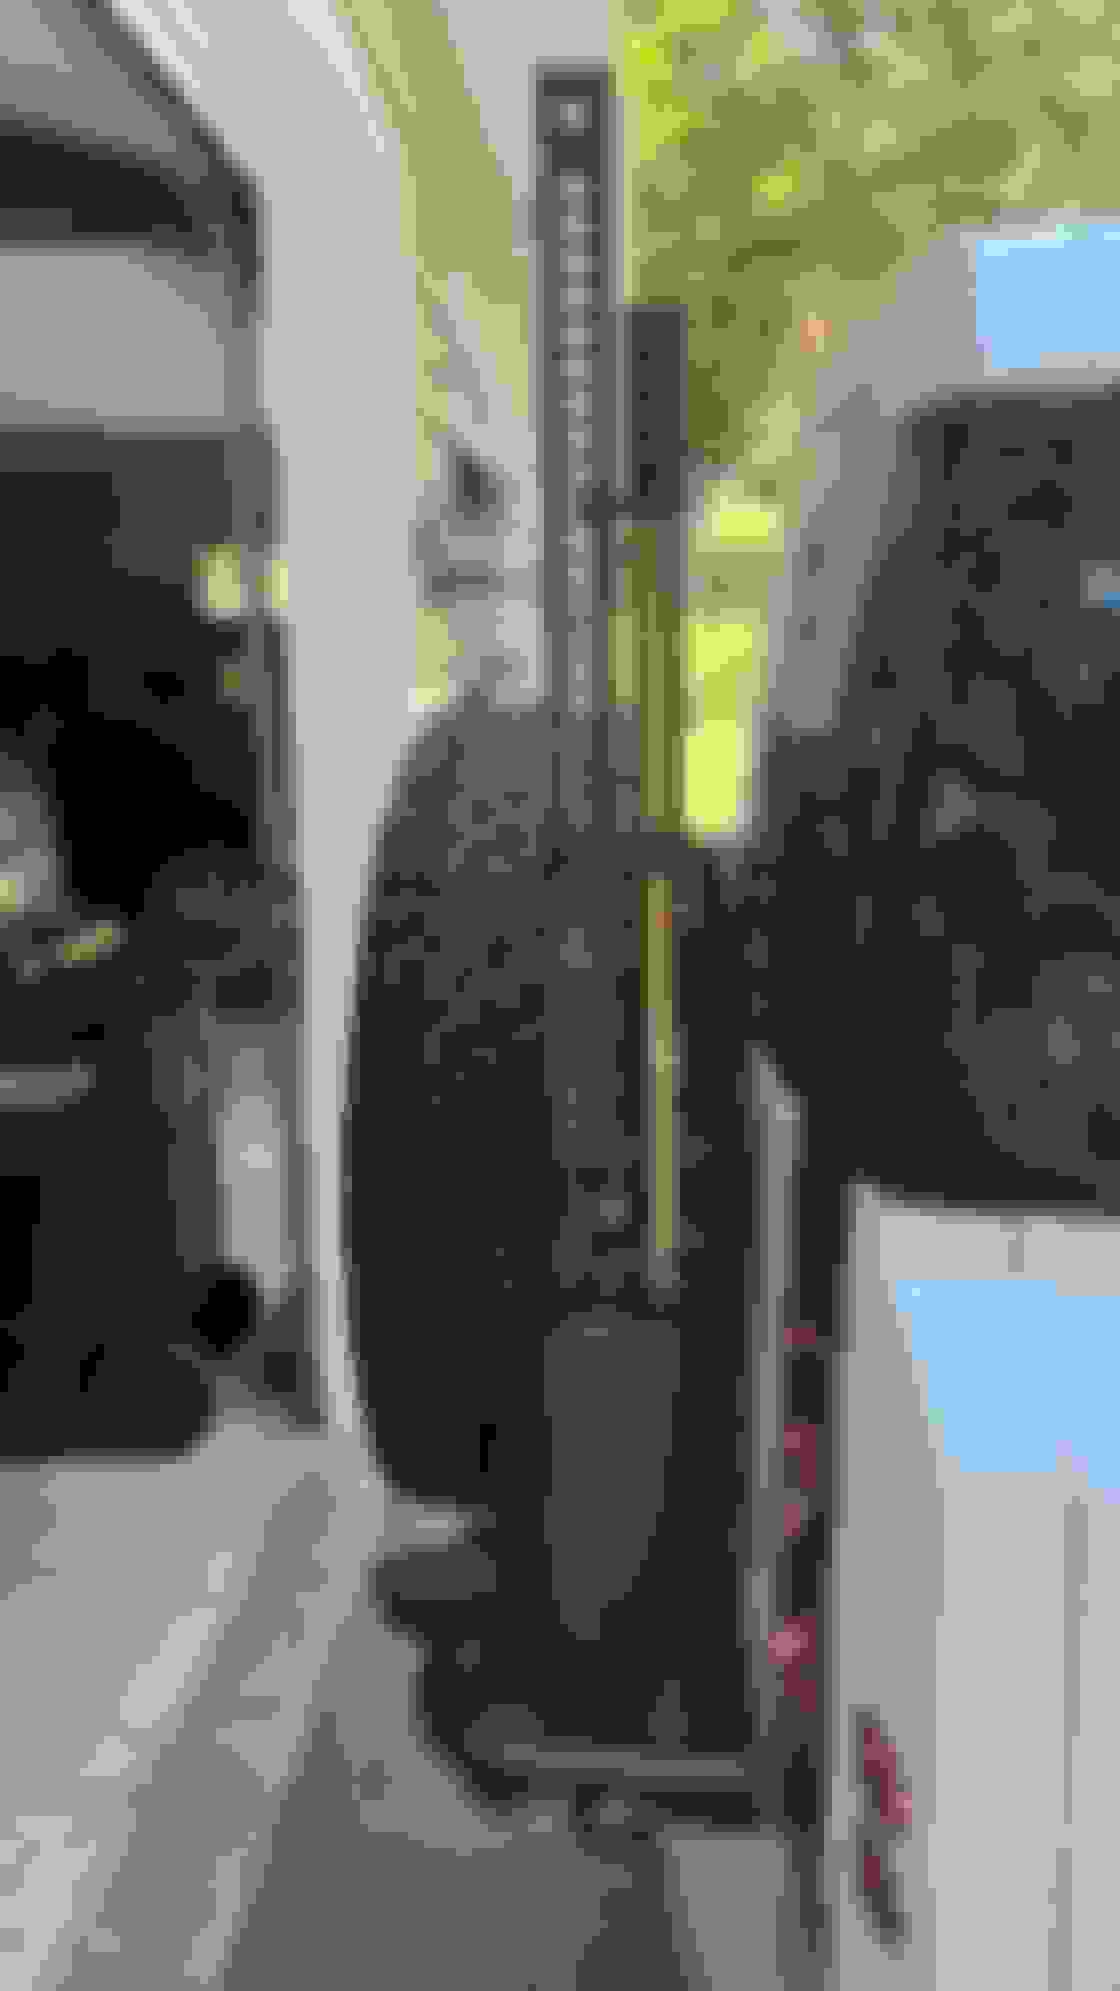
Got busy this weekend and did a couple of projects I've been planning First one was retrofitting the Clearsight Rear View Mirror. After studying Marco�s (mmbaf) guide and getting all the required part numbers from Ian (Hairy Dan) I assembled all the required parts and cables. I studied the videos from Powerful UK and decided today was the day. It as an easy project! First I removed the rear view mirror. Always a little scary the first time you do it. But it came off without a hitch. Next I removed the roof lights console, one of the back seat courtesy lights, and finally the rear trim piece at the tailgate so that I could get access to the antenna. I fed the Land Rover repair cable through the light console to the mirror opening (I fed it from the side of the console and it curved over to the mirror opening quite nicely). I then attached the 3 meter aerial extension cable to an electrician�s �fish� tape and sent it to the courtesy light opening from the rear of the vehicle. I pulled the cable out of the courtesy light hole enough to remove the fish tape. I then inserted the fish tape through the roof light console opening towards the courtesy light opening. I attached the extension cable to the fish and then pulled it back to the roof light console. I connected it the Land Rover repair cable. I went back to the rear of the vehicle and began removing the existing antenna. This was the most difficult part of the project for me. There is limited space in which to work and I had an awful time disconnecting the Fakra cables from old antenna. After about 30 minutes fiddling with it, I was finally able to remove the old antenna and replace it with the new Clearsight antenna. Attaching the Fakra cables is a lot easier the disconnecting them! I moved back to the driver�s seat and attached the cables to the mirror and the mirror to the vehicle. The mirror turned on as soon as I connected the cables. I then coiled up the excess cable, secured it with tape and tucked it up in the headliner. There was a lot of excess cable. I probably could have gotten by with a much shorter cable for my 90. I installed the light console, the courtesy light and the trim at the rear of the Defender. Please note you will need to replace the headliner rear clip (LR091317) as it will break when you access the antenna. After putting my tools away and cleaning up, I broke out the GAP tool and changed MultiCAN 711 to SVRM with Homelink After that was completed I programmed the Homelink to my garage door and then I called it a day, Total time 3 hours. Skill level is about a 2 out of 5. Don�t be afraid to do it.
My second project was installing a pair of aftermarket backup lights the next day. This was very easy but was scarier due to pulling off the taillight covers. After watching Youtube videos by Hunters Prestige and Lucky8 Off-Road, I removed the covers by using plastic pry tools and judicial use of brute force. I did spray soapy water towards the clips that held on the covers. It made pulling them off a little easier. Once they were off I wired up the new reverse lights (which are plug and play) and then tested the connections. Everything worked, I replaced the wiring into the body cavity, clicked the covers and the reverse lights into place and called it a day. Total time 1 hr. Skill level is about 1 and a half out of 5. Easy peasy.
The clear sight mirror is my number one wish of things I missed out on. You referenced two threads about install and parts tips but I can't find them anywhere. Can you help at all? Where did you source all the parts? Thanks.
I lucked out with the mirror and the antenna-both were acquired via eBay. I just kept searching for LR140340 (mirror) and LR140535 (antenna) As soon as the mirror popped up for sale I selected “Buy It Now” and snagged it. I also purchased the antenna from the same vendor. (Seller: parts link). It appears that both were from the same donor Defender.
The rest of the parts (repair cable, LR164584 and headliner clip, LR091317) I ordered from Land Leaping Genuine British Parts. You can order the mirror and antenna from them as well (and they do discount) but it’s still pricey.
I ordered the In car radio aerial extension cable lead 3M male Fakra - Fakra female CT27AA118 from In car connections but it is readily available from Amazon.
Good luck it’s a worthwhile project.
@ThunderBob - Congrats!! You seem to be the first person to post about my dream retro fit! I am now inspired to get the remaining parts. Can you post more pics? Any other tips you want to mention? I'm saving this post for further reference. Well done.
I've gotten other parts from that seller. (parts link) as well... in my case rear brakes that will be used to allow small rim fitment. Reputable seller.
Installed the Spare Wheel Cradle & Hi-Lift Jack Mount from Safety Devices for my 48" Hi-Lift Jack X-Treme. Simple install, very sturdy, and well built. Used the Hi-Lift Running Gear Cover, Versatile Locking **** (for security...had to get a different bolt than what came with the mount), and Handle Keeper (plus a few zip ties to keep down the rattling). I do have Lucky8's rock sliders so I got a RCI Lotus Slider Adapter (Rock Sliders Adapter for Hi-Lift Jacks)...it works great on the rails was very stable, when I tested it with the off-road base...also added a cheap Amazon handle grip to the jack and Lift-Mate so I can lift a tire and stack rocks if/when needed off-road.
The Spare Wheel Cradle is fantastic...really helps with re-mounting the wheel...definitely saves your back. However, the clearance is very tight...I am running 267/70R18 BFGoodrich KO3's (32.6") tires and that is close to the maximum size that will fit with the Spare Wheel Cradle & Hi-Lift Jack Mount installed.