When you click on links to various merchants on this site and make a purchase, this can result in this site earning a commission. Affiliate programs and affiliations include, but are not limited to, the eBay Partner Network.
Awesome, I installed mine yesterday but I gotta say for the price it should have come assembled and the damn stamped stainless tray and supports should have the damn edges finished off.
Cursing and bleeding should not happen on Christmas Day ..
The tray should have been powder coated just as the mounting plate..
Still no rattles and the best folding table I've seen..
Did you ever install the light MUD makes? I am thinking of installing it, but I do not know how power to it is provided. Do you know if there is a 12V source within the door, or do you need to run a wire to the fuse box?
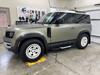
Going camping in Joshua Tree this weekend and need to bring my diesel heater due to the weather. Figured a little extra diesel wouldn't hurt, so I purchased a Rotopax wheel mount, LOX pack mount, and 2 gallon diesel tank. I'm happy with the setup overall, but 3 main complaints.
1. Rotopax Cost - Definitely overpriced. Could have gone a cheaper route, but I guess I'm paying for the brand name. 2. Rotopax LOX Mount - Figured I needed a locking mount since I live in Los Angeles with high rates of crime/theft. Would really only have it mounted to/from camping trips, but just didn't want to be paranoid of someone easily stealing the tank if I stop by at a restaurant or shop. That being said, the reviews on the LOX mount I've read are true. The locking mechanism is terrible and is extremely difficult to lock/unlock brand new out of the box. I can only assume it may get stuck/difficult to open once it inevitably gets sand/dirt in the lock when I'm off roading. 3. Defender rear spare tire mounting - Is it just me, or is it extremely difficult to line up the studs to reattach the spare? This whole process should have taken me 10-15 minutes tops, but took me over an hour just to re-mount the spare. Any tips/tricks would be greatly appreciated!
Yeah. My Tuffant sliders for my 90 don�t include any instructions and they don�t have any published online. That was unexpected and I had already started the job when I realized that. Given it was a weekend and there was no hope of calling Tuffant USA I just plowed in. All the various slightly different height spacers were a pain to sort out. It took me a solid 3.5 hours to complete. I�m happy with how they turned out but the severe lack of info published on these is definitely a miss in my book.
For those with Tuffant rock sliders I would advise getting their jack adapter. My friend has the same rock sliders and experienced a tire blow out on the trail and it was a nightmare trying to get it up on the jack as the rock sliders cover up the factory jacking points.
Seems like if you have these sliders then an off-road bottle jack would be a good investment�especially one that indexes on one of the small holes underneath.
After two years of living with the 10 inch screen I decided to do something about it. After searching EBay and always missing out on reasonably priced used 11.4 screens and considering purchasing a new screen and not finding anyone that successfully installed it with the GAP tool I decided to take one for the team and try one of the 13.3 curved screens from AliExpress. I found one sold by WIMAFUN Manufacturer Store for around $600 that promised to be plug and play. Two weeks later I had it in my hands. It didn�t come with any printed instructions but after watching Powerful UK�s YouTube videos I decided to give it a shot. After carefully removing top and bottom dash rails I unplugged the 10 inch display and removed it. I installed the new bracket that came with the display (very intuitive). It had inputs for both the 10 inch screen (with the blue locking clasp) and an input that is used for the factory 11.4 plug. Per the manufacturer website using the 10 inch input would result in a slightly distorted stretched output. They were correct about that but it really wasn�t that bad. Since I have a GAP G4 tool, I tried changing the CCF to reflect a 13 inch screen. Unfortunately, that didn�t work out and I had to change it back. I then ordered Powerful UK�s 10 inch to 11.4 conversion kit to get the wiring loom (they wouldn�t sell the loom separately) thinking if I had the screen wired like the 11.4 unit and changed the CCF appropriately it would display properly. Wrong again. I reverted back to the 10 inch input snapped everything back together and decided to let them do the programming remotely. Was I worried about giving control of my car to someone half way around the world? Yes. Anyway I bit the bullet and contacted customer support to find out what was needed. A Ethernet to OBD 2 cable was included with the display when it was shipped to me. I located a new HP Laptop with an Ethernet port and downloaded a trial copy of TeamViewer (TODESK was an alternative that can be used) no other software is required. Using the AliExpress app to communicate, I was instructed to turn on the ignition, plug in the OBD 2 connector and let them connect. The vehicle responded just like I was updating a CCF with the GAP tool. Five minutes later we were done. I had to scroll up from the bottom of the screen to display a hidden menu to update the screen from 10 inch to 11.4. After rebooting the system the resolution was perfect. All screens display perfectly, no distortion or placeholders. Total time installing the screen about 40 minutes and about 15 minutes spent programming.
Would I prefer OEM-probably. Would I do this again-absolutely! If you are considering upsizing your screen don�t be afraid to try this upgrade. Stretched screen (no programming) Stretched screen (no programming) Menu to change resolution after programming Display with correct resolution (after programming)