
Super Model With Bad Crack Habit Rehab Build-


Thread Starter
|
Recovery Vehicle
Joined: Apr 2015
Posts: 951
Likes: 39
From: AWESOMEVILLE, MAINE
Actually, you can replace almost the whole system for $149.00....SHIPPED!
Why mess around?....
1993 1996 Saturn SC2 1 9 DOHC Vin 7 Muffler Exhaust Pipe System 708181 790161 | eBay
Or just this section for 63 bucks, shipped.....
http://www.ebay.com/itm/Walker-48294...k7sUsA&vxp=mtr
Why mess around?....
1993 1996 Saturn SC2 1 9 DOHC Vin 7 Muffler Exhaust Pipe System 708181 790161 | eBay
Or just this section for 63 bucks, shipped.....
http://www.ebay.com/itm/Walker-48294...k7sUsA&vxp=mtr
Last edited by Detoured Discovey; Dec 8, 2015 at 06:24 AM.

Camel Trophy
Joined: Jan 2010
Posts: 4,245
Likes: 402
From: Traverse City MI
Interesting, from sublime to the mundane. I'm hoping to cut the chunky can off the back of the system cuz it shows under the bumper, just want a tail pipe barely to show. Move the bullet or can to just before the rear wheels. Not a bunch of room so it's gonna have to be a small form and 2" minimum in/out. No resonator and no ricer sound, just clean. Triumph did use res tips, may let that stew a minute......
Thread Starter
|
Recovery Vehicle
Joined: Apr 2015
Posts: 951
Likes: 39
From: AWESOMEVILLE, MAINE
Don't get me going on Triumph.....they used Pacesetters...... 
All Righty...... This is going to get a little...........EXSTENSIVE....
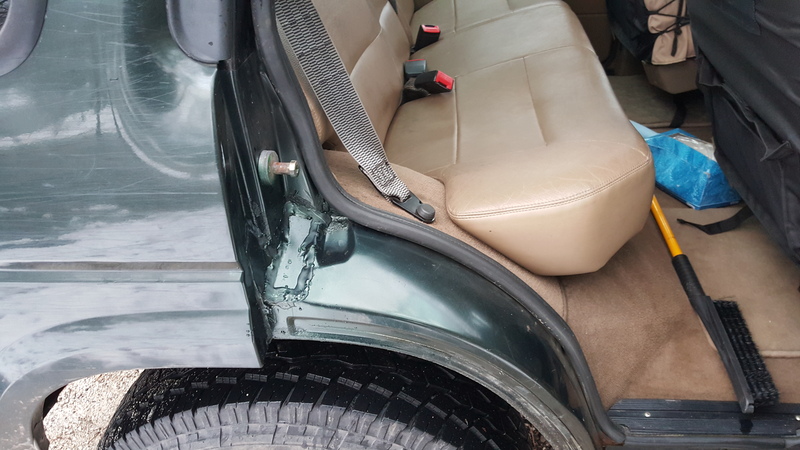
C Pillar base repair......Many snow belters suffer, it's yet another poorly engineered area by Rover, now we suffer, suck it up, and repair......
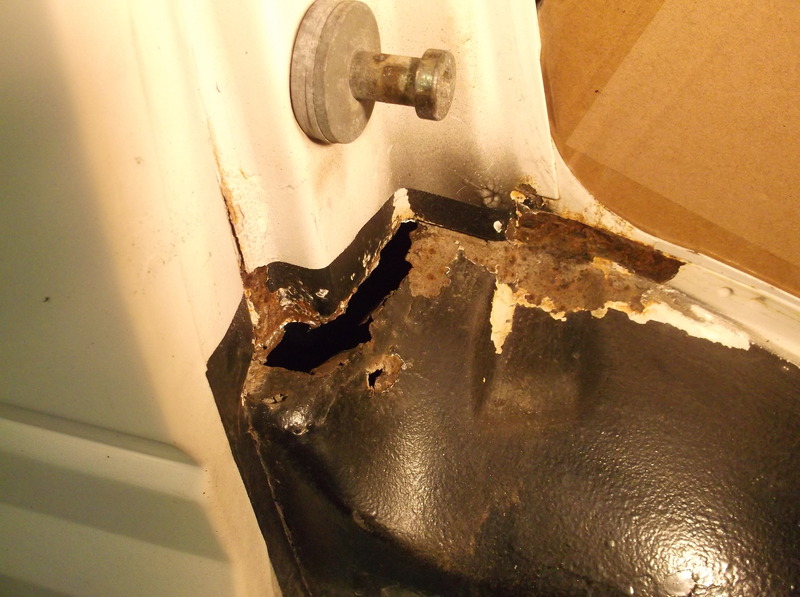
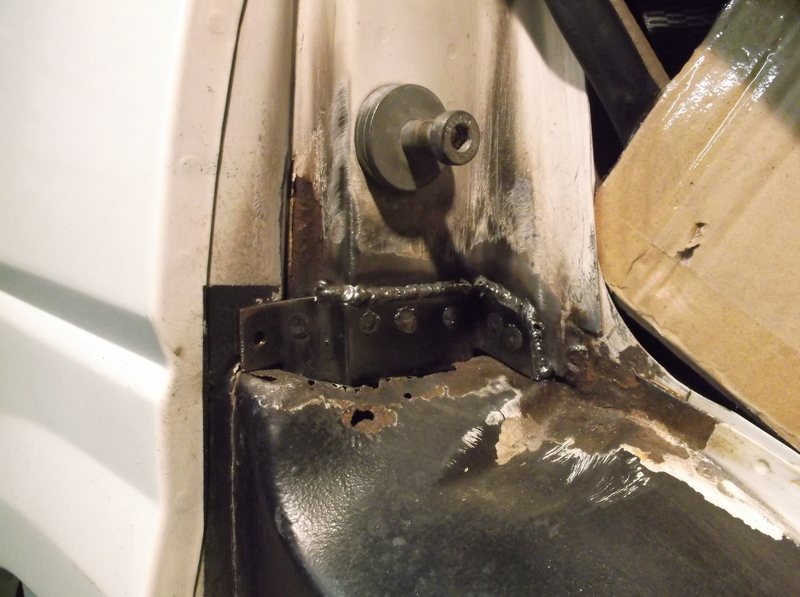
So......initial tell tail.....creepy rust.....I started with my "EASY" side....let's take a look...
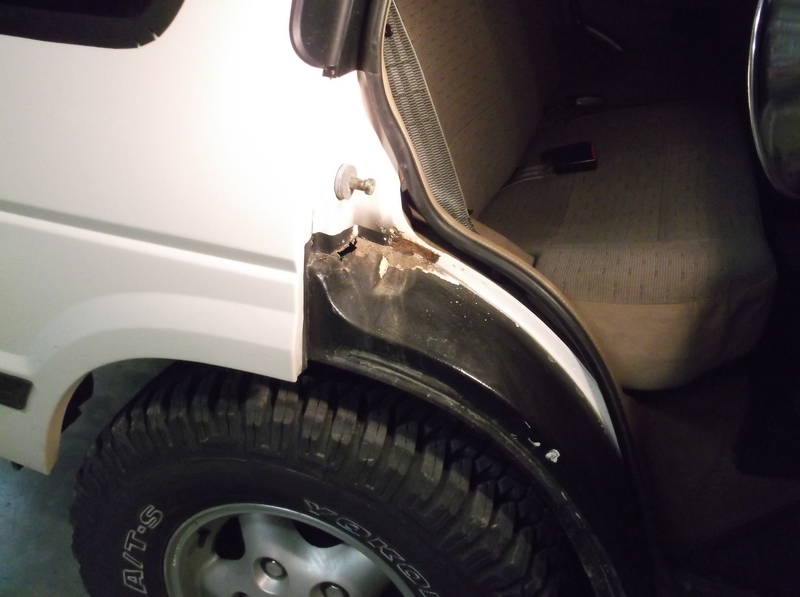
In this area, there's not a single one that doesn't suffer from this, multiple joints stuffed into a single area, over formed steel making it thinner, and what appears to be some sort of engineered weep hole by Rover...Brillant!
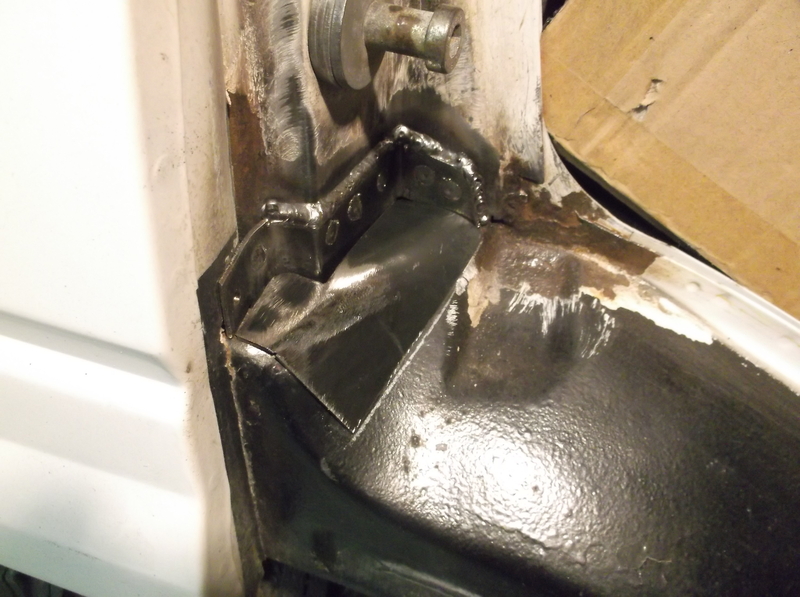
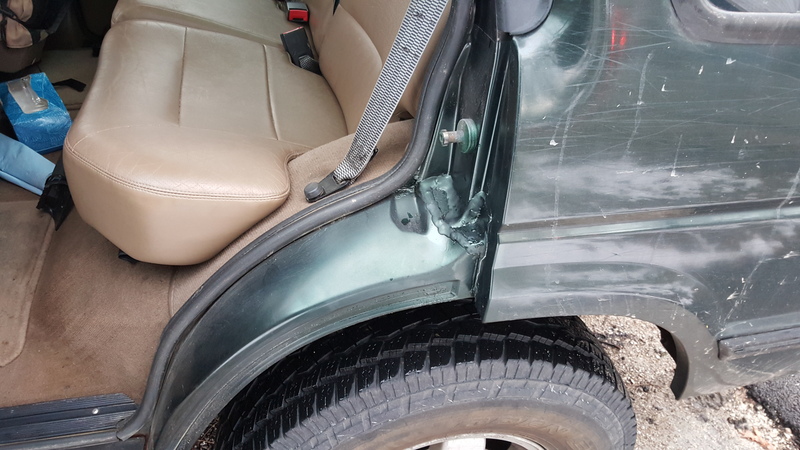
Picking away at it, my choice was obvious.....Vertical repair 1st vs a horizontal cover up.....vertical equals strength.....(that's why rockets are round and not square)....so I fabbed up this...
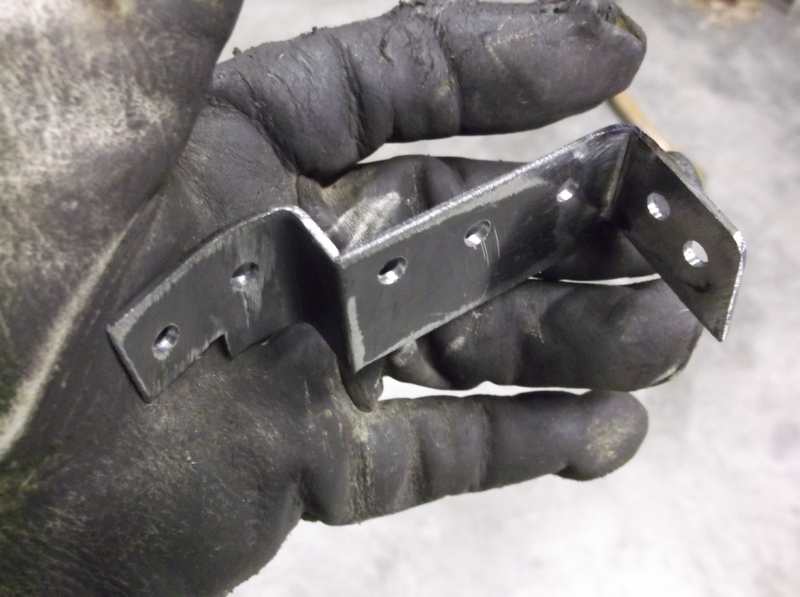
I designed it to sit on what existing metal was left, yet protrude thru the base for further welding.....holes were drilled to catch additional support to adjoining metal......it's a better weld system, much stronger than welding a patch around the edge.....
If your doing this repair.......Don't expect Mr. Pretty welds, your dealing with old seam sealer, under coating and crust....the important thing is to make it as solid as humanly possible......on the aluminum side, a 3/16" rivet was applied..
More to follow, just got tarter sauce on me laptop.....
All Righty...... This is going to get a little...........EXSTENSIVE....
C Pillar base repair......Many snow belters suffer, it's yet another poorly engineered area by Rover, now we suffer, suck it up, and repair......
So......initial tell tail.....creepy rust.....I started with my "EASY" side....let's take a look...

In this area, there's not a single one that doesn't suffer from this, multiple joints stuffed into a single area, over formed steel making it thinner, and what appears to be some sort of engineered weep hole by Rover...Brillant!

Picking away at it, my choice was obvious.....Vertical repair 1st vs a horizontal cover up.....vertical equals strength.....(that's why rockets are round and not square)....so I fabbed up this...

I designed it to sit on what existing metal was left, yet protrude thru the base for further welding.....holes were drilled to catch additional support to adjoining metal......it's a better weld system, much stronger than welding a patch around the edge.....

If your doing this repair.......Don't expect Mr. Pretty welds, your dealing with old seam sealer, under coating and crust....the important thing is to make it as solid as humanly possible......on the aluminum side, a 3/16" rivet was applied..

More to follow, just got tarter sauce on me laptop.....
Last edited by Detoured Discovey; Dec 8, 2015 at 05:45 PM.
Thread Starter
|
Recovery Vehicle
Joined: Apr 2015
Posts: 951
Likes: 39
From: AWESOMEVILLE, MAINE
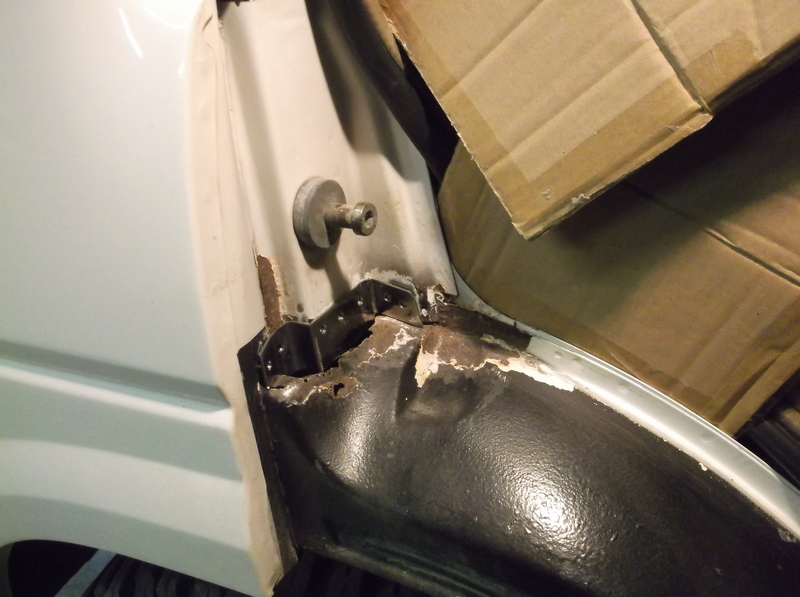
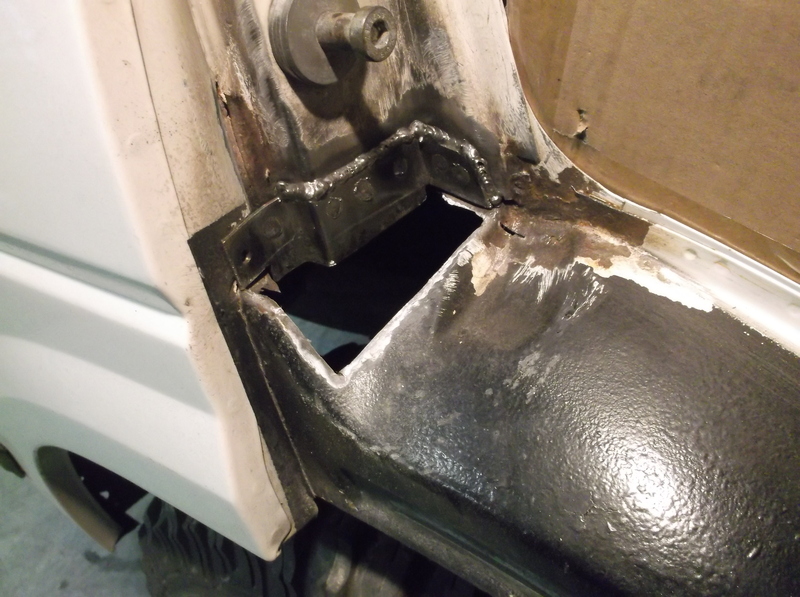
Horizontal repair.....formed up this.......

Which did this.......
So that done, I removed that.....
About this time I was ready for that..

But instead was stuck with wha'laa....
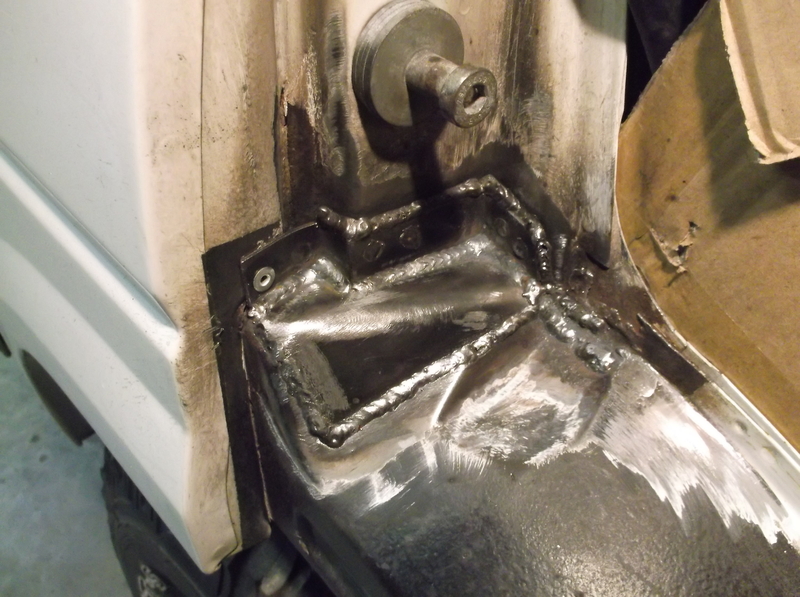
Happy enough, I primed it........WE HAVE 'YET' to get to the underside...
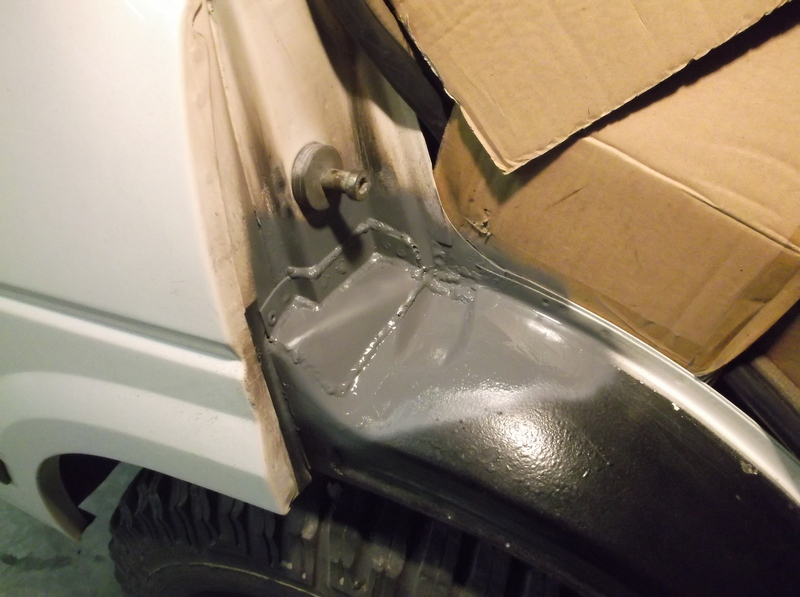
There is a hell of a lot to this, it'll be continued..........the under side gets worse, the mis-engineered forward wheelwell comes into play in a big way.......the adventure will continue.........What a bunch of CRAP, think I'm doing it wrong.......drivers side I'll just.....

Which did this.......

So that done, I removed that.....

About this time I was ready for that..

But instead was stuck with wha'laa....

Happy enough, I primed it........WE HAVE 'YET' to get to the underside...

There is a hell of a lot to this, it'll be continued..........the under side gets worse, the mis-engineered forward wheelwell comes into play in a big way.......the adventure will continue.........What a bunch of CRAP, think I'm doing it wrong.......drivers side I'll just.....


Thread Starter
|
Recovery Vehicle
Joined: Apr 2015
Posts: 951
Likes: 39
From: AWESOMEVILLE, MAINE
It's my understanding Rover left a hole on the very top, inner wheel well.
I didn't look into why, whether it's to access door latch pin or required for body assembly......But the hole is there, allowing water, salt, mud to do what they do over a short period of time. My drivers side is much worse, pass. side is 100% complete & will post the work as time permits.
To me it's a real side impact safety issue, the more I see how these we're built & assembled, the more curious I become about their crash ratings, they couldn't have been very good.

Camel Trophy
Joined: Nov 2009
Posts: 4,079
Likes: 227
From: IL
I just redid my wheel arches, too. What a pain. I pulled the C pillar trim and seat belts and welded in new metal under there, too.
I covered all the seams with sealer. I found the gutter sealant from the hardware store is cheap and works great.
Was able to find an almost perfect match for Epsom Green at PepBoys in a ratte can.
I covered all the seams with sealer. I found the gutter sealant from the hardware store is cheap and works great.
Was able to find an almost perfect match for Epsom Green at PepBoys in a ratte can.


Baja
Joined: Mar 2009
Posts: 5,736
Likes: 230
From: south n.j. and ne va.
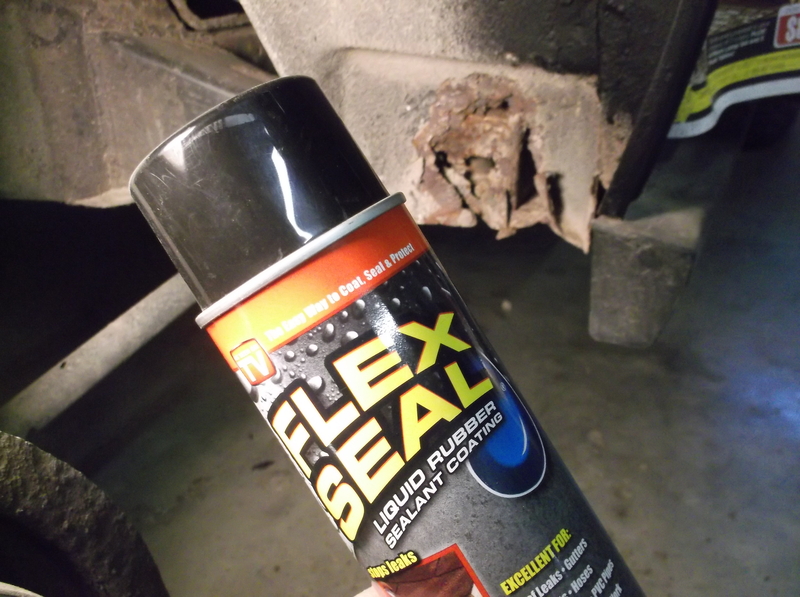
You guys are way more ambitious then me, I killed the rust applied rust primer, metal tape? And sprayed over several coats of flex seal on top and behind, repair has held for 4 years now? The amount of rust I have swapping to a new body would be faster
Thread Starter
|
Recovery Vehicle
Joined: Apr 2015
Posts: 951
Likes: 39
From: AWESOMEVILLE, MAINE
Looking GOOD Fish! Yes, 'major' PIA.....but on the other hand you get a real good schooling on how these were assembled.
Tom.....That must have been an internet fix somewhere, my drivers side was done that way. My issue is structural integrity, my kid is sitting back there and every little bit is going to help........Someone needs to name their rig 'The Crusty Crab'......
Judging by my forward wheel well body mount, my body is sagging over the frame by 1/8" inch.......Genius engineering when it comes to that body mount......more on that later.